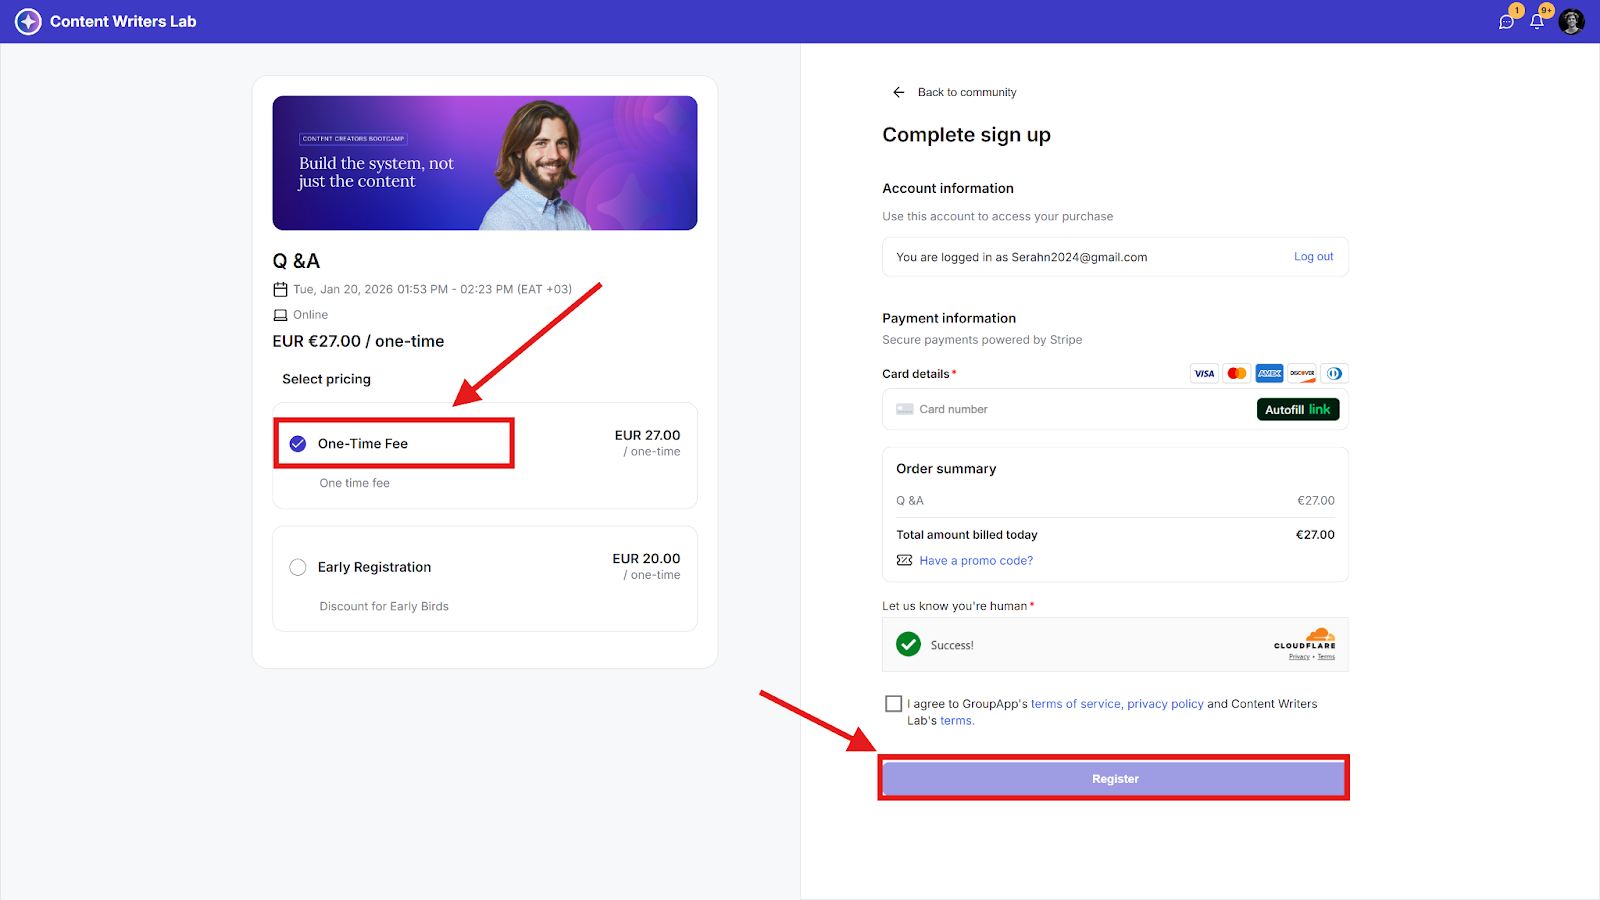
This guide walks you through creating a paid event, setting up pricing, managing access, and publishing it. It also shows how members can RSVP and make payments.
Learn how to set up events:
How to create events
Learn how to create events for your community
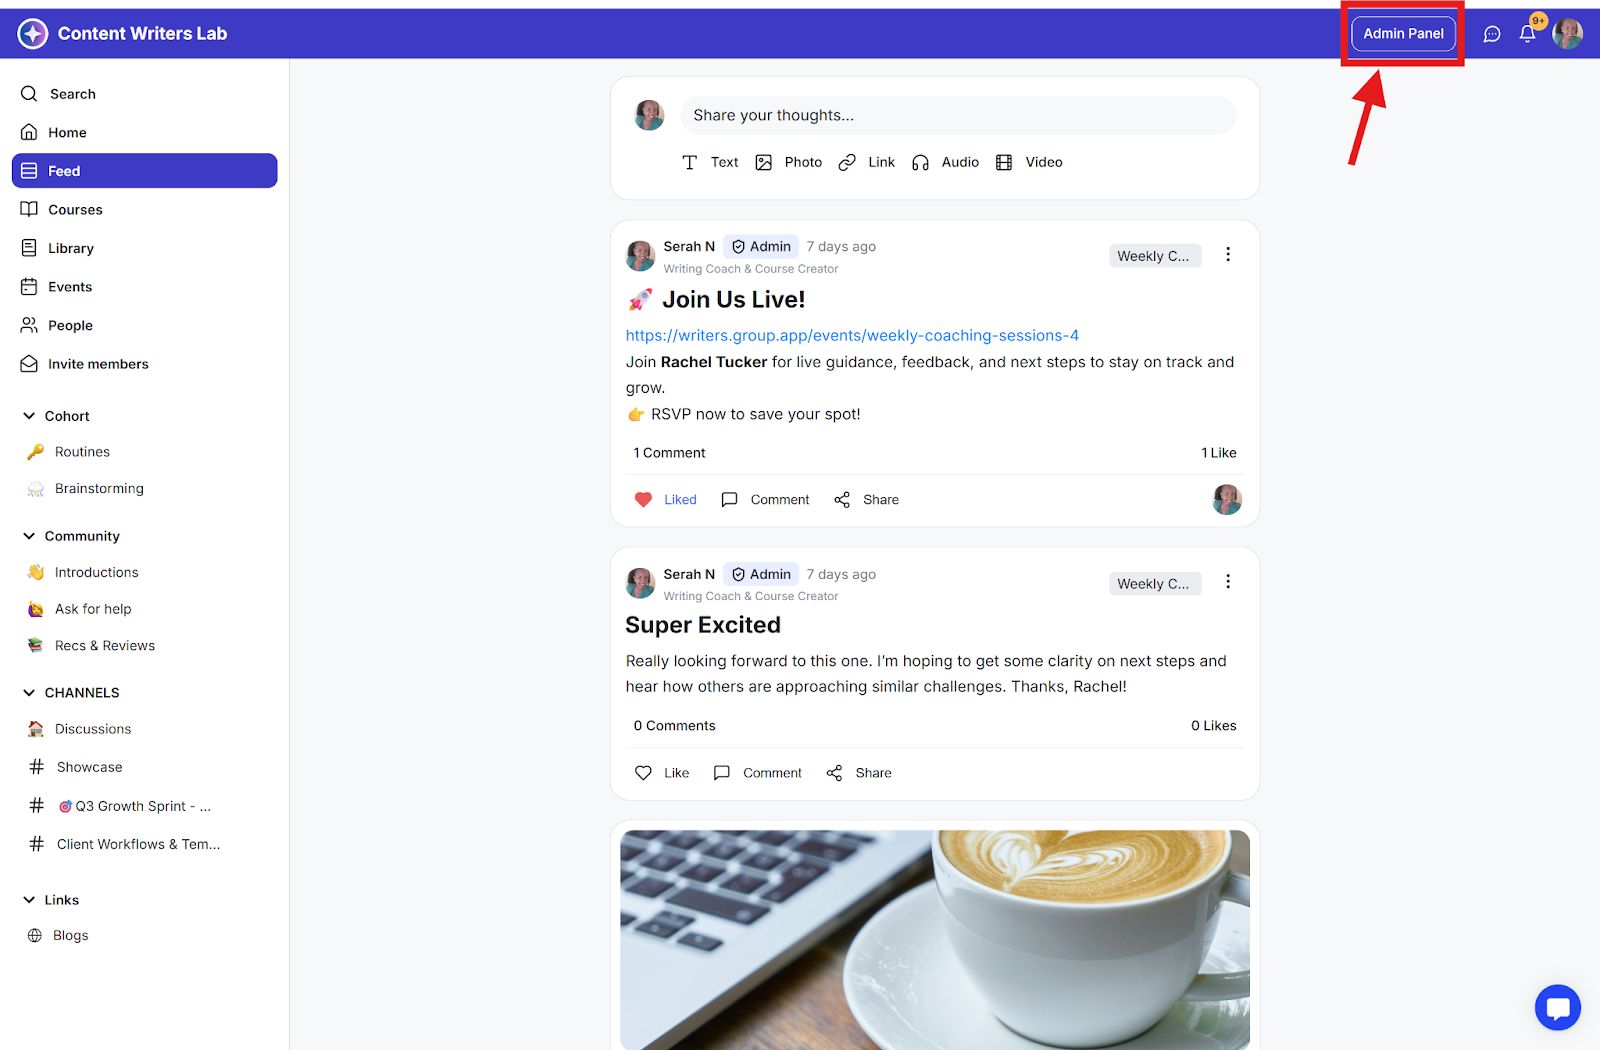
Step 1: Click on the Admin Panel button.
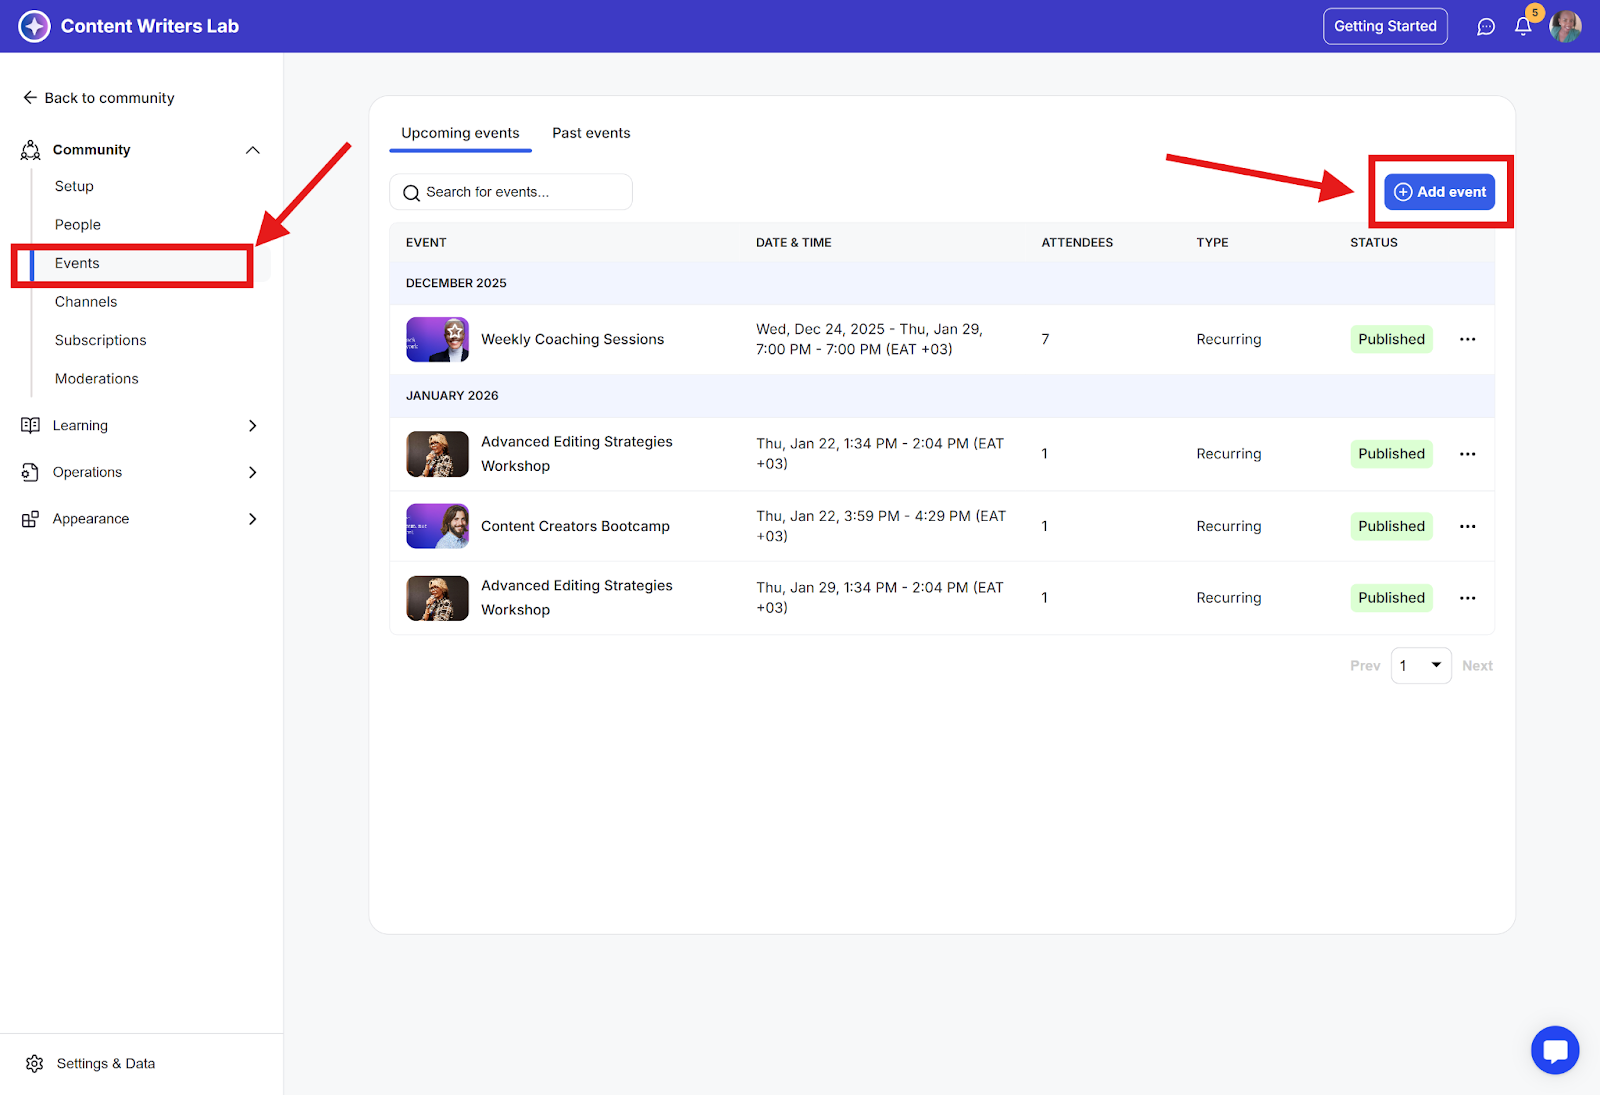
Step 2: Click on Events in the side menu and then click the Add Event button.
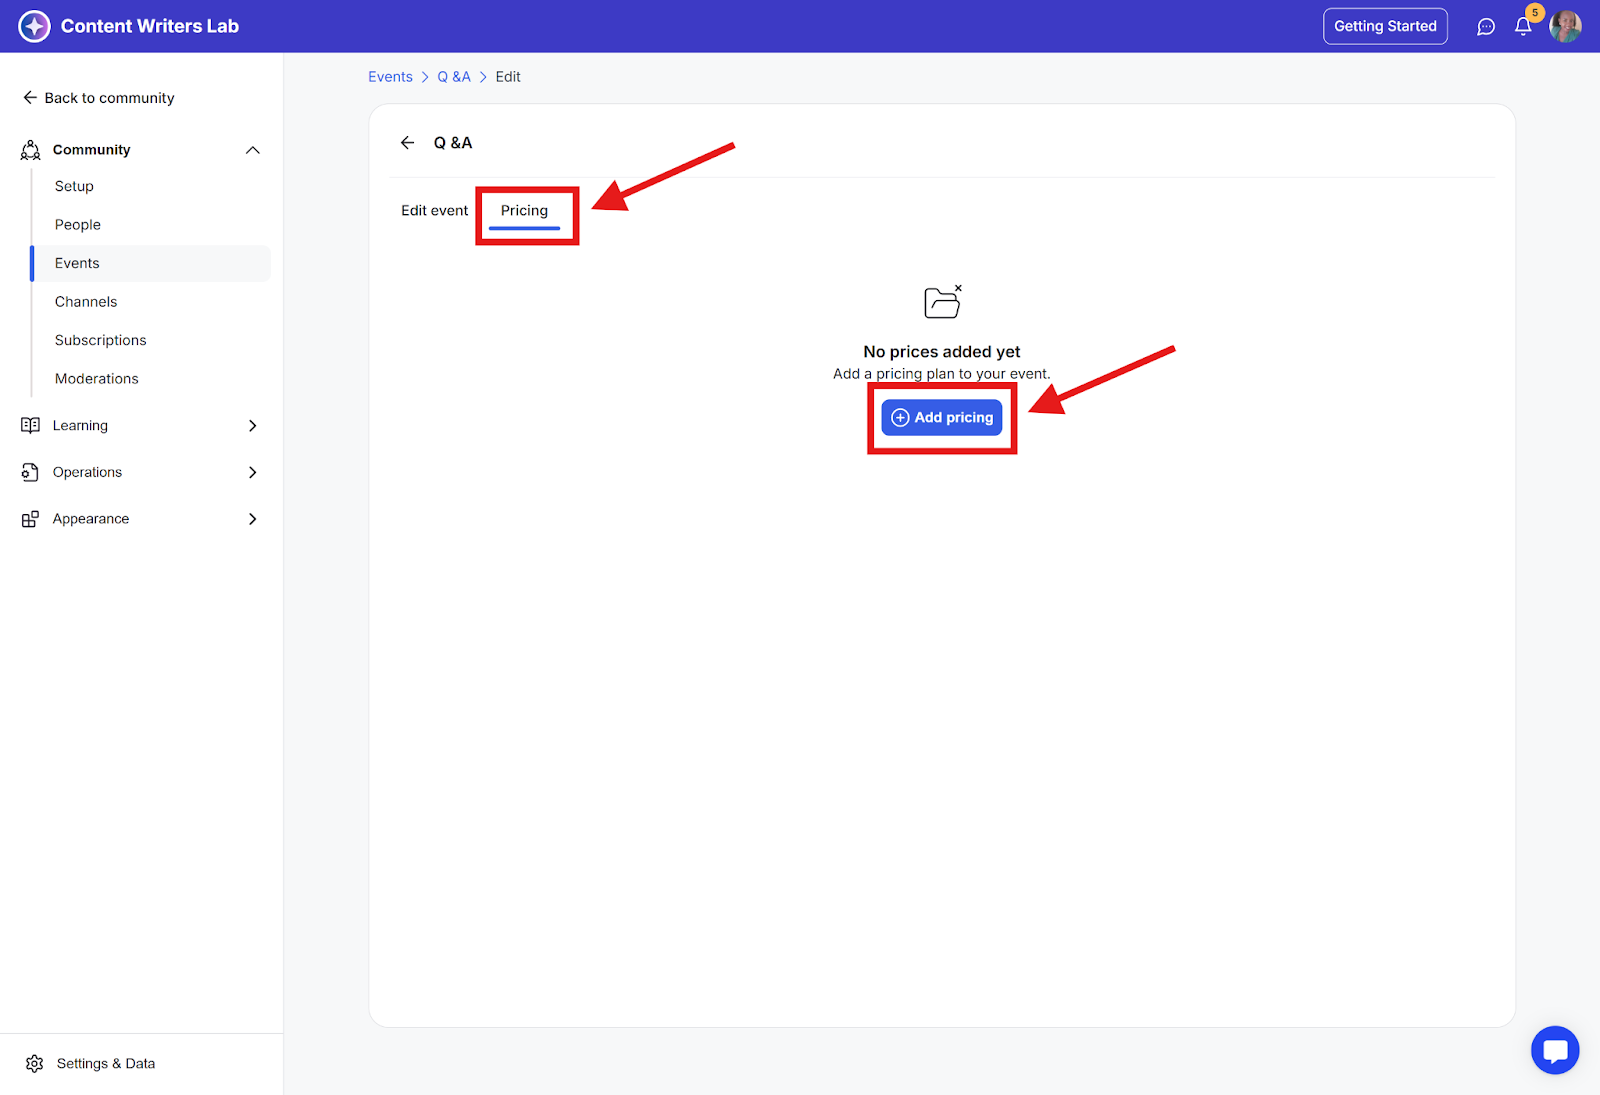
Step 3: On the event builder, add your event details, then click the Pricing tab to create a free or paid pricing.
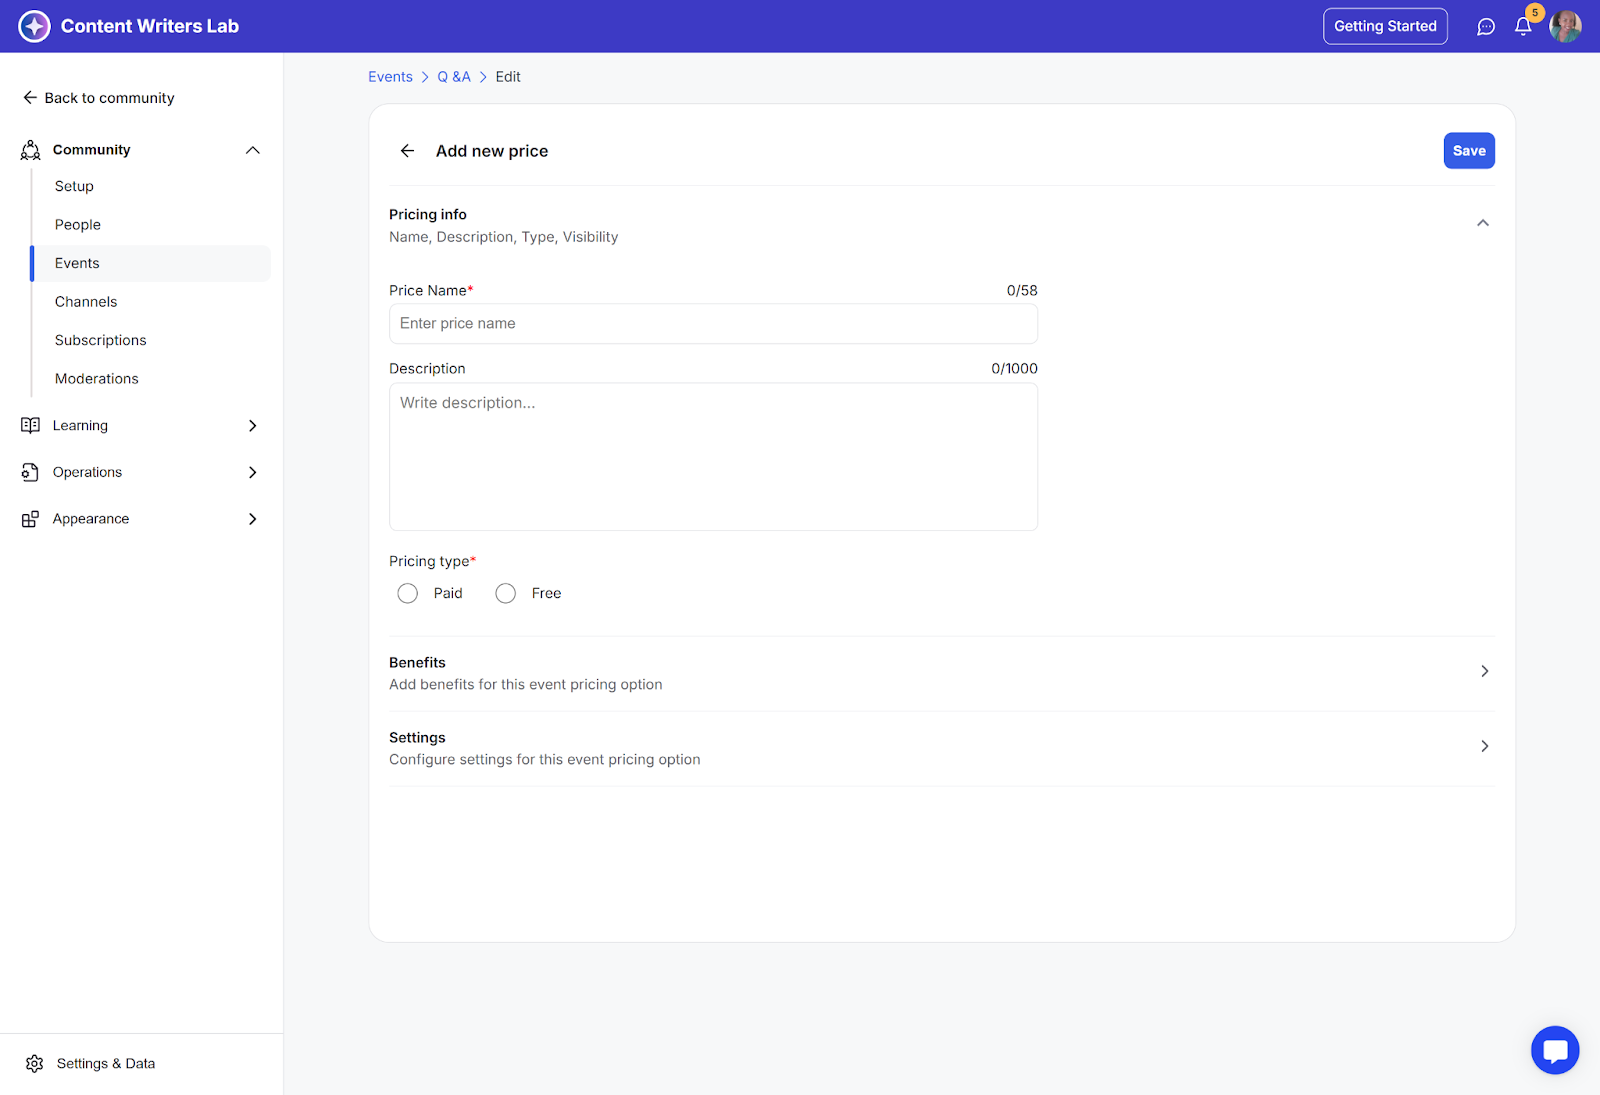
Step 4: Enter details of your pricing
Pricing type
Benefits
Price amount if it is a paid price
Custom redirect URL— option of a site that the event attendees will be redirected to after they have finished purchasing the event.
Add buyer to your community— option to add event attendees to the community if they are not community members yet
Add buyer to segments— option to add members to a segment
Recommended:
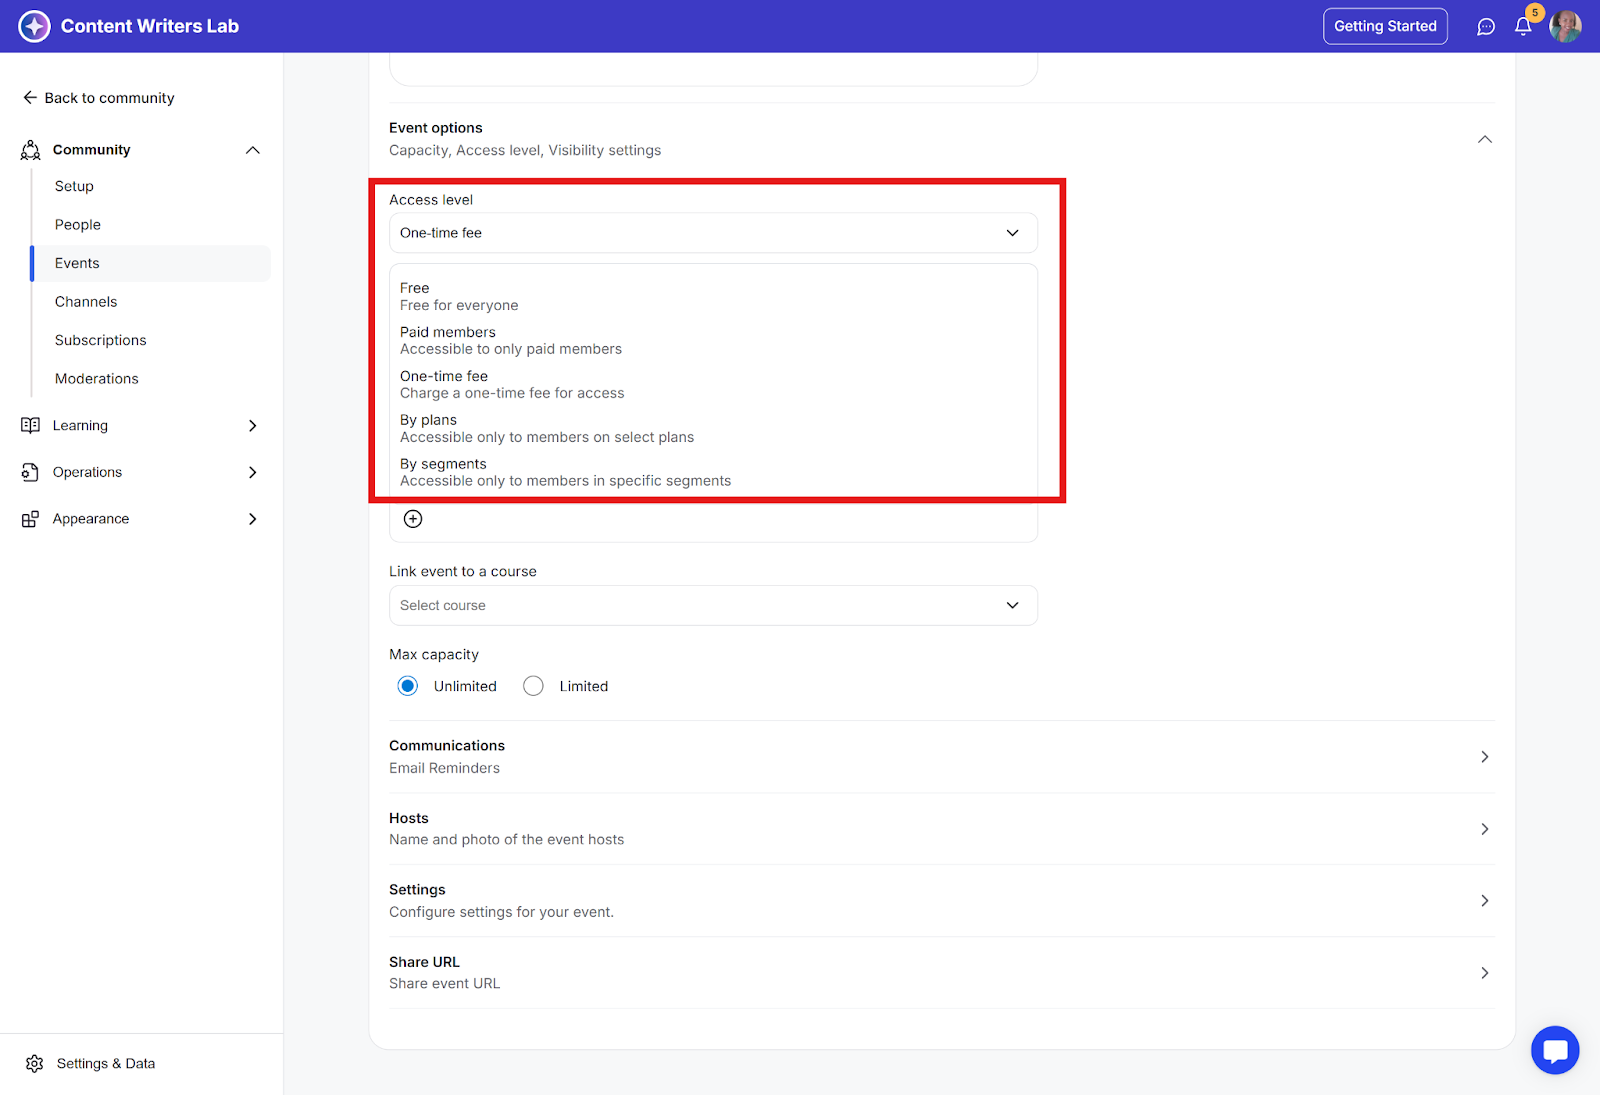
Step 5: Navigate back to the Edit Event tab, scroll to the event options section, set the access level of the event to One-Time Fee, and click Save.
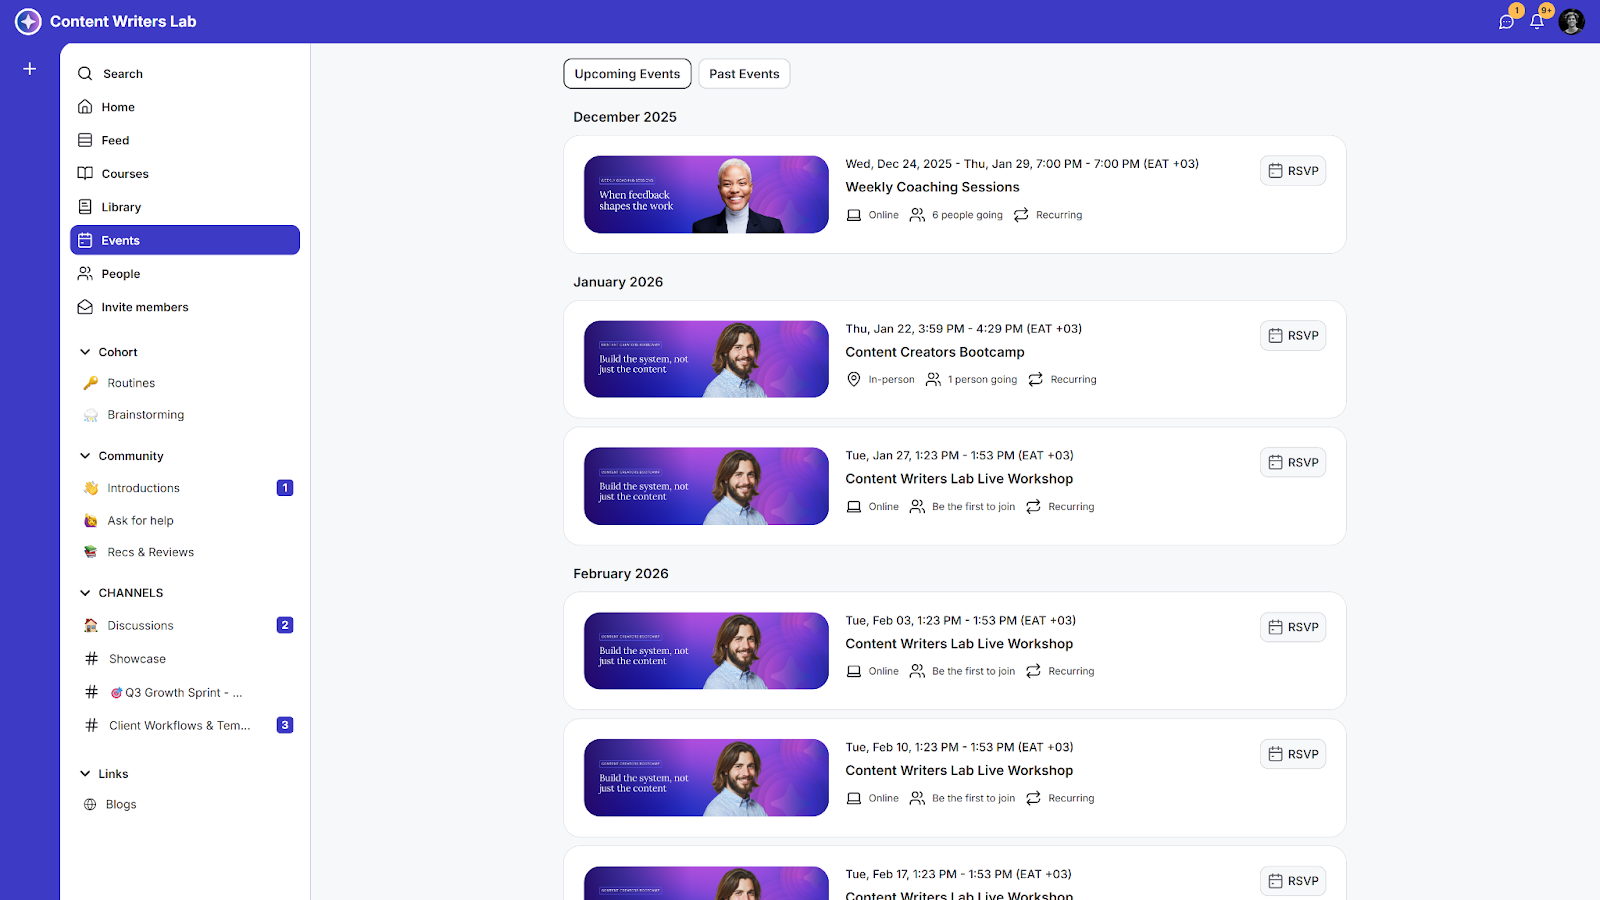
Step 1: Click Events on the side menu.
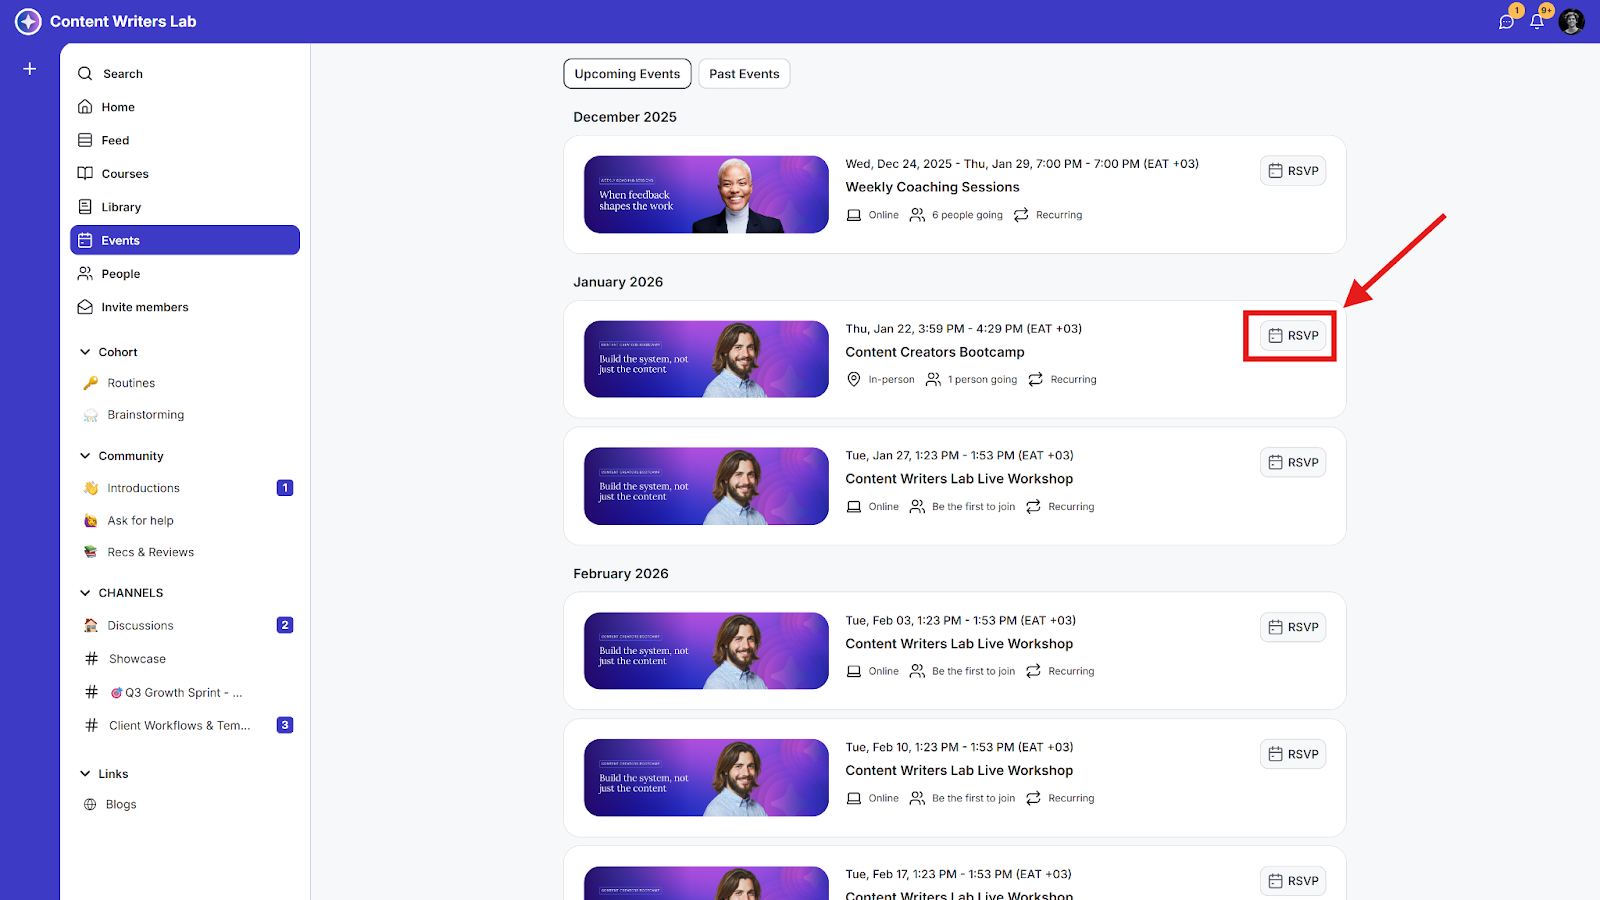
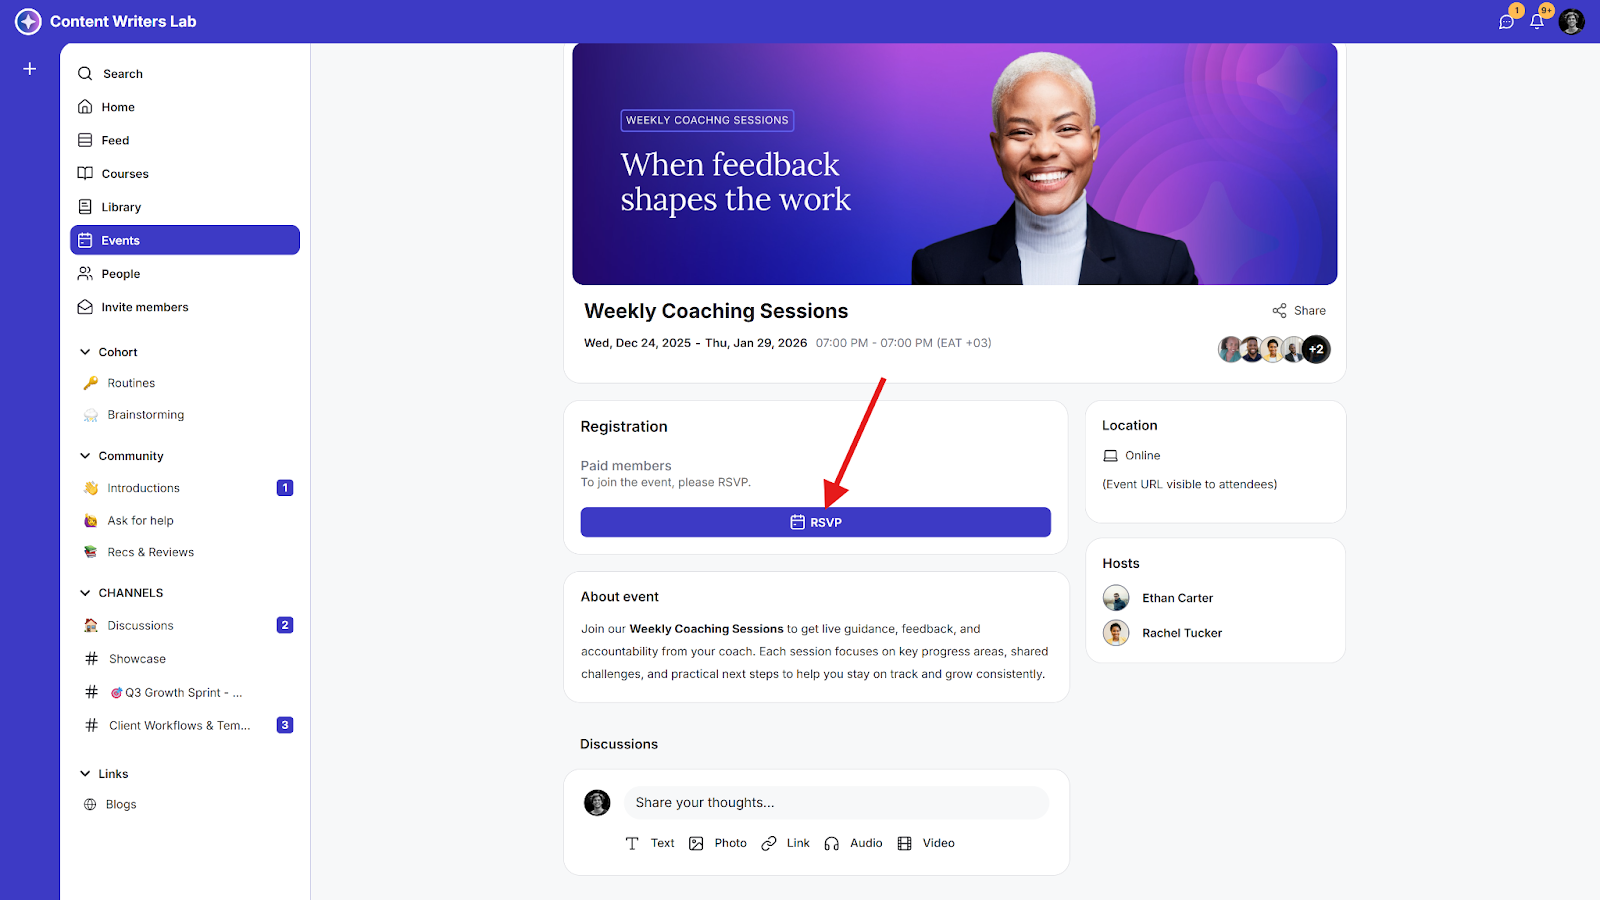
Step 2: Click the RSVP button, or click on the event card.
Step 3: Click the RSVP button.
Step 4: If there are multiple pricing options, select the one you want. Then, fill in the payment details and click the Register button to complete your RSVP.