A plans block is a clear, organized way to present the different pricing options for your products or services. It helps potential customers quickly compare features, benefits, and costs across various plans, making it easier for them to choose the one that best fits their needs.
The various plans and pricing can be created for these products on GroupApp
The conditions for the pricing to be used in the plans block are:
The subscription plan/course/event/library content pricing option must have a status of active and not hidden.
The event, course, or library content must be set to an access level of one-time and visibility of public
The event, course, or library content must be published
Before creating a plans block, review the articles below, which will guide you through creating and configuring pricing options and subscription plans.
How to set up membership subscriptions
Learn how to set up your community's membership subscriptions
How to configure pricing for Courses
Learn to configure pricing for Courses
How to configure pricing for Courses
Learn to configure pricing for Courses
How to configure pricing for Events
Learn to configure pricing for Events
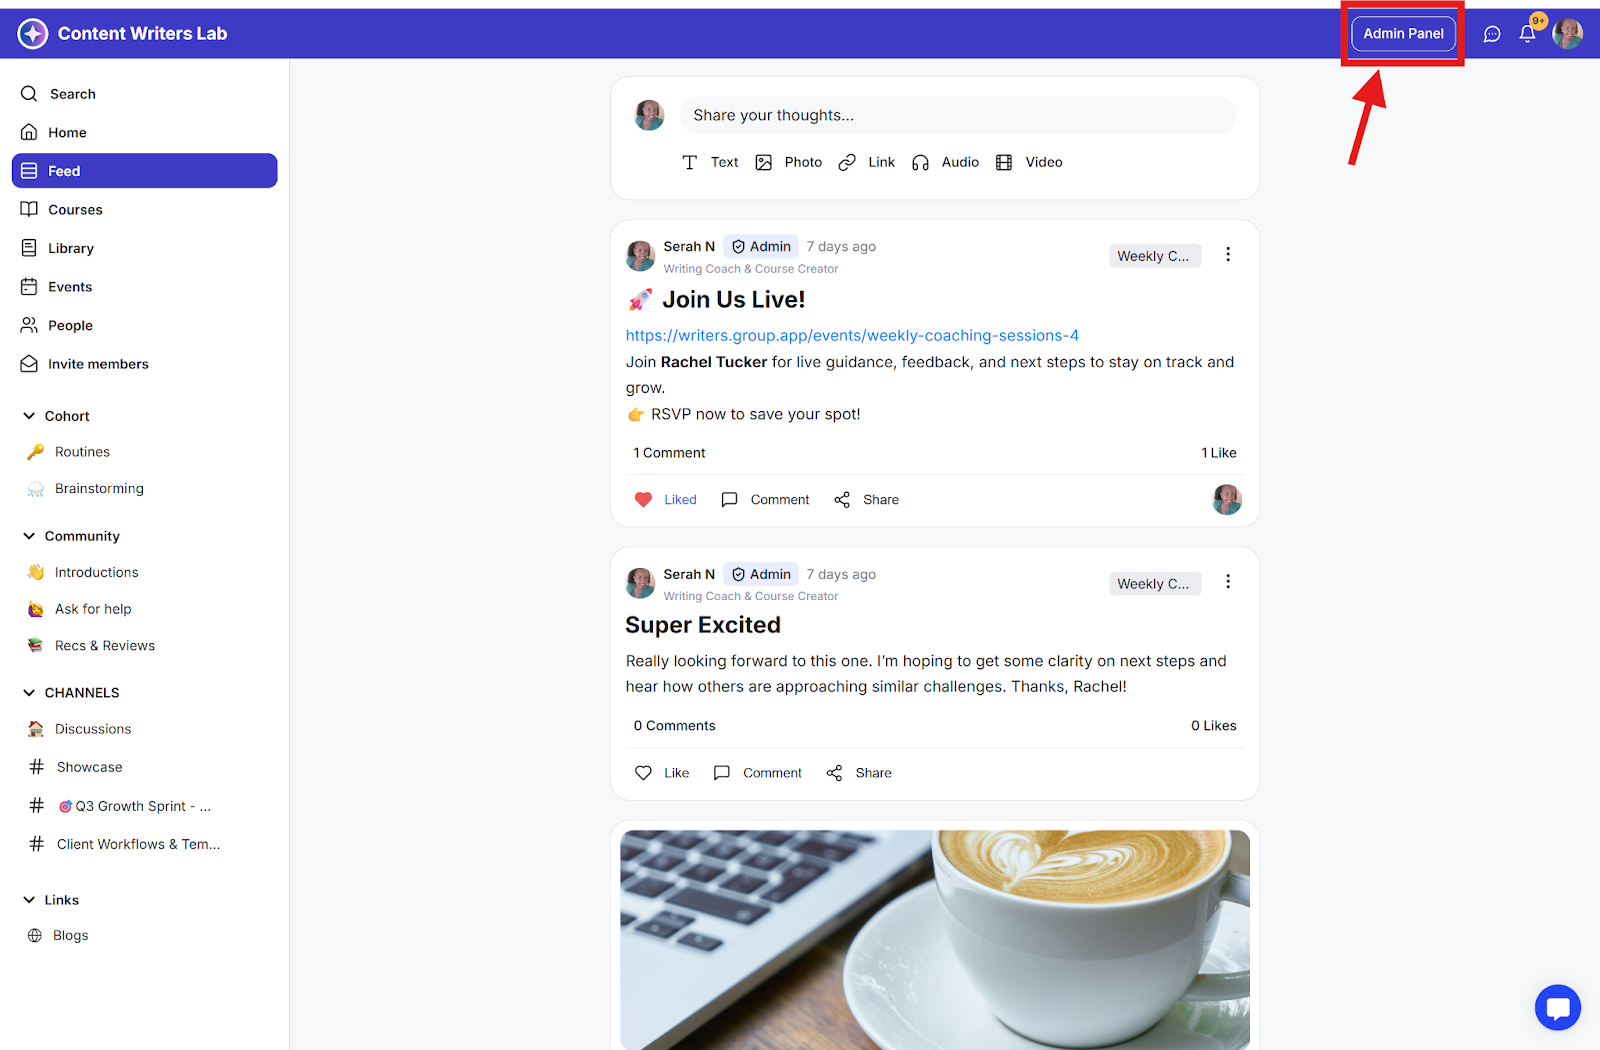
Step 1: Click on the Admin Panel to navigate to the admin menu.
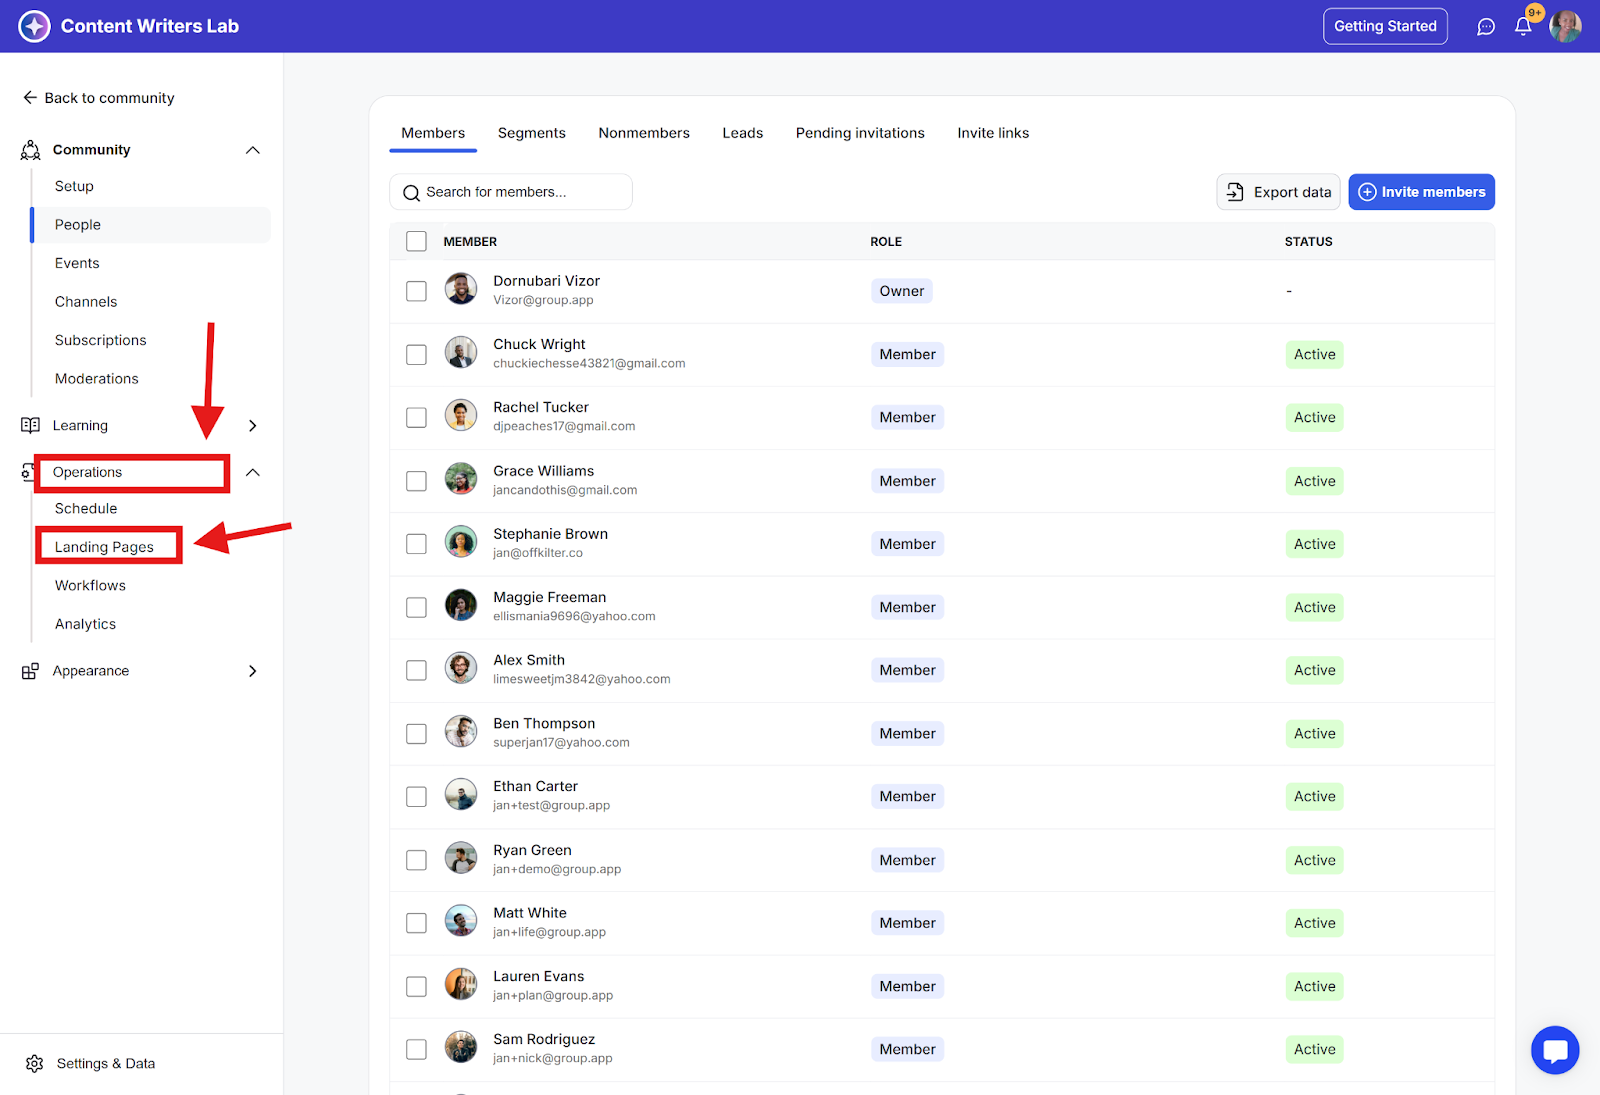
Step 2: Click on Operations in the side menu and select Landing Pages.
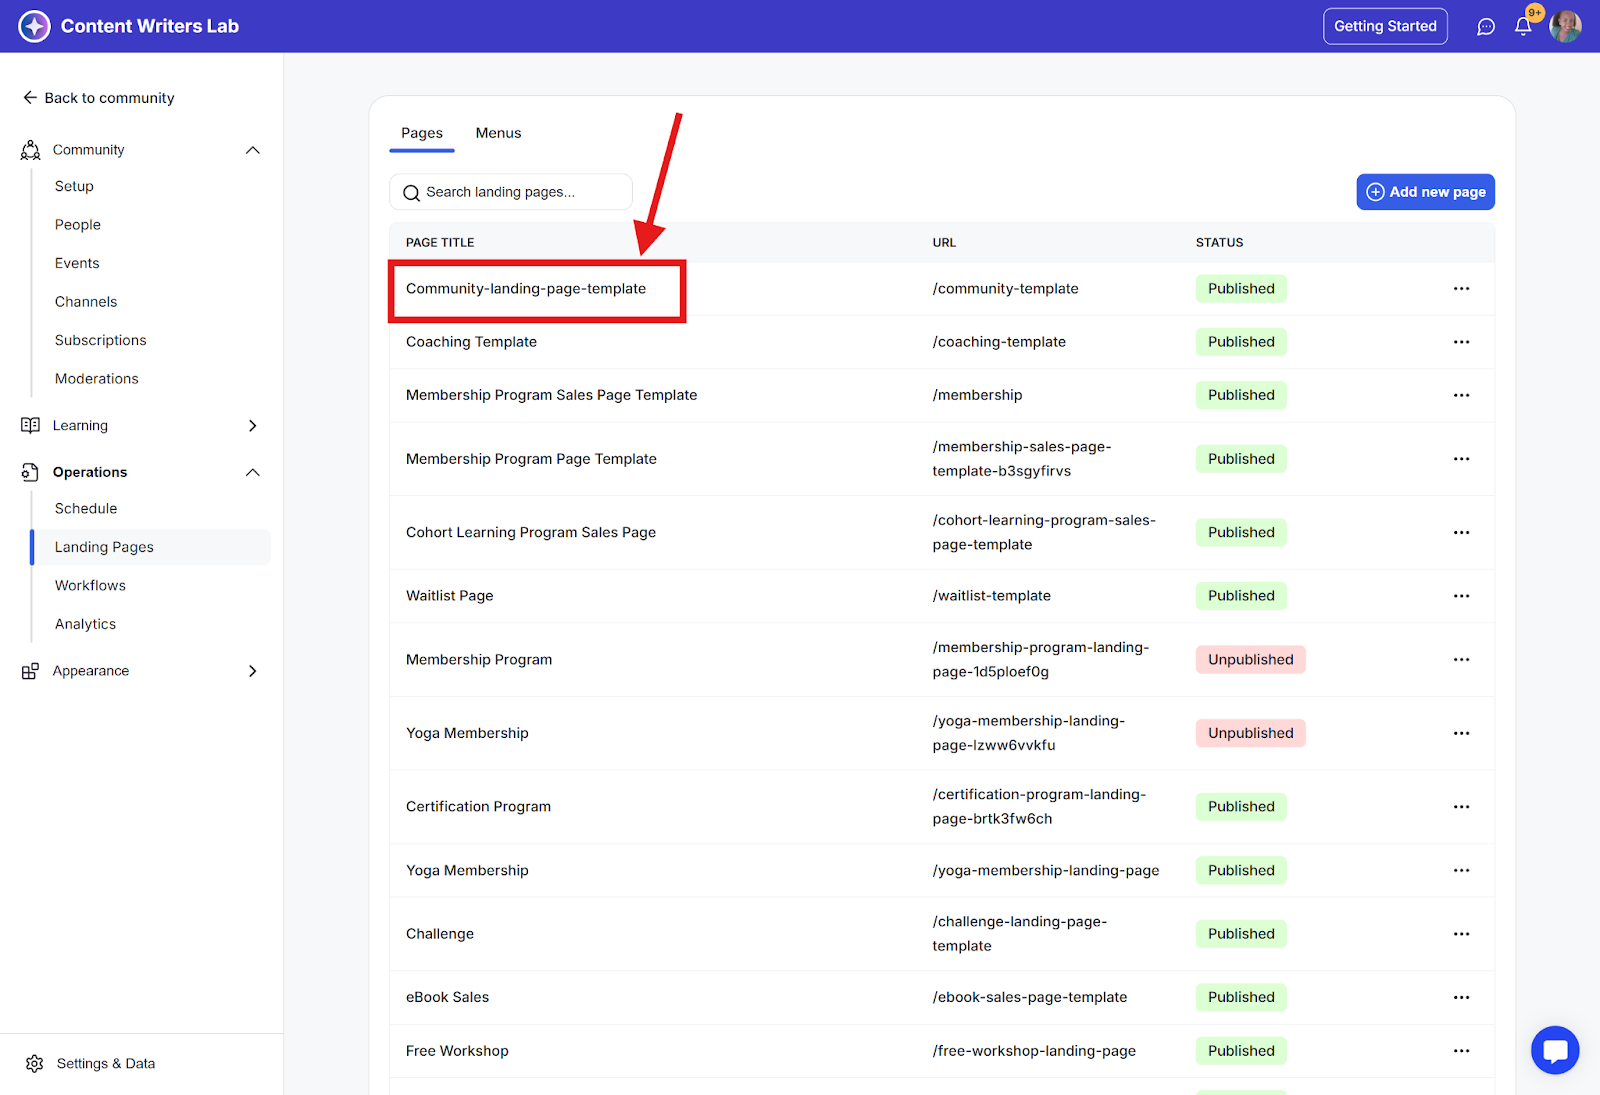
Step 3: On the landing page dashboard, click on the page name to open the one you want to edit, or create a new page.
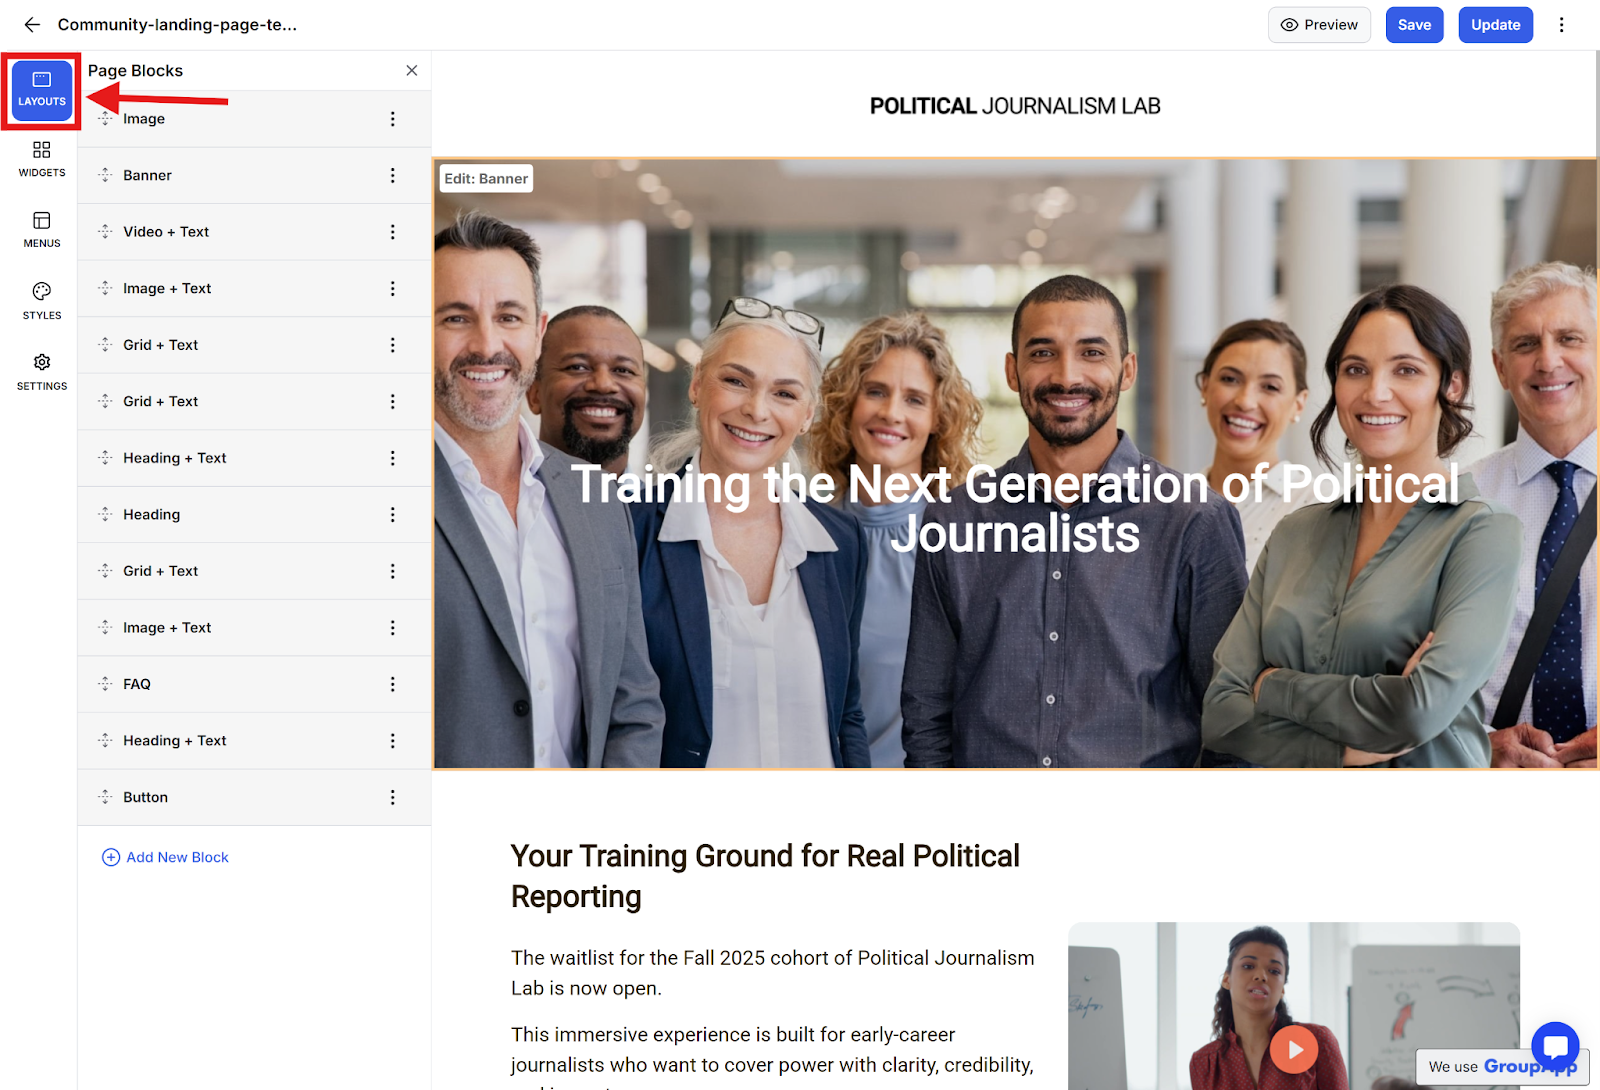
Step 4: Click on the Layouts tab.
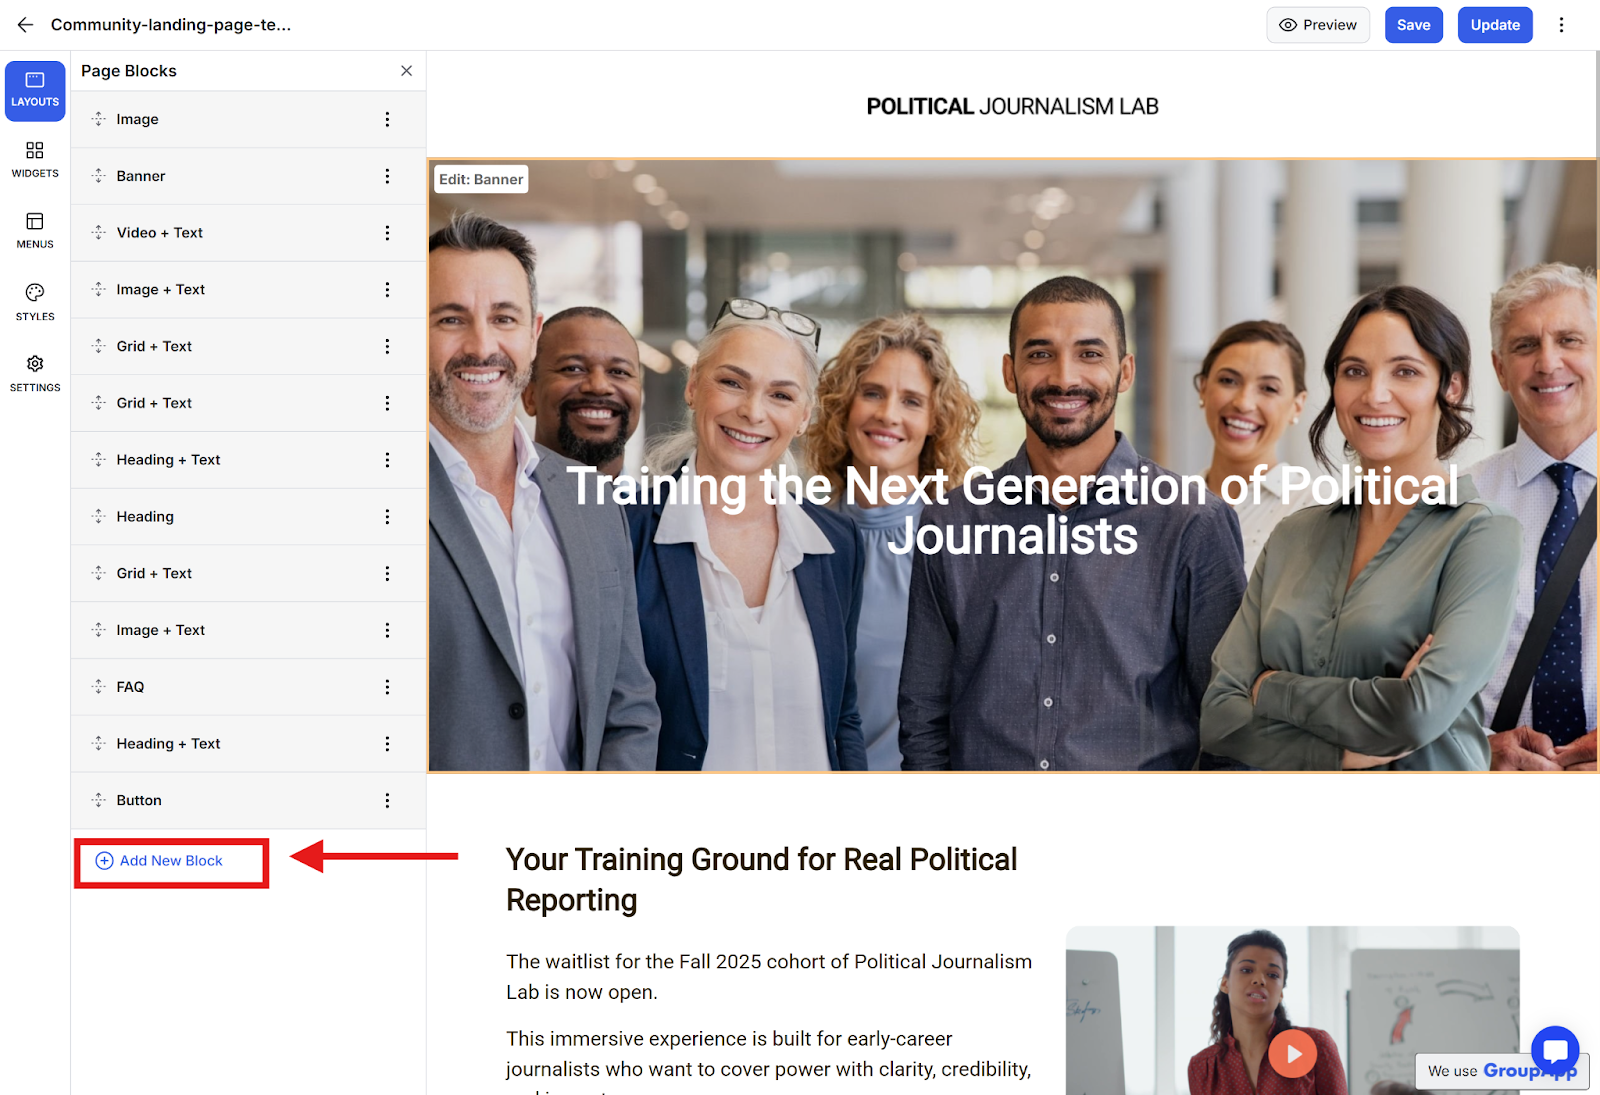
Step 5: Select Add New Block.
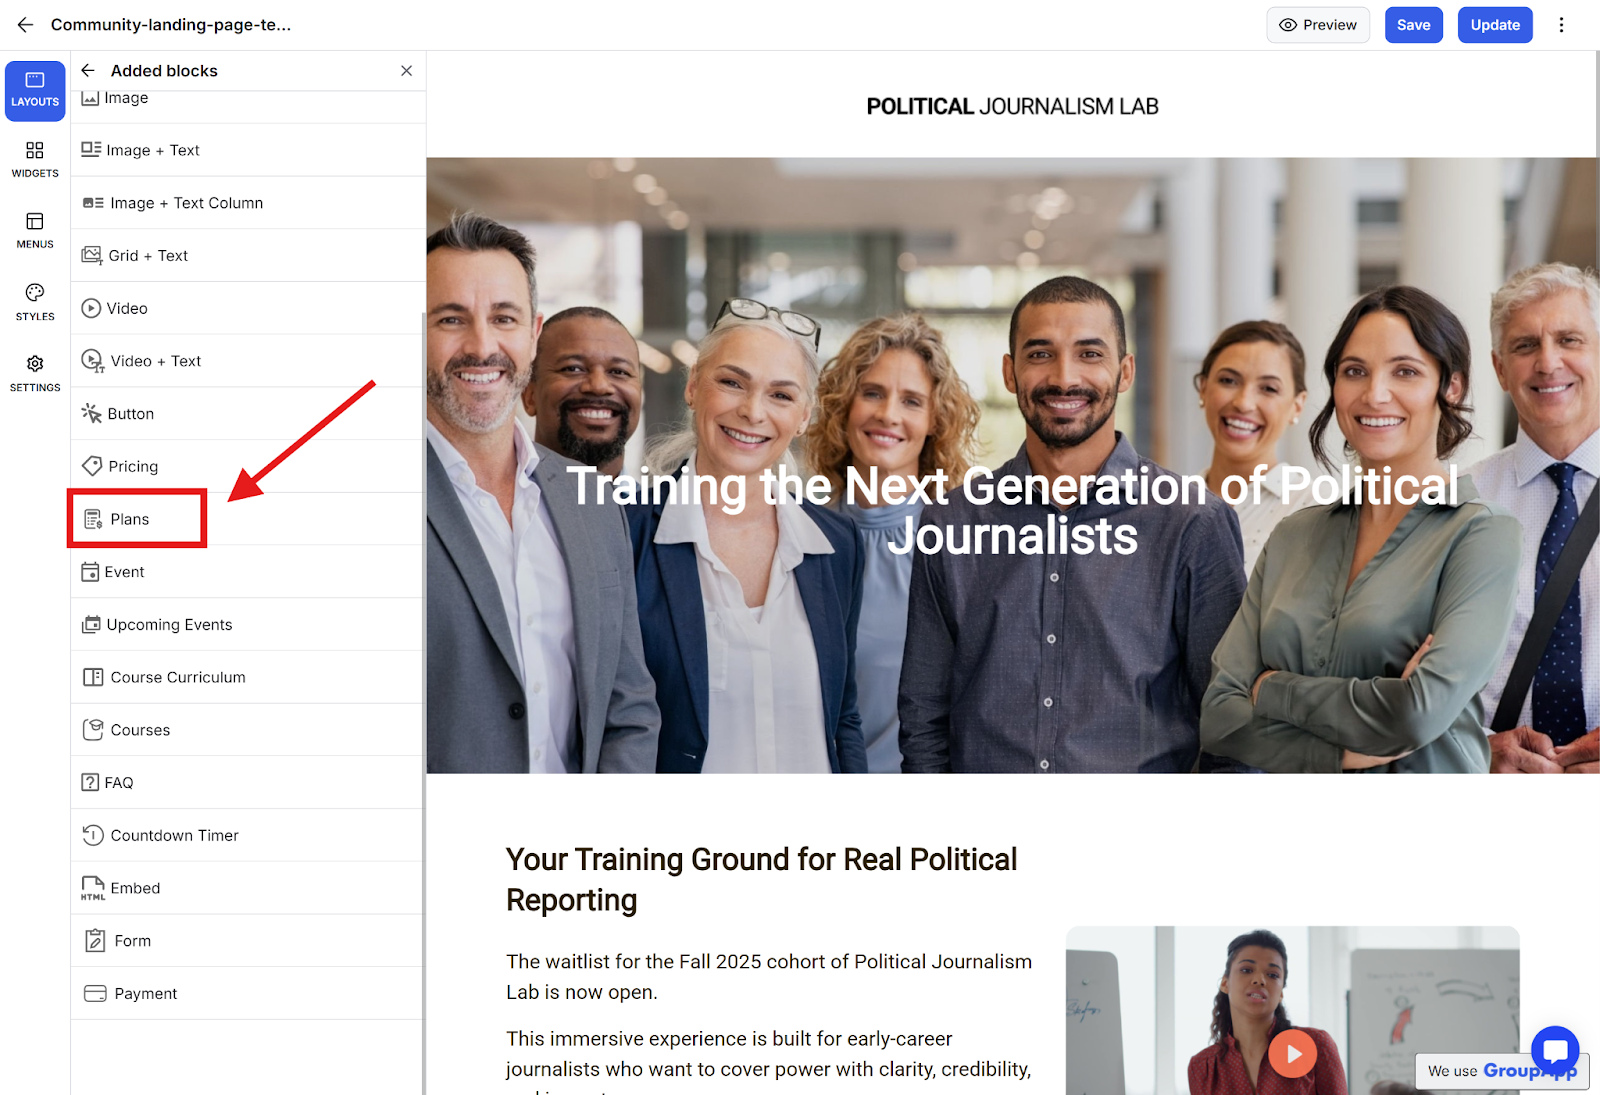
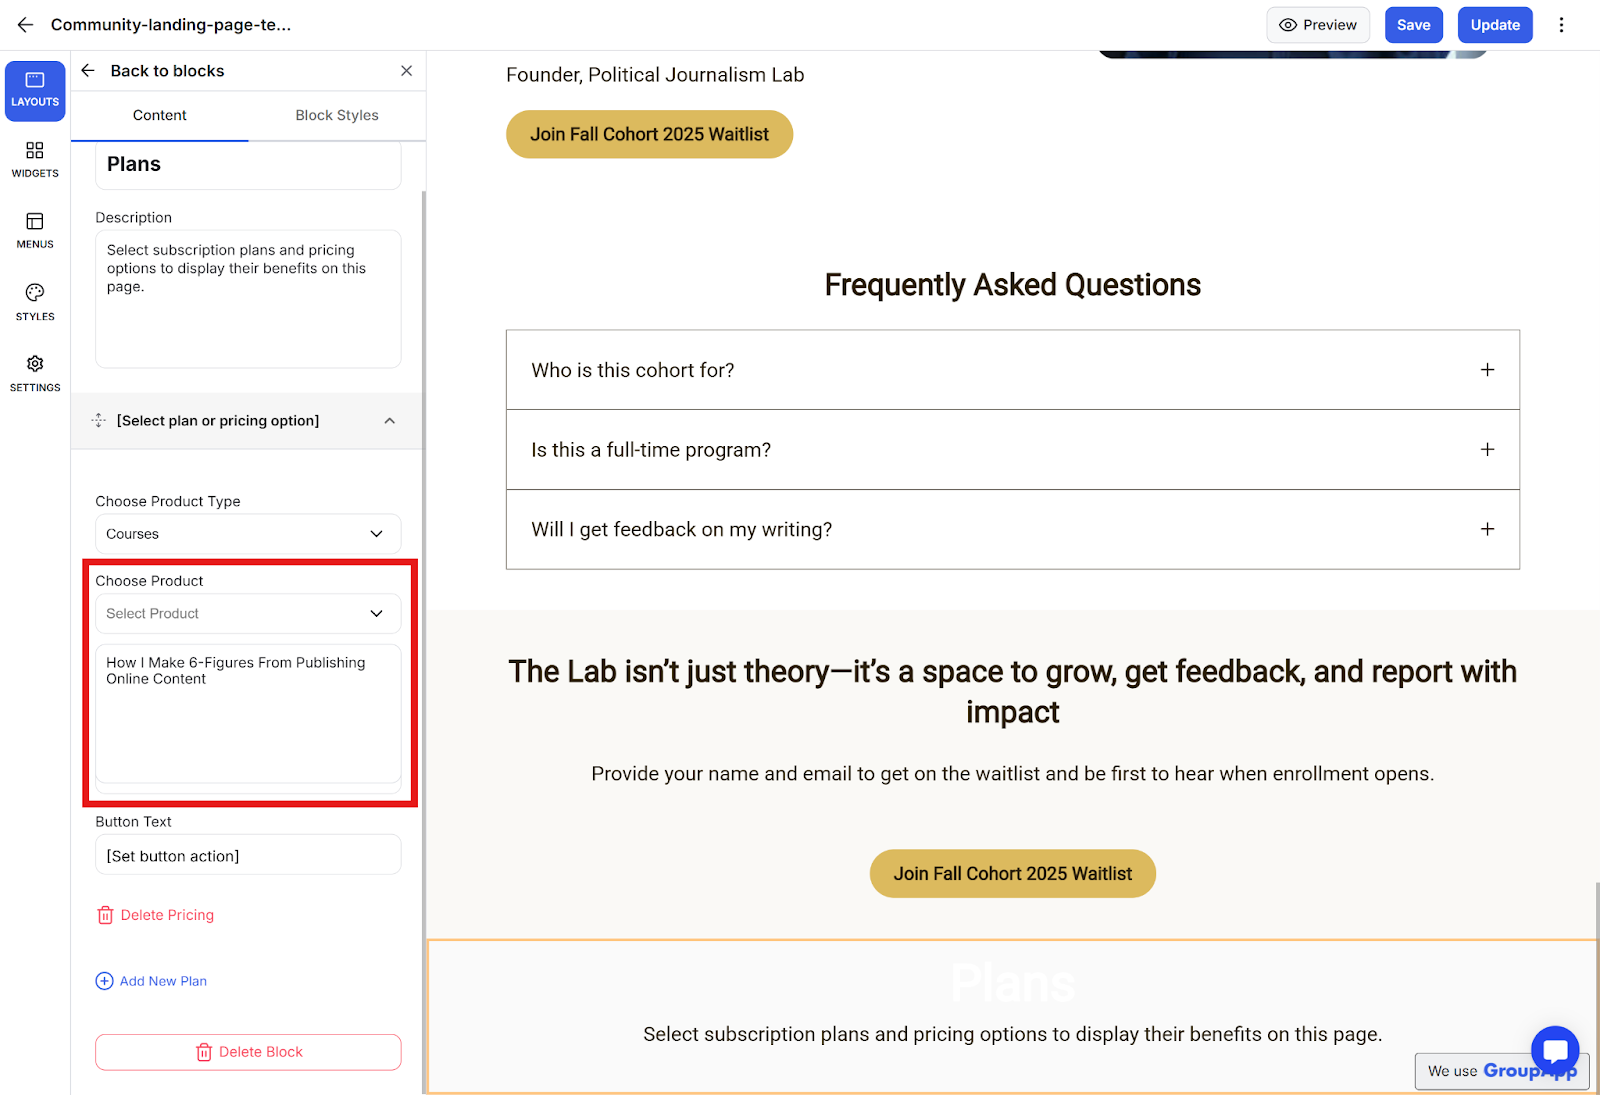
Step 6: Add a Plans block.
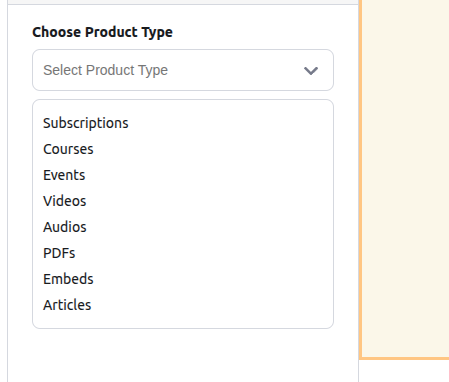
Step 7: Select the product type to add.
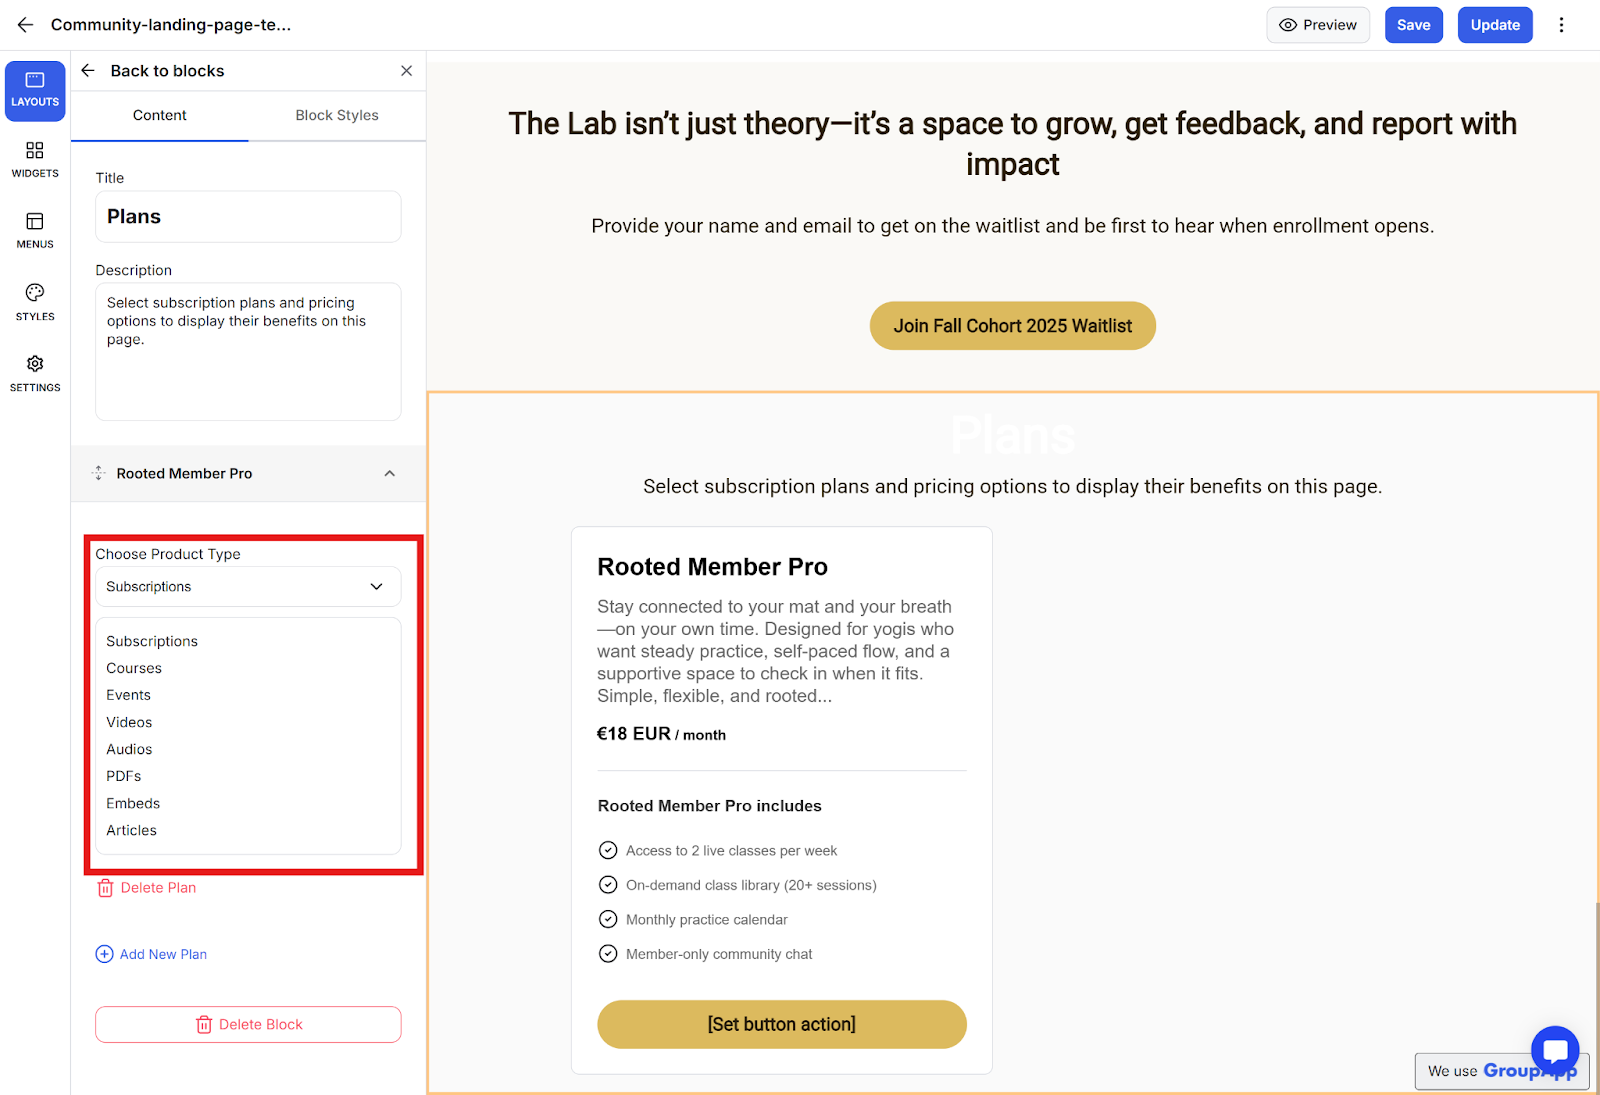
Step 8: For a subscription plan, you go straight to selecting a product.
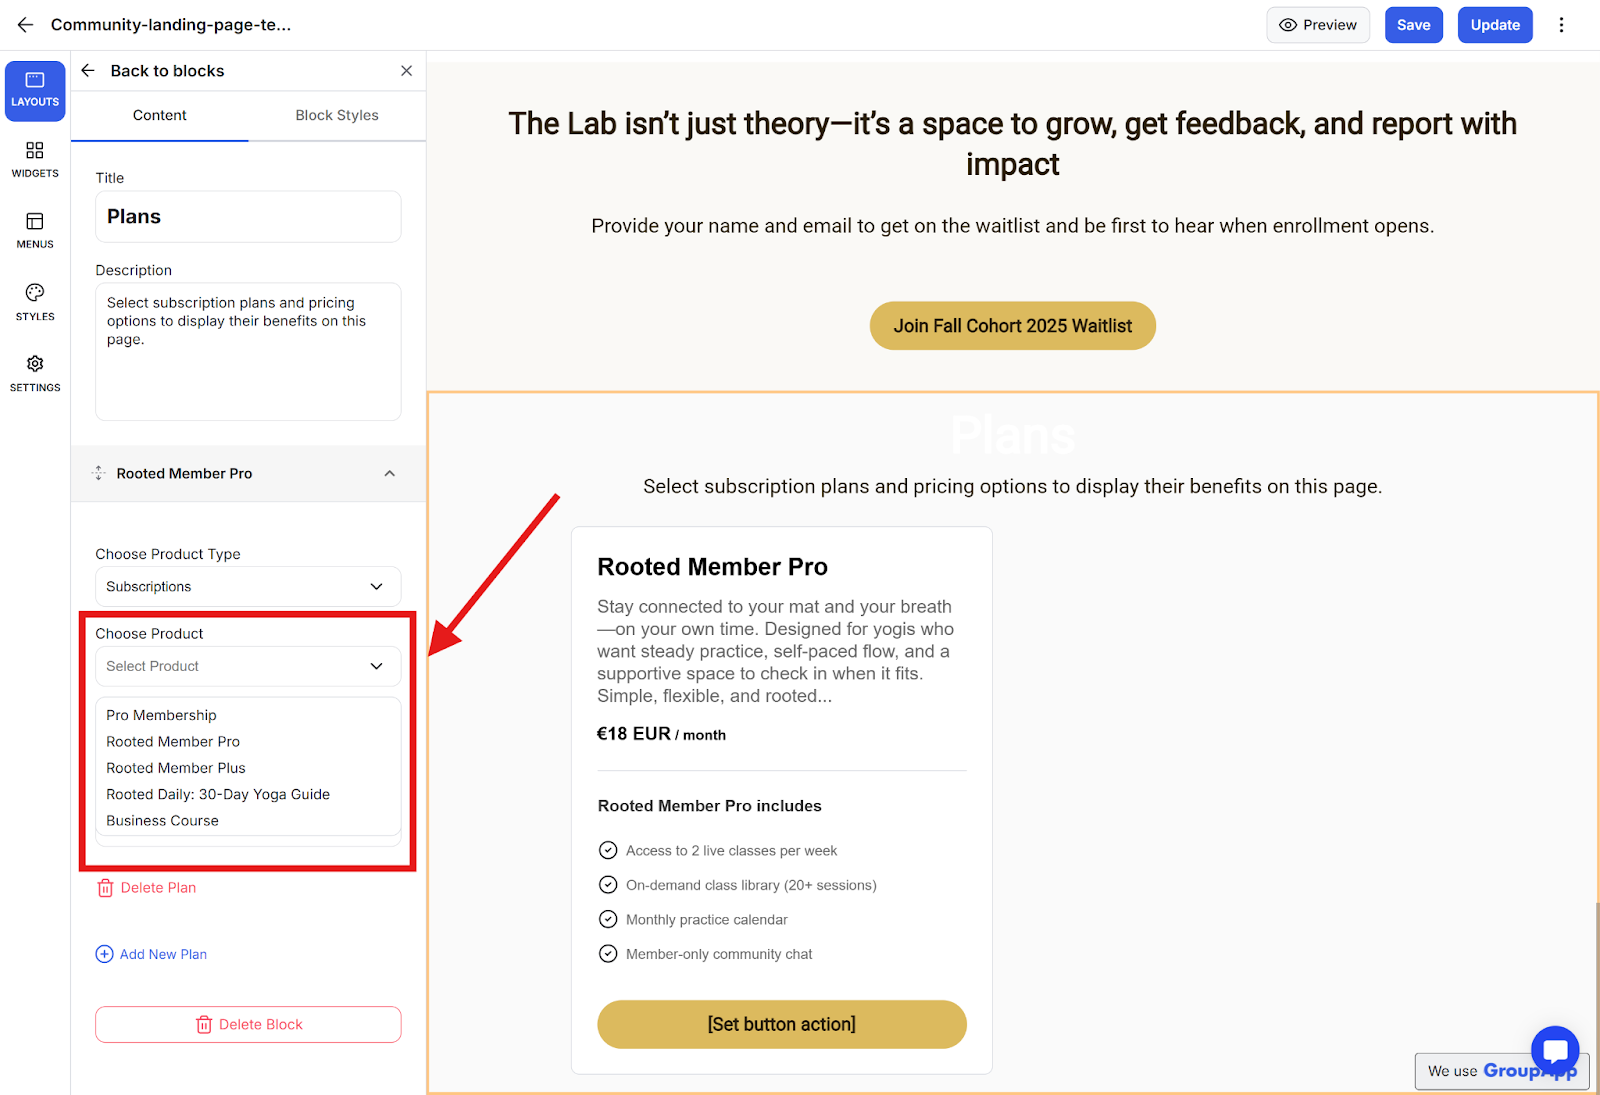
Note: For the subscription product to appear in the dropdown, it must have a status of active and not hidden.
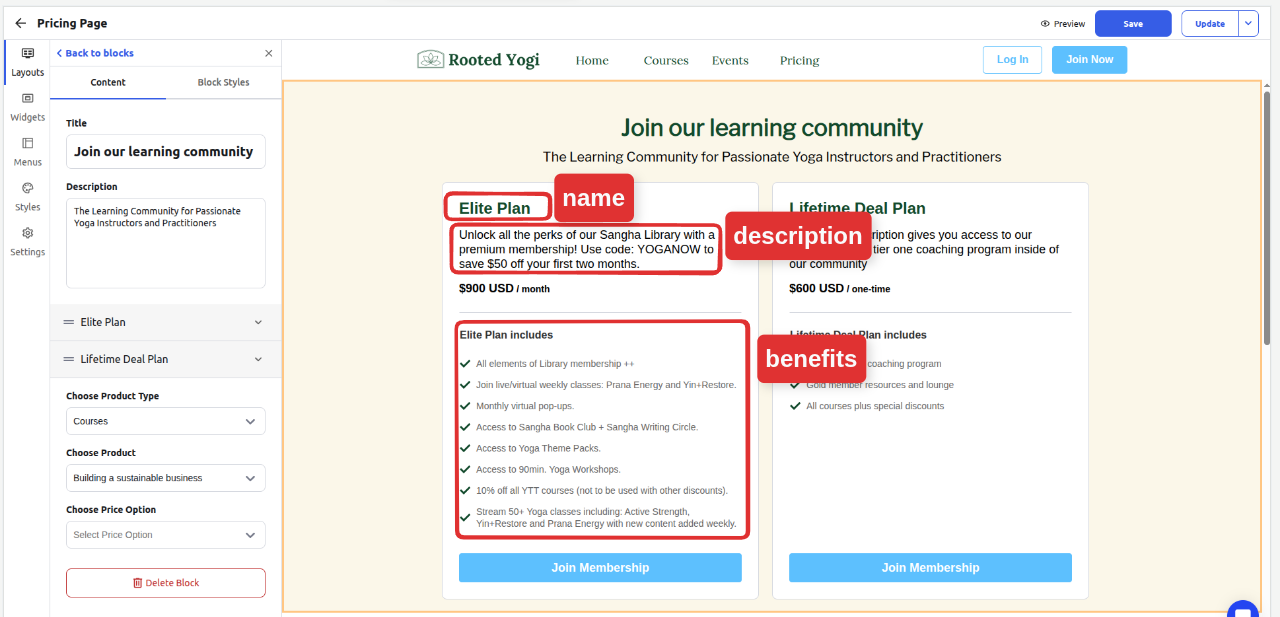
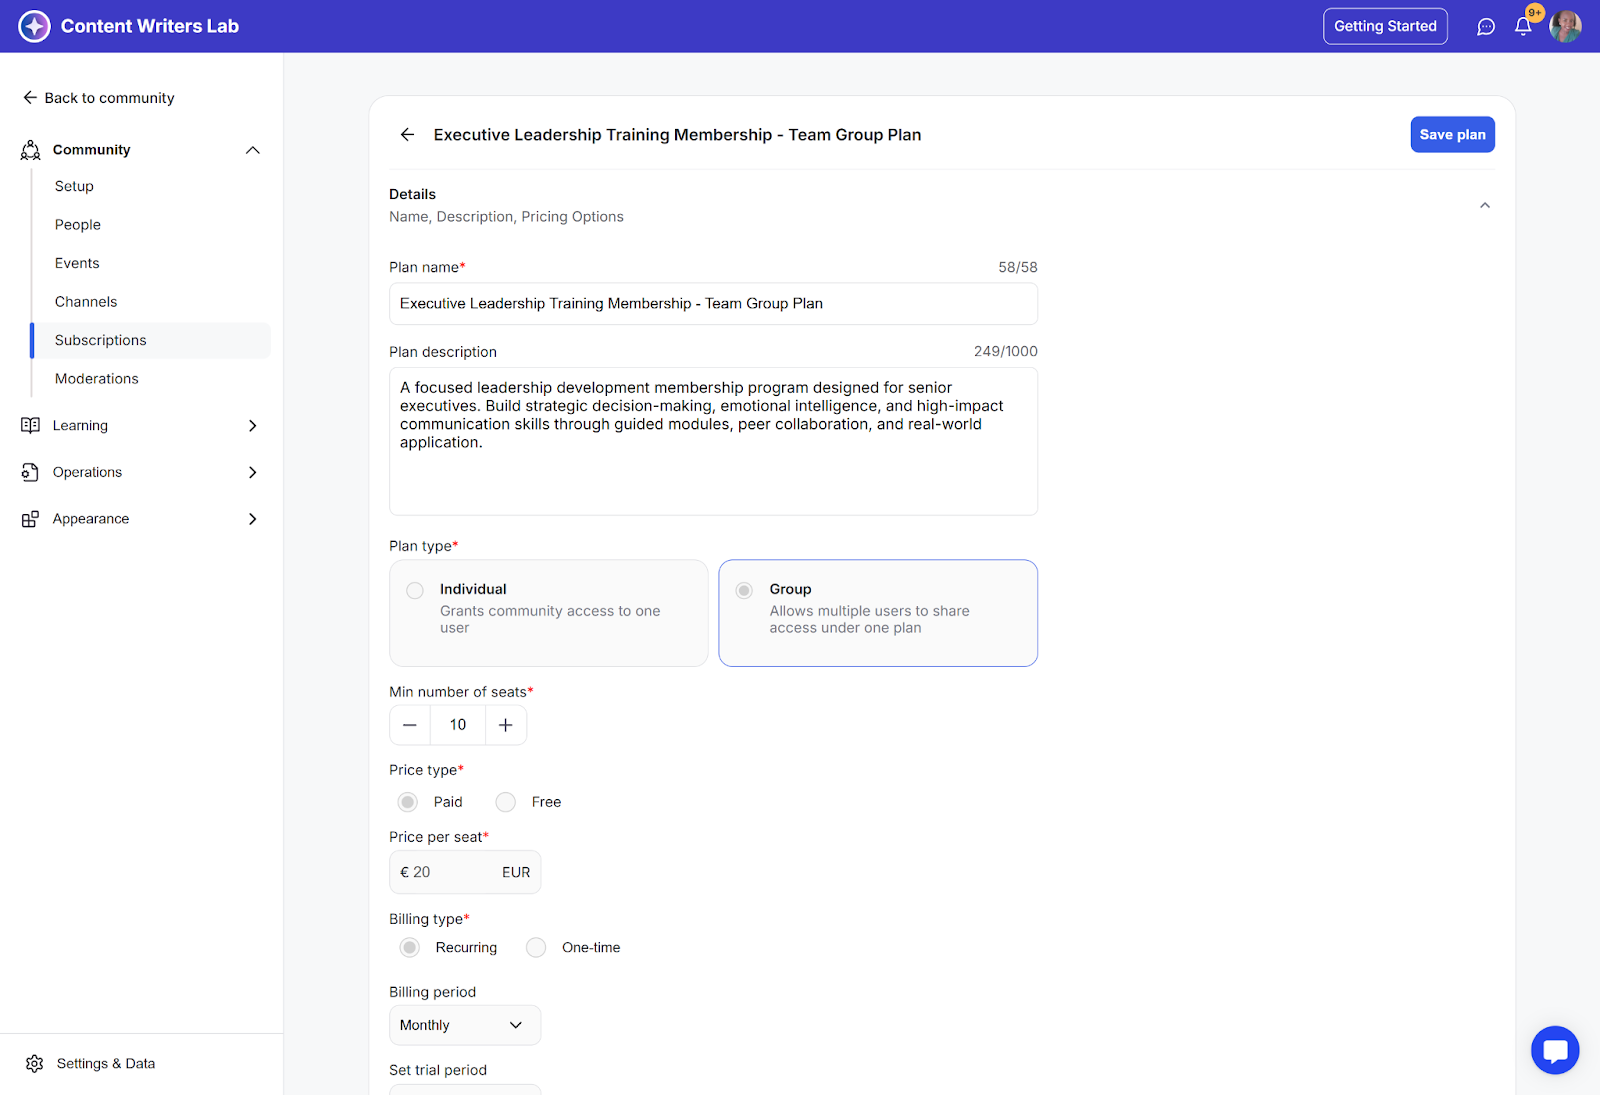
To edit a subscription's details, eg, name, benefits, or description, or change the status
Click the Admin Panel and navigate to Subscriptions in the side menu.
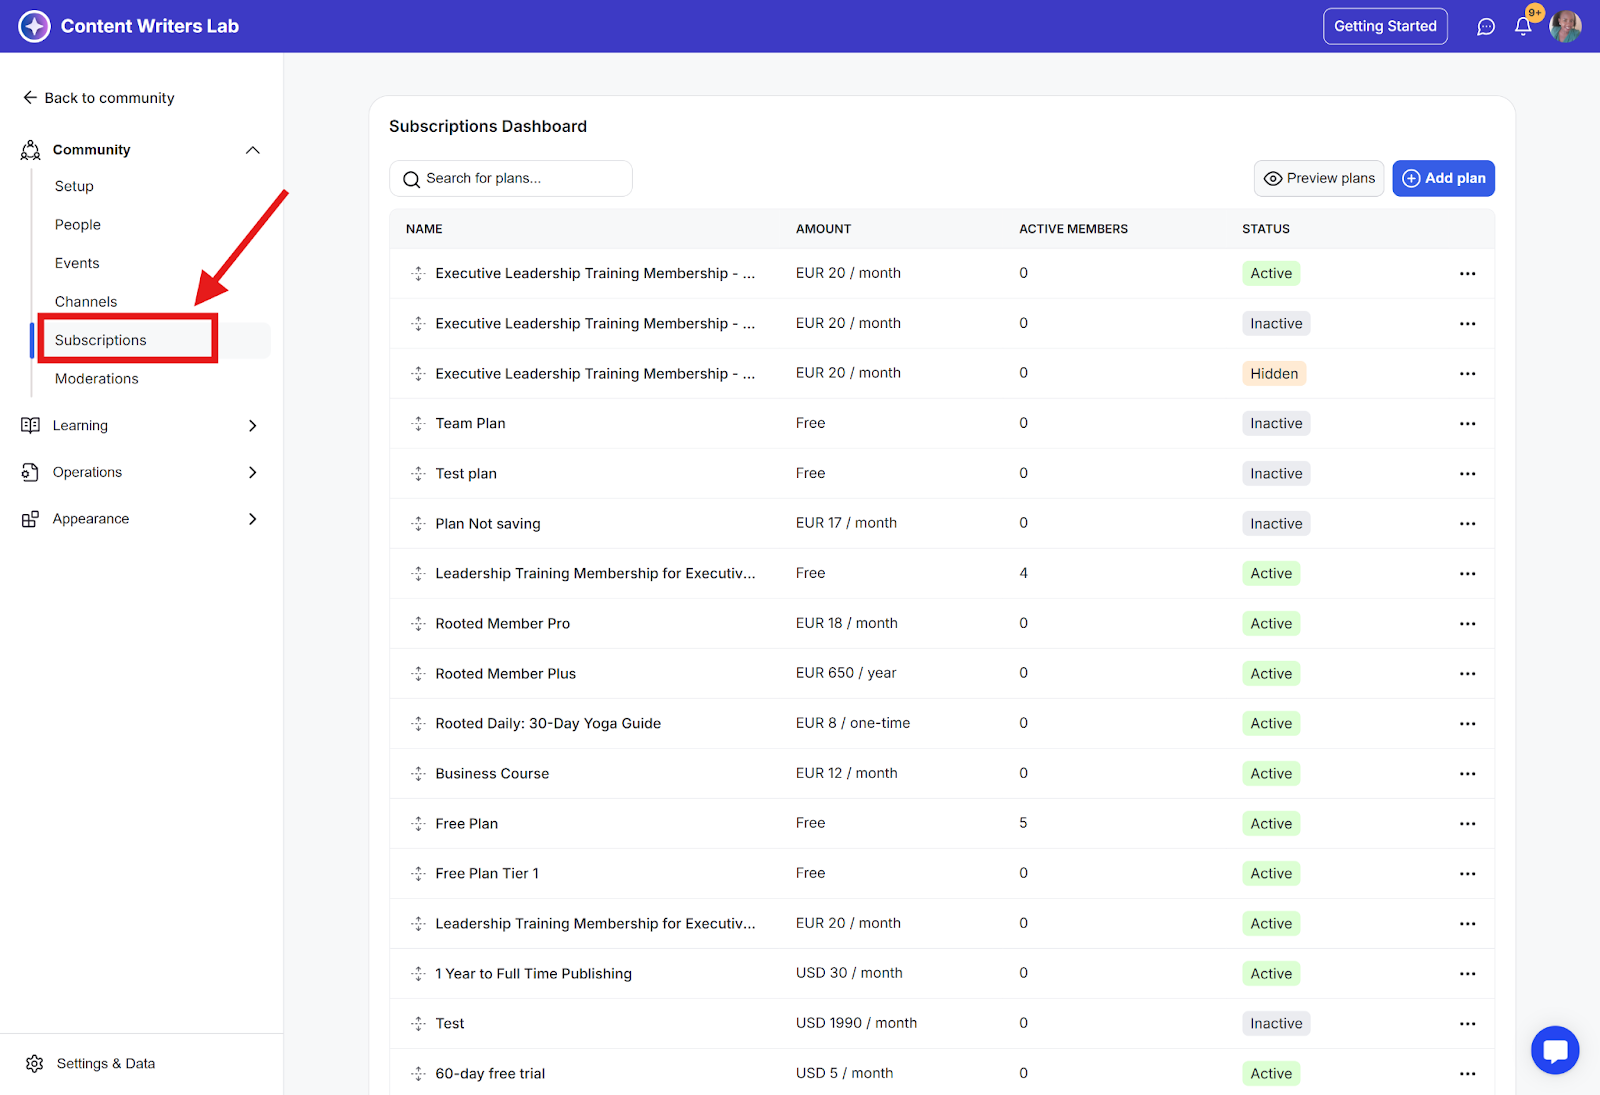
Locate the specific plan you want to edit.

Click on the three-dot menu and select the Edit option.
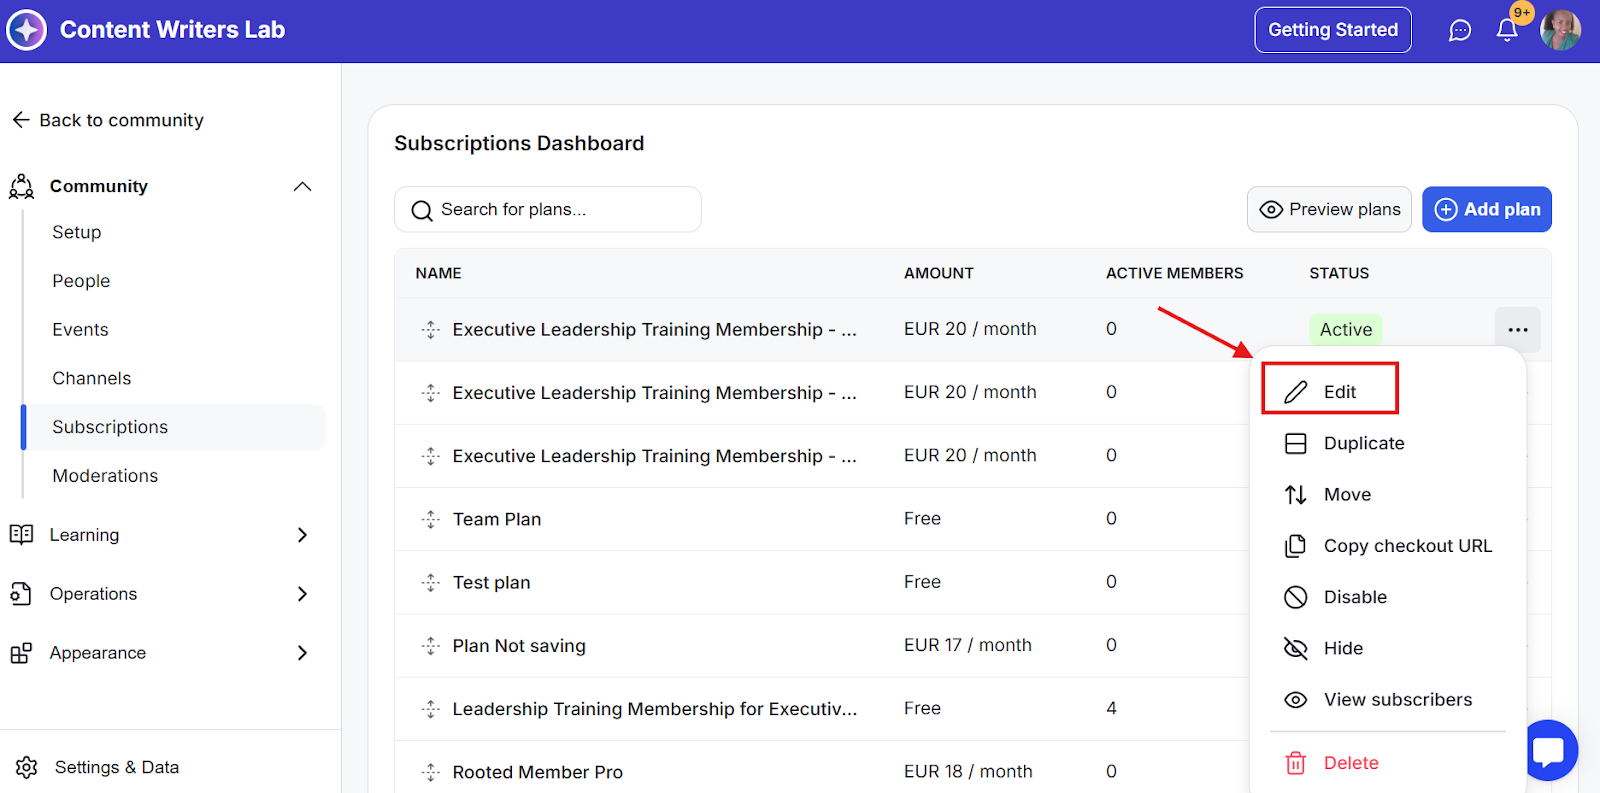
The edit option will open the details of the subscription in a pop-up. Click Save Plan after you are done with the changes.
Step 9: For a course, event, or library content, you need to select a pricing option as an extra step after selecting a product.
So the product will be the specific course or event, then the pricing will be the list of pricing created inside that event, course, or library content.
Note: For the product to appear in the dropdown:
It must have a status of published.
It should be set to a one-time fee access level
Step 10: After selecting the course, select the pricing option.

Note: For the pricing option to appear in the dropdown:
It must have a status of active and not hidden.
To edit a course's pricing details, eg, name, benefits, or description, or status
Go to the Admin Panel and navigate to Learning and select Courses.
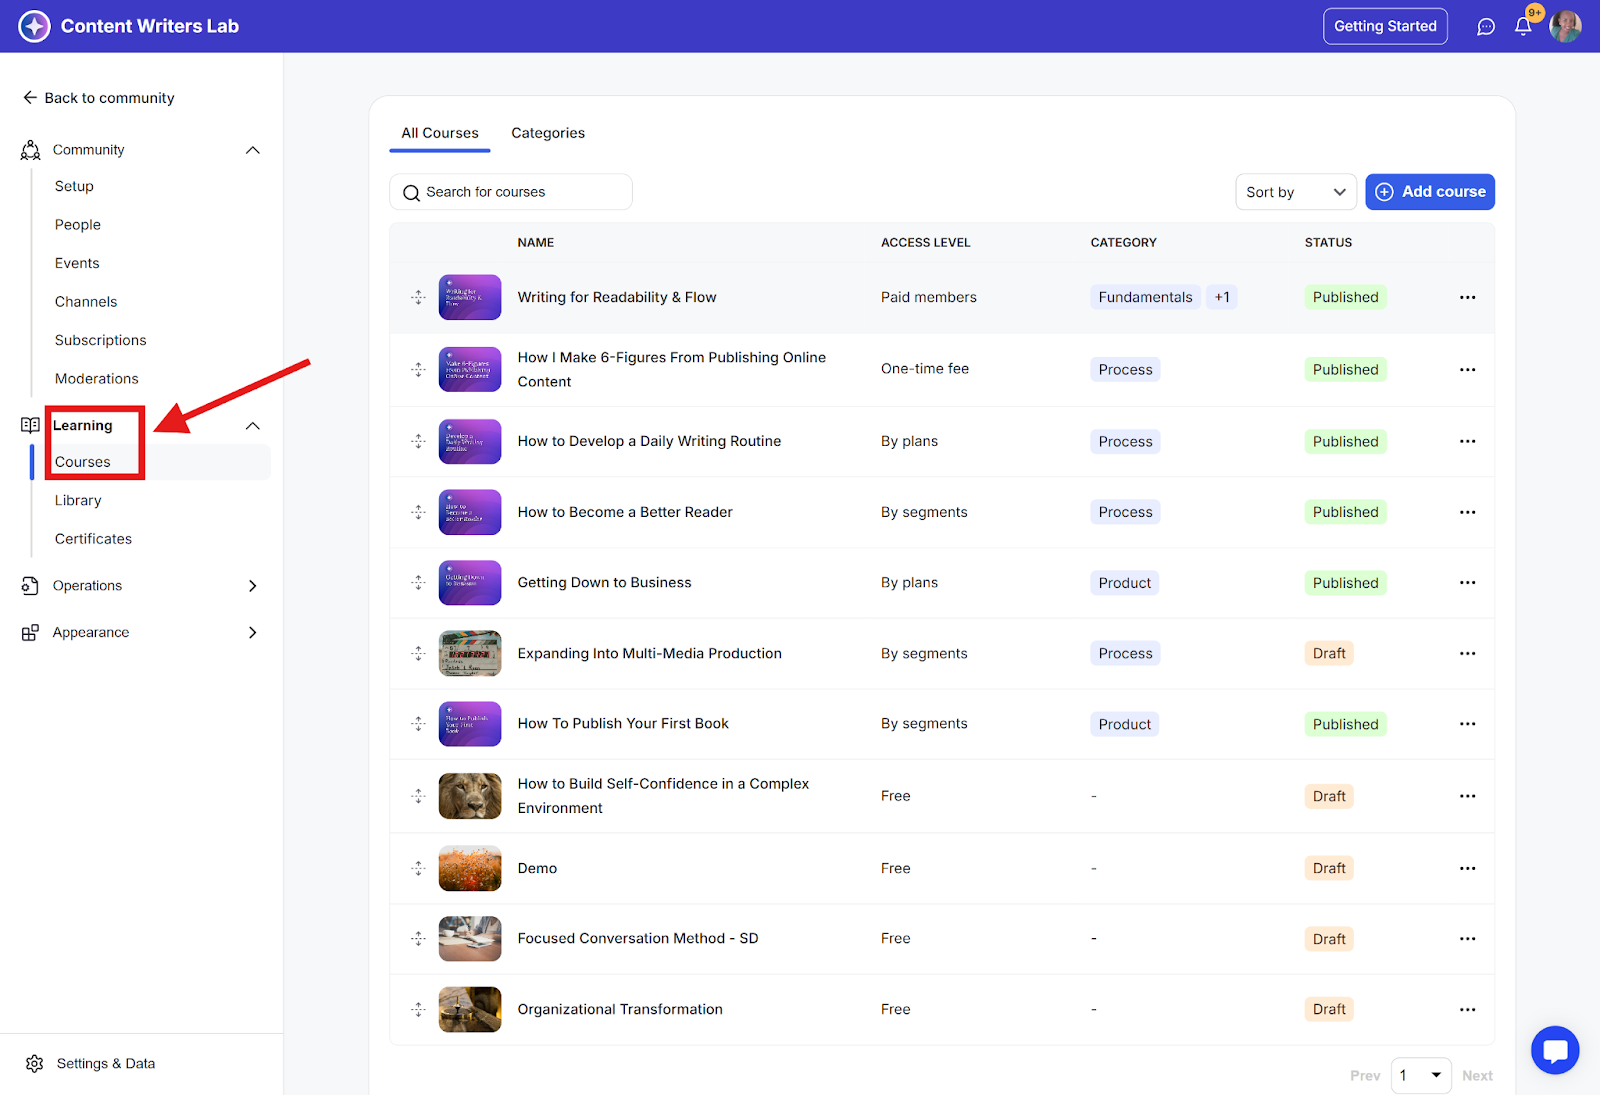
Select the course to open the course builder, then click on the pricing tab.
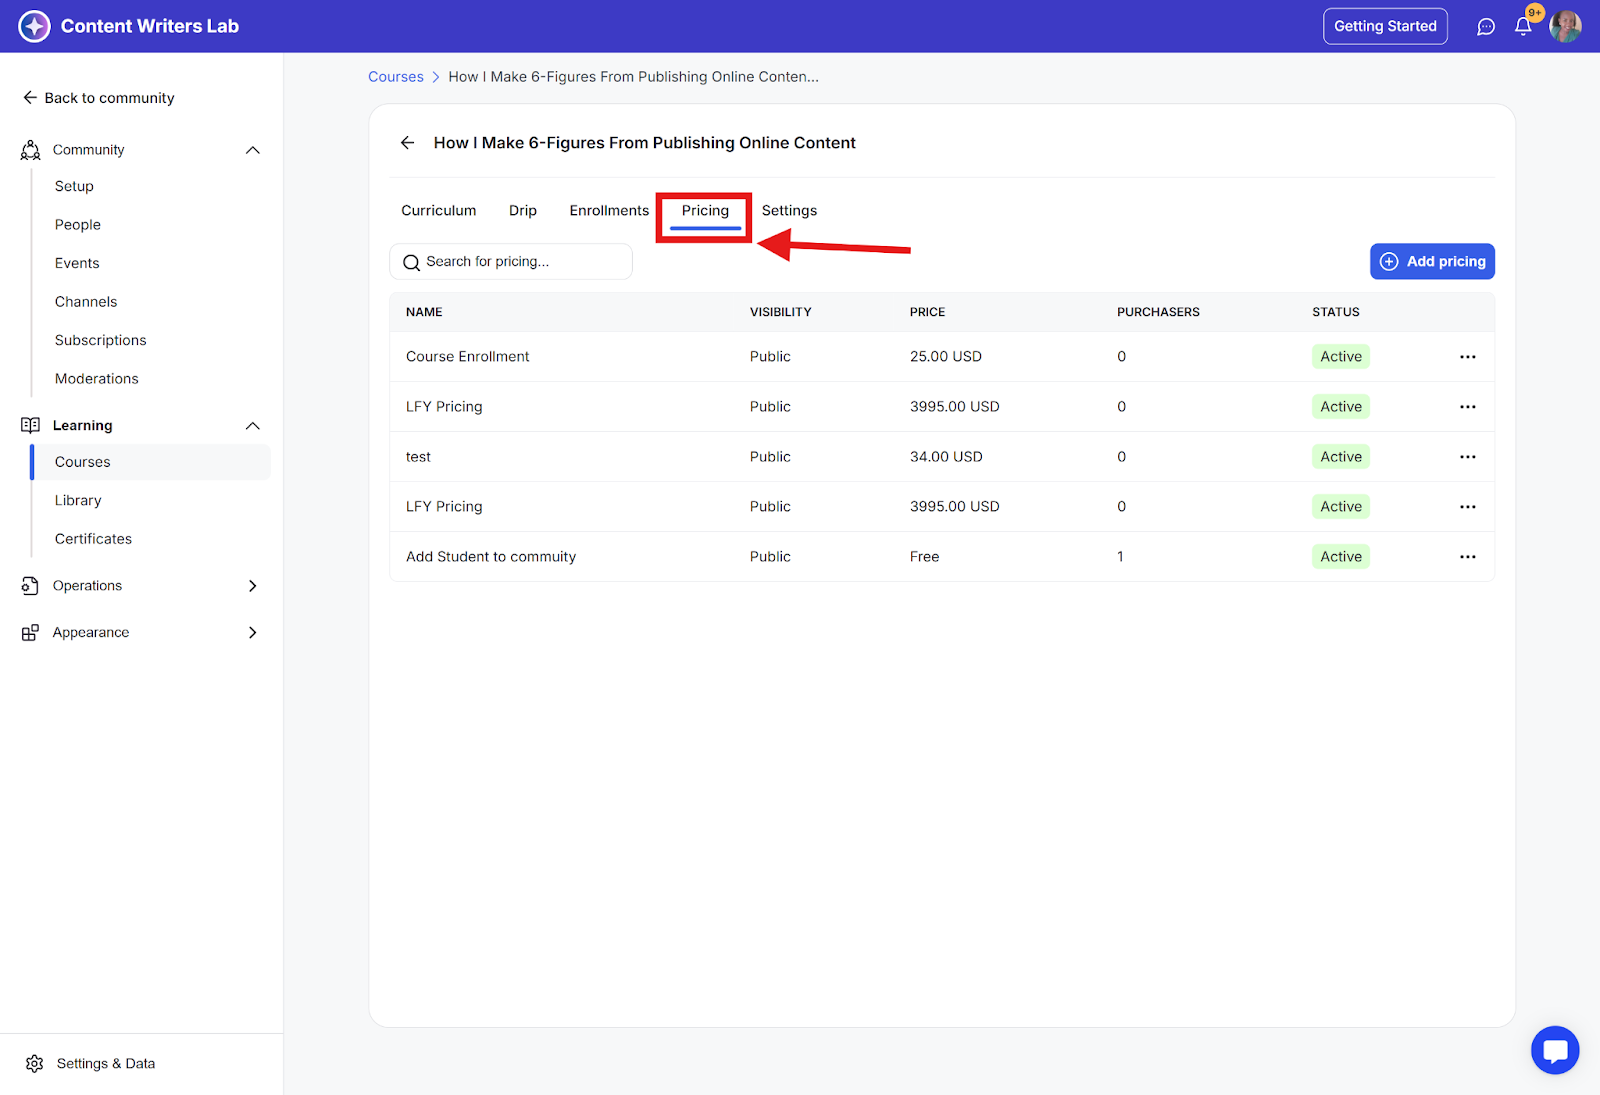
Locate the pricing option, and click on the 3-dot menu and select the edit option.
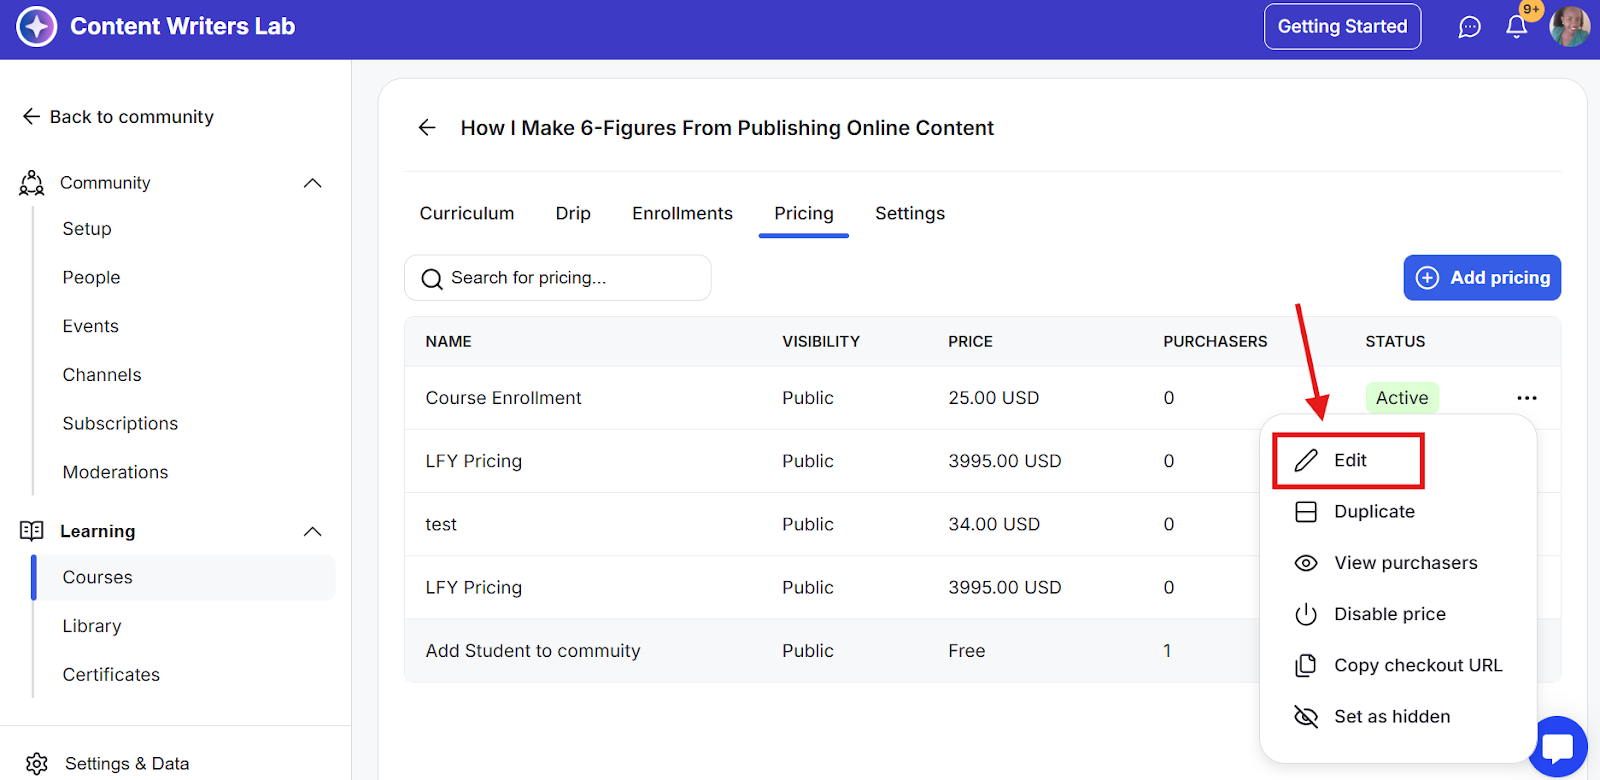
This will open a pop-up, and you can edit the details and click Save to update.

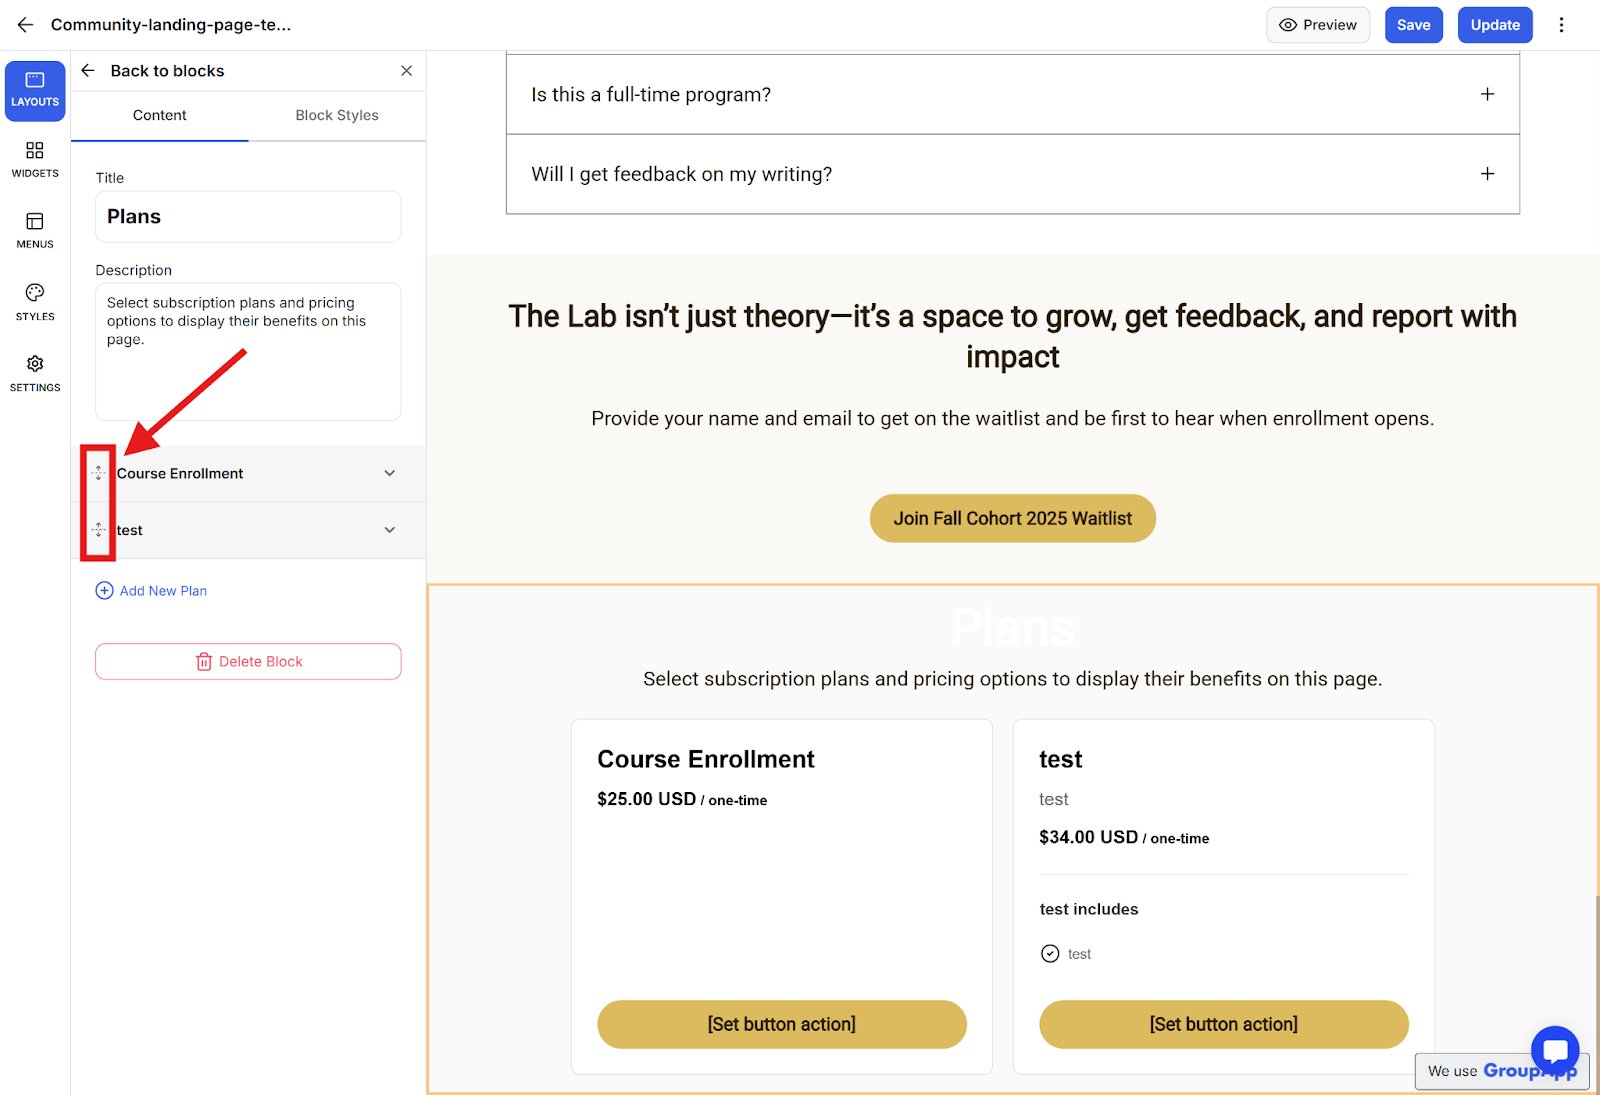
Step 11: You can rearrange the order of the plans on the landing page by dragging them using these move icons.
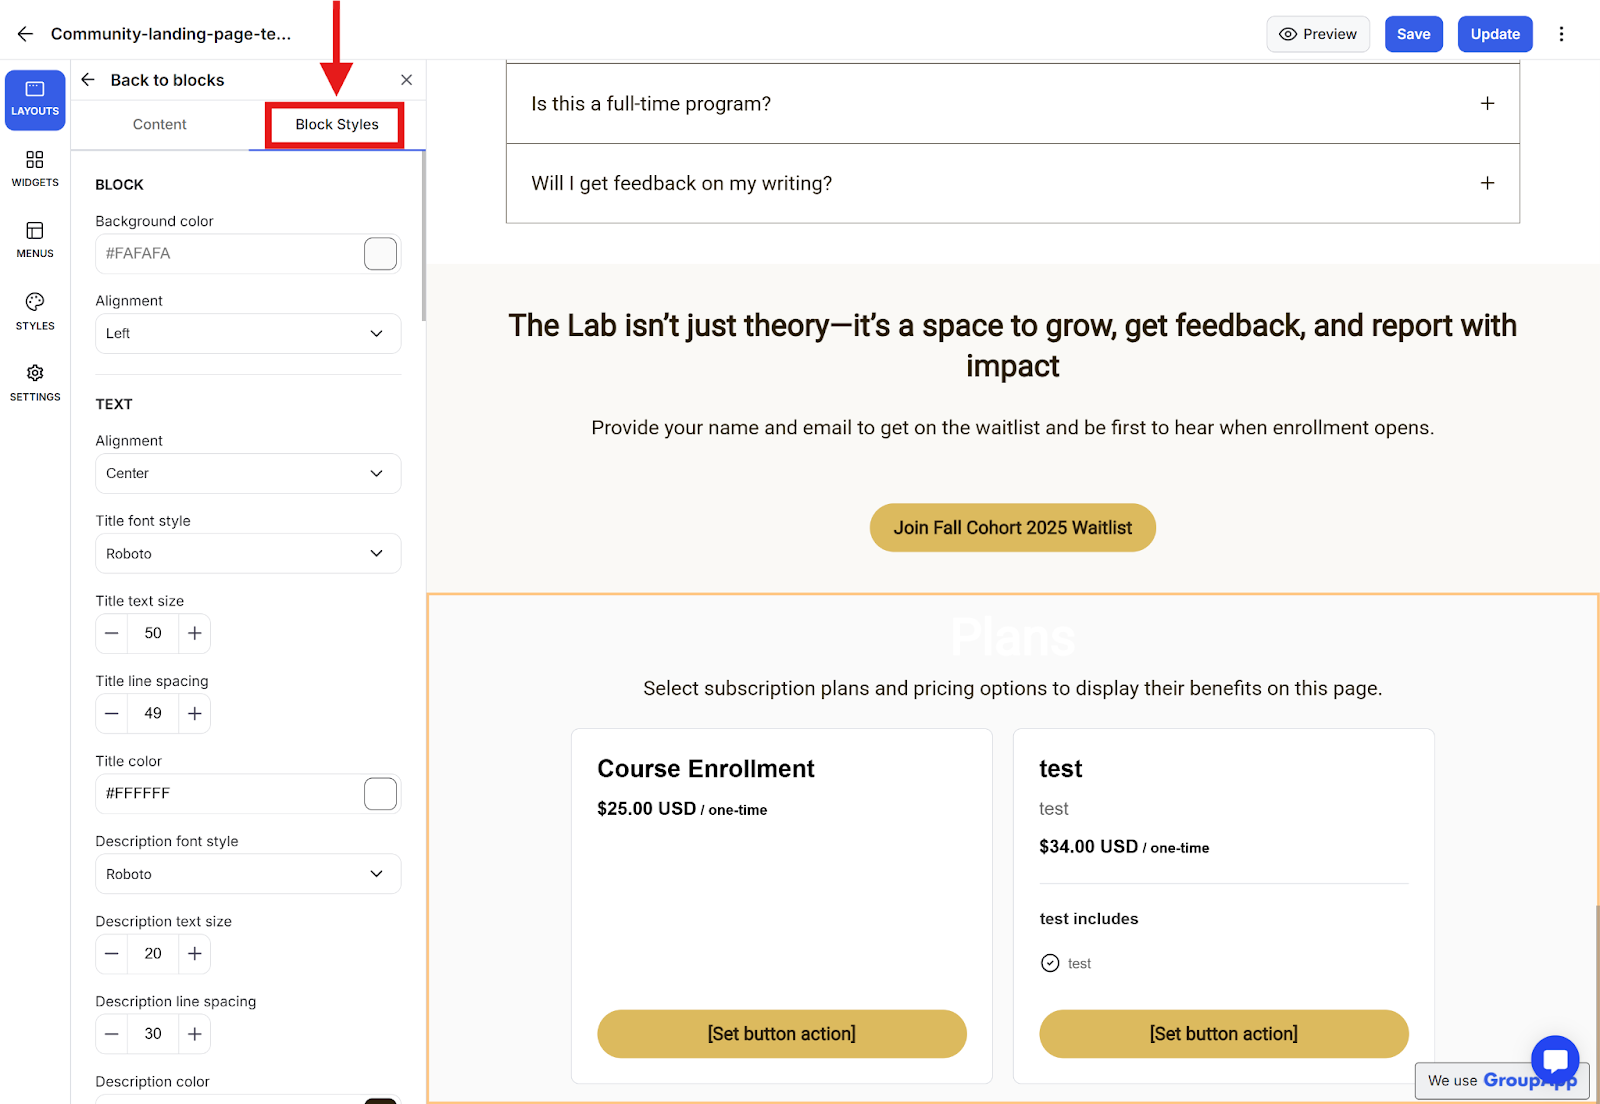
Step 12: Style the block using the Block Styles tab.
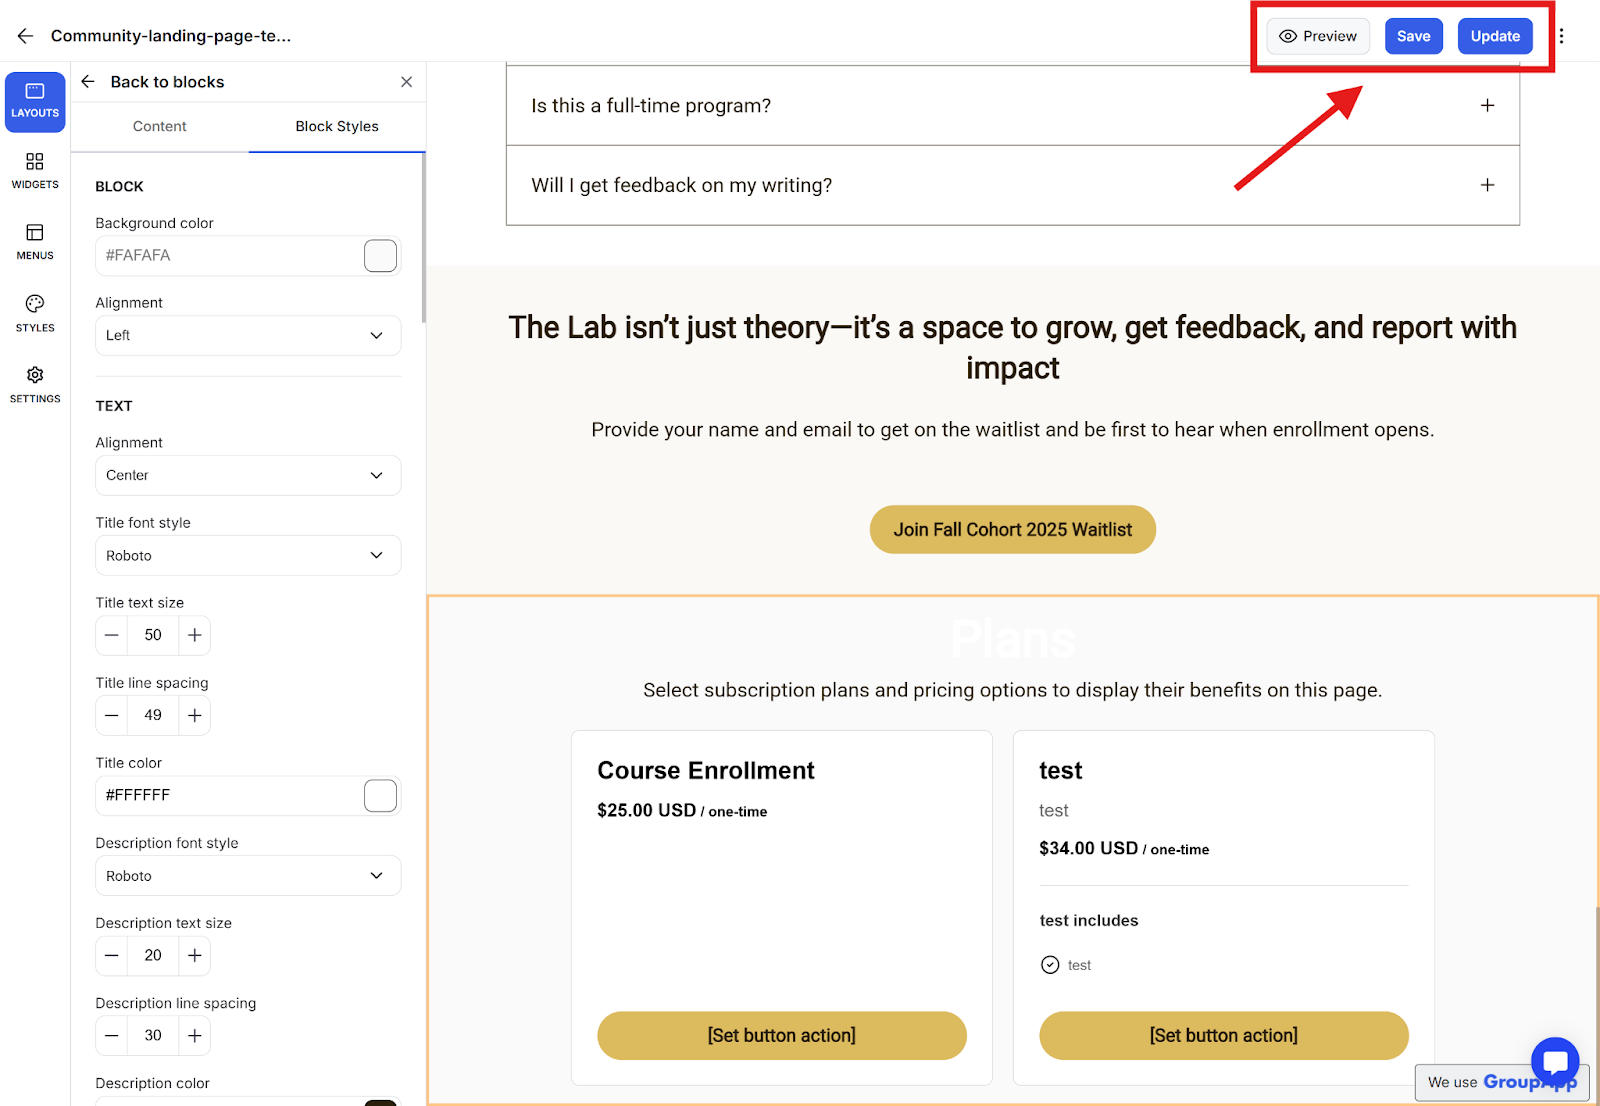
Step 13: After you are done, you can save and preview the changes, and once you are ready, you can go ahead and publish your updates for the live page.
An example of how the updates would look on a live page.

