Monetize your expertise and actively engage your community by setting up membership subscriptions.
This guide will walk you through every step of creating a subscription plan. You’ll learn how to configure a subscription plan, customize its details, and preview it to ensure it’s ready for your members.
Step 1: Go to the Admin Panel.

Step 2: On the side menu, scroll down to Settings & Data and select Integrations.
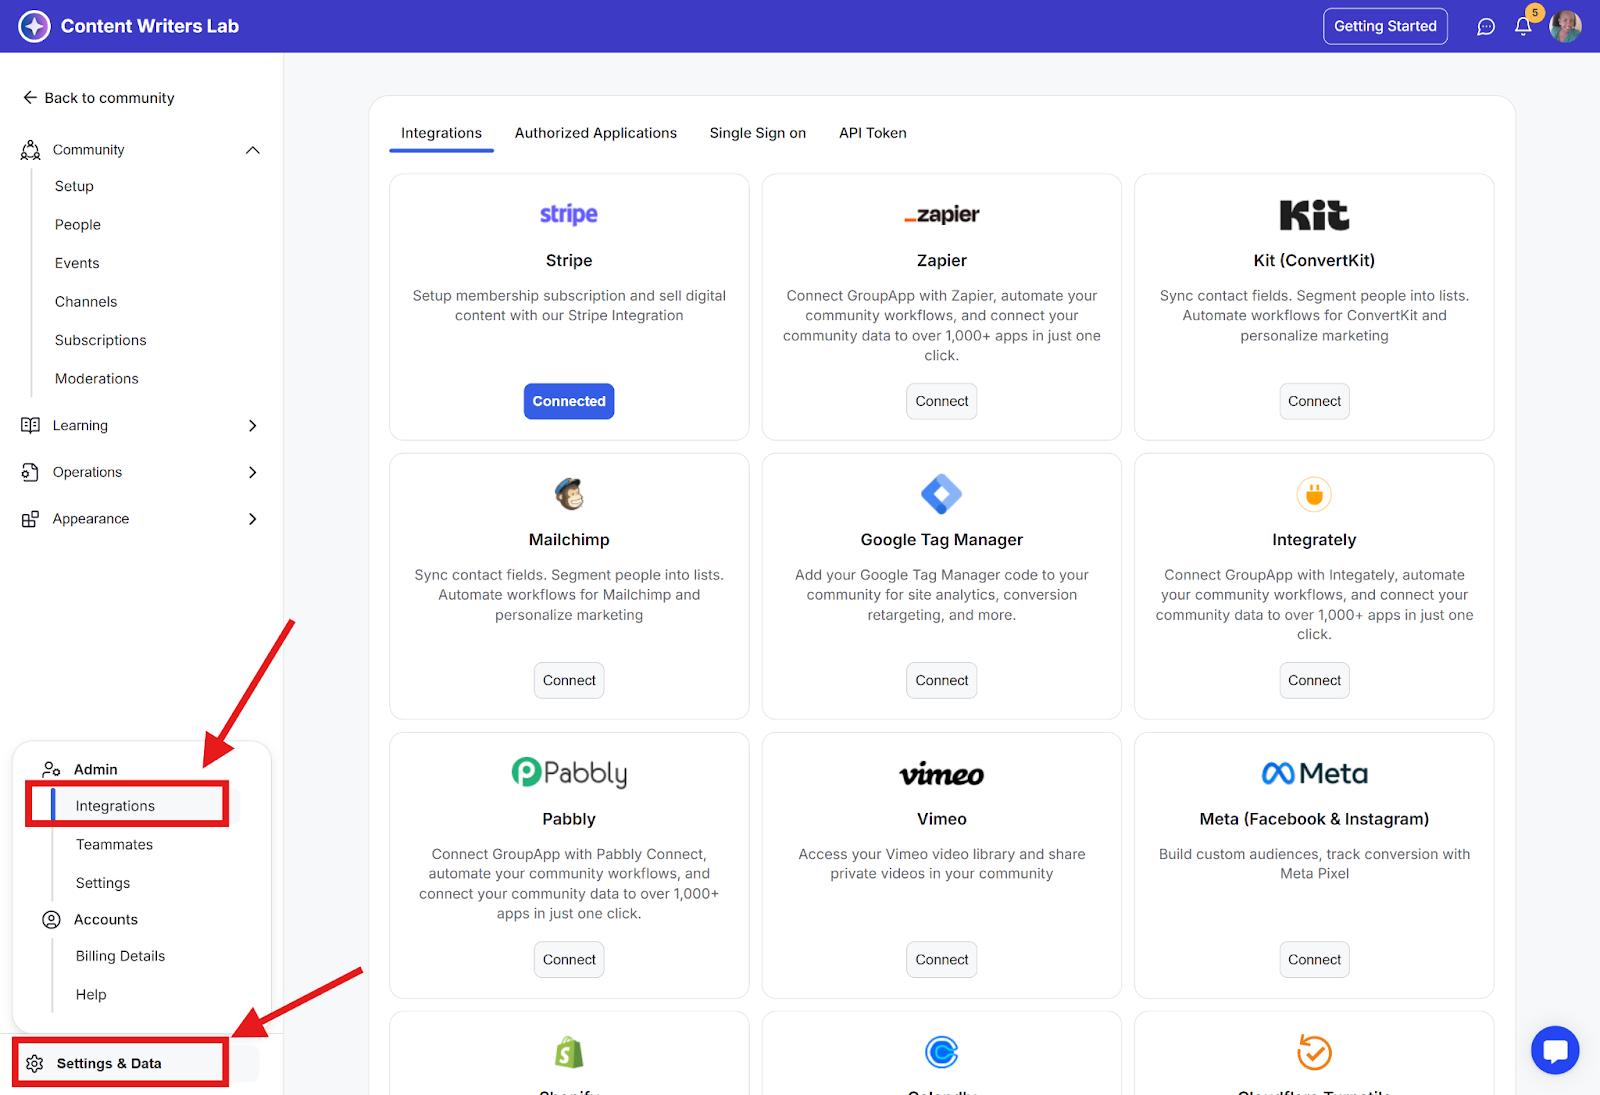
Step 3: Find Stripe integration and click Connect.
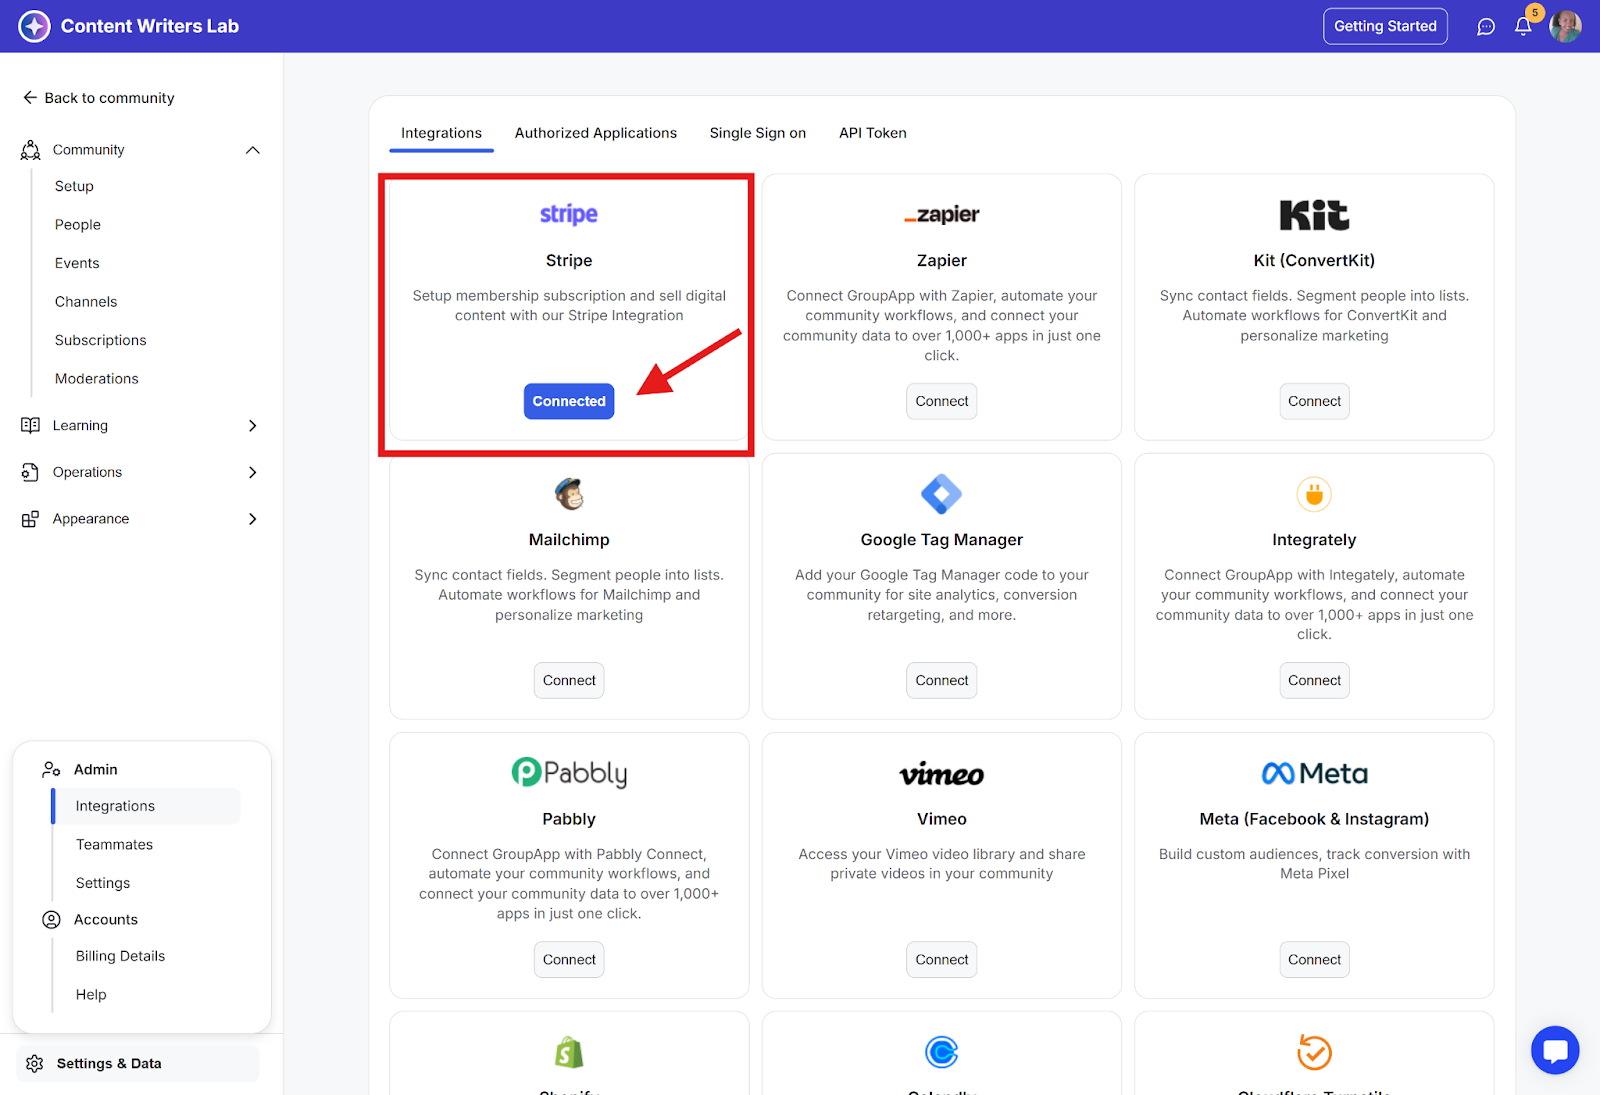
Step 4: When you click on Connect with Stripe, you will be taken to a new window where you must connect your Stripe account or create a new Stripe account. Follow the setup steps on the page and connect your Stripe Account with GroupApp.

Step 1: Go to the Admin Panel and select Subscriptions from the side menu. This opens the subscription dashboard.
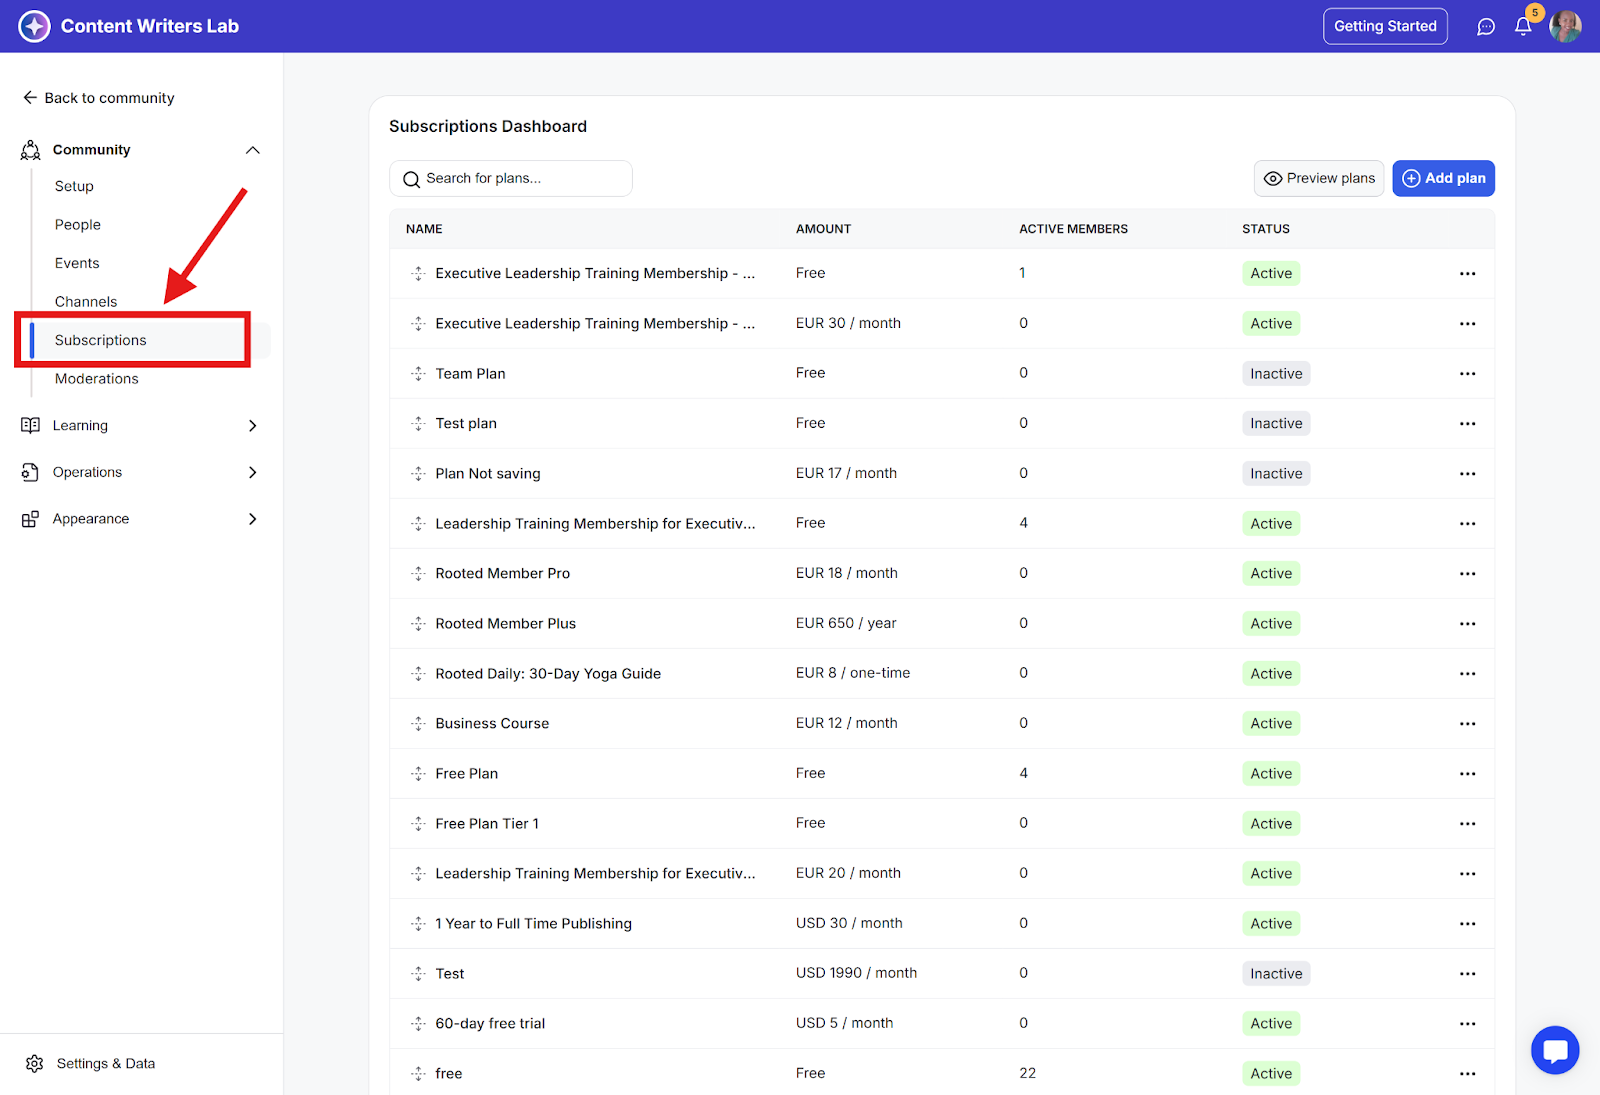
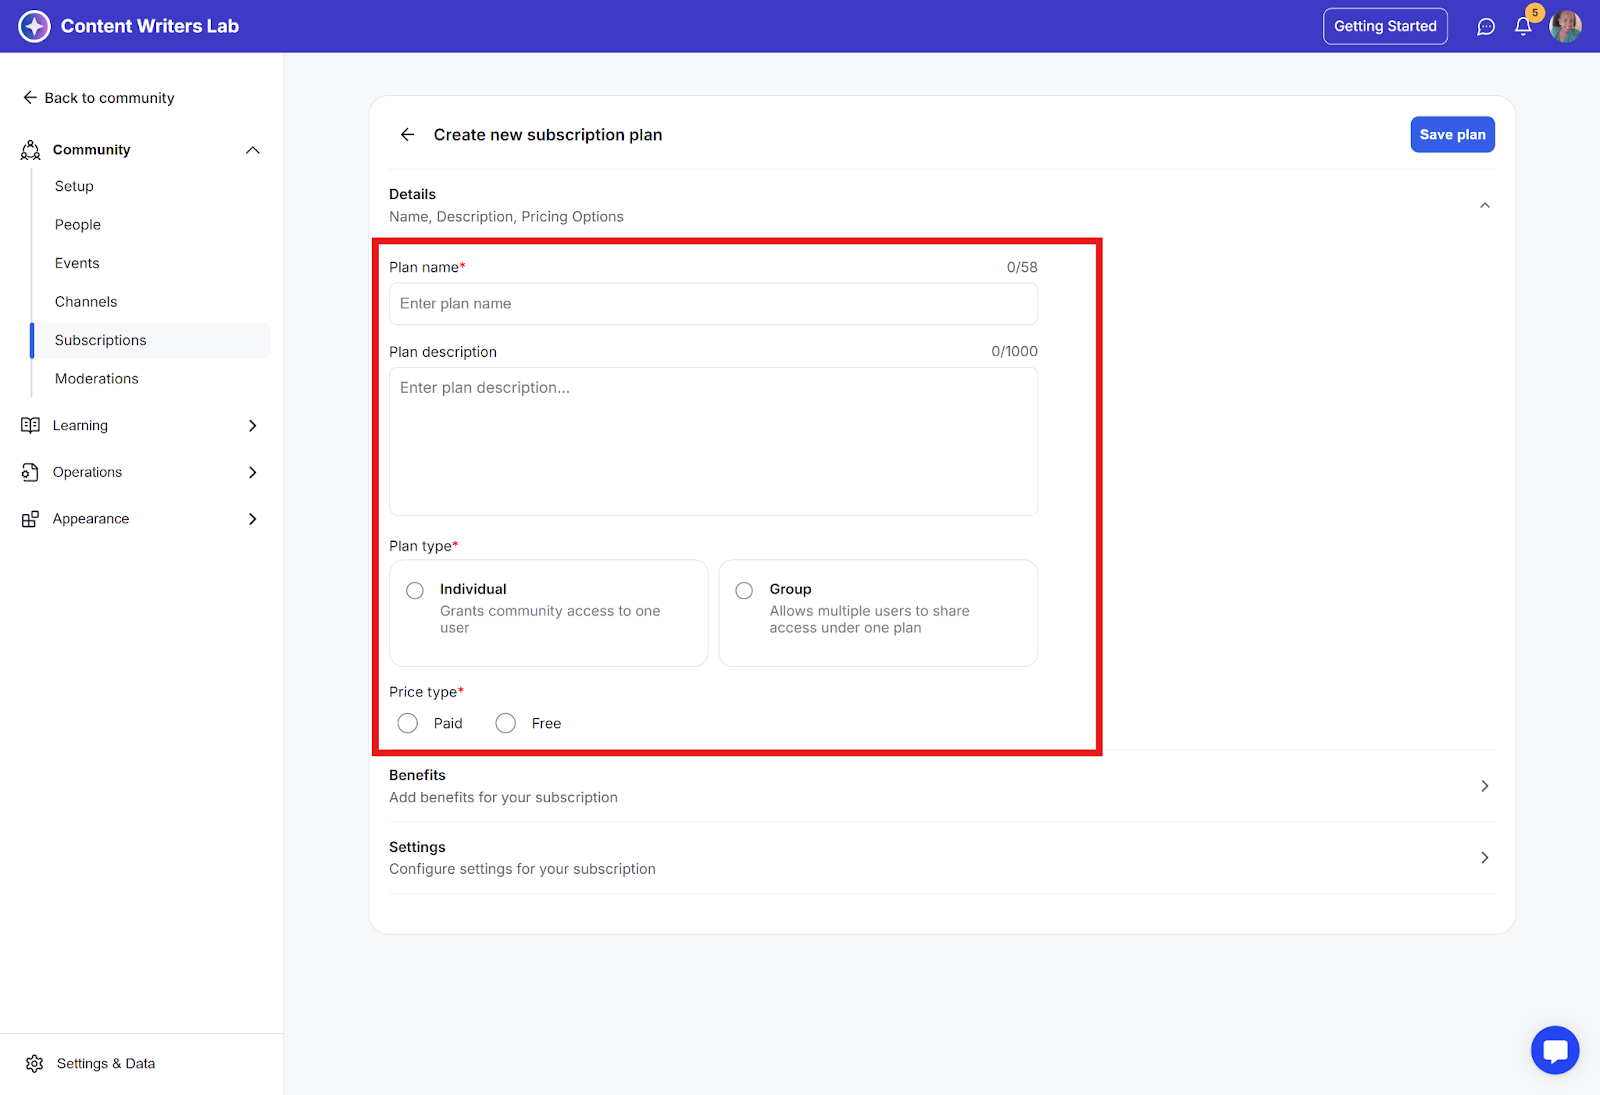
Step 2: Click the Add Plan button.

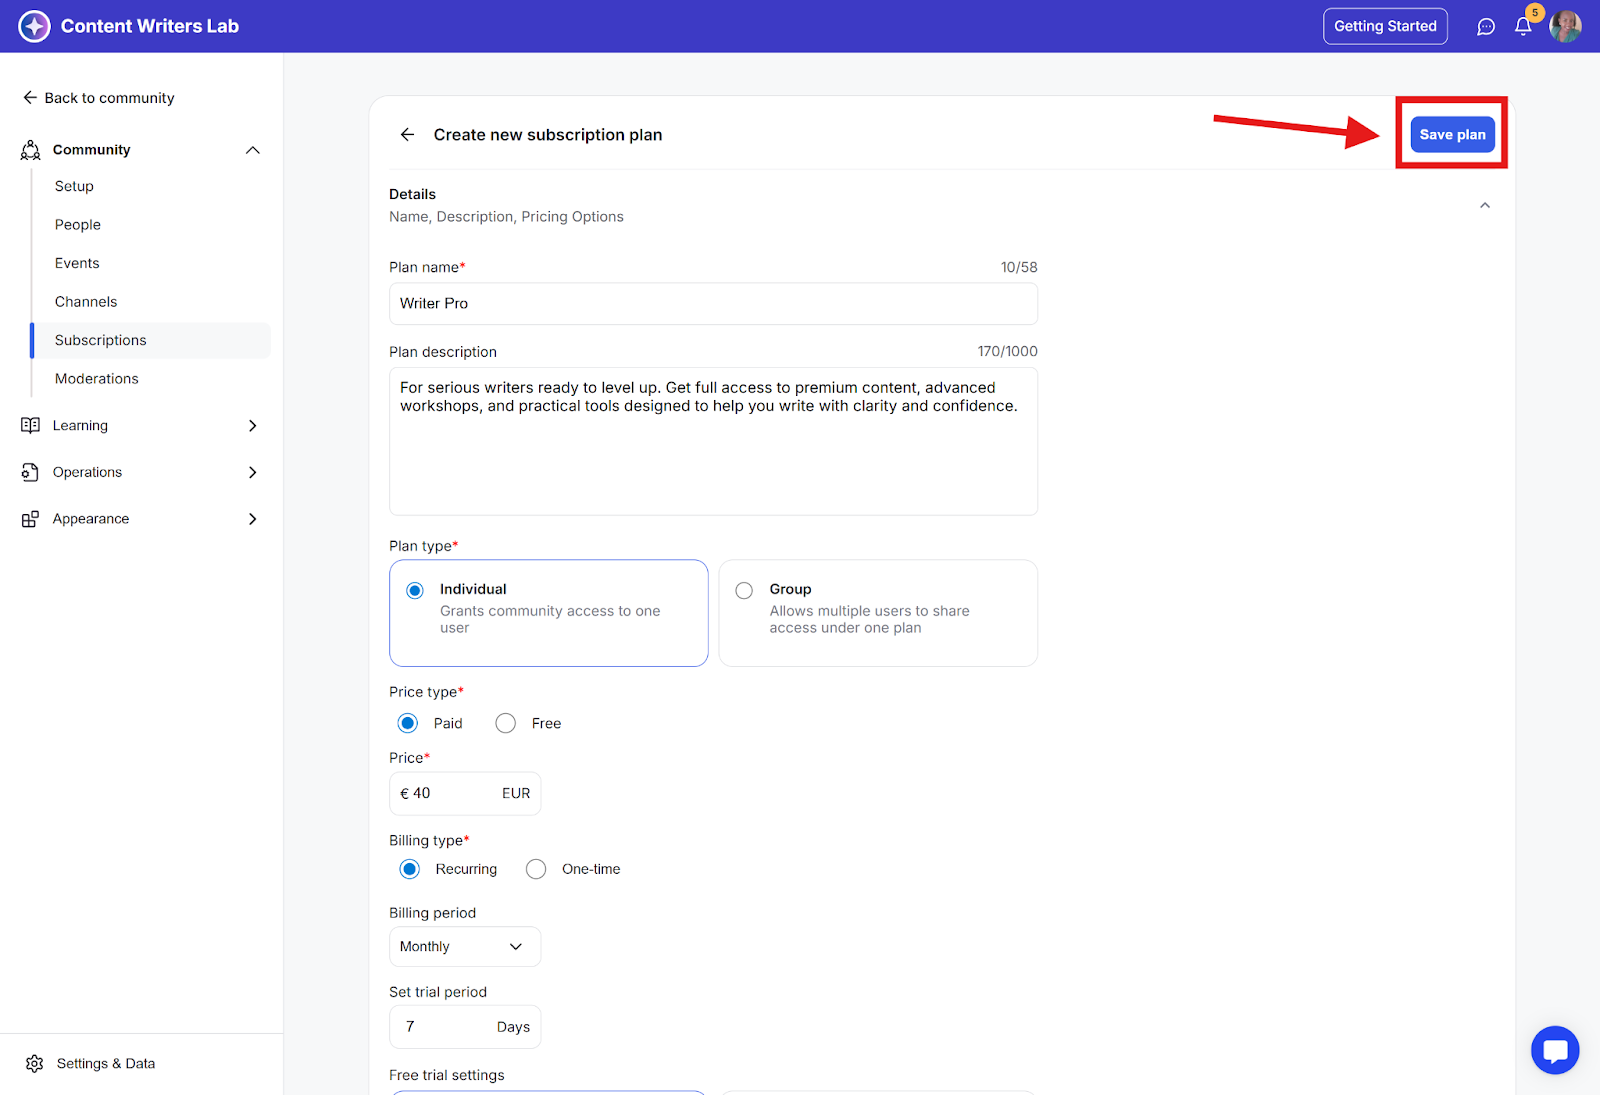
Step 4: Enter the plan name, description, and pricing options.
Step 5: Click Save Plan.
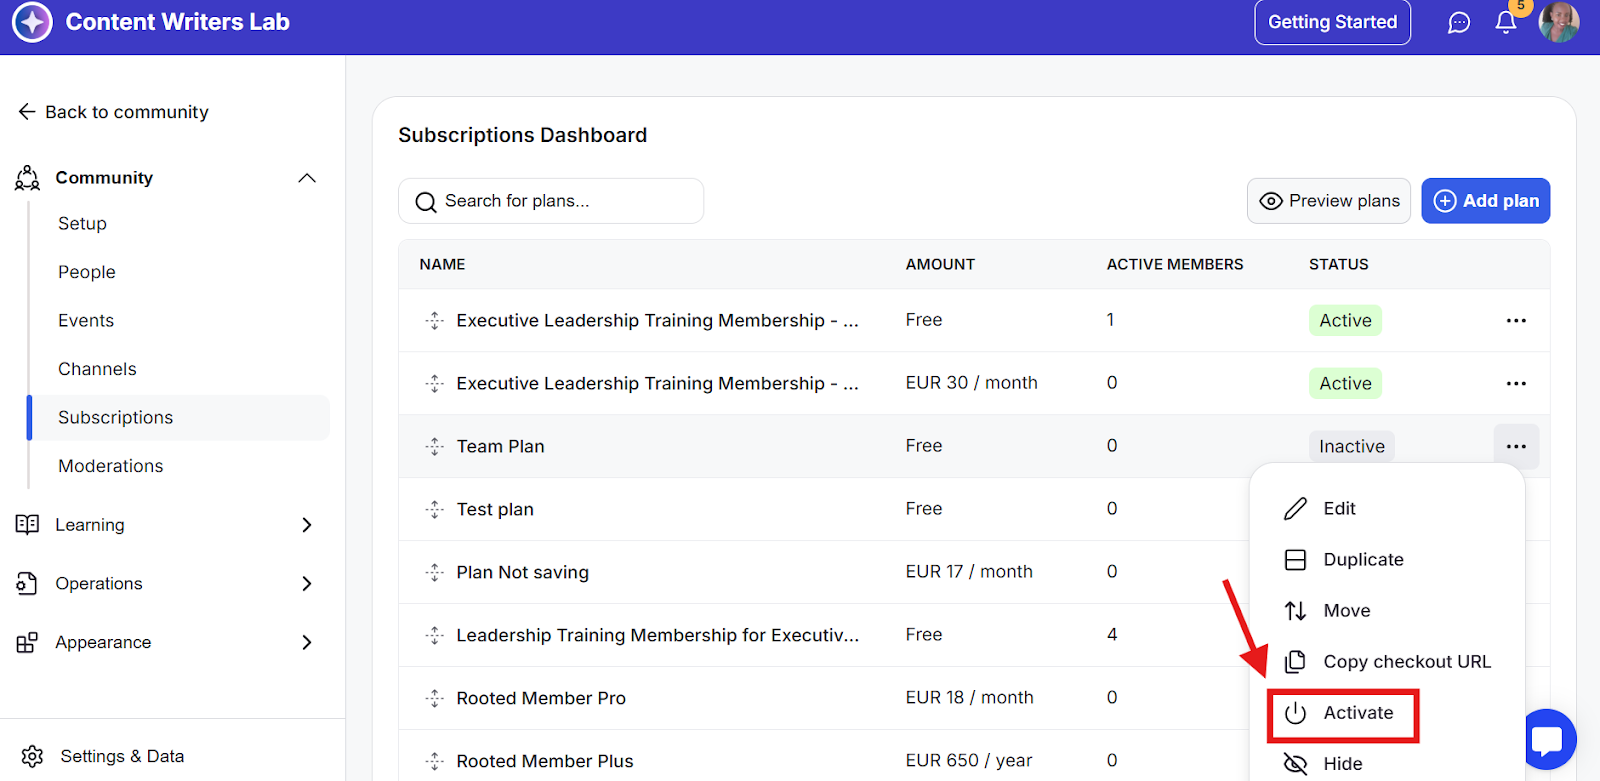
Step 6: You can activate or disable your membership subscription plan by clicking the 3-dot icon located on the right side of each plan. Please note that if all subscription plans are disabled, new users won’t be able to join the community, and sign-ups will appear as closed.
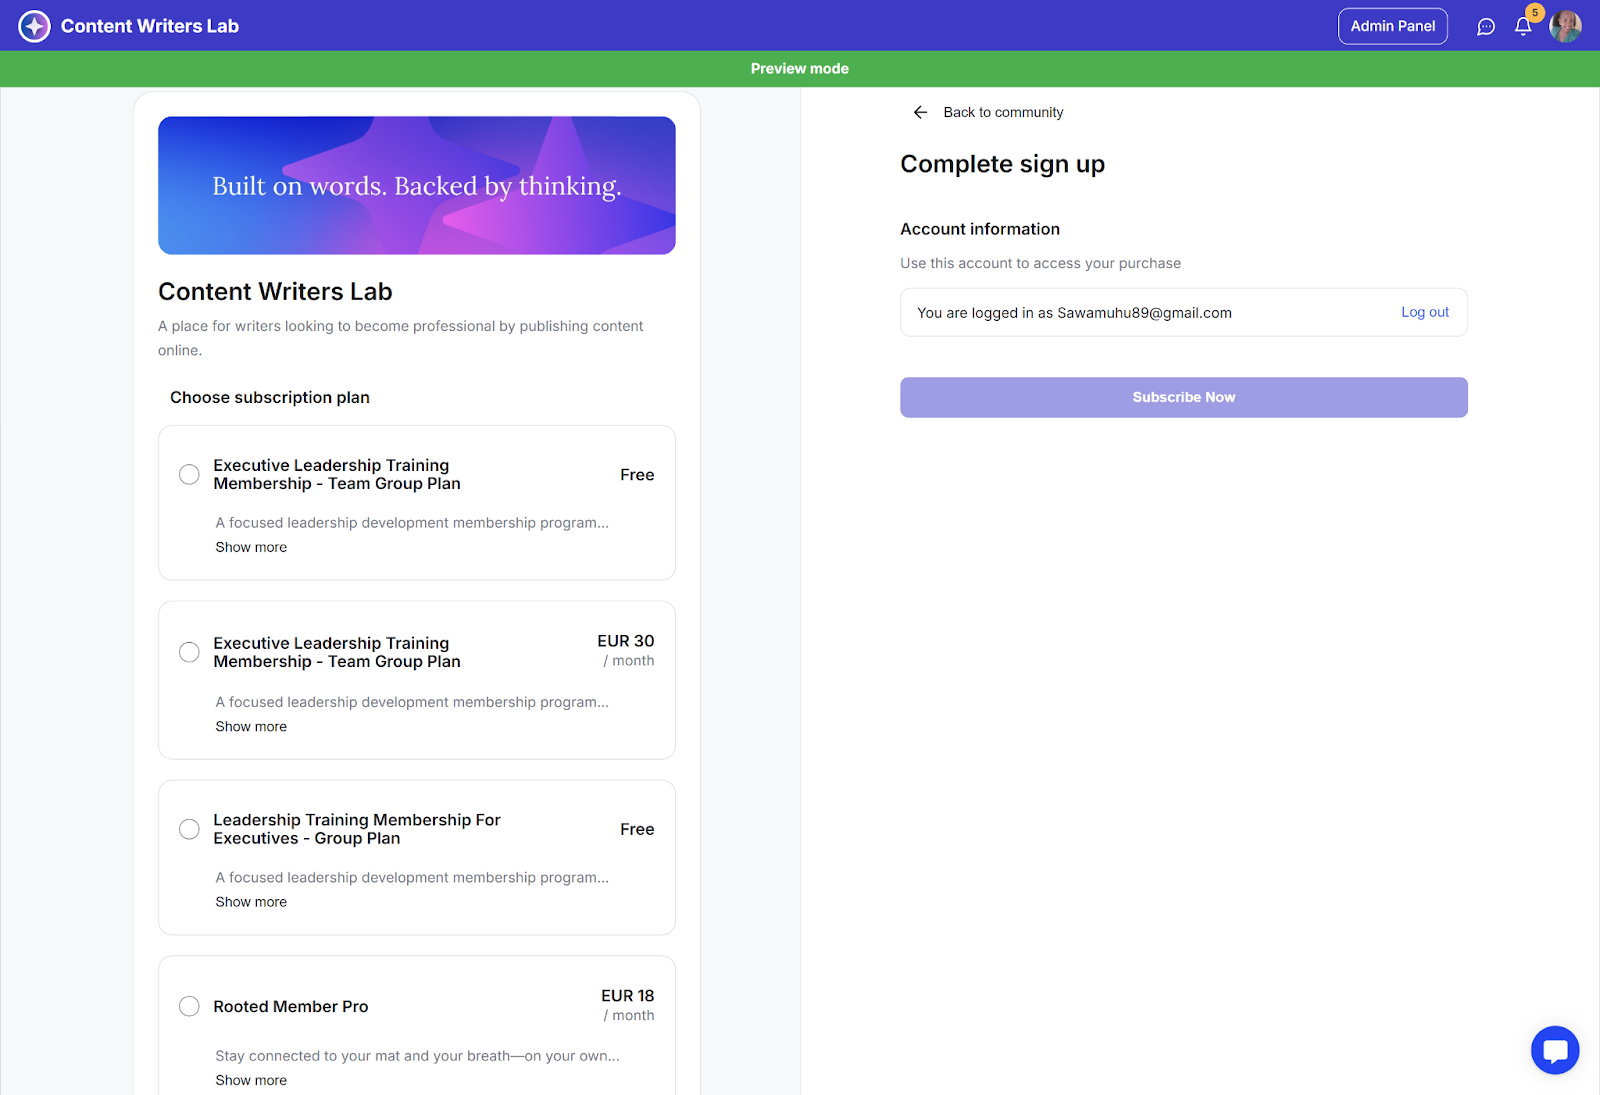
Step 7: Once you set up subscriptions, you can preview them by clicking Preview Plans in the top right-hand corner.
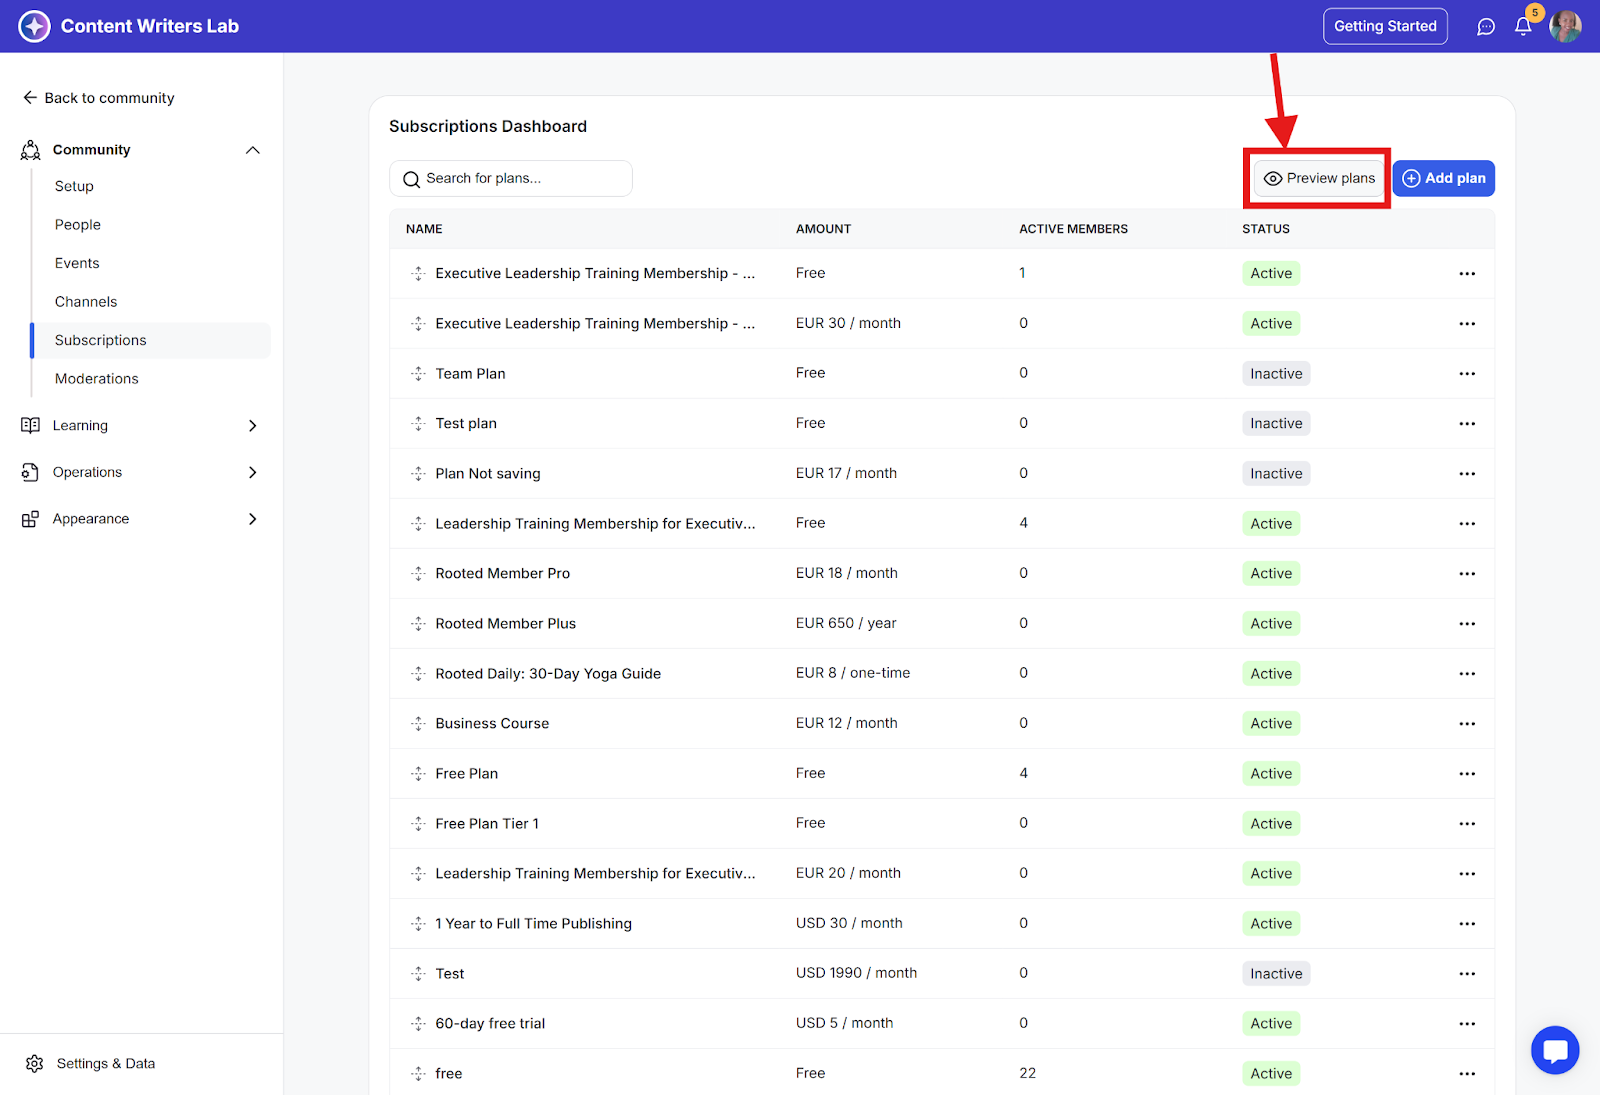
Step 8: Preview subscriptions will show you exactly what your subscription plan setup will look like to members who sign up for your community.