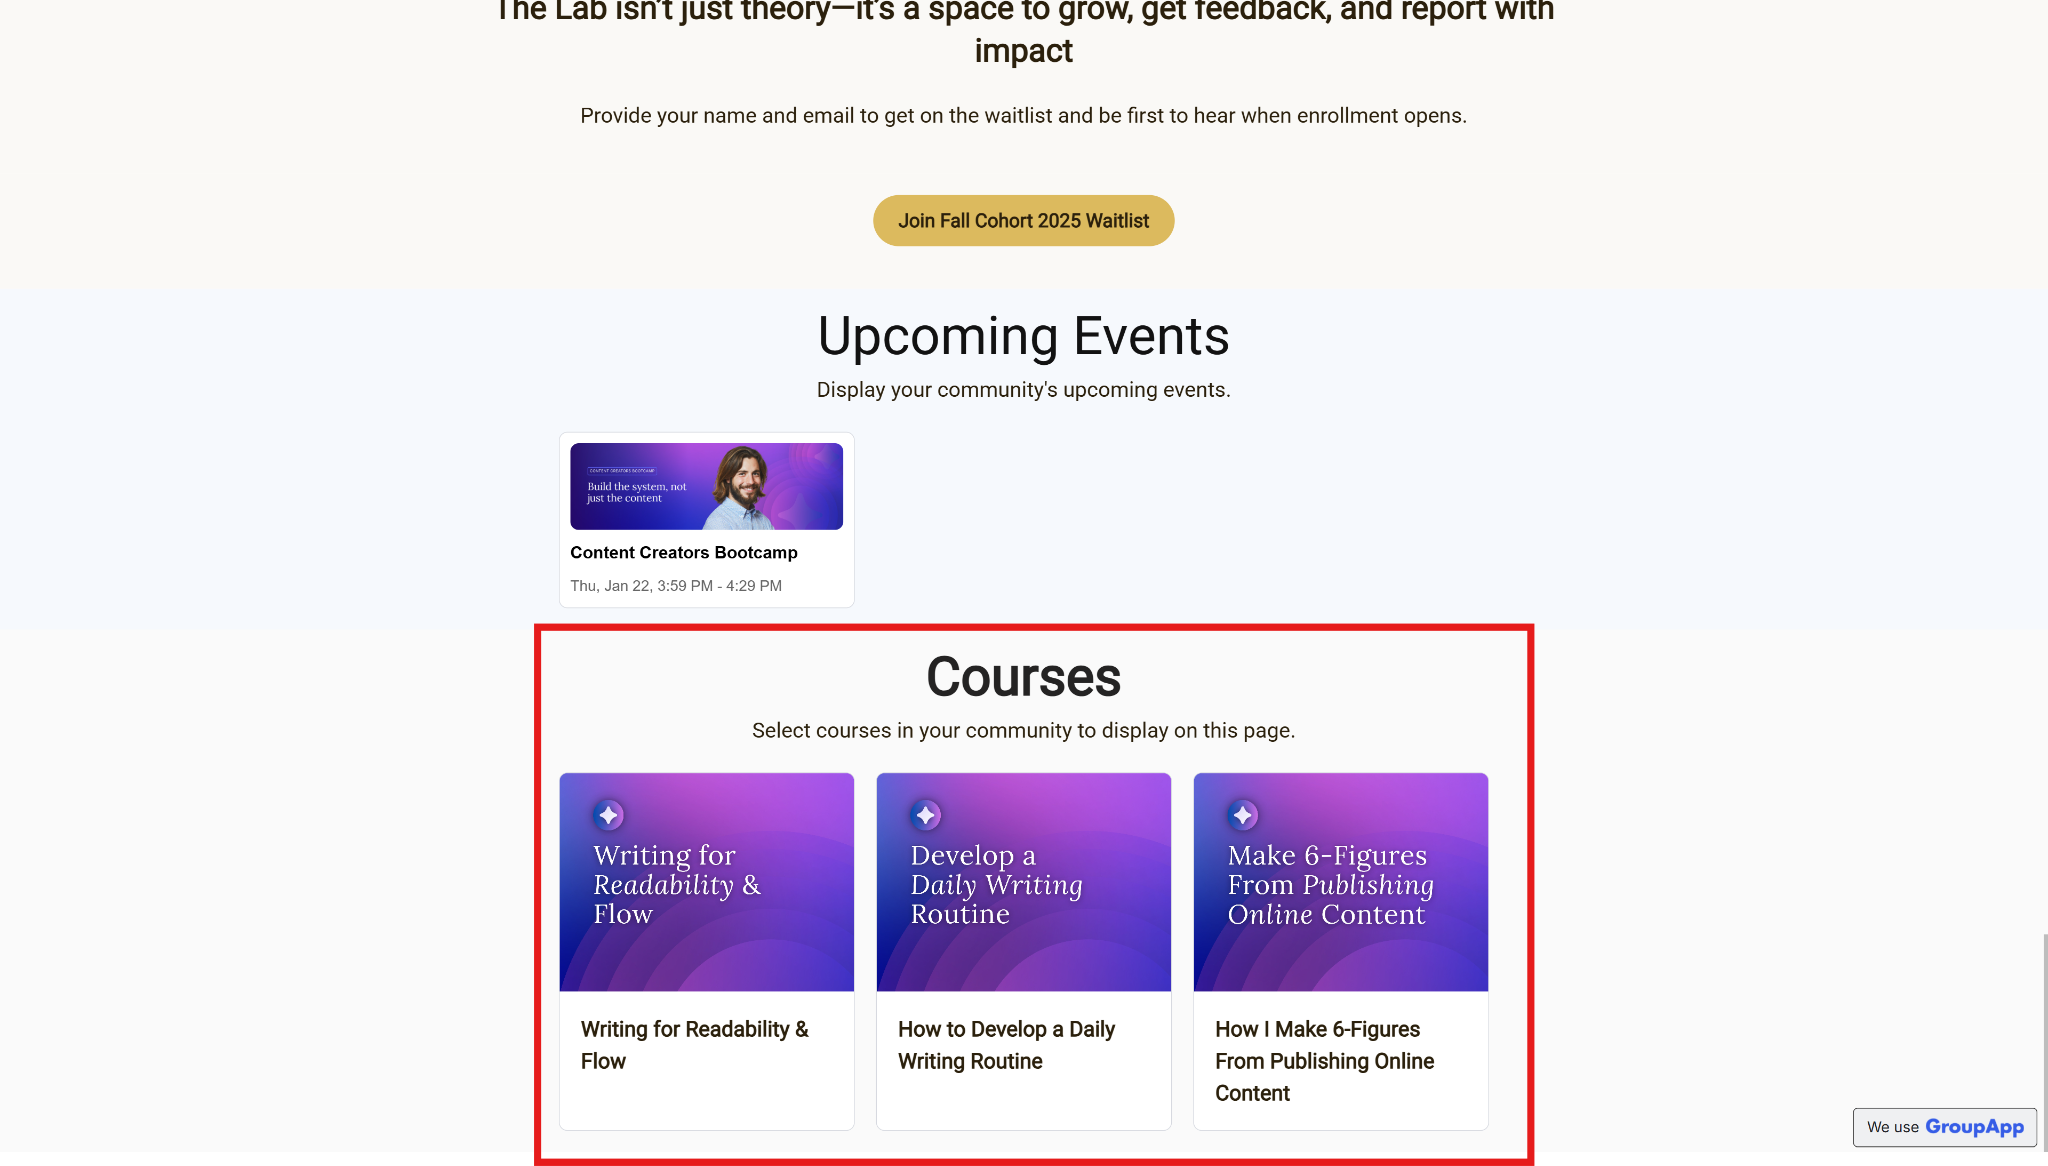
A courses block is essential for showcasing your educational offerings in a clear, engaging way. It gives visitors a quick overview of available courses, helping them understand what they can learn and why it’s valuable.
This allows you to consistently present either training programs that you have published and made available for potential members or members of your community to see directly on your landing page.
The courses block will show multiple public courses on the landing page that people can enroll in.
For the community courses to be used in the courses block, they must be set to
Published
Publicly visible
Learn how to create a course before proceeding to add a courses block
How to create online courses
Share your knowledge with your community by creating online courses and selling them to anyone anywhere.
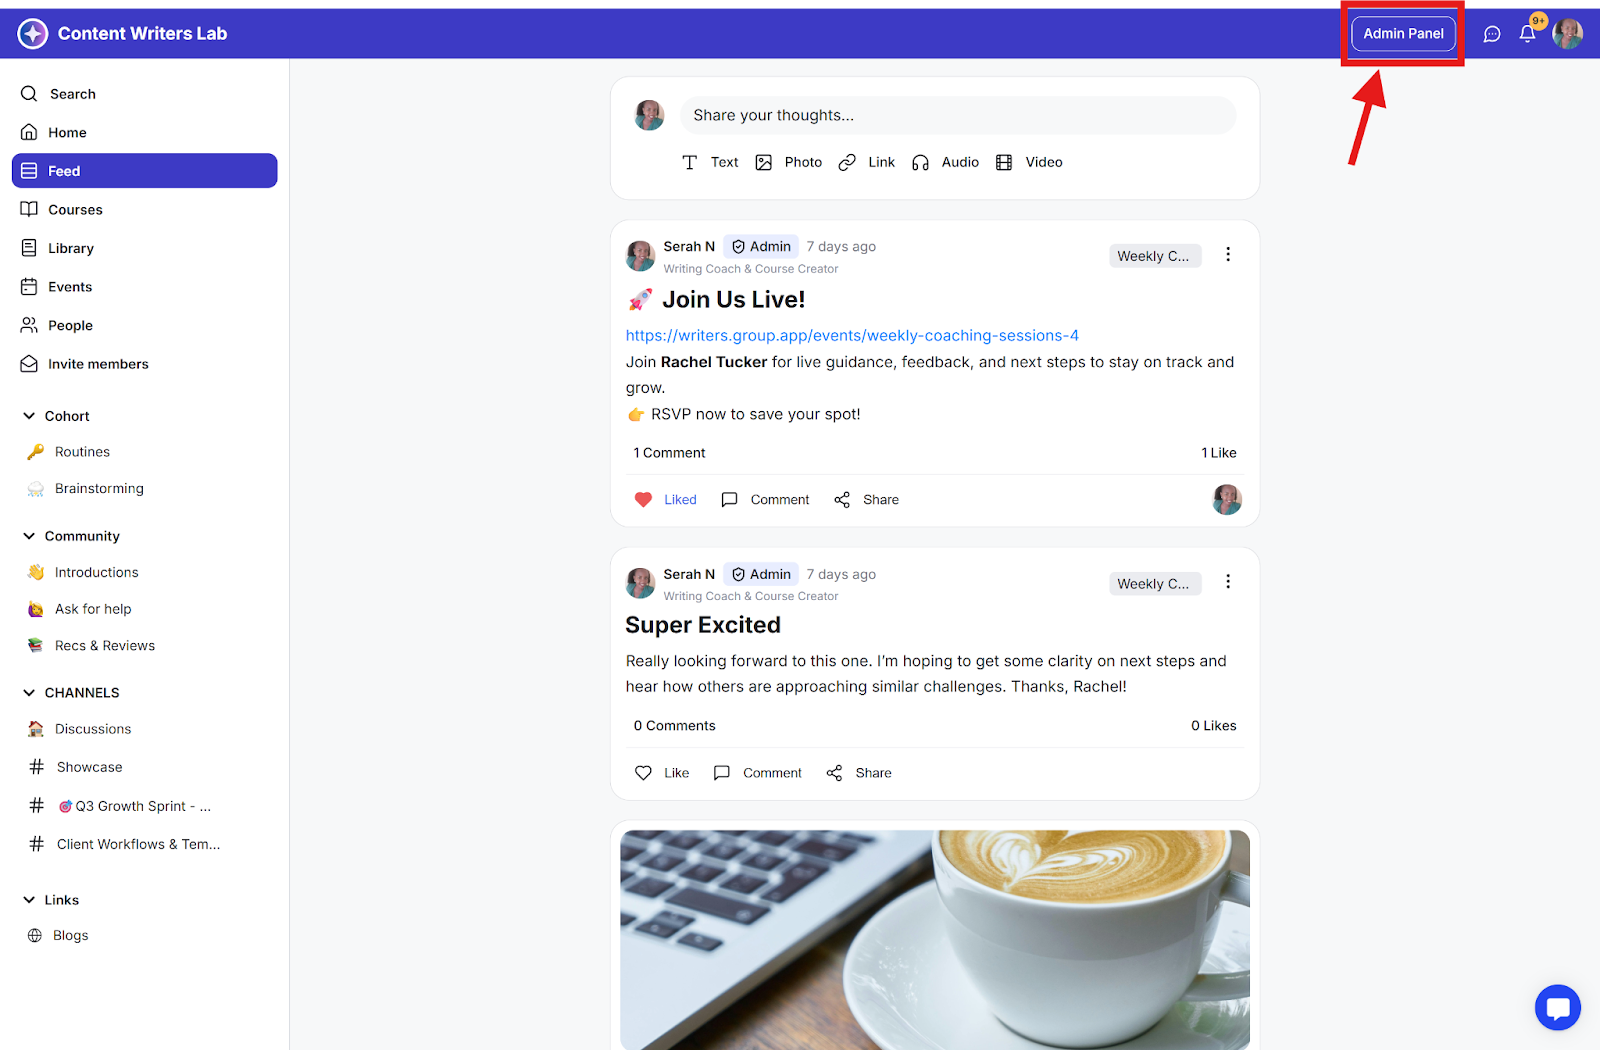
Step 1: Click the Admin Panel button.
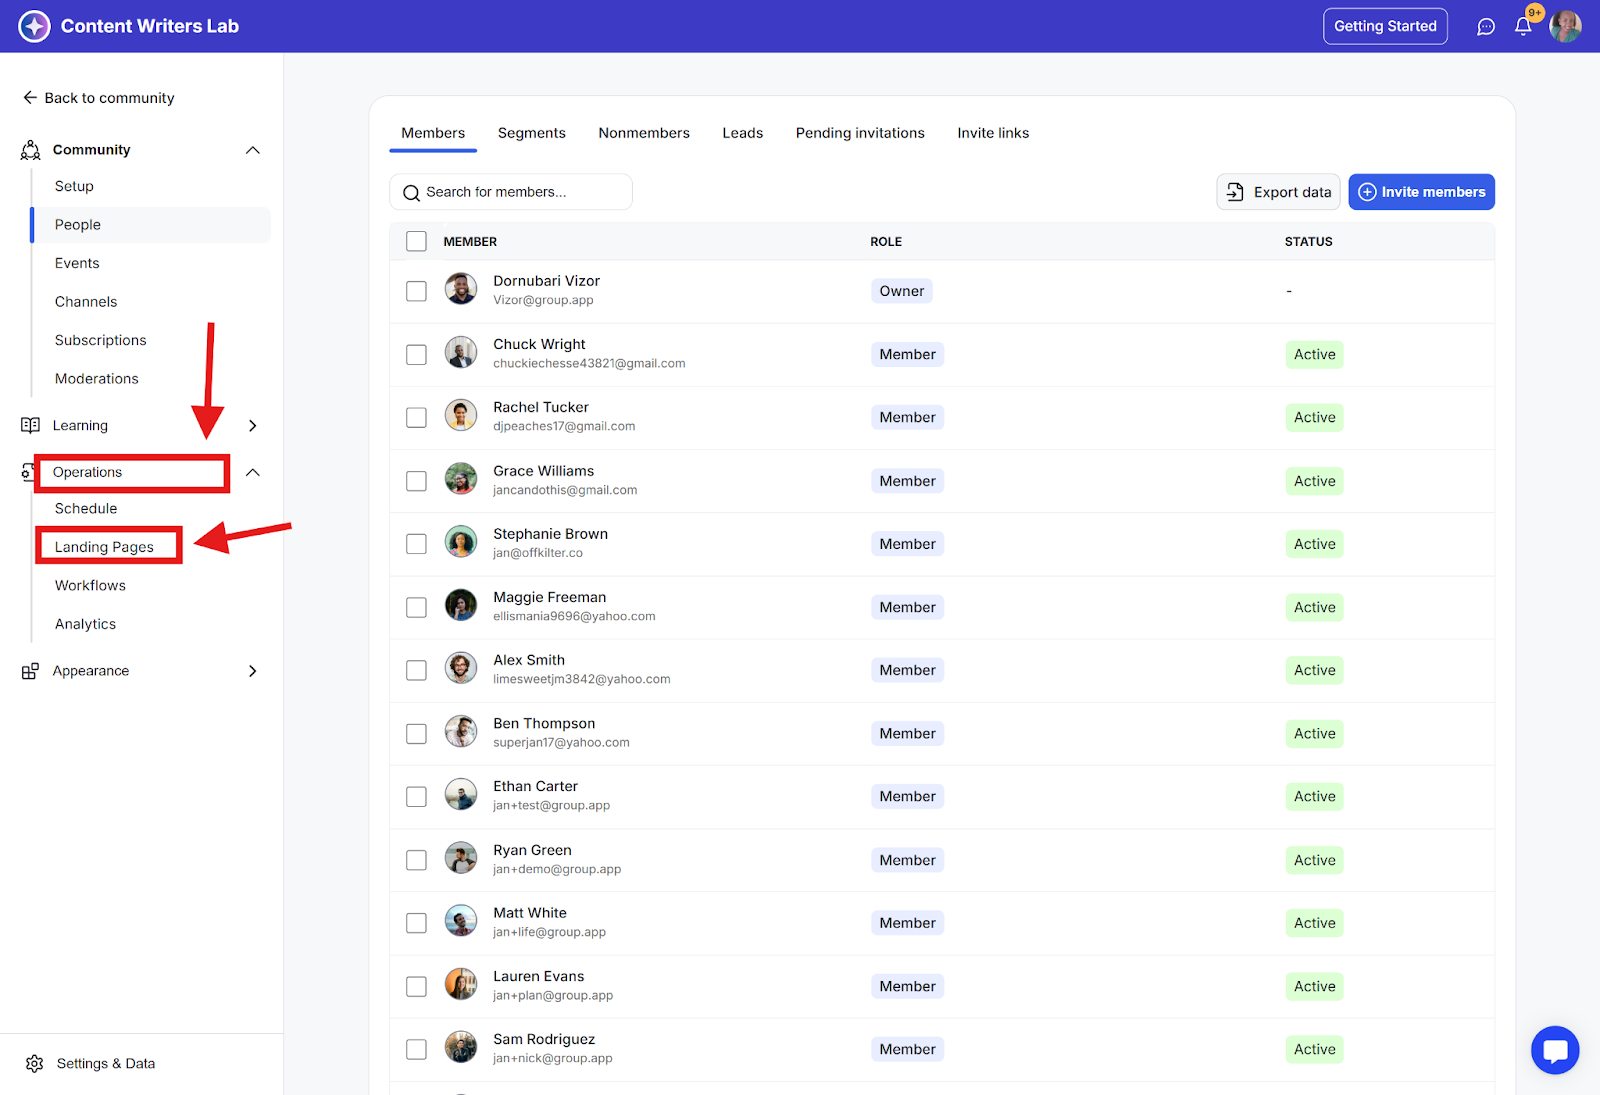
Step 2: Click Operations in the side menu and select Landing pages.
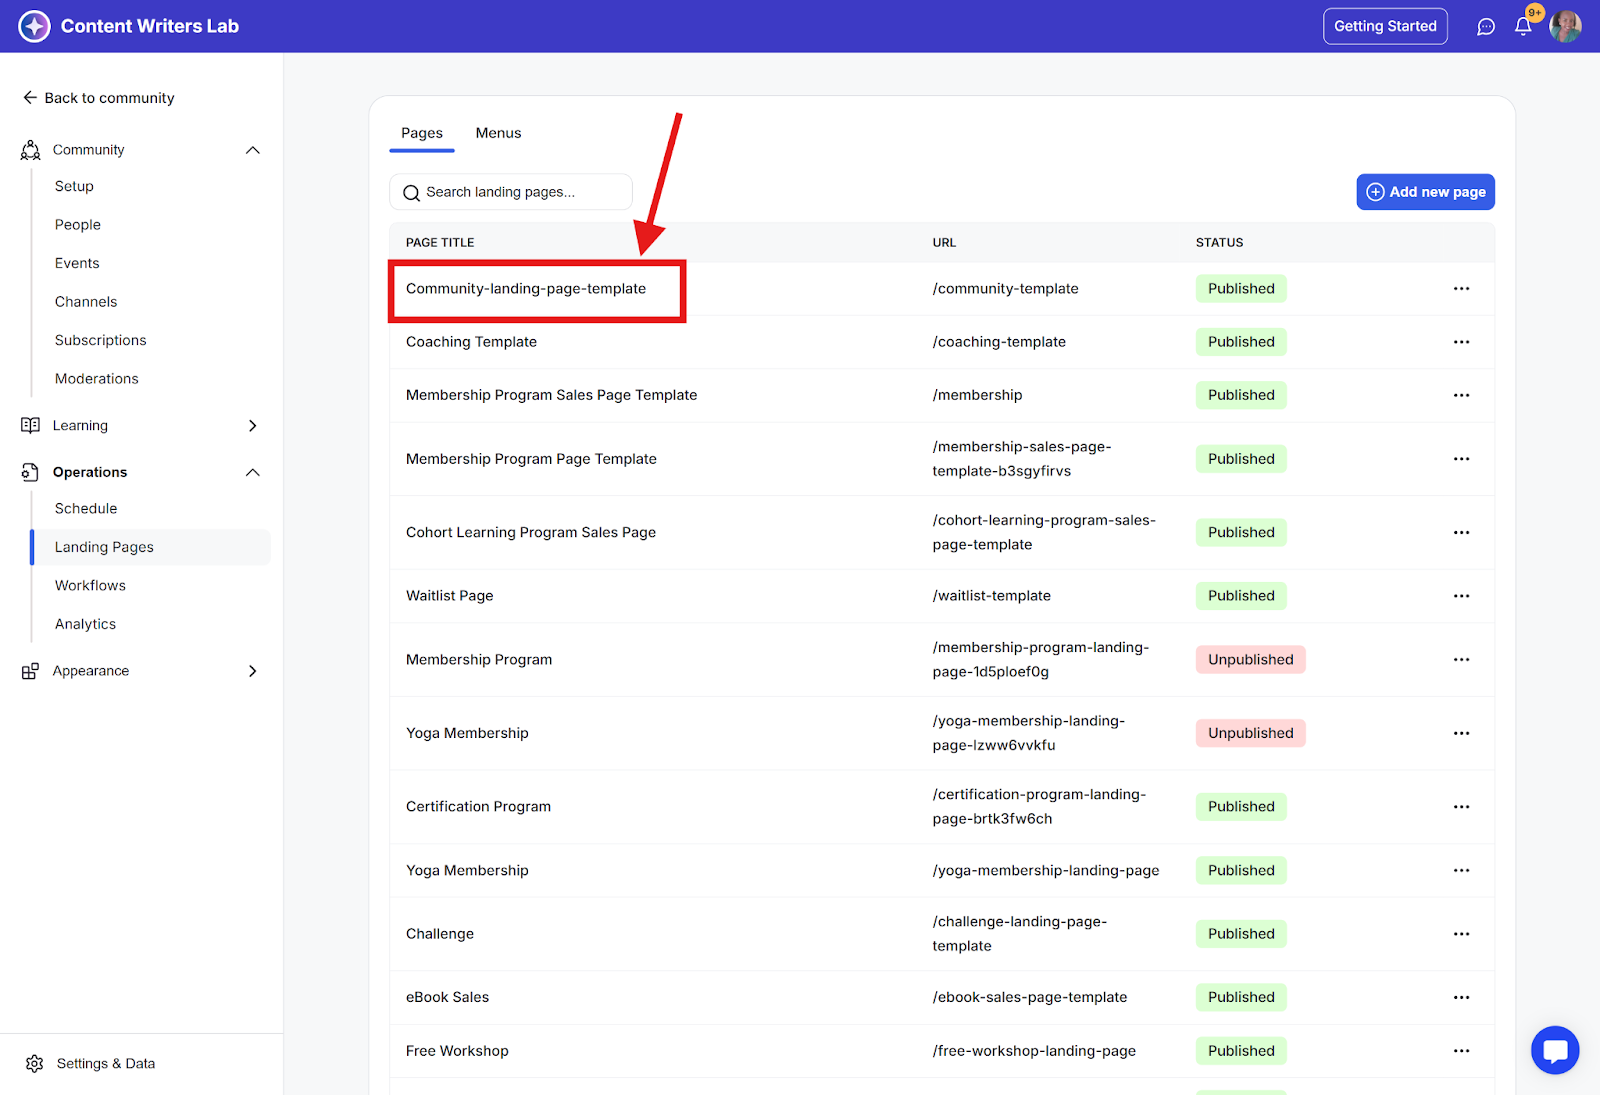
Step 3: On the landing page dashboard, click on the page name to open the one you want to edit, or create a new page.
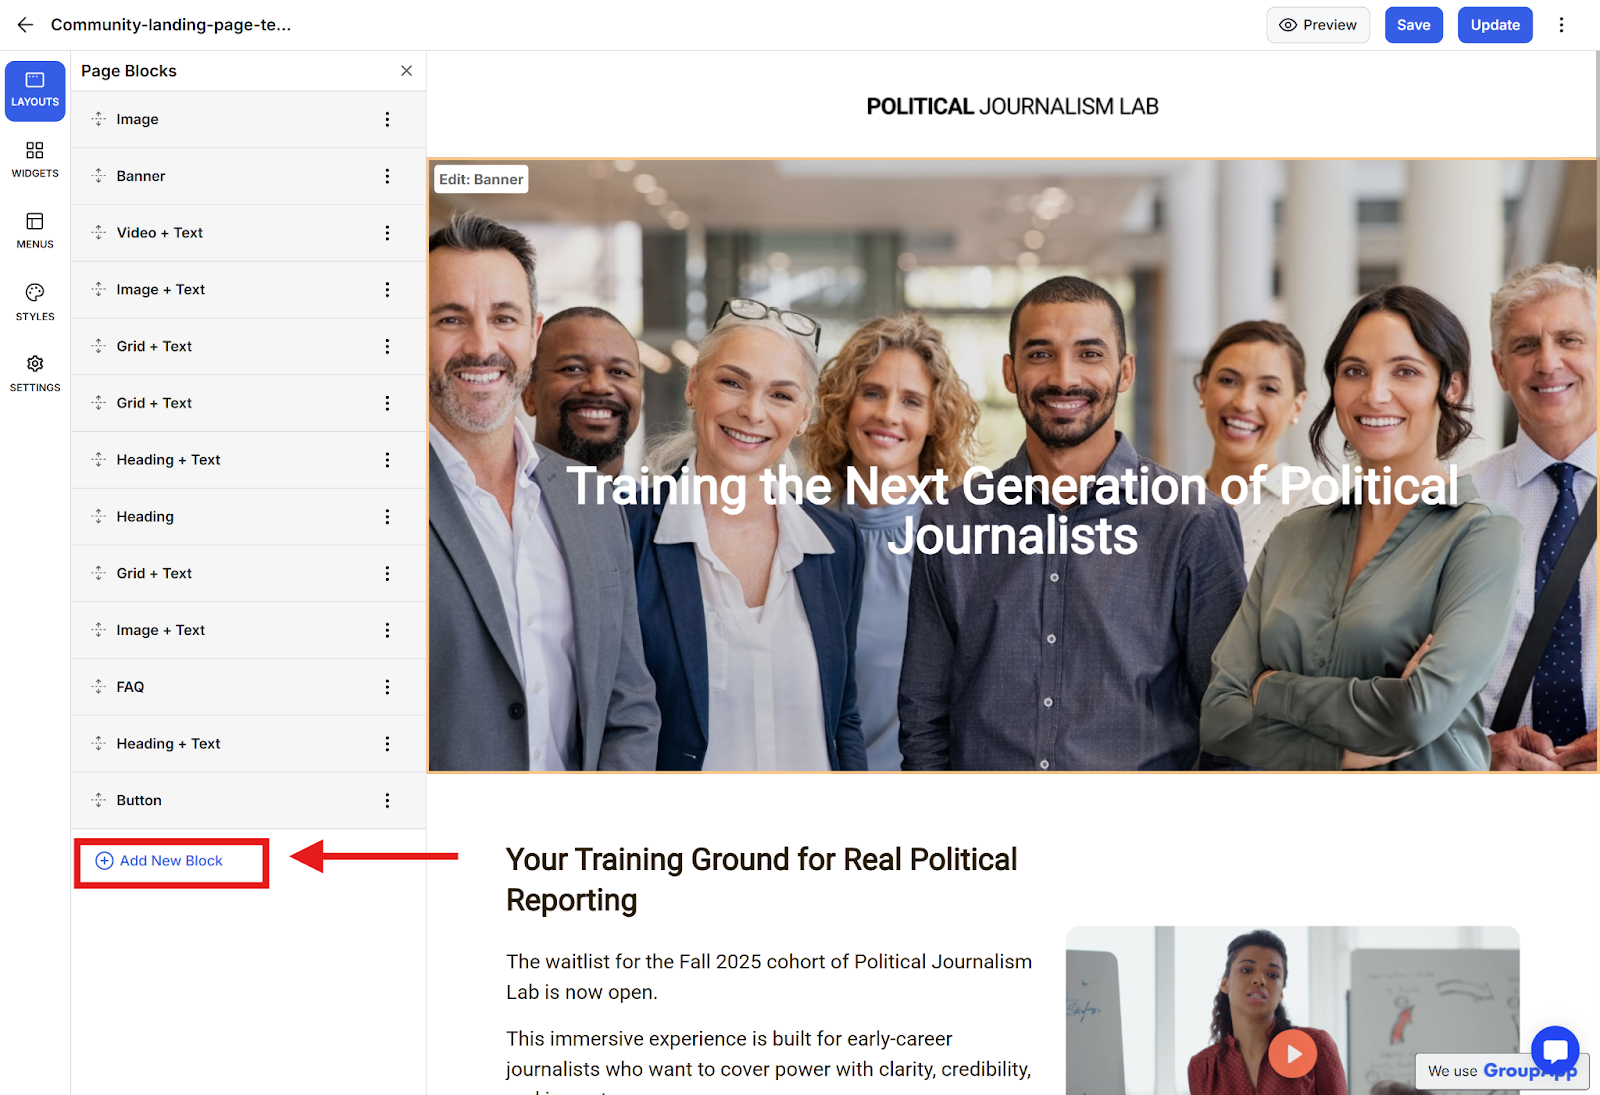
Step 4: Click on the Layouts tab.

Step 5: Select Add New Block.
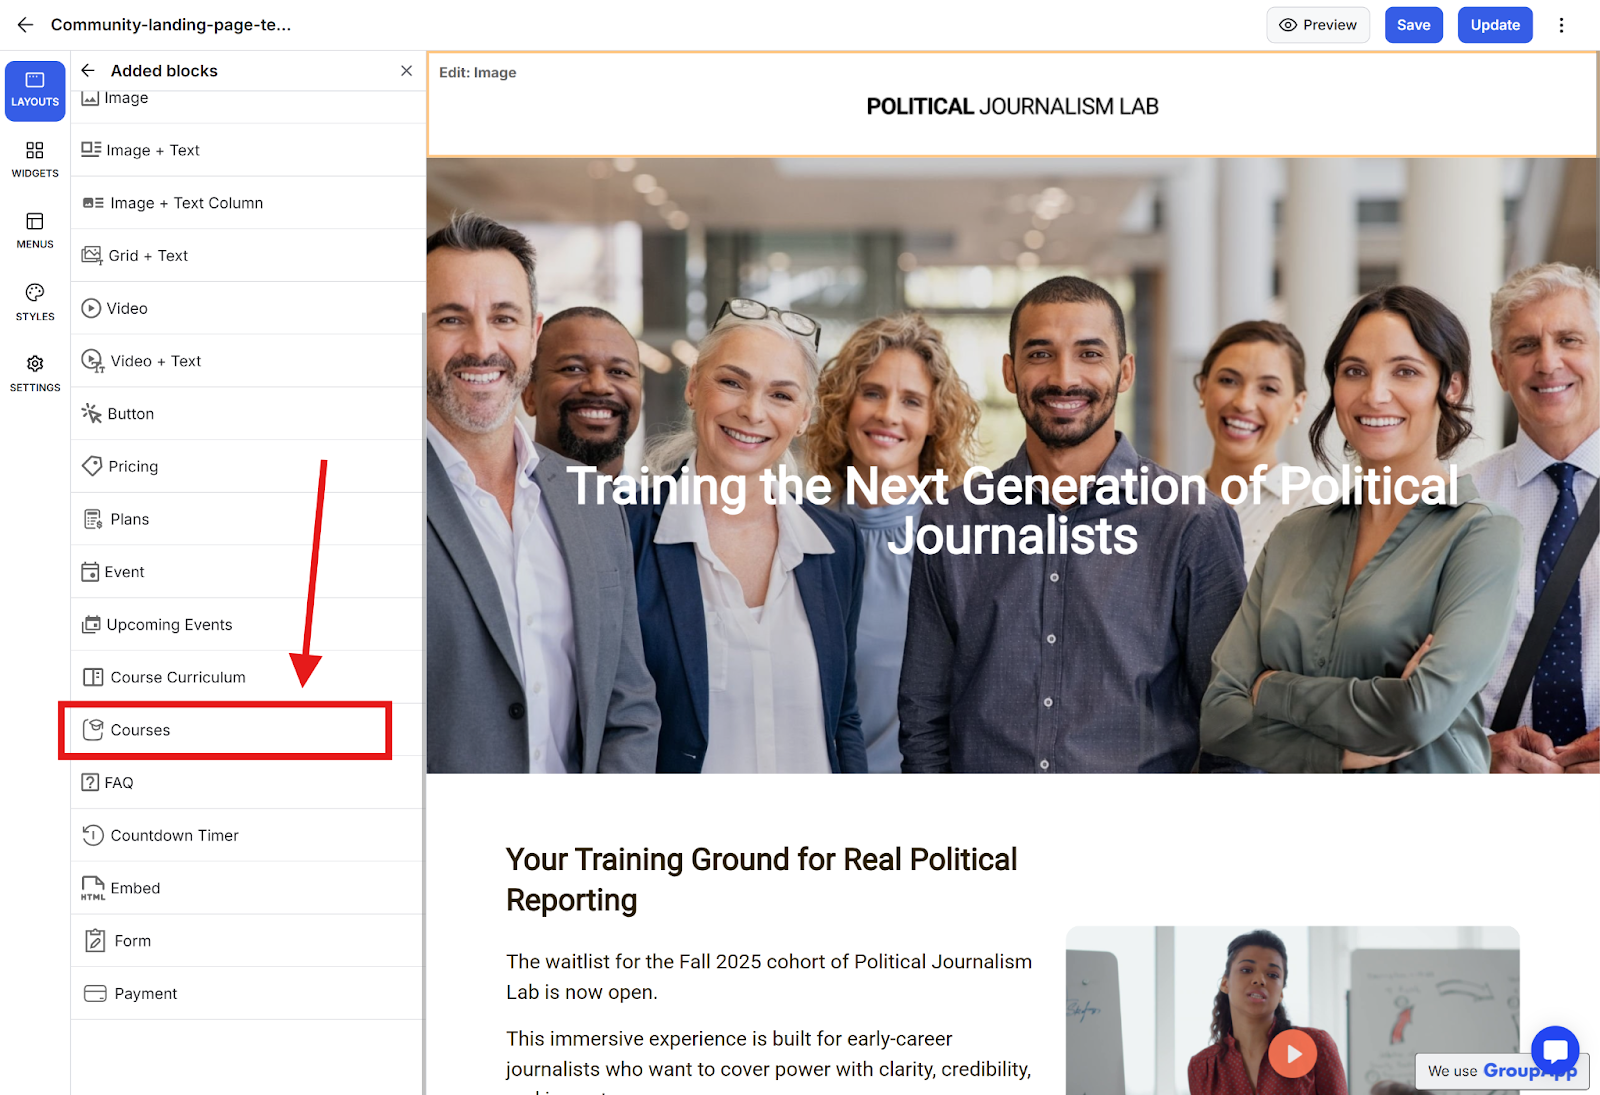
Step 6: Add a Courses block.
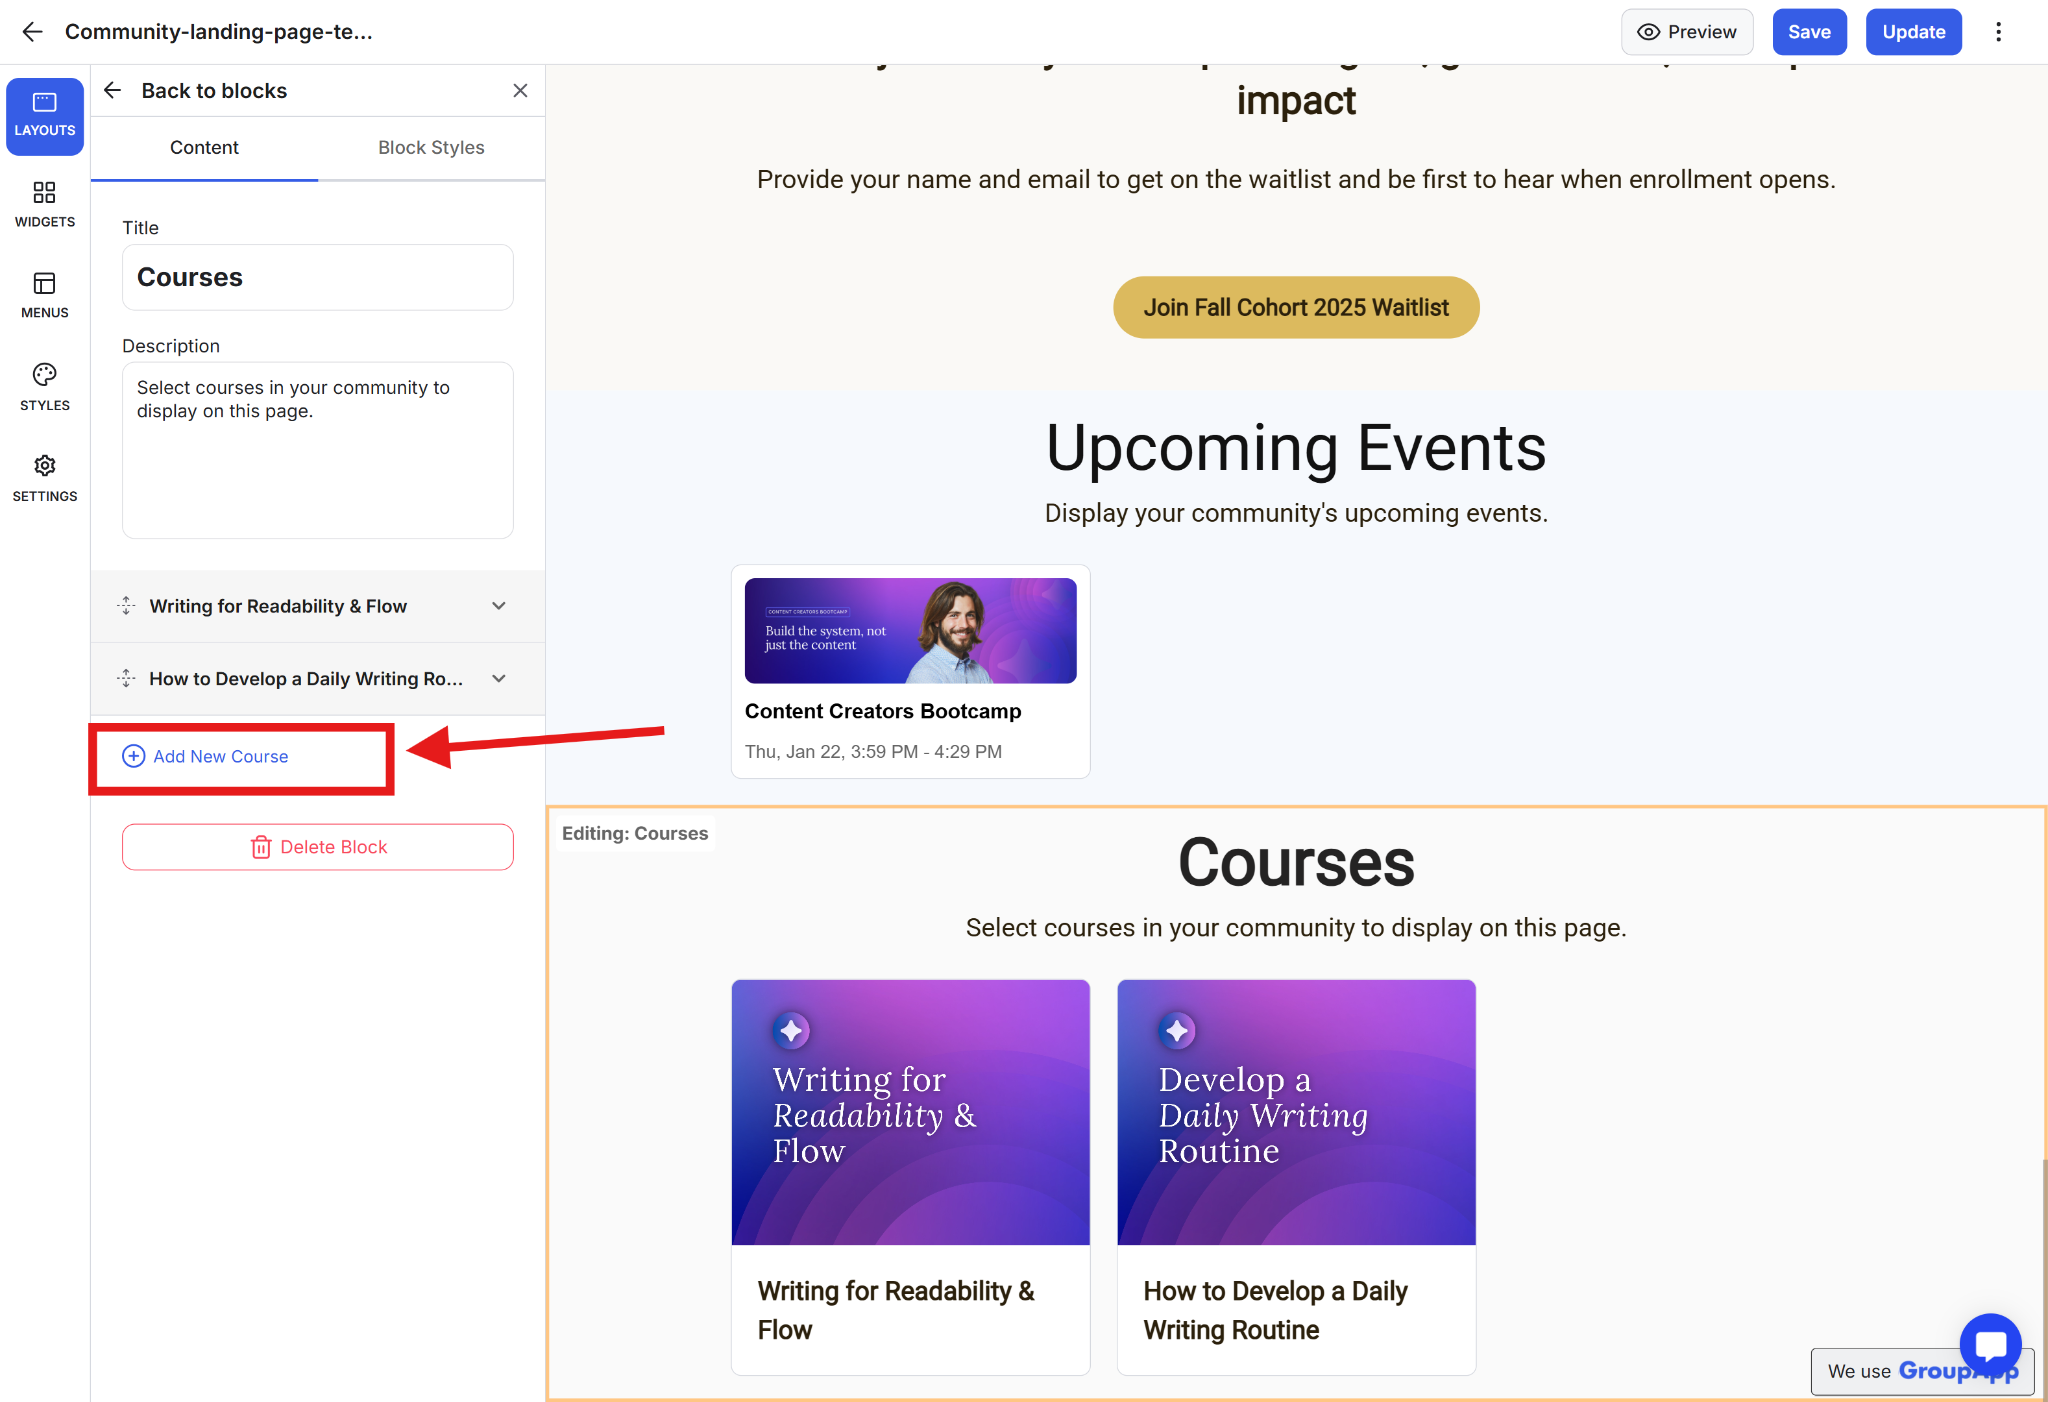
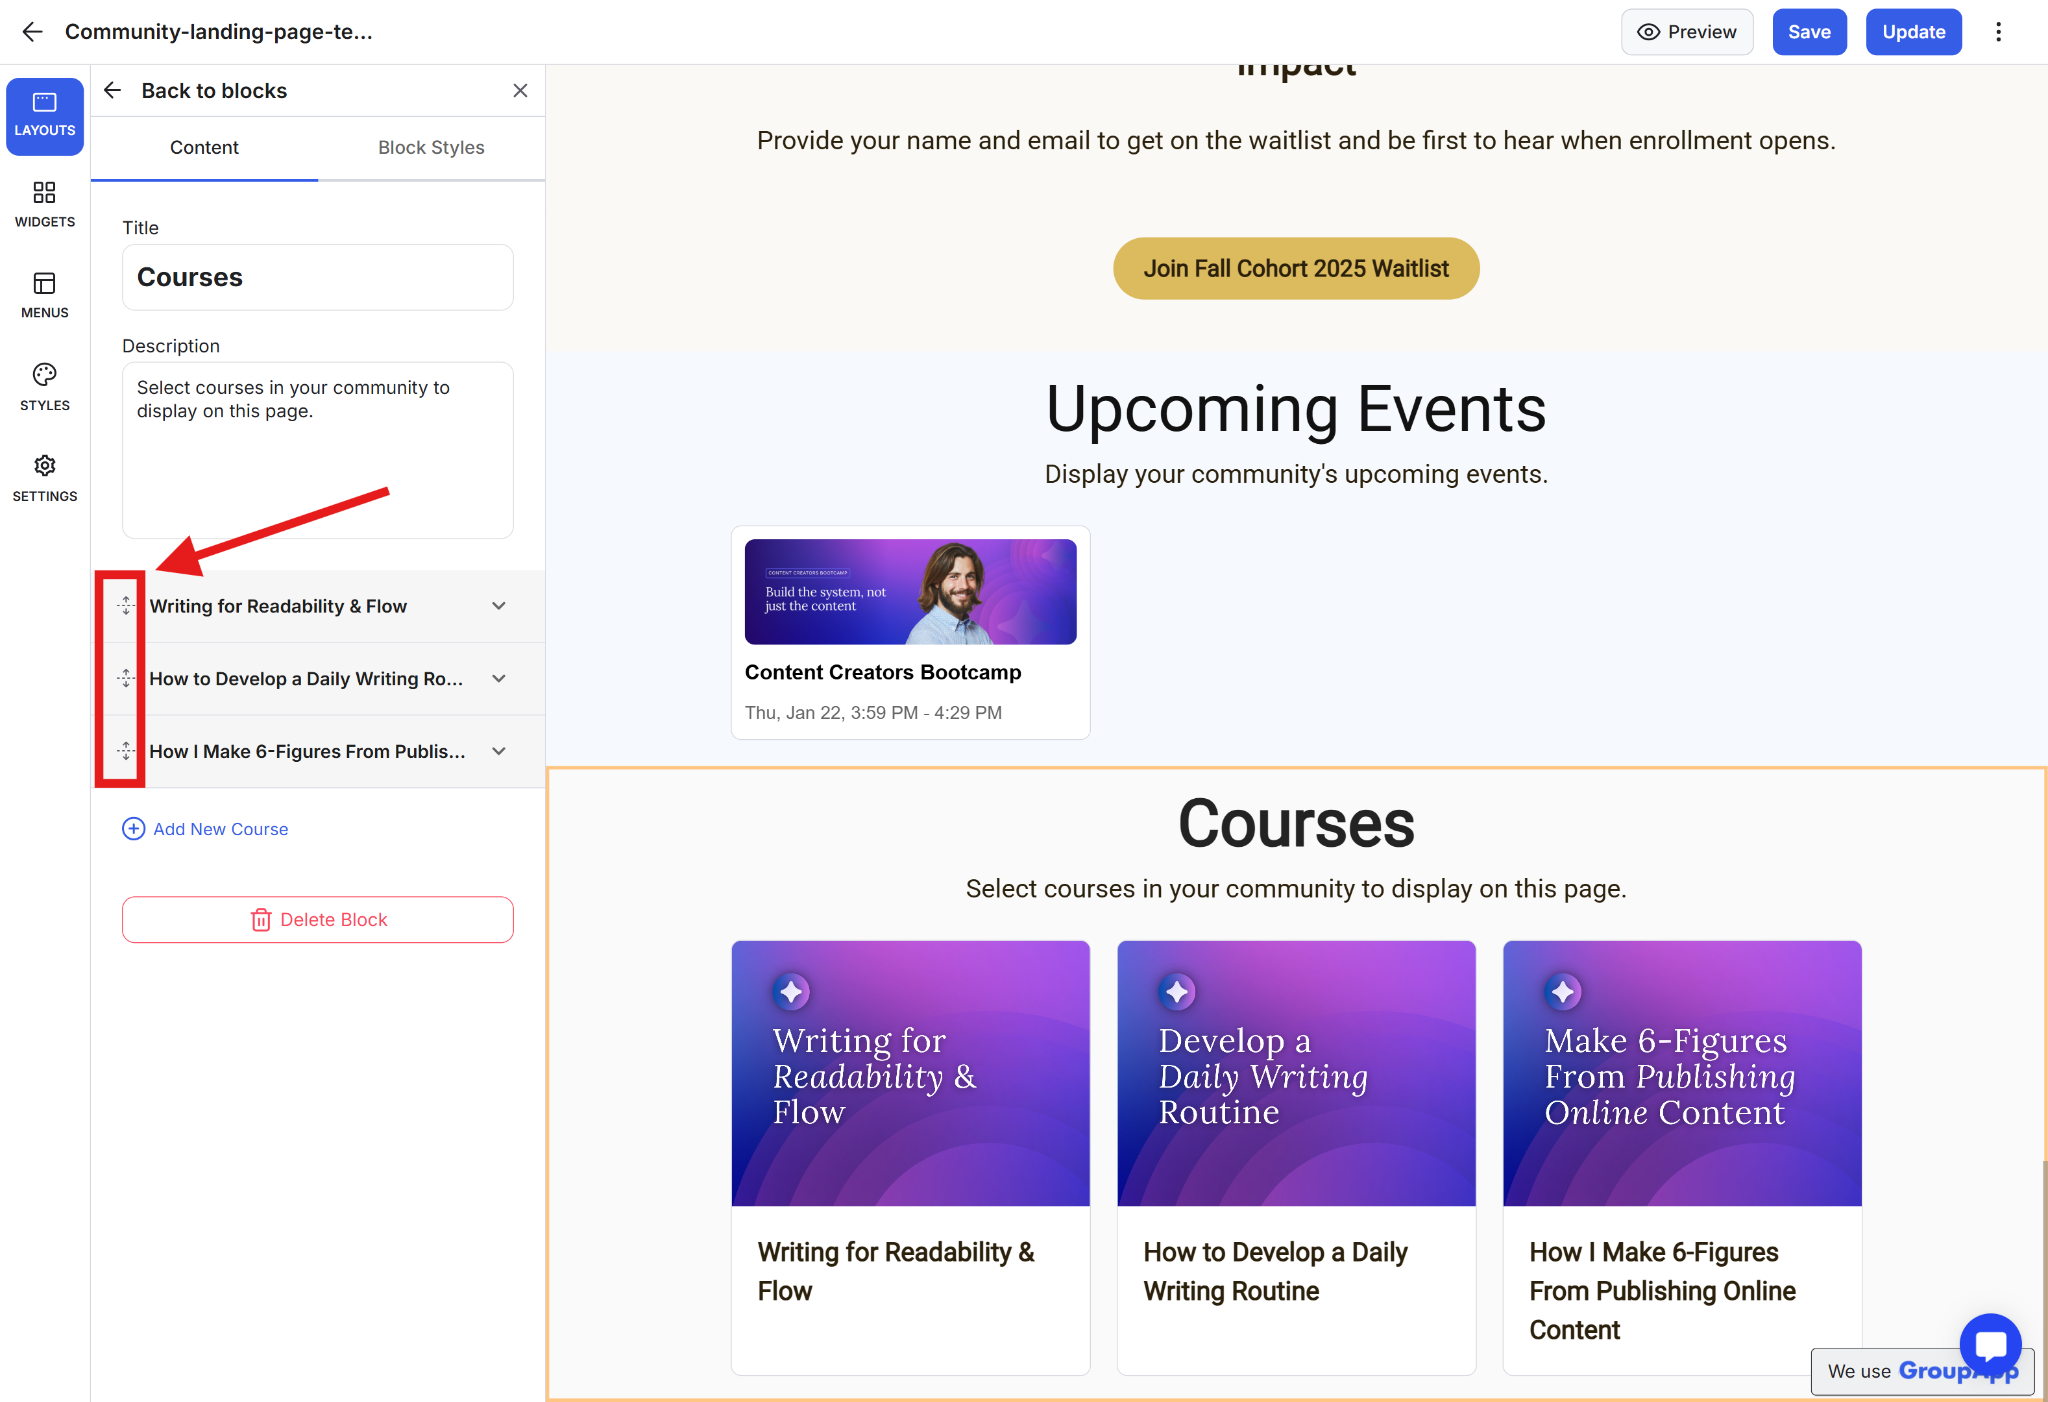
Step 7: Click on Add New Course to select a course.
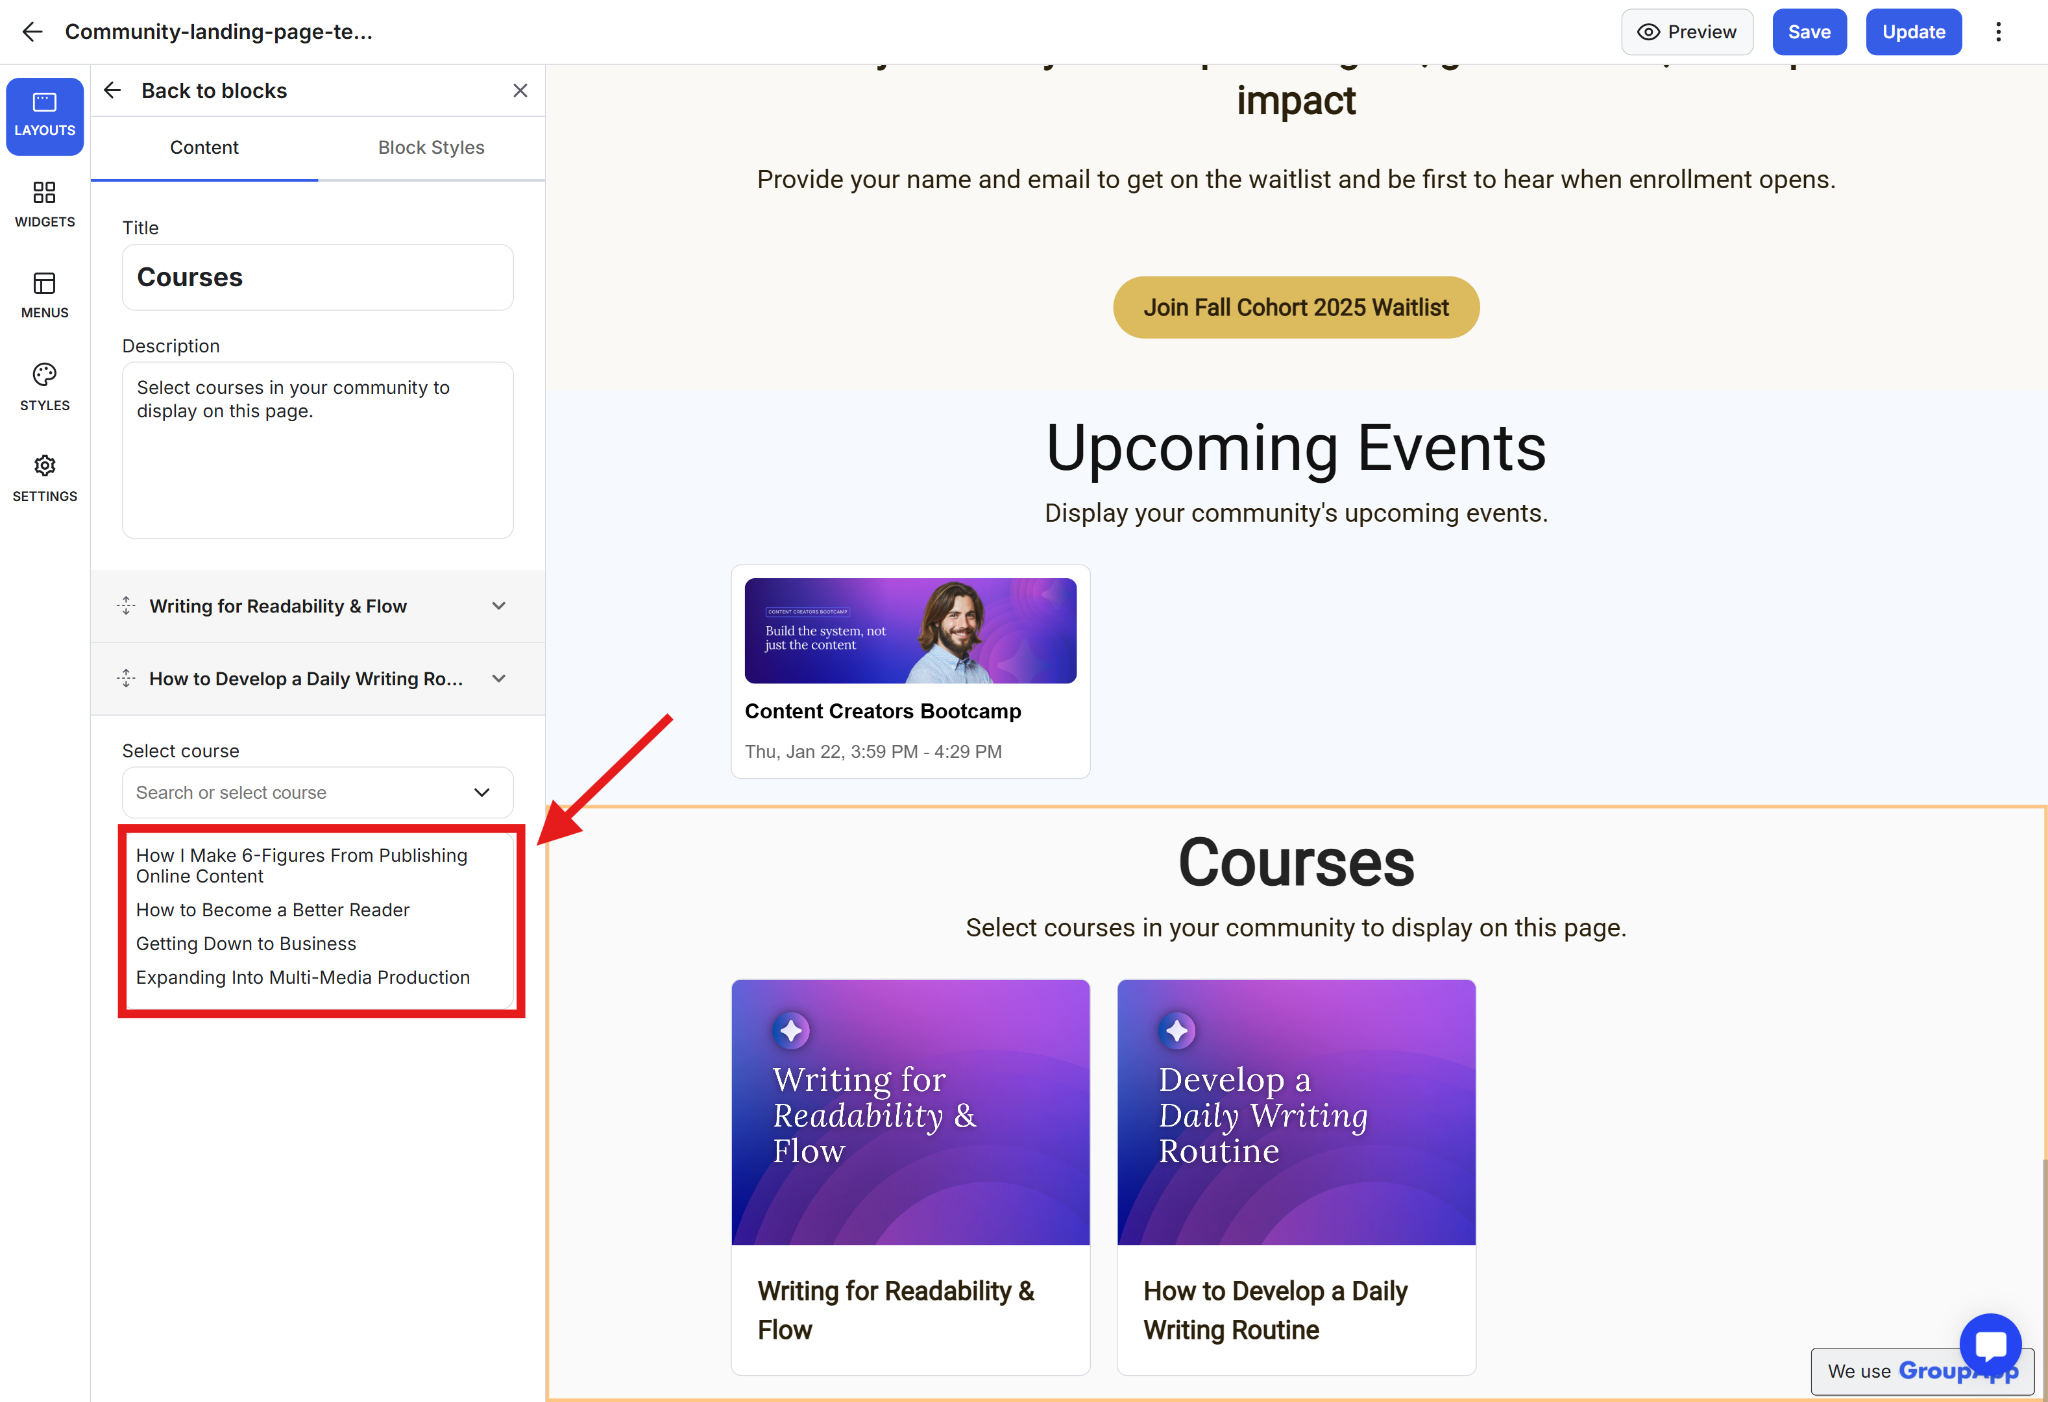
Step 8: The courses that appear in the courses dropdown are publicly visible and published.
Step 9: Drag the courses using the move icons to rearrange the order of the courses and their appearance on the landing page.
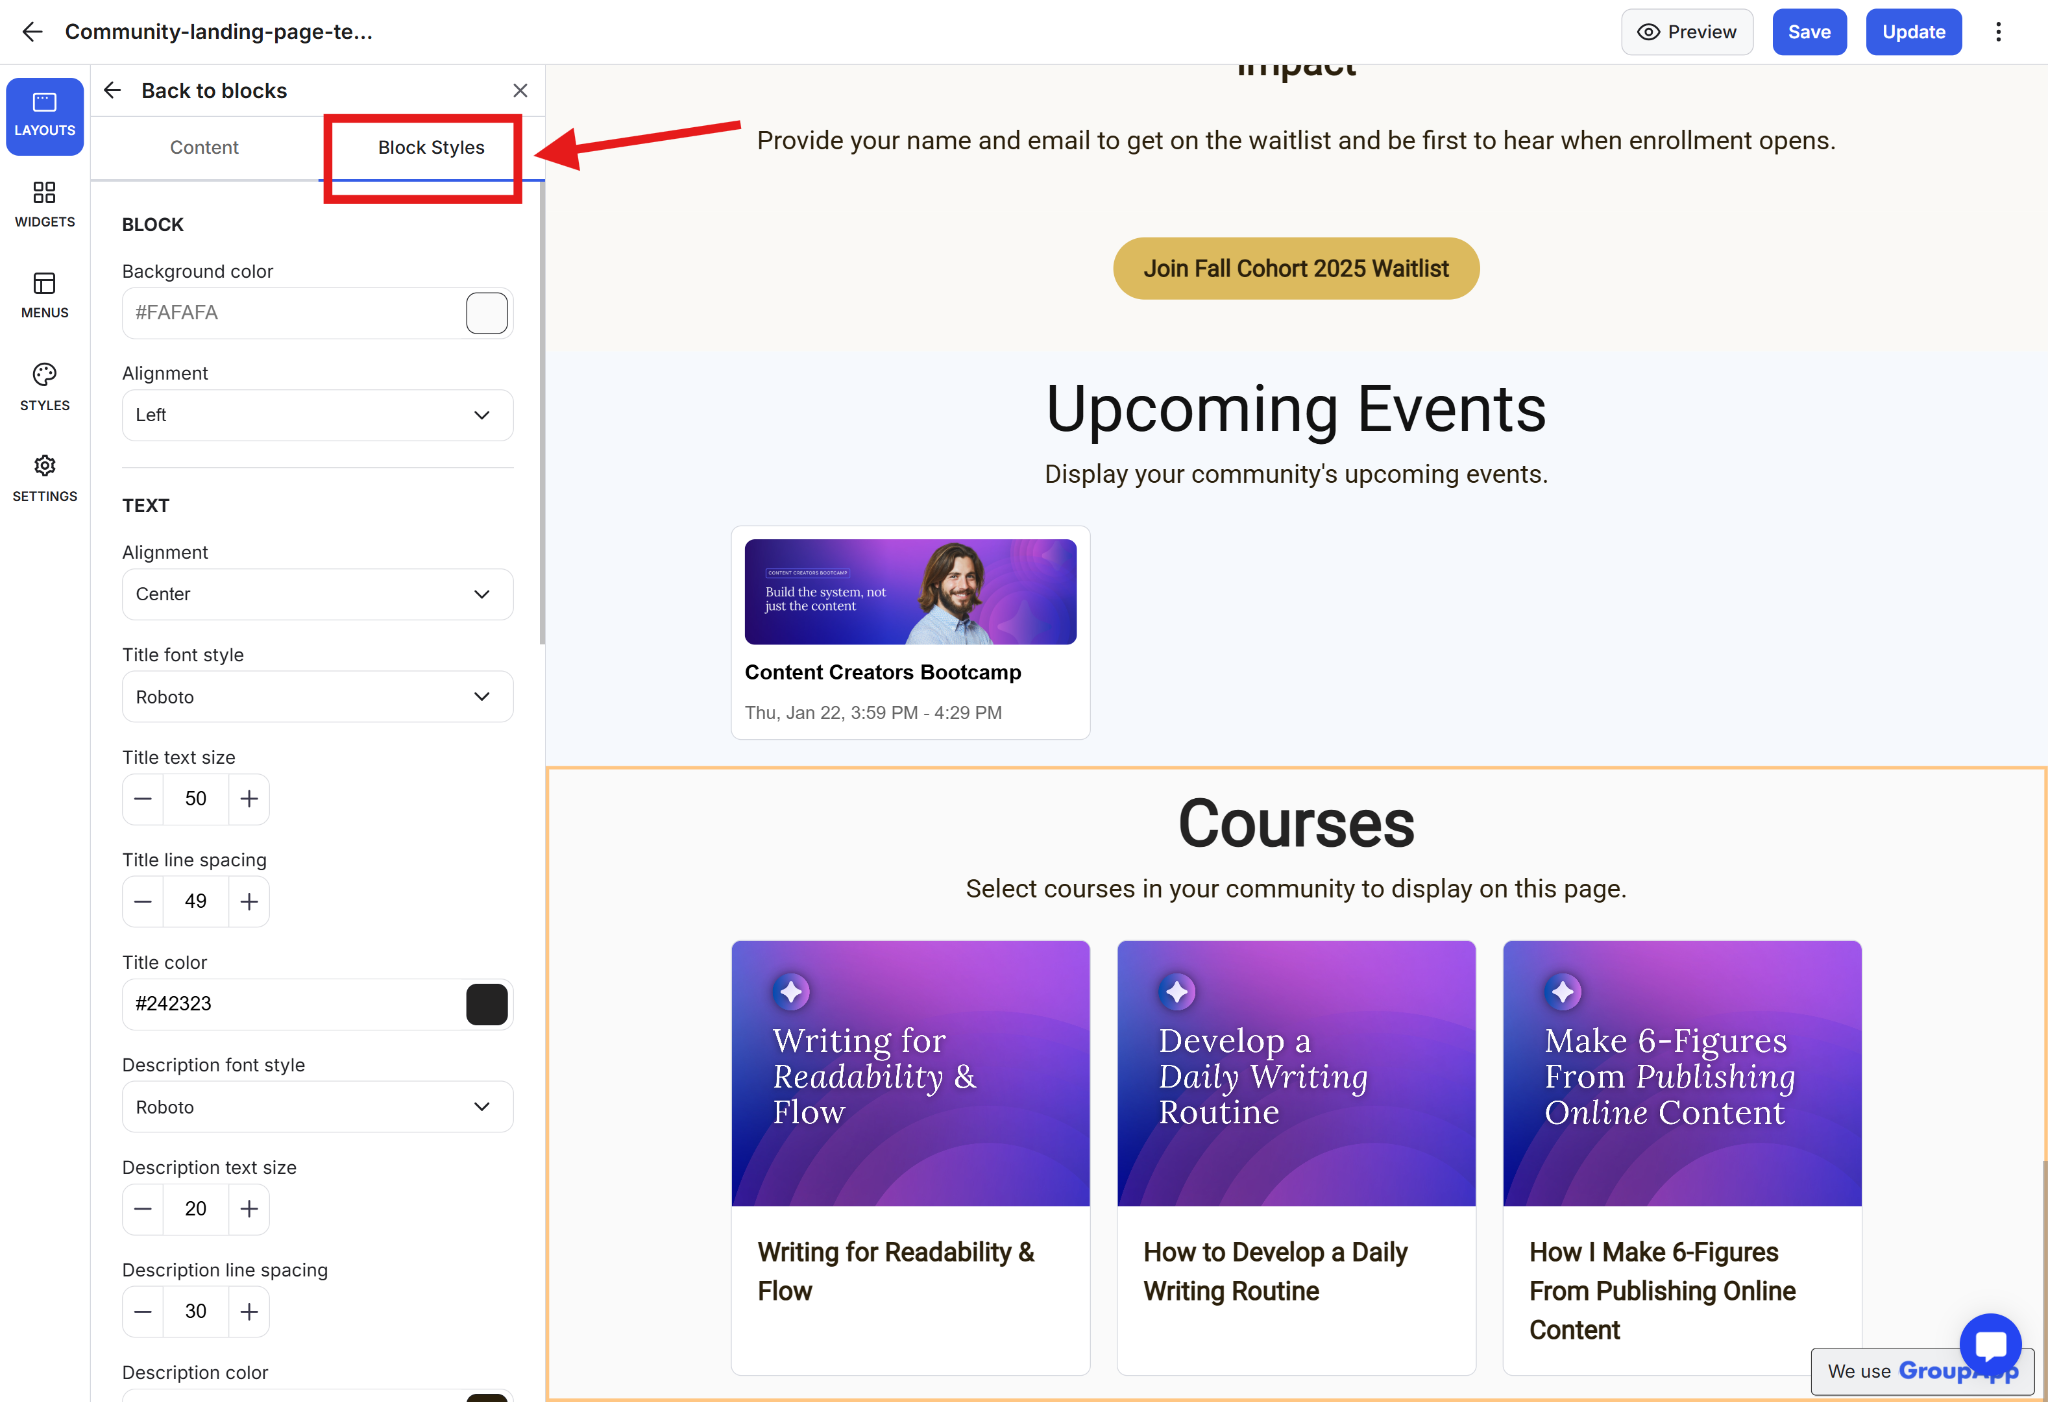
Step 10: Style the block using the Block Styles tab.
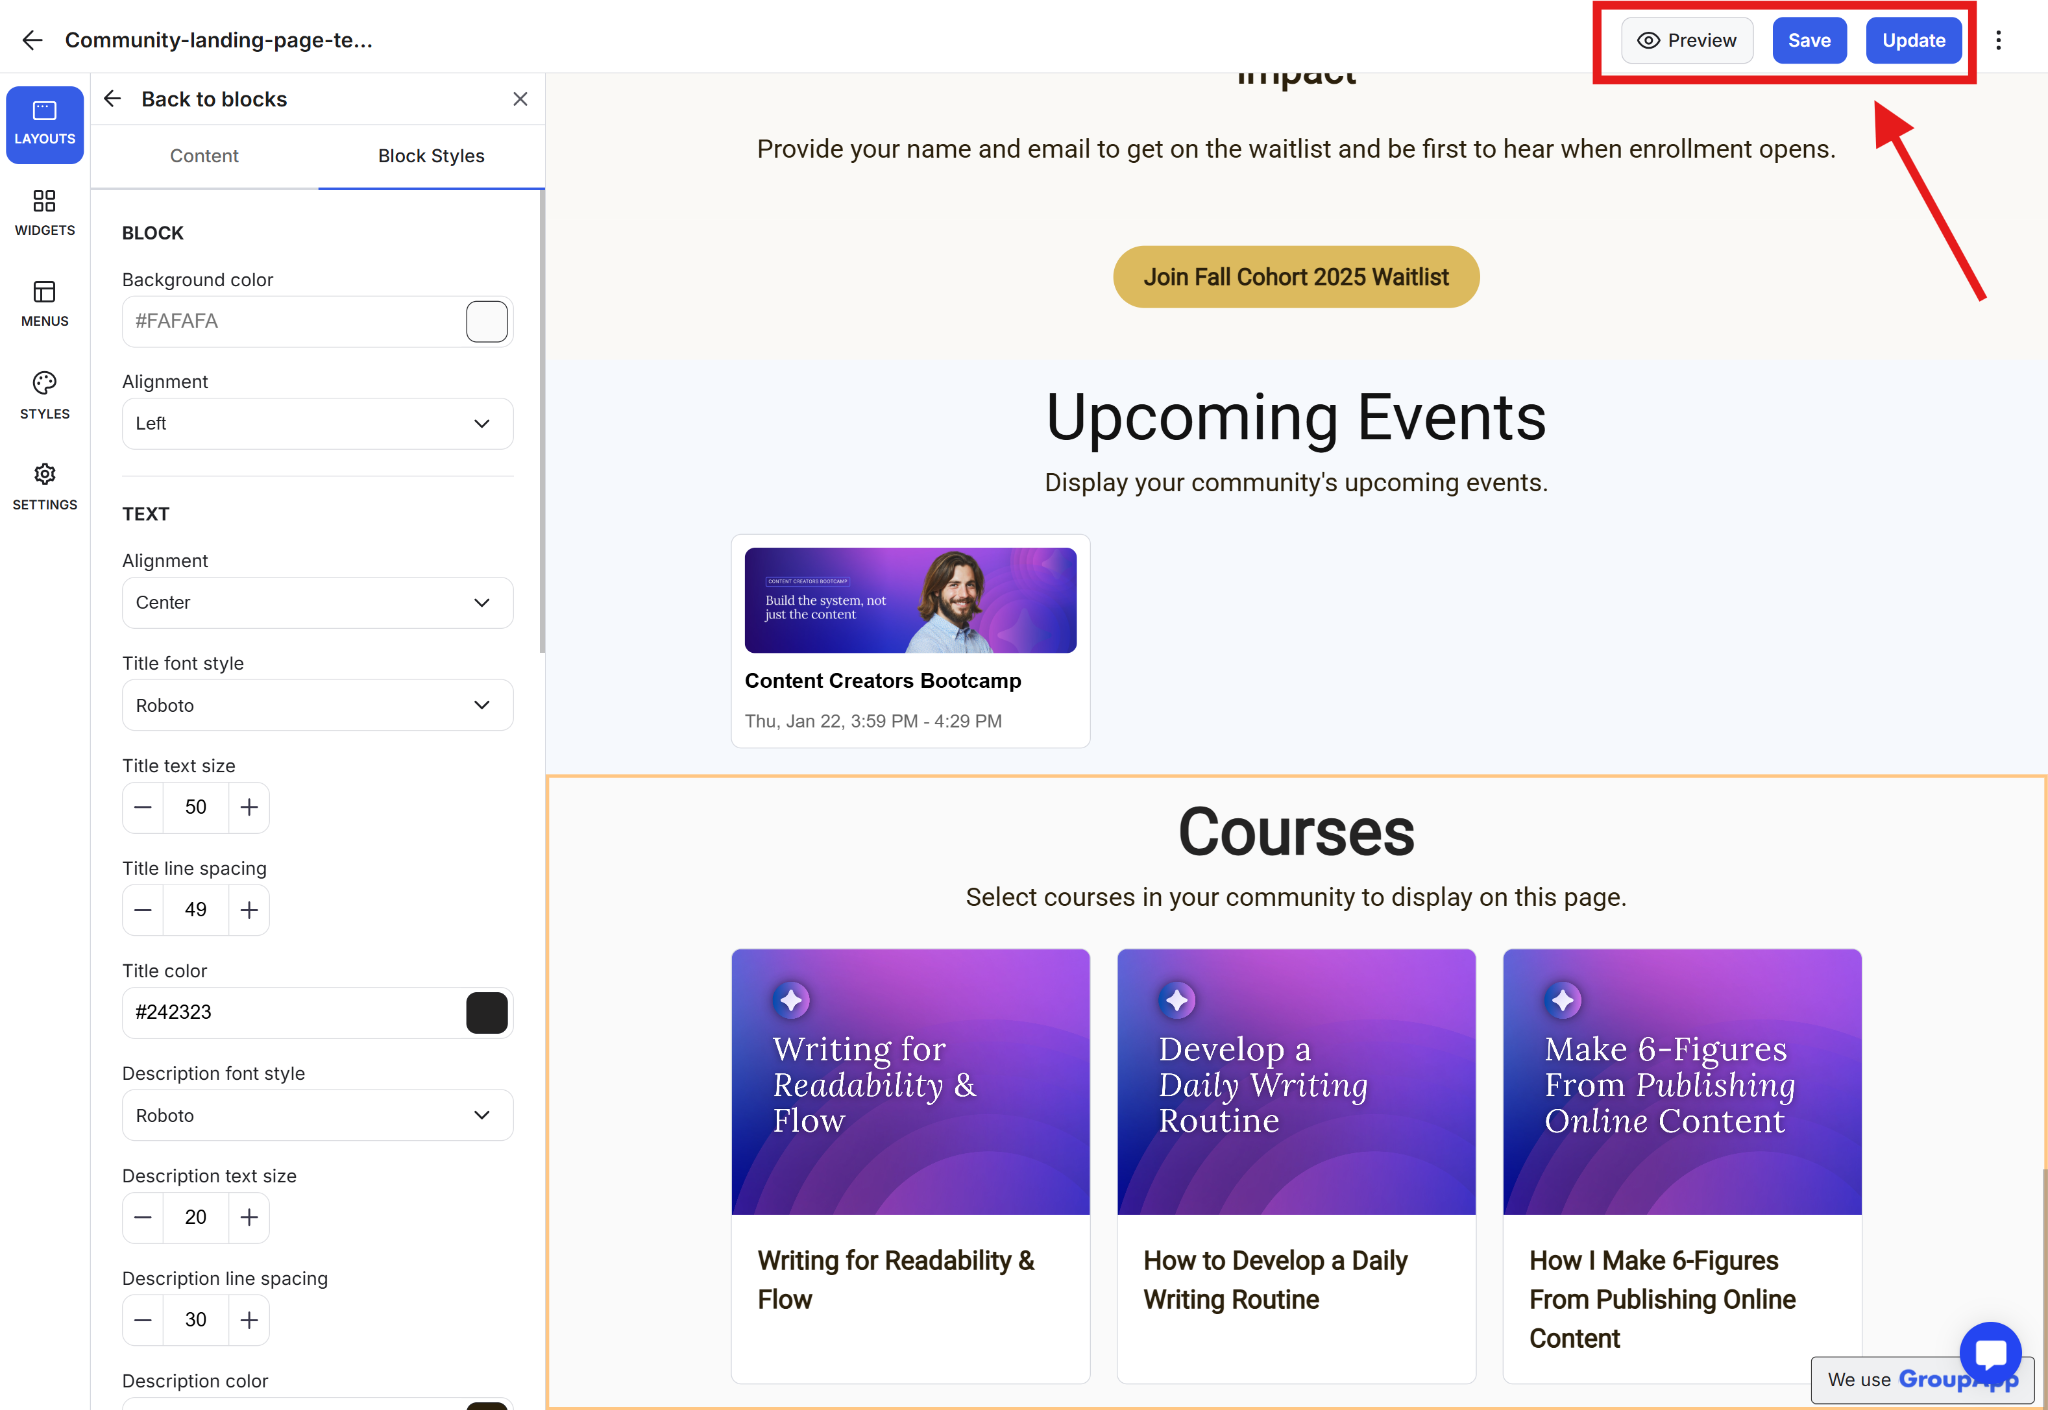
Step 11: You can click Save, then Preview to see how the landing page looks live. When you’re ready, click Update to publish your changes.
The final live published page would look like this: