Your Branded Mobile App is published to the App Store from your own Apple Developer Program account. This guide covers creating that account from start to finish. Membership costs 99 USD per year and is billed to you directly by Apple.
An Apple Account with two-factor authentication enabled. For a business, create a fresh one on your company domain rather than using a personal Apple Account.
Your legal name as it appears on your ID, and a government-issued photo ID to upload.
A credit or debit card. Apple does not accept P.O. box addresses.
Enrolling as an organization? Also: a D-U-N-S number, a work email on your organization's domain, and a public website on your own domain. Start the D-U-N-S first — see How to Set Up Your D-U-N-S Number for Your Branded App. It can take days or weeks and everything else waits on it.
Enrolling from India? Apple only supports enrollment through the Apple Developer app there, not on the web.
Decide this before you start. It determines what Apple asks you for, and it is difficult to change afterwards.
Individual — your personal legal name appears publicly as the seller on the App Store. No D-U-N-S needed. This is what Apple recommends for sole proprietors and single-person businesses.
Organization — your business name appears as the seller. Requires a D-U-N-S number and a legal entity that can enter into contracts.
We recommend organization for any business. Beyond showing your company name, only organization accounts can add team members with full role-based access to signing resources — which is what lets a development partner build and release on your behalf.
Apple does not accept DBAs, fictitious business names, trade names, or branches as organizations. The entity must be something like a corporation, LLC, or limited partnership. You must also be the owner, founder, an executive, a senior project lead, or an employee with legal authority granted by a senior employee — Apple may ask for a reference contact to confirm this.
Open developer.apple.com.
In the top-right corner, click Account.

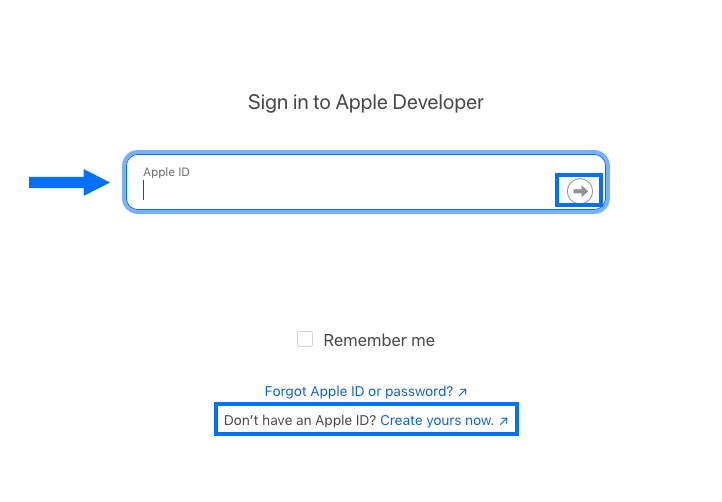
Enter your Apple Account and password. If you do not have one, click Create yours now.
Complete two-factor authentication. It is required — you cannot enroll without it.
Enter your legal first and last name. Aliases, nicknames, or company names in the name fields are the single most common cause of enrollment delays.
Review the agreement, tick the confirmation checkbox, and click Submit.
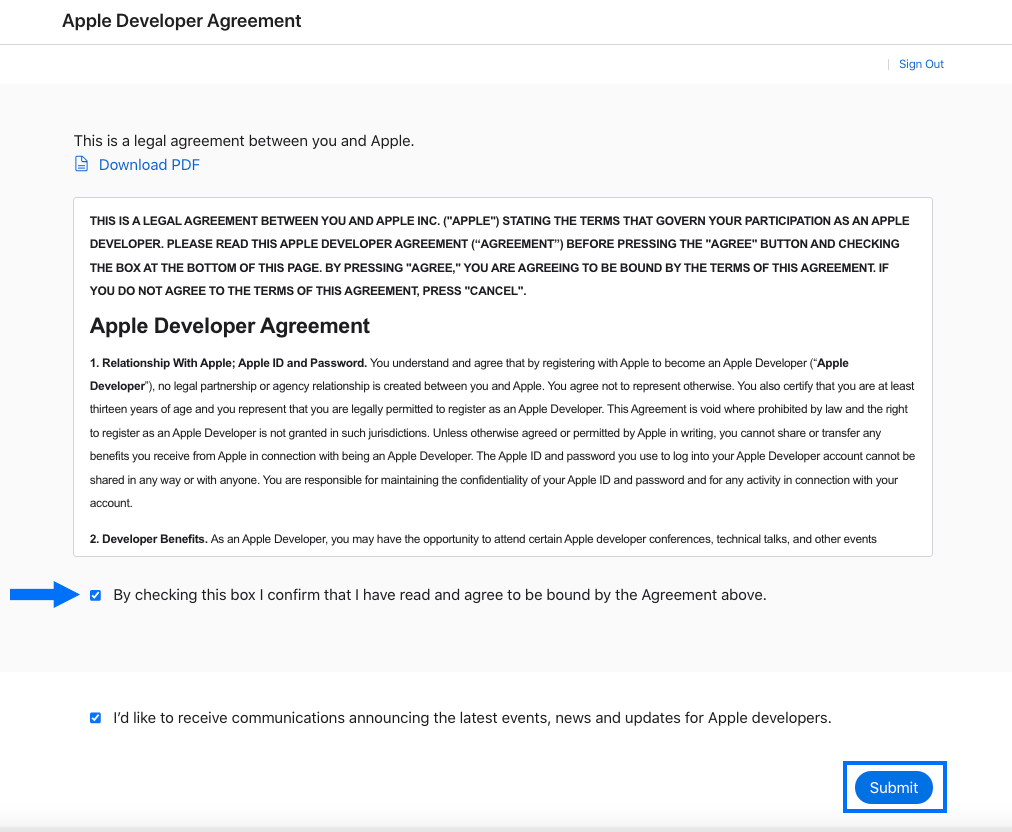
You now have a free Apple Developer account. It is not yet a paid membership, so you cannot publish to the App Store until you finish enrolling.
On your account page, find Join the Apple Developer Program and click Enroll Today, or go straight to developer.apple.com/programs/enroll.
Click Continue Enrollment to enroll on the web. You can also enroll through the Apple Developer app on iPhone or iPad, which some people find faster because the ID scan happens with the device camera. This guide follows the web.
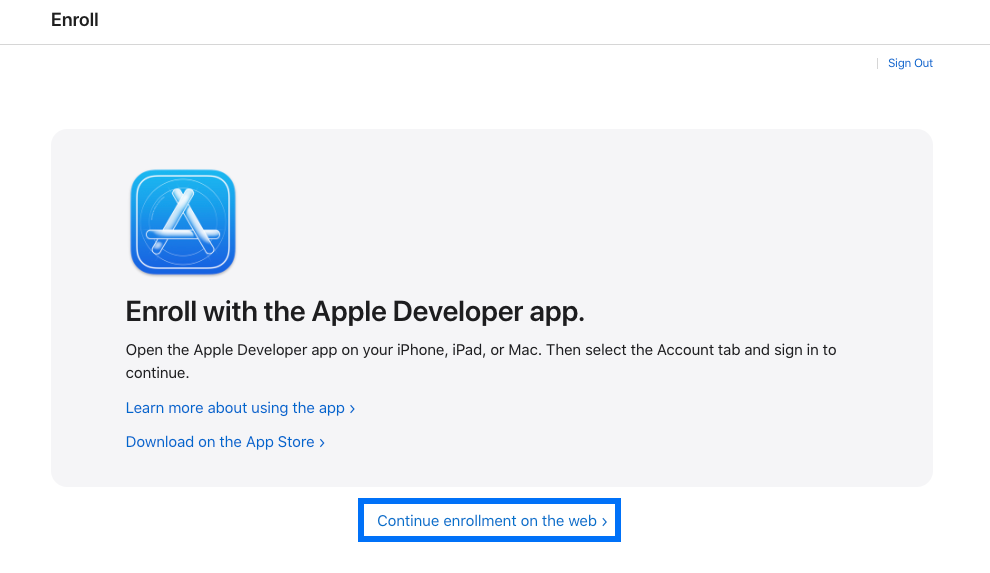
If you enroll through the app, use the same device for the whole process, and make sure it has Face ID, Touch ID, or a passcode set up and is signed in to iCloud.
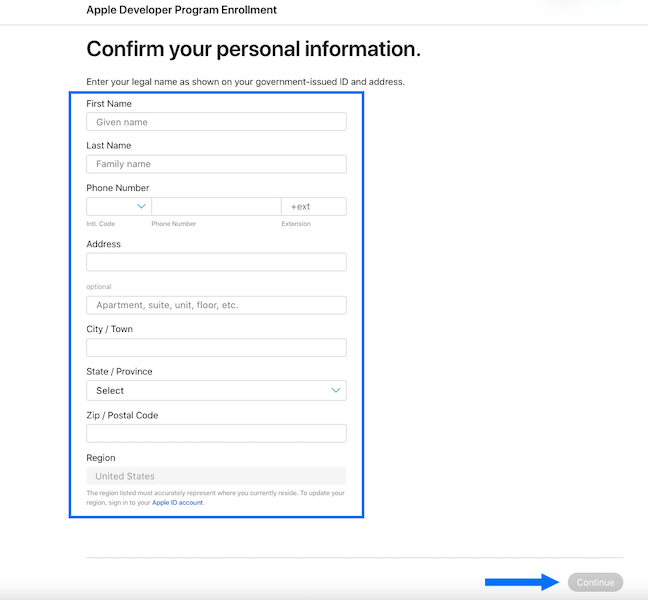
Enter your legal first and last name, phone number, and address. No P.O. boxes.
Click Continue.
Choose the entity type that matches your situation — individual or sole proprietor if you are enrolling personally, or the organization option if you are enrolling a company, nonprofit, educational institution, or government body.
If you choose an organization type, you will be asked for your D-U-N-S number, legal entity name, and website.
Click Continue.
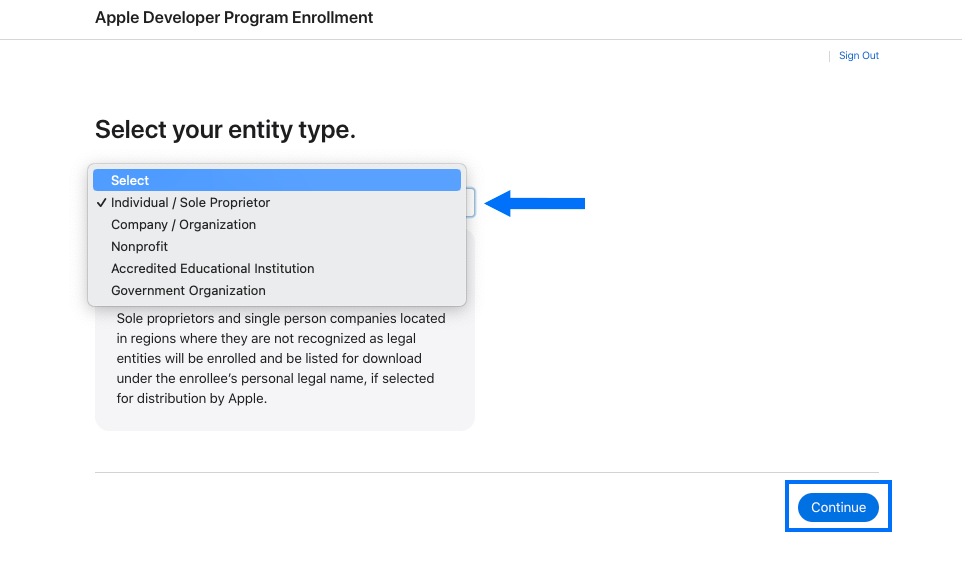
Important: from this point the order of screens differs by entity type. Organizations are reviewed and verified by Apple before they can purchase a membership — you will get an email from Apple when your enrollment information has been verified, and only then can you pay. Individuals are generally able to complete identity verification and payment in one sitting. The steps below cover both; do them in whichever order Apple presents them.
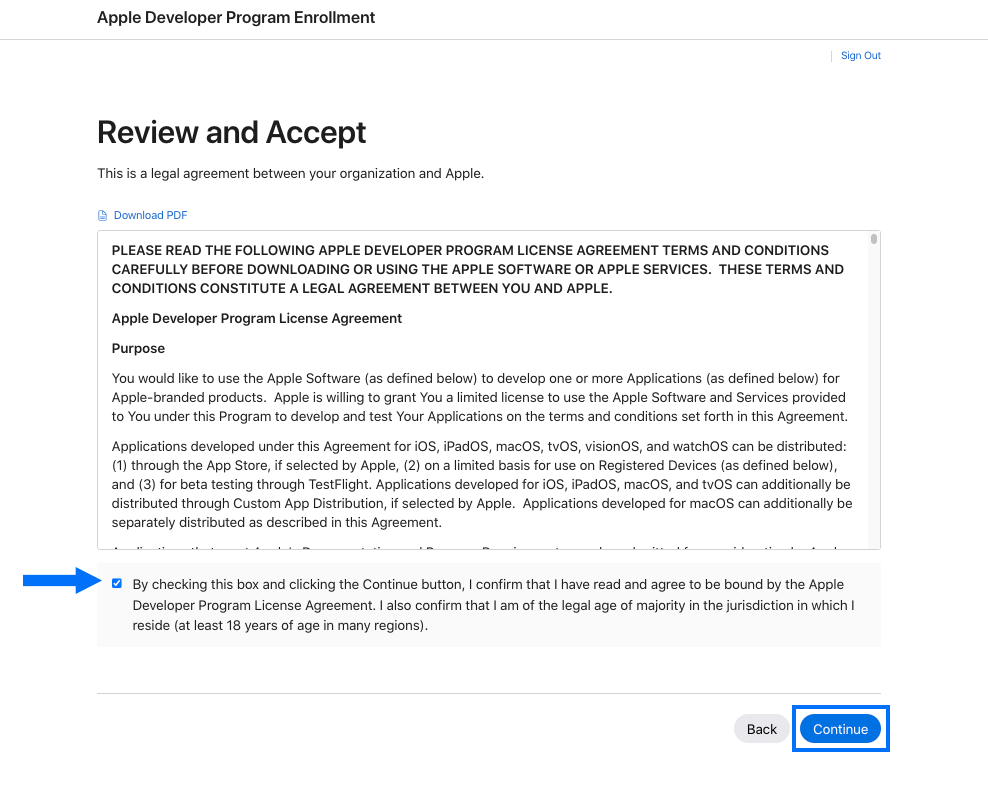
Review the agreement, confirm you accept the terms and are of legal age, and click Continue.
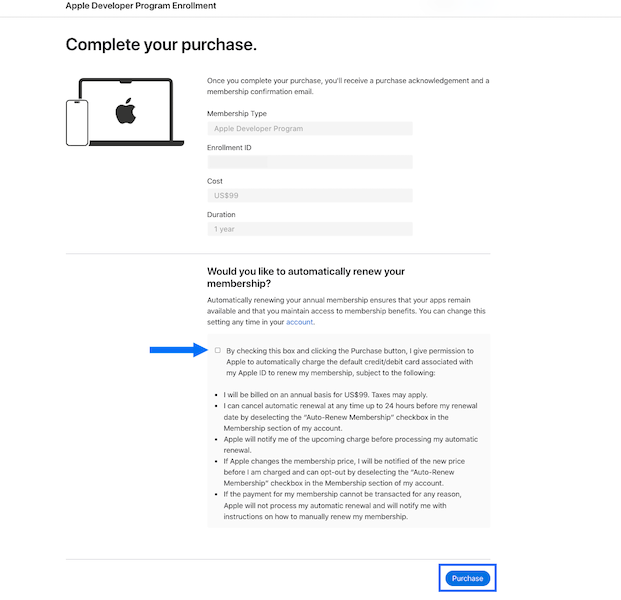
Choose whether to enable automatic annual renewal. We strongly recommend leaving this on — if your membership lapses, your app is removed from the App Store until it is renewed.
Click Purchase.
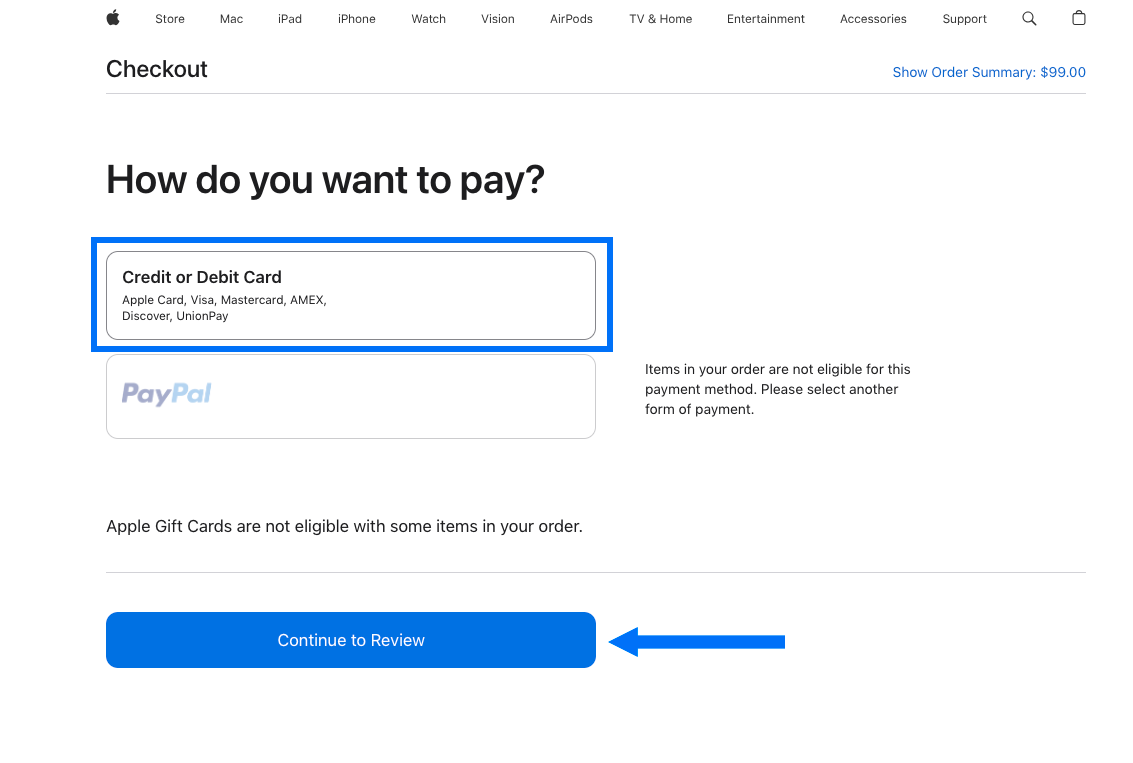
Sign back in if prompted, then enter your payment details under Credit or Debit Card and click Continue to Review.
If you are enrolling as an individual, Apple requires you to use your own card.
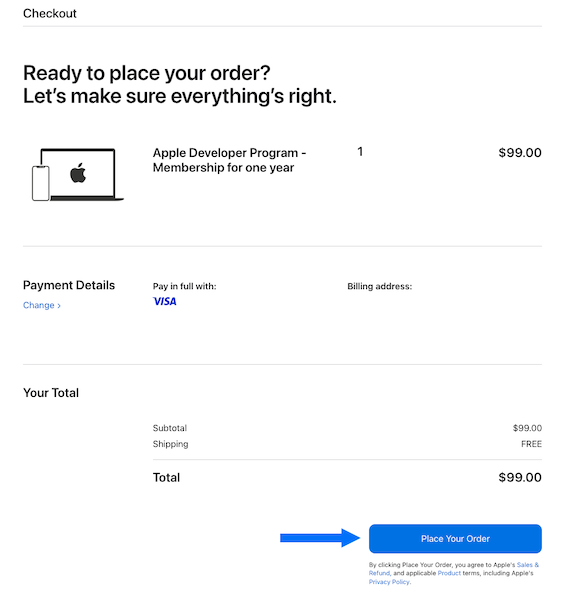
Check your details and click Place Your Order. Apple will email you to confirm the order is being processed.
Fee waivers. Nonprofits, accredited educational institutions, and government entities may qualify for a waiver of the 99 USD fee. You must be a legal entity with that official status, must not be a sole proprietor or single-person business, and must not sell digital goods or services through your apps. Select the fee waiver option during enrollment. Note that a waiver is incompatible with selling paid content in your app, so it is usually not the right choice if you plan to sell memberships through the app.
Apple verifies the identity of the person enrolling. Depending on your entity type and how you enrolled, you will either be prompted on screen or receive an email asking you to upload identification. Complete it promptly — your enrollment sits idle until you do.
Photograph your government-issued photo ID and save it to your device. Apple accepts passports in most regions, and some regions also accept a driving licence or other government ID.
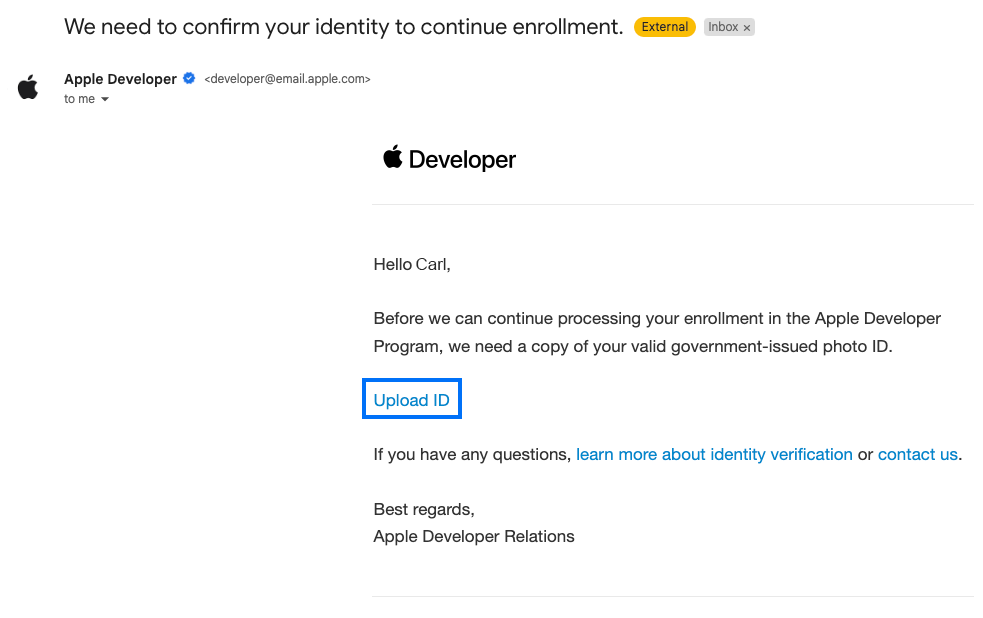
Open the email from Apple and click Upload ID.
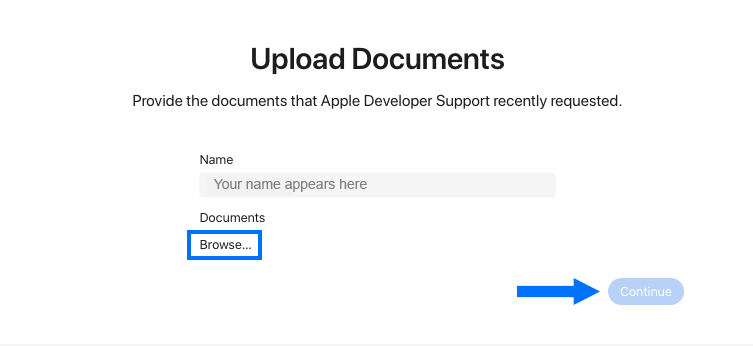
Sign in, then click Browse to upload your document and click Continue.
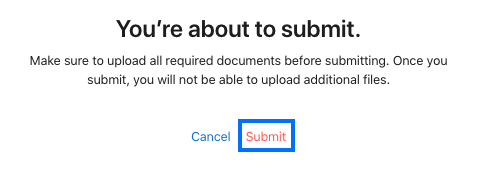
Click Submit in the confirmation dialog.
Apple reads your name and address from the photo and does not keep the image. A third-party identity verification provider may be involved. Verification is tied to the Apple Account you used — you cannot redo it with a different Apple Account, so make sure you are signed in as the account that will own the membership.
Organizations may also be asked for notarised business documents, and for a reference contact who can confirm your authority to sign on the company's behalf.
You will receive an email once your membership is activated, and App Store Connect will become available.
Check status any time by signing in at developer.apple.com/account with the same Apple Account.
Apple's guidance: if you have not received confirmation within 24 hours of purchase, contact Apple and include your Enrollment ID.
Since February 2025, Apple requires every developer to declare a trader status under the EU Digital Services Act — even if you do not distribute in the EU. Apps without a declared trader status are removed from the App Store in the European Union. If you declare as a trader, you will need to verify your email and phone and upload a document confirming your business name and address; for organizations the address shown publicly on your App Store product page comes from your D-U-N-S record. You complete this in App Store Connect, and we can walk you through it when we set up your app.
My enrollment was rejected or is stuck in review.
The most common causes are a name that does not match your ID, a D-U-N-S record that does not match the legal entity name you entered, or a website that does not meet Apple's requirements. Fix the underlying detail first, then contact Apple with your Enrollment ID.
My website was rejected.
Apple requires a publicly available, functional website on a domain associated with your organization. Social media pages, sites with minimal content, and domain-registrar parking pages are explicitly not accepted. A simple one-page site on your own domain describing your business is enough.
Apple says my organization is not listed as a legal entity.
This is a D-U-N-S issue, not an Apple one. See How to Set Up Your D-U-N-S Number for Your Branded App for how to get D&B to correct your record.
I enrolled as an individual but need my company name shown.
An individual membership always shows your personal legal name as the seller. Contact Apple about converting the membership to an organization — it is supported, but requires a D-U-N-S number and a fresh review. Talk to us first so we can time it around your release.
I used the wrong Apple Account.
Because identity verification is bound to the Apple Account you used, this is painful to unwind. Contact Apple support before starting a second enrollment.
Your Apple account is now ready. Two things remain before your app can be released, and both are covered in How to Add GroupApp to Your Apple Developer Account (App Store Connect):
Inviting the GroupApp team so we can create your app record, handle signing, and publish for you.
Accepting Apple's agreements under Business in App Store Connect. Only you, as Account Holder, can do this.
Stuck anywhere in this process? Message us at [email protected] and we will help you through it.