The Content Library lets you publish and manage standalone digital resources inside your community.
You can use it to share downloads, recordings, guides, and other resource-based content. Content Library items can be offered for free, included in a paid membership plan, or sold as one-time learning products.
You can add the following types of content to the Content Library:
Video
Audio
PDF document
Embedded content (via link or code)
Article (text-based content)
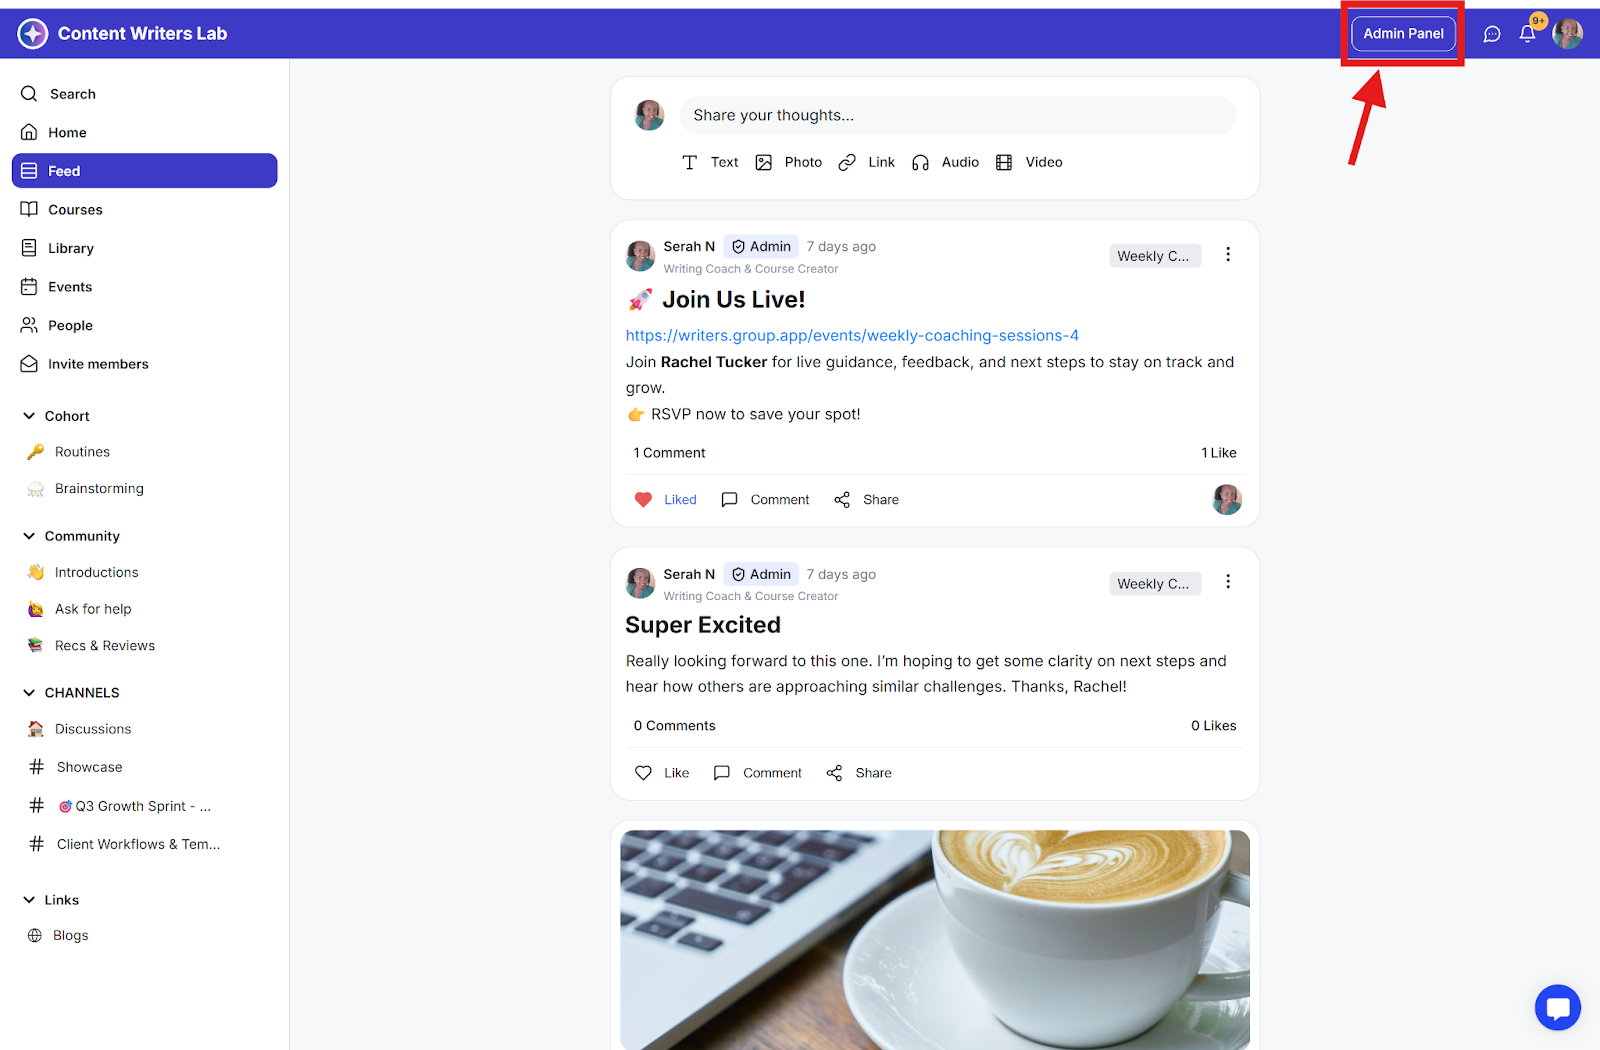
Step 1: Click the Admin Panel button.
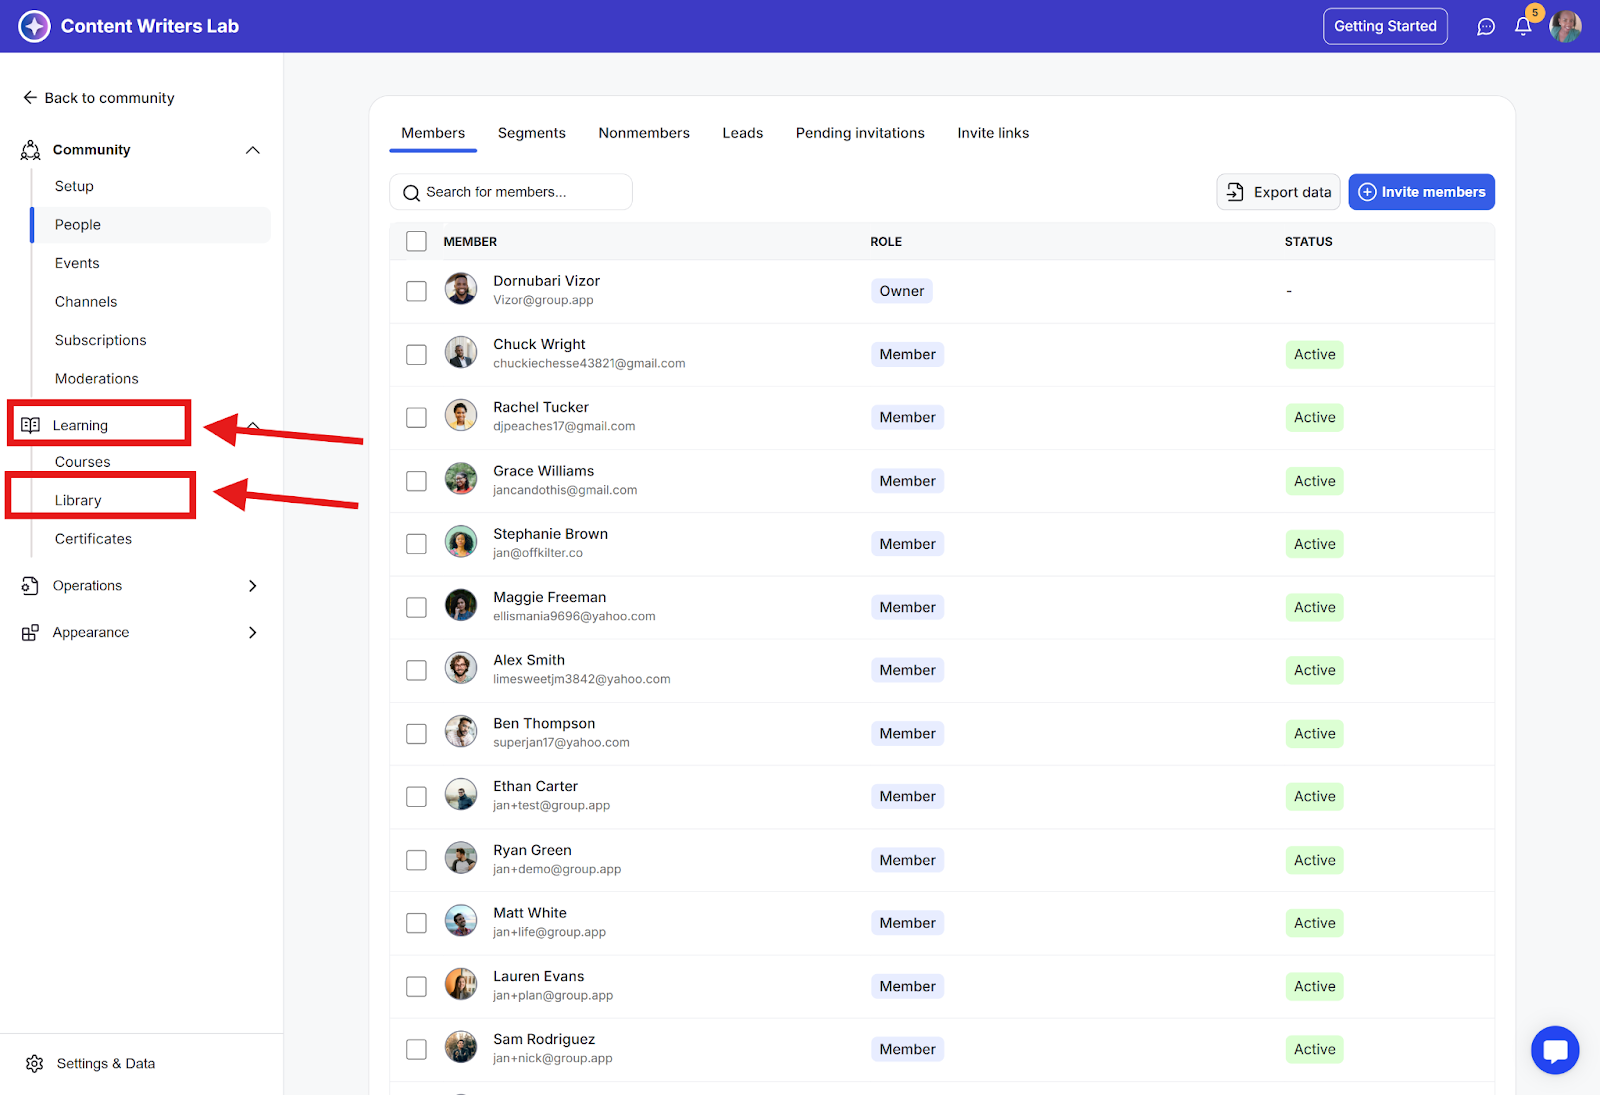
Step 2: On the side menu, go to Learning and select Library.
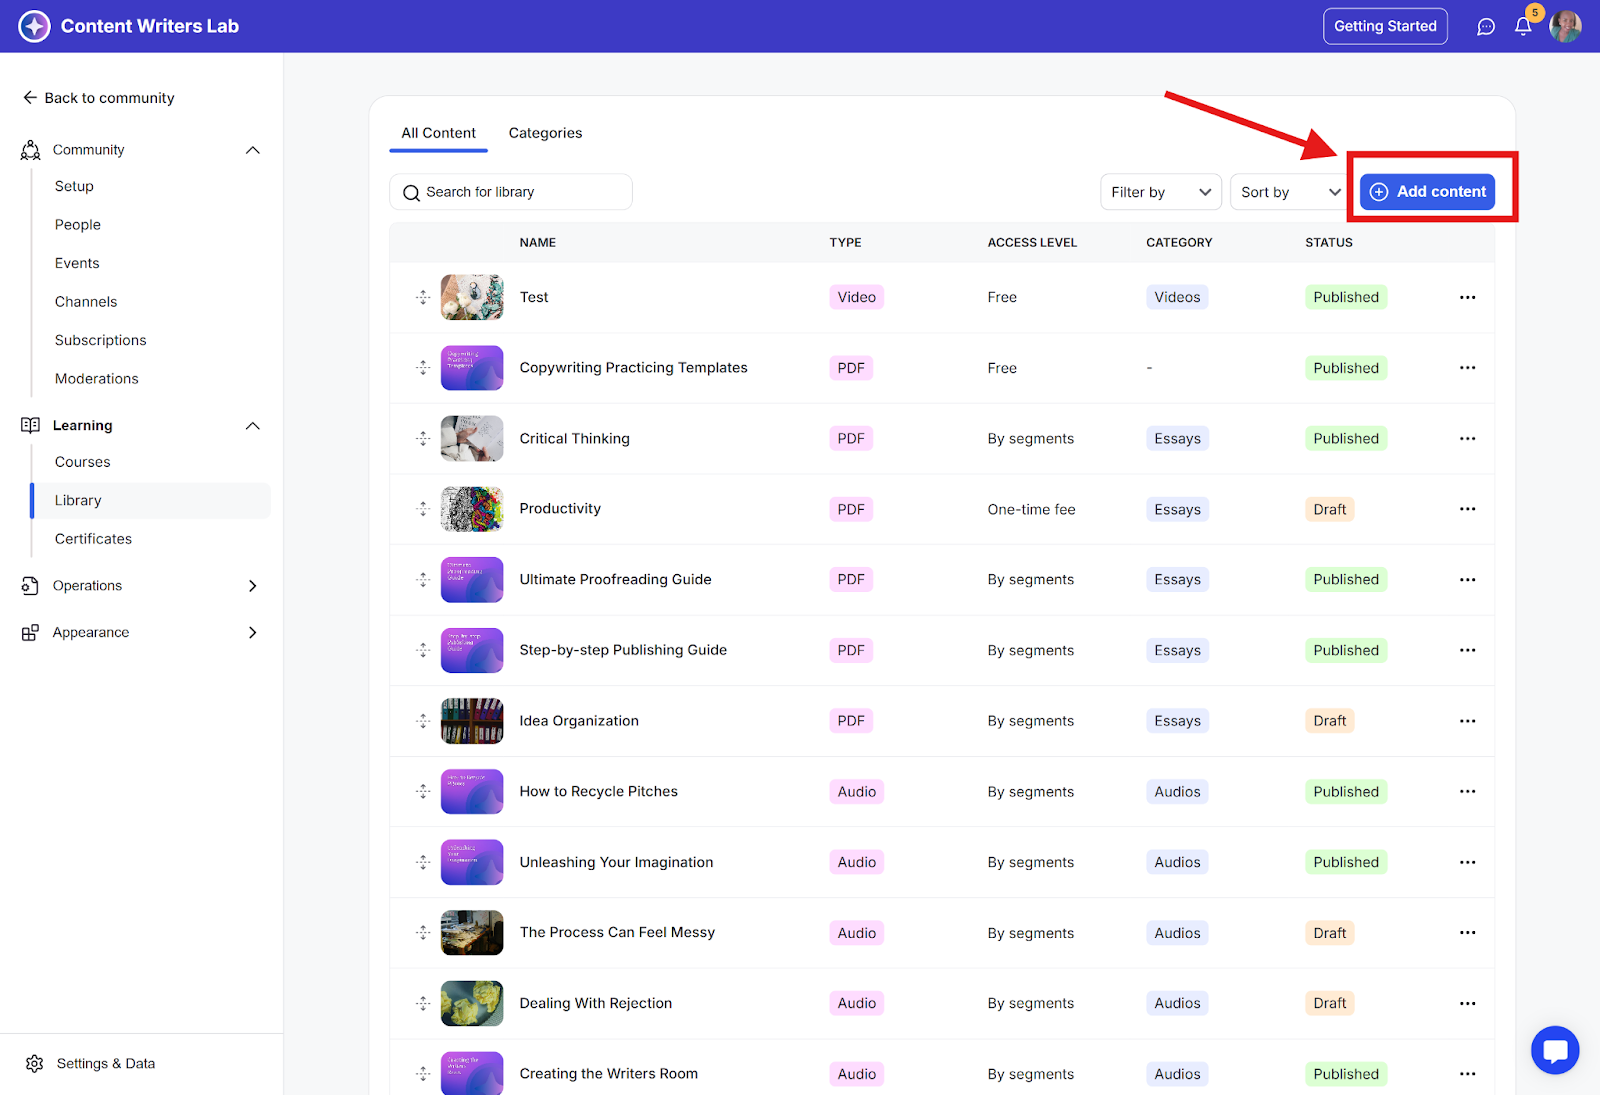
Step 3: On the Library page, click the Add Content button.
Step 4: Enter a Name for your new library resource.
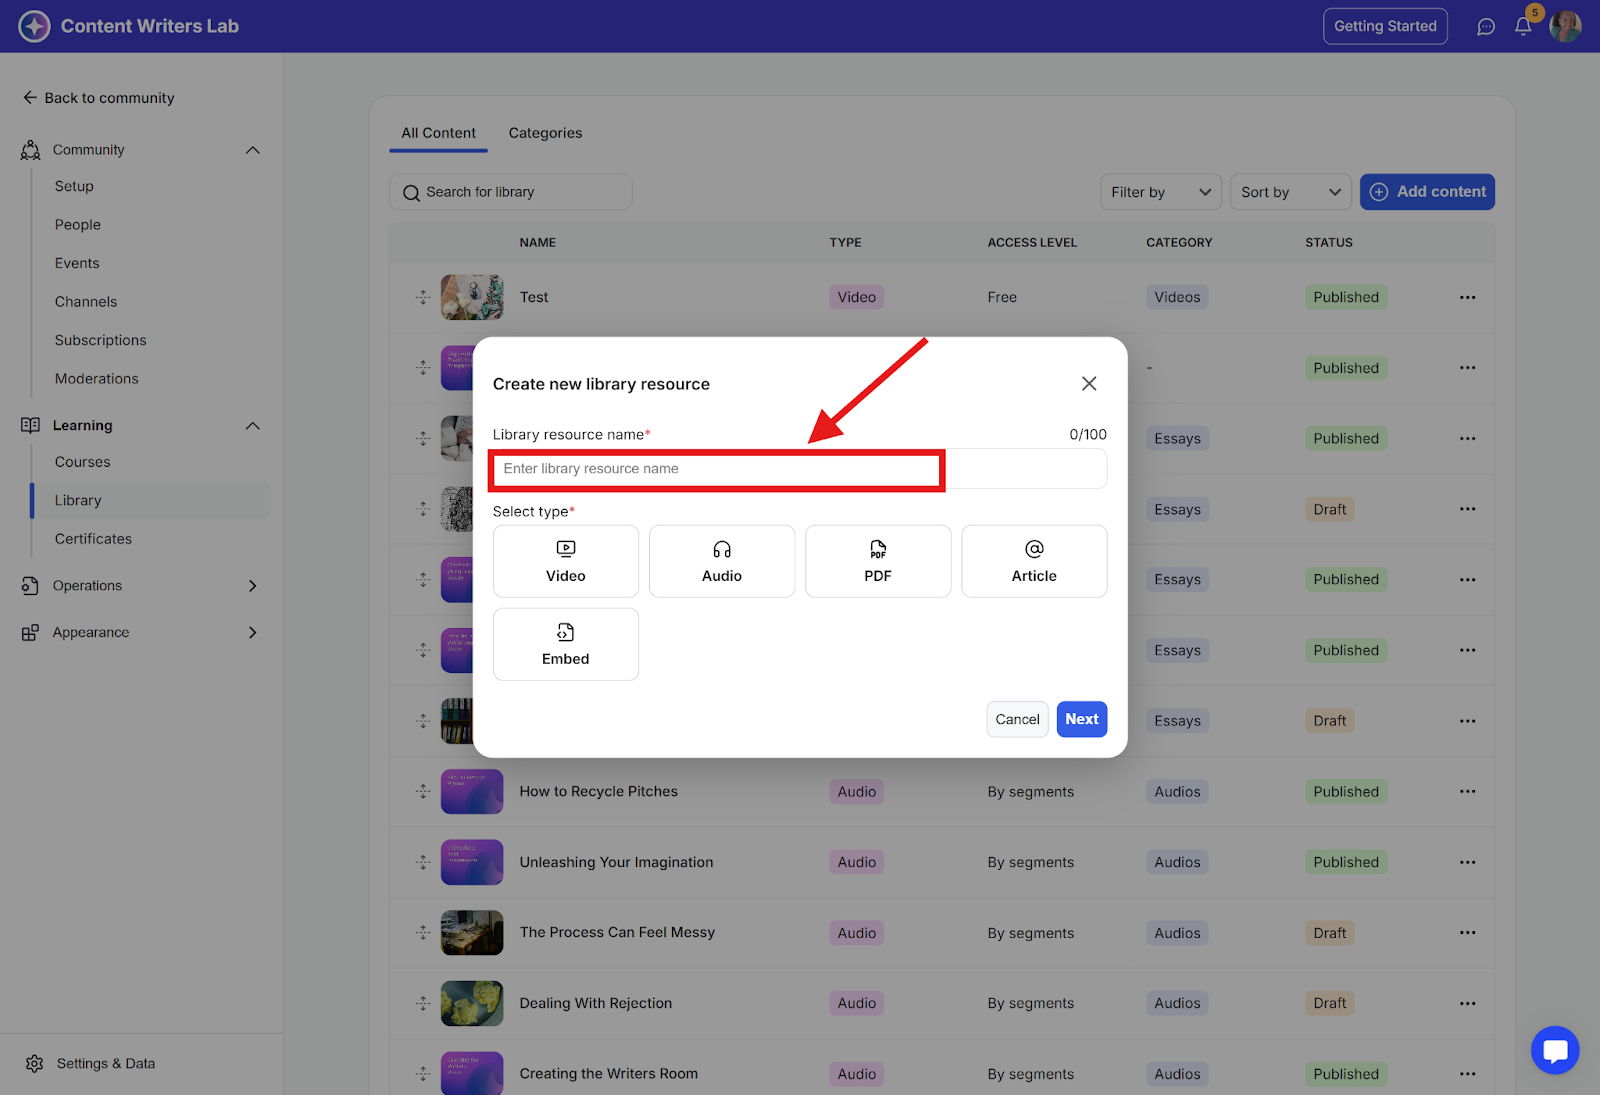
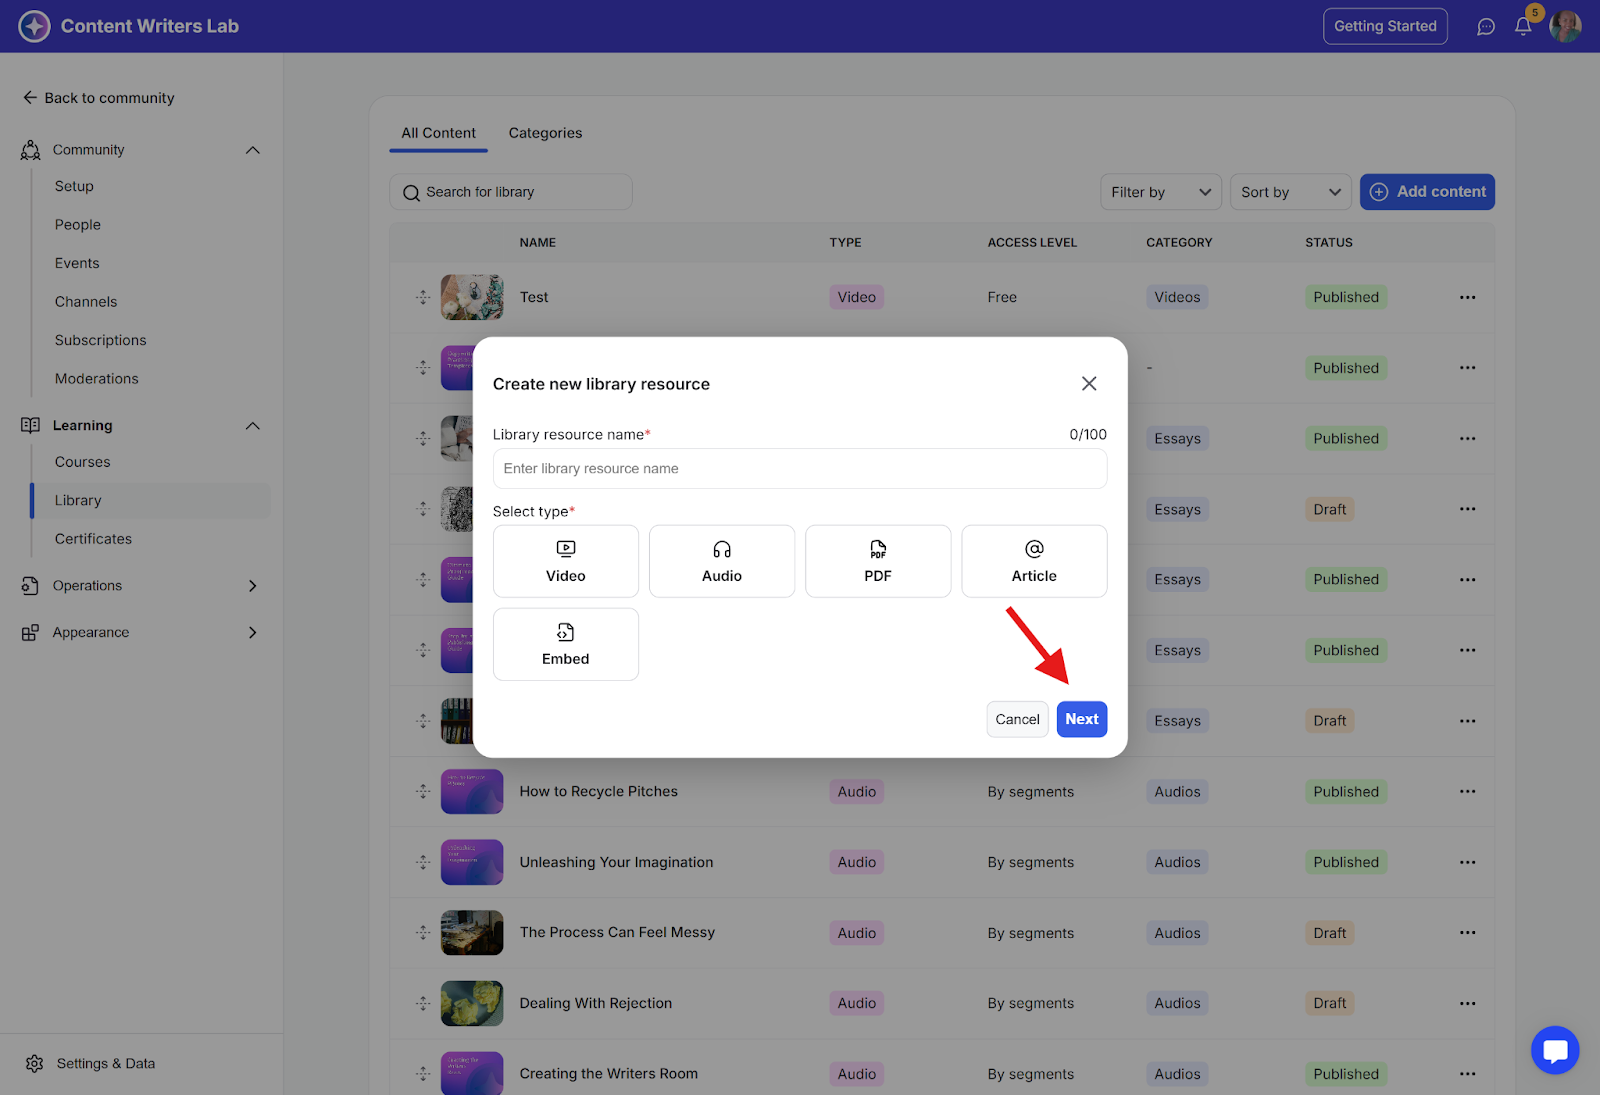
Step 5: Select the Content Type (e.g., Video, PDF, Embed, Audio, Article).

Step 6: Click the Next button to proceed.
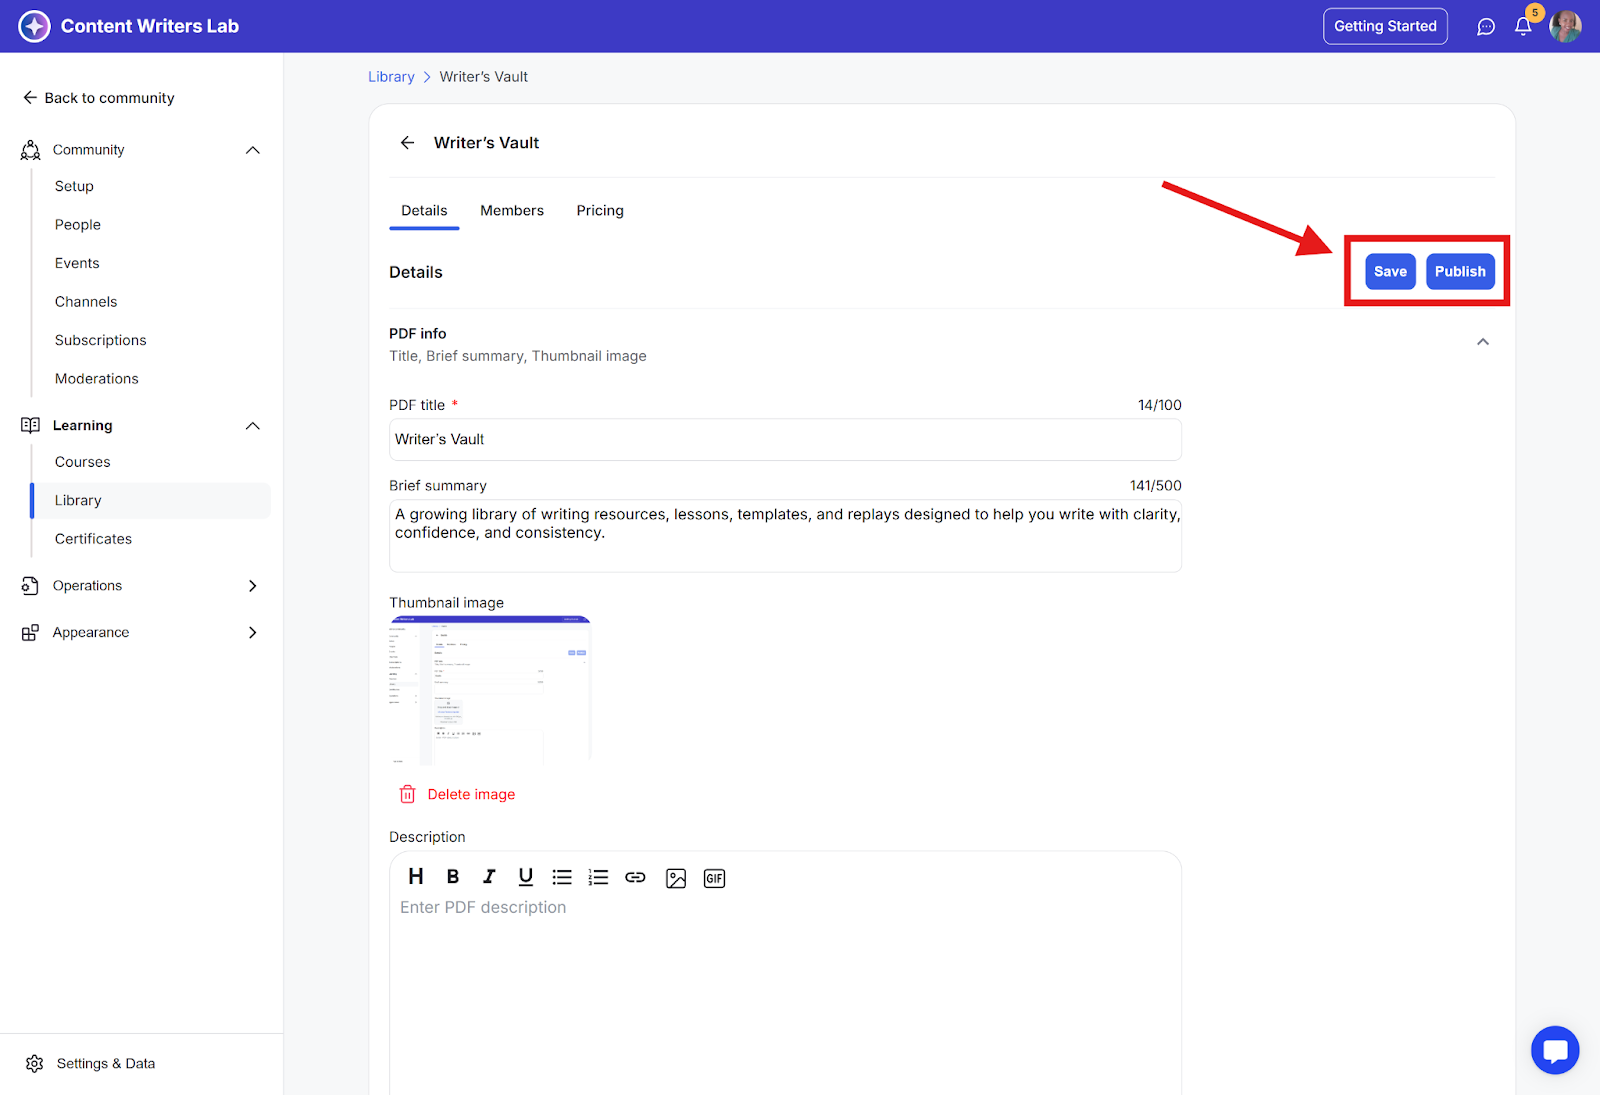
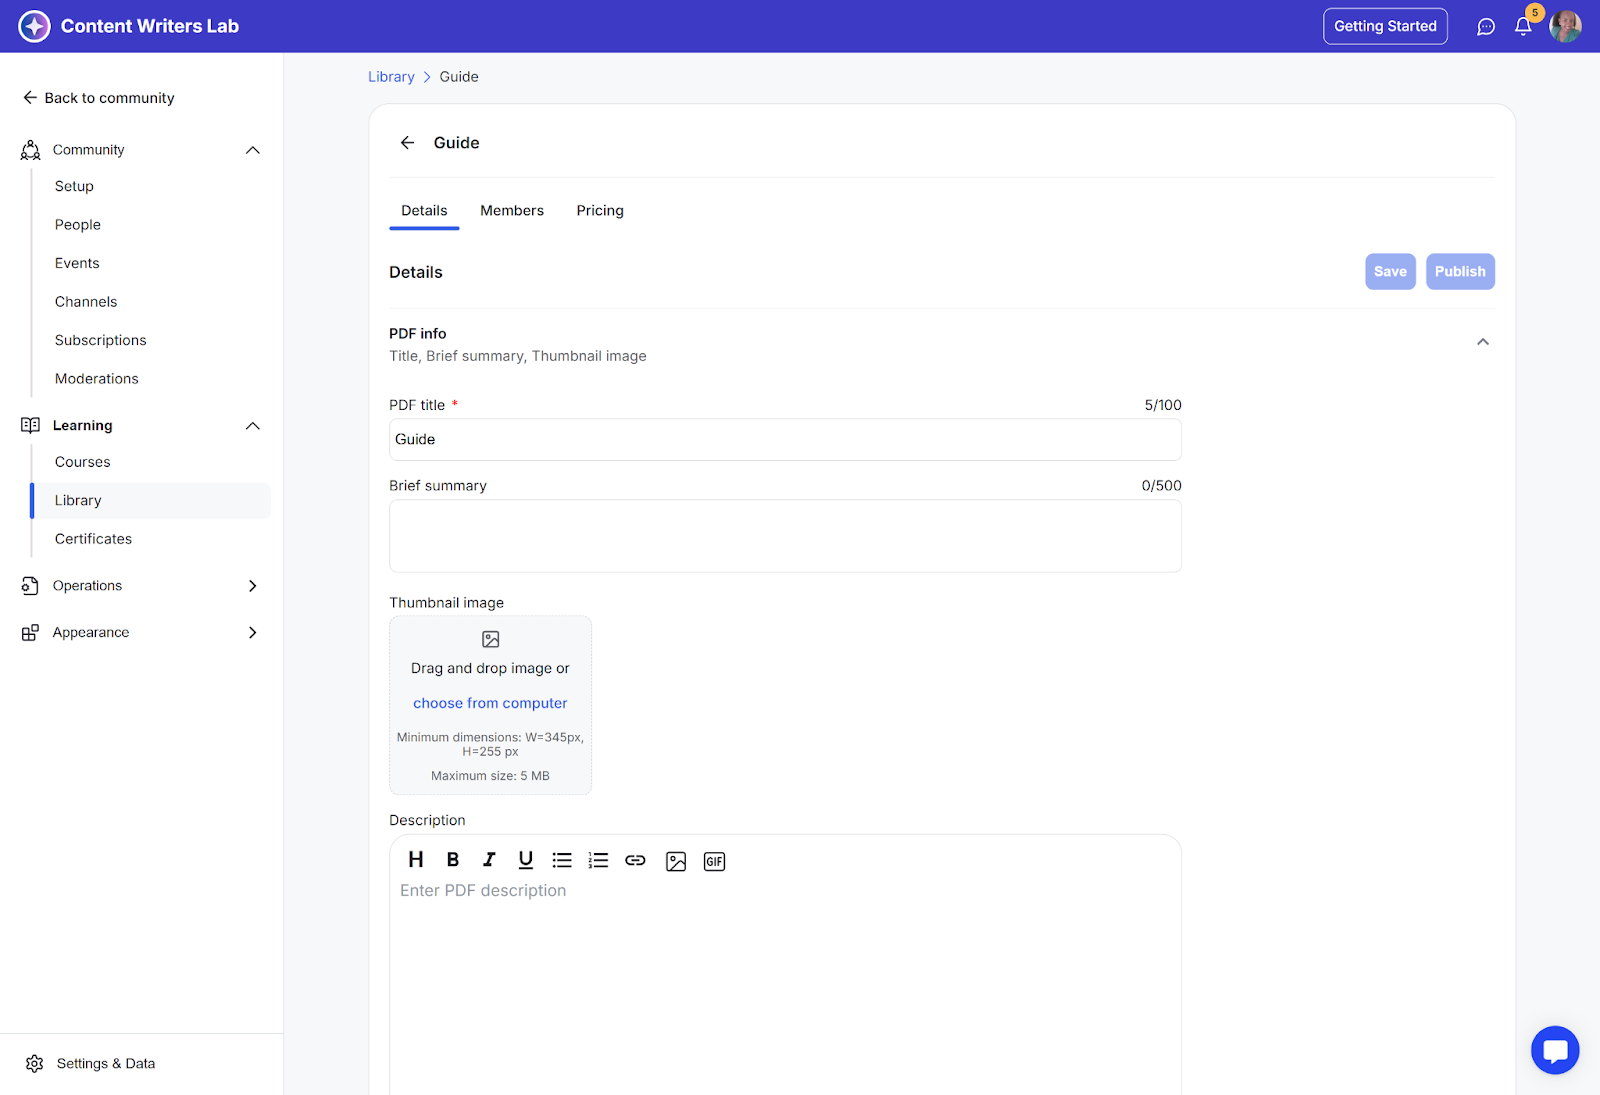
Step 7: You will be taken to the Edit Content page. Complete the following fields:
Content Title: (Pre-filled from the previous step, but editable)
Brief Summary: A short description displayed on the library overview page.
Thumbnail Image: Upload an image that will represent this content in the library list.
Description: Provide a detailed description that will appear on the content page under the "About" section.
Customize Lock Screen: (Optional) Enable this to control what users see if they do not have access to the content.
Access Level: Select who is allowed to access the content. You can only choose one.
Visibility Settings: Select who can see the content listed in the library (choose one).
Content-Specific Settings:
Enable/Disable Comments: Allow or prevent users from posting comments on the content.
Enable Downloads: (For Video, Audio, or PDF) Allow users to download the file.
Step 8: Click the Save button to apply all changes and the Publish button to make the content live for your members.