Course categories help you organize and group related courses so members can find them more easily. This guide shows you how to create categories, assign courses, and arrange their order.
Step 1: Click the Admin Panel button.

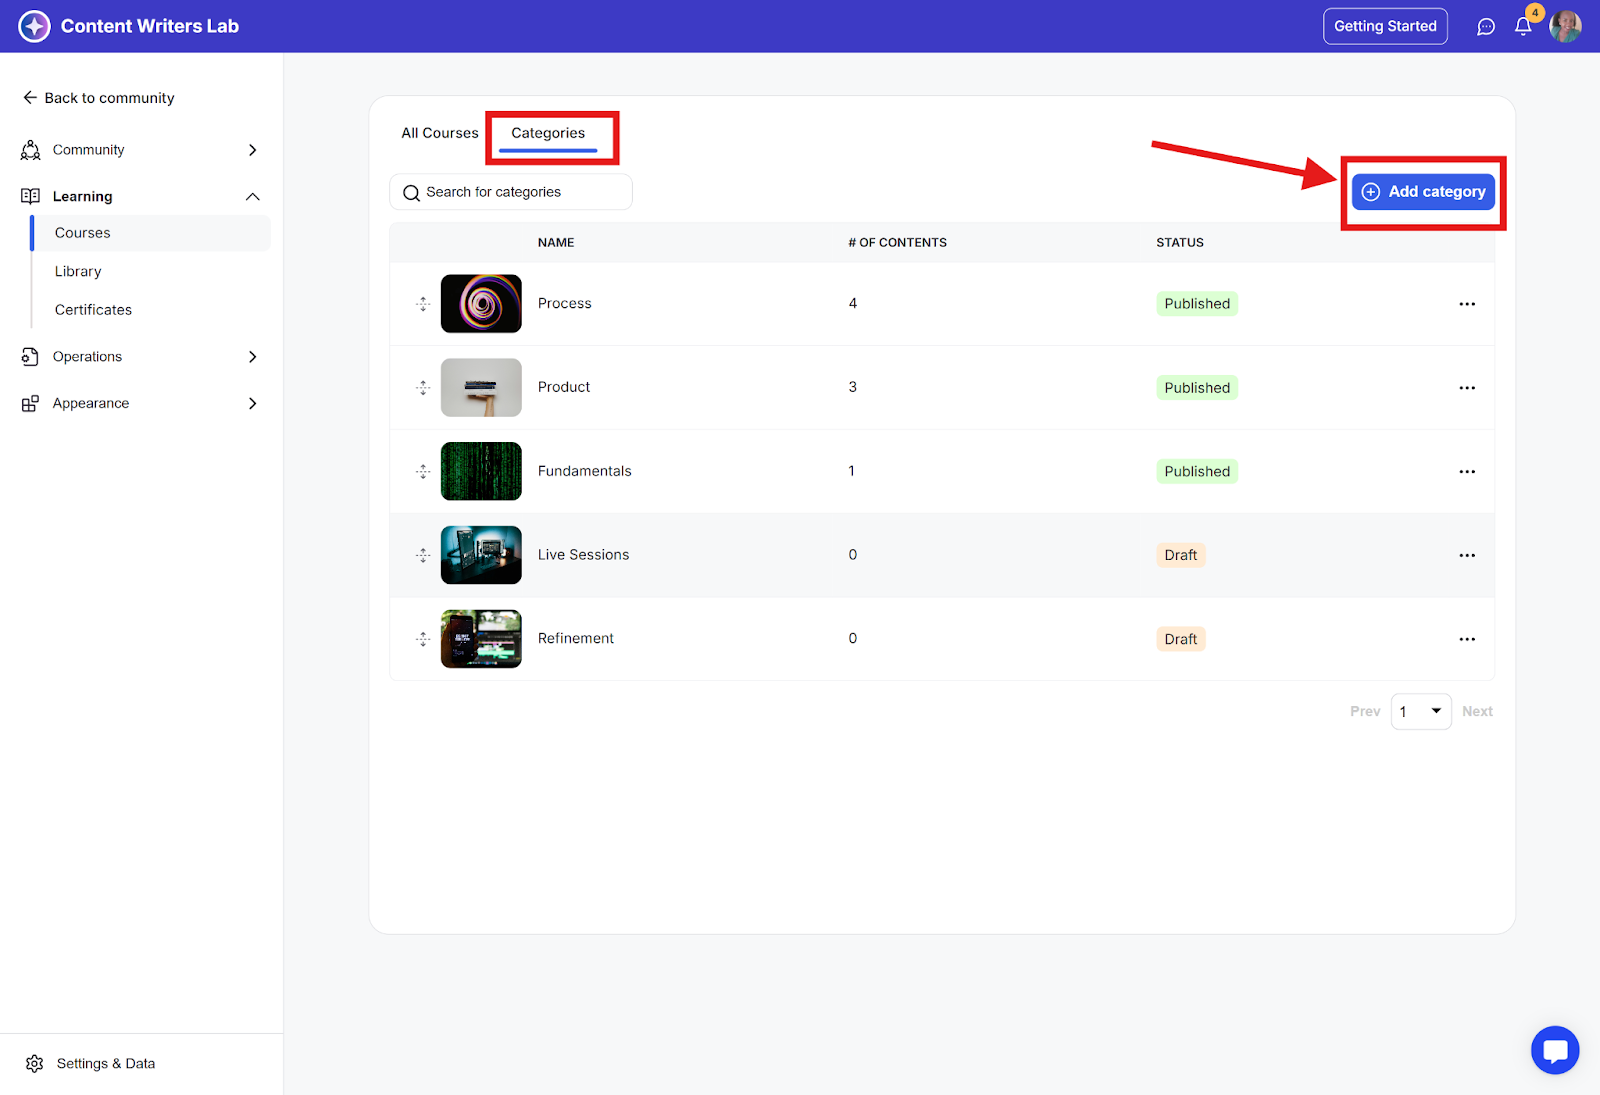
Step 2: Click Learning on the side menu and select Courses.
Step 3: Choose the Categories tab and click the Add Category button.
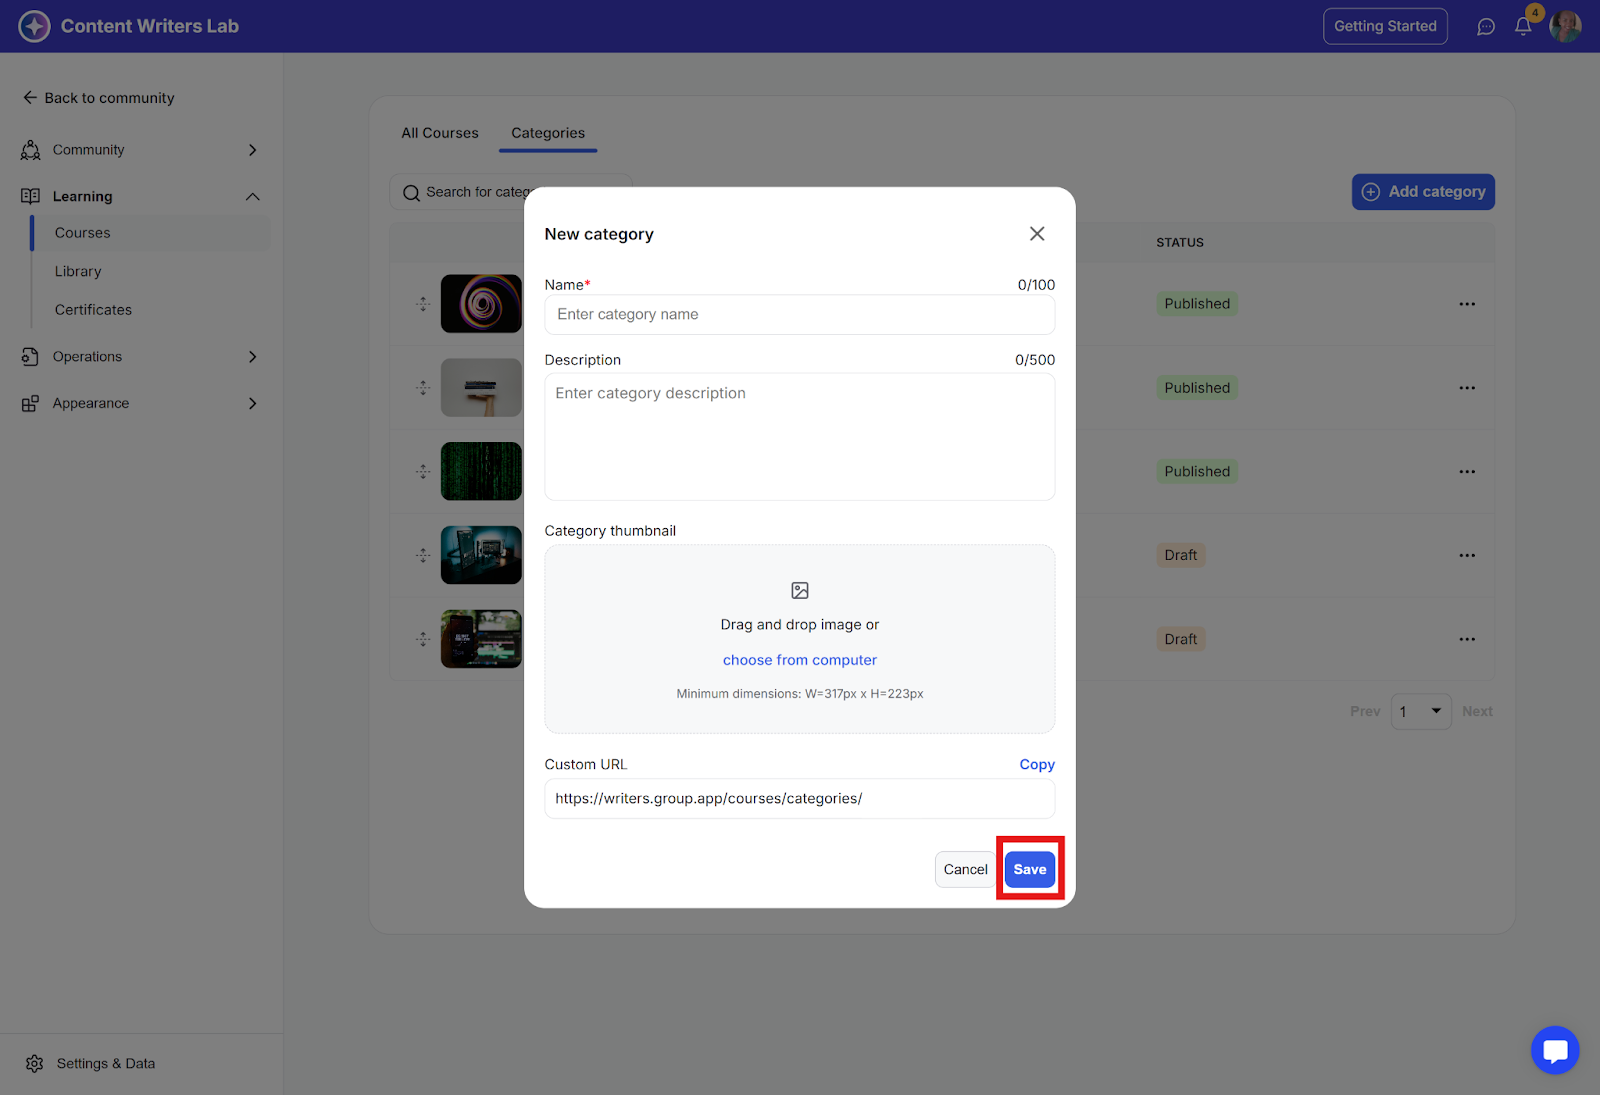
Step 4: Complete the category details (name, description, thumbnail) and click the Save button.
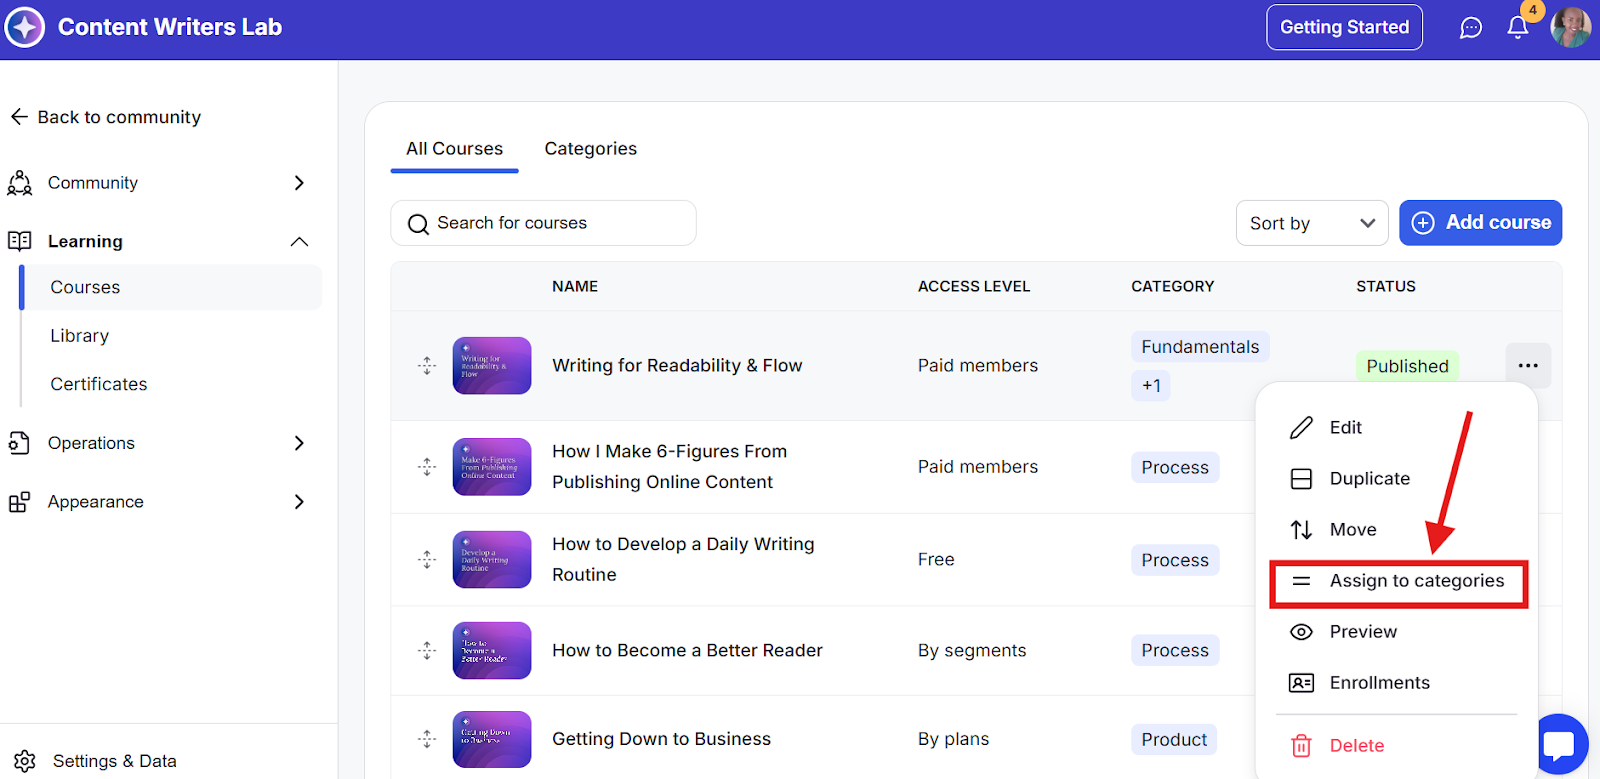
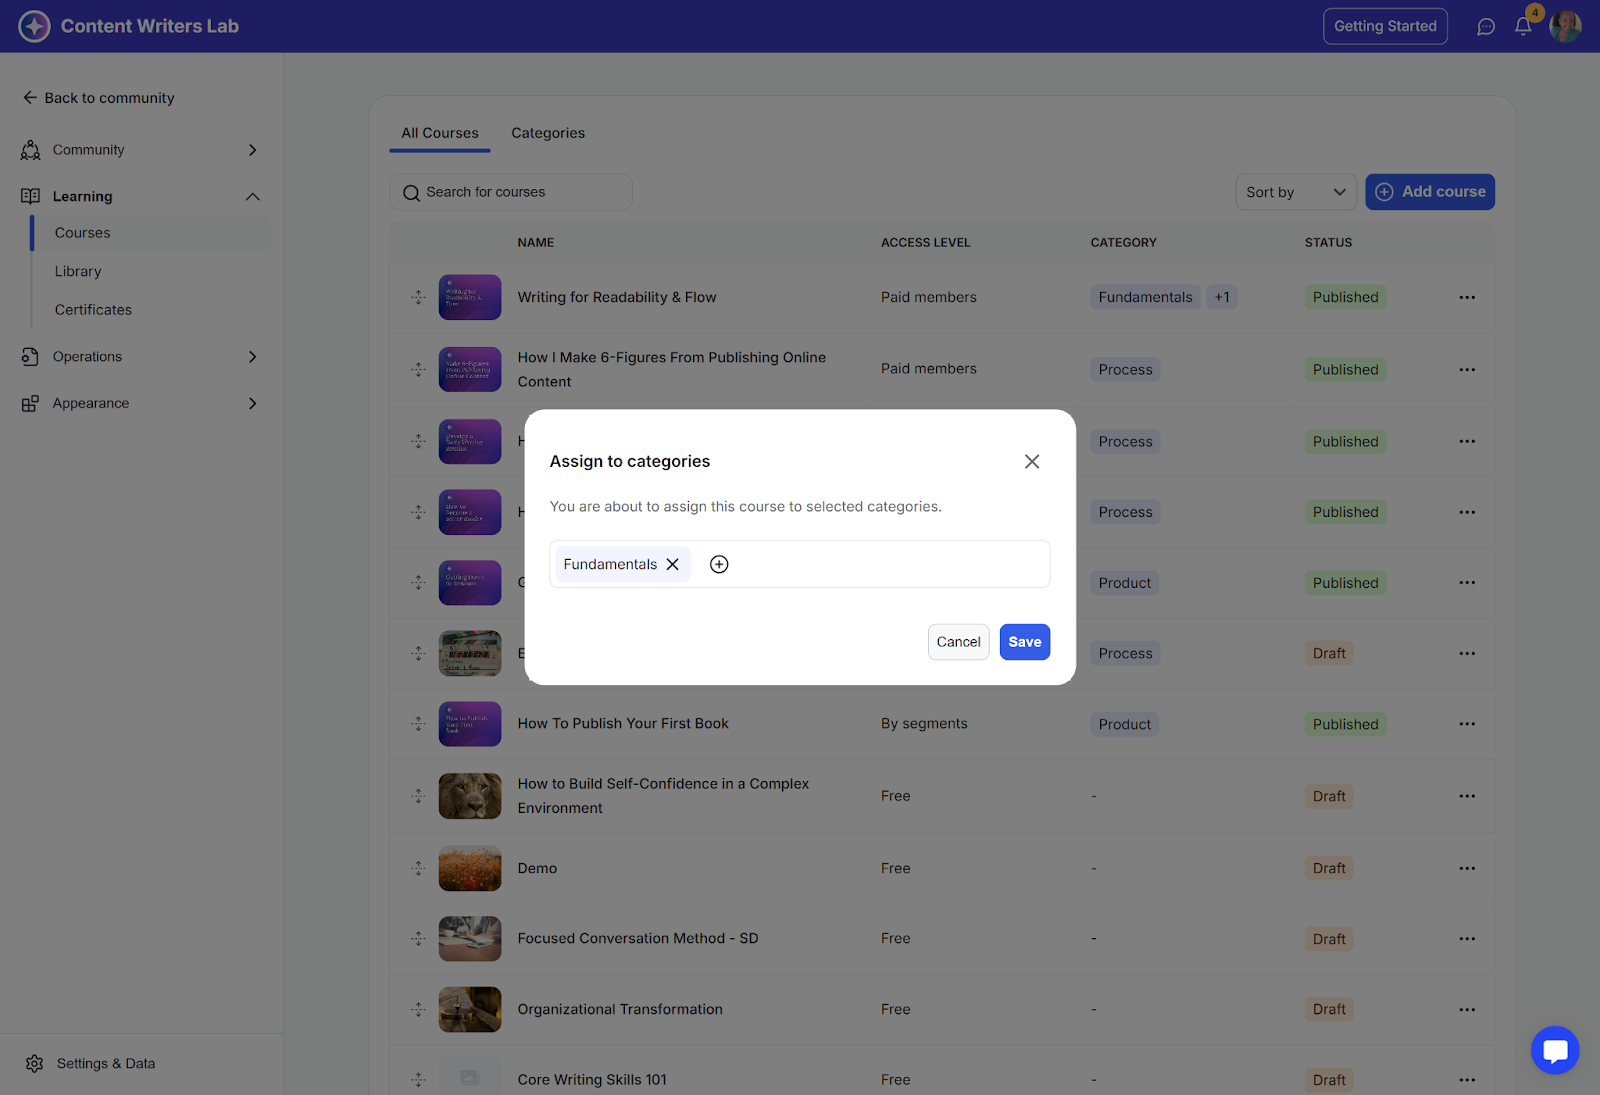
Step 1: Click the All Courses tab, select a course you want to assign to a category.

Step 2: Click the corresponding 3-dot icon, and click the Assign to Categories option.
Step 3: Select the category or categories to which you want to assign the course, and click the Save button.
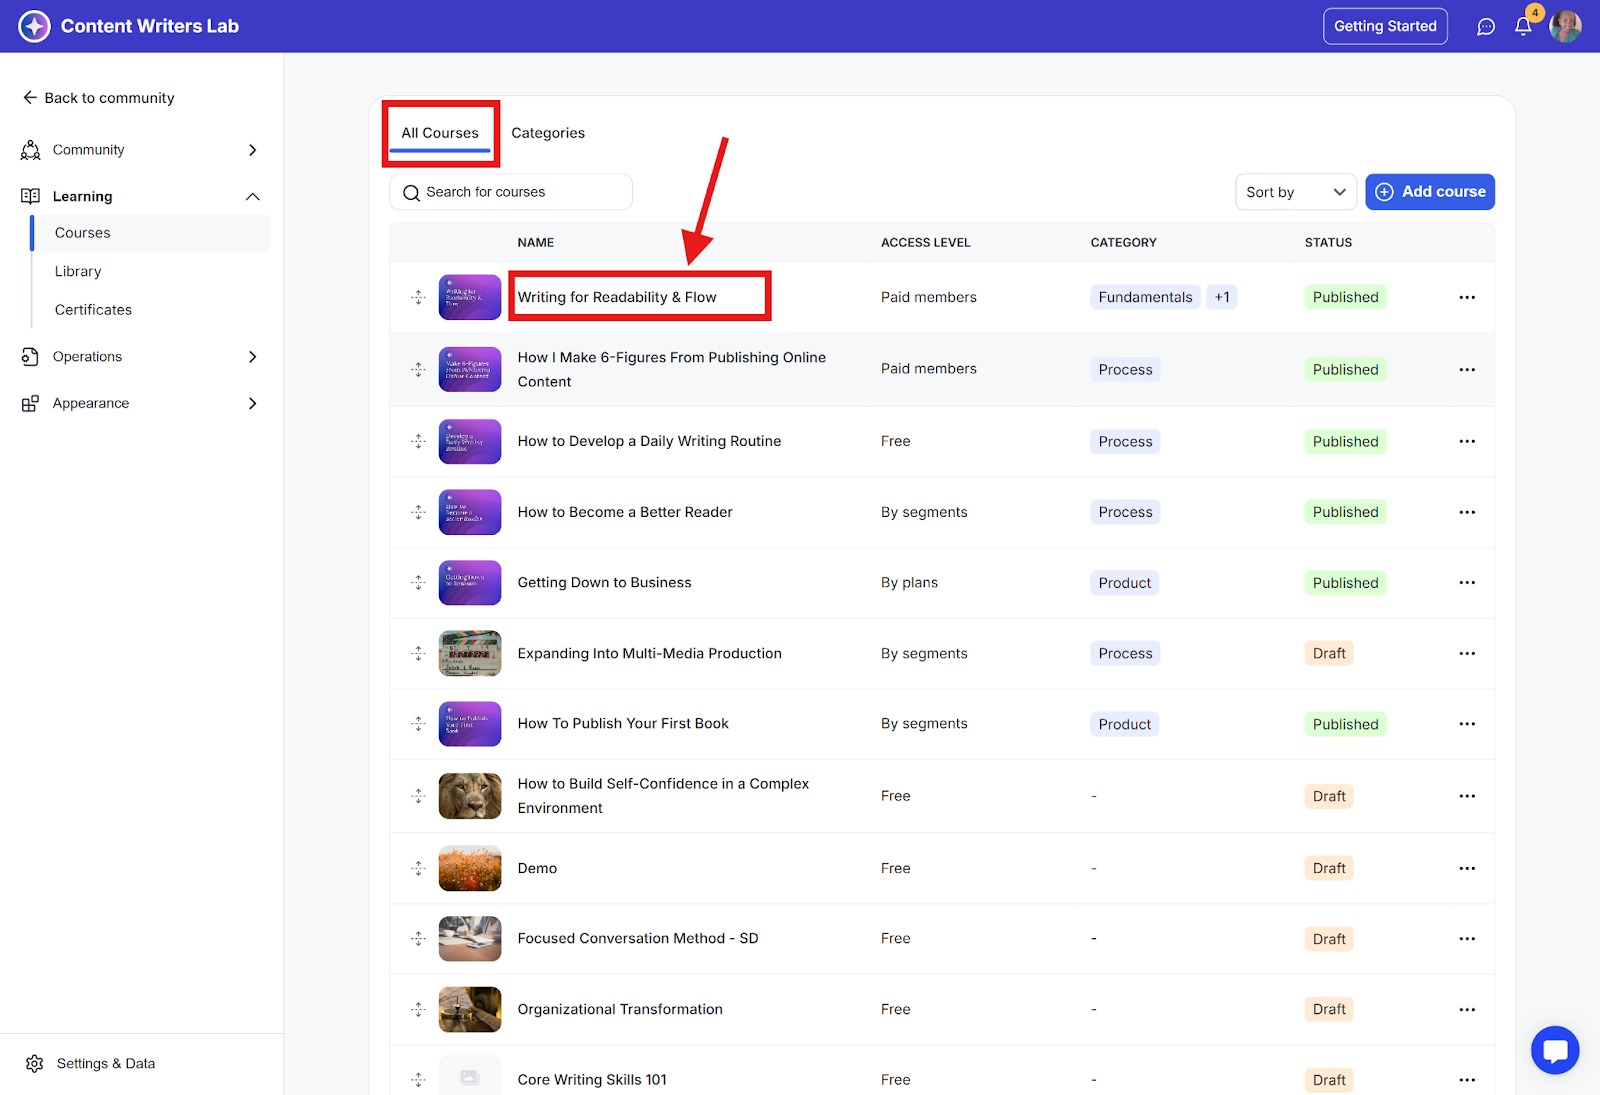
Step 1: Go to the All Courses tab and click on the course you want to edit.
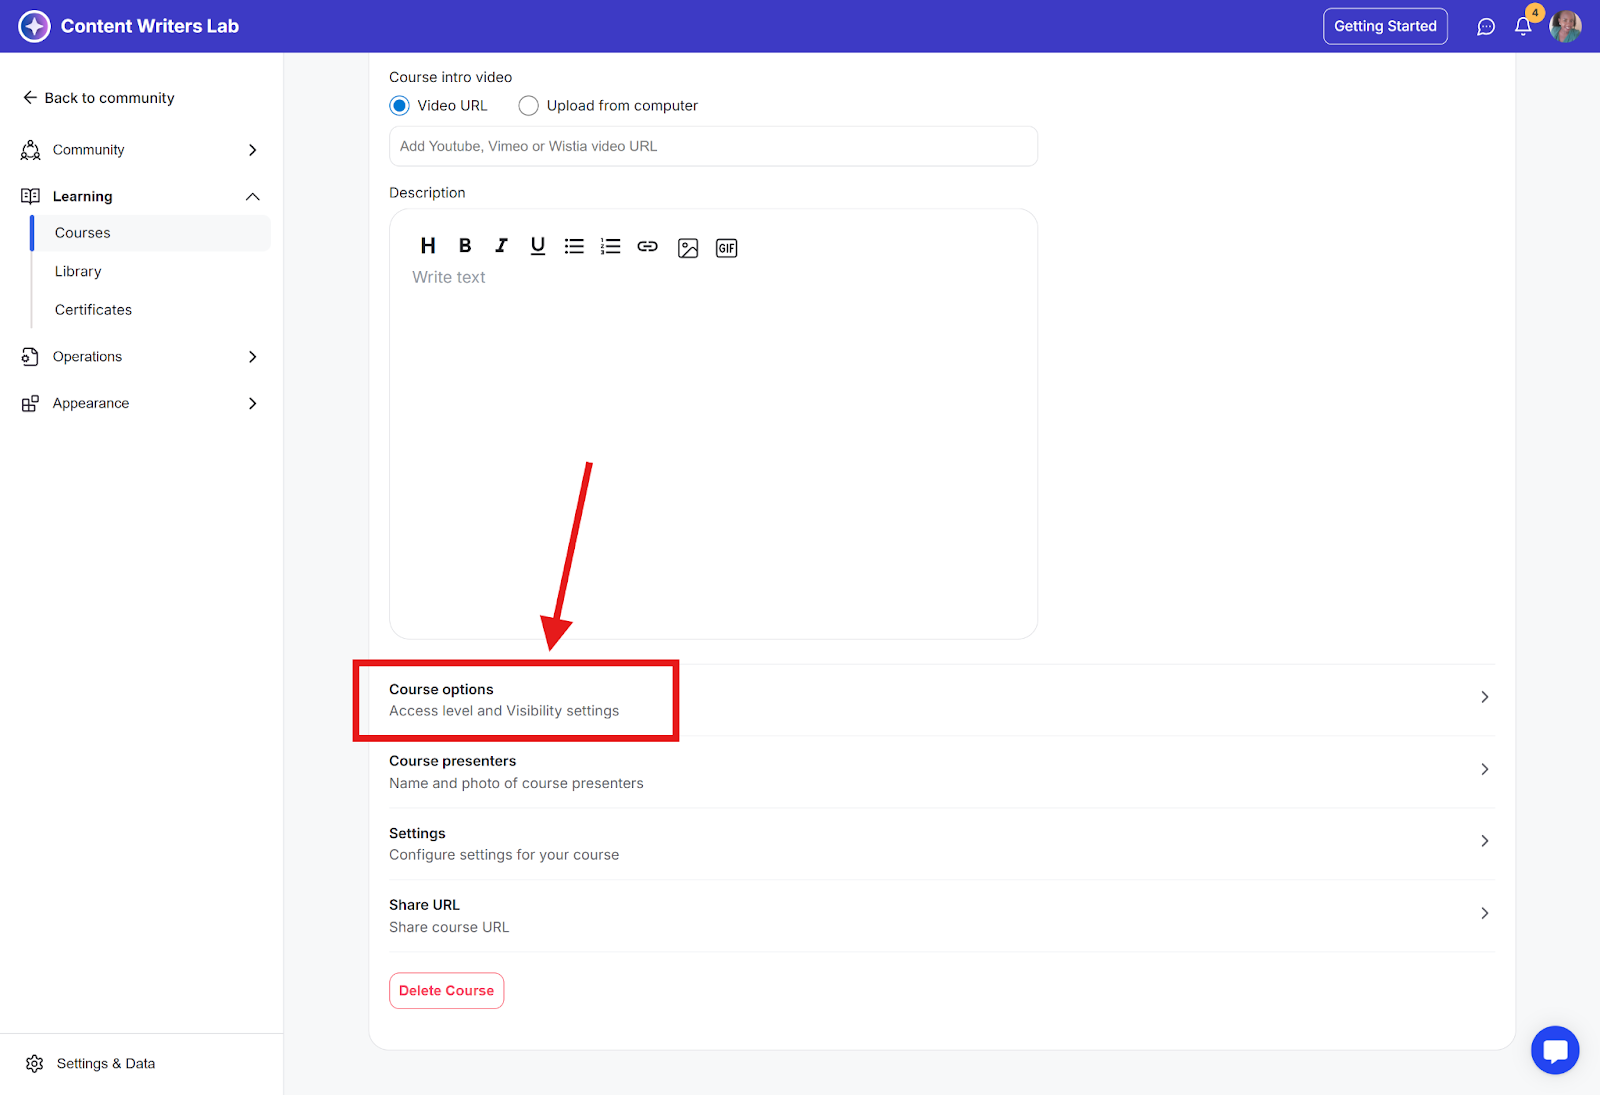
Step 2: Once inside the course edit mode, click on the Settings tab and navigate to the bottom Course Options.
Step 3: Click the Course Categories options and select or search the categories you want to assign.

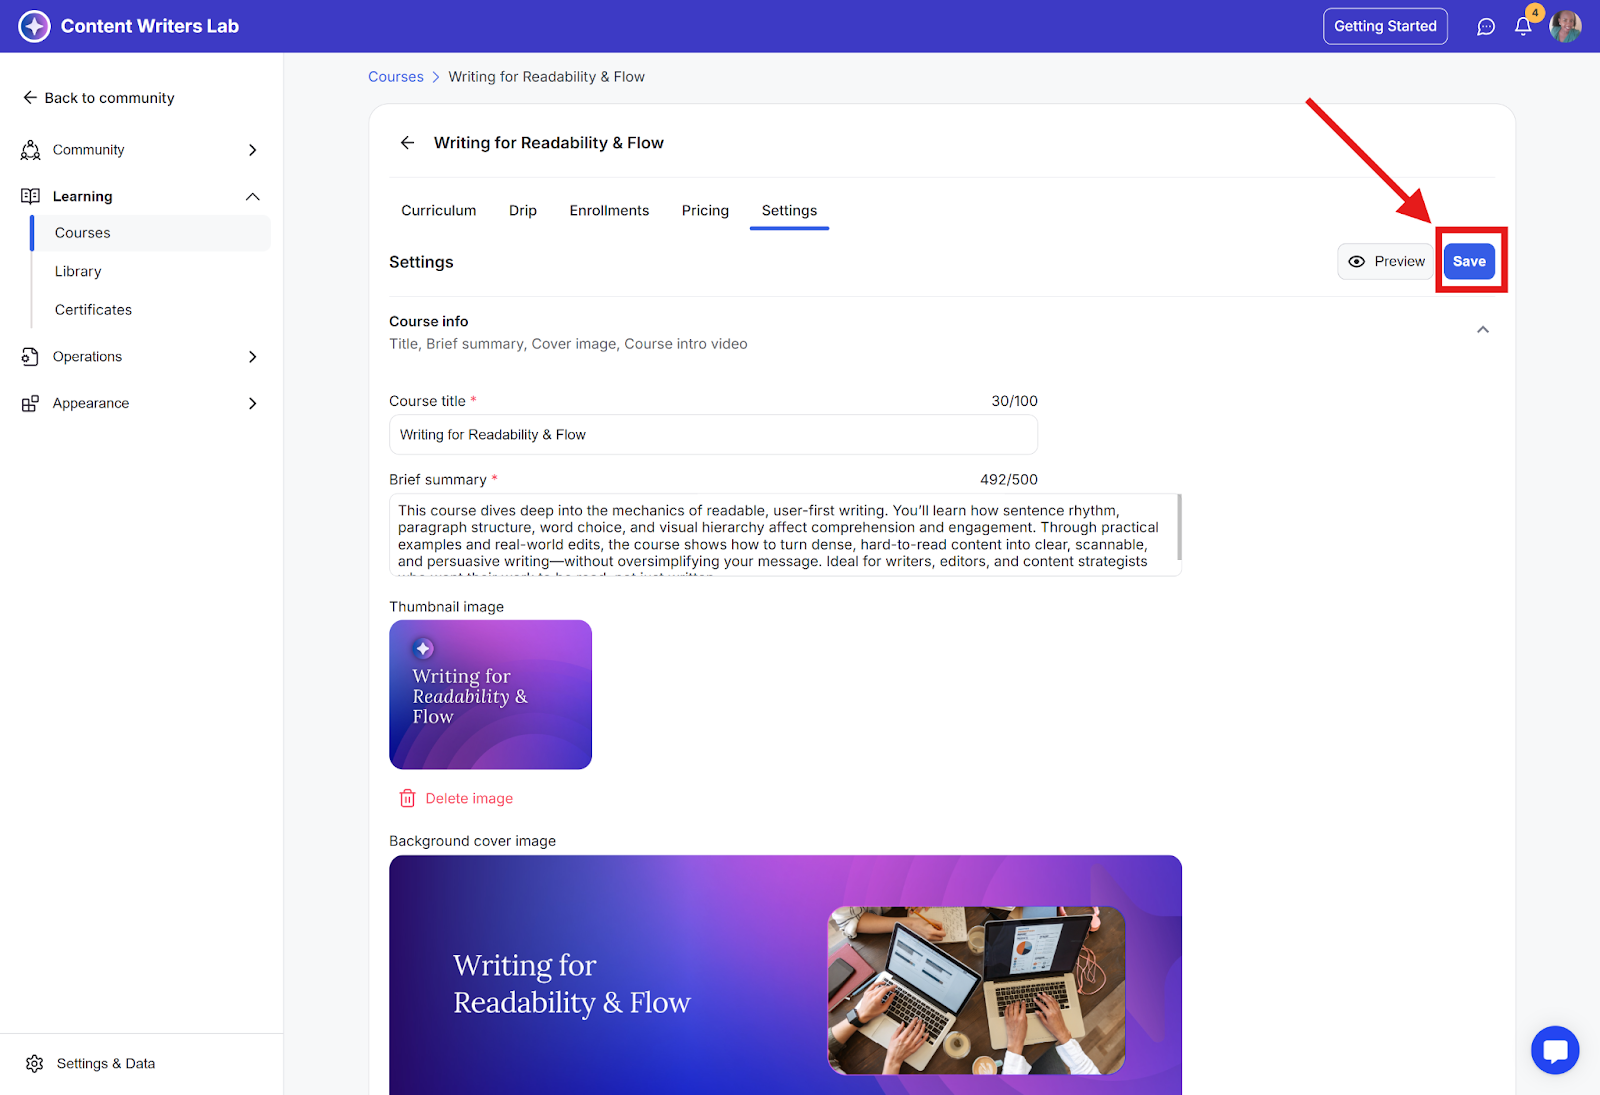
Step 4: Click the Save button to update the changes.
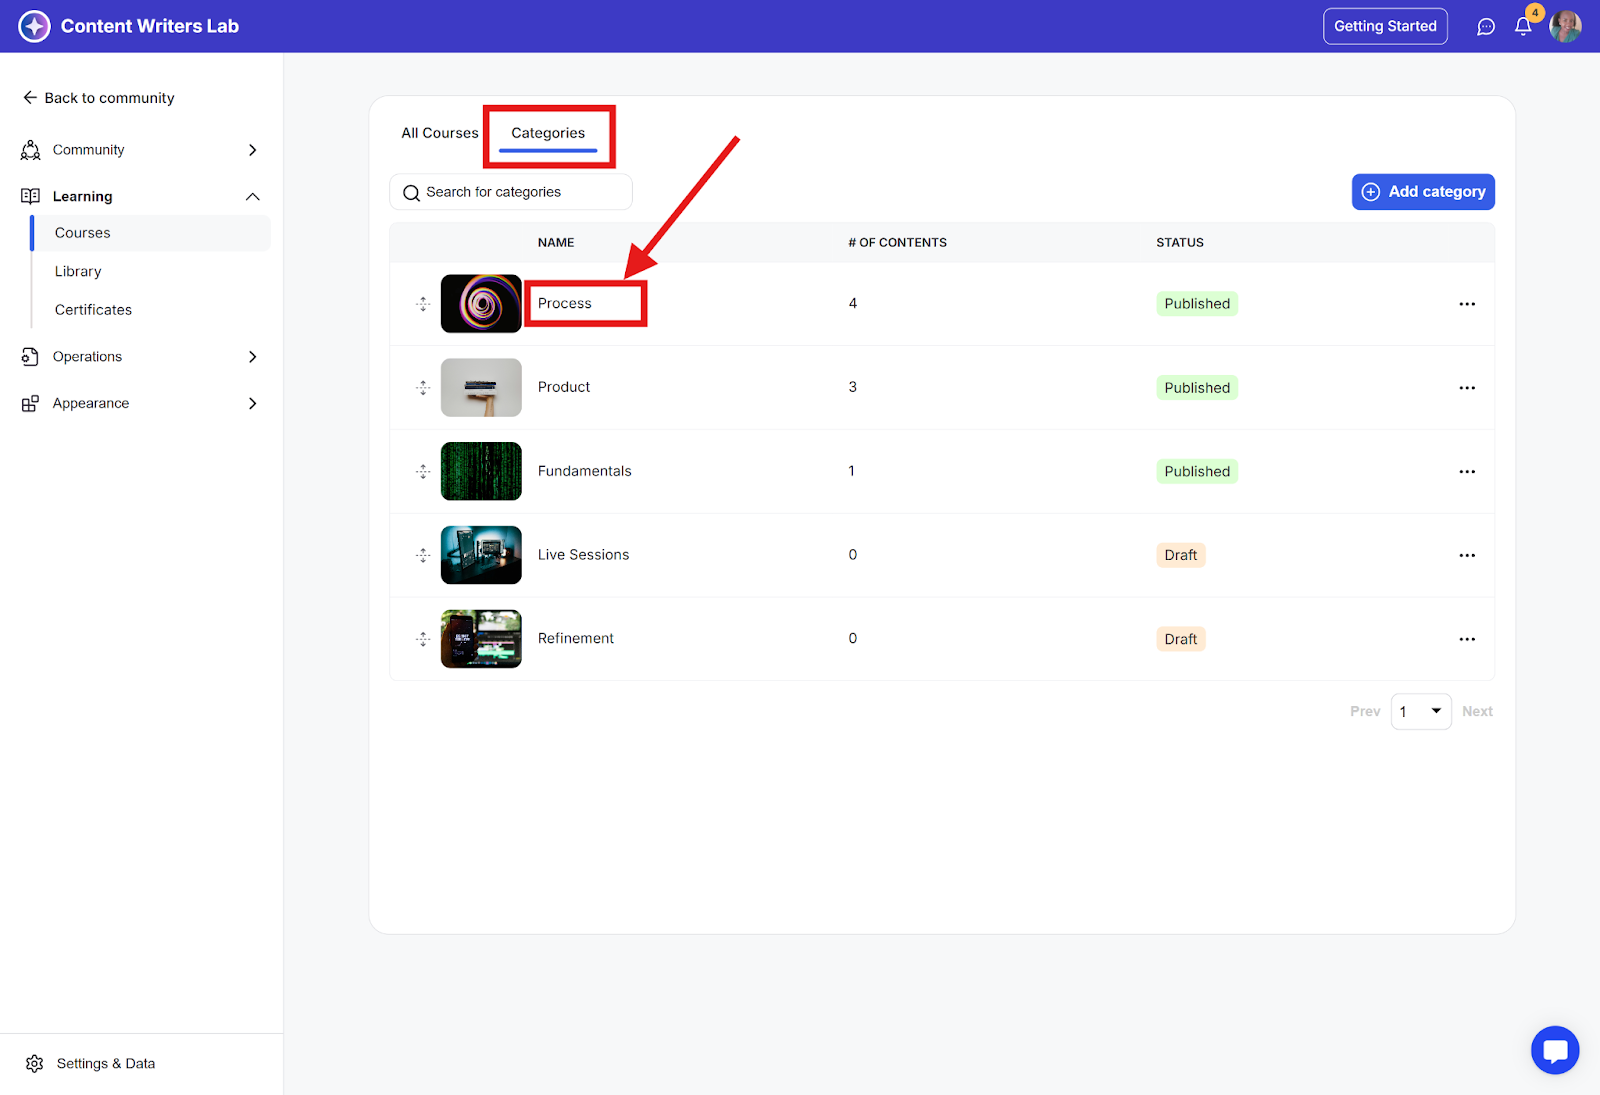
Step 1:Click the Categories tab and click the Category you wish to update.
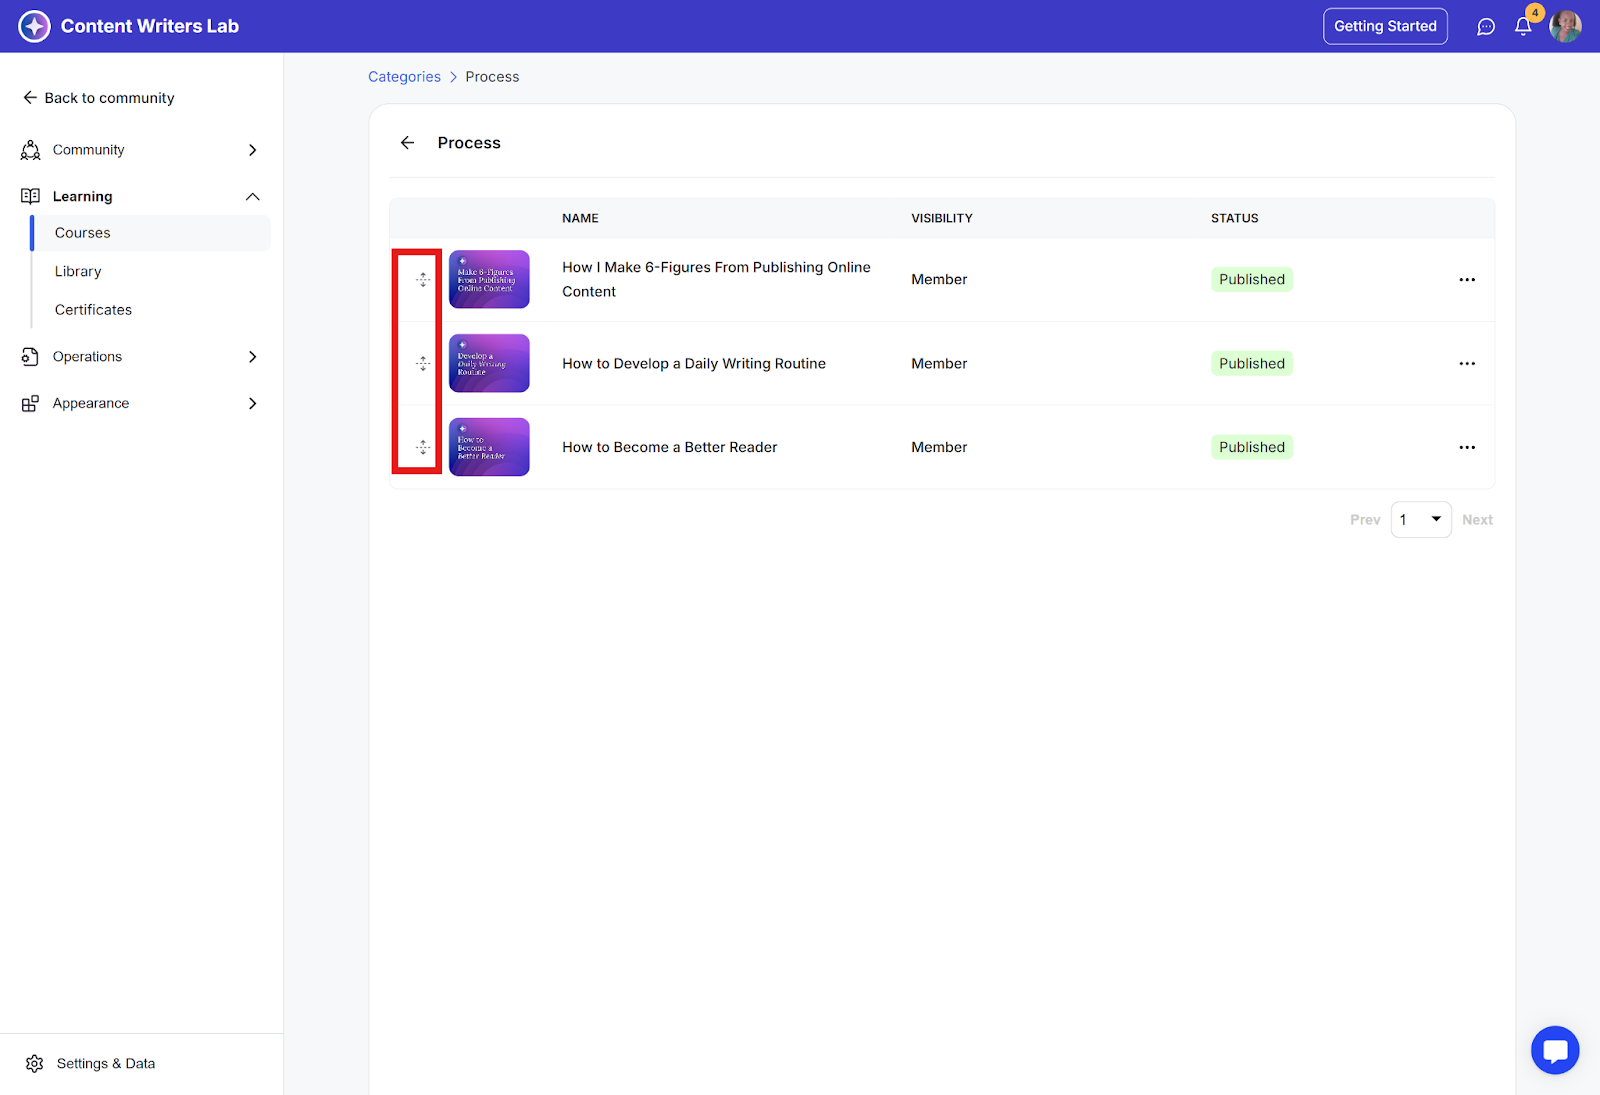
Step 2: You can use these move icons to drag and drop courses to change the order of the list. You can also use the icons to arrange the categories on the Categories tab.
Step 1: Click Courses in the left-side menu.
Step 2: Go to the All Courses tab.
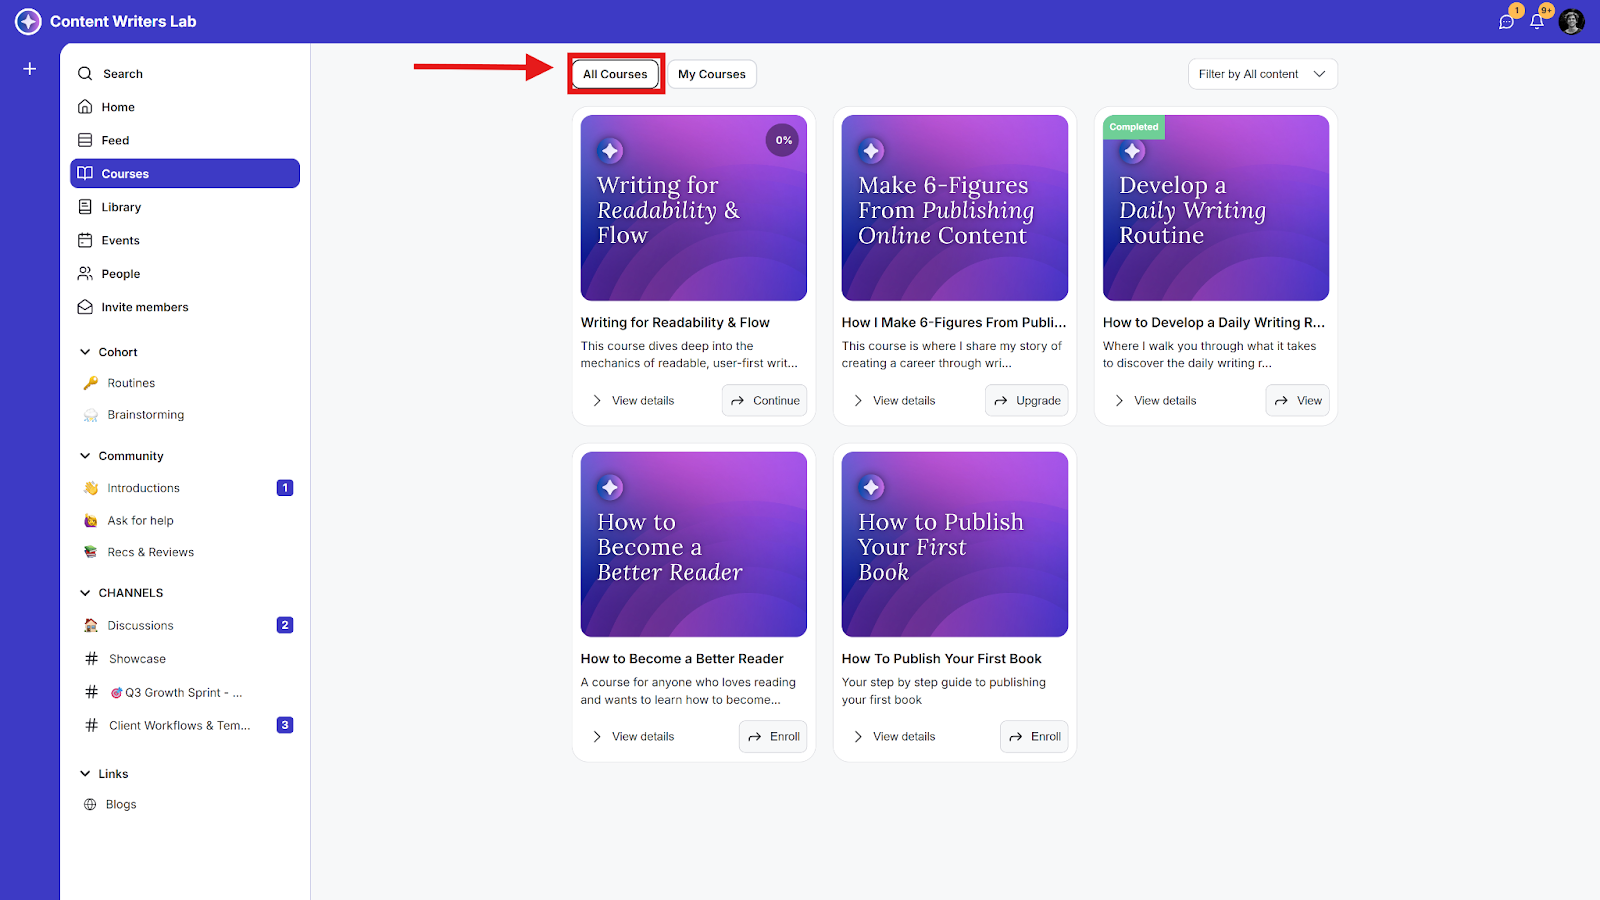
Step 3: Click Filter by All Content on the top right.
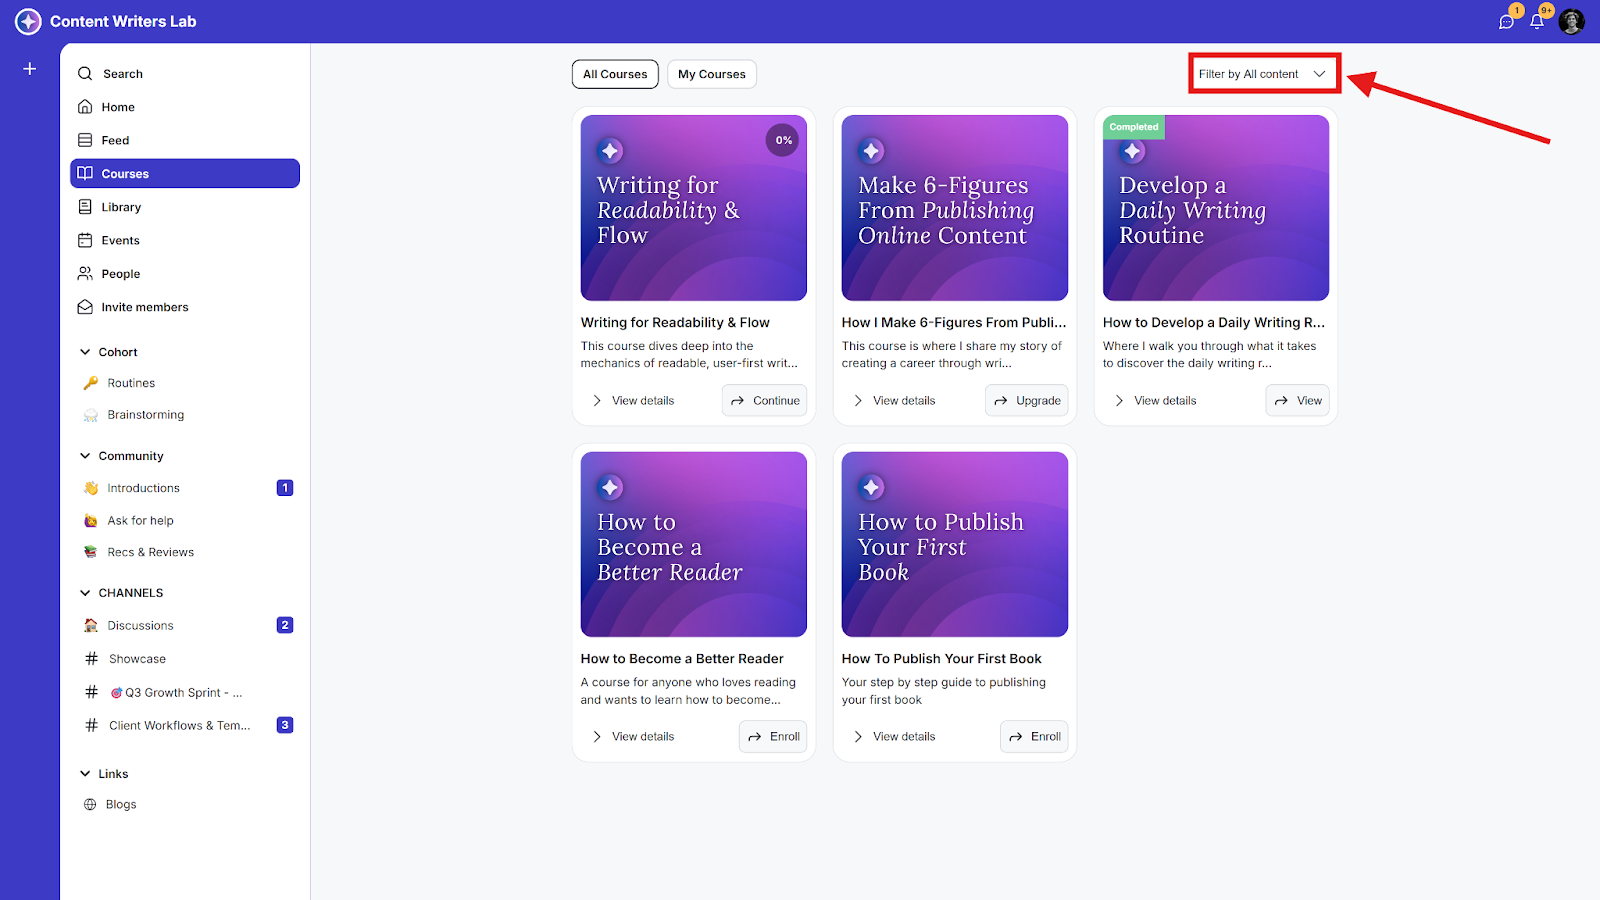
Step 4: Select Categories from the dropdown.