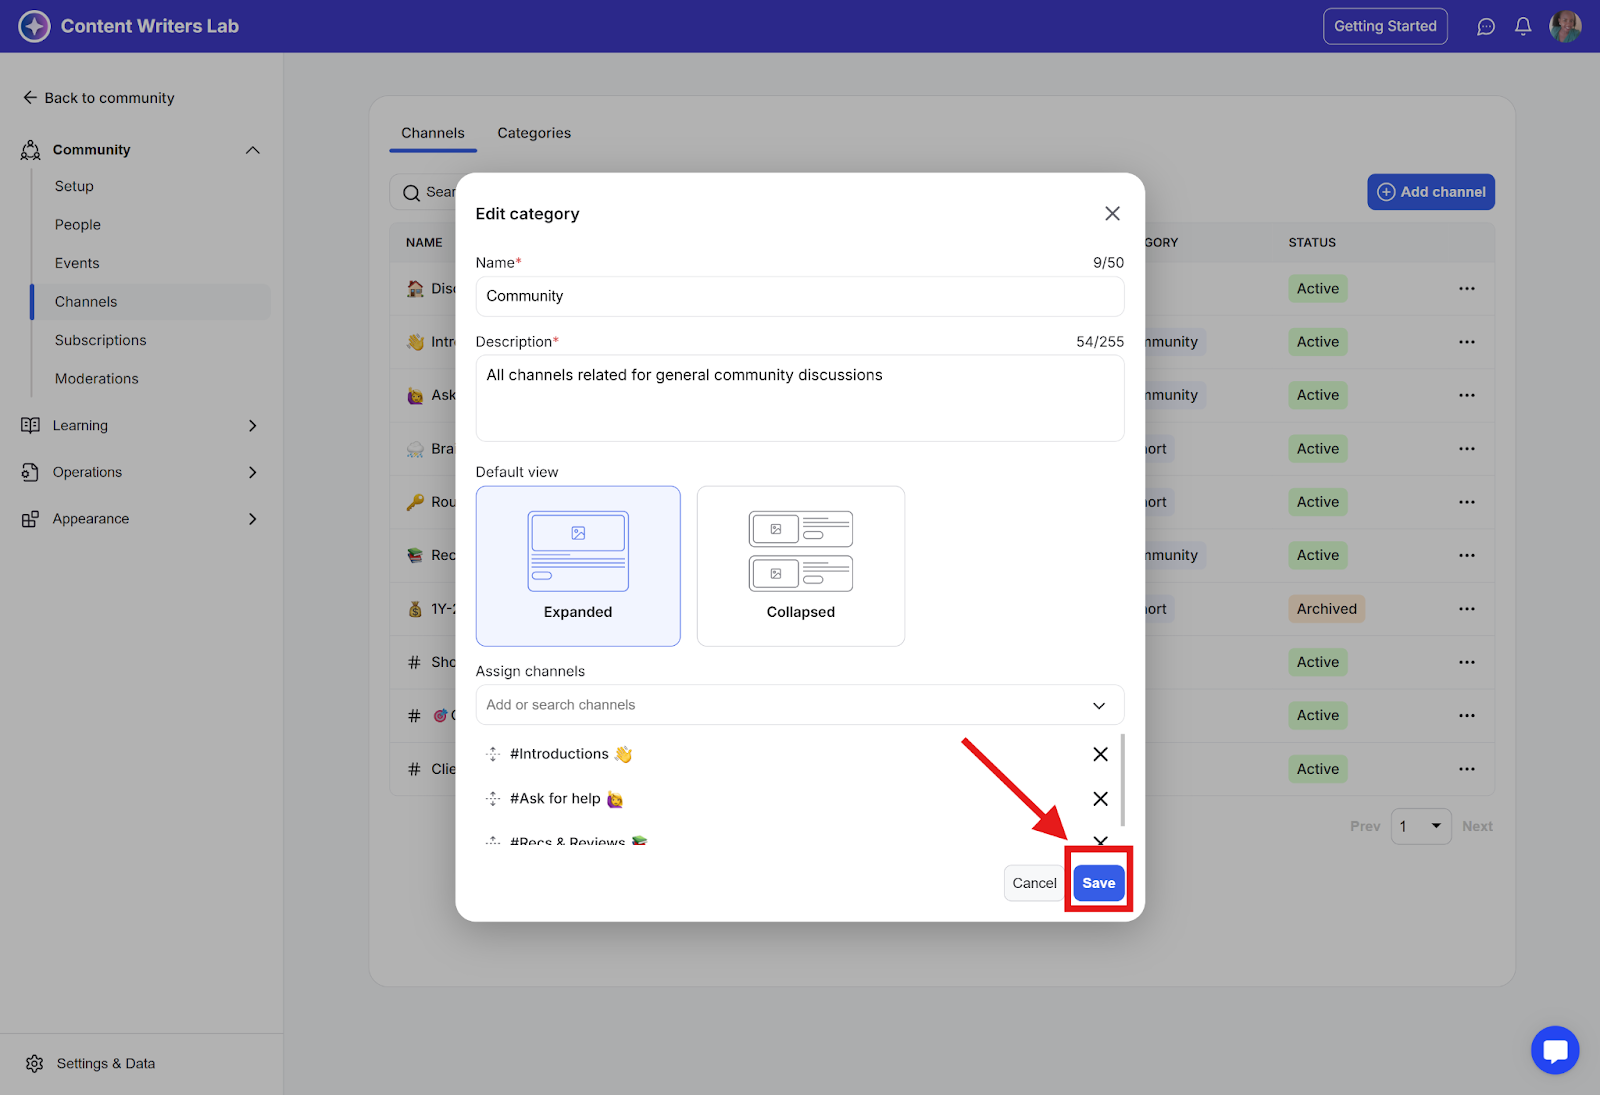
Keeping your channels organized makes navigation easier and helps your team quickly find what they need. Below are two simple ways to structure your channels using Categories and drag-and-drop ordering.
1. Group Your Channels by Assigning Them to Categories
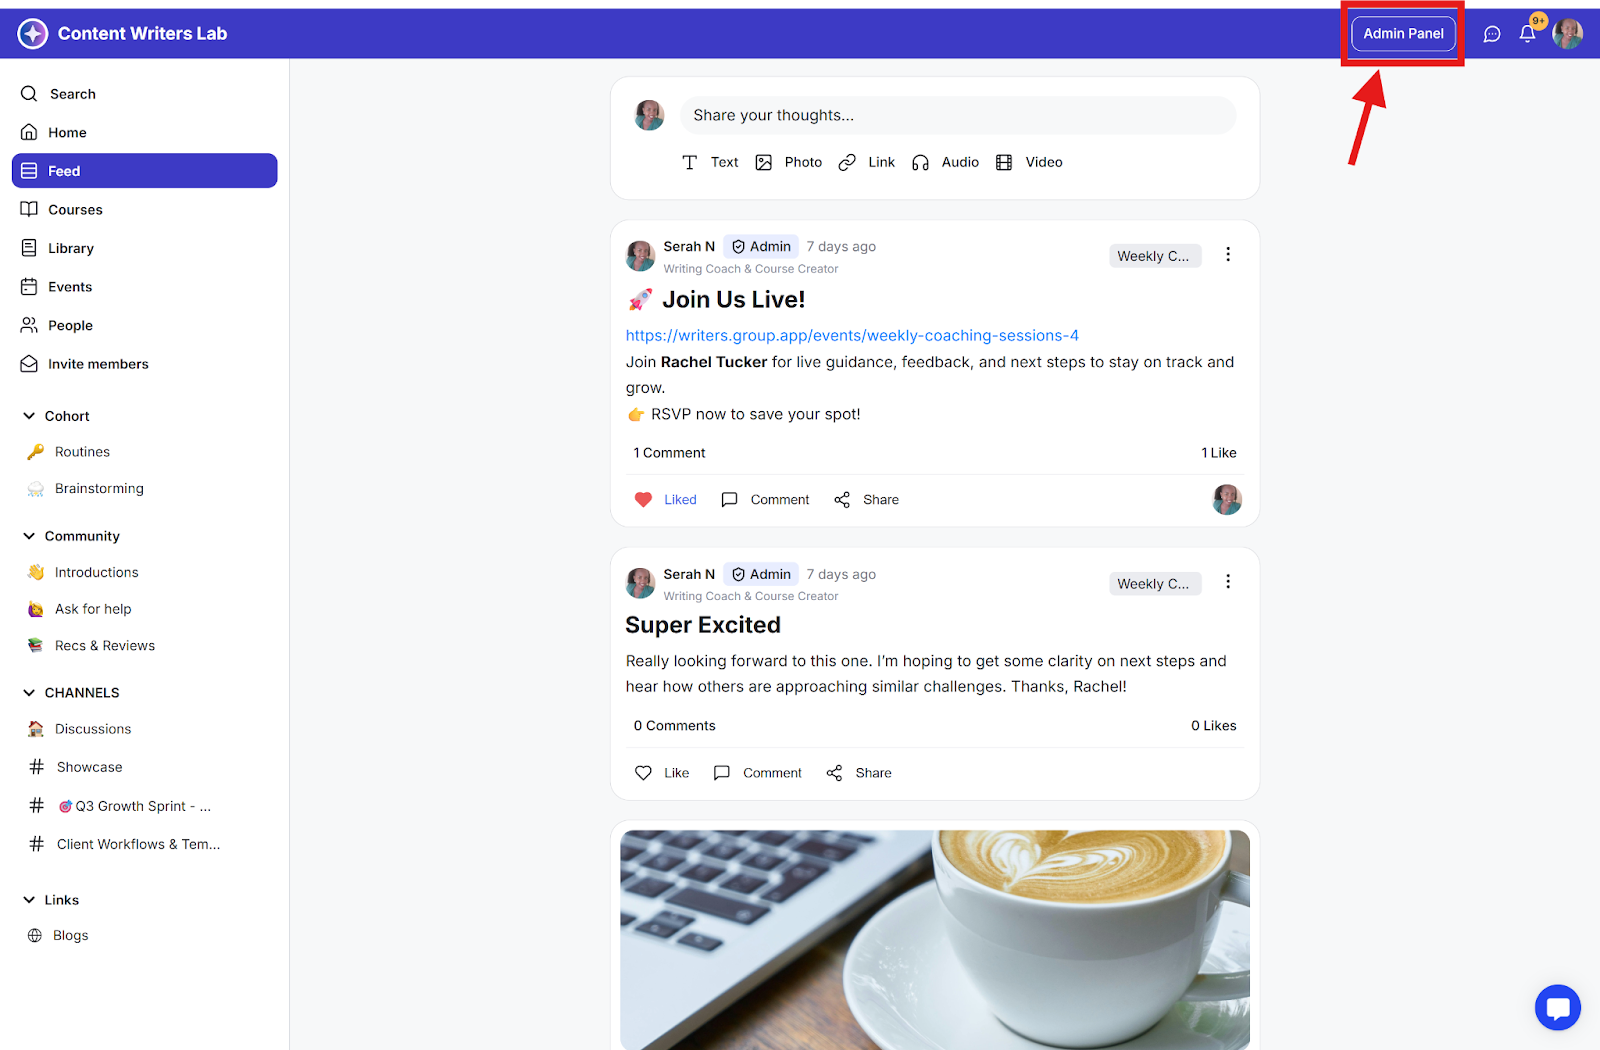
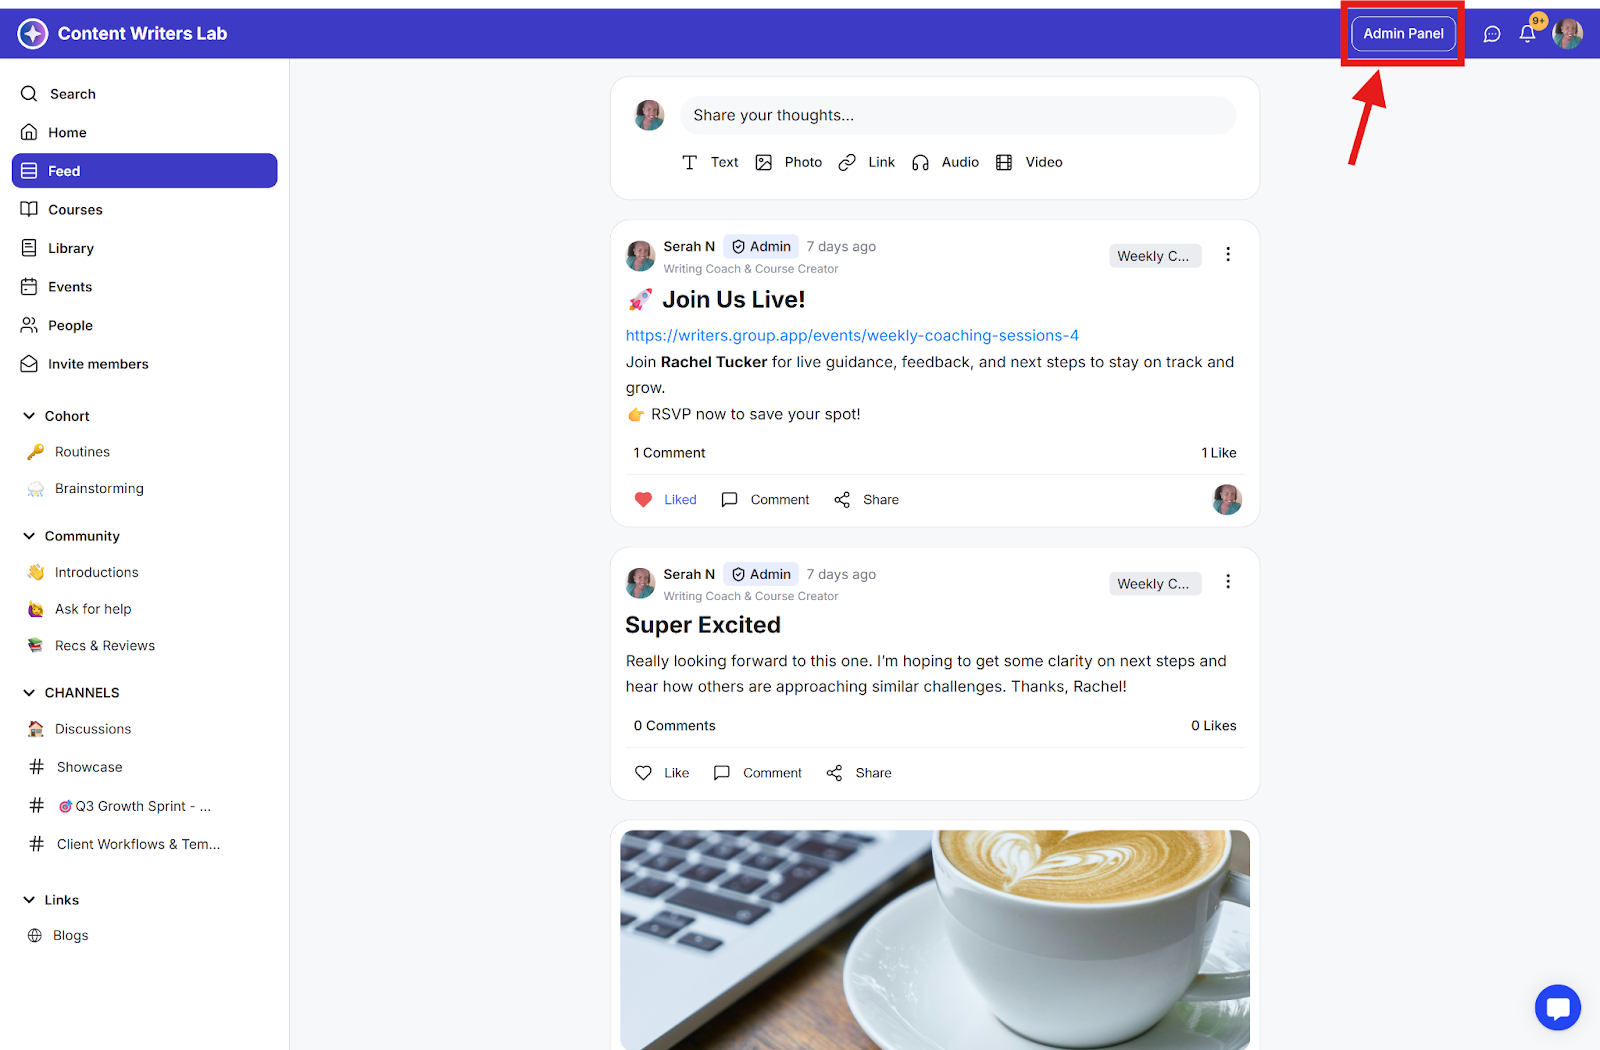
Step 1: Go to the Admin Panel on the top right of the dashboard.
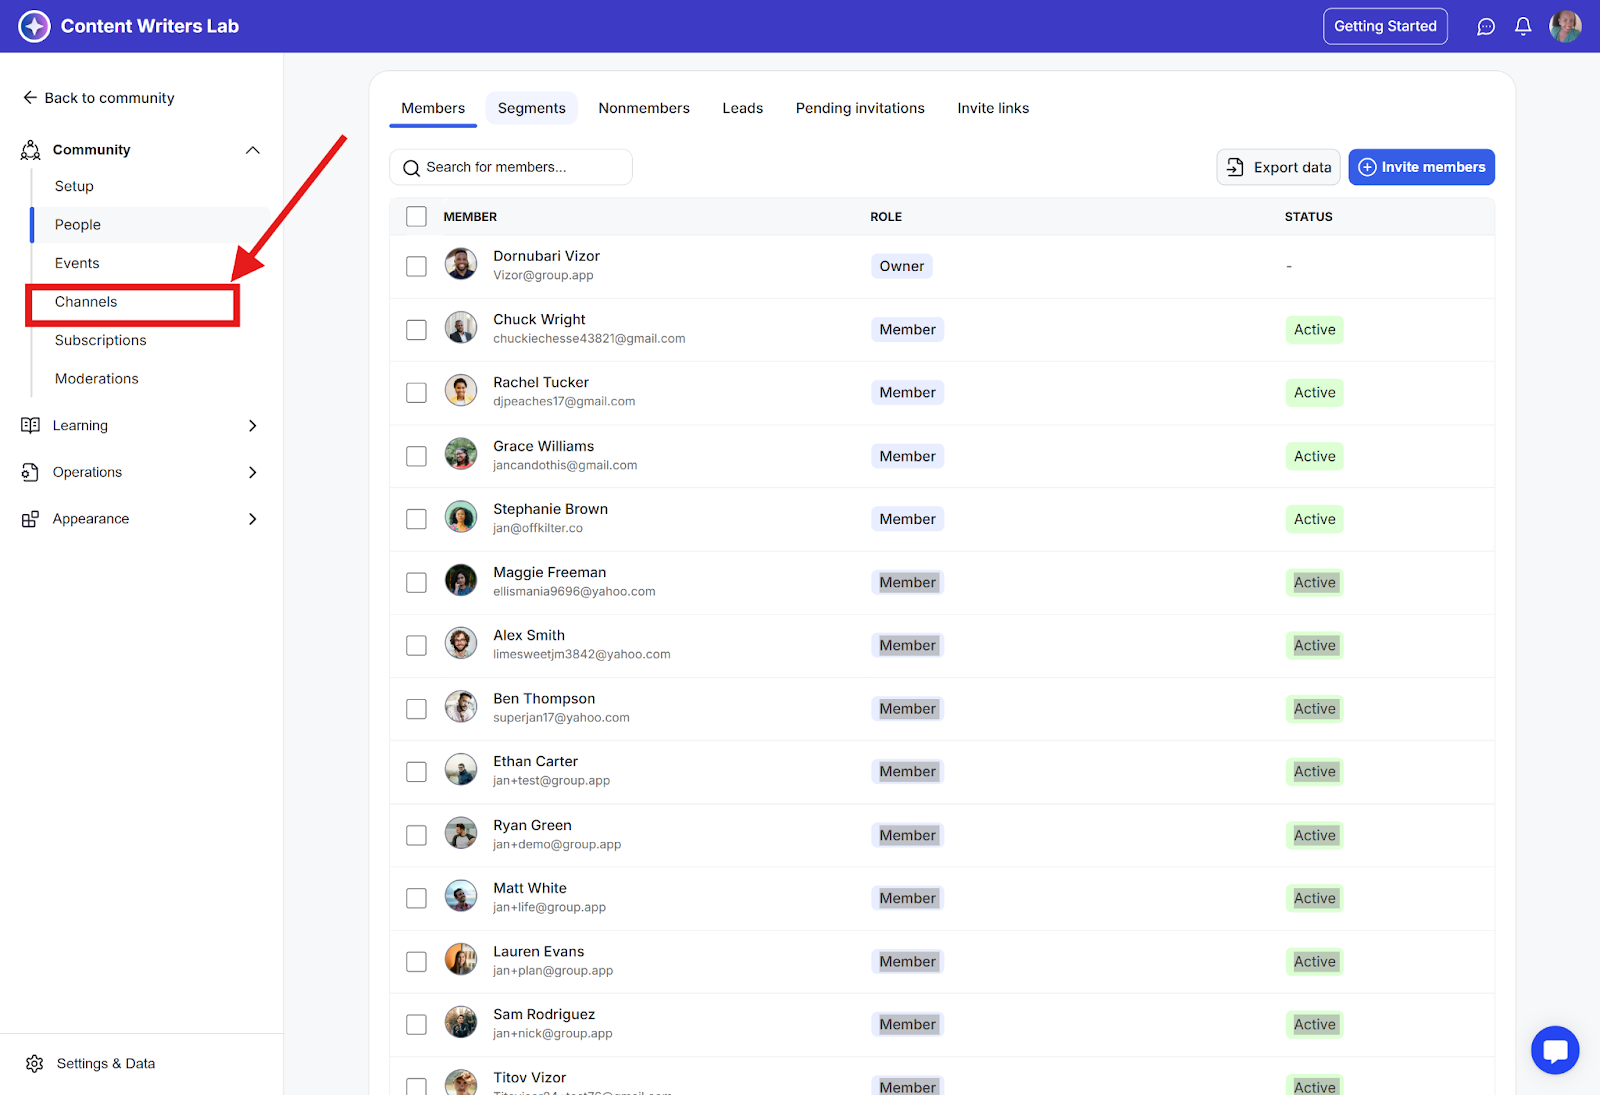
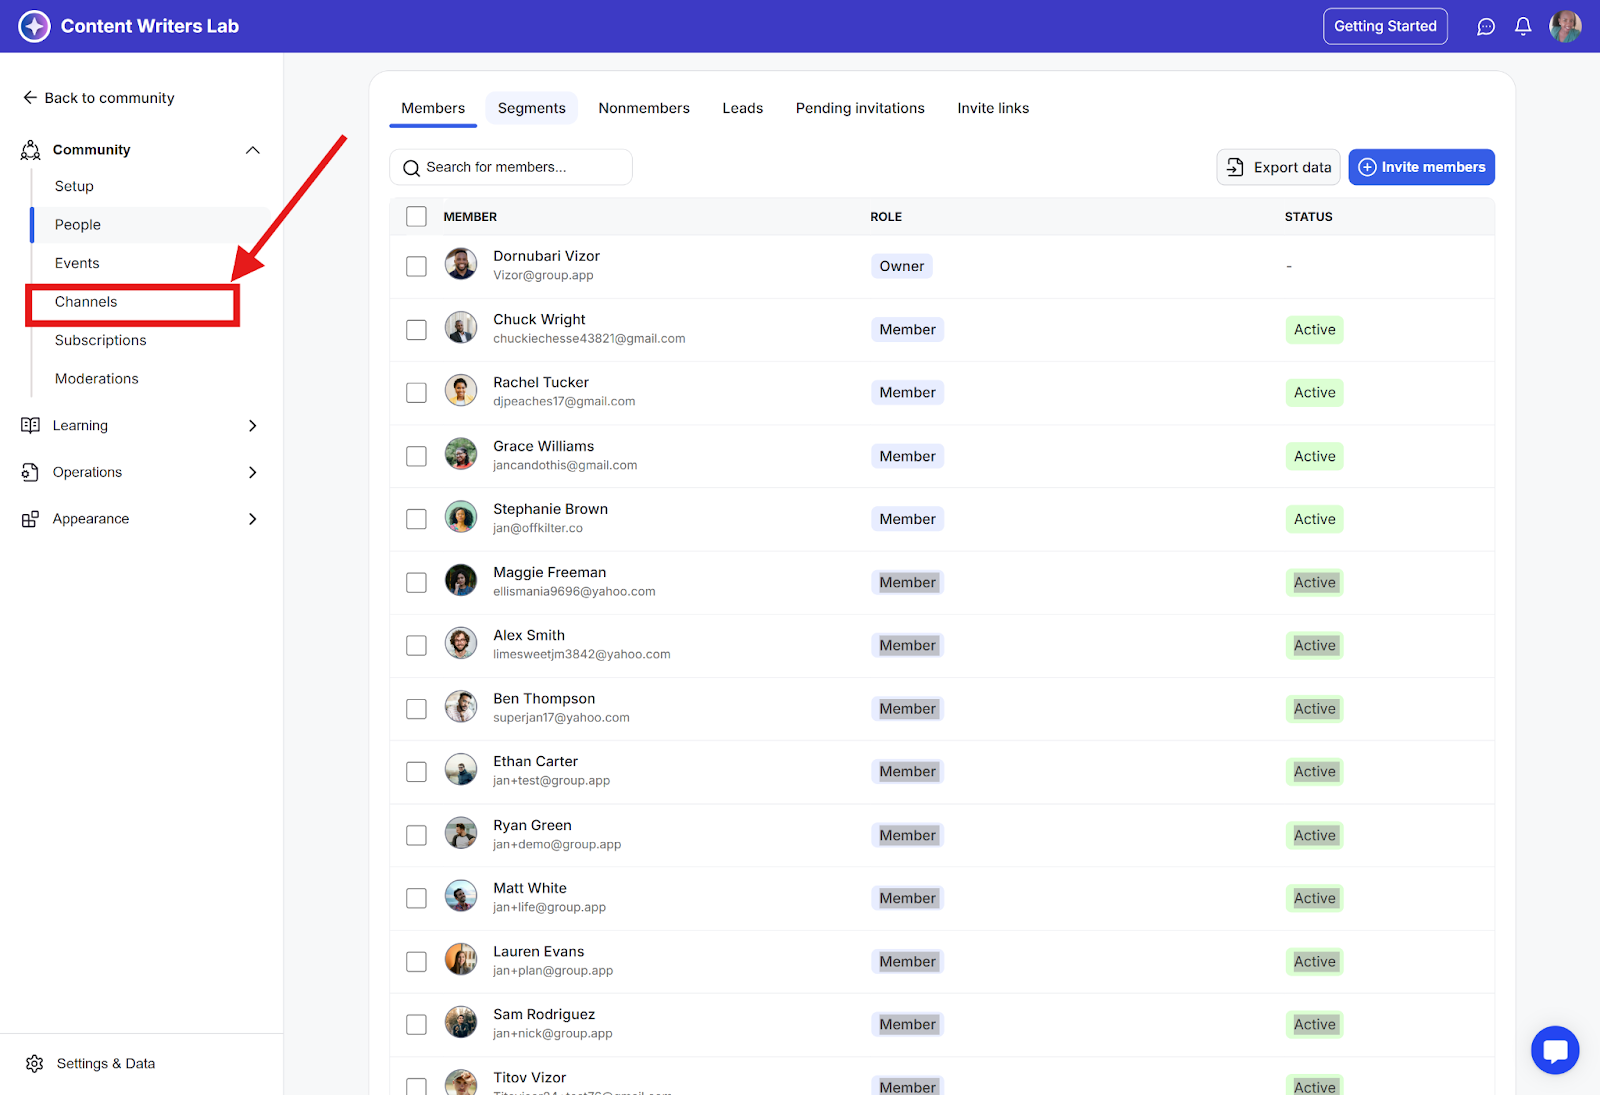
Step 2: Navigate to Channels.
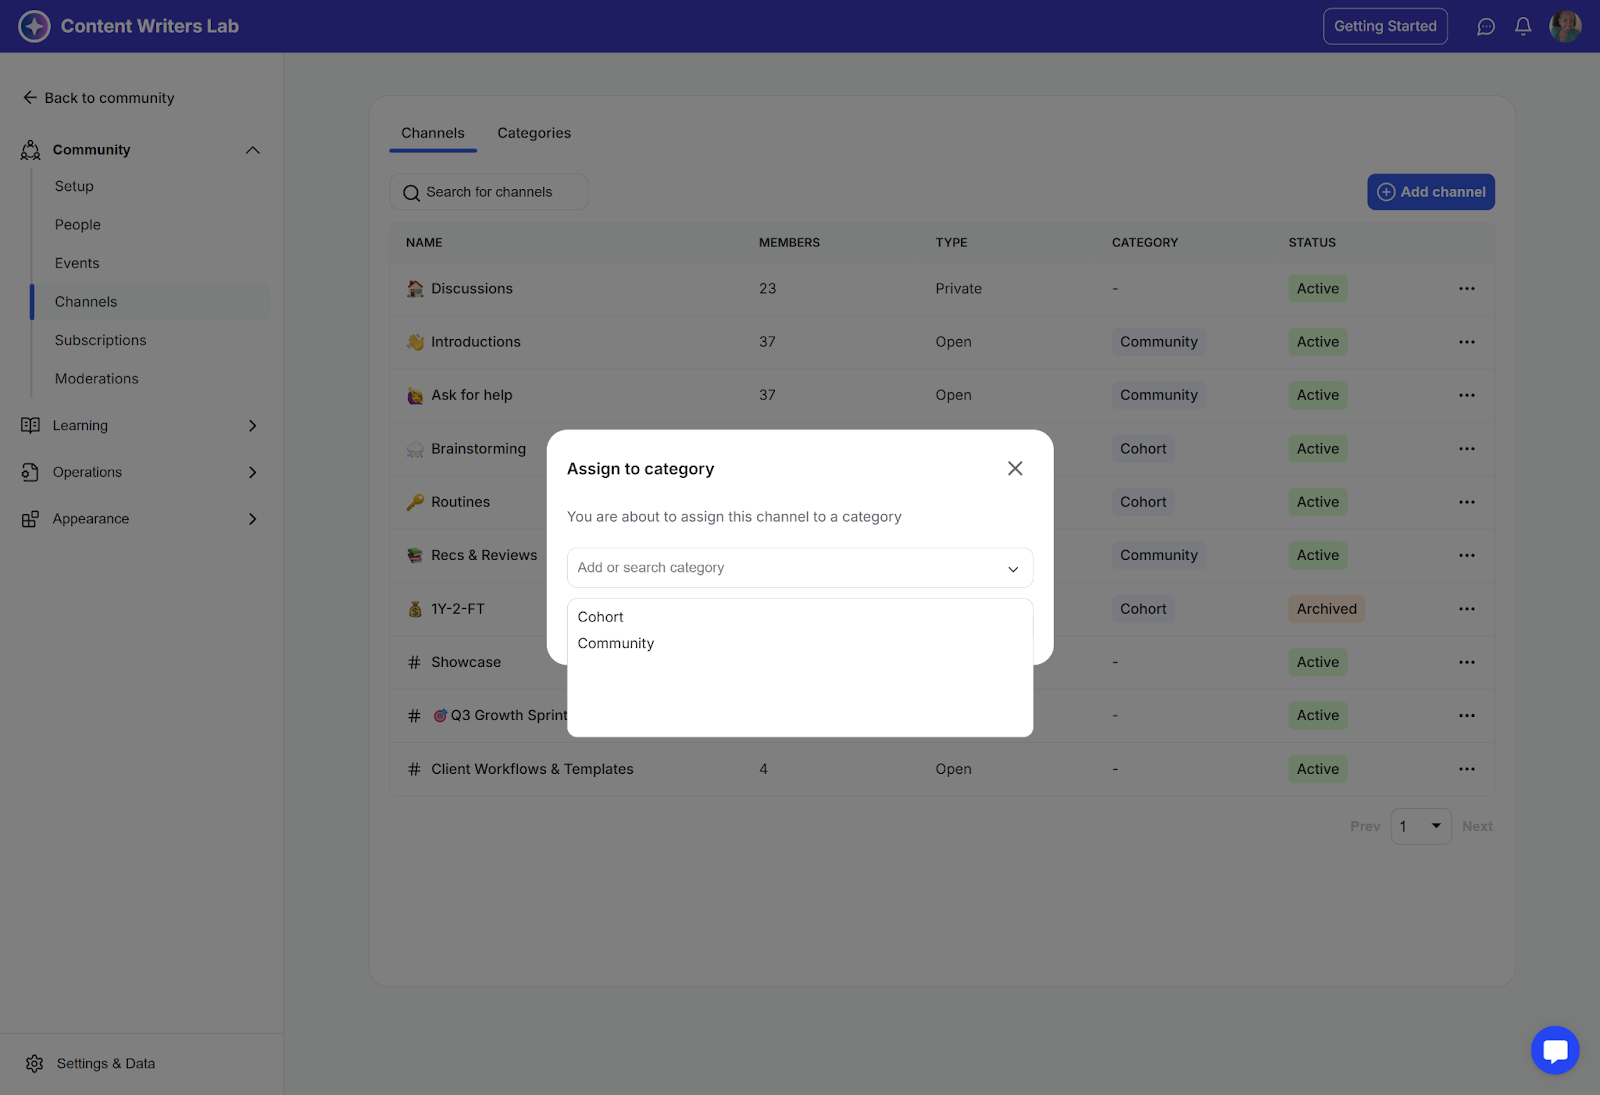
Step 3: Find the channel you want to assign to a category and click the three-dot Icon. Select Assign to Category.
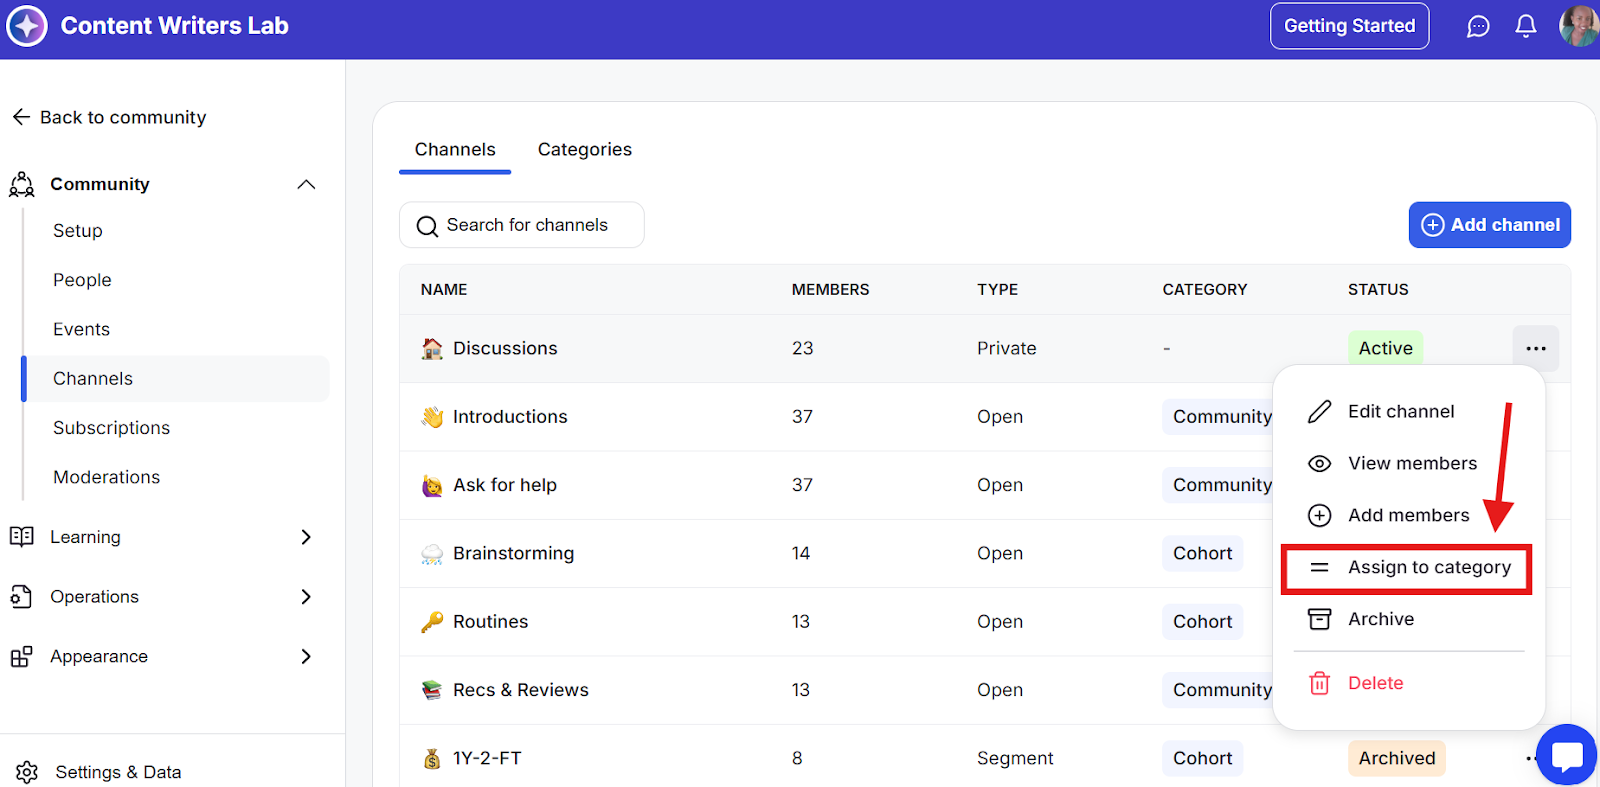
Step 4: Once you click Assign to Category, a drop-down menu will appear. Select the category you want to assign the channel to.
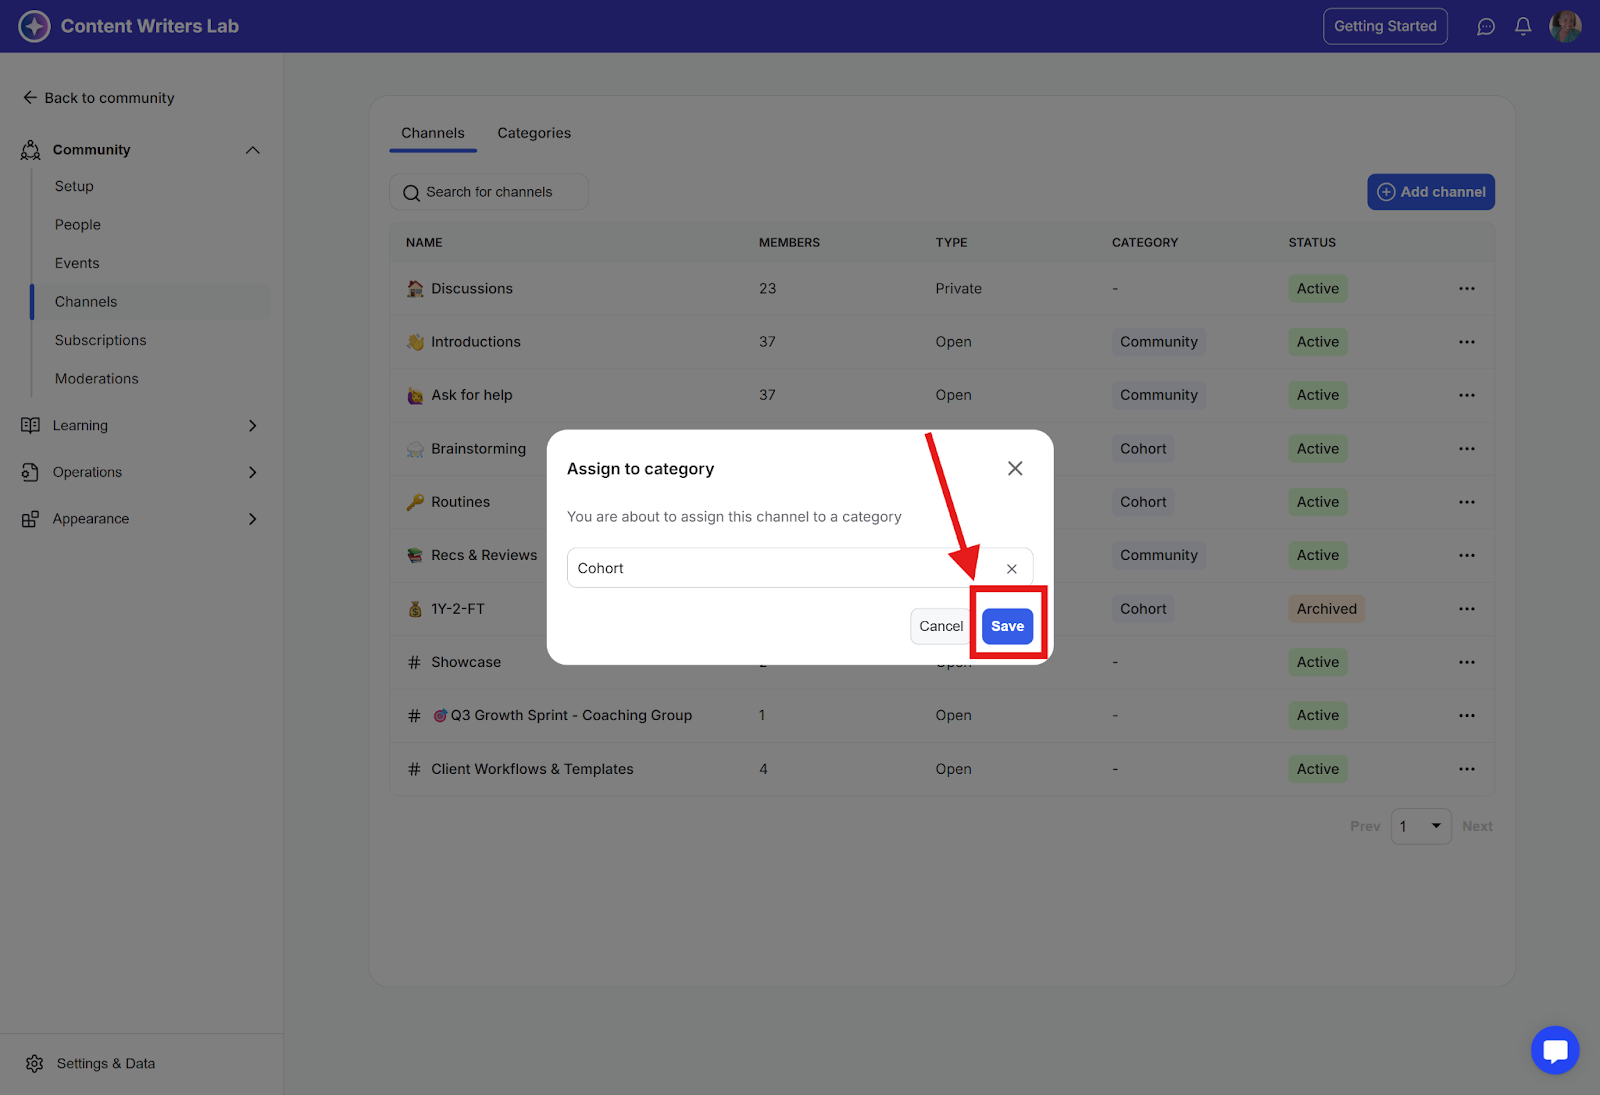
Step 5: Choose a category and click Save
2. Rearrange Your Channels Within a Category
Step 1: Go to the Admin Panel on the top right.
Step 2: Navigate to Channels.
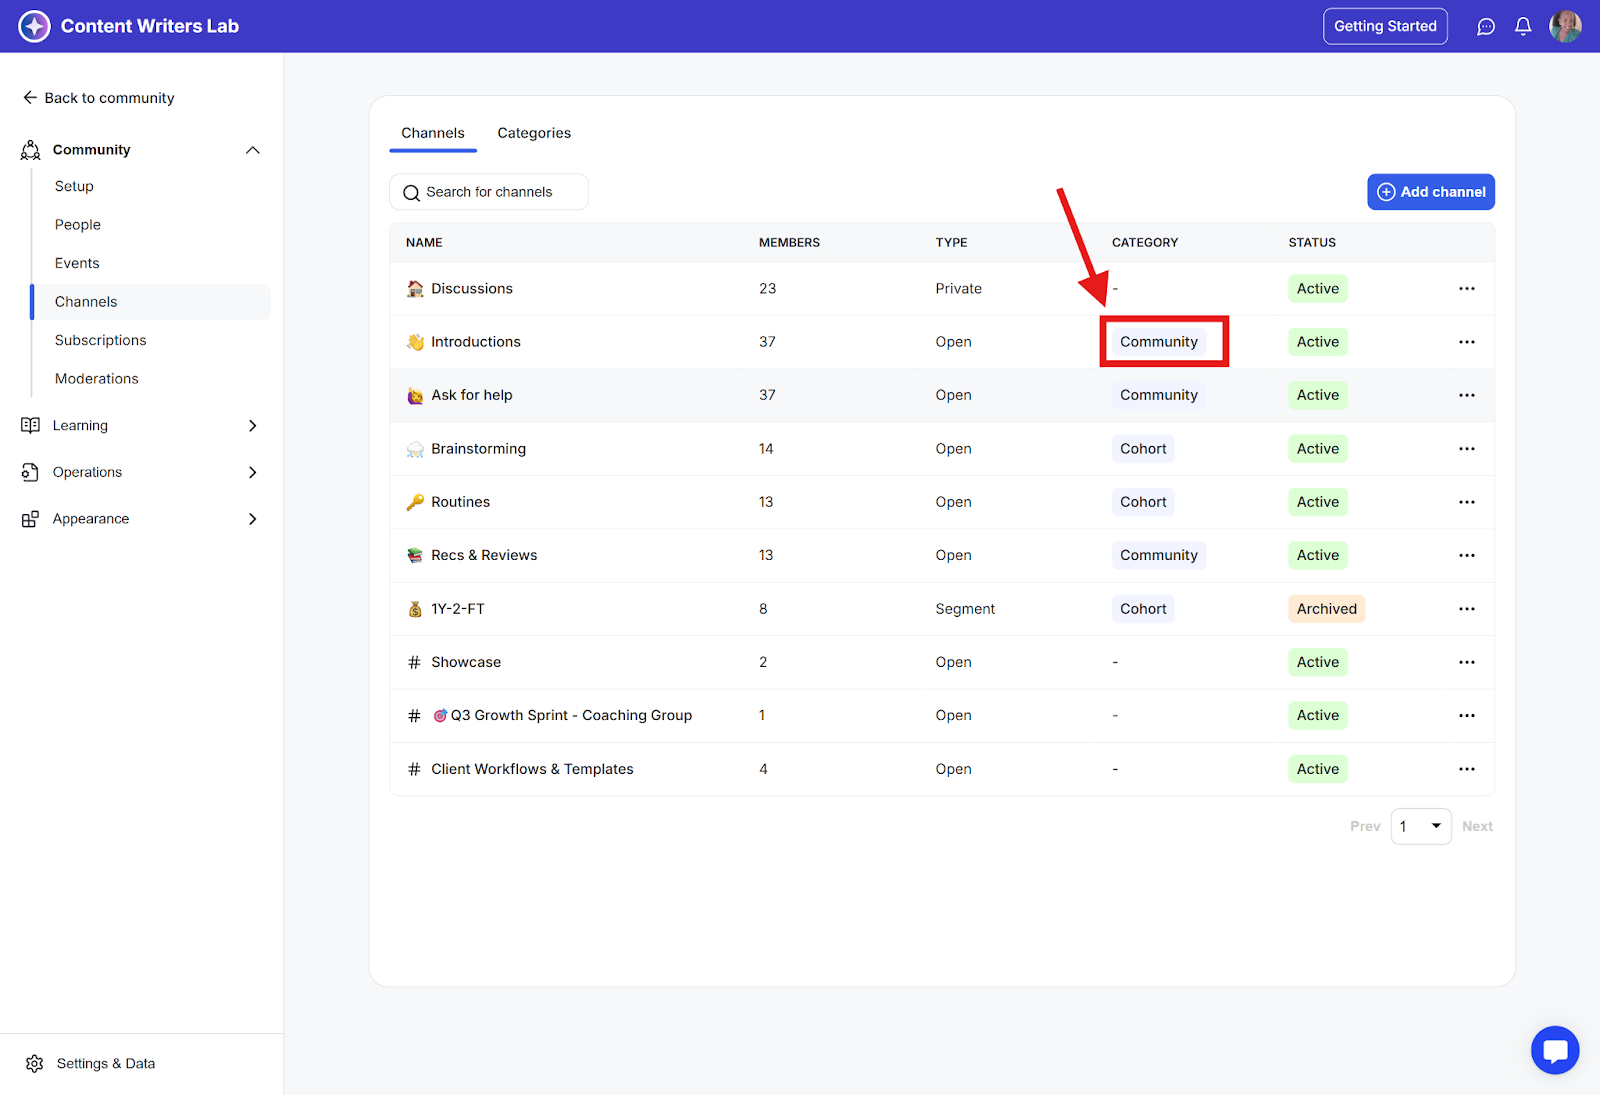
Step 3: In the Category column, click the category name you want to rearrange.
Step 4: Scroll down to view the channels in that category and use the move icons to reorder channels in the category.
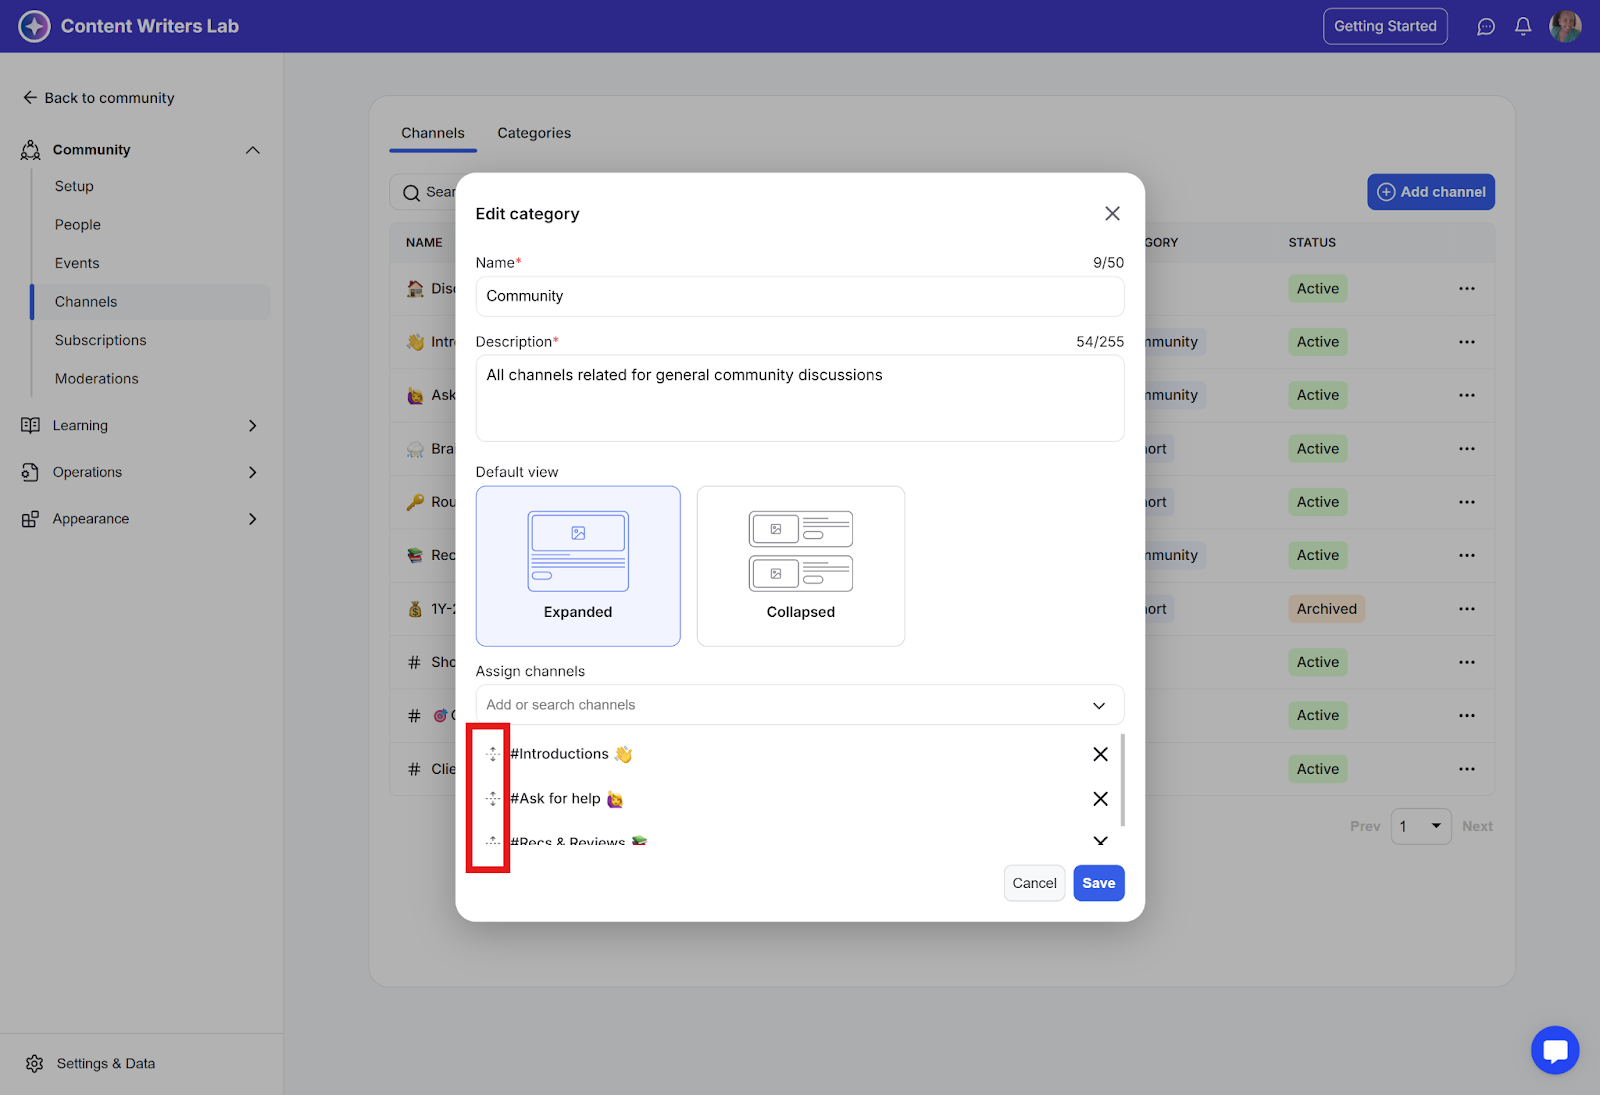
Step 5: Click Save to confirm and update the channel order.