Embedding content means adding media or tools from another platform directly into your Content Library using embed code or a supported link.
Instead of uploading a file, you paste the embed code, and the content displays inside your library item. This allows you to include interactive tools, videos, forms, or other external resources without hosting them directly on the platform.
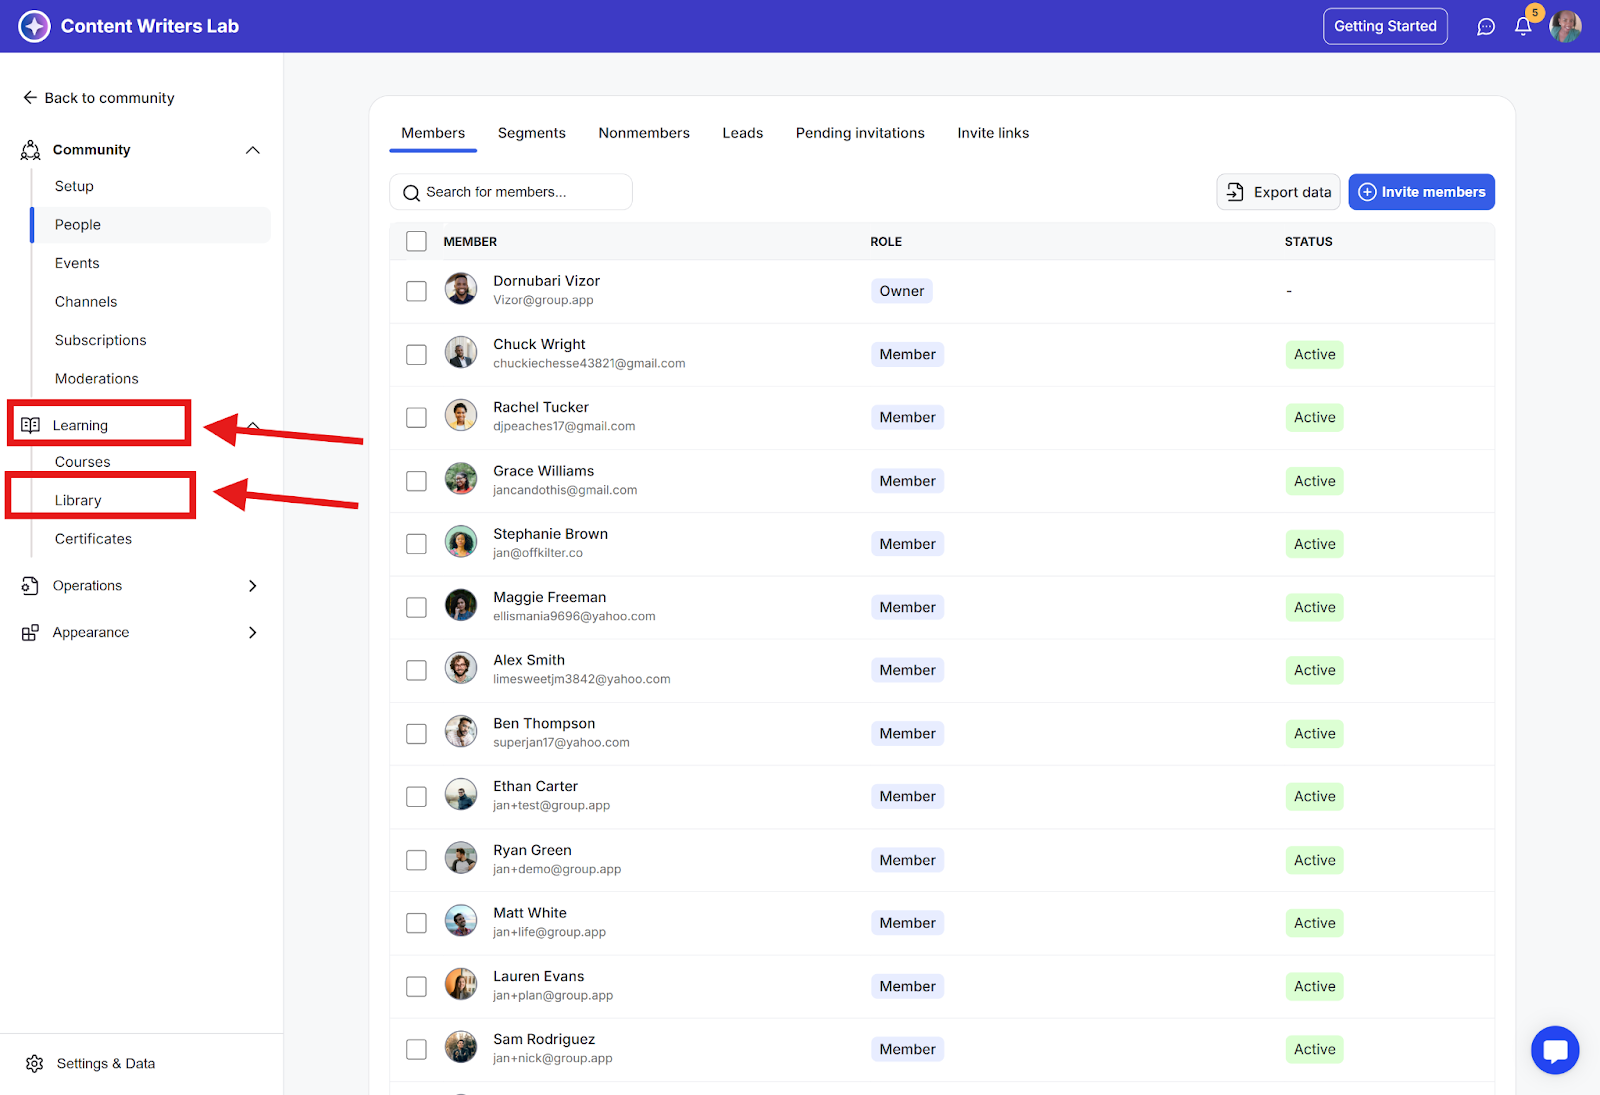
Step 1:In your Admin Panel, go to Learning and select Library.
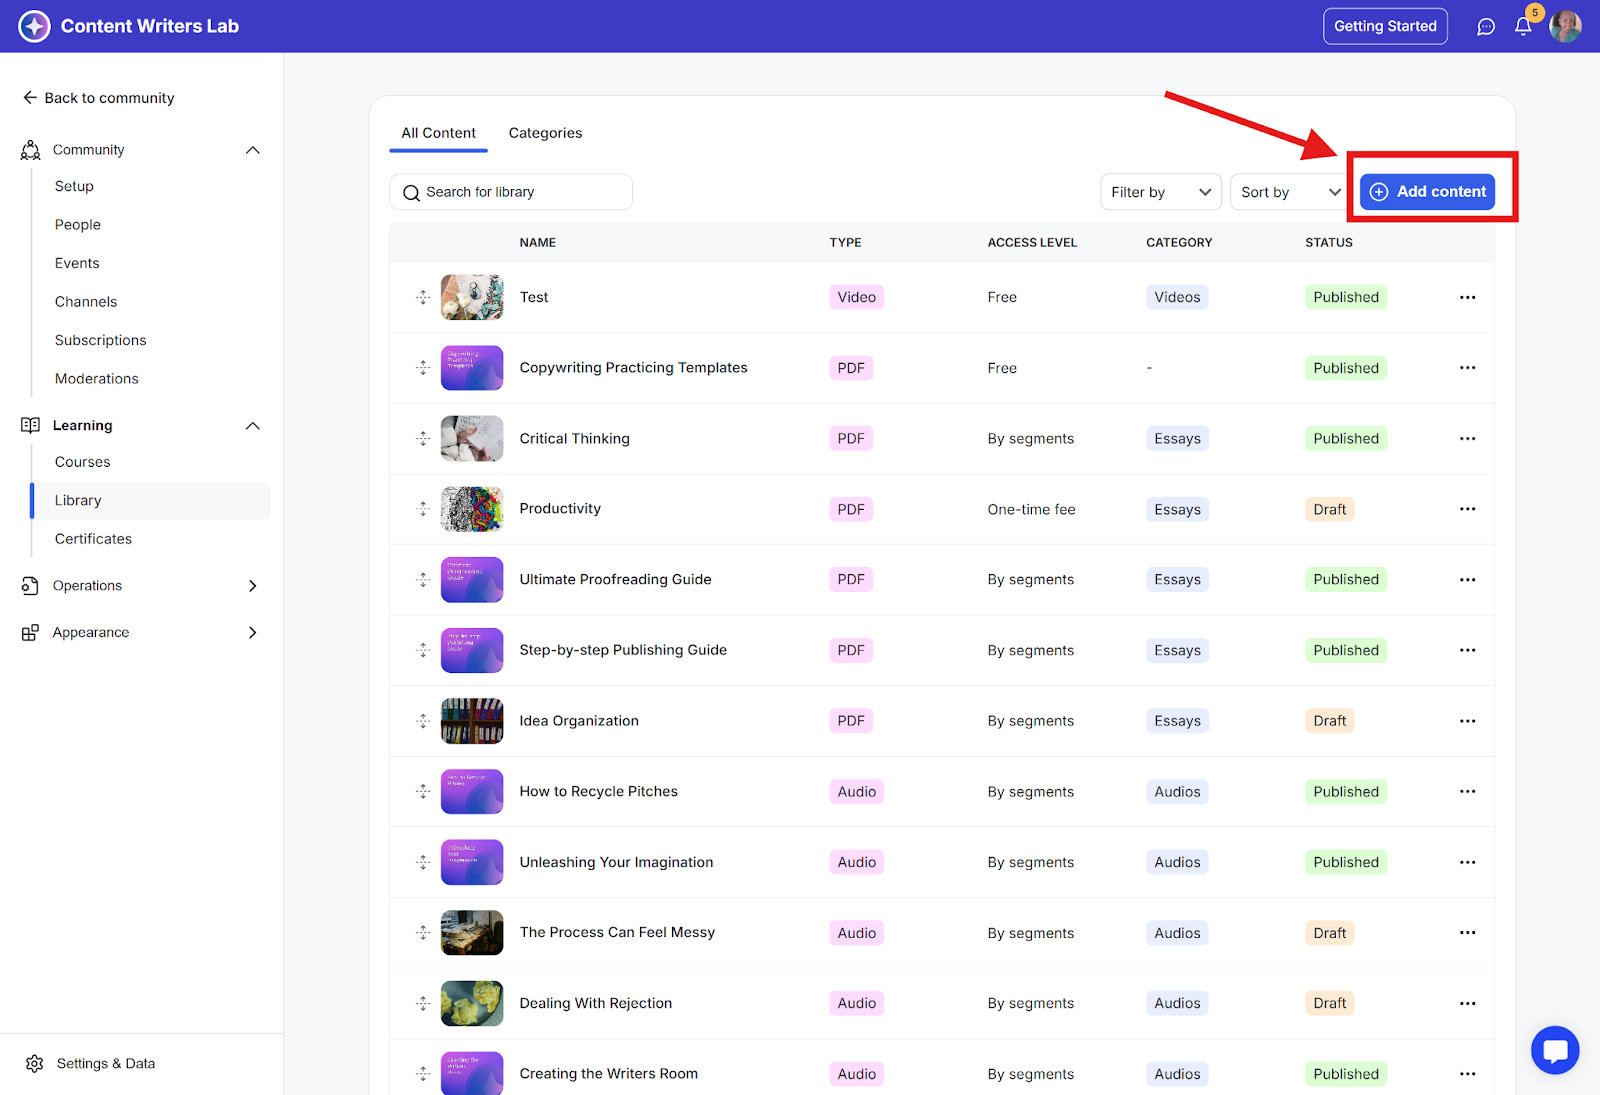
Step 2: Click the Add Content button.
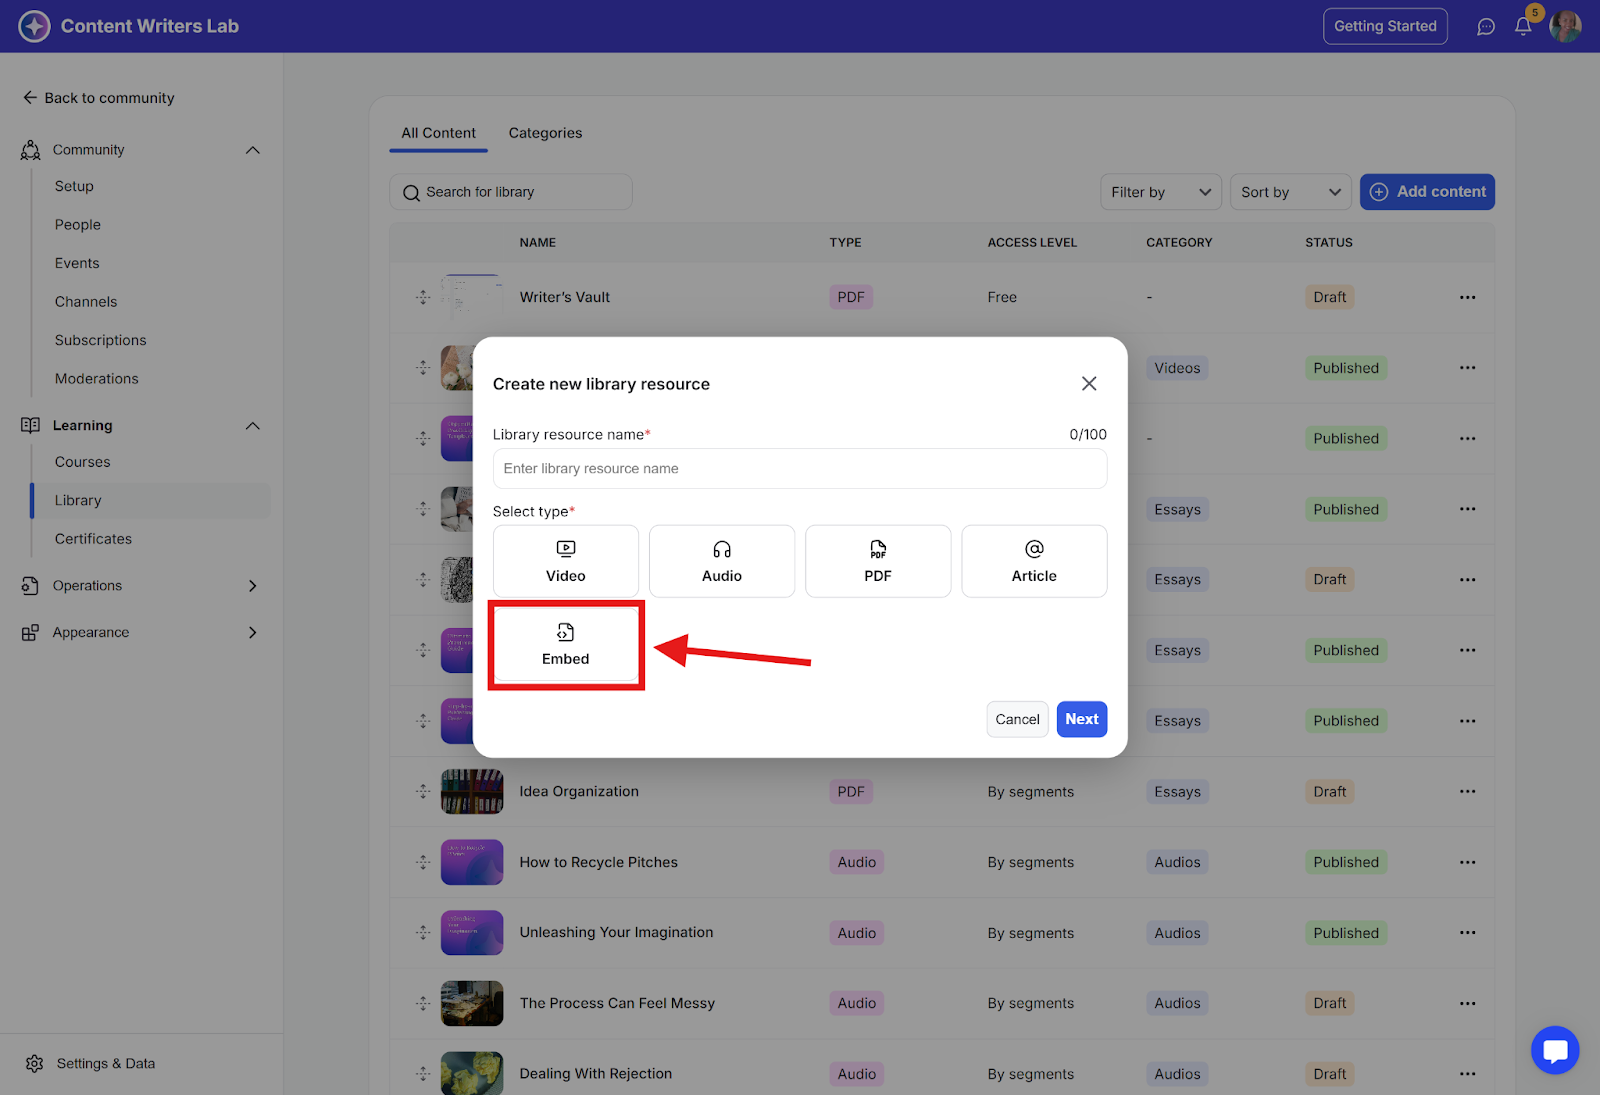
Step 3: In the content type pop-up, select Embed.
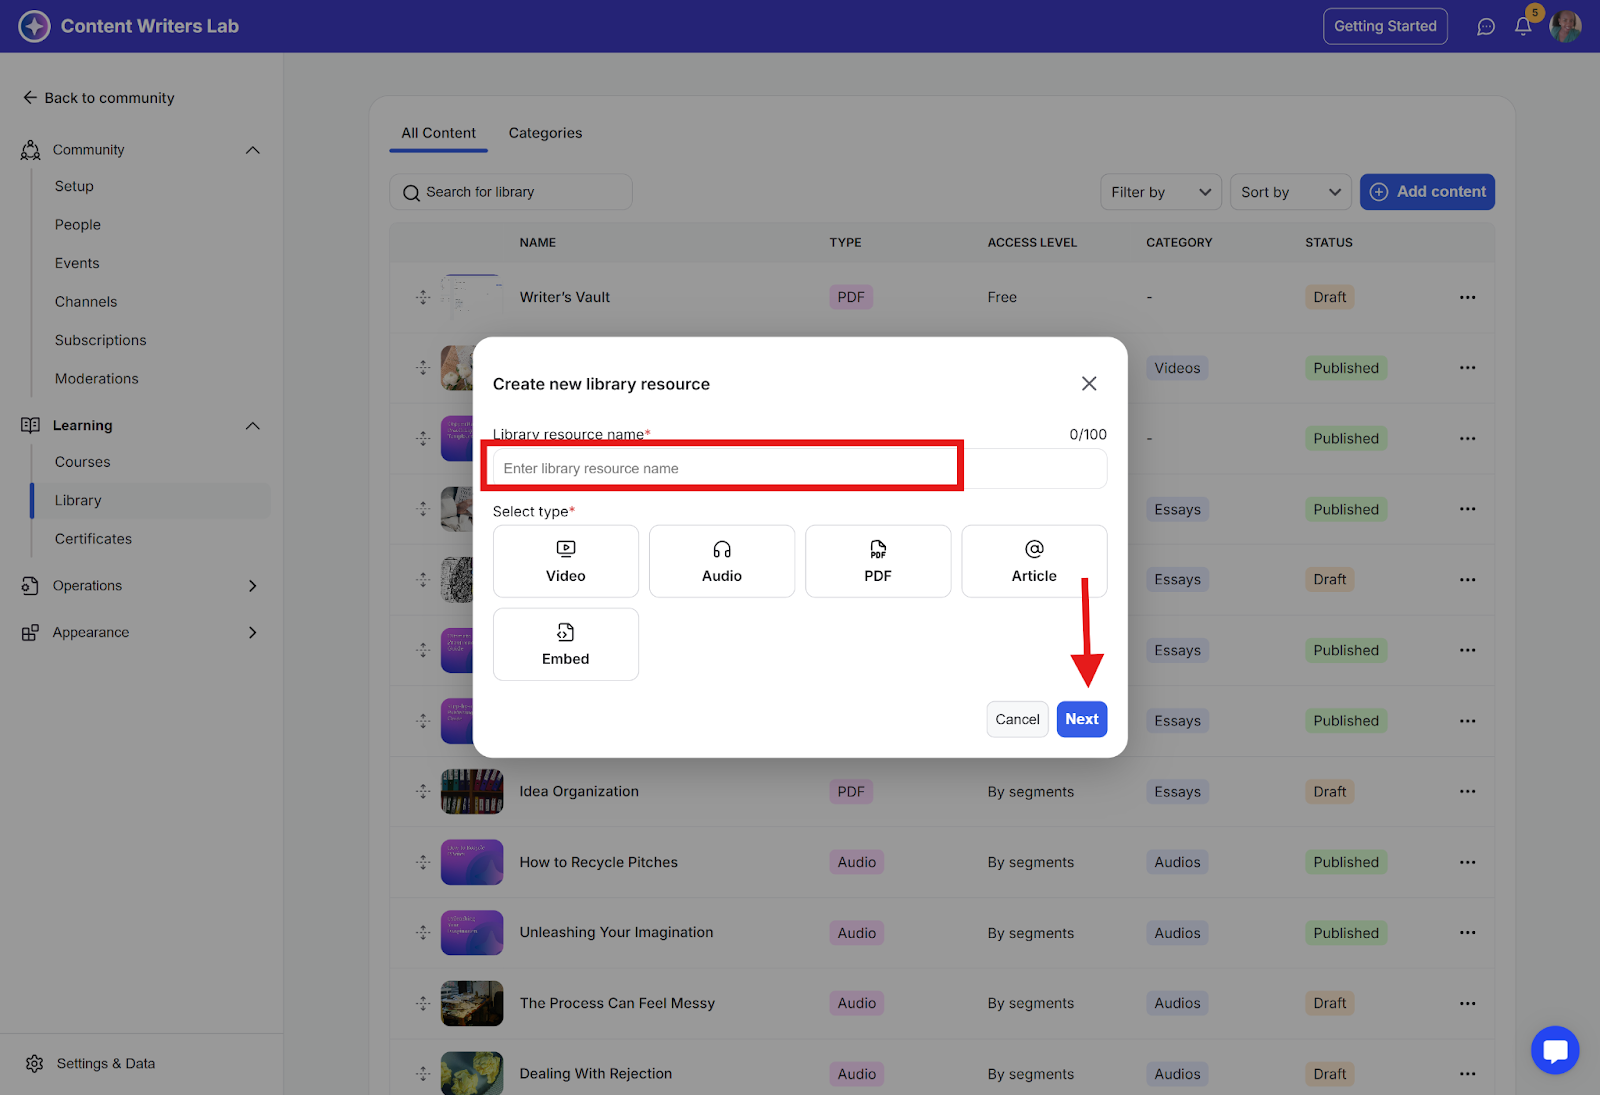
Step 4: Enter a Name for your embedded content and click Save to proceed.
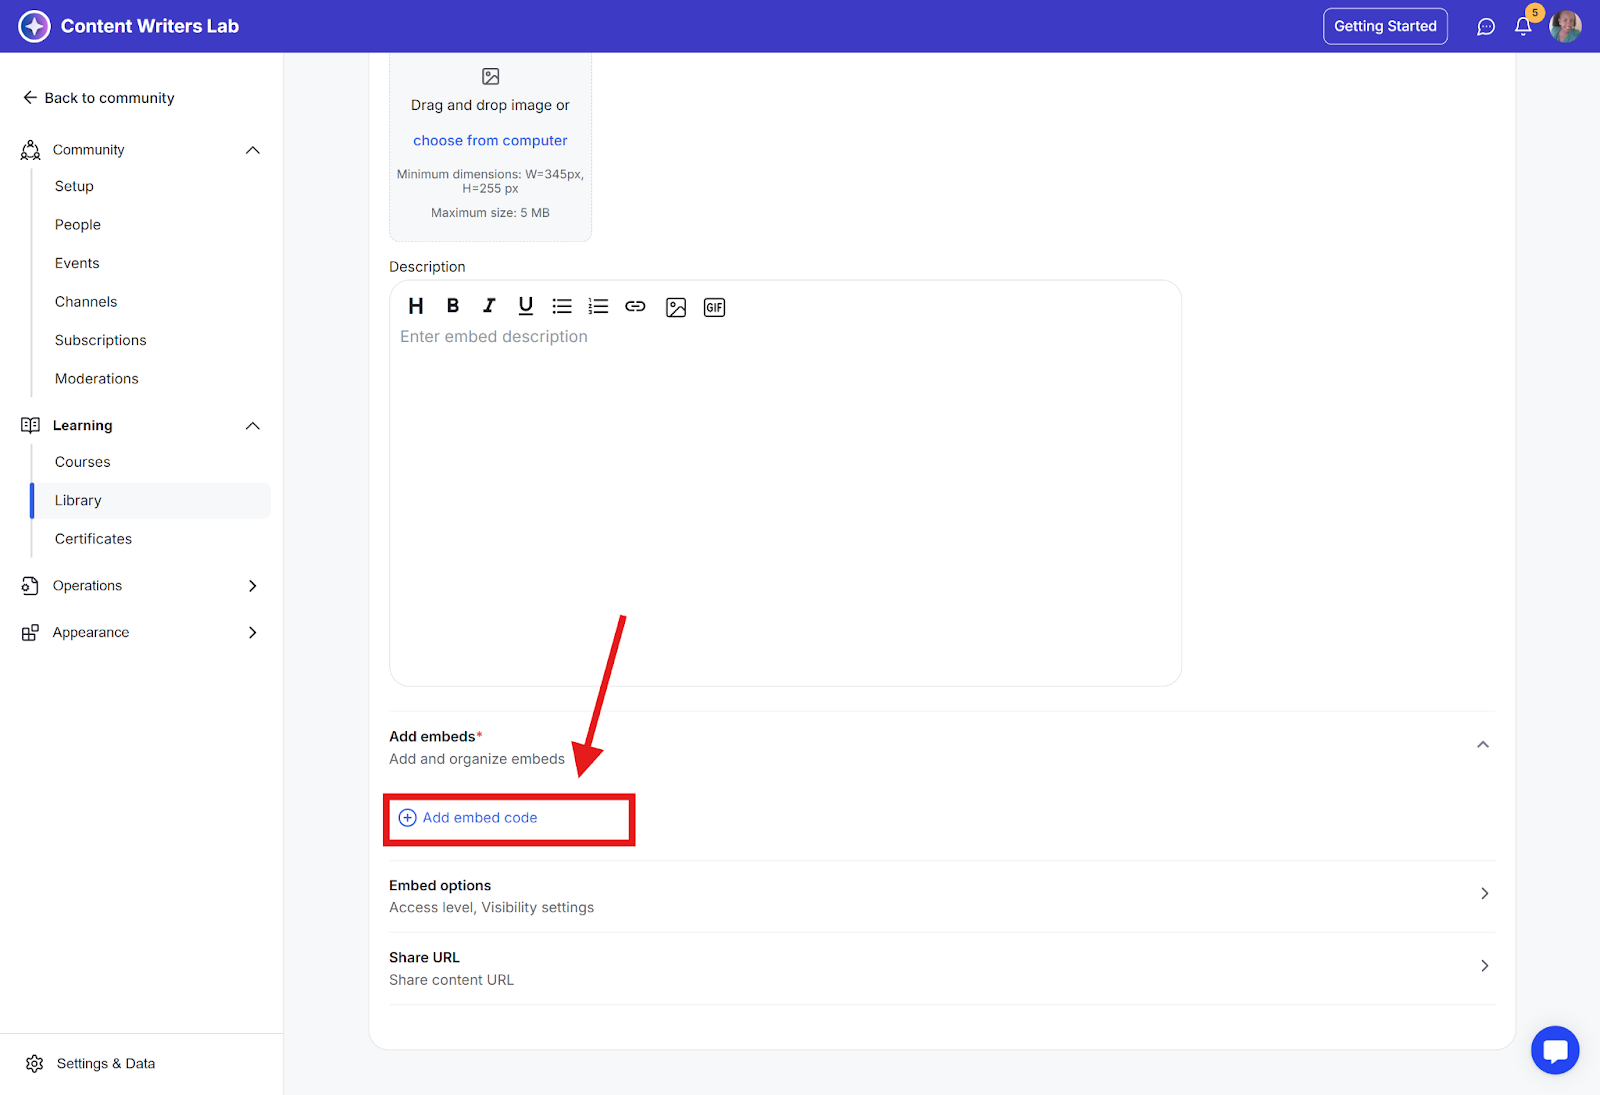
Step 5: On the Edit Content page, scroll down to the Add Embeds section.

Step 6: Click the Add Embed Code button.
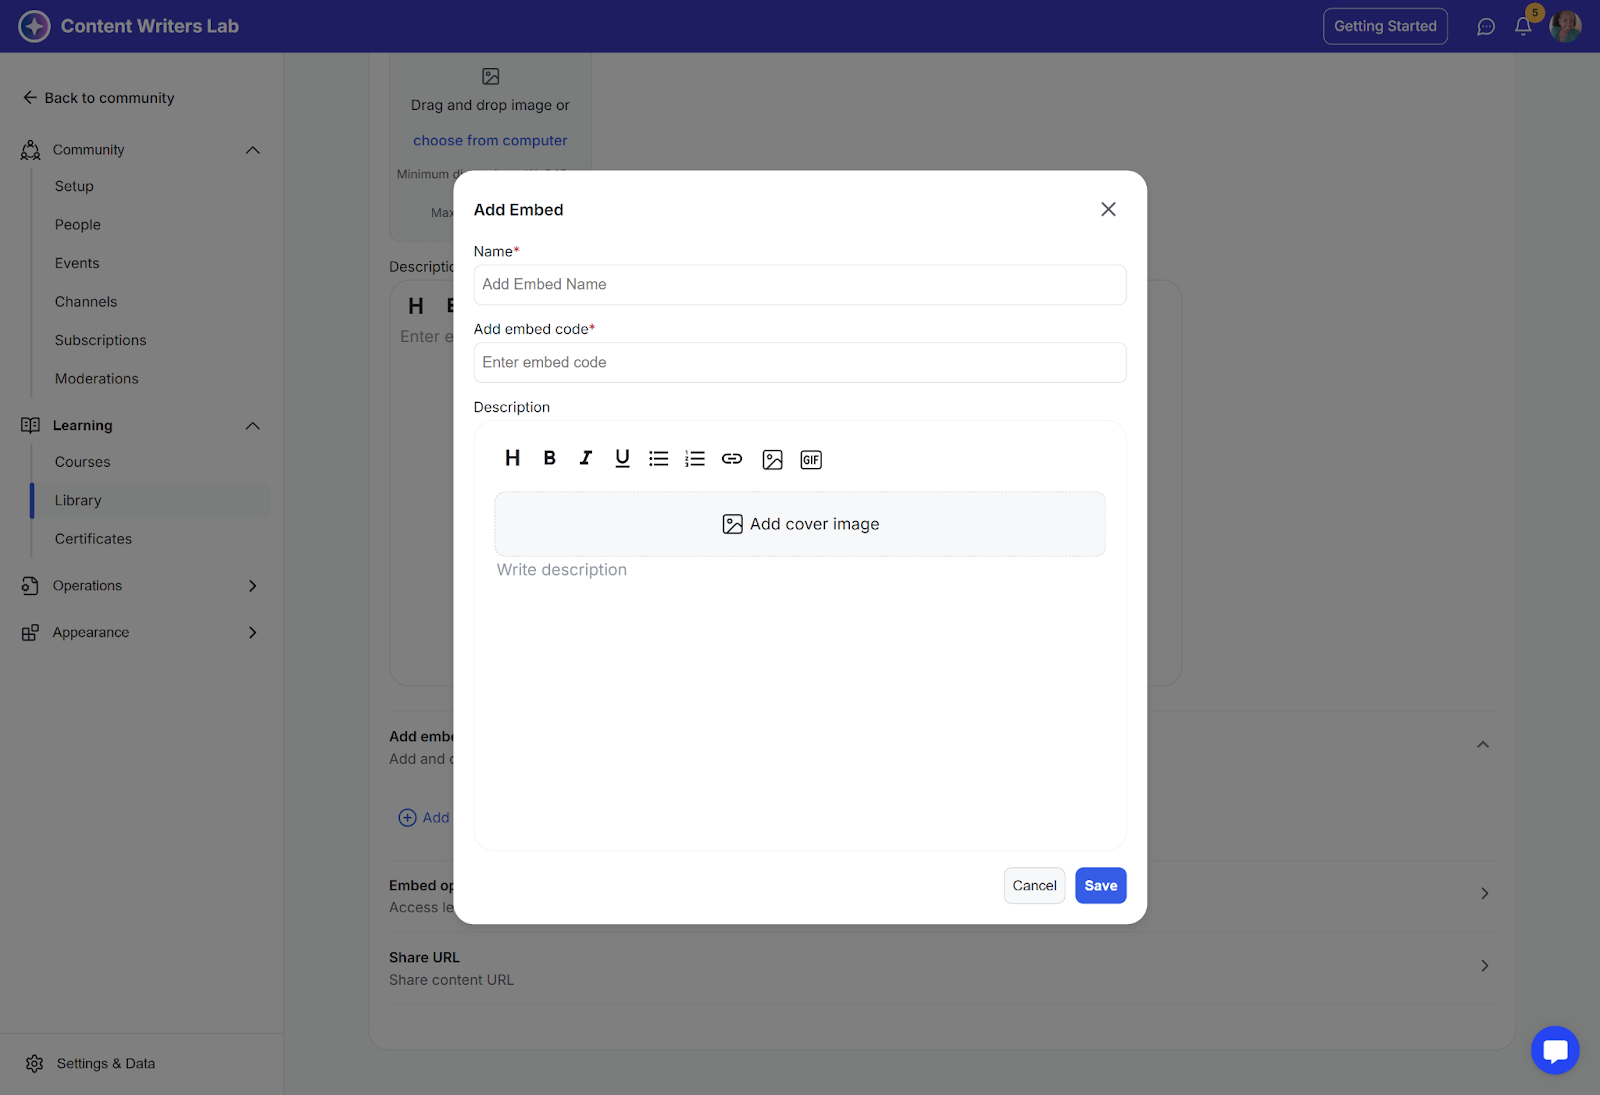
Step 7: A pop-up window will appear. Add a name, paste your embed code, add a description, and a cover image into the provided fields.
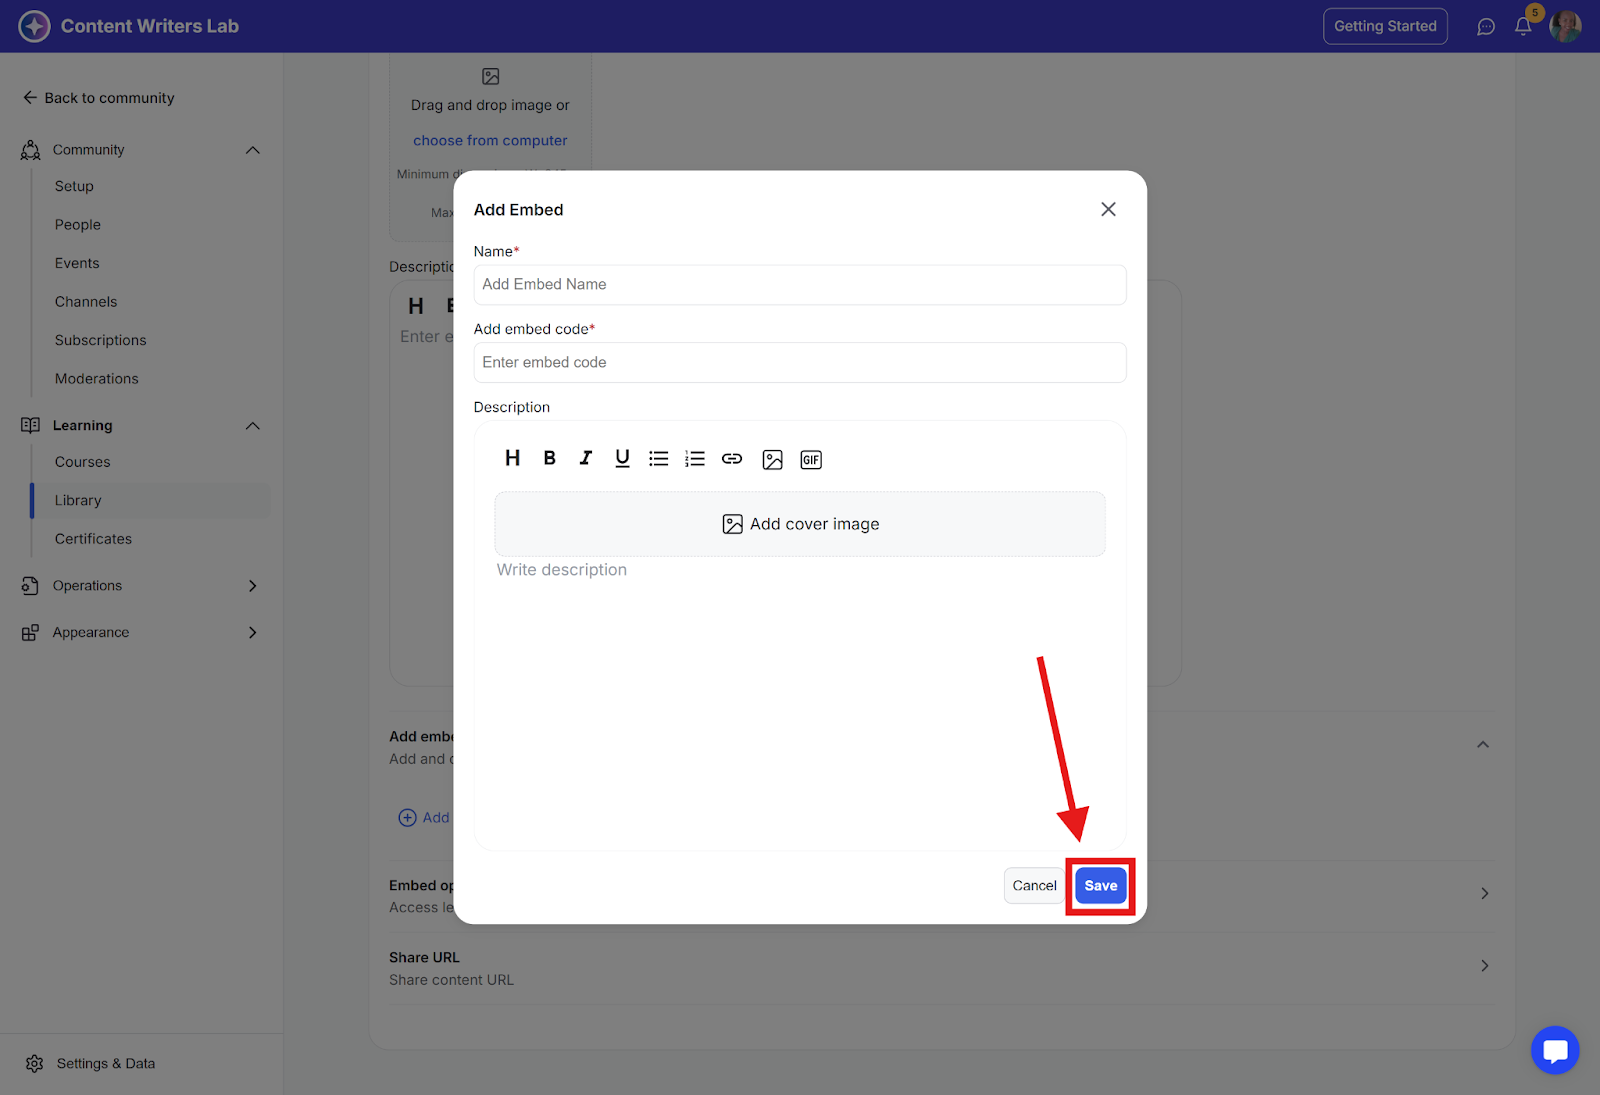
Step 8: Click Save to confirm. You can add multiple embed codes to a single library item if needed.
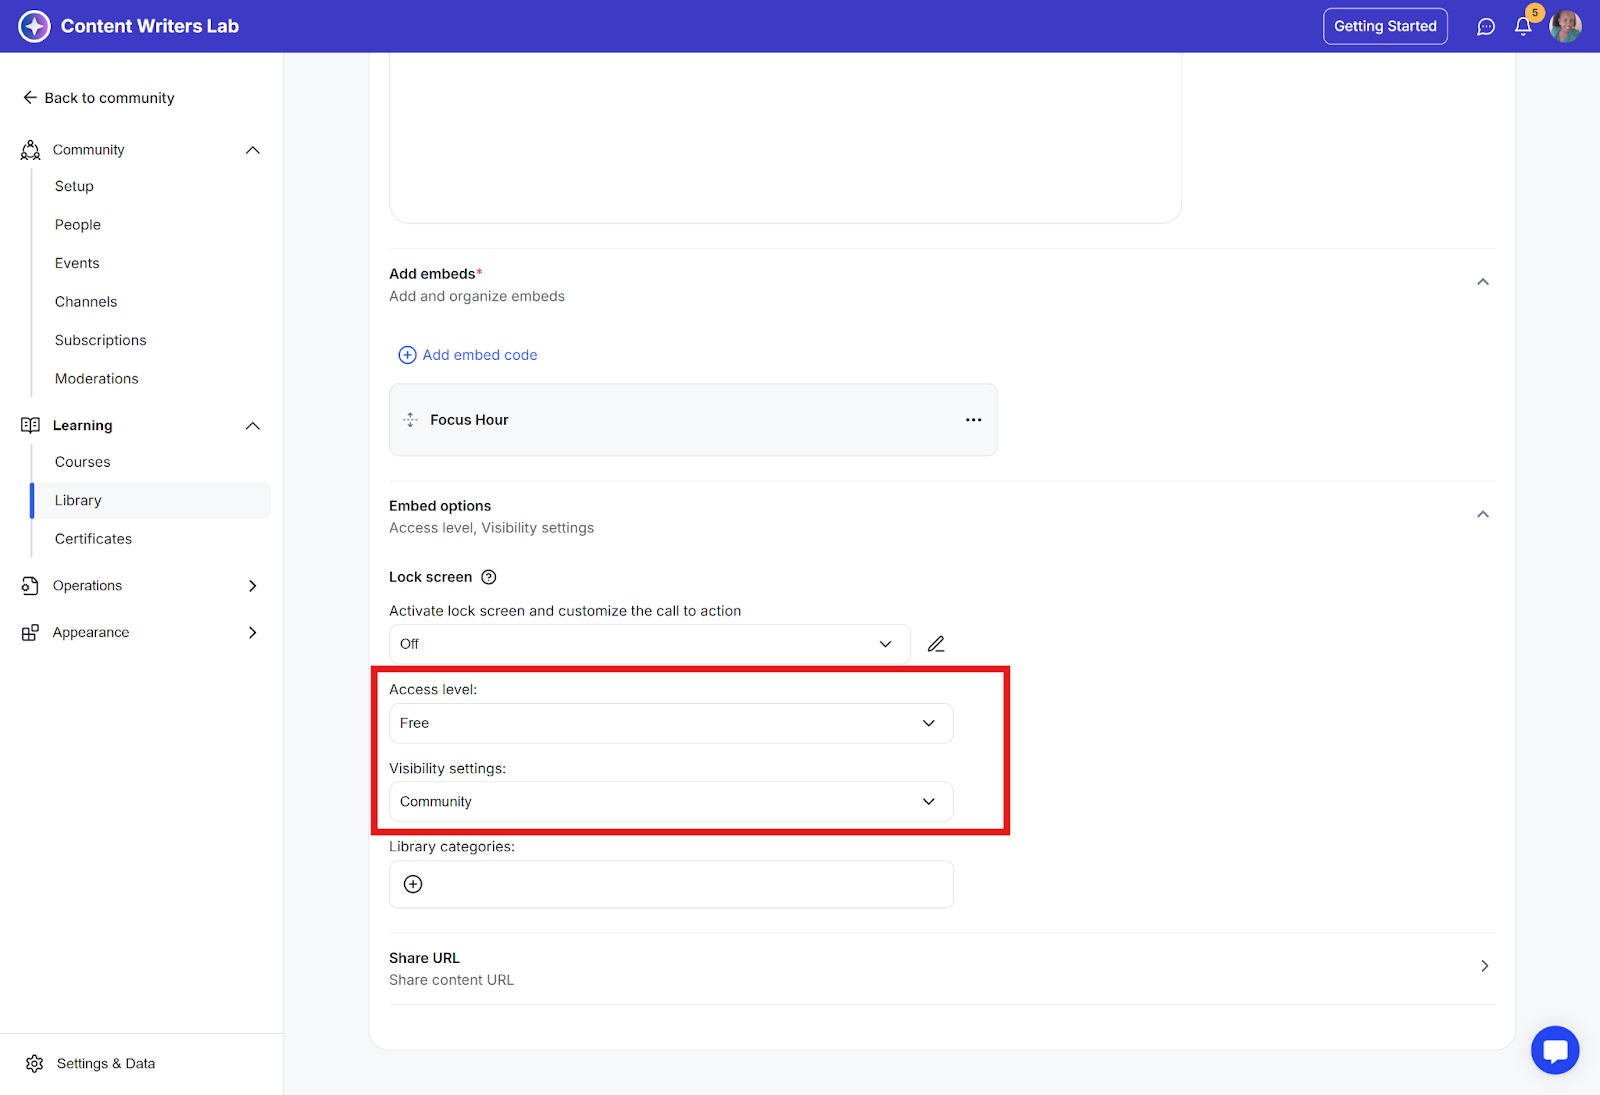
Step 9: Before publishing, remember to configure the other settings on the page, such as:
Access Level and Visibility Settings to control who can see and use the content.
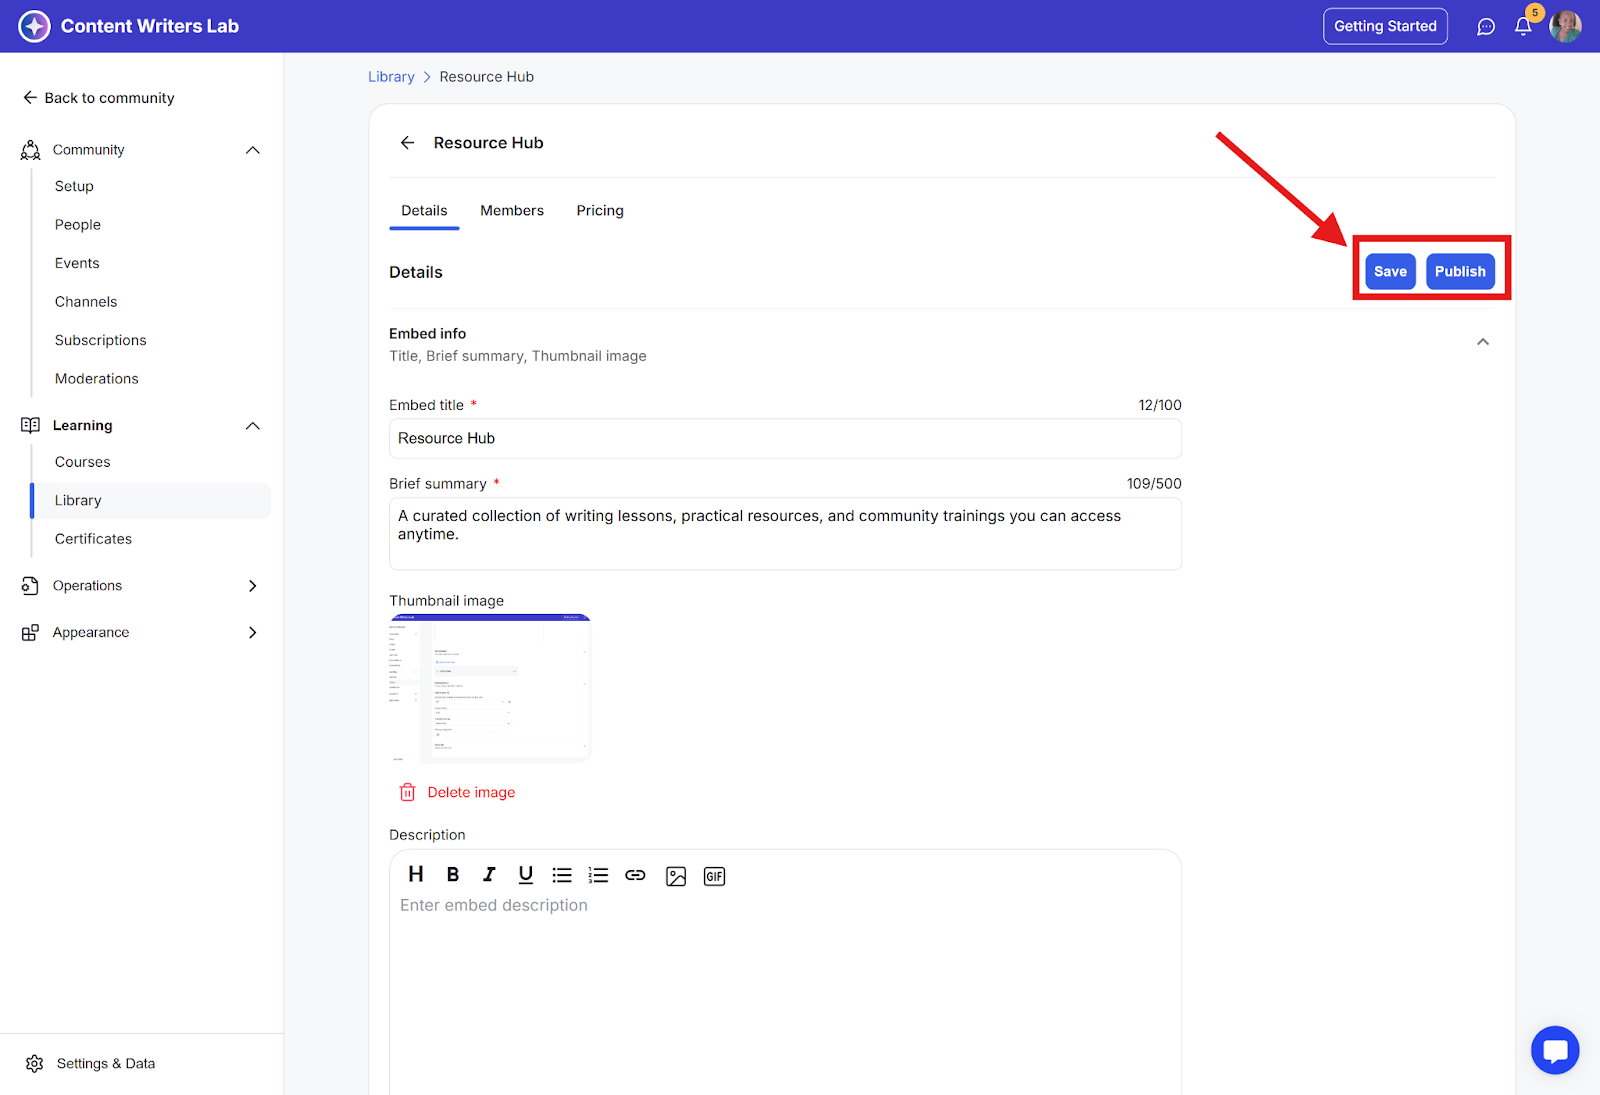
Step 10: Once configured, click the Save and then the Publish button at the top of the page to make the embedded content live for your members.
You can embed code from any platform that supports it. Common examples include:
Loom
Acuity & Calendly Scheduling
Google Slides
Google Sheets
Google Docs
Notion
Airtable
Google Slides
Soundcloud
Spotify playlist
Tweets from X formerly Twitter
Typeform
Facebook Post
Instagram Post
SimpleCast
