company logo

Help center

Go to GroupApp
All collectionsMCP & APIHow to Generate an API Key

How to Generate an API Key

Learn how to generate an API key for your GroupApp account, configure its permissions, and revoke it when needed.

You can generate an API key to connect GroupApp with external tools, build custom integrations, and create your own experiences using the GroupApp API.

To learn more about available endpoints and how to use them, see the GroupApp API Documentation.

Generate an API Key

Follow these steps to create an API key:

1) Go to your Admin Panel. Click Settings & Data at the bottom of the left-hand menu and select Integrations.
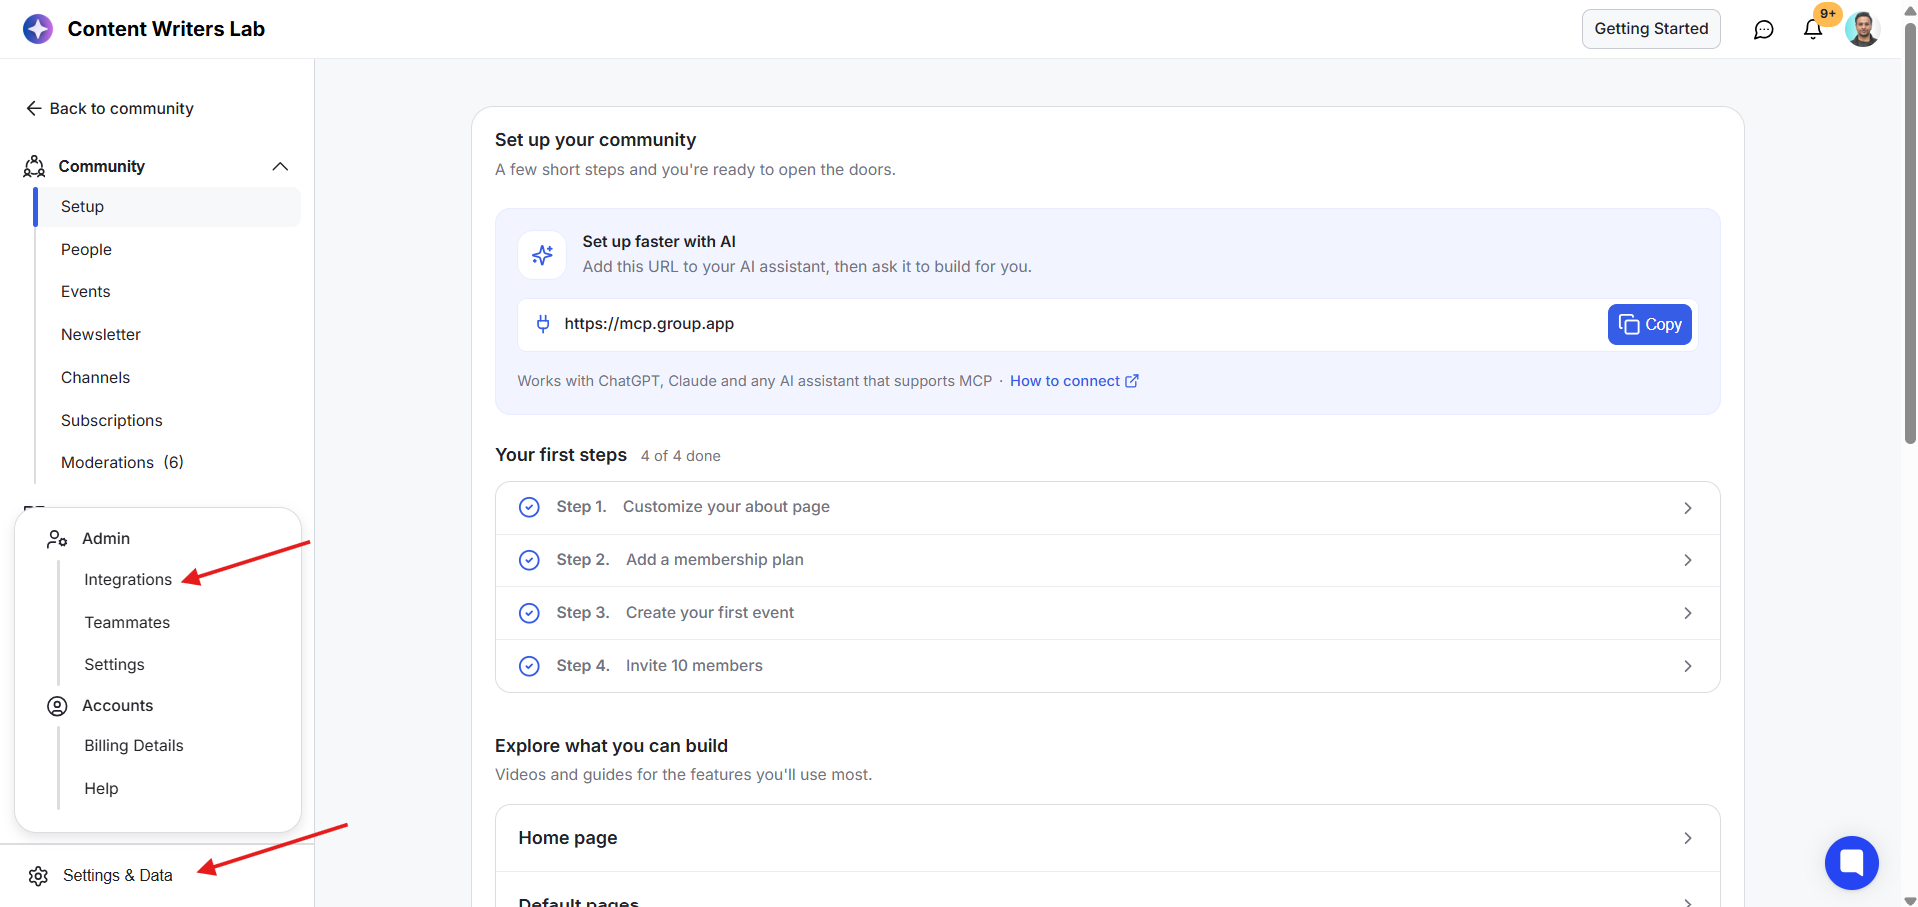
Community Setup page shows setup steps and an open navigation panel, with red arrows pointing to Admin > Integrations and Settings & Data. Visible: Content Writers Lab, Getting Started, Back to community, Community, Setup, People.

2) Open the API Keys tab. Click + Create API Key.
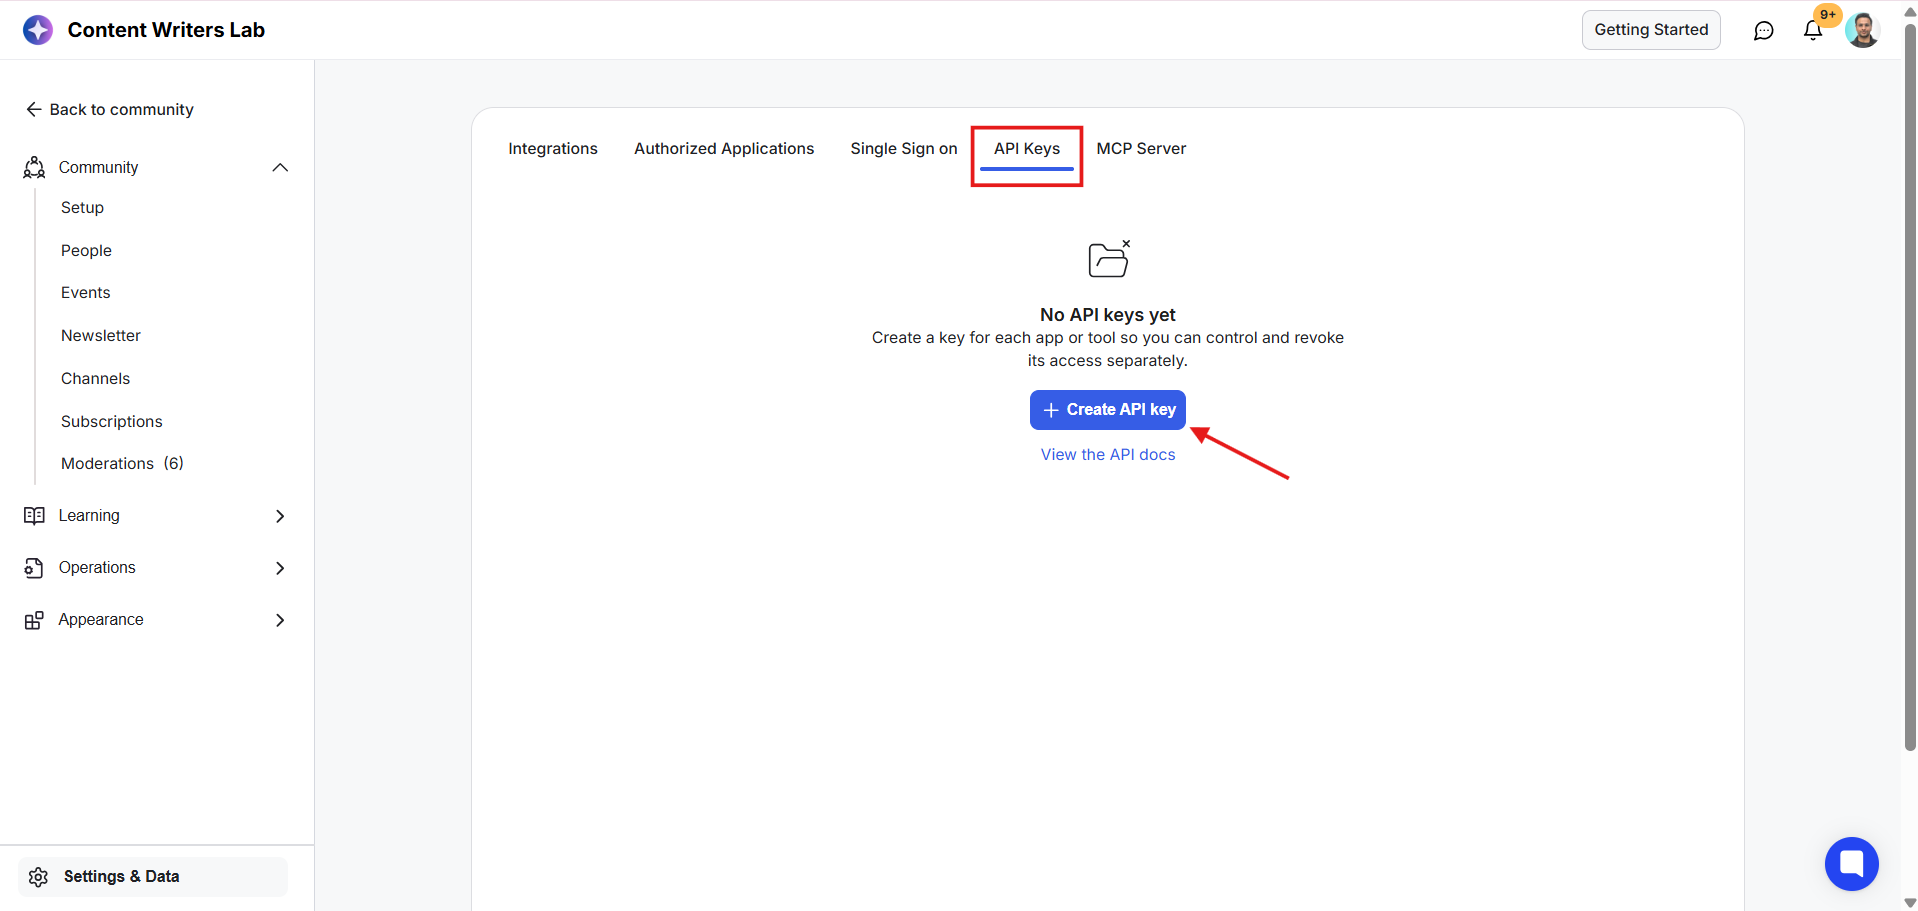
Settings & Data screen showing the API Keys tab with no keys created; a red box highlights API Keys and an arrow points to Create API key. Visible: Settings & Data, Integrations, Authorized Applications, Single Sign on, API Keys, MC Server.

3) Enter a name for your API key so you can identify it later.
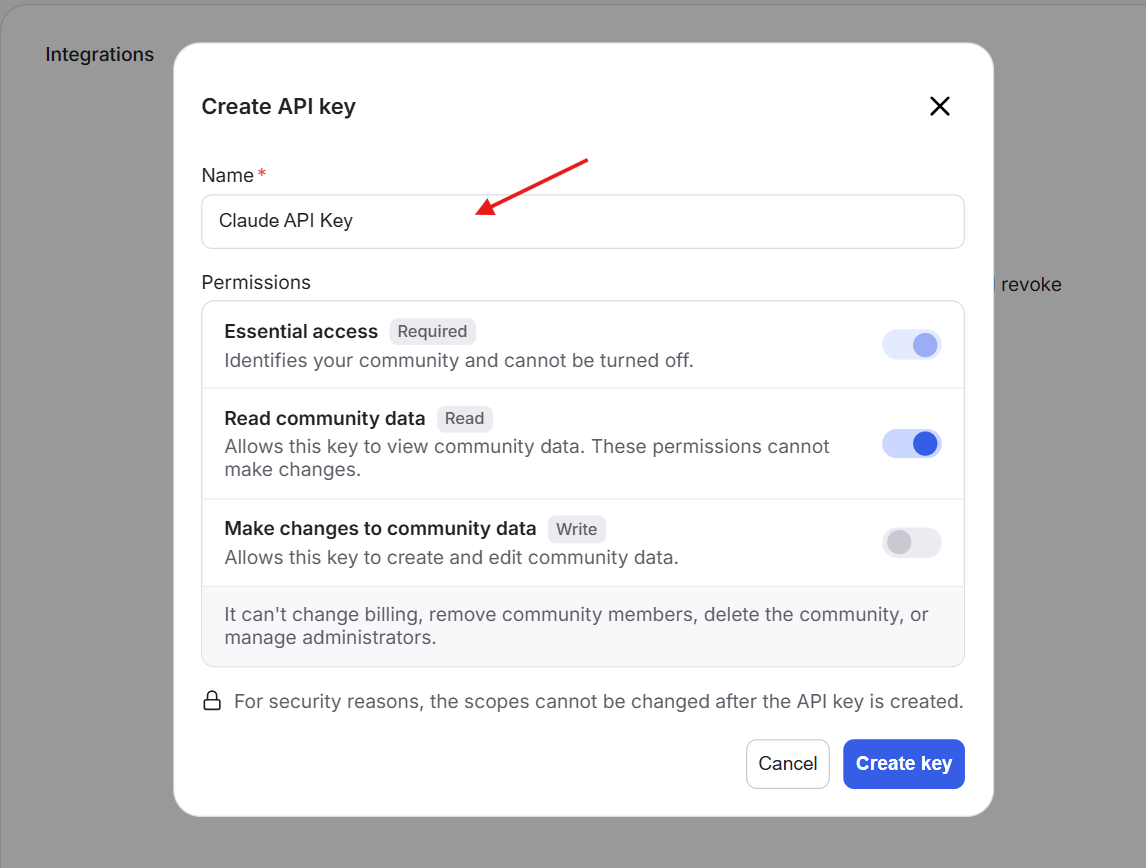
The Integrations screen’s Create API key dialog shows permission toggles, with a red arrow pointing to the Name field containing “Claude API Key.”. Visible: Integrations, Create API key, Name *, Claude API Key, Permissions, Essential access.

4) Choose the permissions you want to grant. You can select read access, write access, or both.
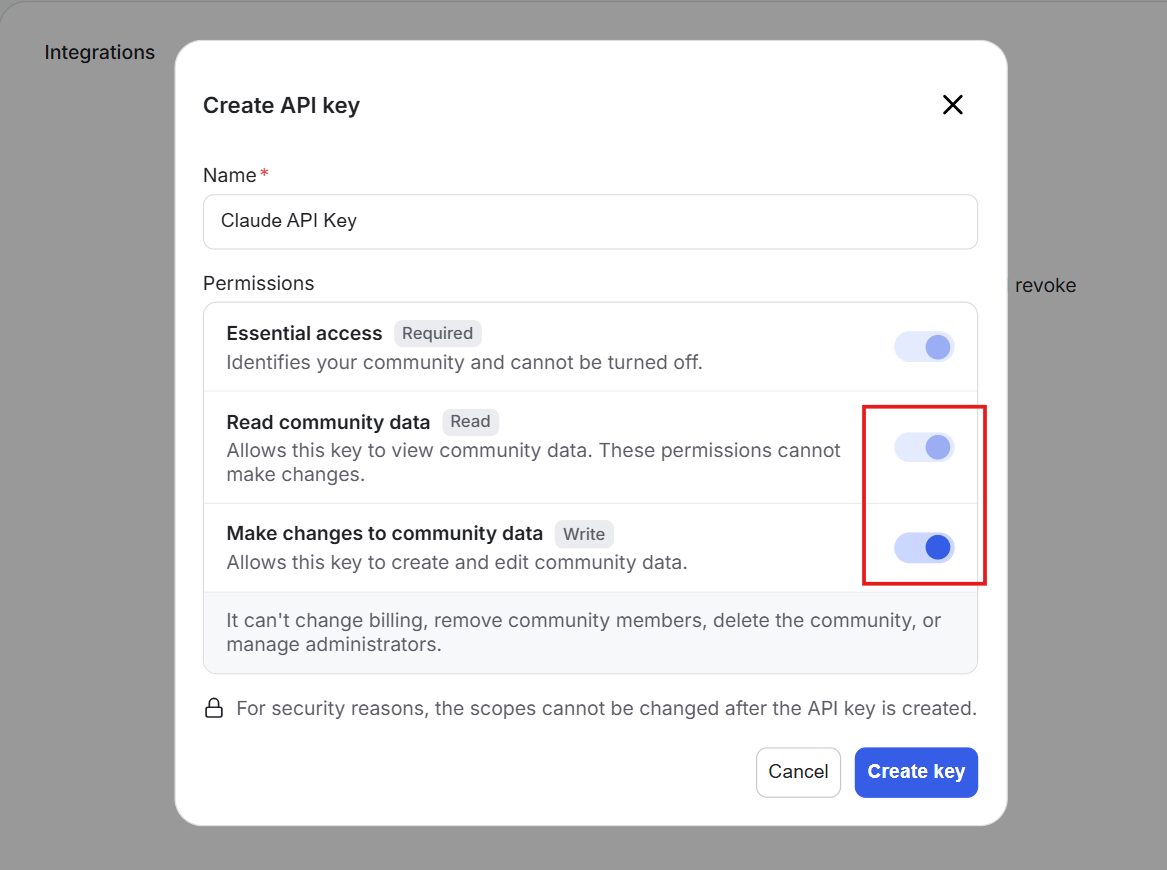
The Integrations screen shows a Create API key dialog with permission toggles; a red rectangle highlights the Read community data and Make changes to community data toggles. Visible: Integrations, Create API key, Name, Claude API Key, Permissions, Essential access.

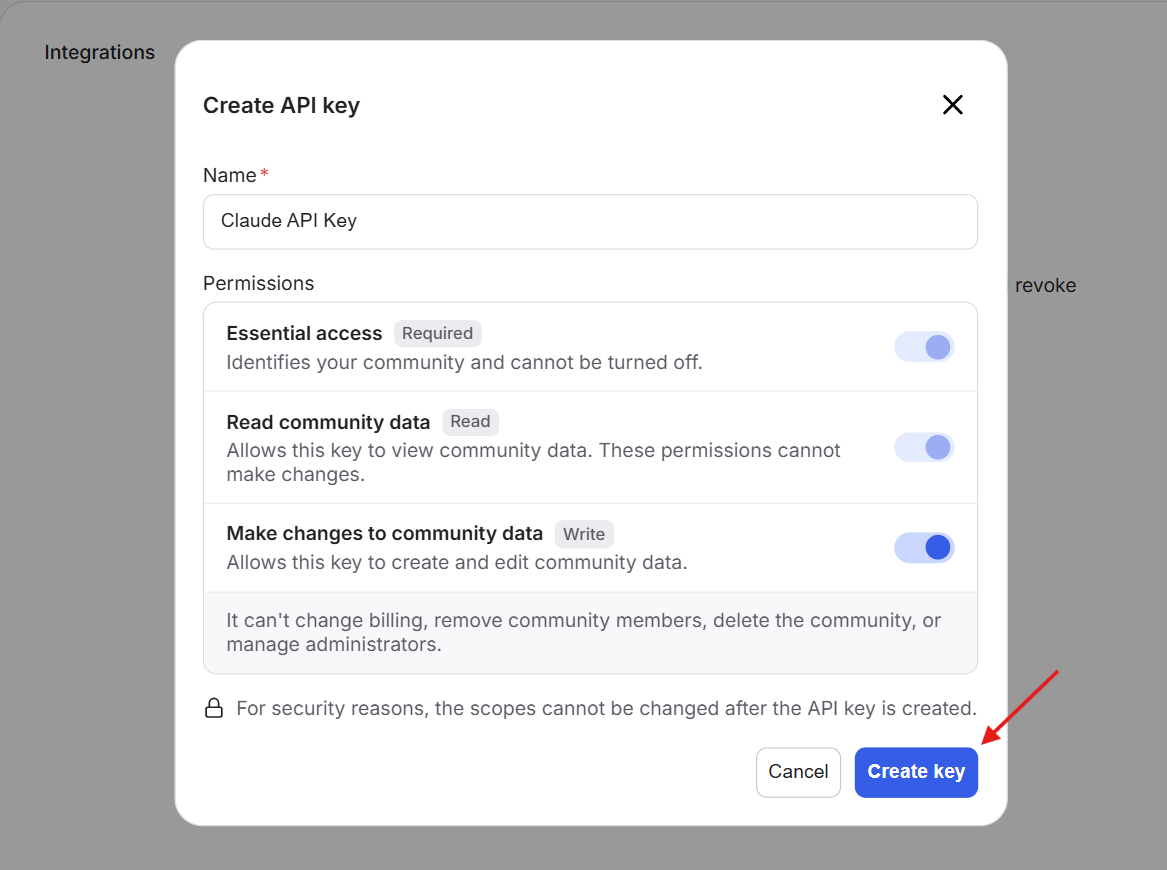
5) Click Create Key.

The Integrations screen’s Create API key dialog shows a name, permissions, and a security notice; a red arrow points to the Create key button. Visible: Integrations, Create API key, Name, Claude API Key, Permissions, Essential access.

Copy and Store Your API Key

Once created, your API key will appear on the screen, and you'll be able to copy it. Click Done to finish.
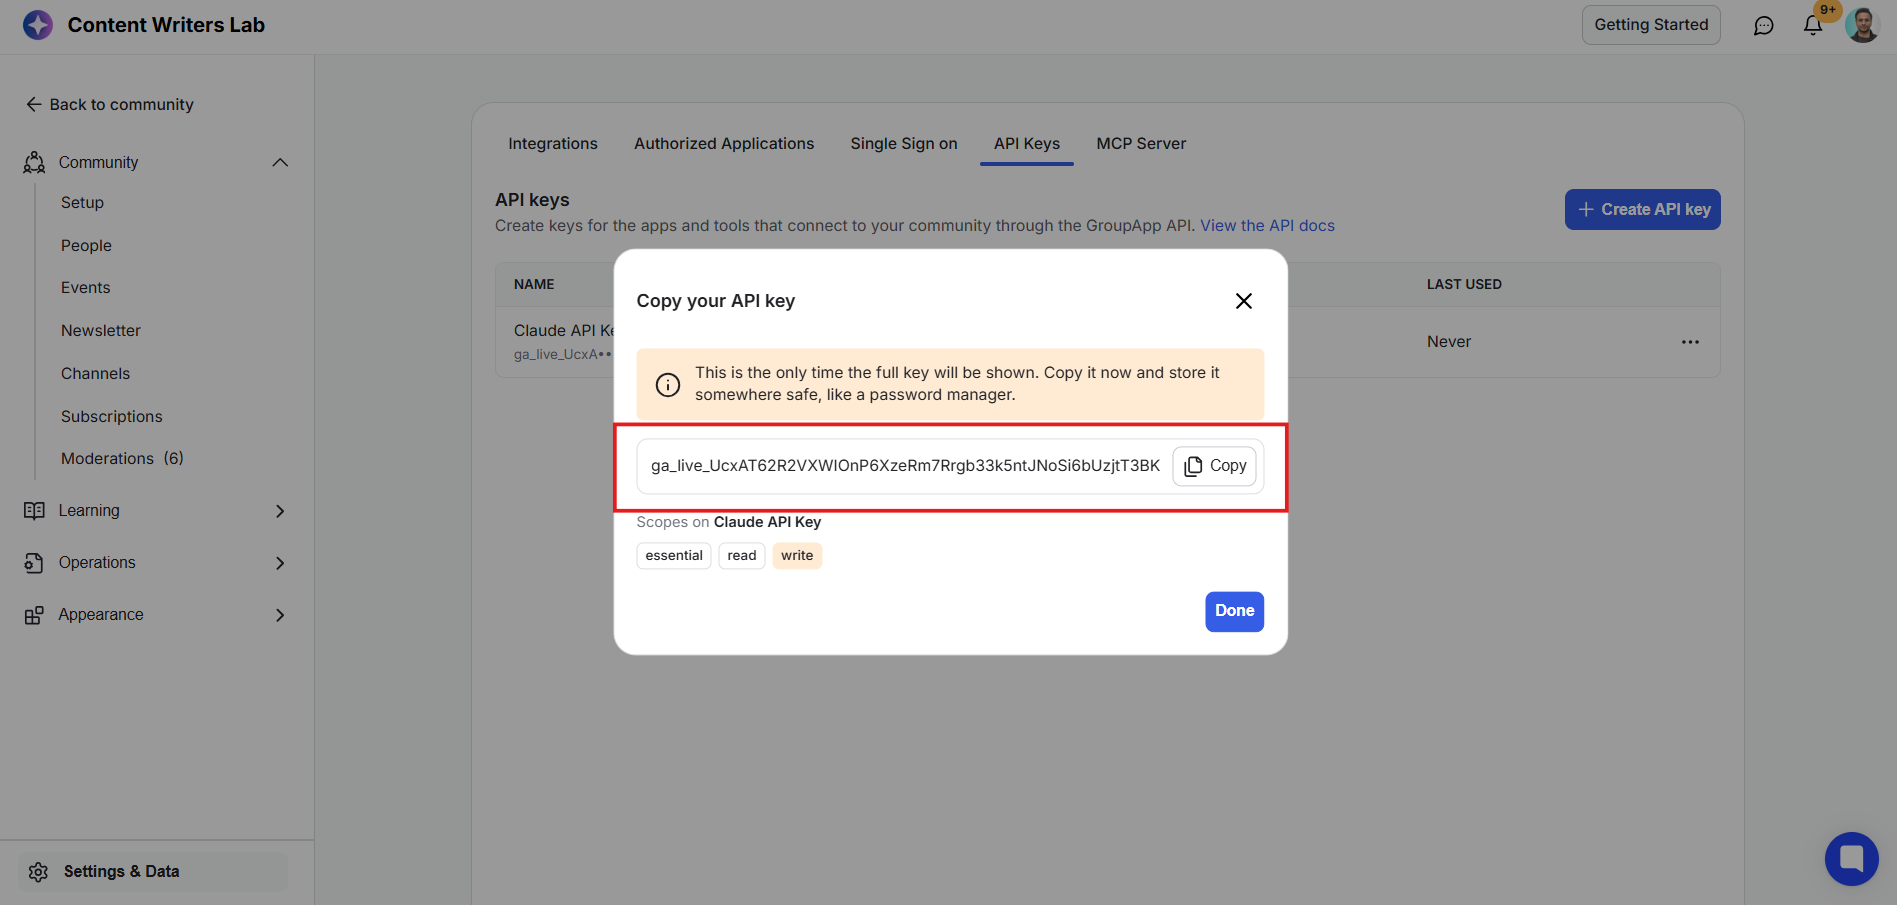
The API Keys settings screen shows a “Copy your API key” dialog, with a red outline highlighting the key field and Copy button. Visible: Settings & Data, Integrations, Authorized Applications, Single Sign on, API Keys, MC Server.

Important: This is the only time you'll be able to view the full API key. Copy it and store it somewhere secure before closing the window. You won't be able to retrieve the full key again.

Once created, your API key will appear in the API Keys tab along with its creation date, assigned scopes (permissions), and usage status.
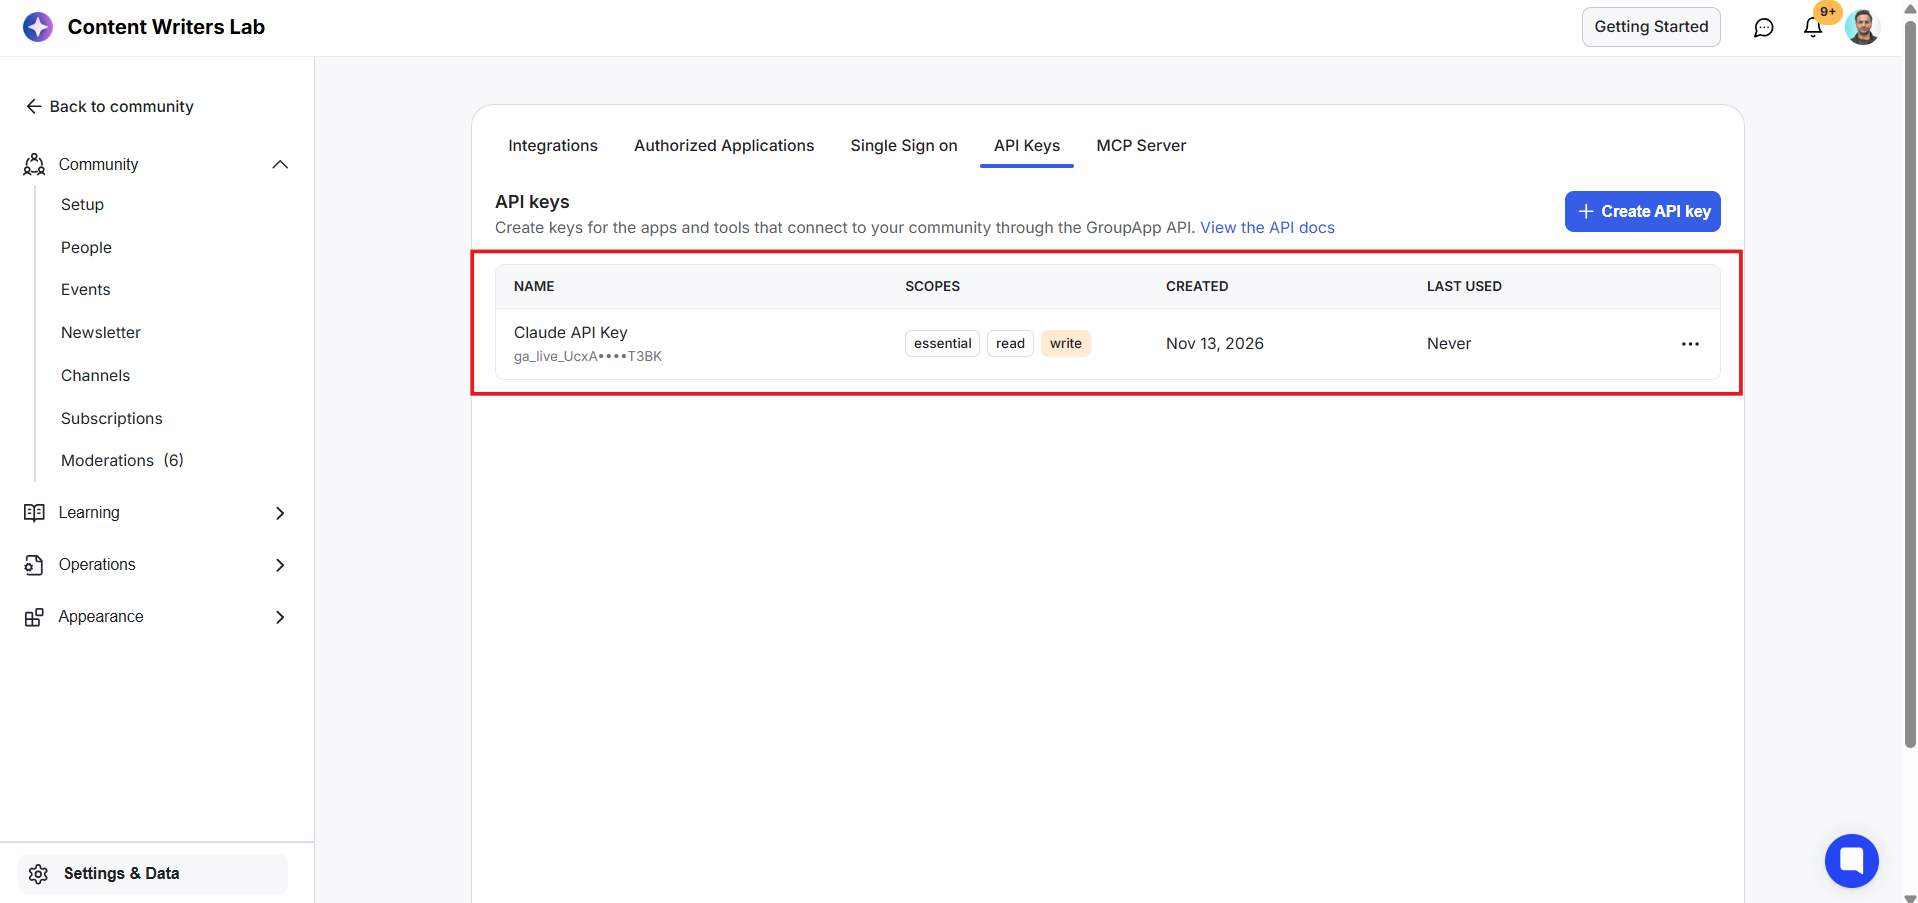
The Settings & Data API Keys section shows a Claude API Key row with scopes, creation date, last-used status, and a red outline highlighting the key list. Visible: Settings & Data, API Keys, API keys, Create API key, NAME, SCOPES.

Revoke an API Key

To revoke an API key, open the API Keys tab, click the three-dot menu next to the key you want to remove, and select Revoke. Confirm your selection in the pop-up.
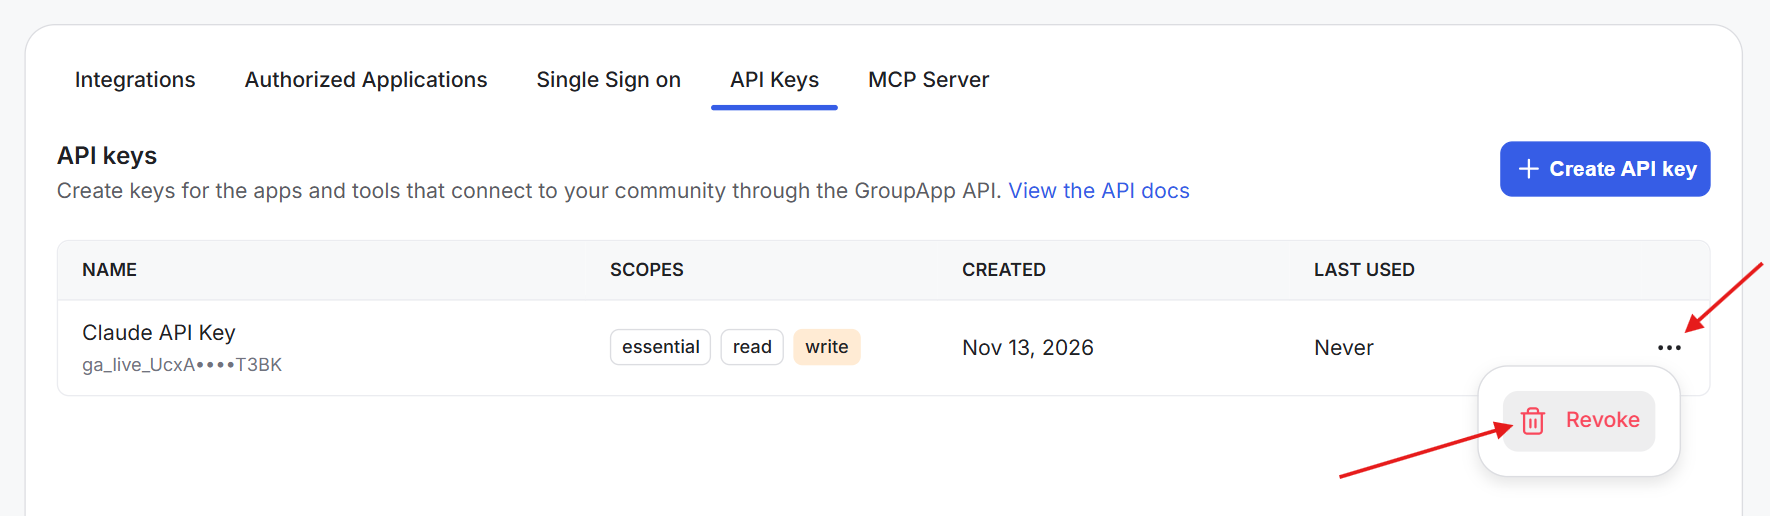
API Keys settings screen showing one Claude API Key row with its overflow menu open, and arrows pointing to the three-dot menu and Revoke option. Visible: Integrations, Authorized Applications, Single Sign on, API Keys, MC Server, Create API key.

Important Things to Know

  • Key expiration: API keys expire after one year by default. Keep track of their expiration dates and generate a new key when needed.

  • Secure storage: Treat your API key like a password. Store it securely and don't share it publicly.

Did this answer your question?
😞
😐
😁