company logo

Help center

Go to GroupApp
All collectionsContent LibraryHow to Add Multiple Files to a Library Resource

How to Add Multiple Files to a Library Resource

Learn how to add multiple files to a single library resource, organize related content, and manage individual files.

You can add multiple files to a single resource in your Community Library. This makes it easier to organize related content under one resource instead of creating separate entries for every file.

Each resource can contain multiple files, but all files within a resource must be the same type. For example, a PDF resource can contain multiple PDFs. The same applies to audio, video, embed, and article resources.

You can add files to an existing published resource or create a new resource for this purpose. This is useful for creating resource collections, multi-part learning materials, audio or video series, and downloadable resource packs.

File limits: You can add unlimited files per resource on all plans except the Free and Launch plans, which have a limit of 5 files per resource.

Add Multiple Files to a Library Resource

Follow these steps to add files to a resource:

1) Open your Community Library and click on the resource you want to add files to.
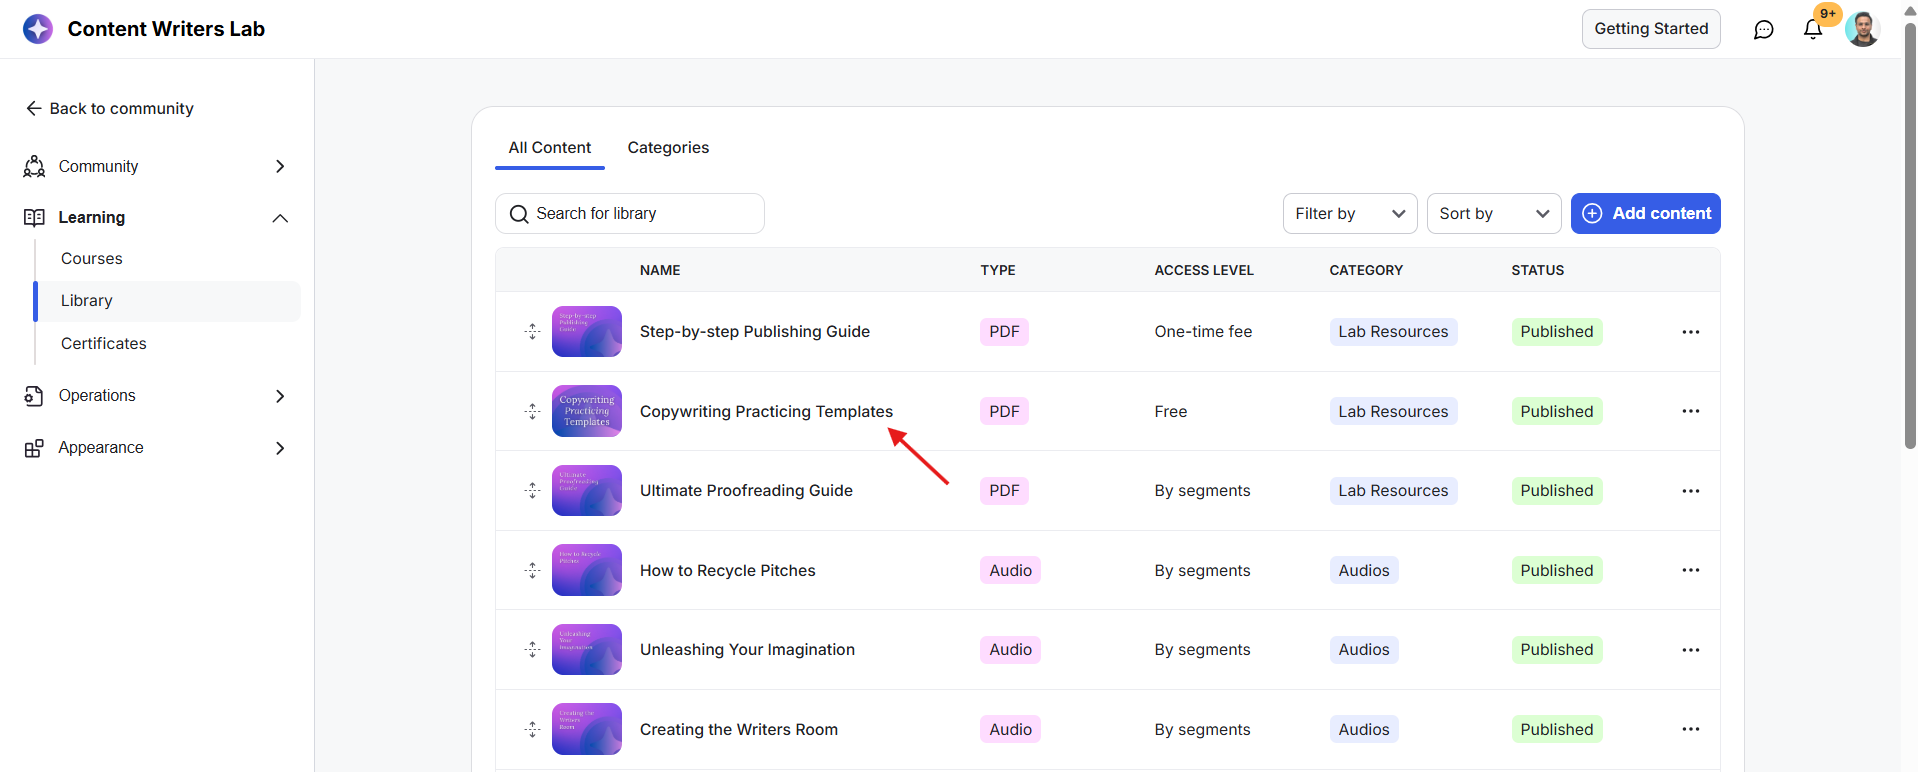
The Learning > Library screen lists published content, with a red arrow pointing to Copywriting Practicing Templates. Visible: Content Writers Lab, Getting Started, Back to community, Community, Learning, Courses.

2) This opens the resource settings.
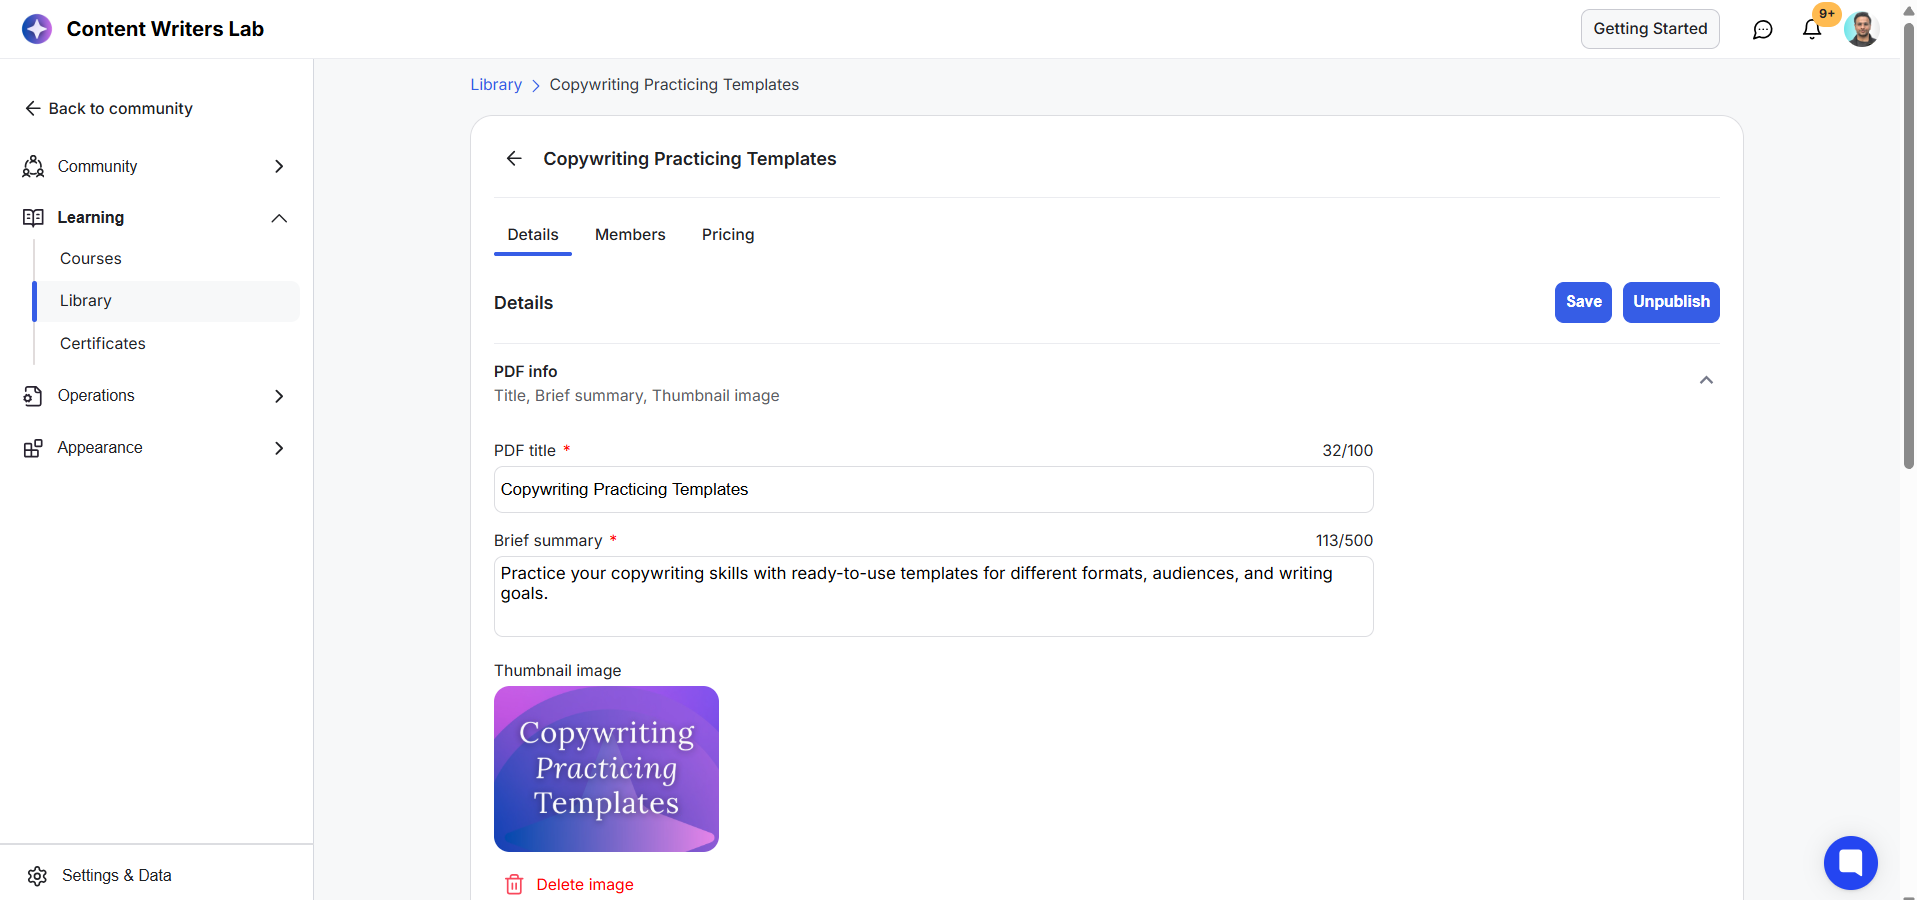
The Library details editor for the Copywriting Practicing Templates PDF shows its title, brief summary, thumbnail image, and Save and Unpublish buttons. Visible: Content Writers Lab, Getting Started, Back to community, Community, Learning, Courses.

3) Scroll down to the Add Content section.
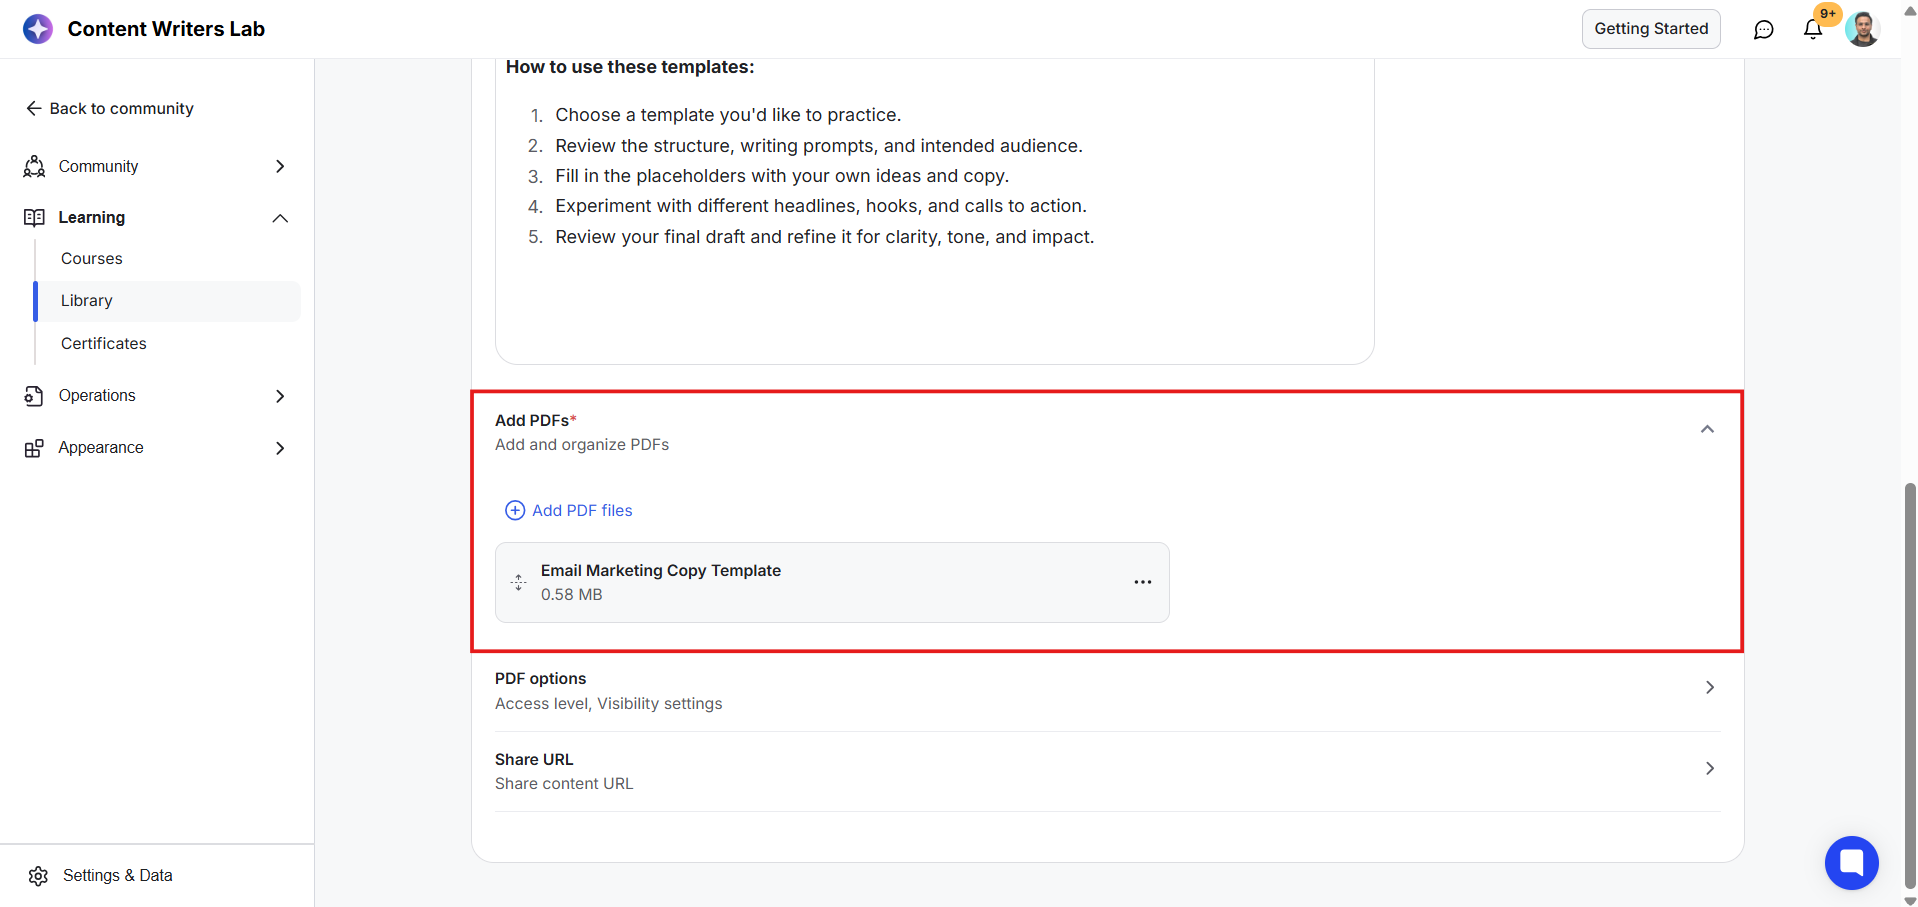
The Learning Library content editor shows the expanded Add PDFs section, outlined in red, with an Email Marketing Copy Template PDF and an Add PDF files control. Visible: Learning, Library, Add PDFs*, Add and organize PDFs, Add PDF files, Email Marketing Copy Template.

4) Click Add PDFs or the corresponding add-content option for your resource format.
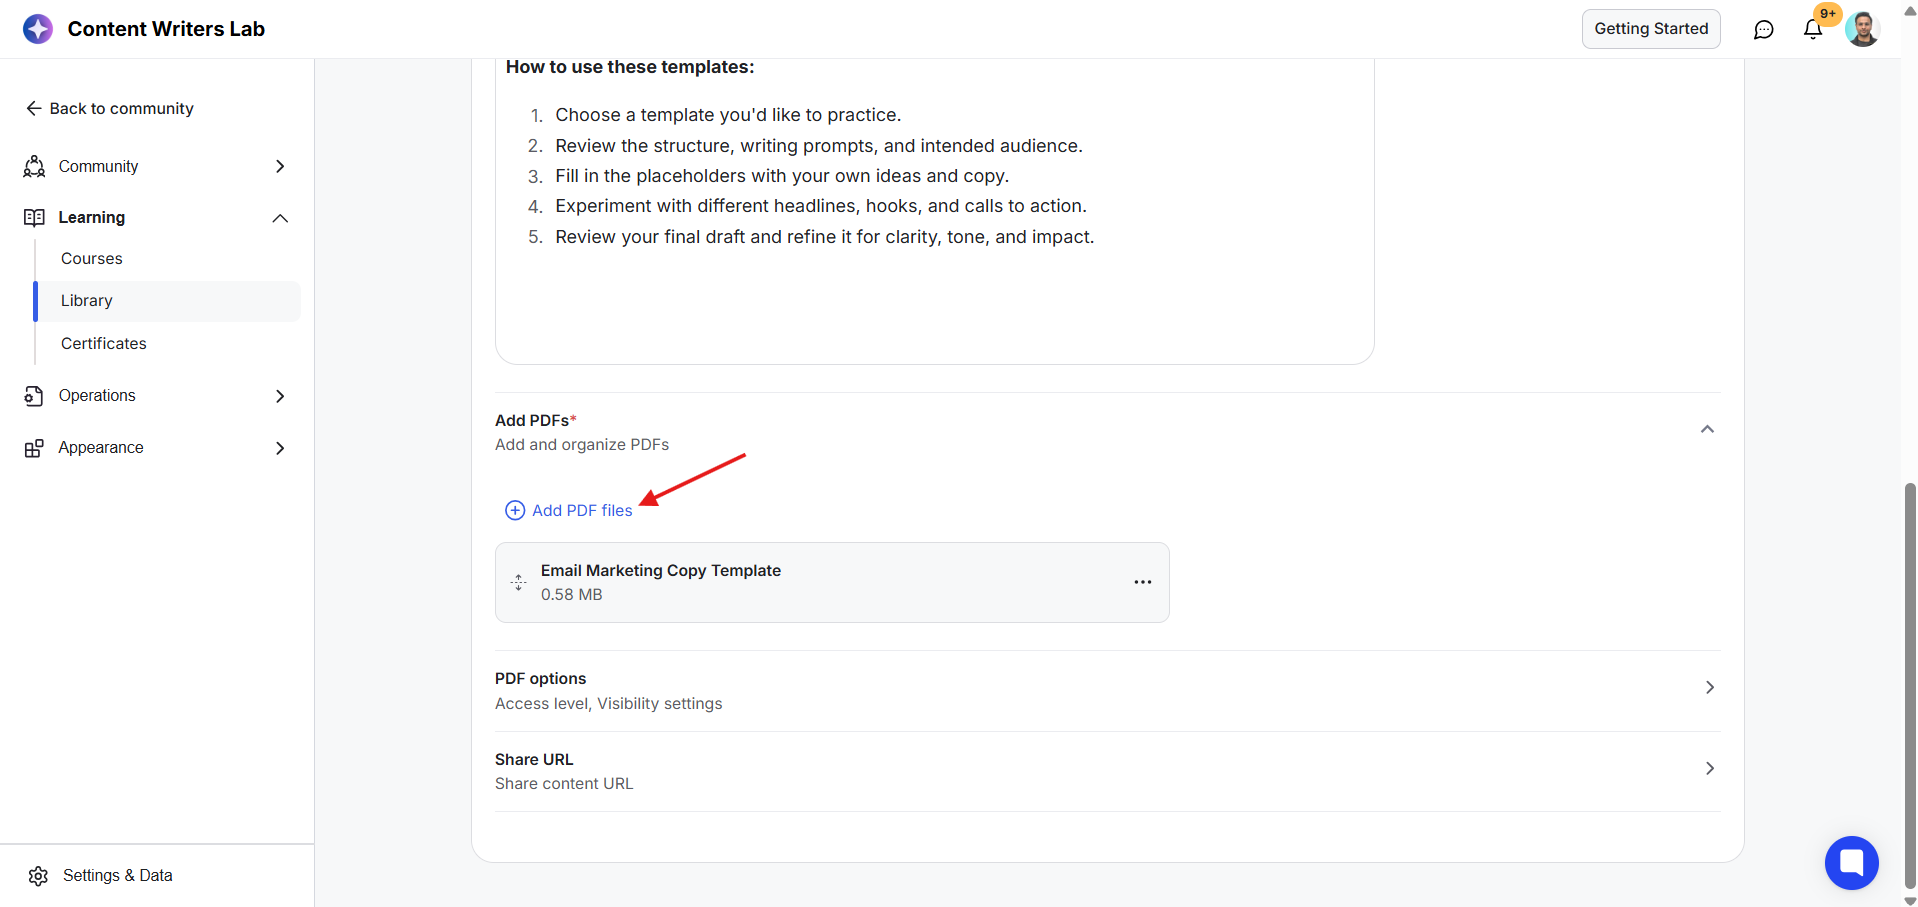
The Learning Library content settings screen shows an expanded Add PDFs section, with a red arrow pointing to Add PDF files. Visible: Content Writers Lab, Back to community, Community, Learning, Courses, Library.

5) Upload the file using the pop-up window.
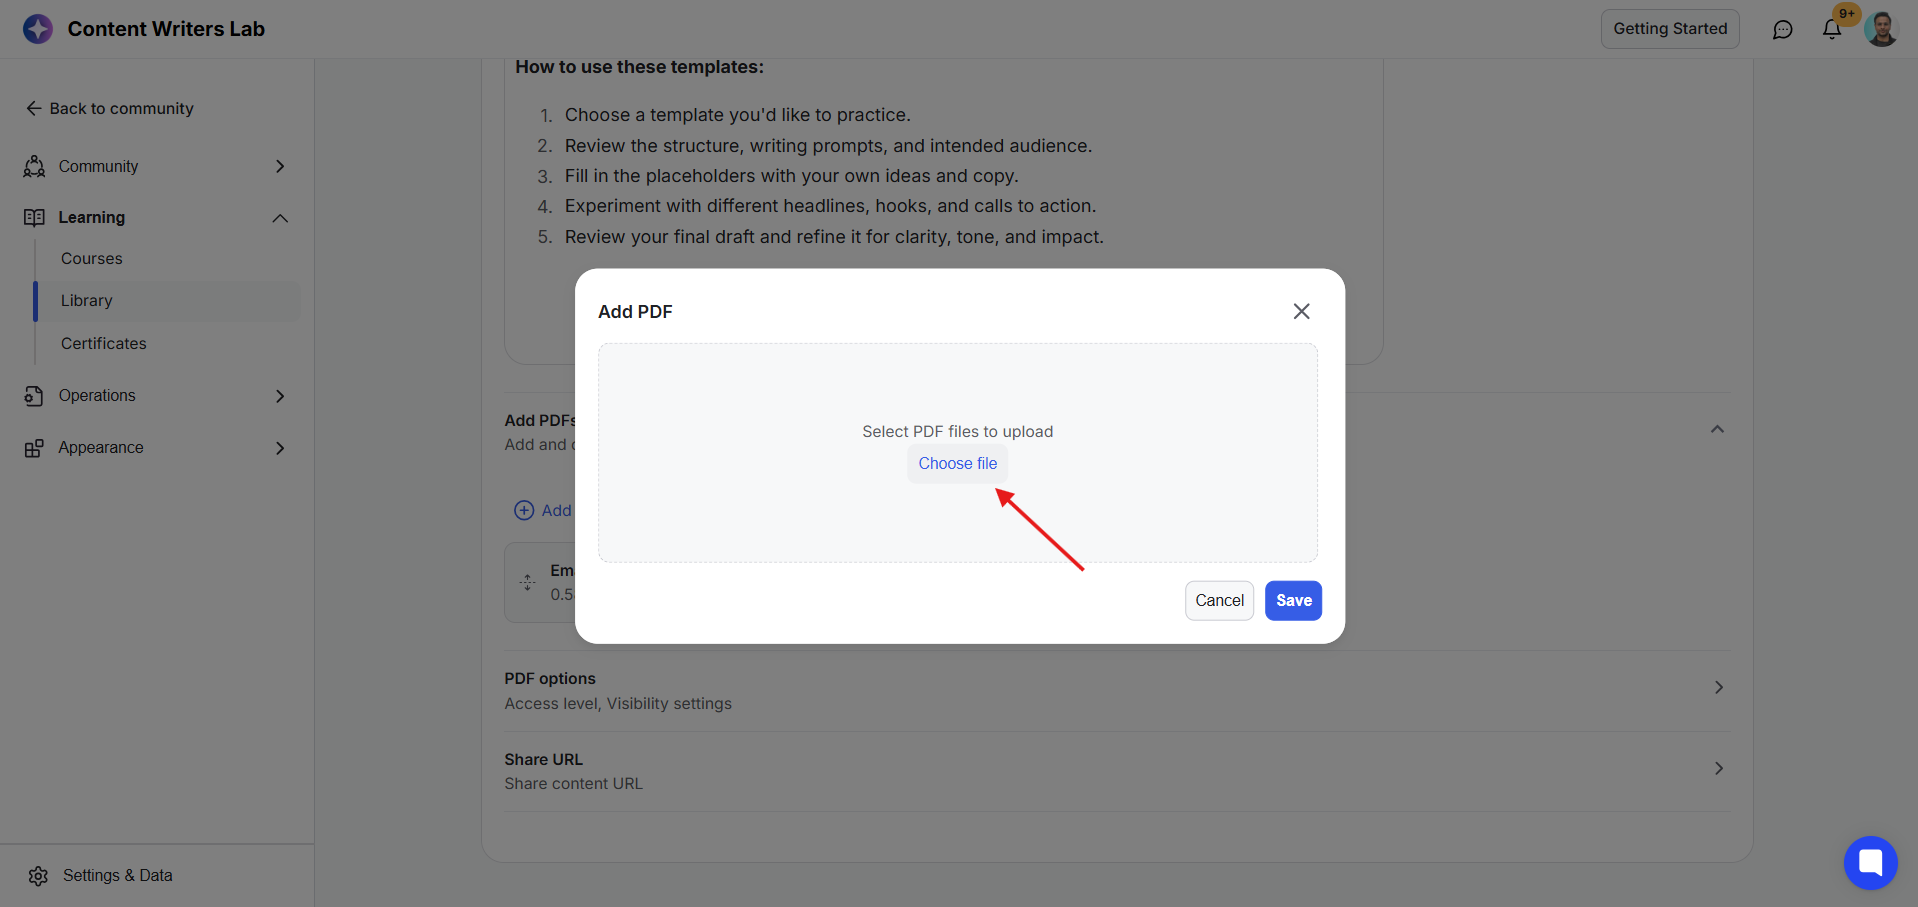
The Add PDF dialog is open over the Learning Library settings, with a red arrow pointing to the Choose file button. Visible: Content Writers Lab, Getting Started, Back to community, Community, Learning, Courses.

6) Once uploaded, the file will appear under the resource's content section.
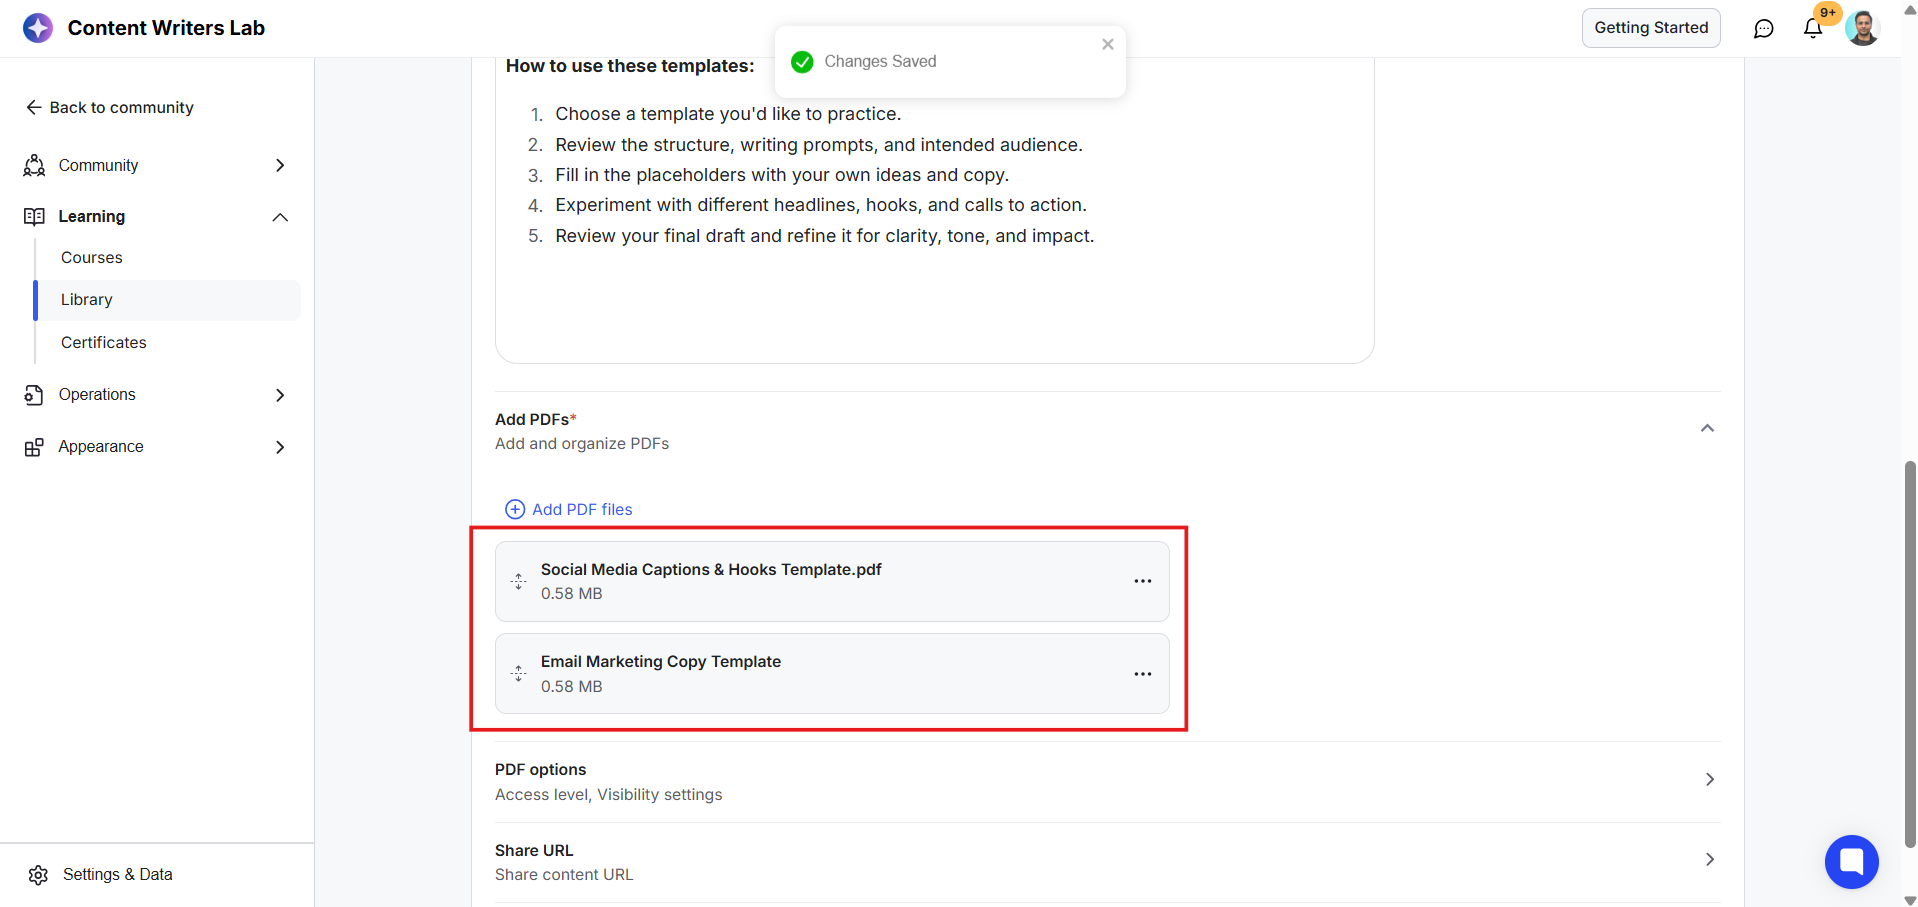
The Library content editor shows the expanded Add PDFs section, with a red rectangle highlighting two uploaded PDF files. Visible: Content Writers Lab, Back to community, Community, Learning, Courses, Library.

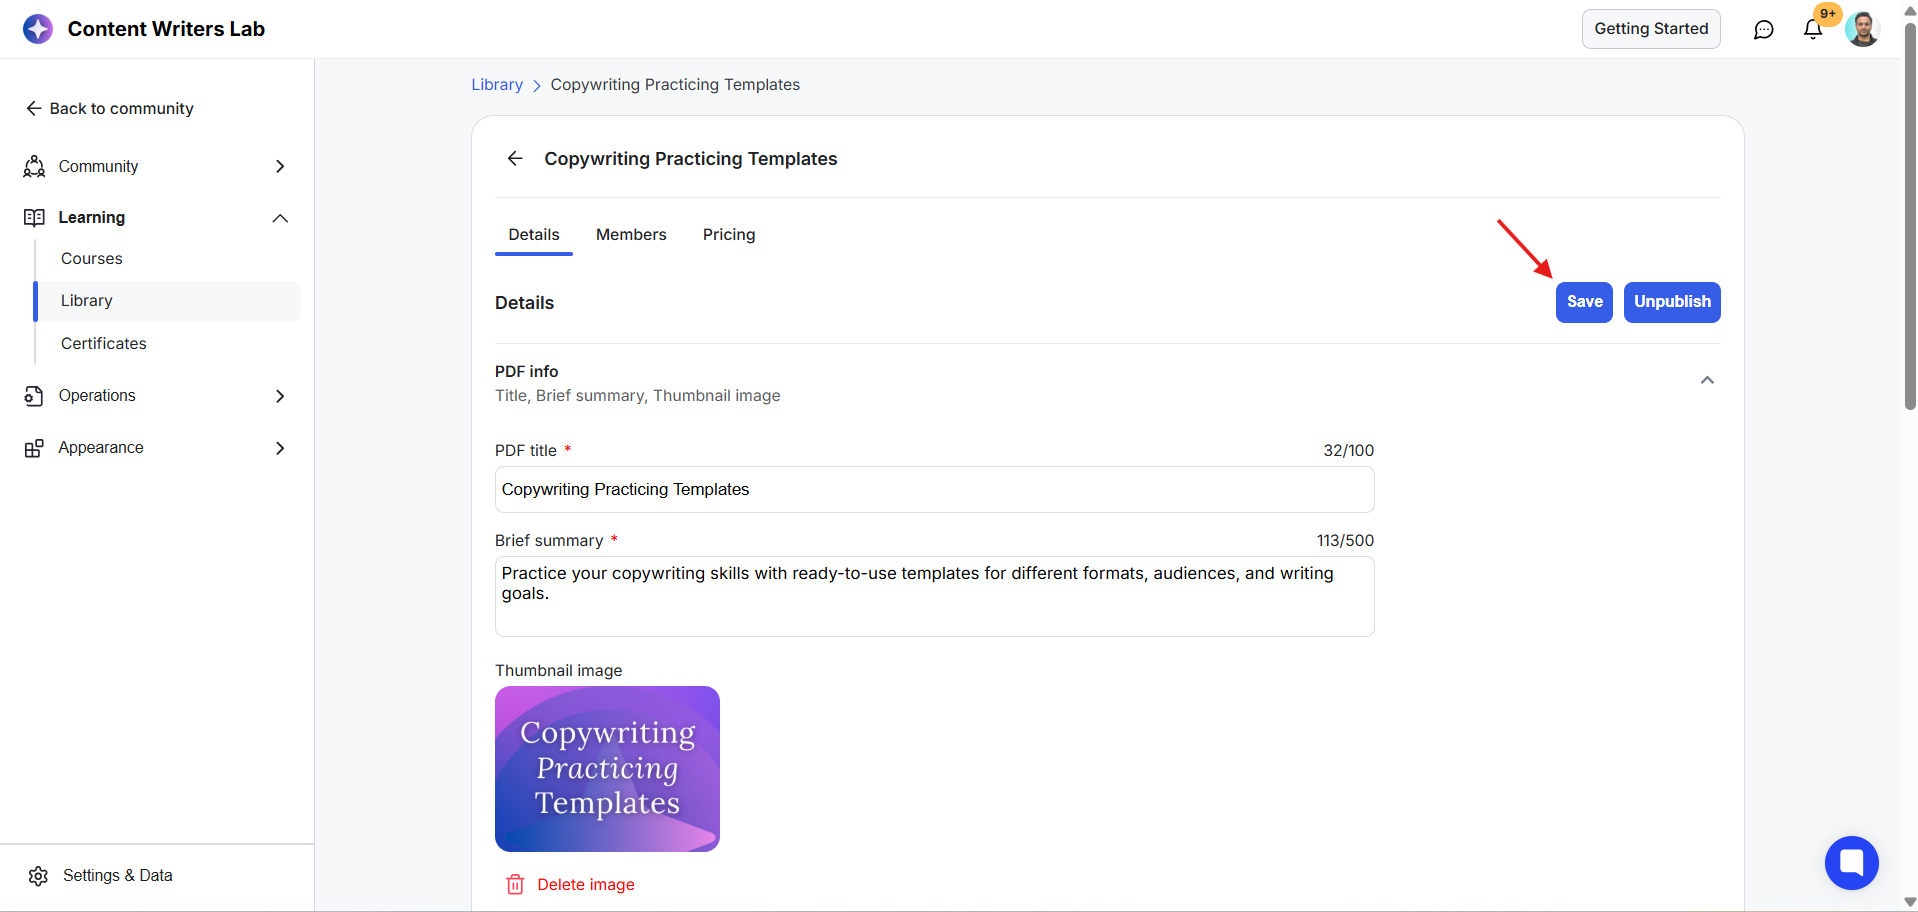
7) Click Save to save your changes.

The Details tab for the Copywriting Practicing Templates library item shows PDF title, brief summary, and thumbnail image fields; a red arrow points to Save. Visible: Content Writers Lab, Getting Started, Back to community, Community, Learning, Courses.

You can repeat this process to add more files, as long as they meet the resource's file type and plan limits.

Manage Files Within a Resource

Once you've added files, you can manage each one individually.
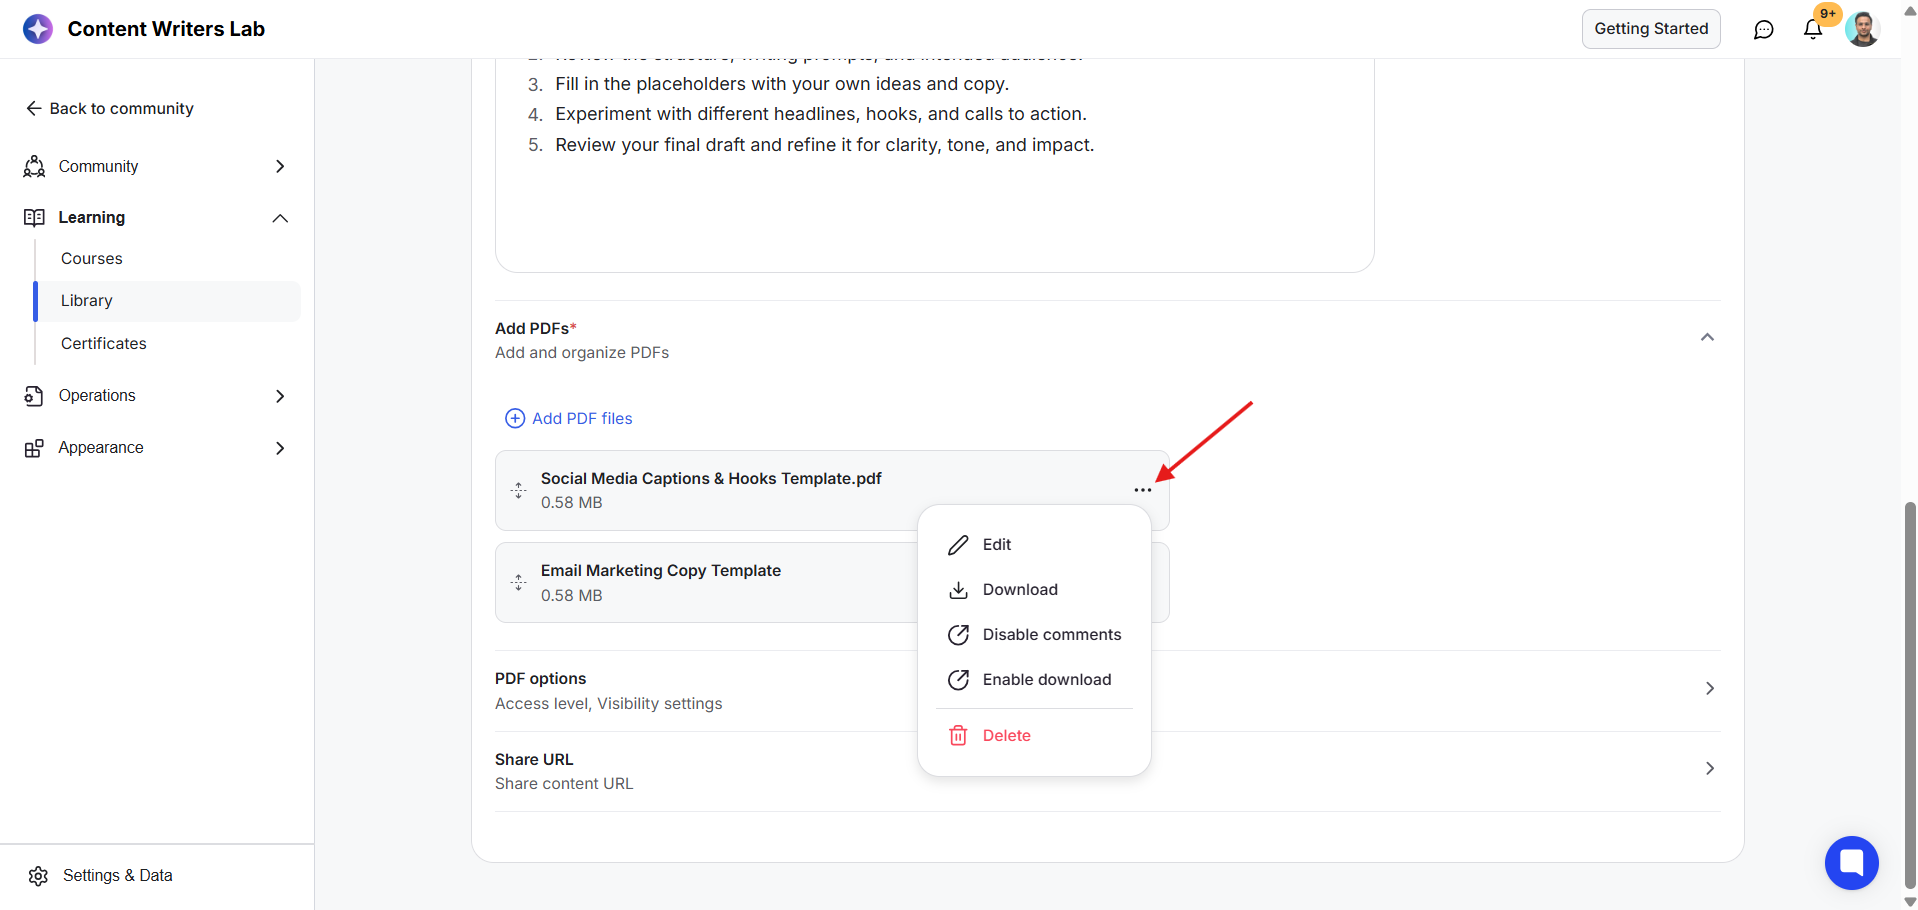
The Learning > Library PDF settings screen shows uploaded PDFs and an open options menu; a red arrow points to the first PDF’s ellipsis button. Visible: Learning, Library, Add PDFs*, Add and organize PDFs, Add PDF files, Social Media Captions & Hooks Template.pdf.

Click the three-dot menu next to a file to access the following options:

  • Edit: Edit the title, description, and thumbnail.

  • Download: Download the file.

  • Disable Comments: Turn off comments for the file.

  • Enable Download: Allow members to download the file.

  • Delete: Remove the file from the resource.

Did this answer your question?
😞
😐
😁