The WordPress Single Sign-On (SSO) integration allows users to log into your community using their existing WordPress account credentials.
Instead of creating a separate login for your community, members authenticate through your WordPress site using OAuth. This creates a seamless login experience and keeps user access centralized under your WordPress system.
Step 1: Log in to the WordPress admin panel.

Step 2: On the left-hand menu of your WordPress dashboard, click on Plugins
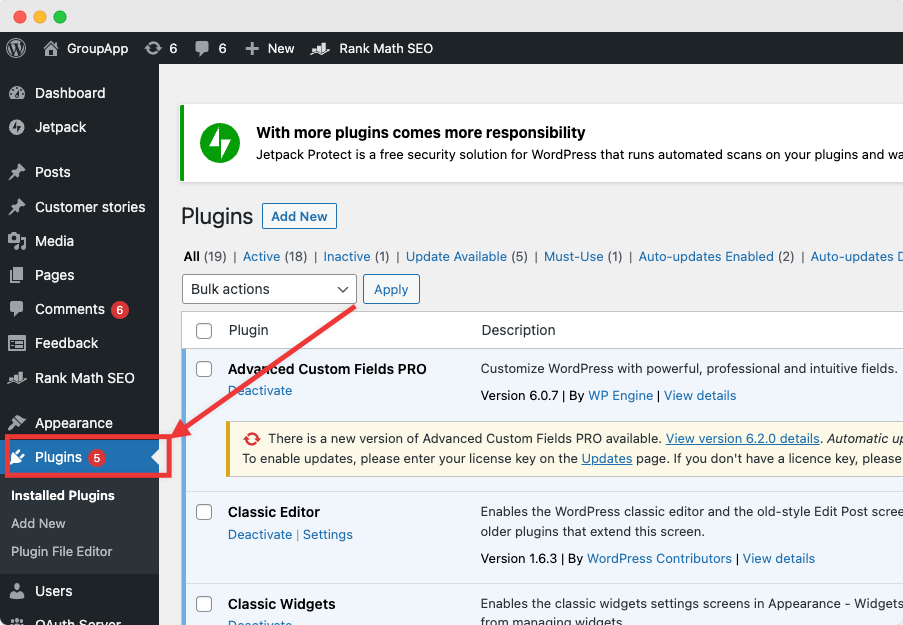
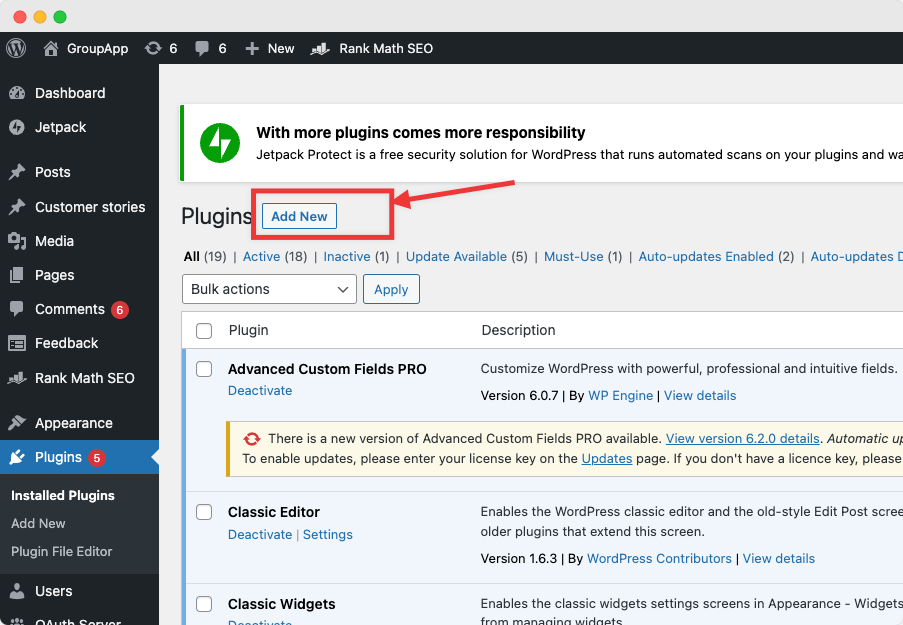
Step 3: On the Plugins page, click the Add New button
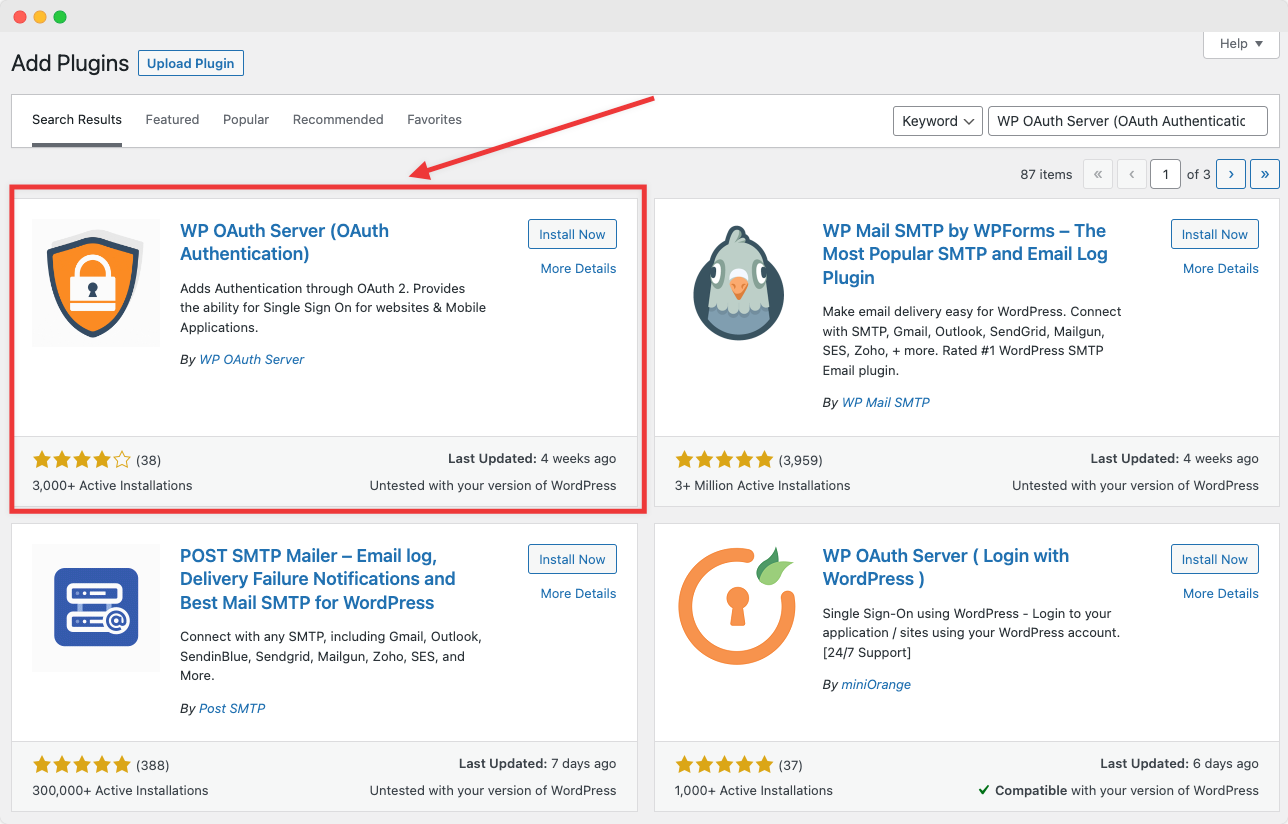
Step 4: On the add plugins page, search for the plugin "WP OAuth Server (OAuth Authentication)" and install the WP OAuth Server (OAuth Authentication) plugin.
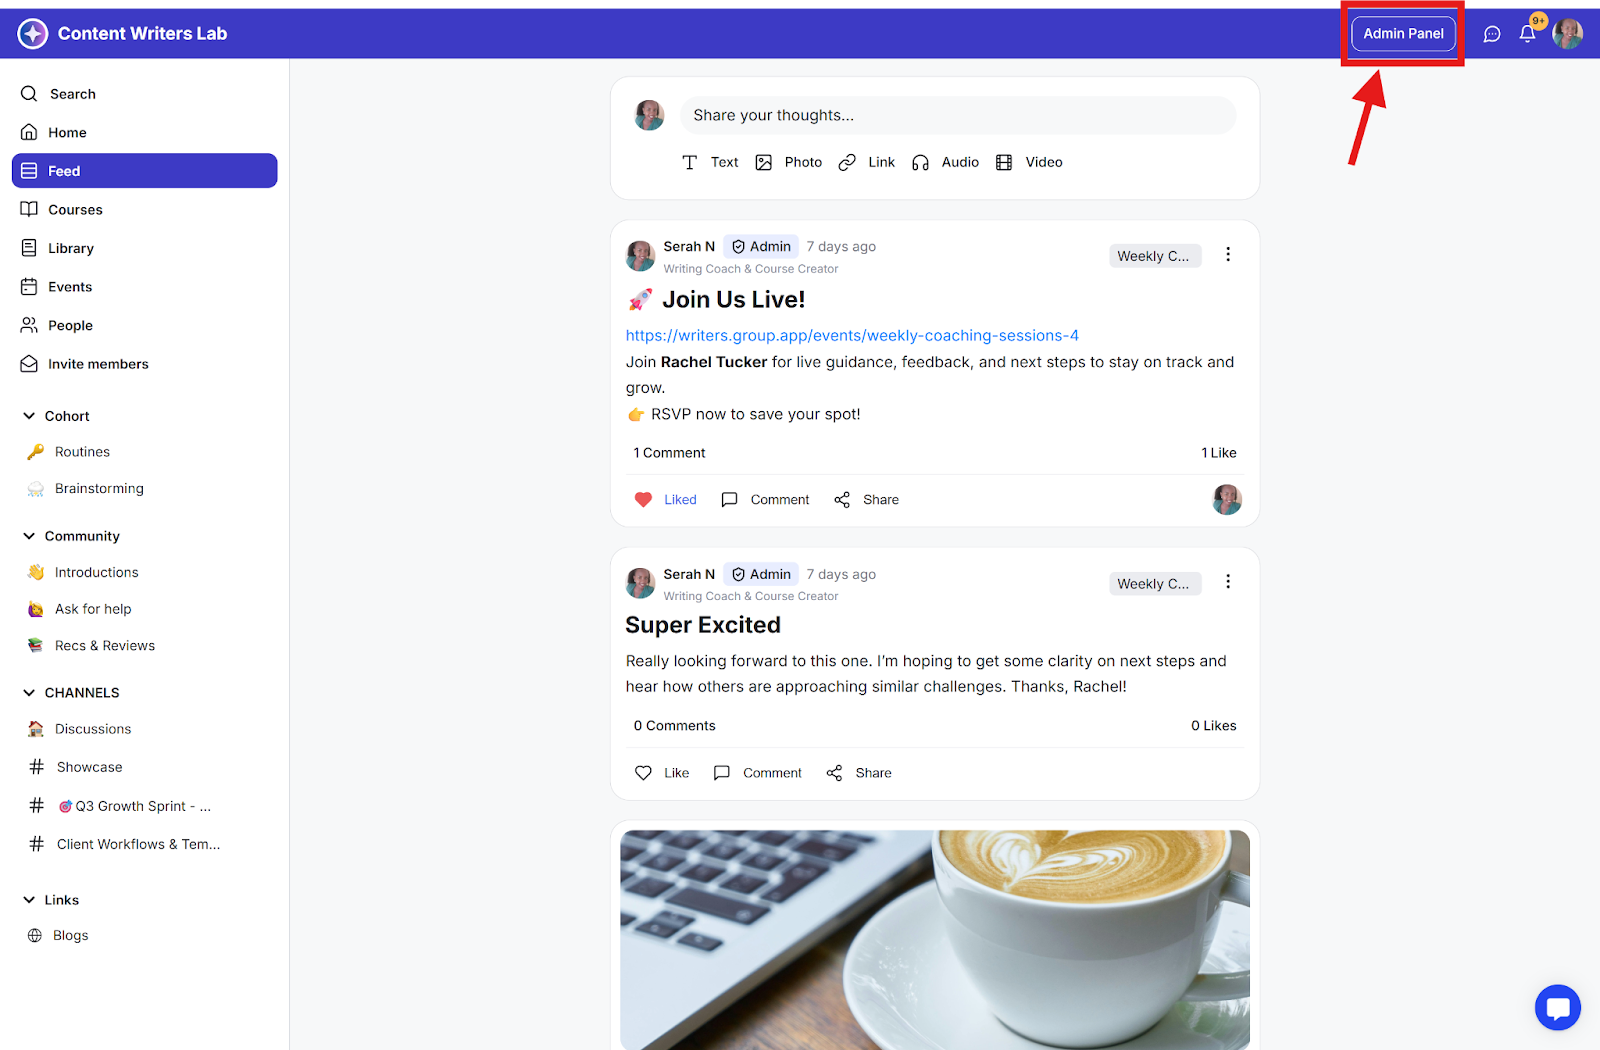
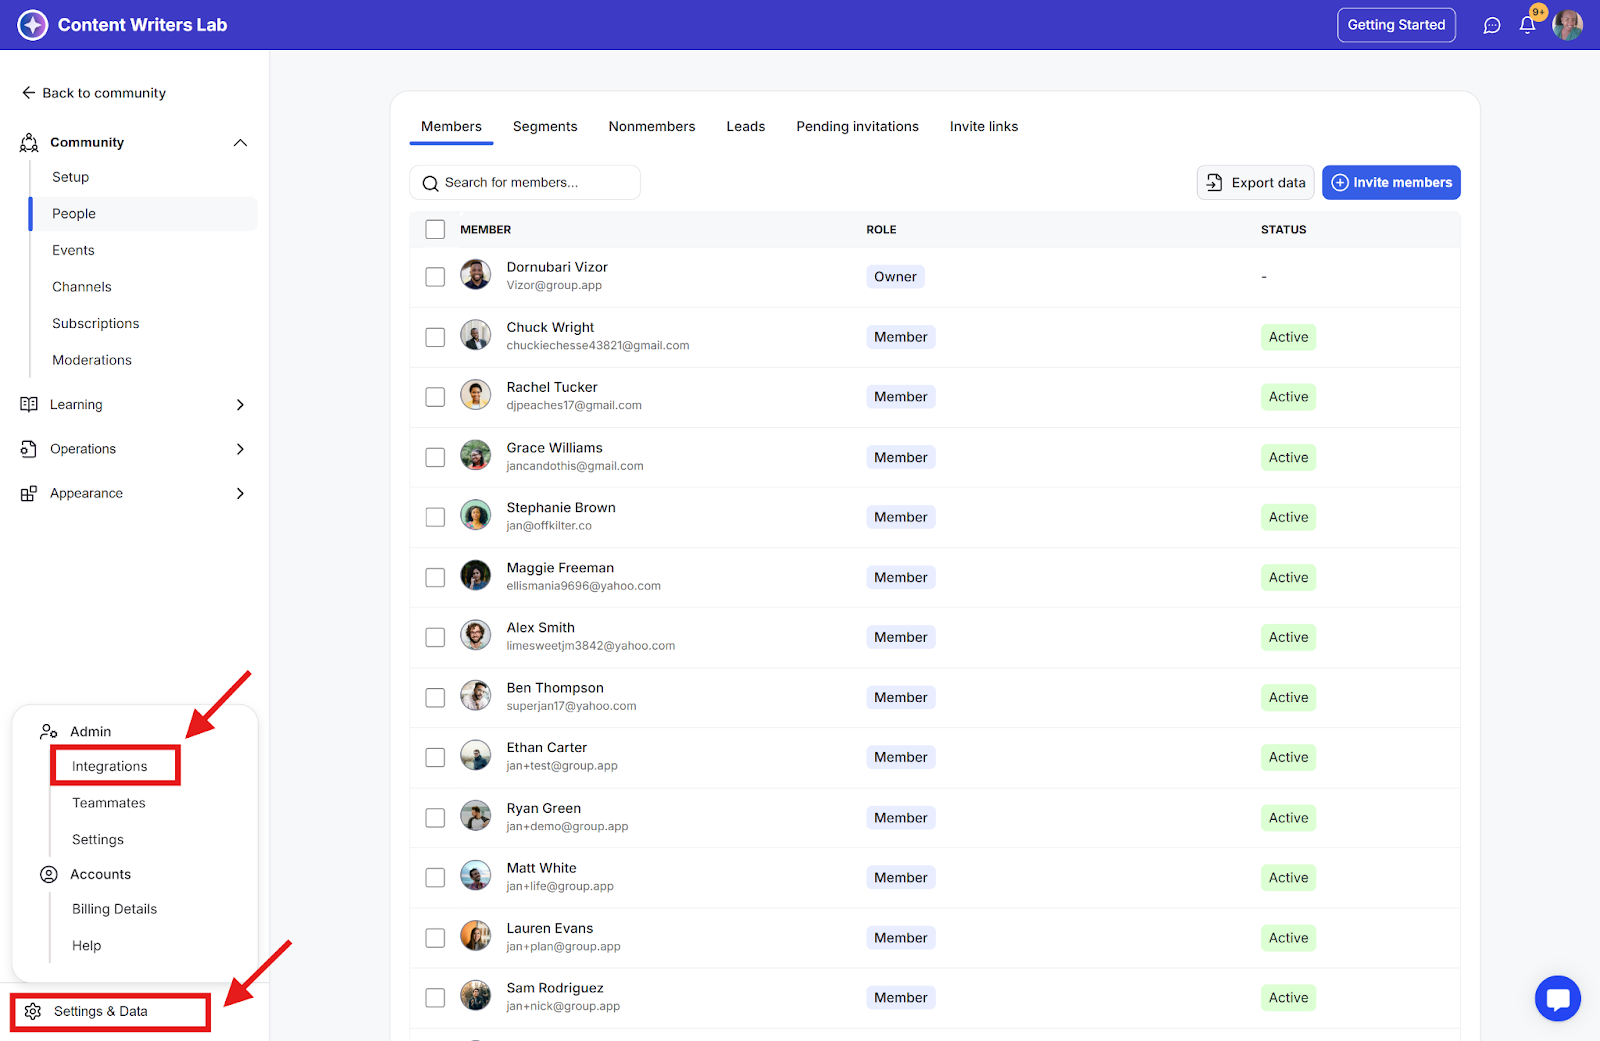
Step 5: Now navigate back to your GroupApp community and click on the Admin Panel button.
Step 6: Click on Settings & Data and select Integrations.
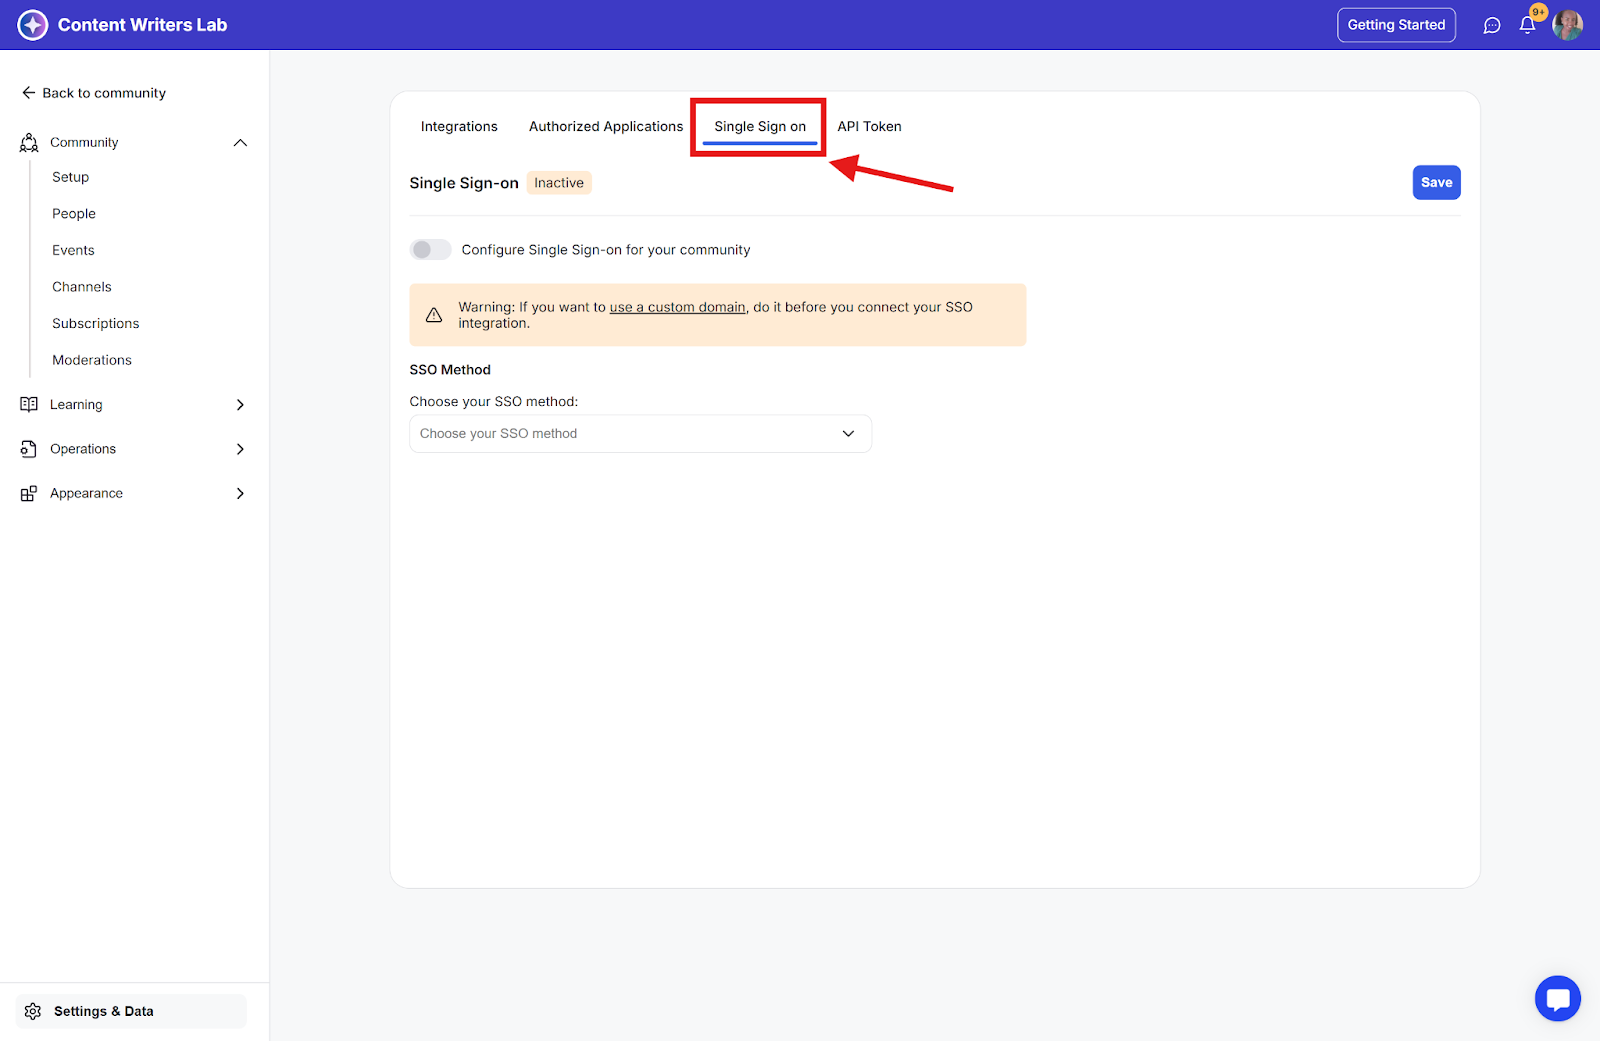
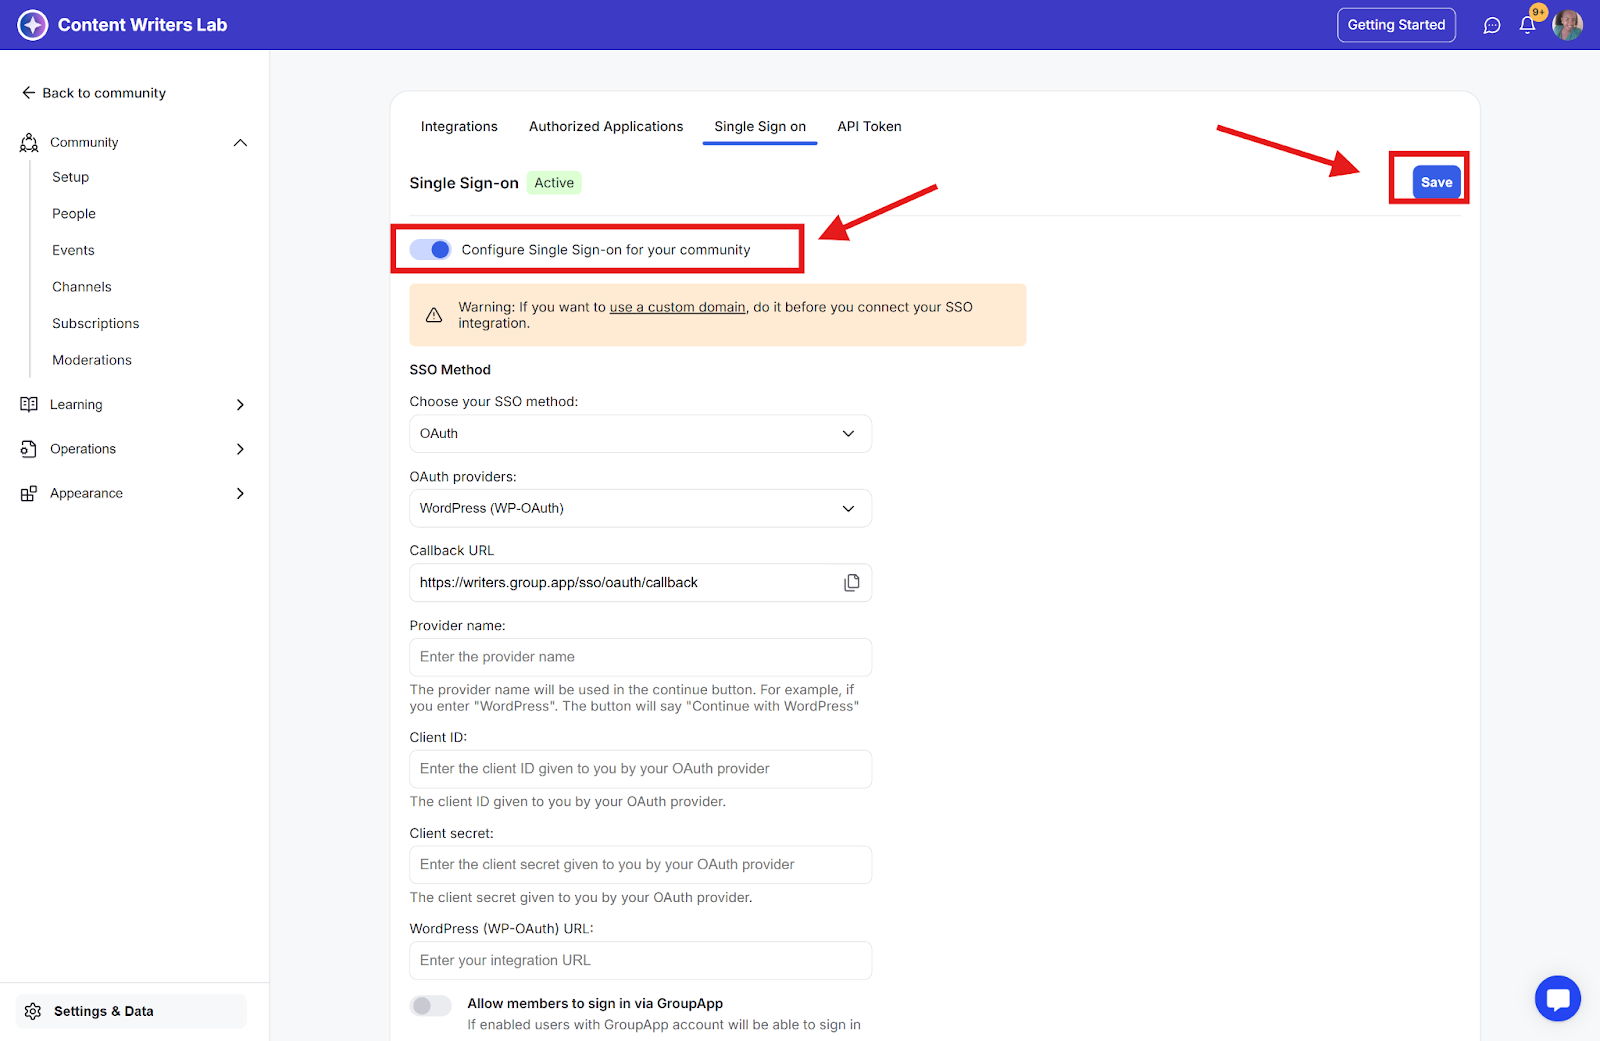
Step 7: Click the Single Sign-On tab at the top of the Integrations page.
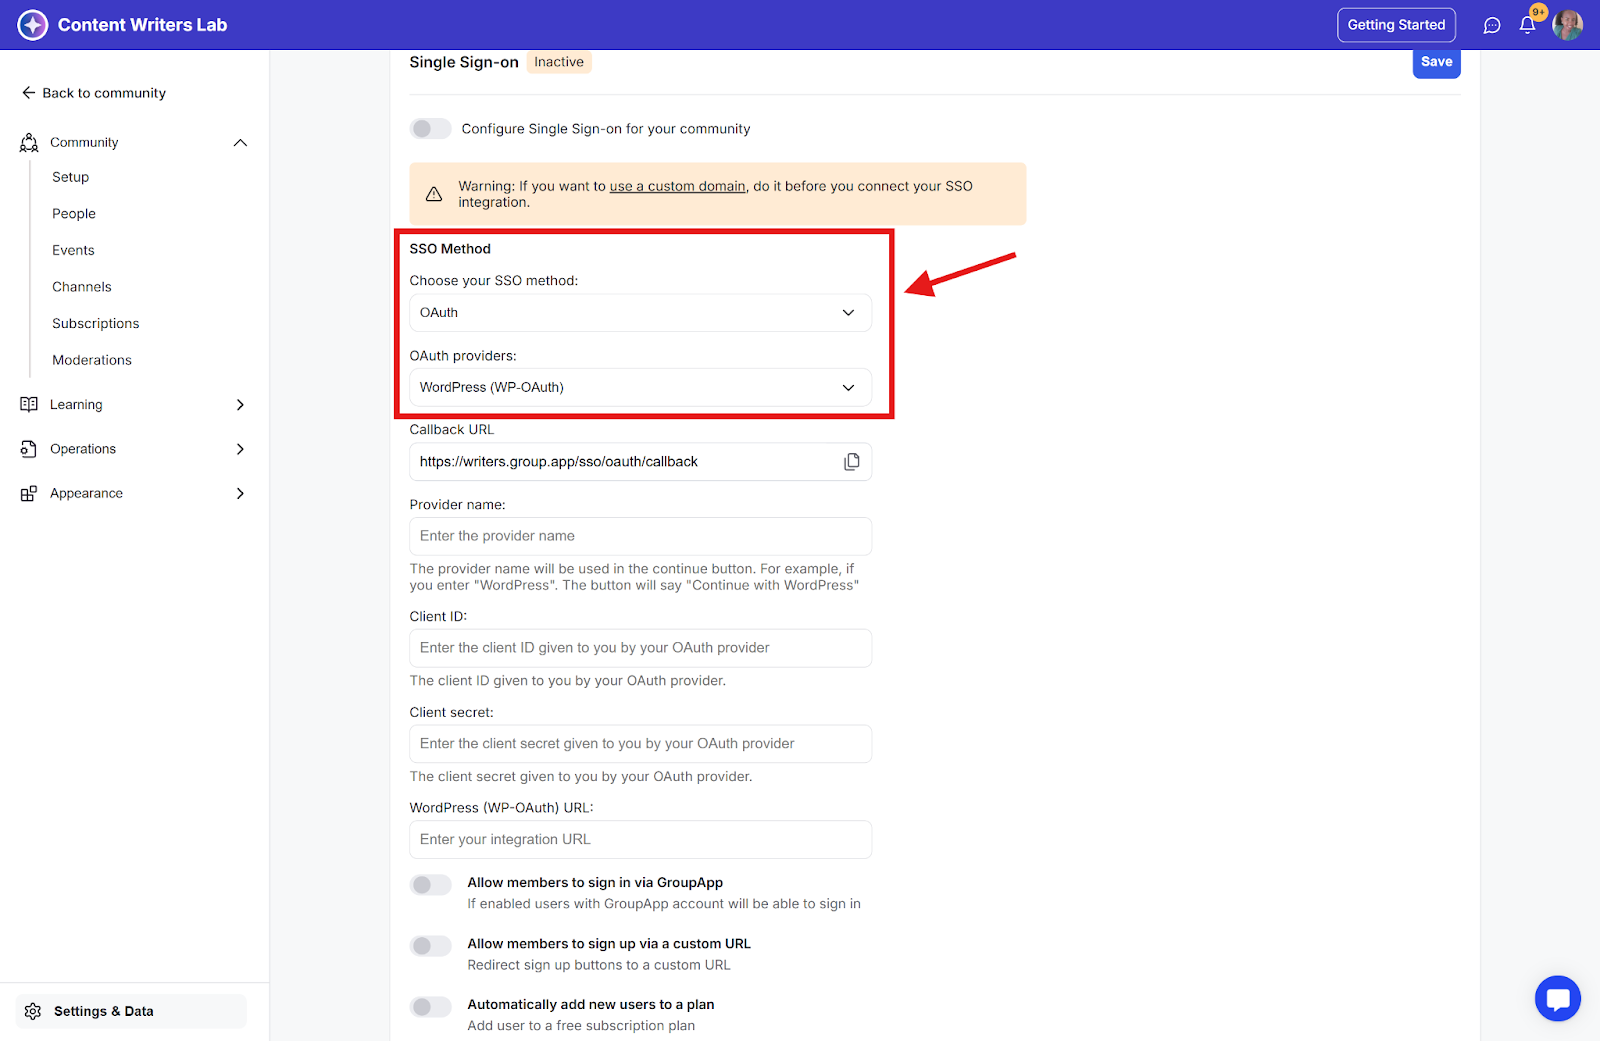
Step 8: On the Single Sign-on page, under SSO Method select OAuth as the single Single-on method and then select WordPress (WP-OAuth) as the OAuth provider.
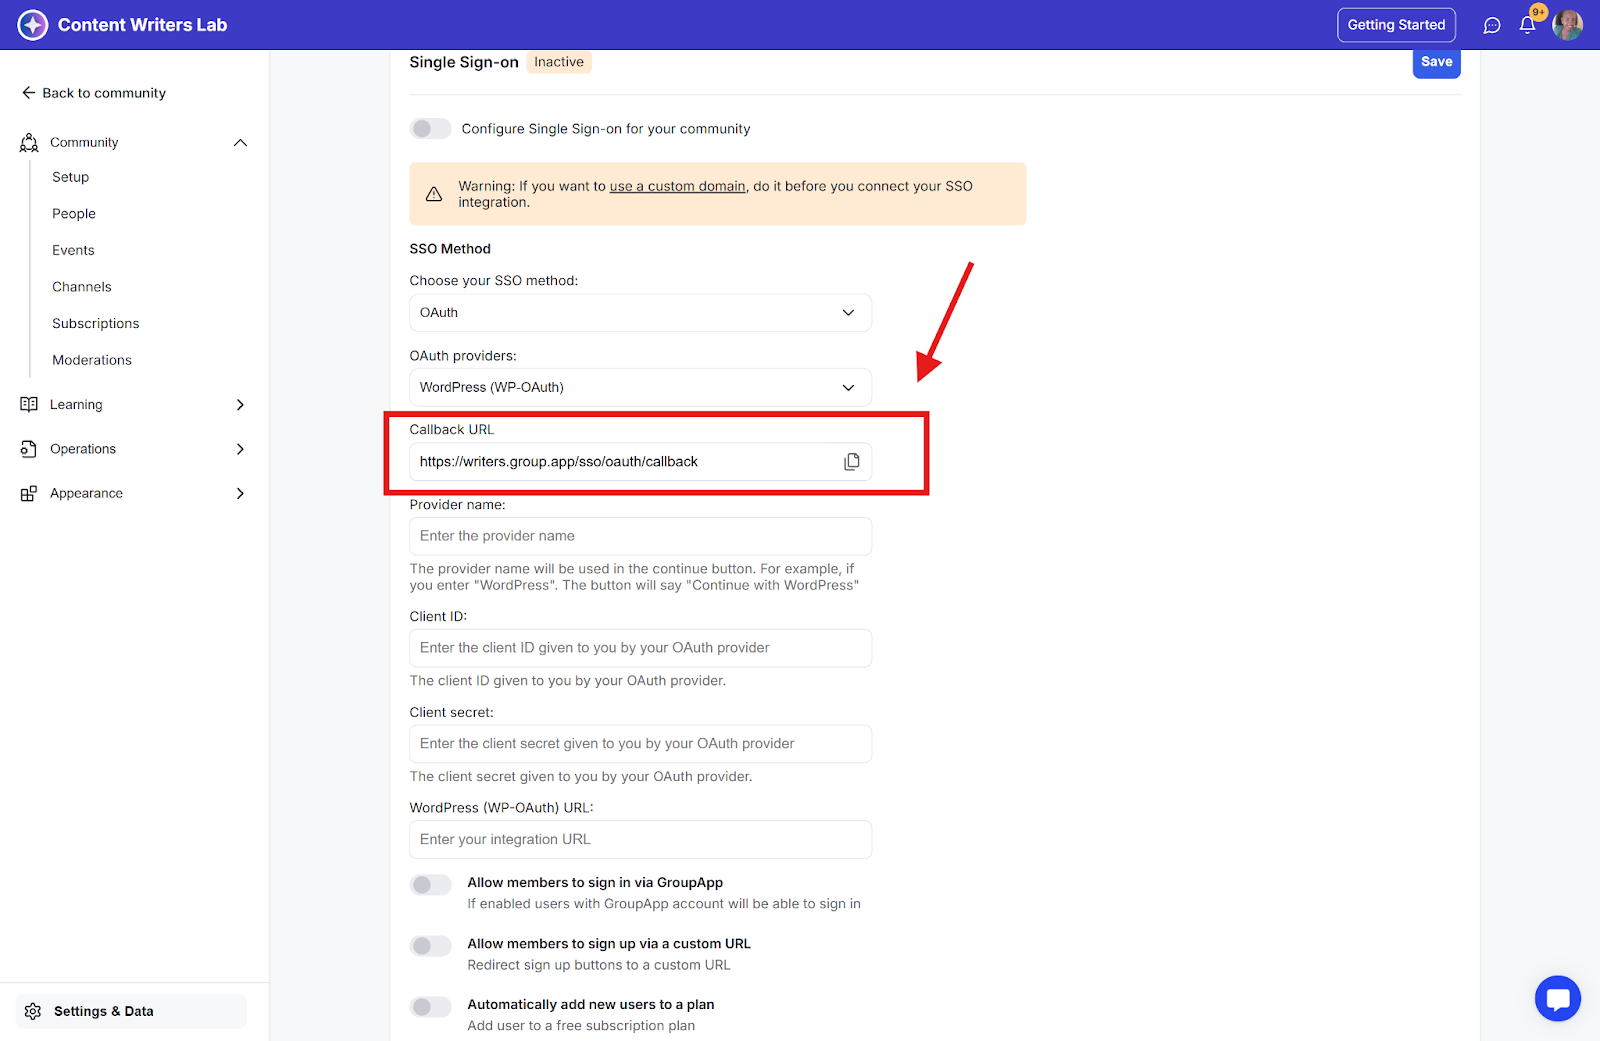
Step 9: Next, copy the call redirect URL provided on the page and navigate back into the WP dashboard.
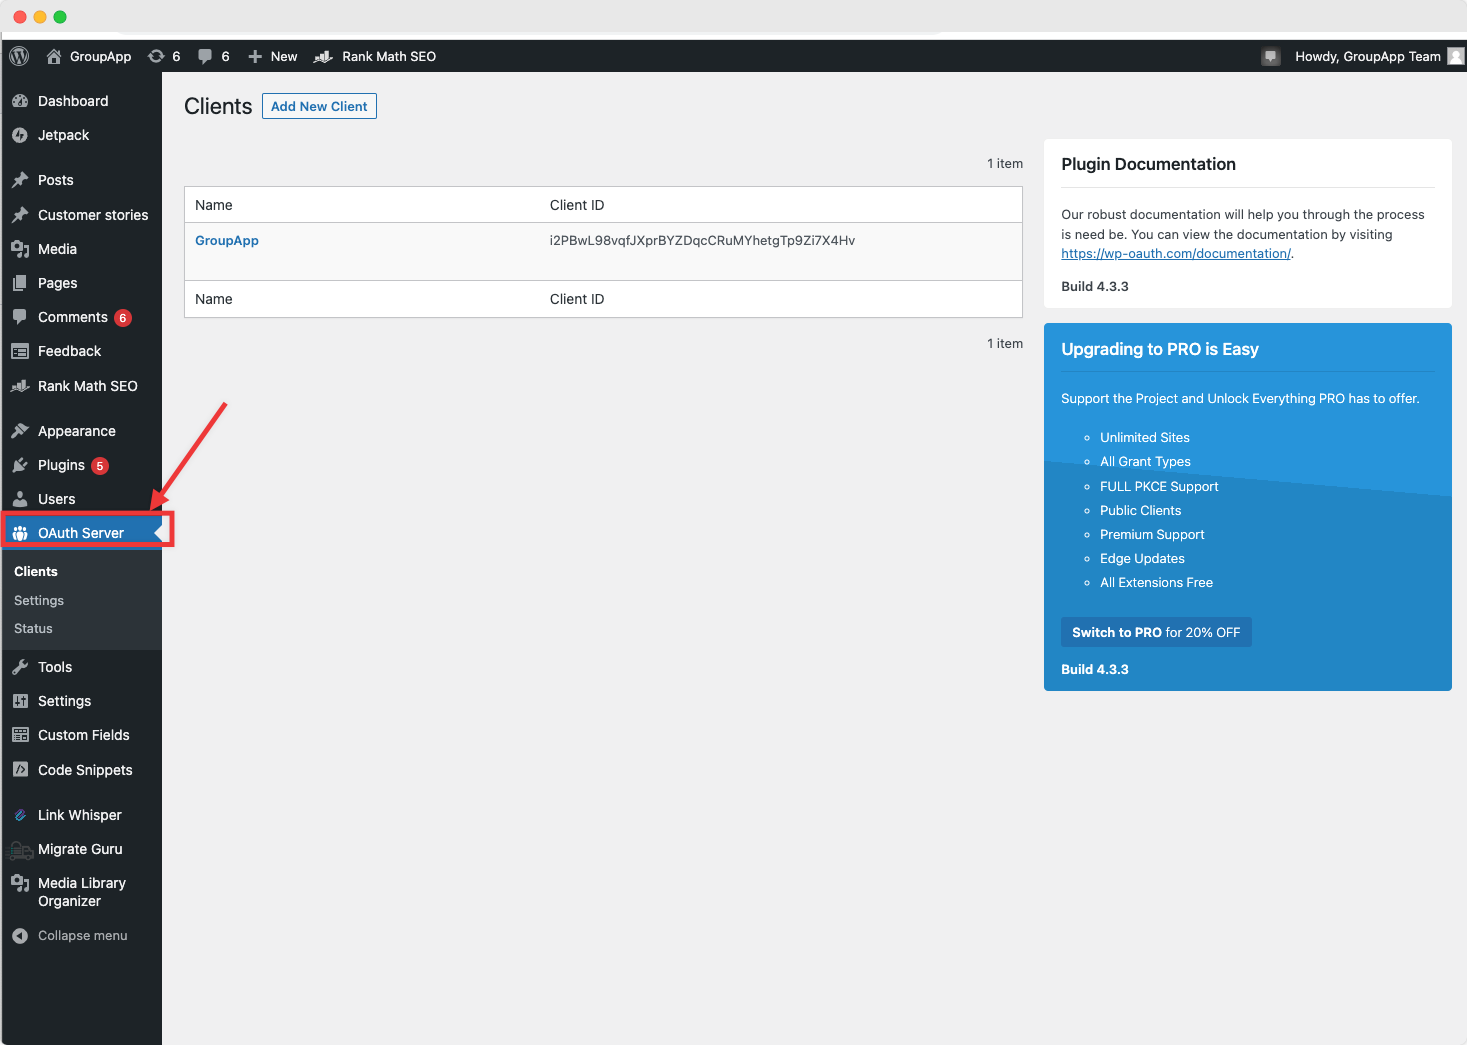
Step 10: Activate the installed "WP OAuth Server (OAuth Authentication)" plugin. Once installed, you will see the plugin name "OAuth Server" added to the left-hand menu of your WP admin panel. Click it.
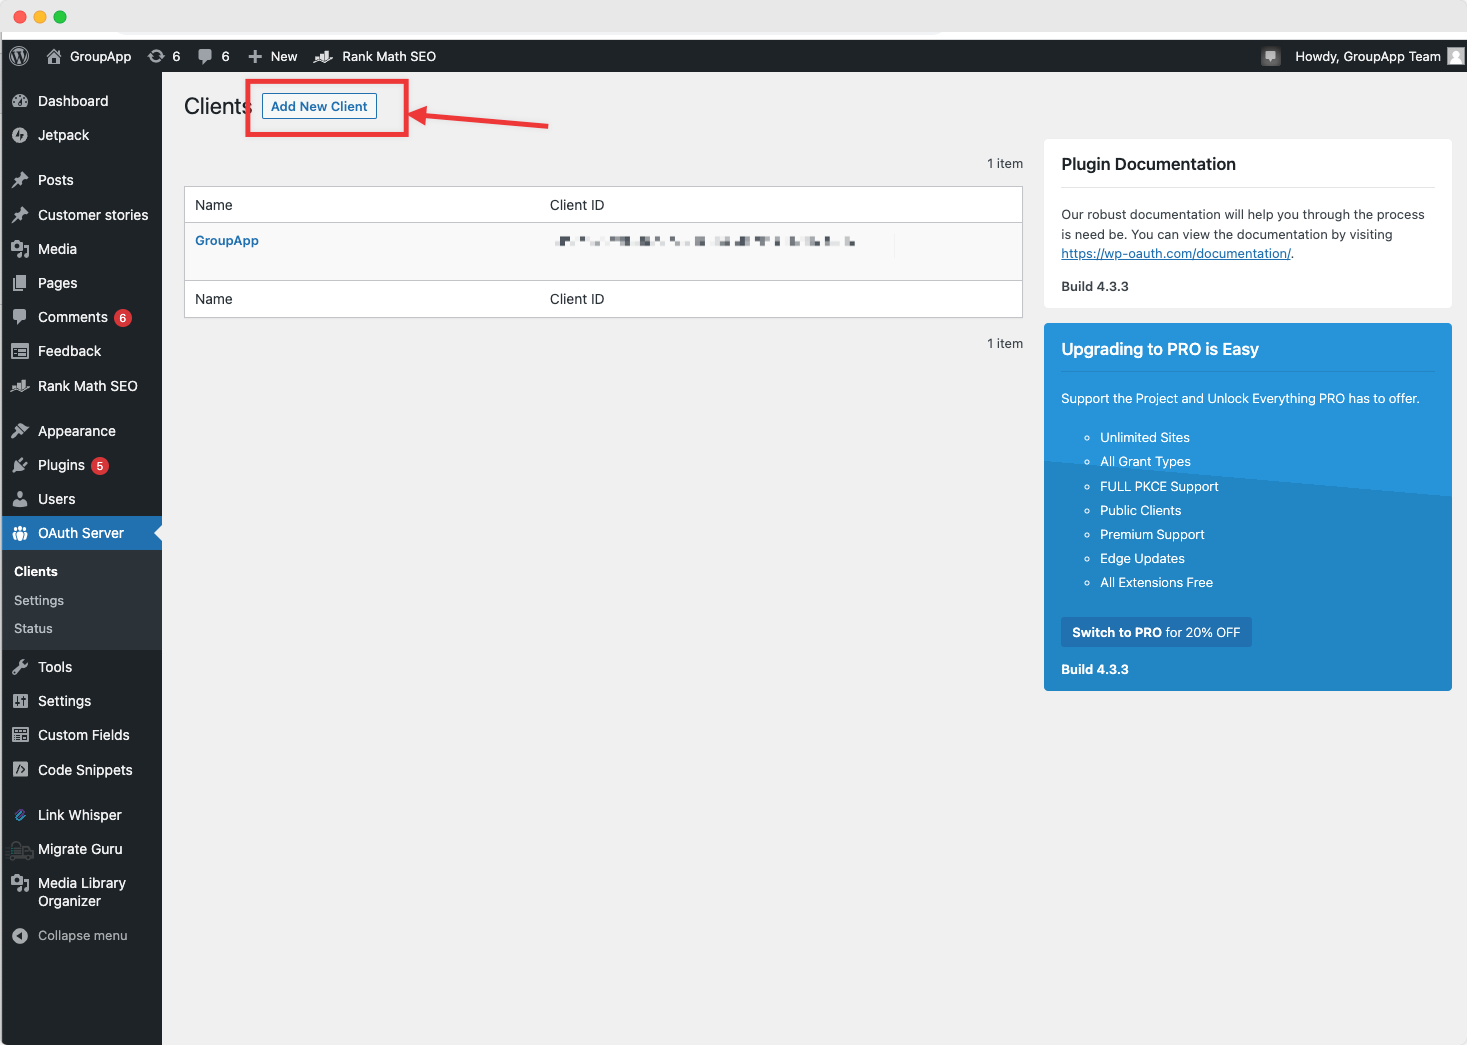
Step 11: Now, click the Add New Client button on the top-right-hand corner of the client page.
Now that you are on the create client, enter the following information.
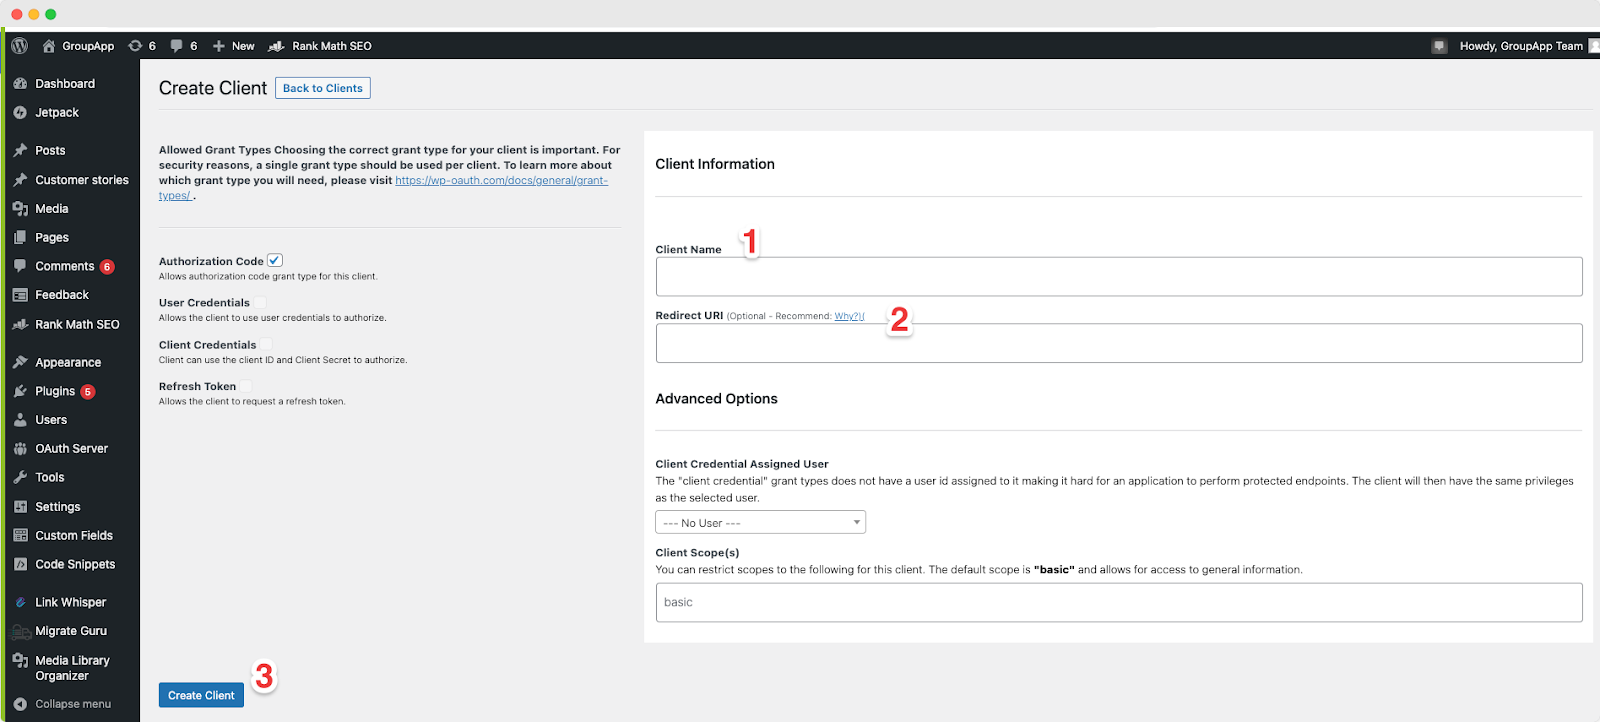
Enter your desired client name.
Paste your community call-back URL into the "Redirect URL" field.
Click the "Create Client" button
Once you click the "Create Client" button, the page will refresh and you will see the client ID and Client secret auto-populated.
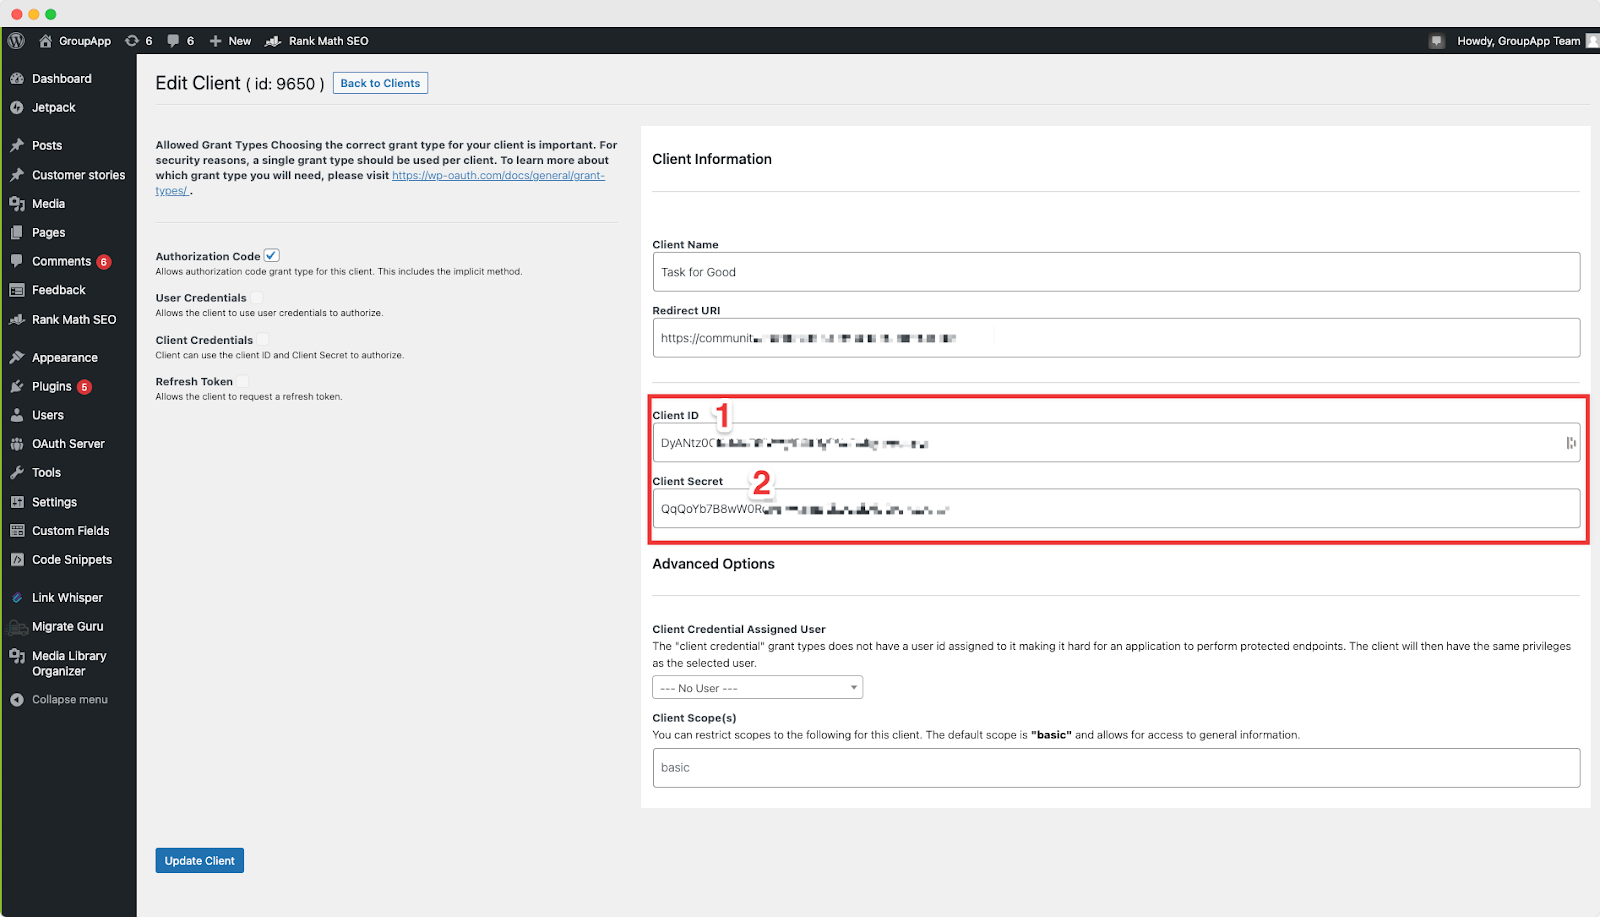
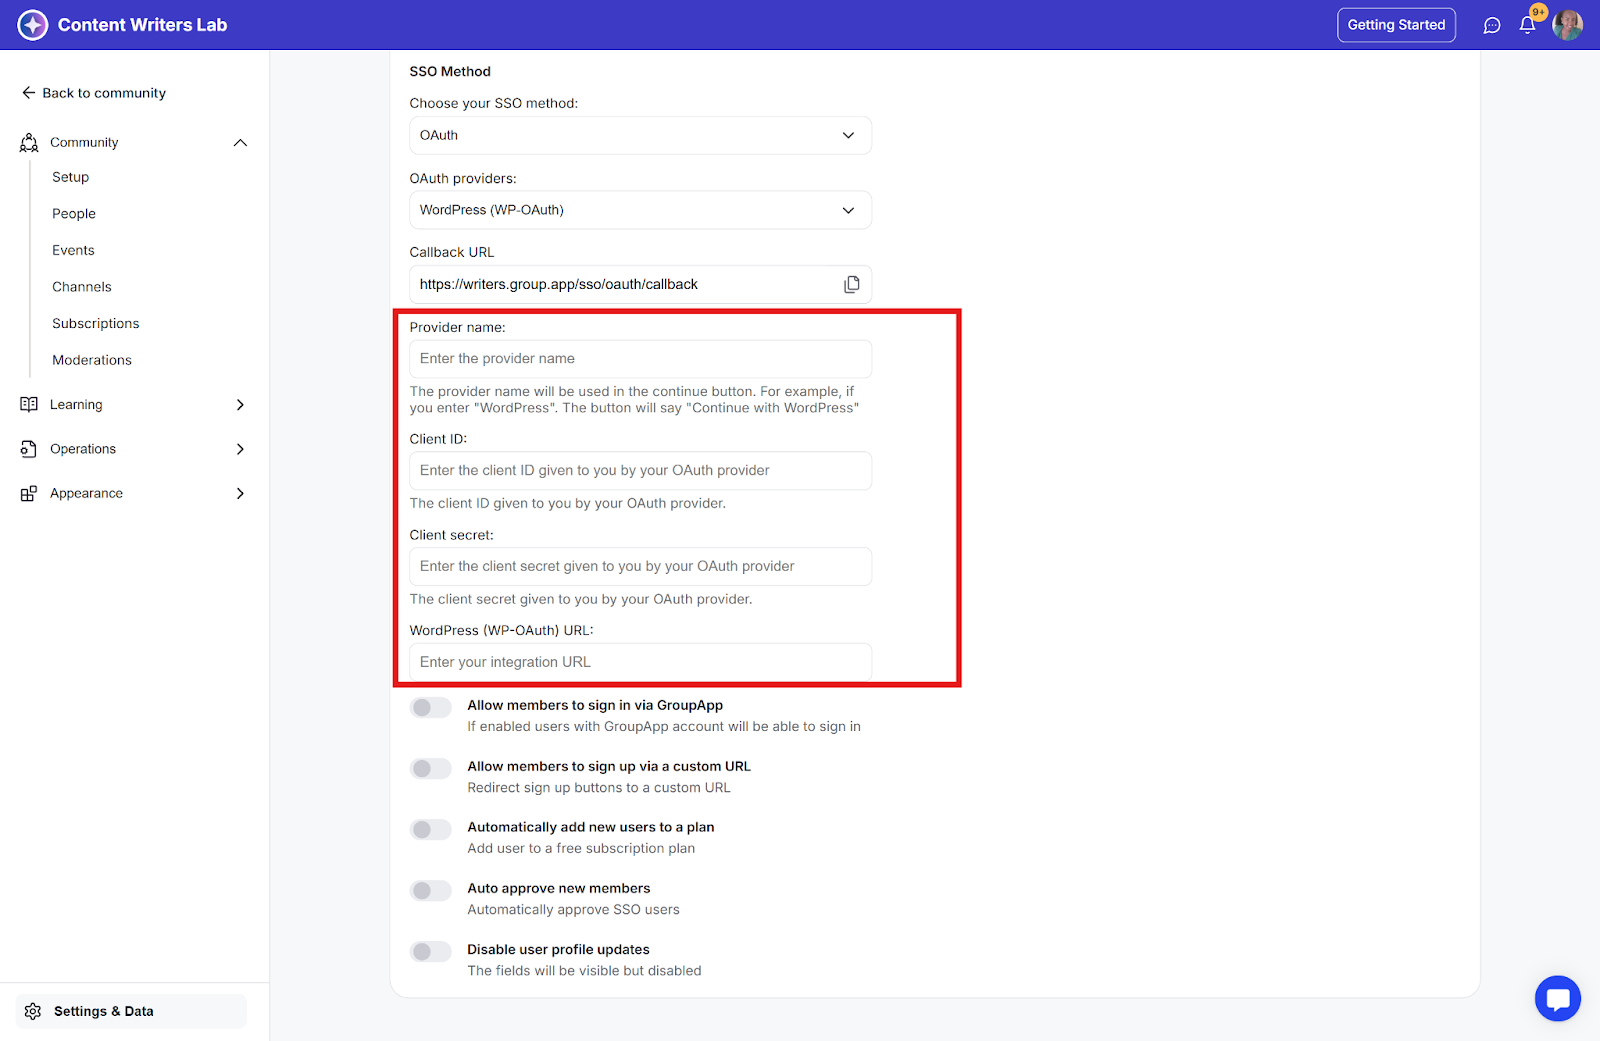
Step 1: Copy the generated Client ID and Client Secret and head back to your community Single Sign-on configuration page.
Step 2: Enter the following details:
The provider name.
Your Client ID.
Your Client Secret.
The URL of your WordPress site as your WordPress URL.
Step 3: Scroll up on the page and toggle on Configure Single Sign-on for your community to Active and click Save.
Now that you have configured everything, it's time to activate your SSO on your WordPress site.
Navigate back to your WP Admin Panel. Click on OAuth Server and under OAuth Server, click Settings.
Enable the OAuth Server by checking the box.
Click on Save Changes

