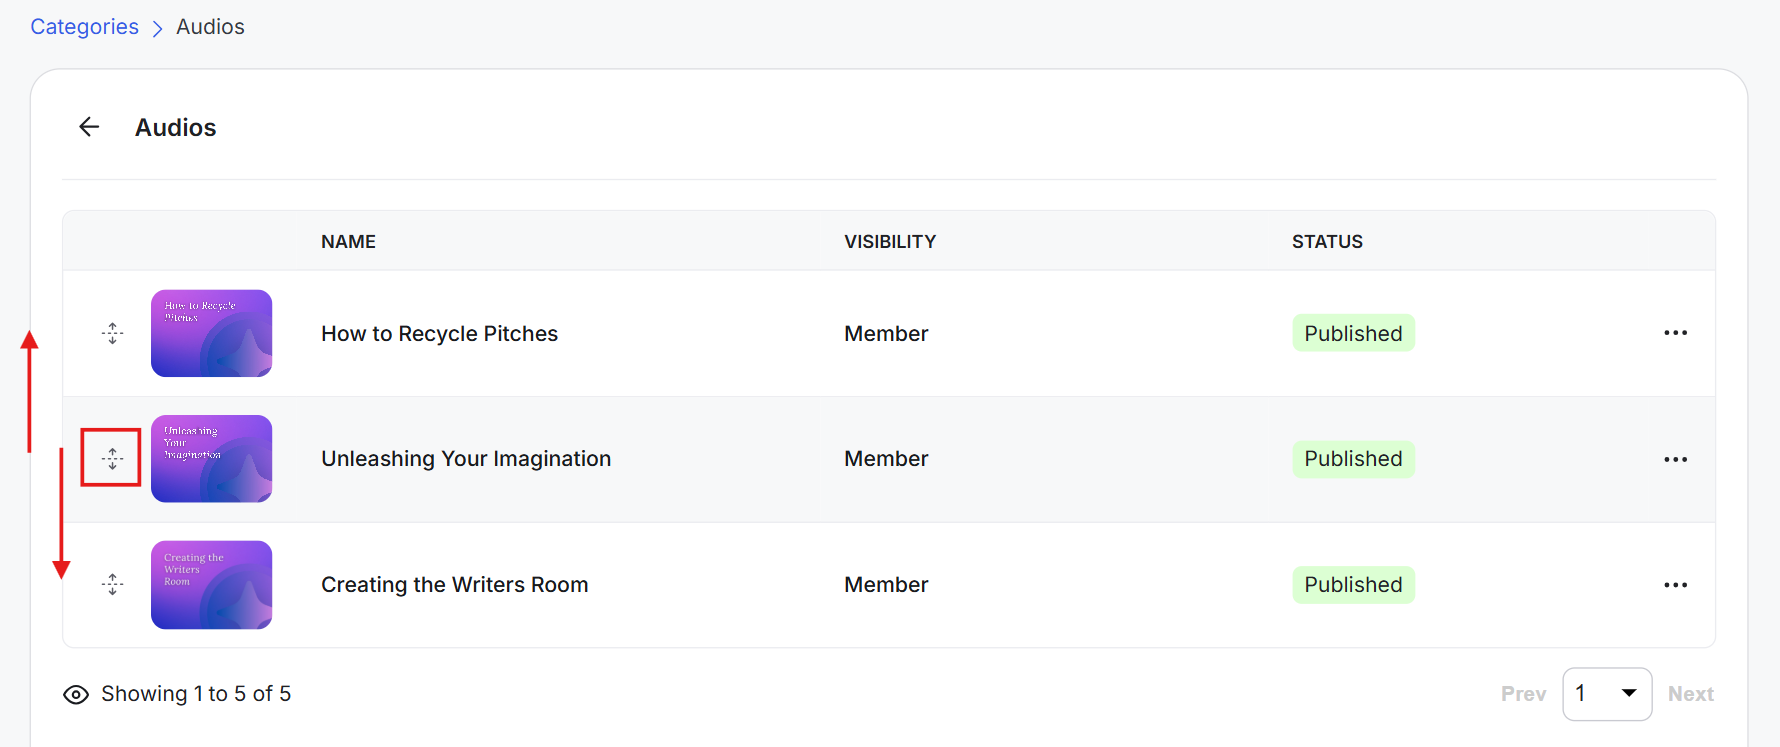
You can control the order in which your channels, courses, and Library resources appear across your community. This helps you put important content first, organize content in a logical sequence, and make it easier for members to find what they need.
You can also reorder categories and control the order of the content within each category.
Here's how to manage the order for each area.
Channels can be organized into categories. You can control both the order in which the categories appear in the main left-side menu and the order of the channels within each category.
1) Go to the Admin Panel and click Channels under Community.
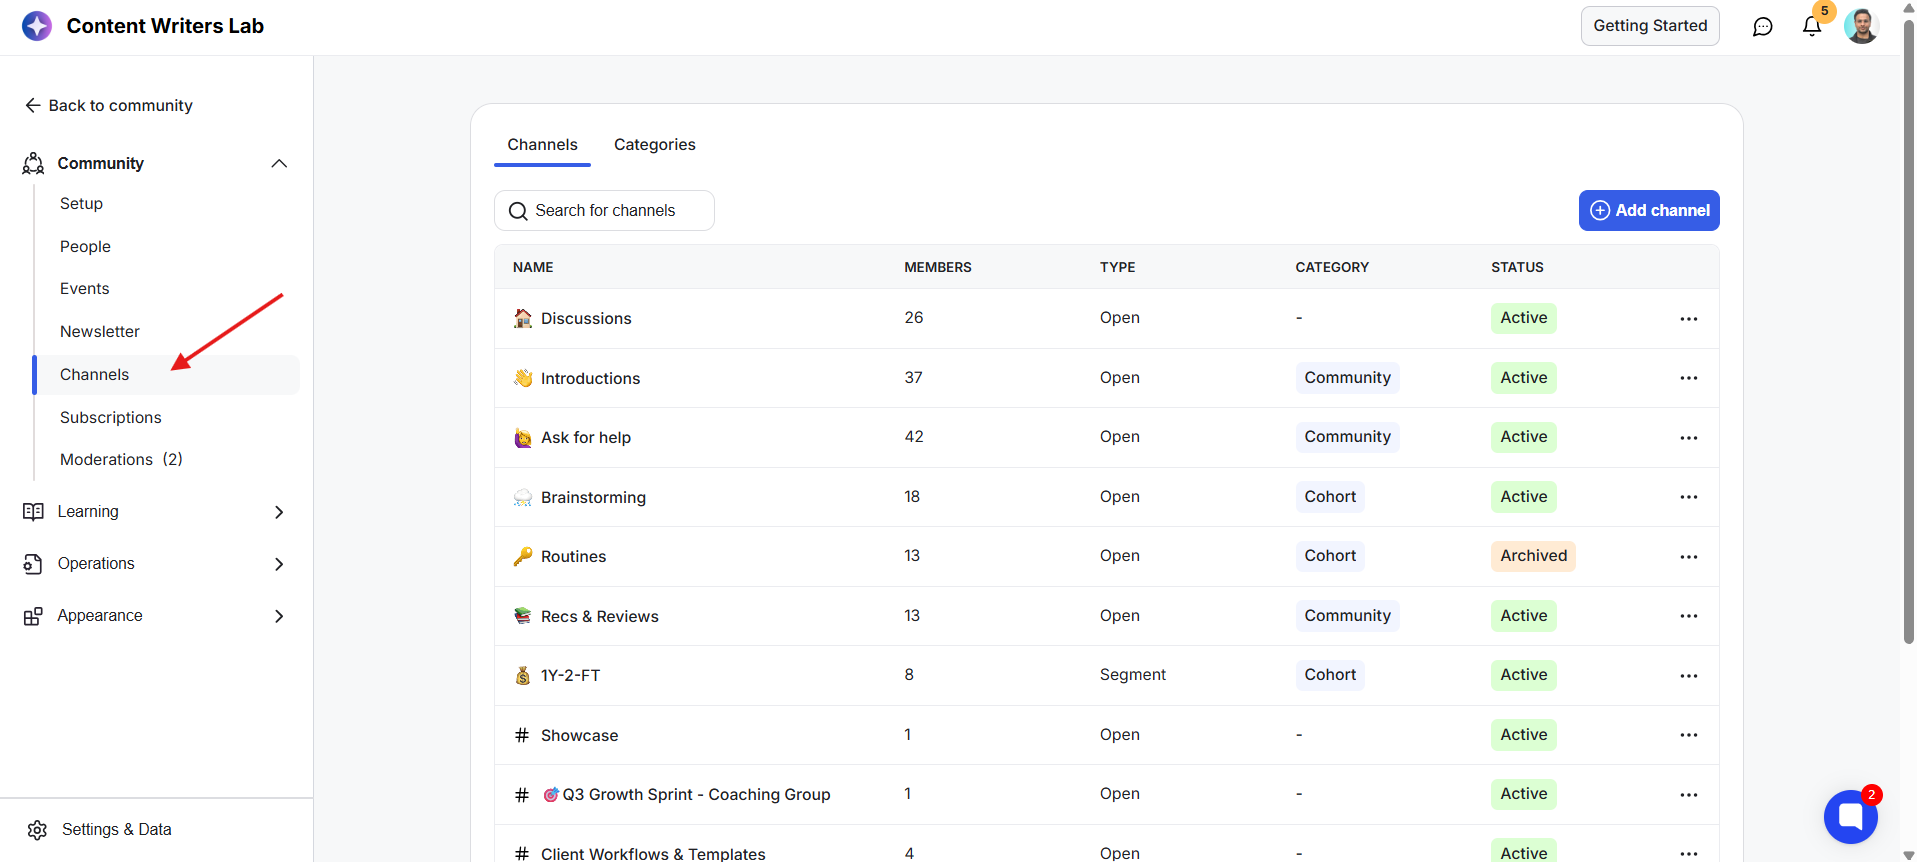
2) Open the Categories tab. Here, you'll see all your channel categories.
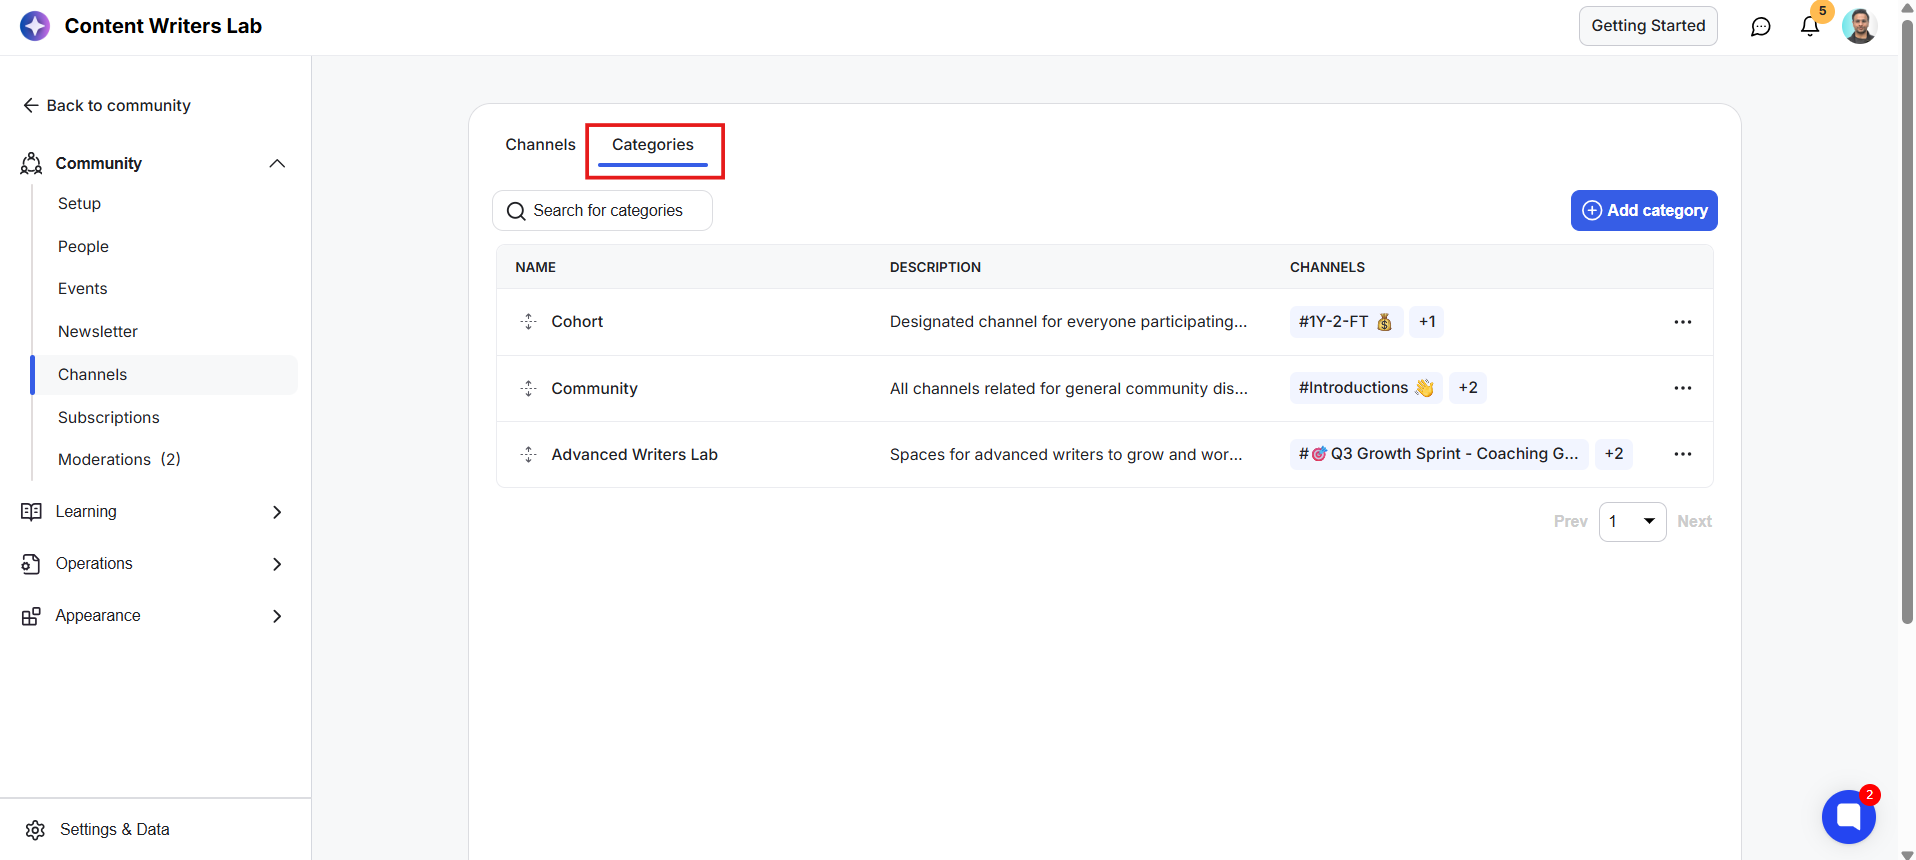
3) Click and hold the drag handle next to a category. Drag the category up or down to move it to the position you want.
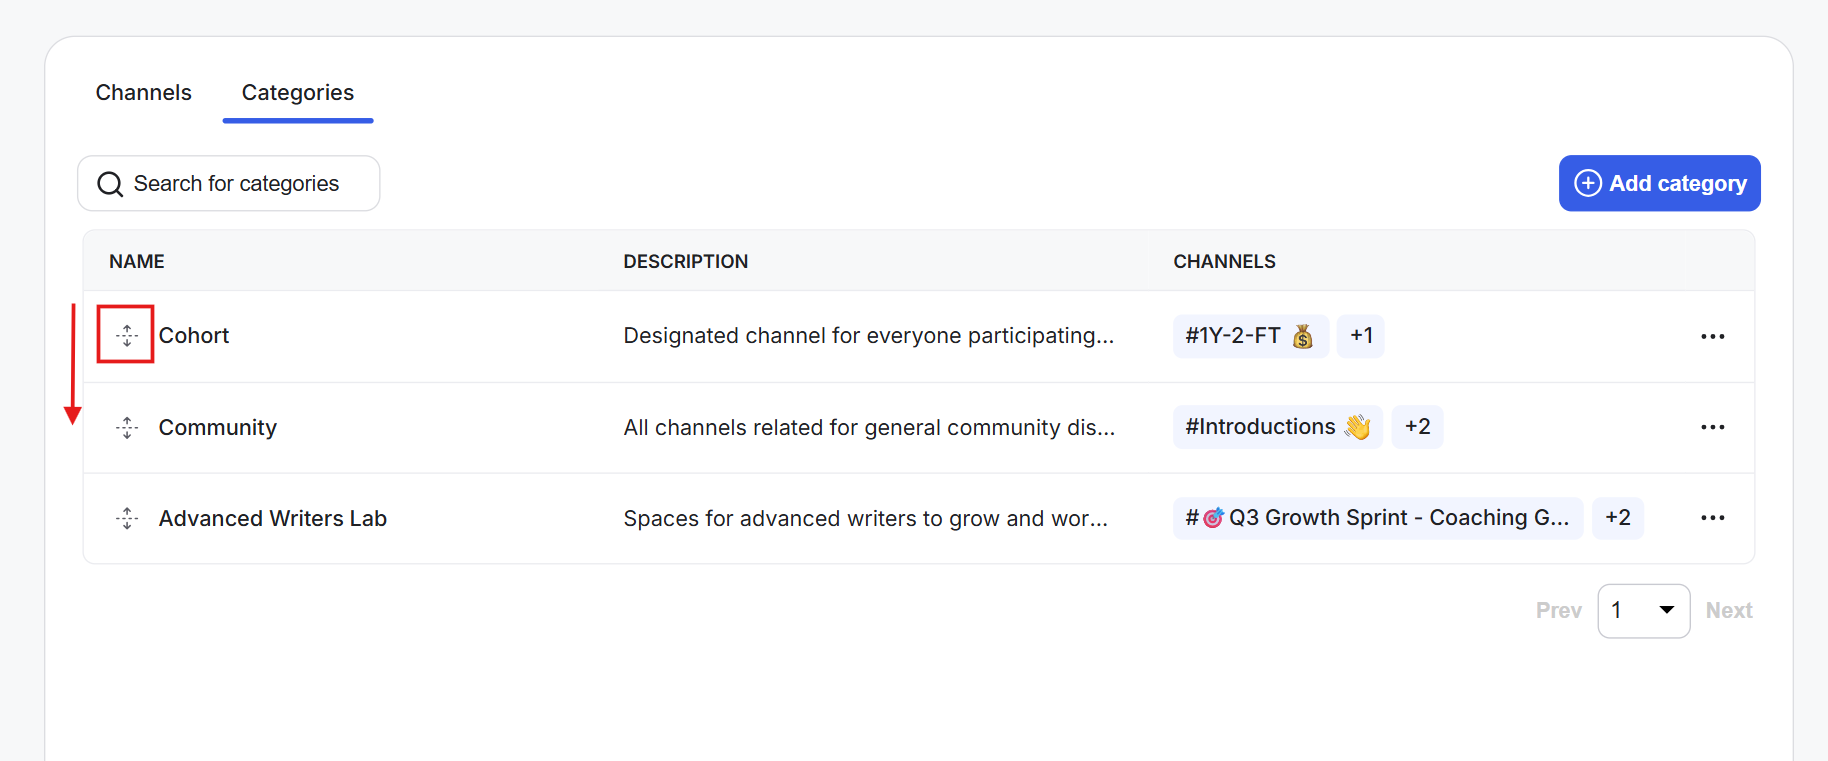
The new order determines how your channel categories appear in the category drop-down on the main left-side menu.
1) From the Categories tab, click the category you want to update.
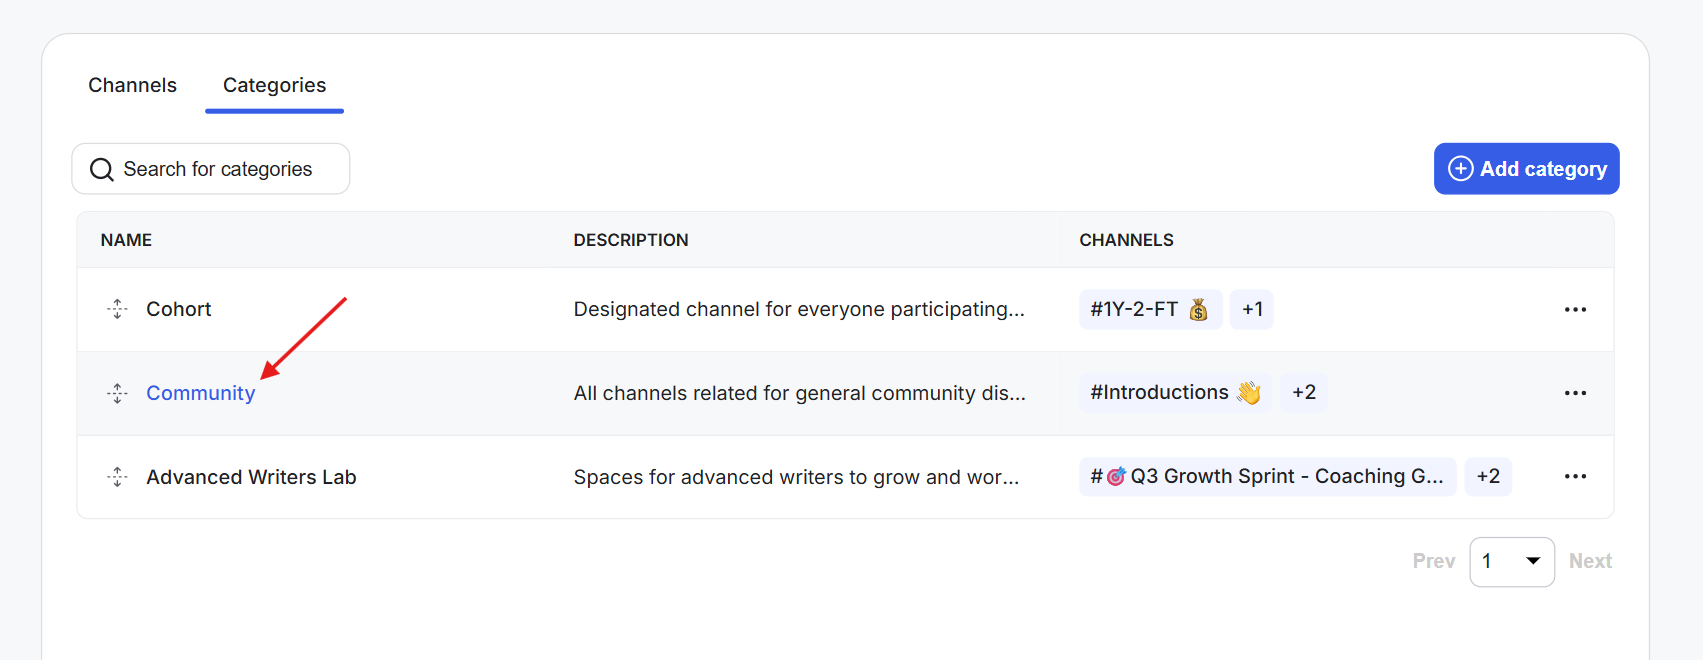
2) This opens the category settings.
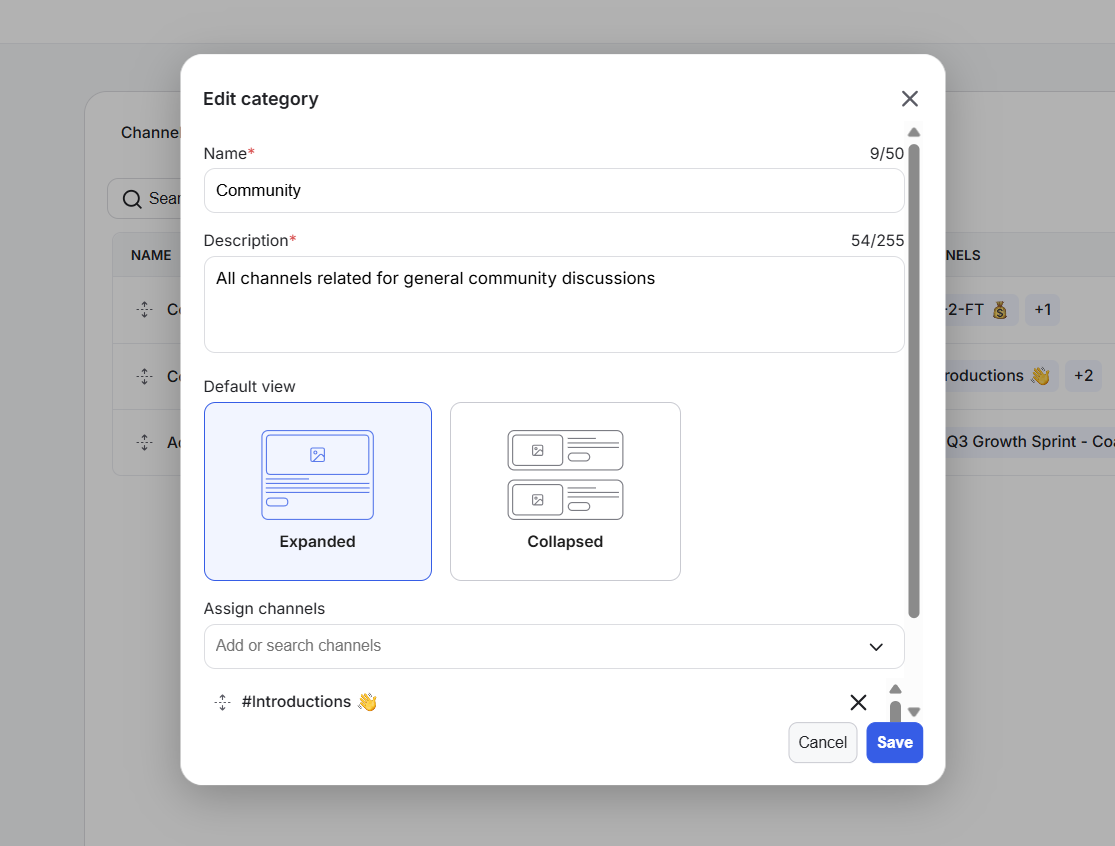
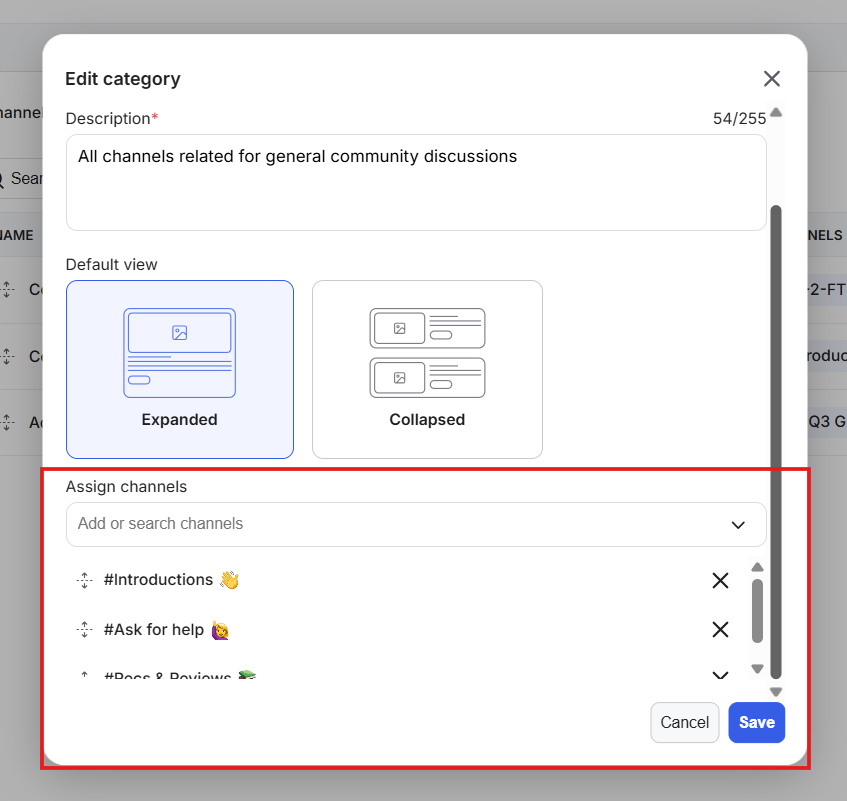
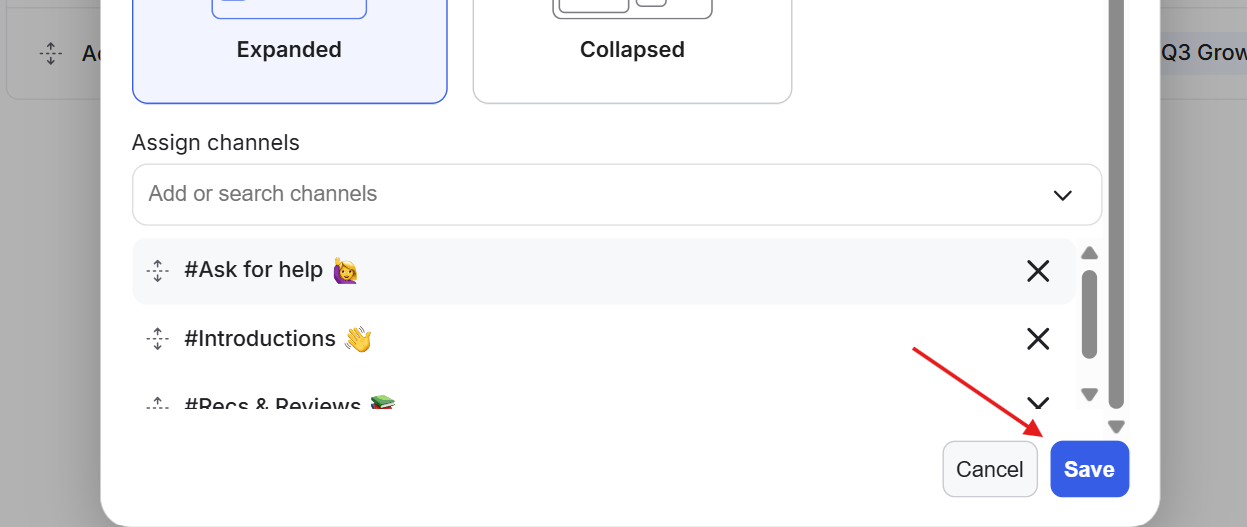
3) Scroll down to the Assign Channels section, where you'll see the channels assigned to that category.
4) Click and hold the drag handle next to a channel. Drag the channel up or down to change its position within the category.
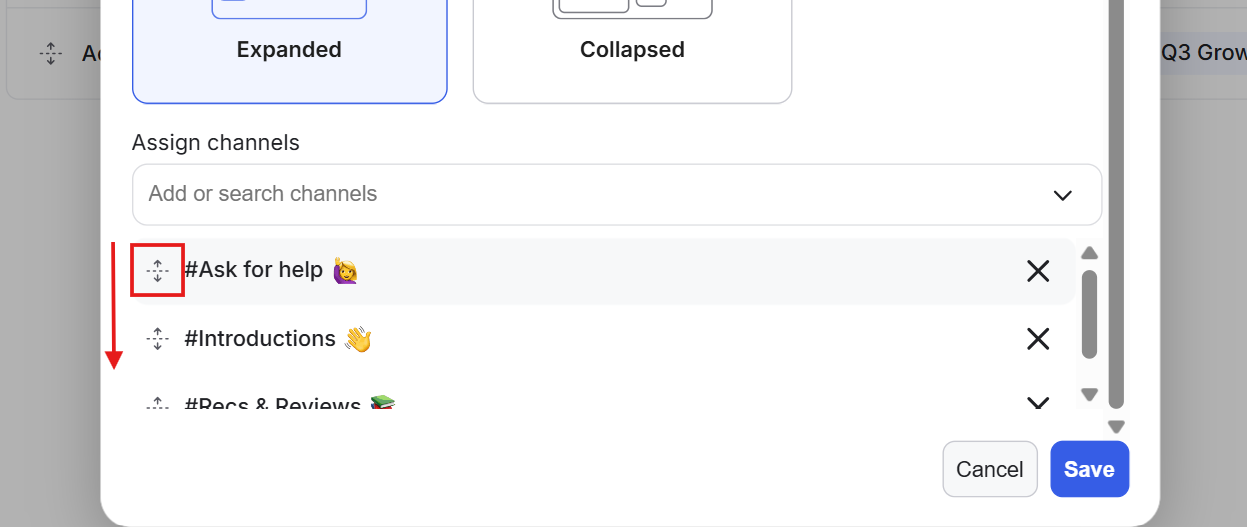
5) Click Save. The channels will appear to members in the order you've set within that category.
You can reorder your courses from the main Courses tab and also organize the order of your course categories and the courses within them.
1) Go to the Admin Panel. Under Learning, click Courses. This opens the Courses tab.
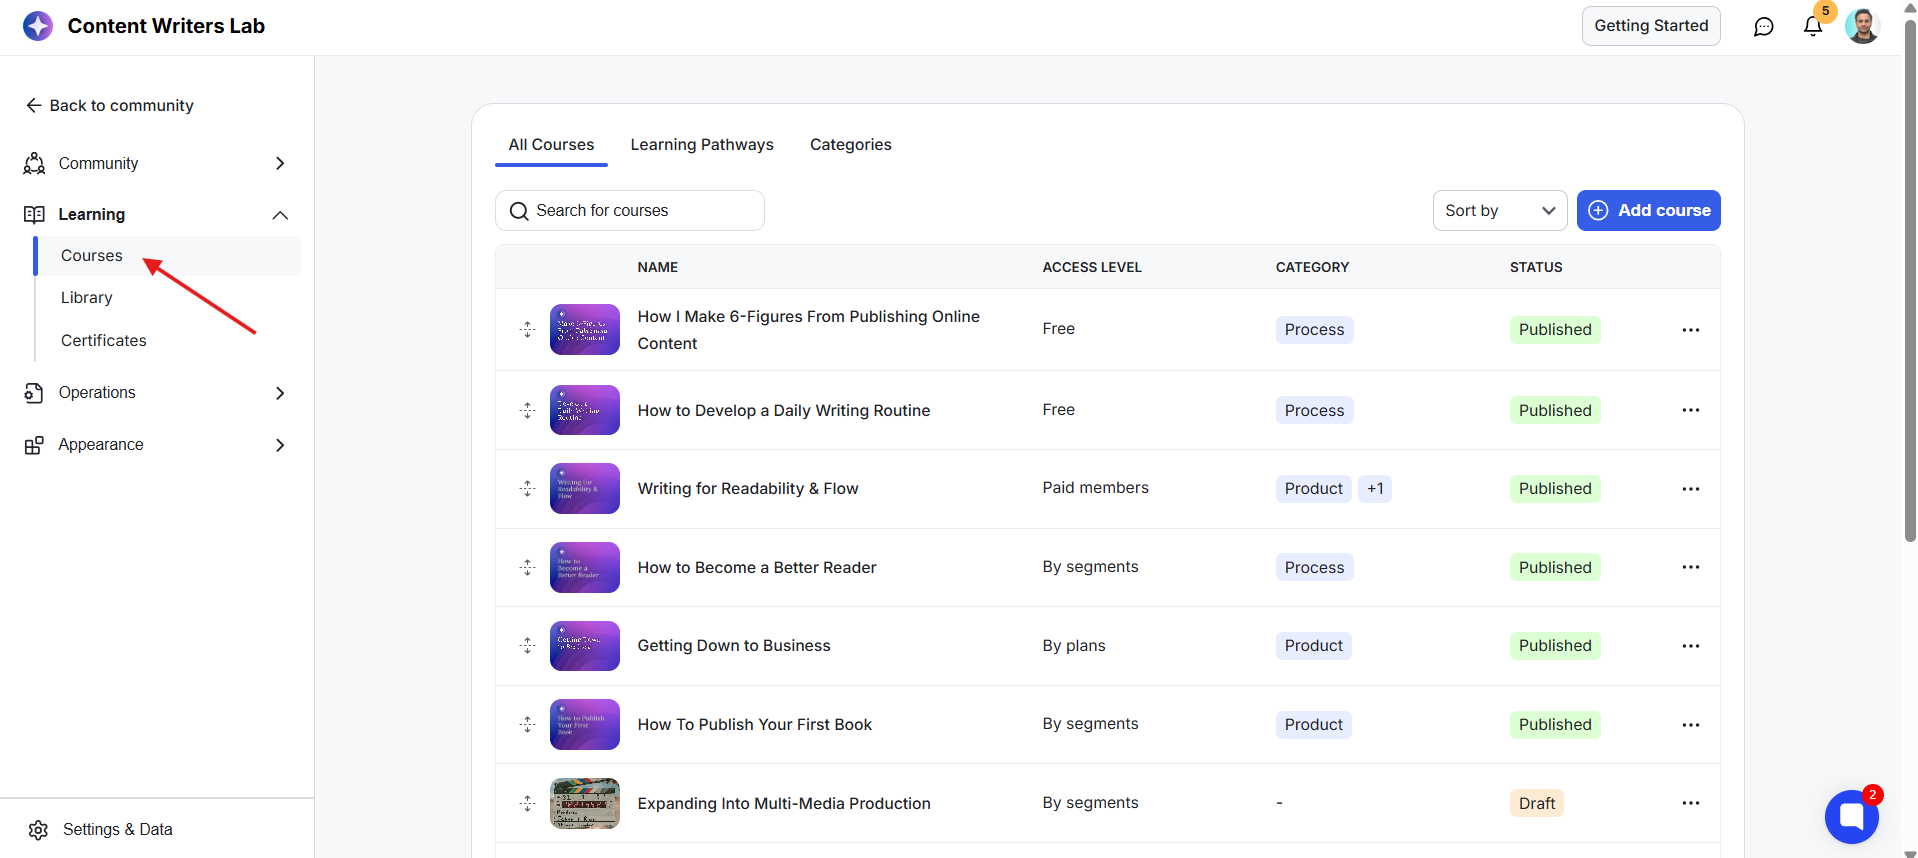
2) Click and hold the drag handle next to a course. Drag the course up or down to move it to the position you want.
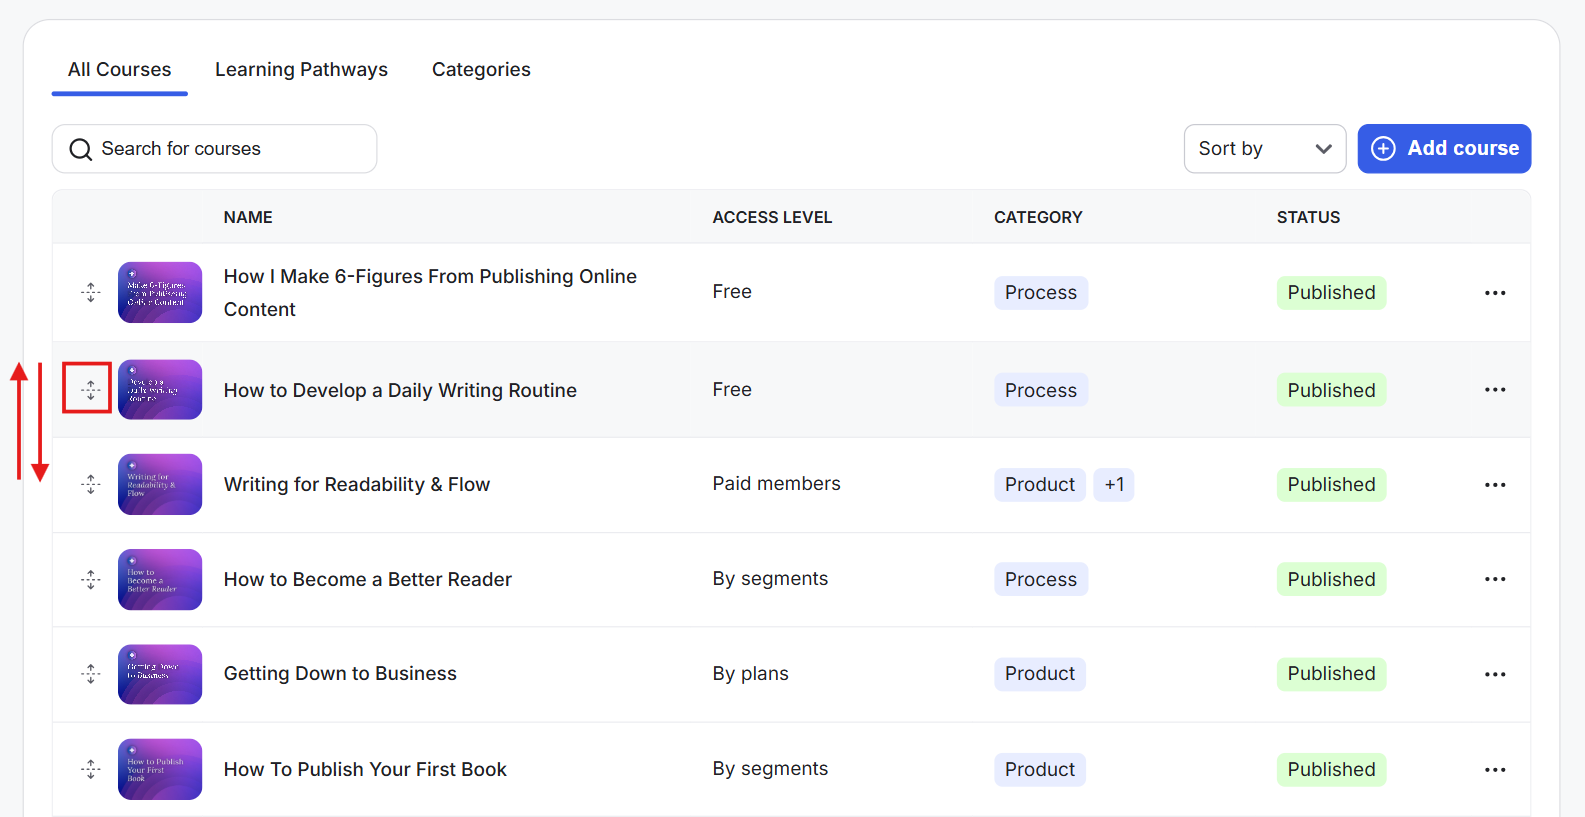
This determines the order in which courses appear in the All Courses view of the main Courses page.
Note: What individual learners see can still vary based on each course's visibility and access settings. For example, a course set to Hidden will not appear to learners who do not have access to it.
1) Open the Categories tab. Here, you'll see all your course categories.
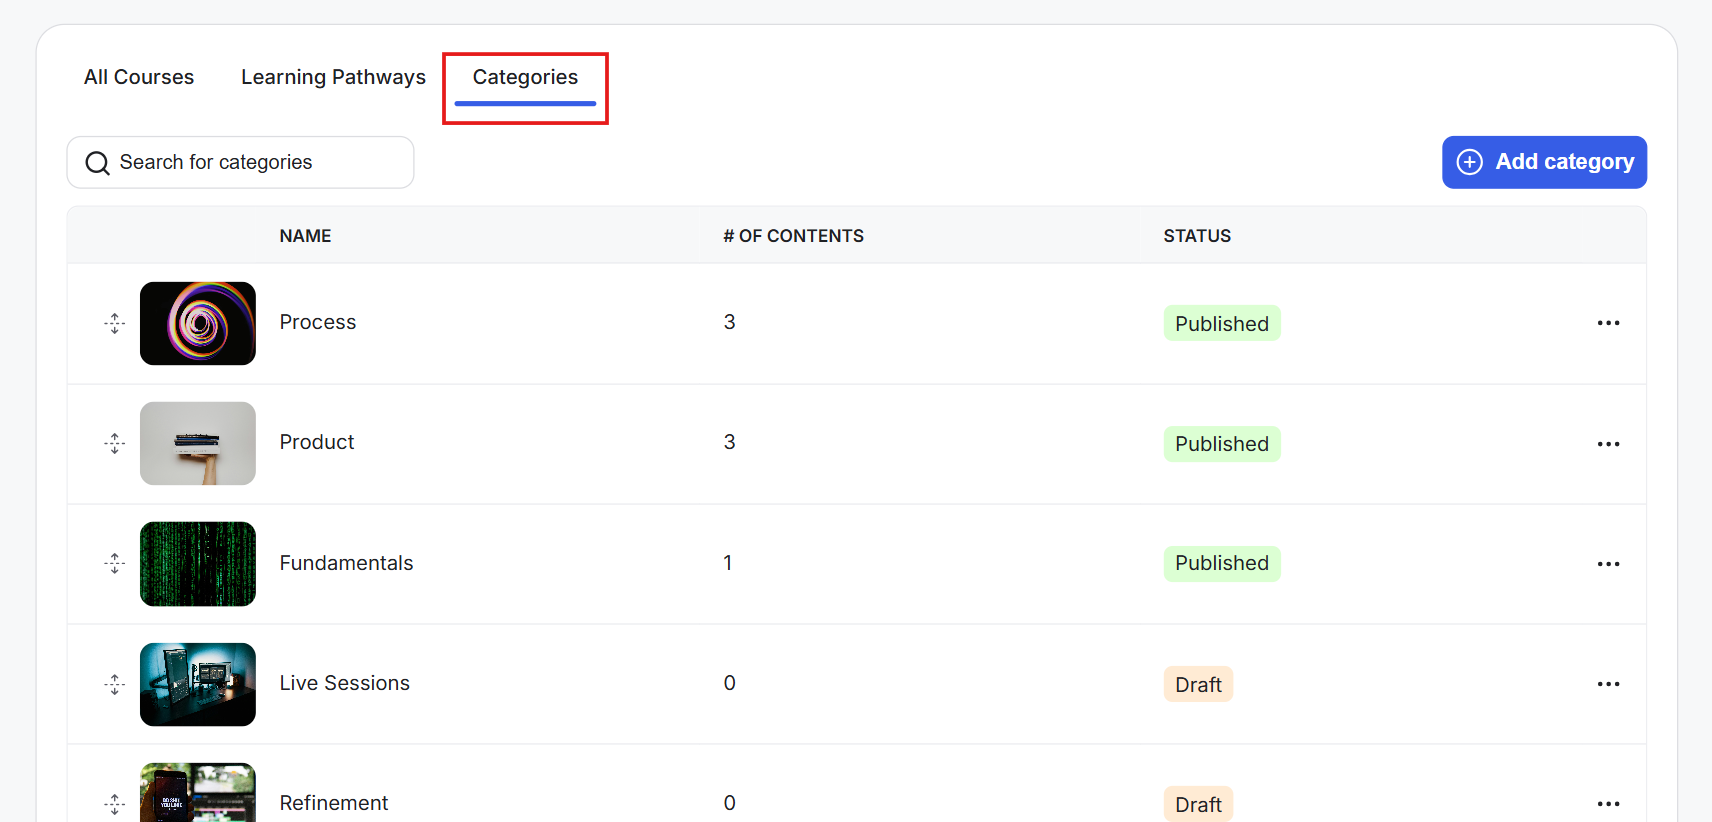
2) Click and hold the drag handle next to a category. Drag the category up or down to change its position.
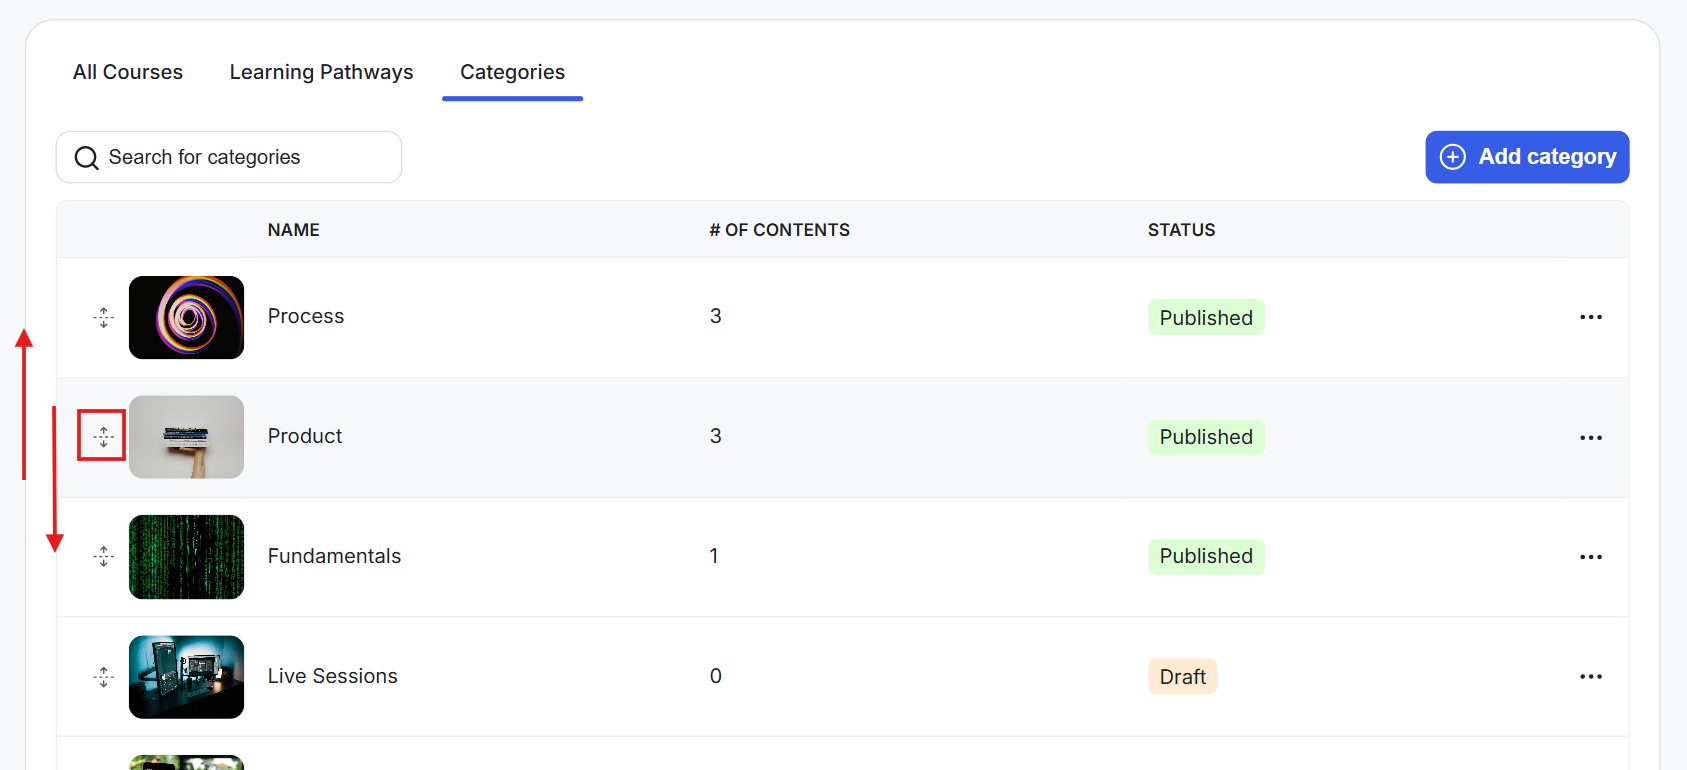
Course categories work like folders for organizing related courses. The order you set here determines how the categories appear when the Courses view or filter is set to Categories.
1) From the Categories tab, click the course category you want to manage.
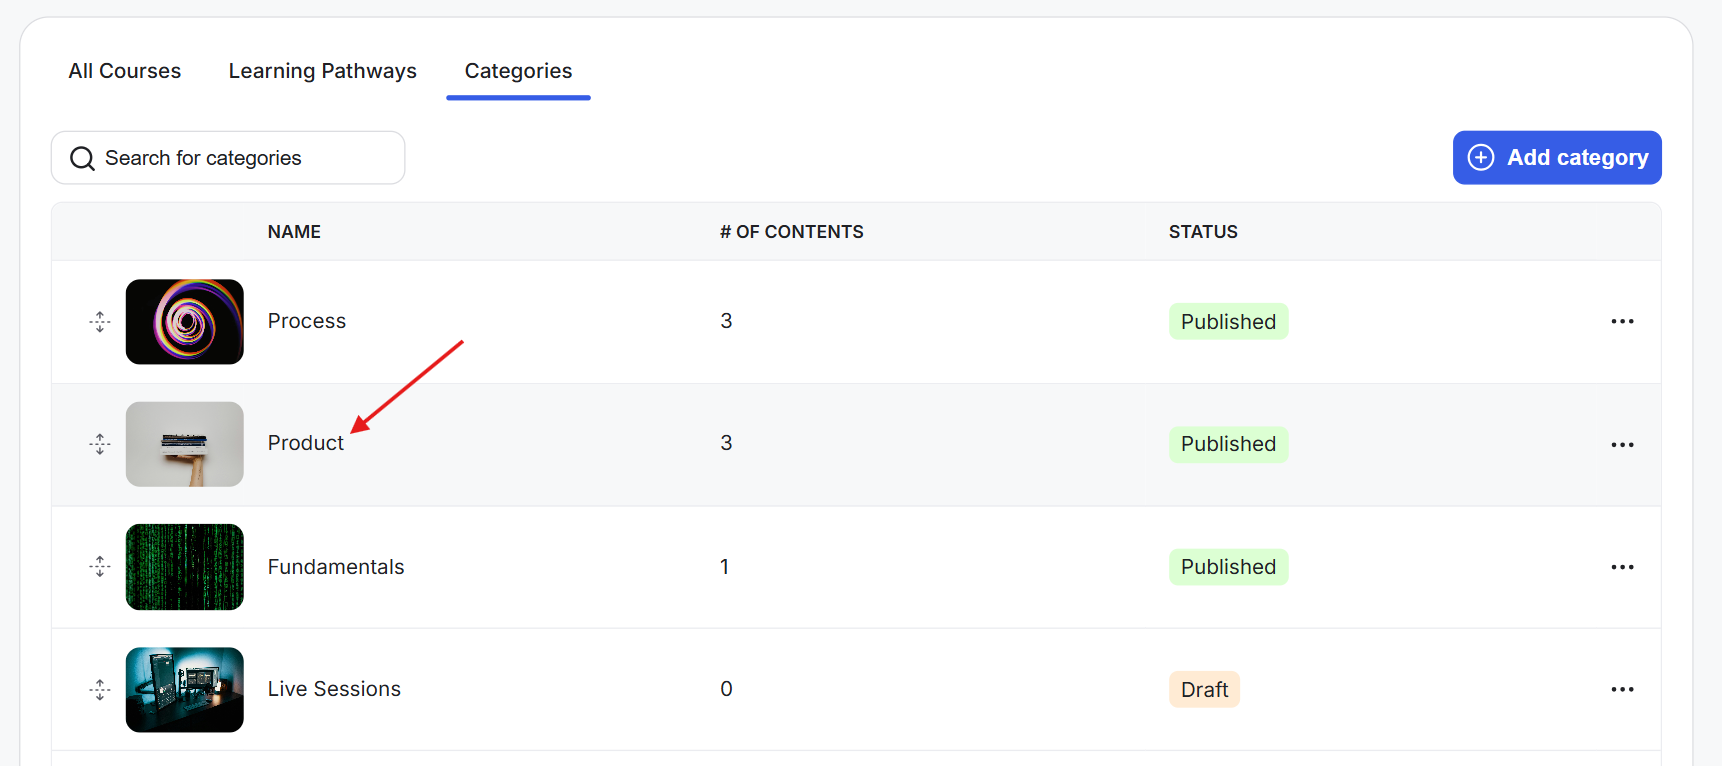
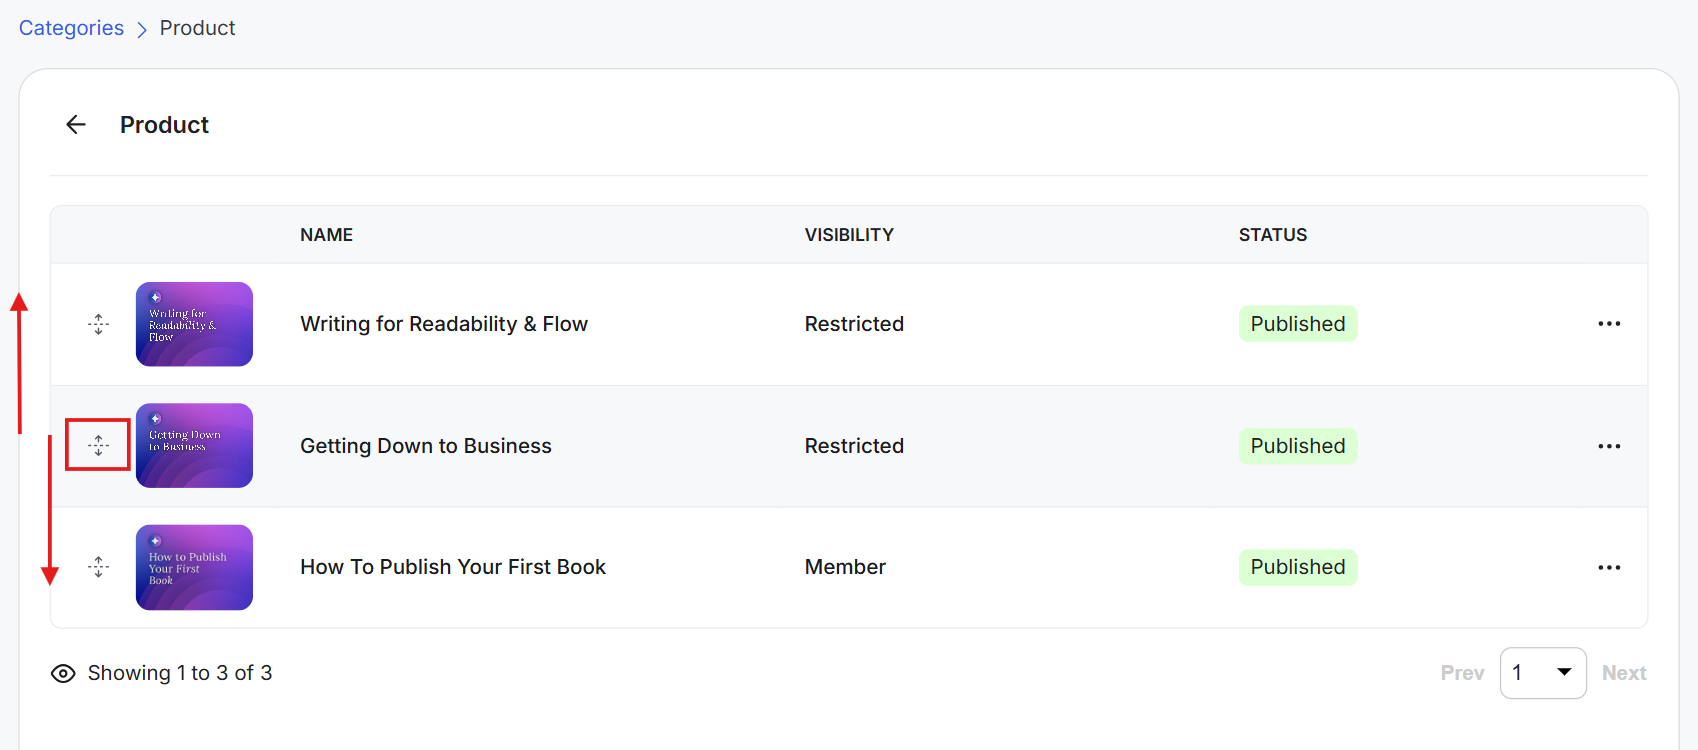
2) You'll see all the courses assigned to that category. Click and hold the drag handle next to a course. Drag the course up or down to change its position within the category.
You can also control the order of individual Library resources, Library categories, and the resources within each category.
1) Go to the Admin Panel. Under Learning, click Library. This opens the Library tab.
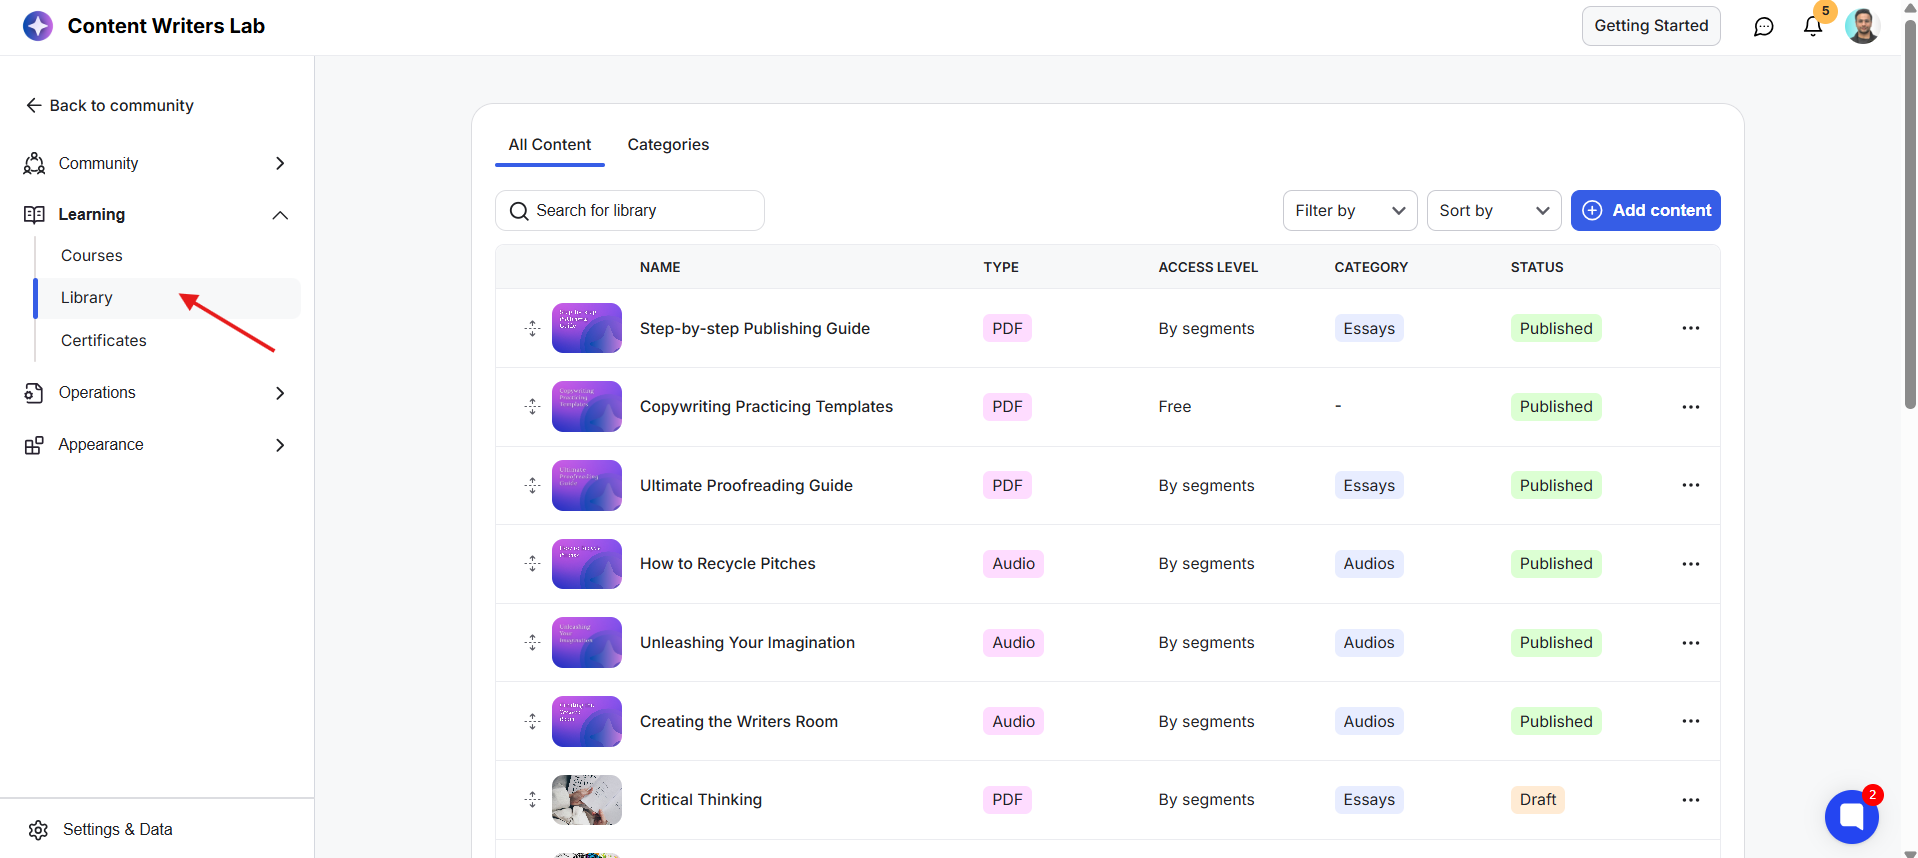
2) Click and hold the drag handle next to a Library resource. Drag the resource up or down to move it to the position you want. This determines how resources appear in the All Content view of the main Library page.
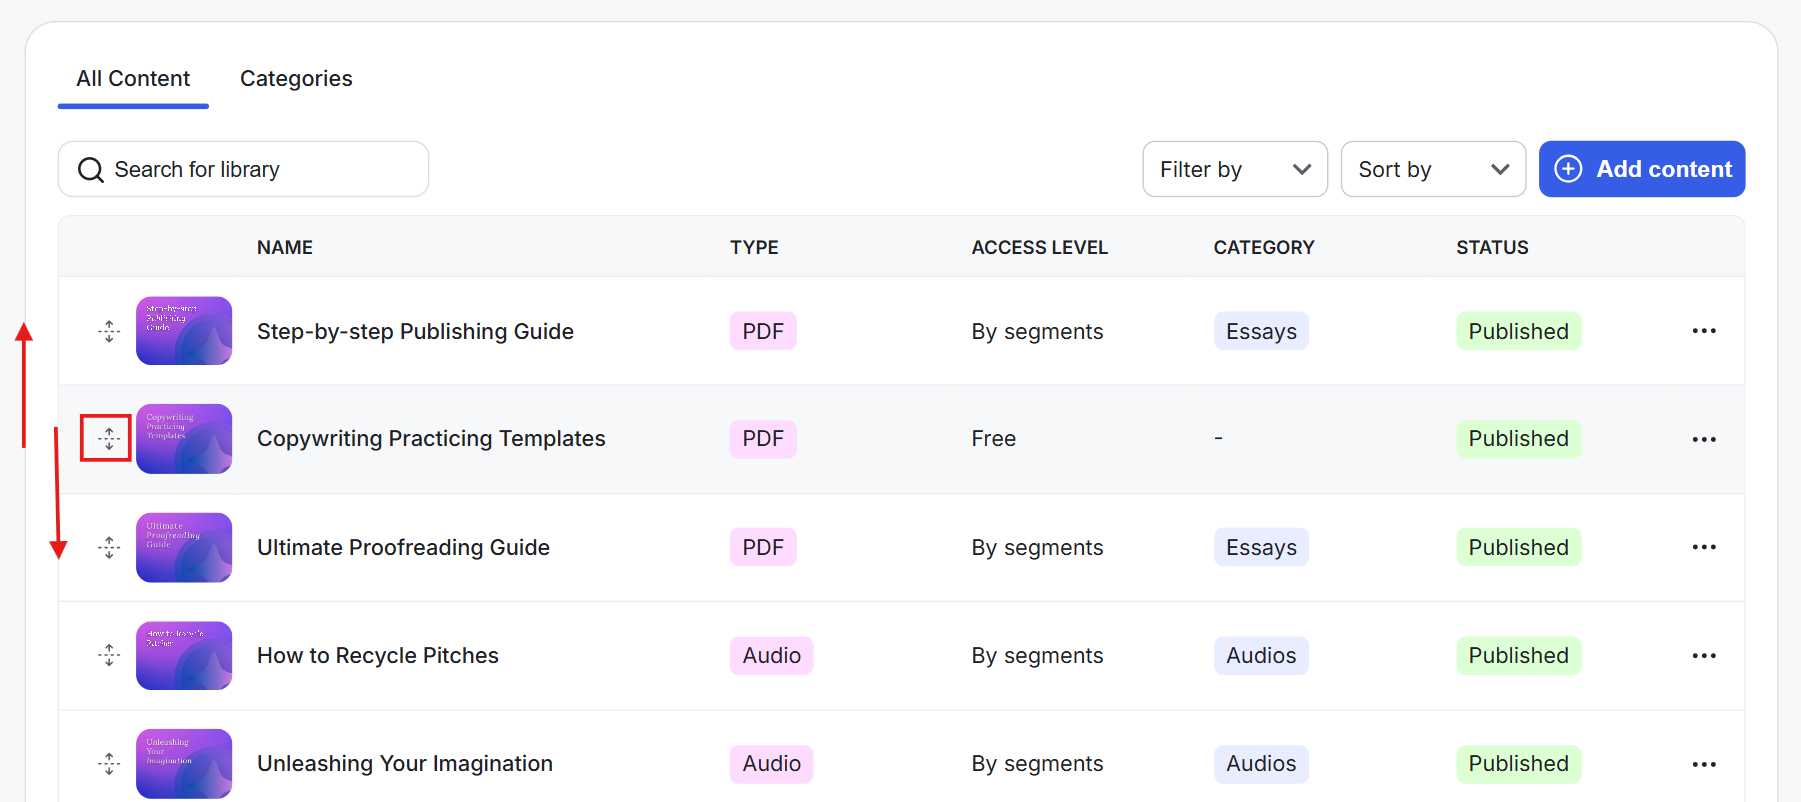
Note: What individual members see can still vary based on the visibility and access settings of each Library resource. For example, hidden content will not appear to members who do not have access to it.
1) Open the Categories tab. Here, you'll see all your Library categories.
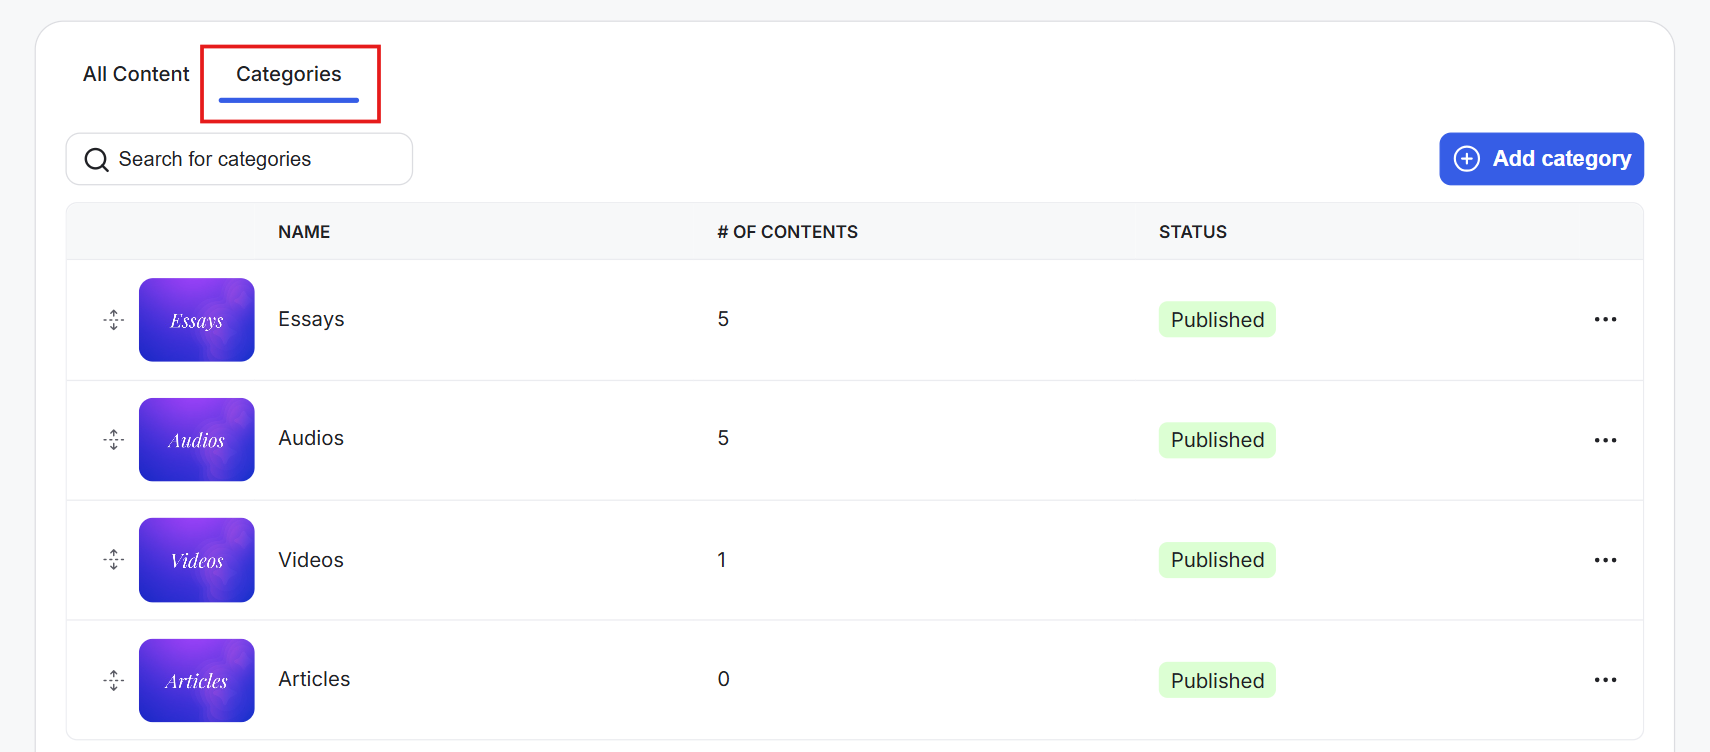
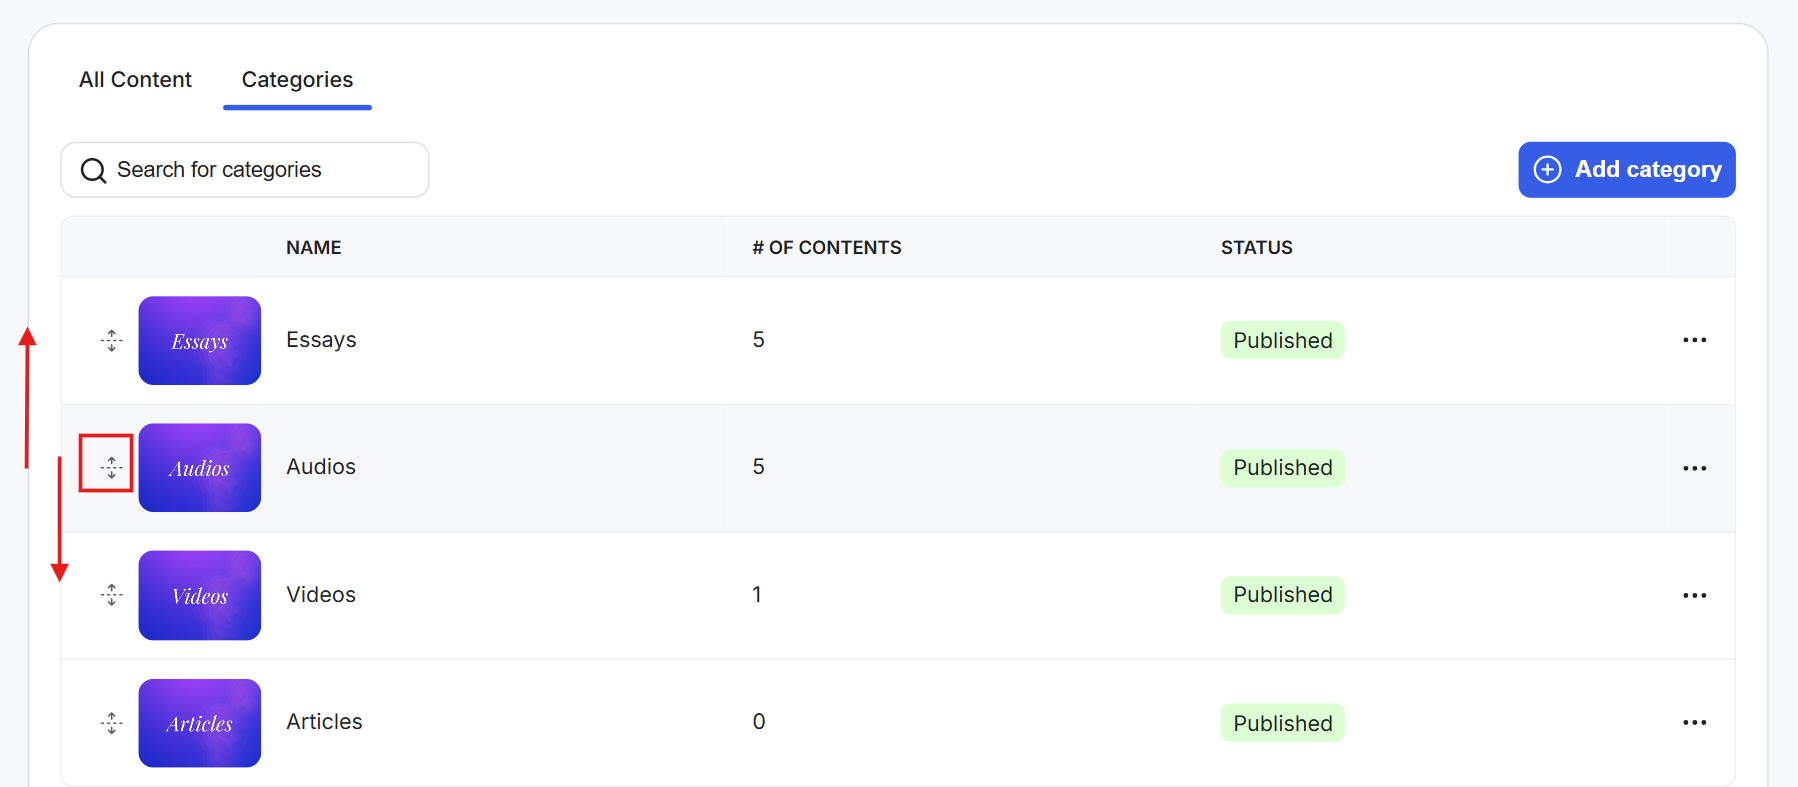
2) Click and hold the drag handle next to a category. Drag the category up or down to change its position. Library categories work like folders for organizing related resources. The order you set here determines how categories appear when the Library view or filter is set to Categories.
1) From the Categories tab, click the Library category you want to manage.
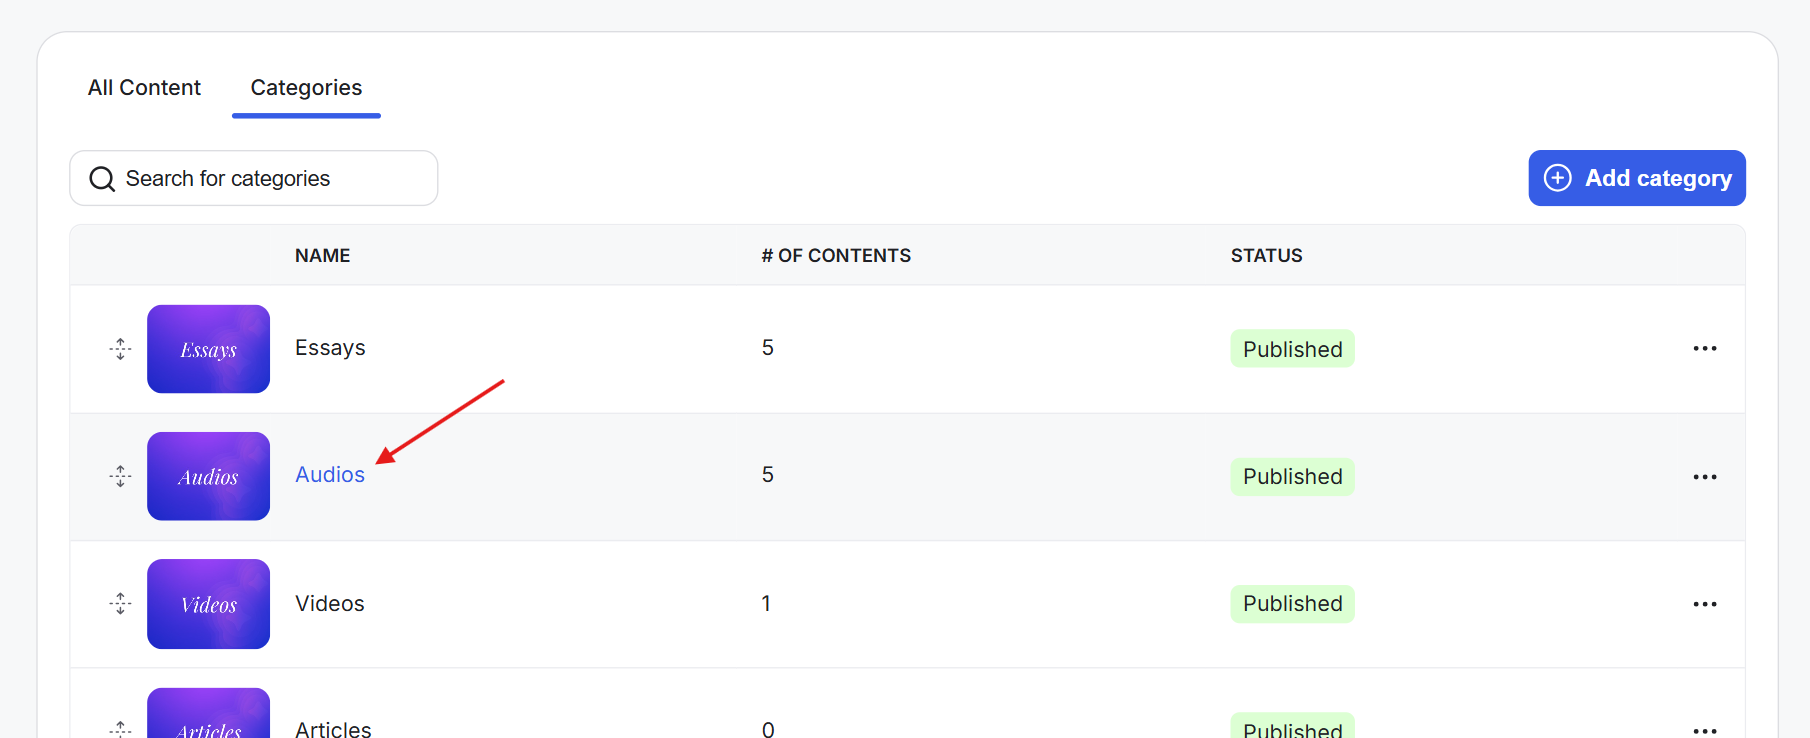
2) You'll see all the Library resources assigned to that category. Click and hold the drag handle next to a resource. Drag the resource up or down to change its position within the category. Your Library resources will now appear in the order you've set within that category.