The GroupApp mobile app includes a set of Admin Tools that let you handle common community management tasks directly from your phone.
You can review moderation requests, manage members, create and schedule posts, manage events, share invite links, and check your community analytics without opening the web version of GroupApp.
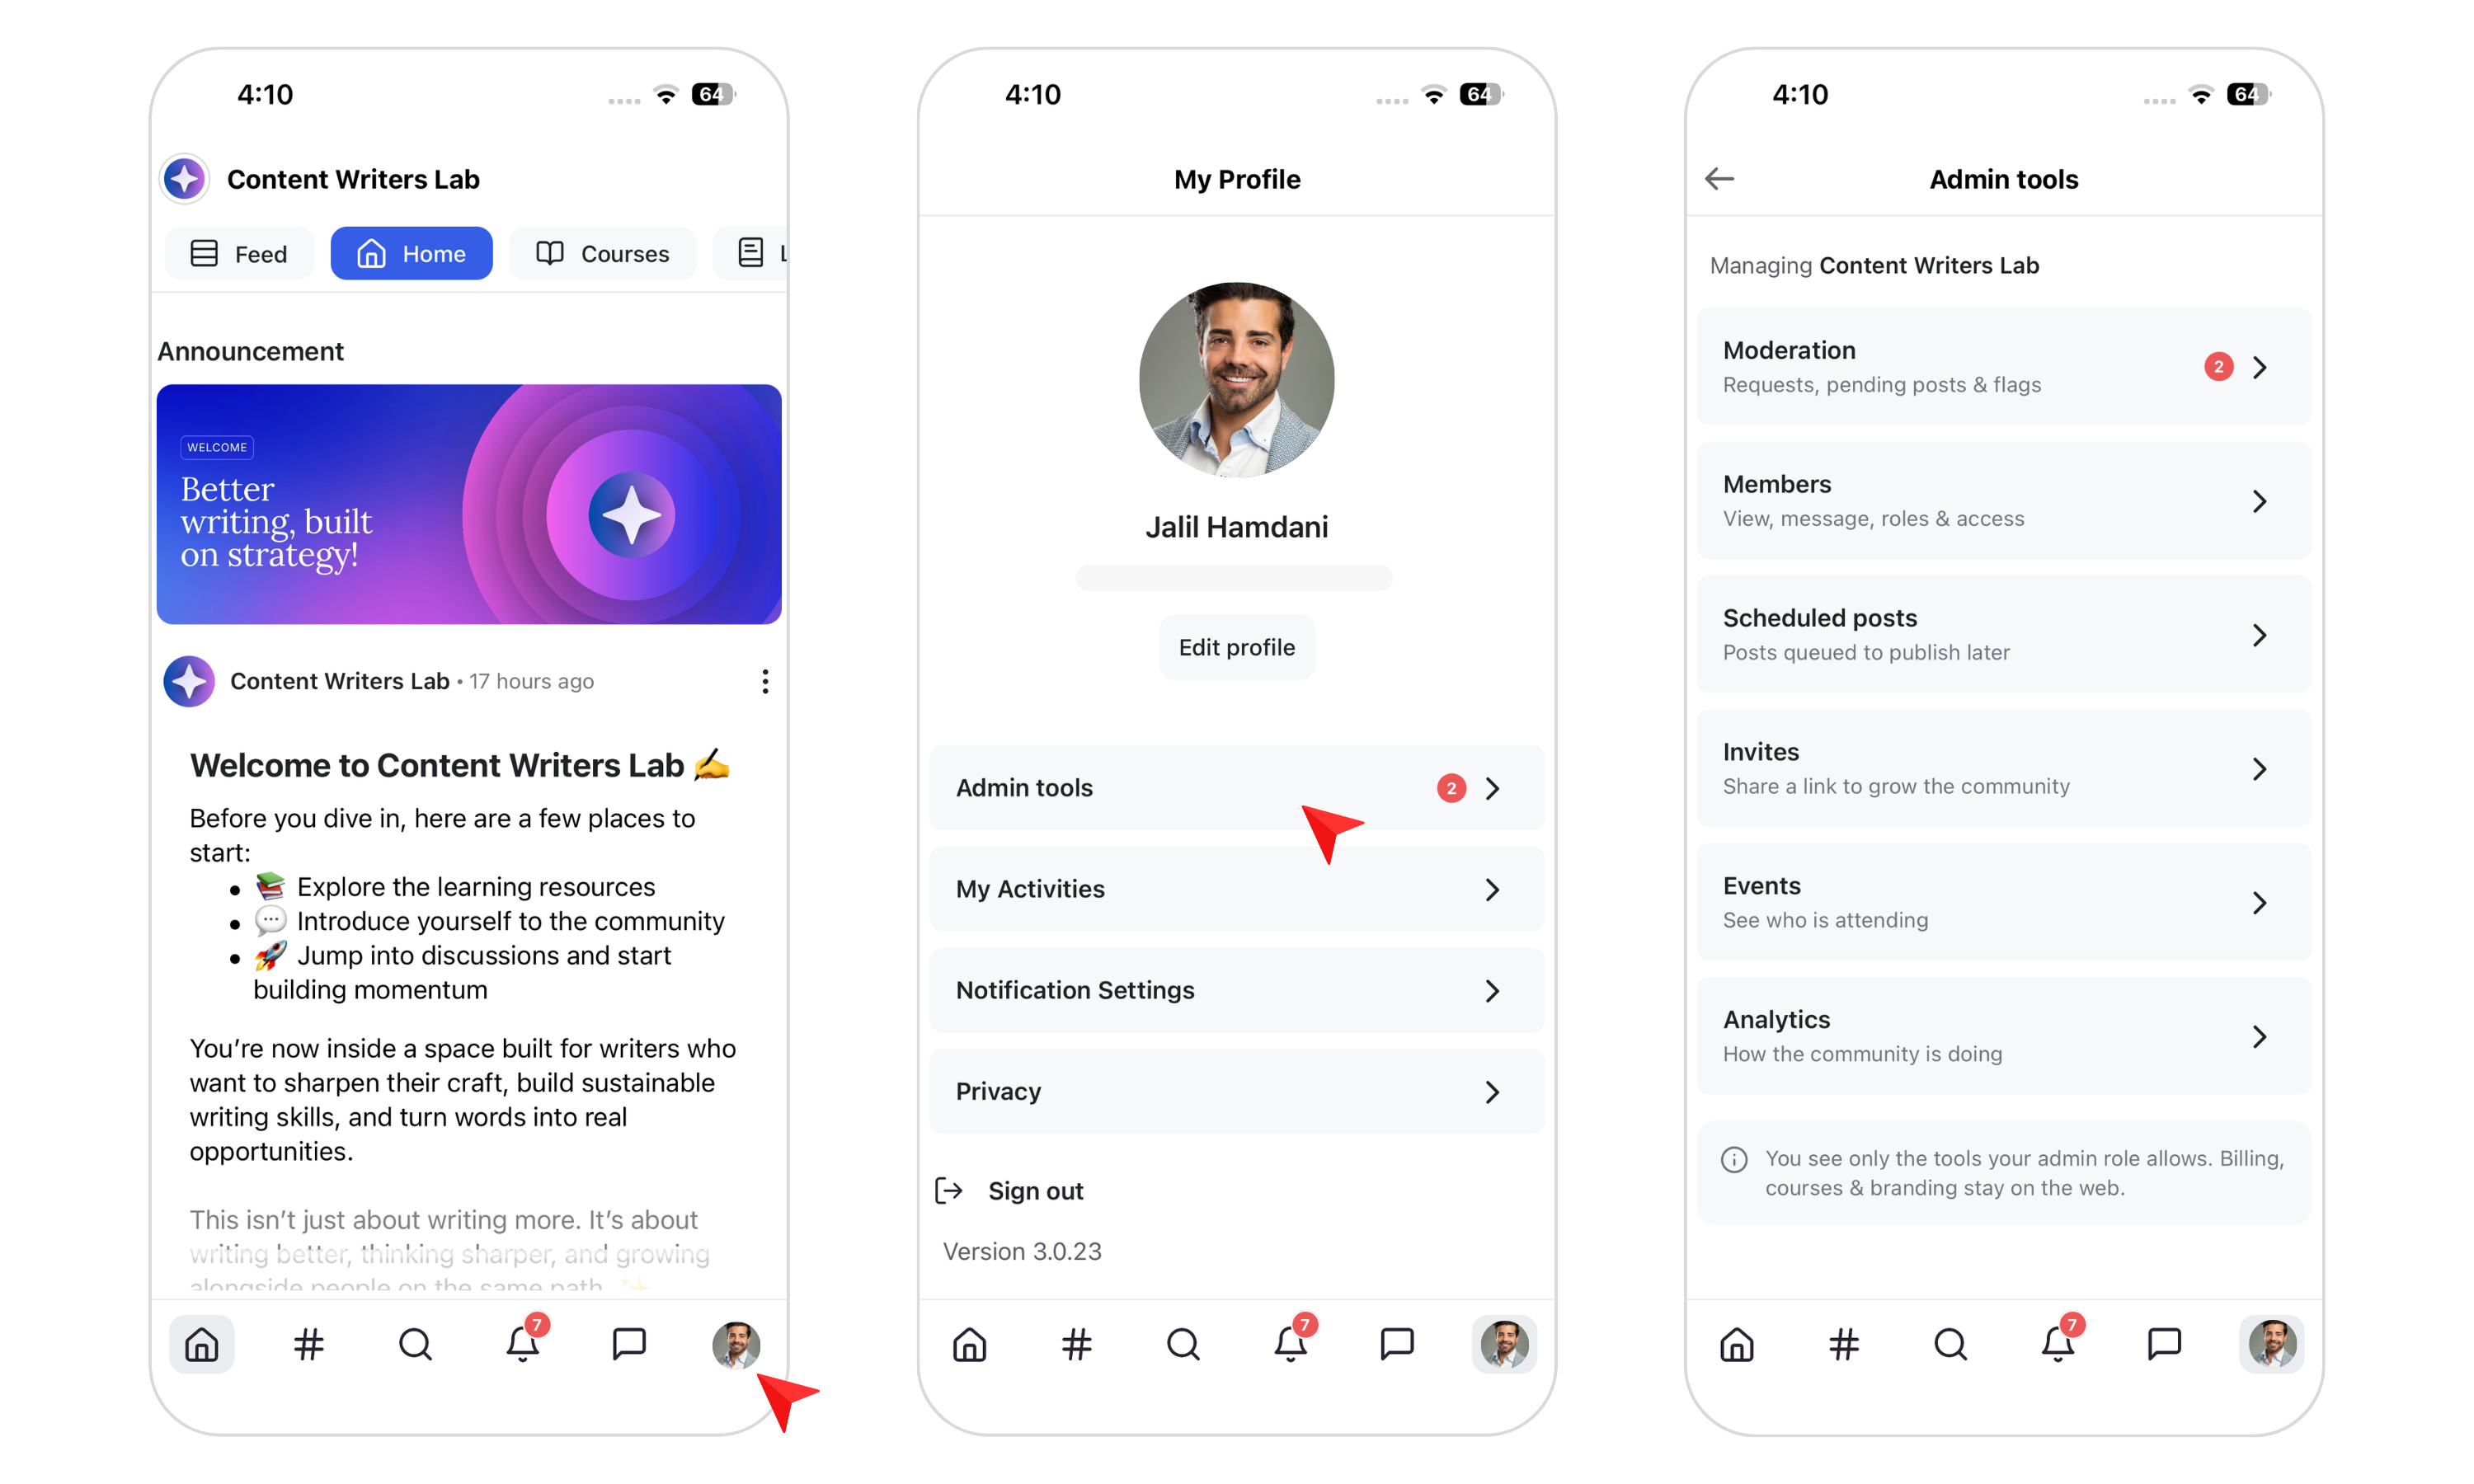
Open the GroupApp mobile app.
Tap your Profile icon in the bottom-right corner.
Tap Admin Tools.
You'll see the following options:
Moderation
Members
Scheduled Posts
Invites
Events
Analytics
Here's what you can do from each section.
The Moderation section helps you review and manage activity that requires admin attention.
It includes:
Membership Requests
Pending Posts
Flagged Content
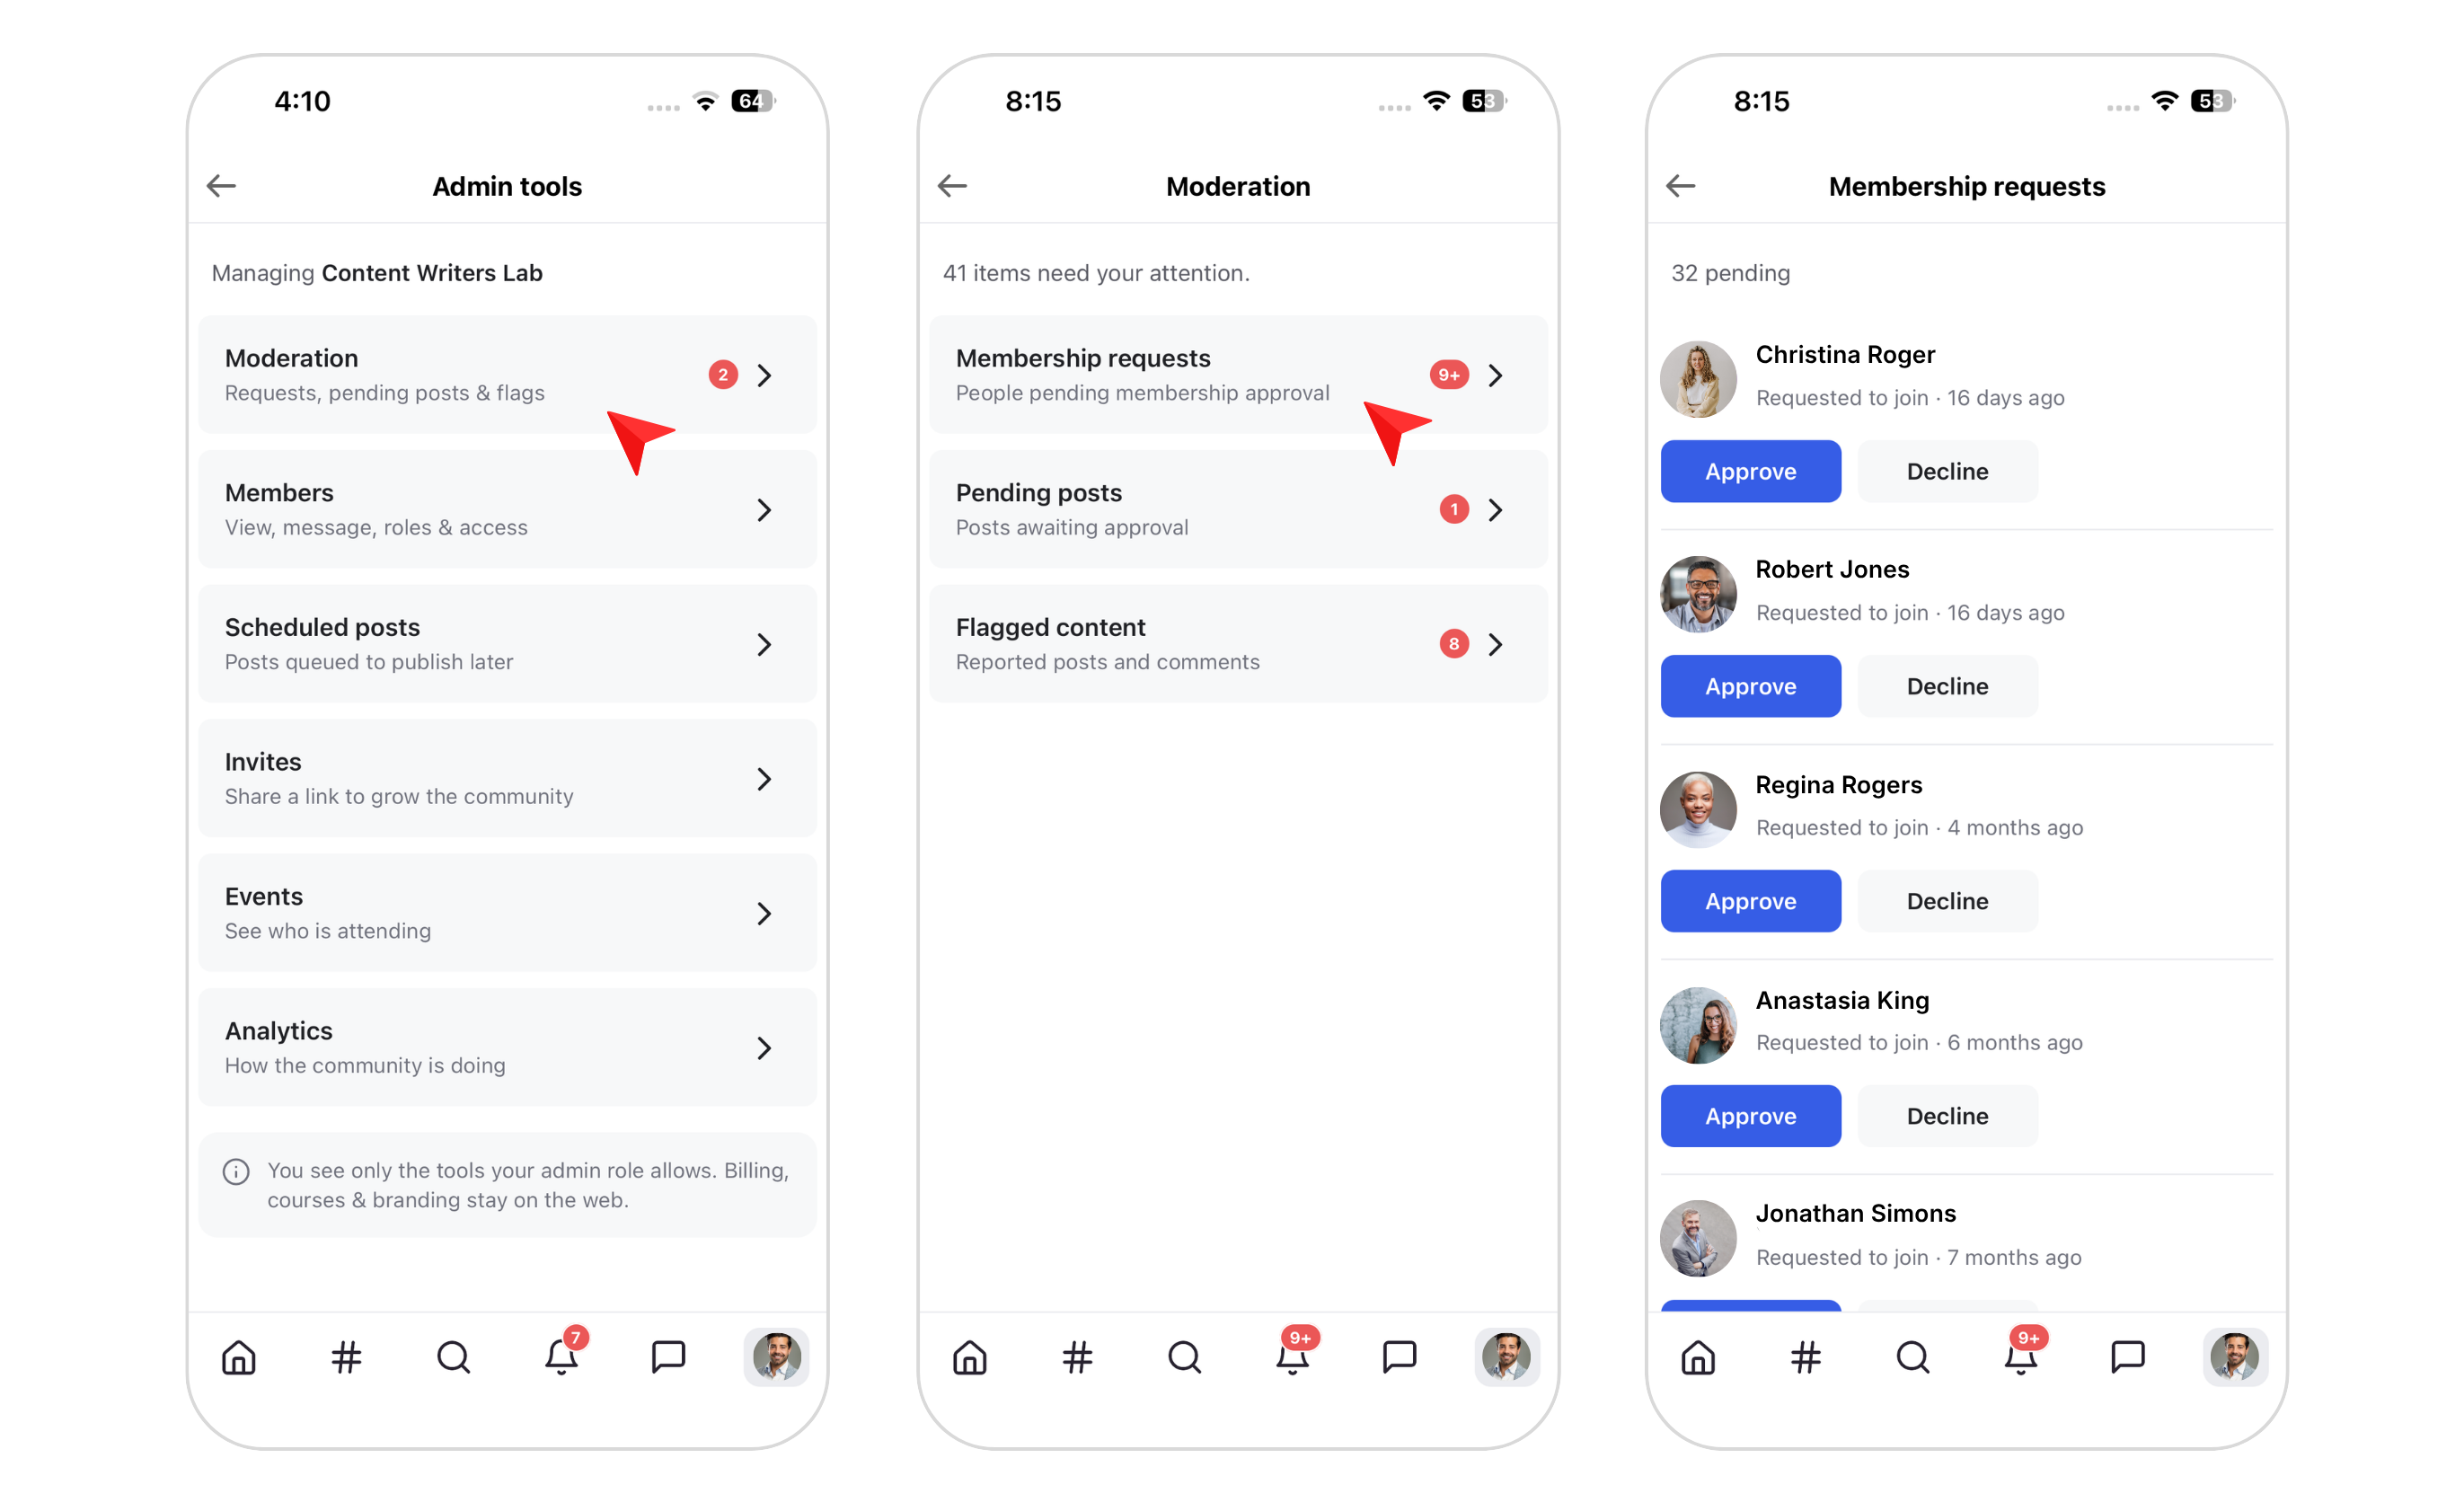
A red badge appears when you have new membership requests waiting for review.
Open Membership Requests to review the requests and approve or decline members directly from the mobile app.
Note: You cannot review a member's onboarding responses from the mobile app.
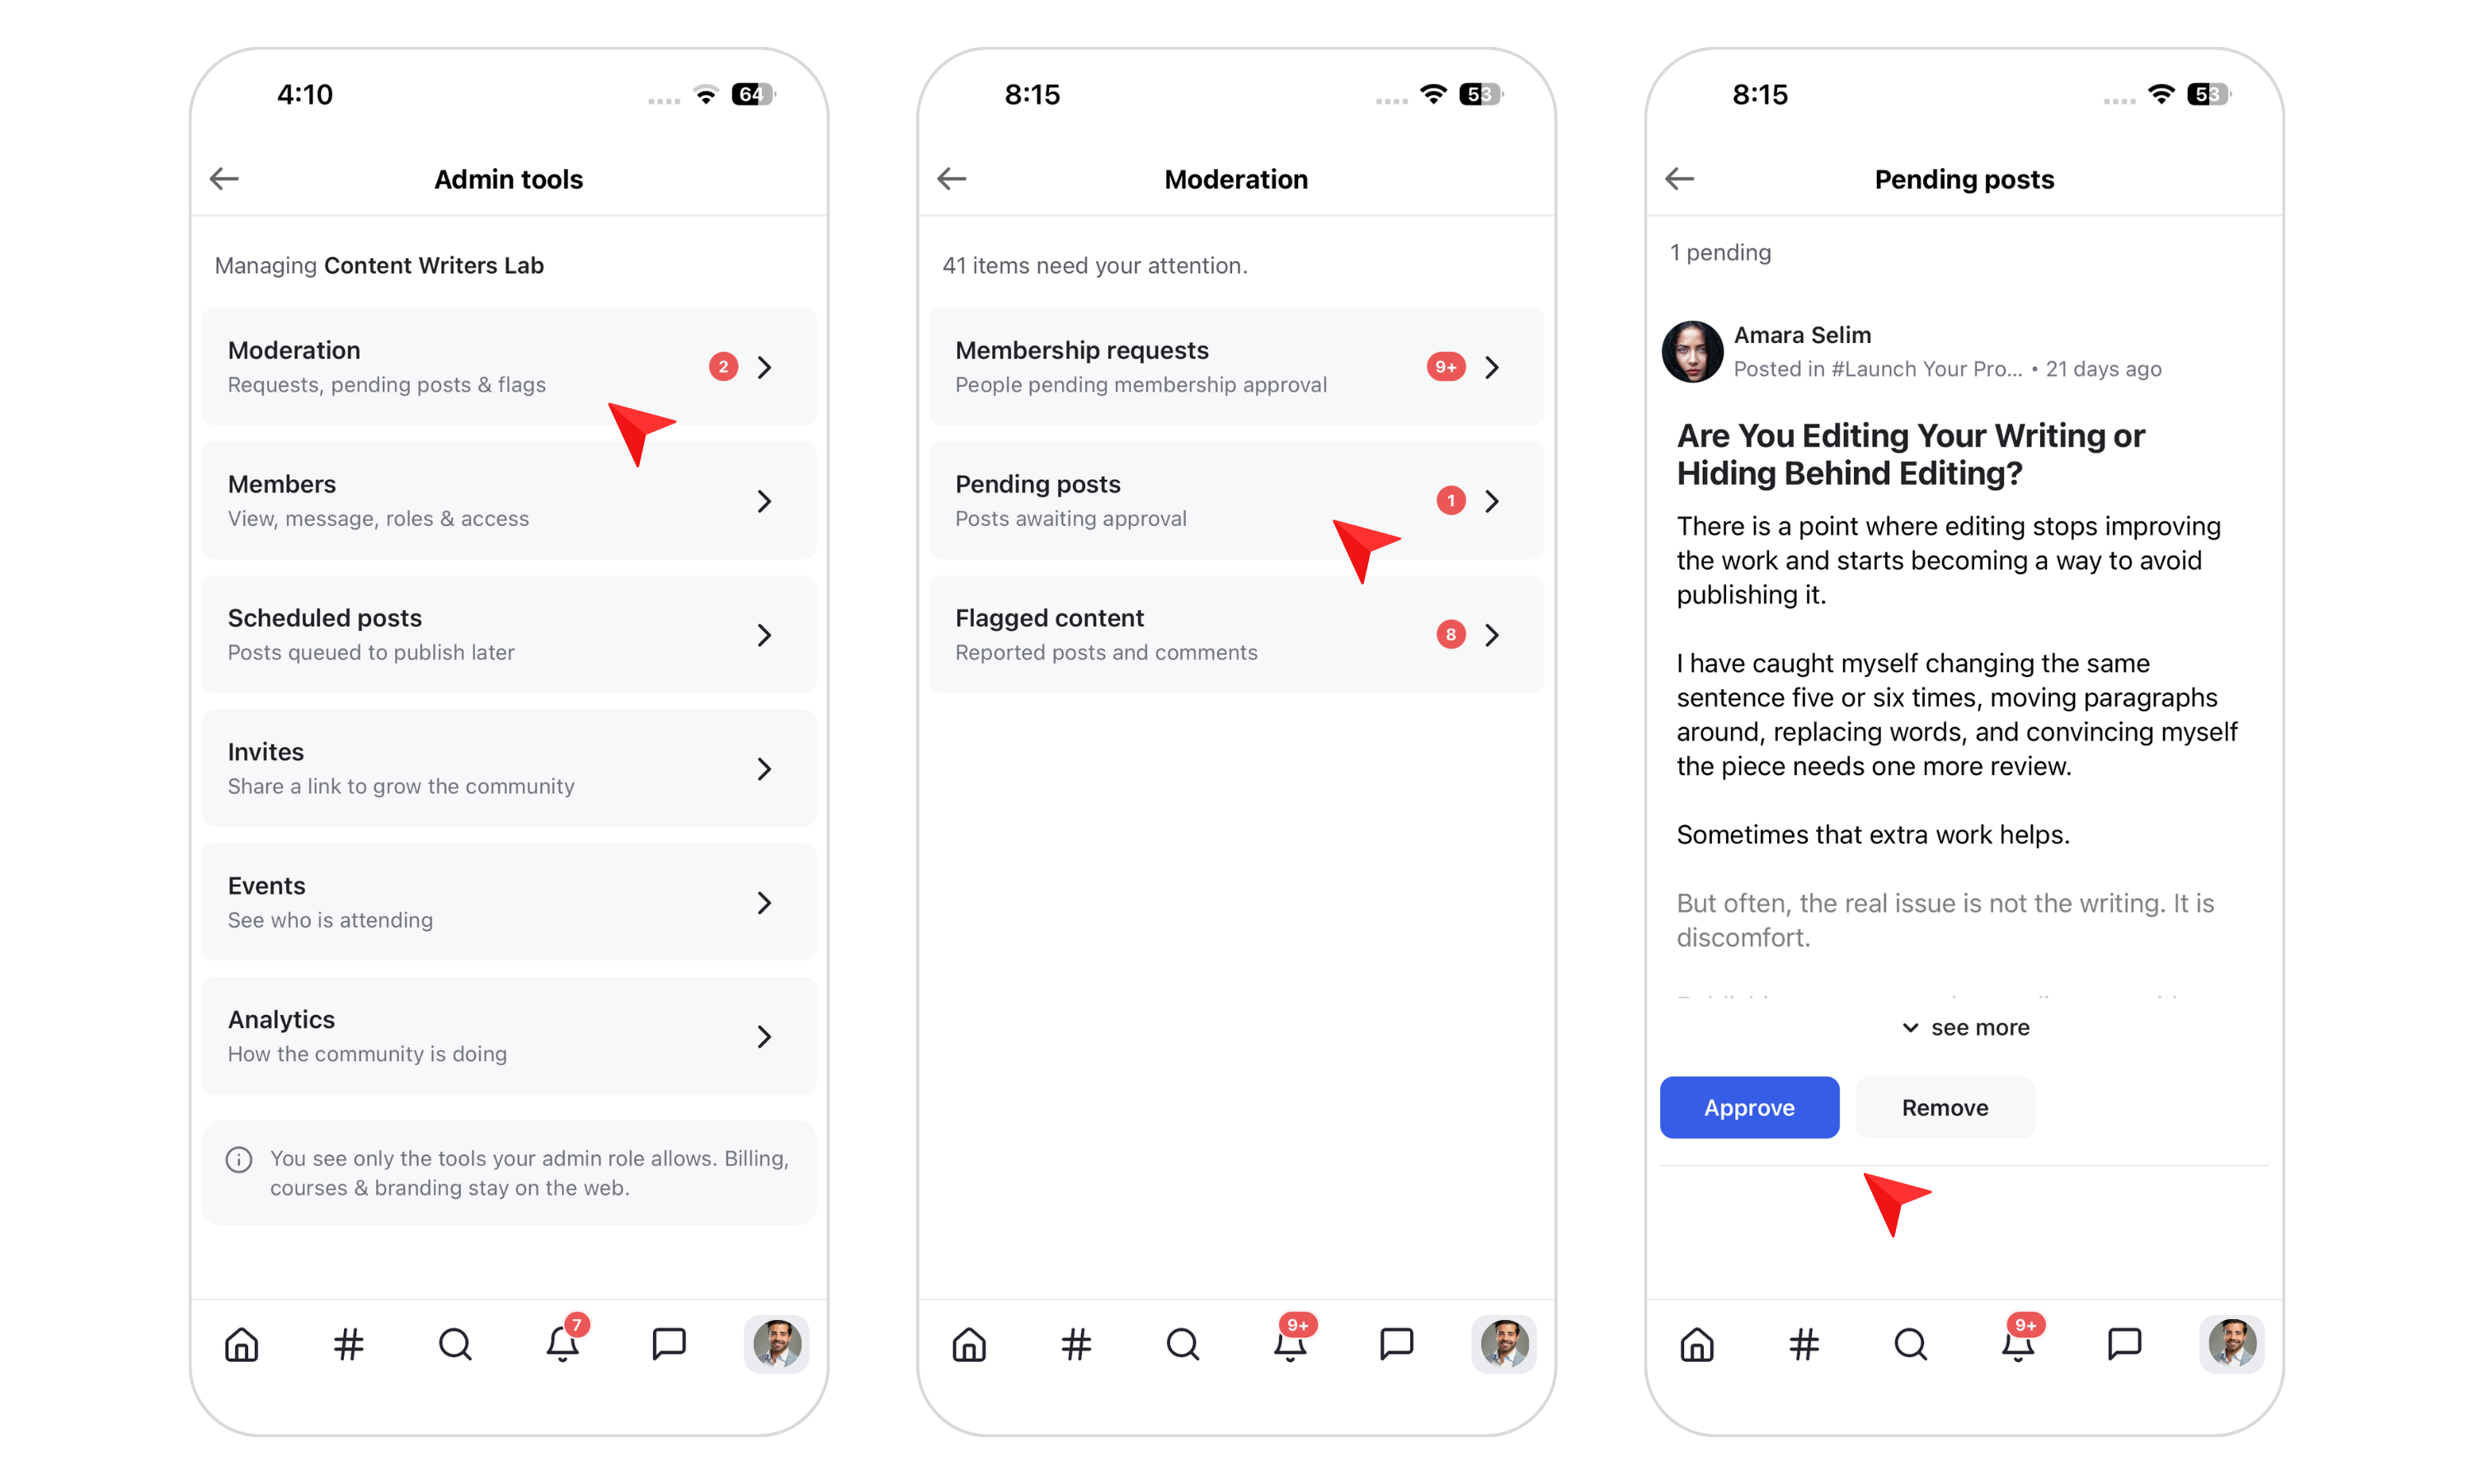
A red badge appears when posts are waiting for admin approval.
Open Pending Posts to review each submission. You can then approve the post or remove it.
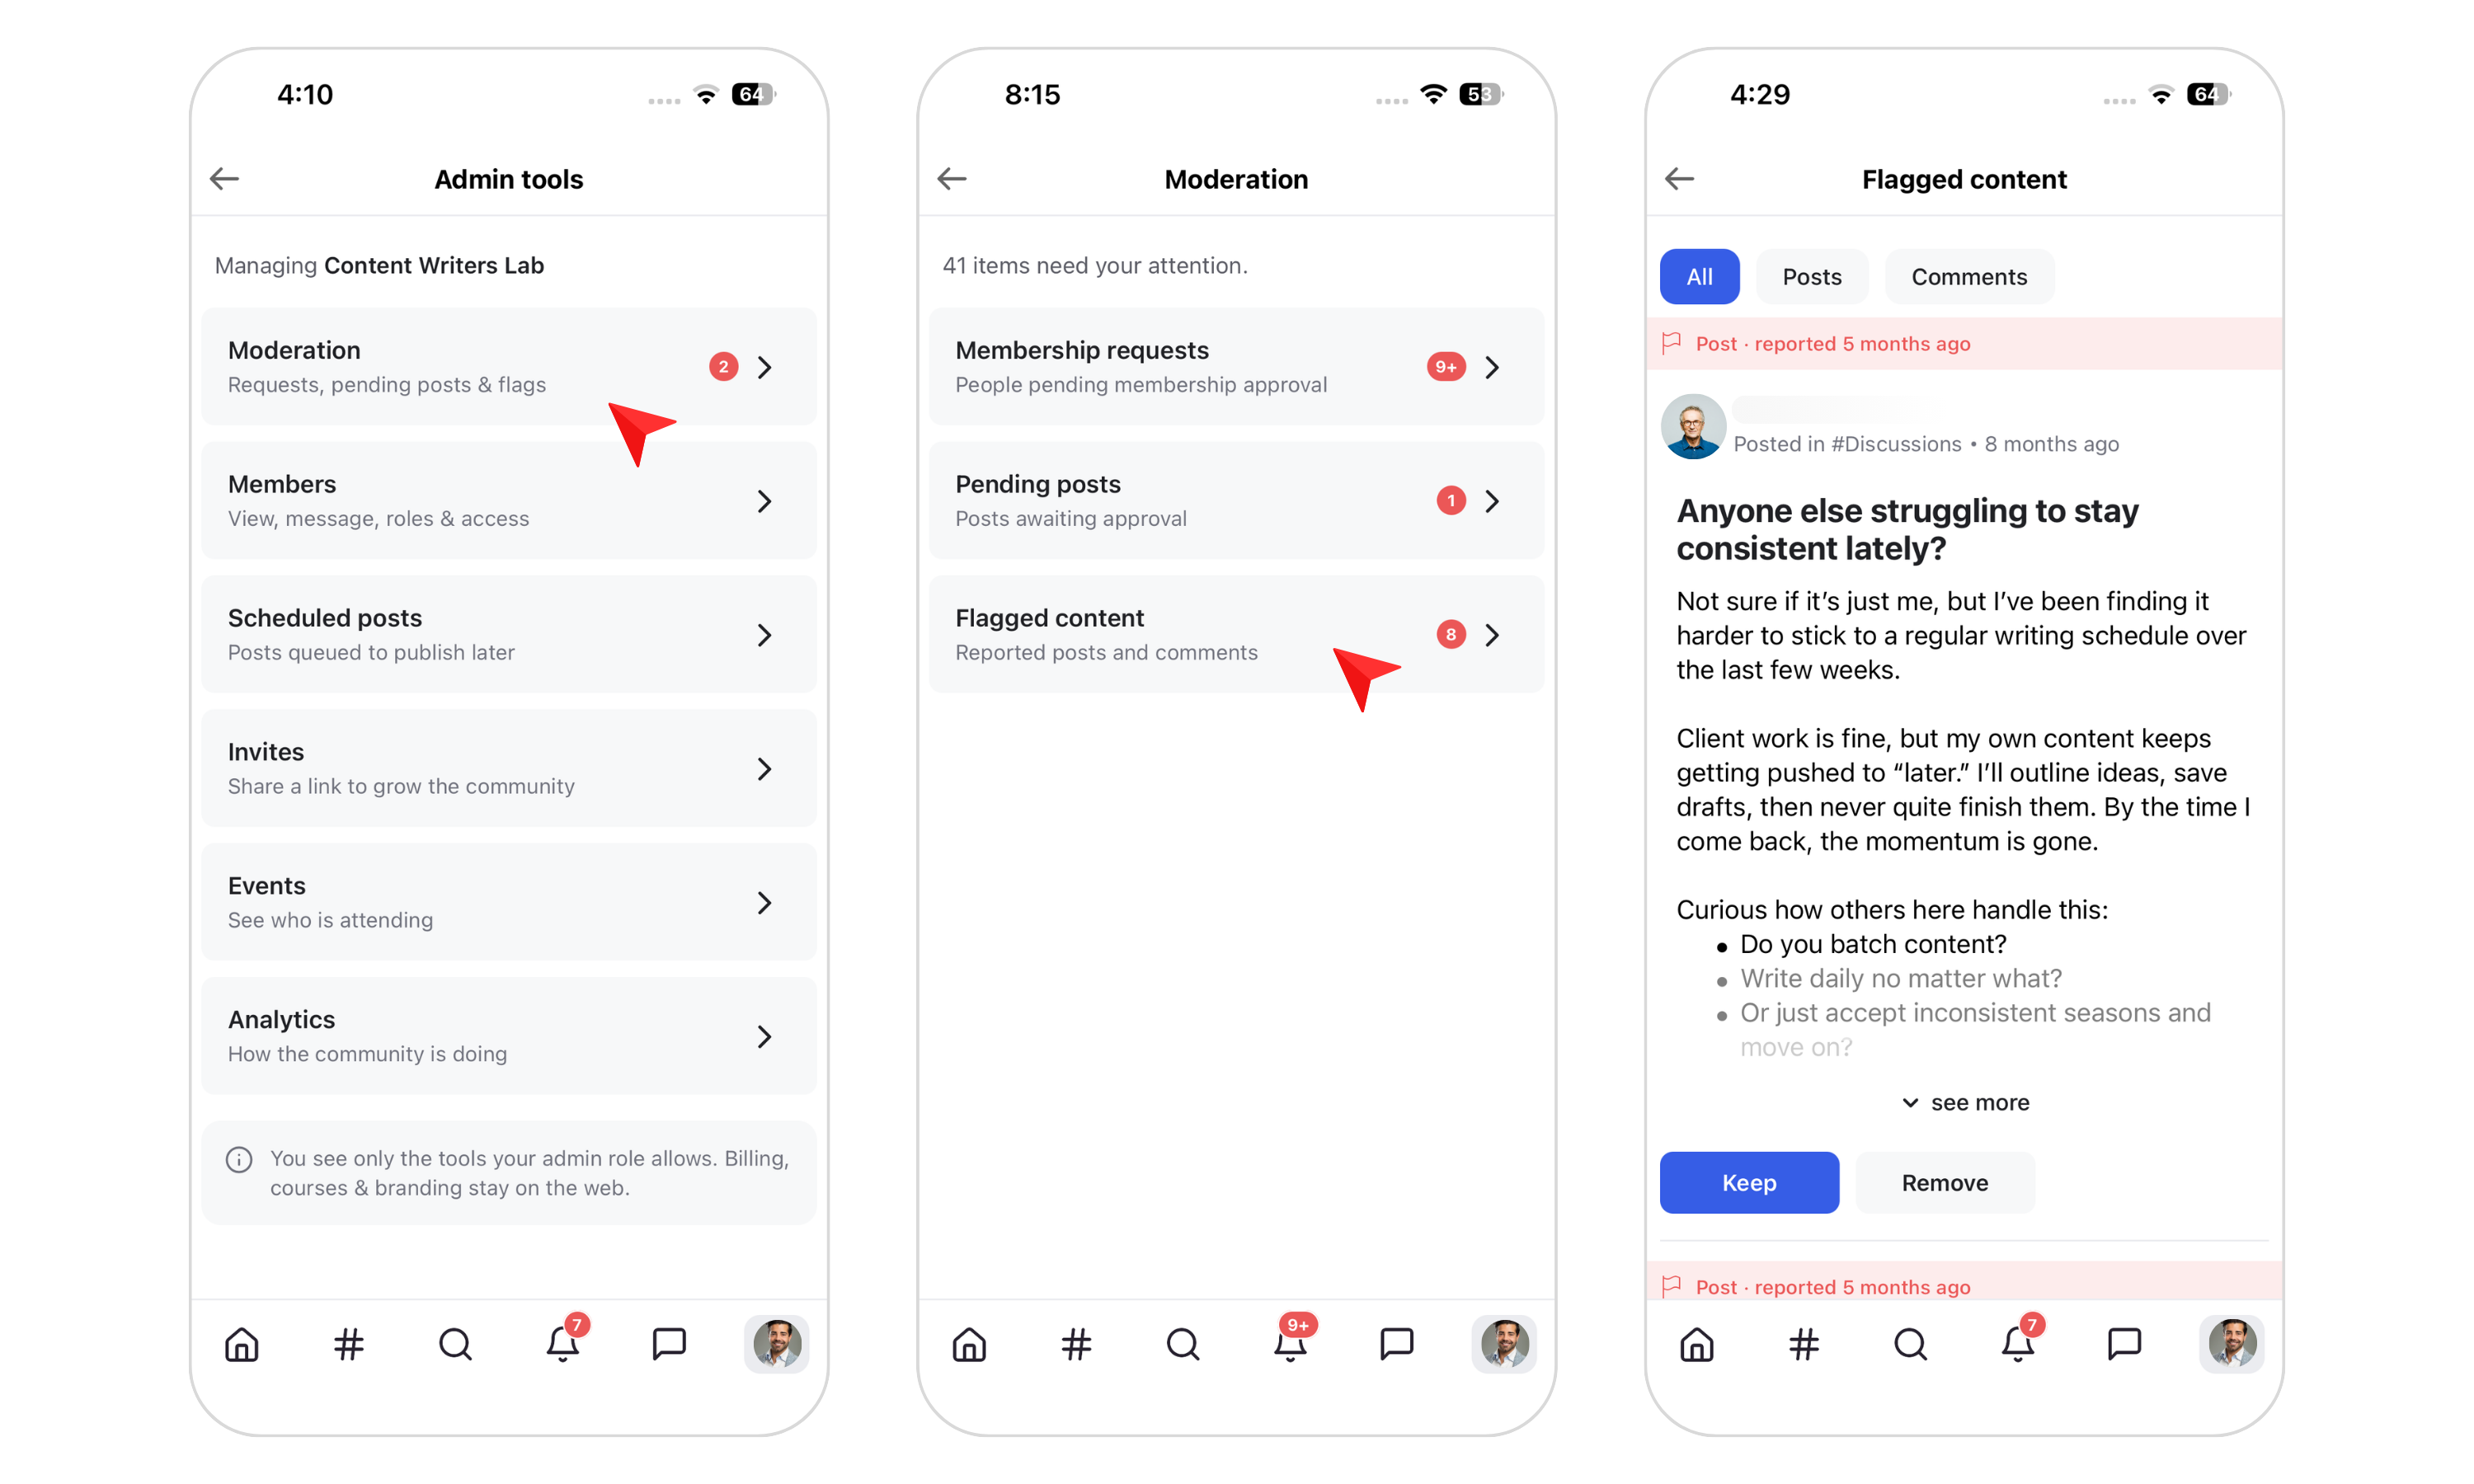
A red badge appears when a post or comment has been flagged for review.
You can filter flagged content by:
All
Posts
Comments
You'll also see when each item was reported. After reviewing the content, you can choose whether to keep or remove it.
The Members section gives you access to your complete community member list.
Tap a member to access additional actions. From here, you can:
Send a direct message
View their profile
Remove them from the community
Ban the member
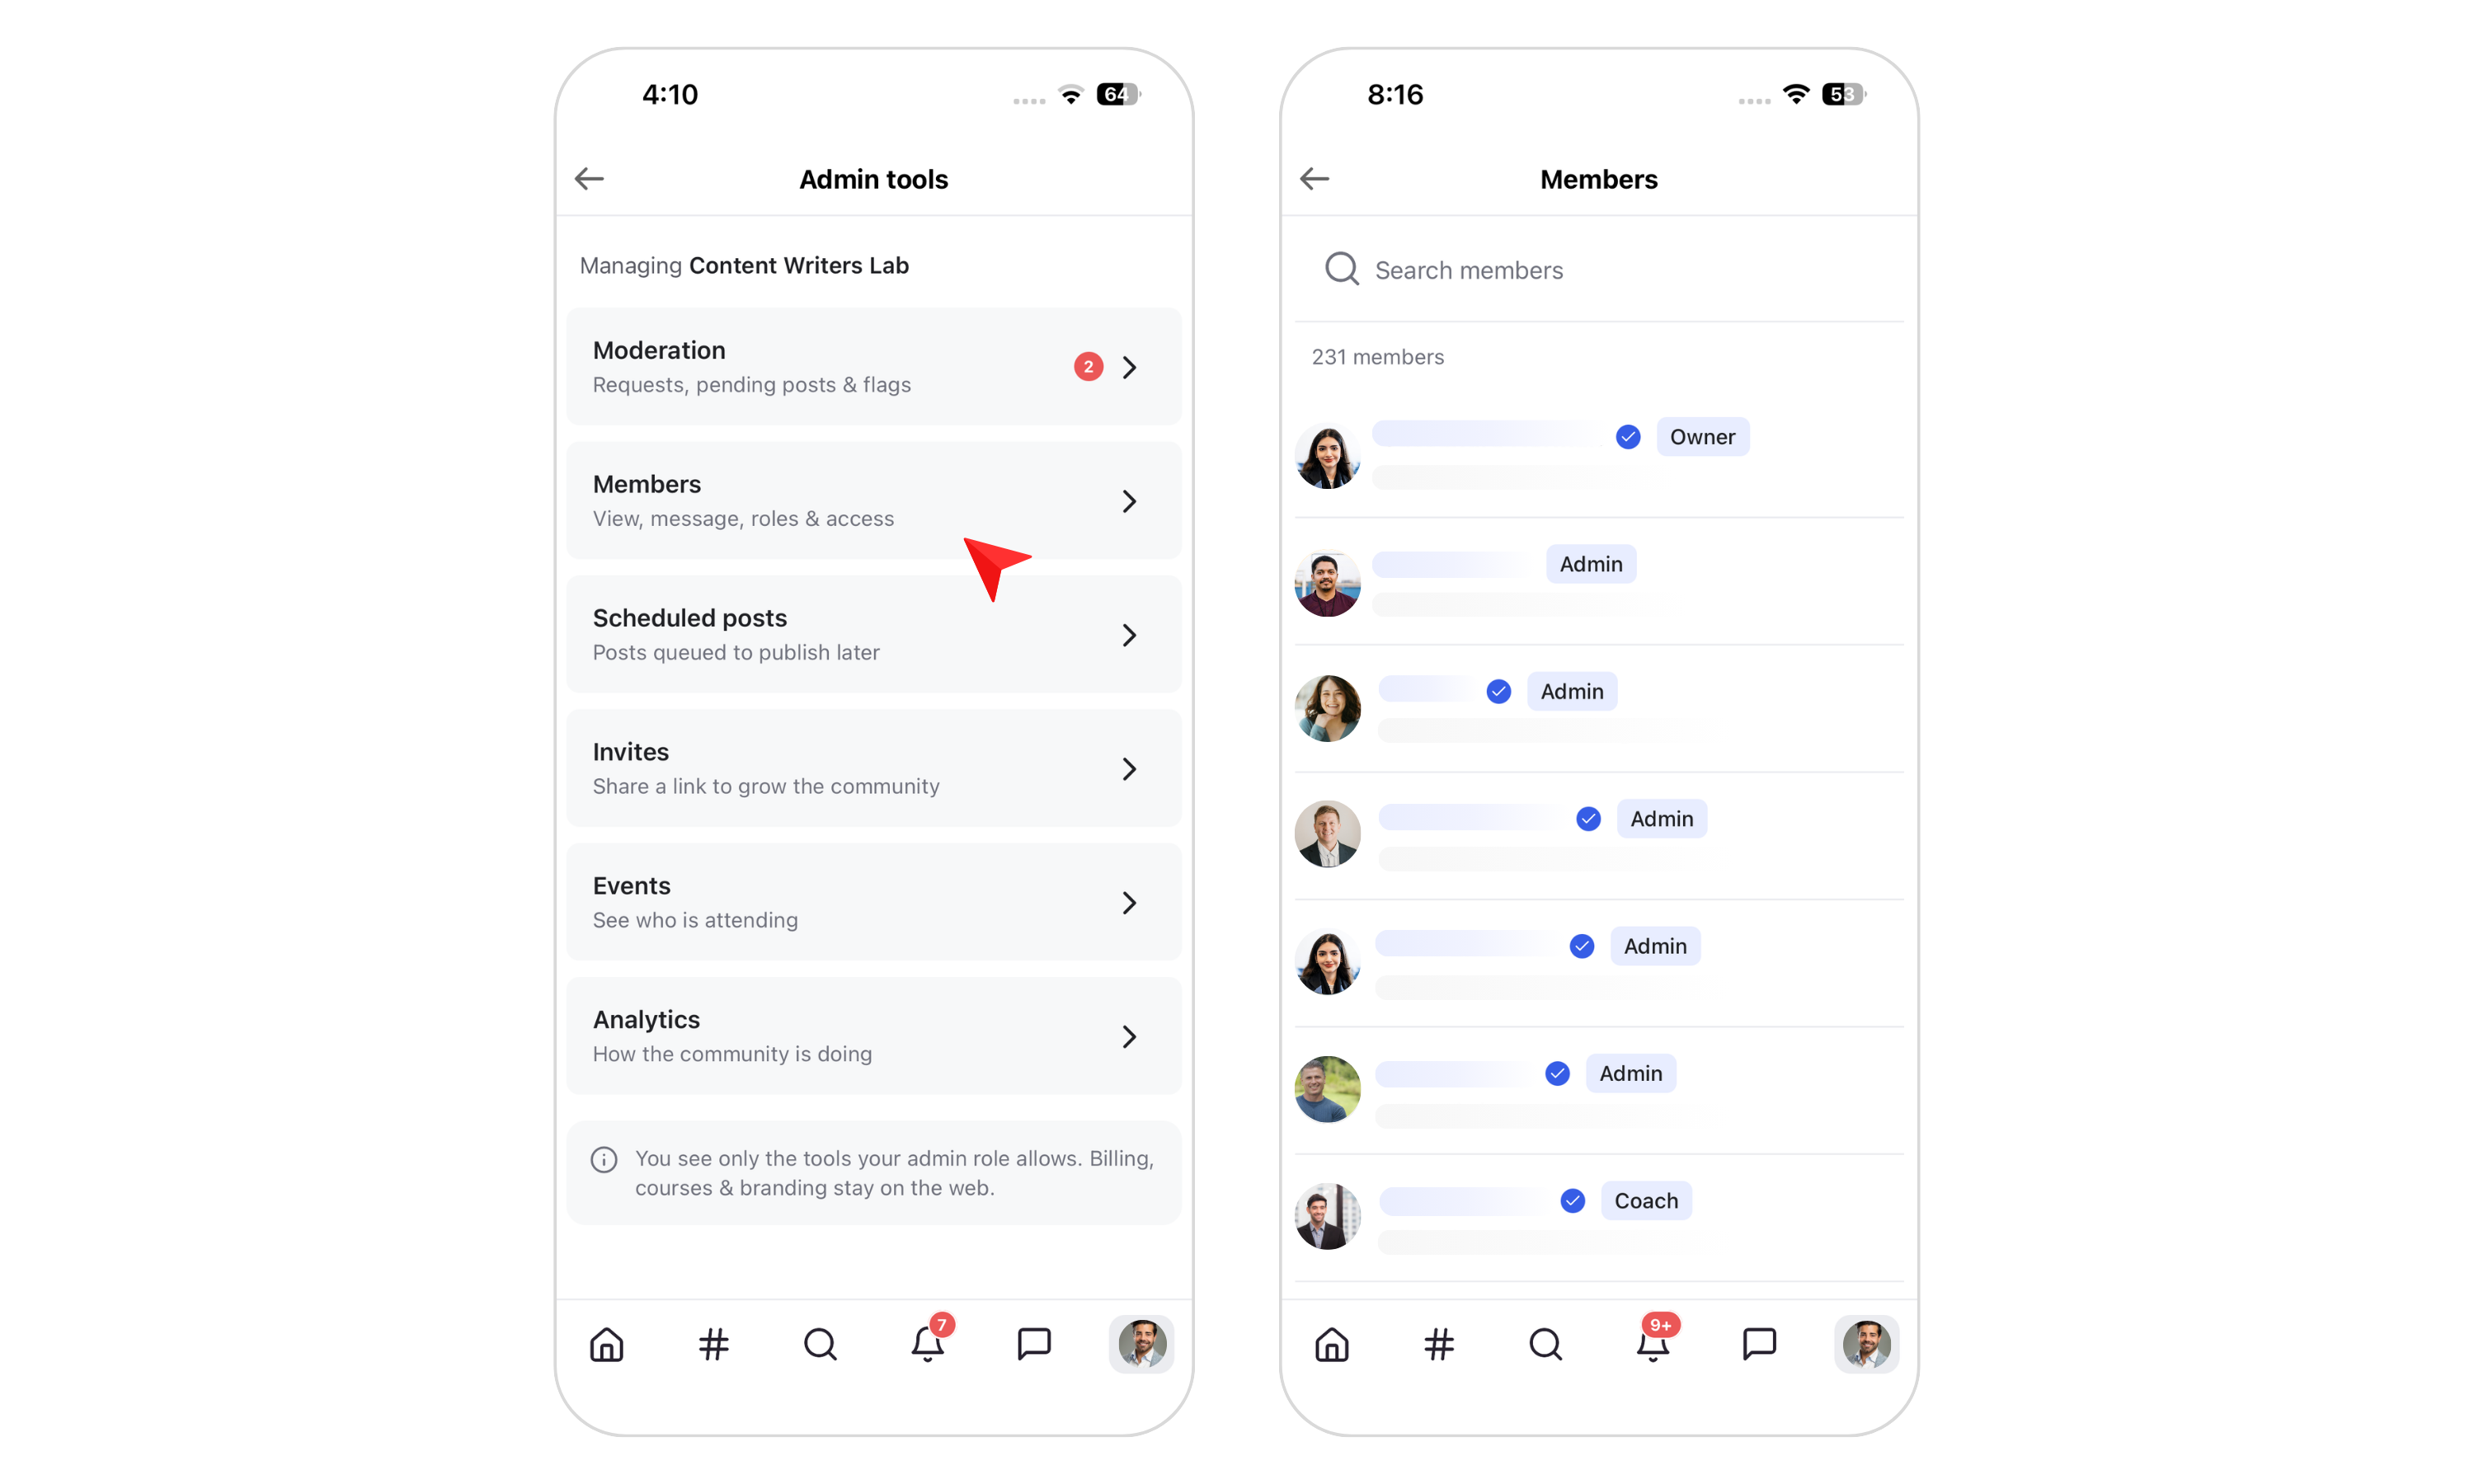
The member profile includes their posts, content access (courses and Resource Library items), member details, custom fields, and activity, including community visits, channels, workflows, and segments they're part of.
The Scheduled Posts section shows your upcoming scheduled posts as well as published posts that were previously scheduled.
Tap the three-dot menu next to a post to view or delete it.
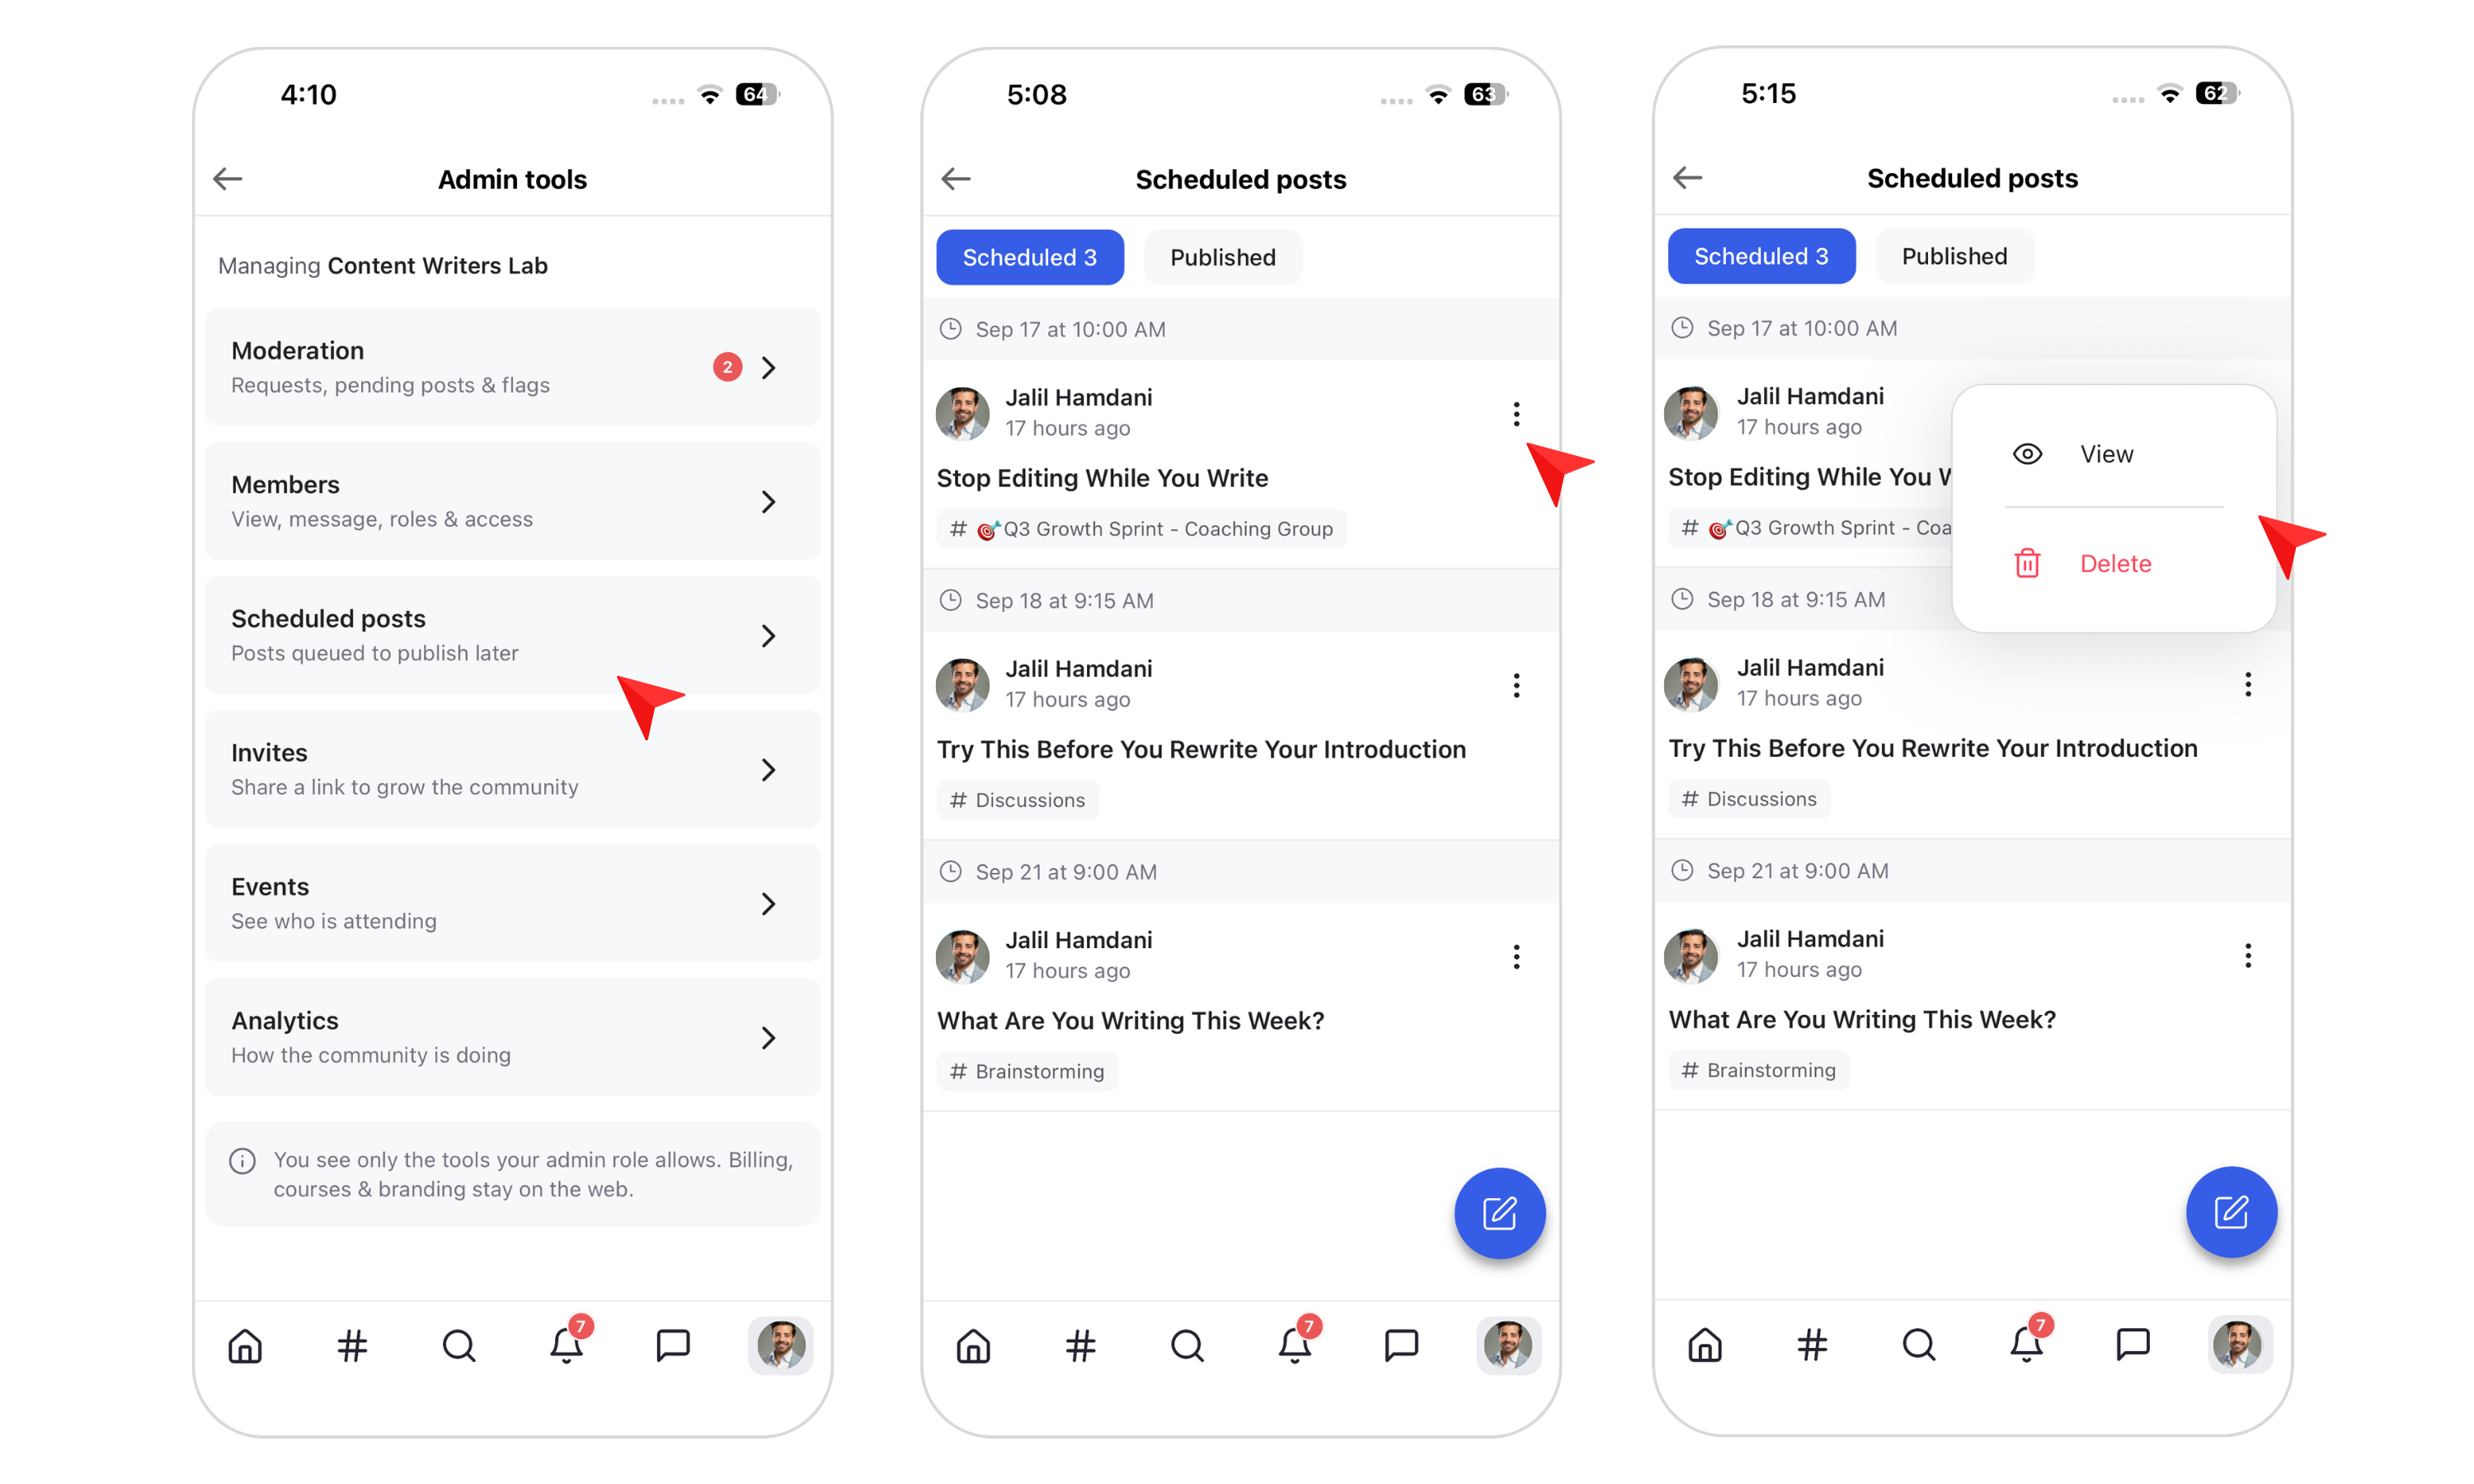
You can also create and schedule a new post directly from here.
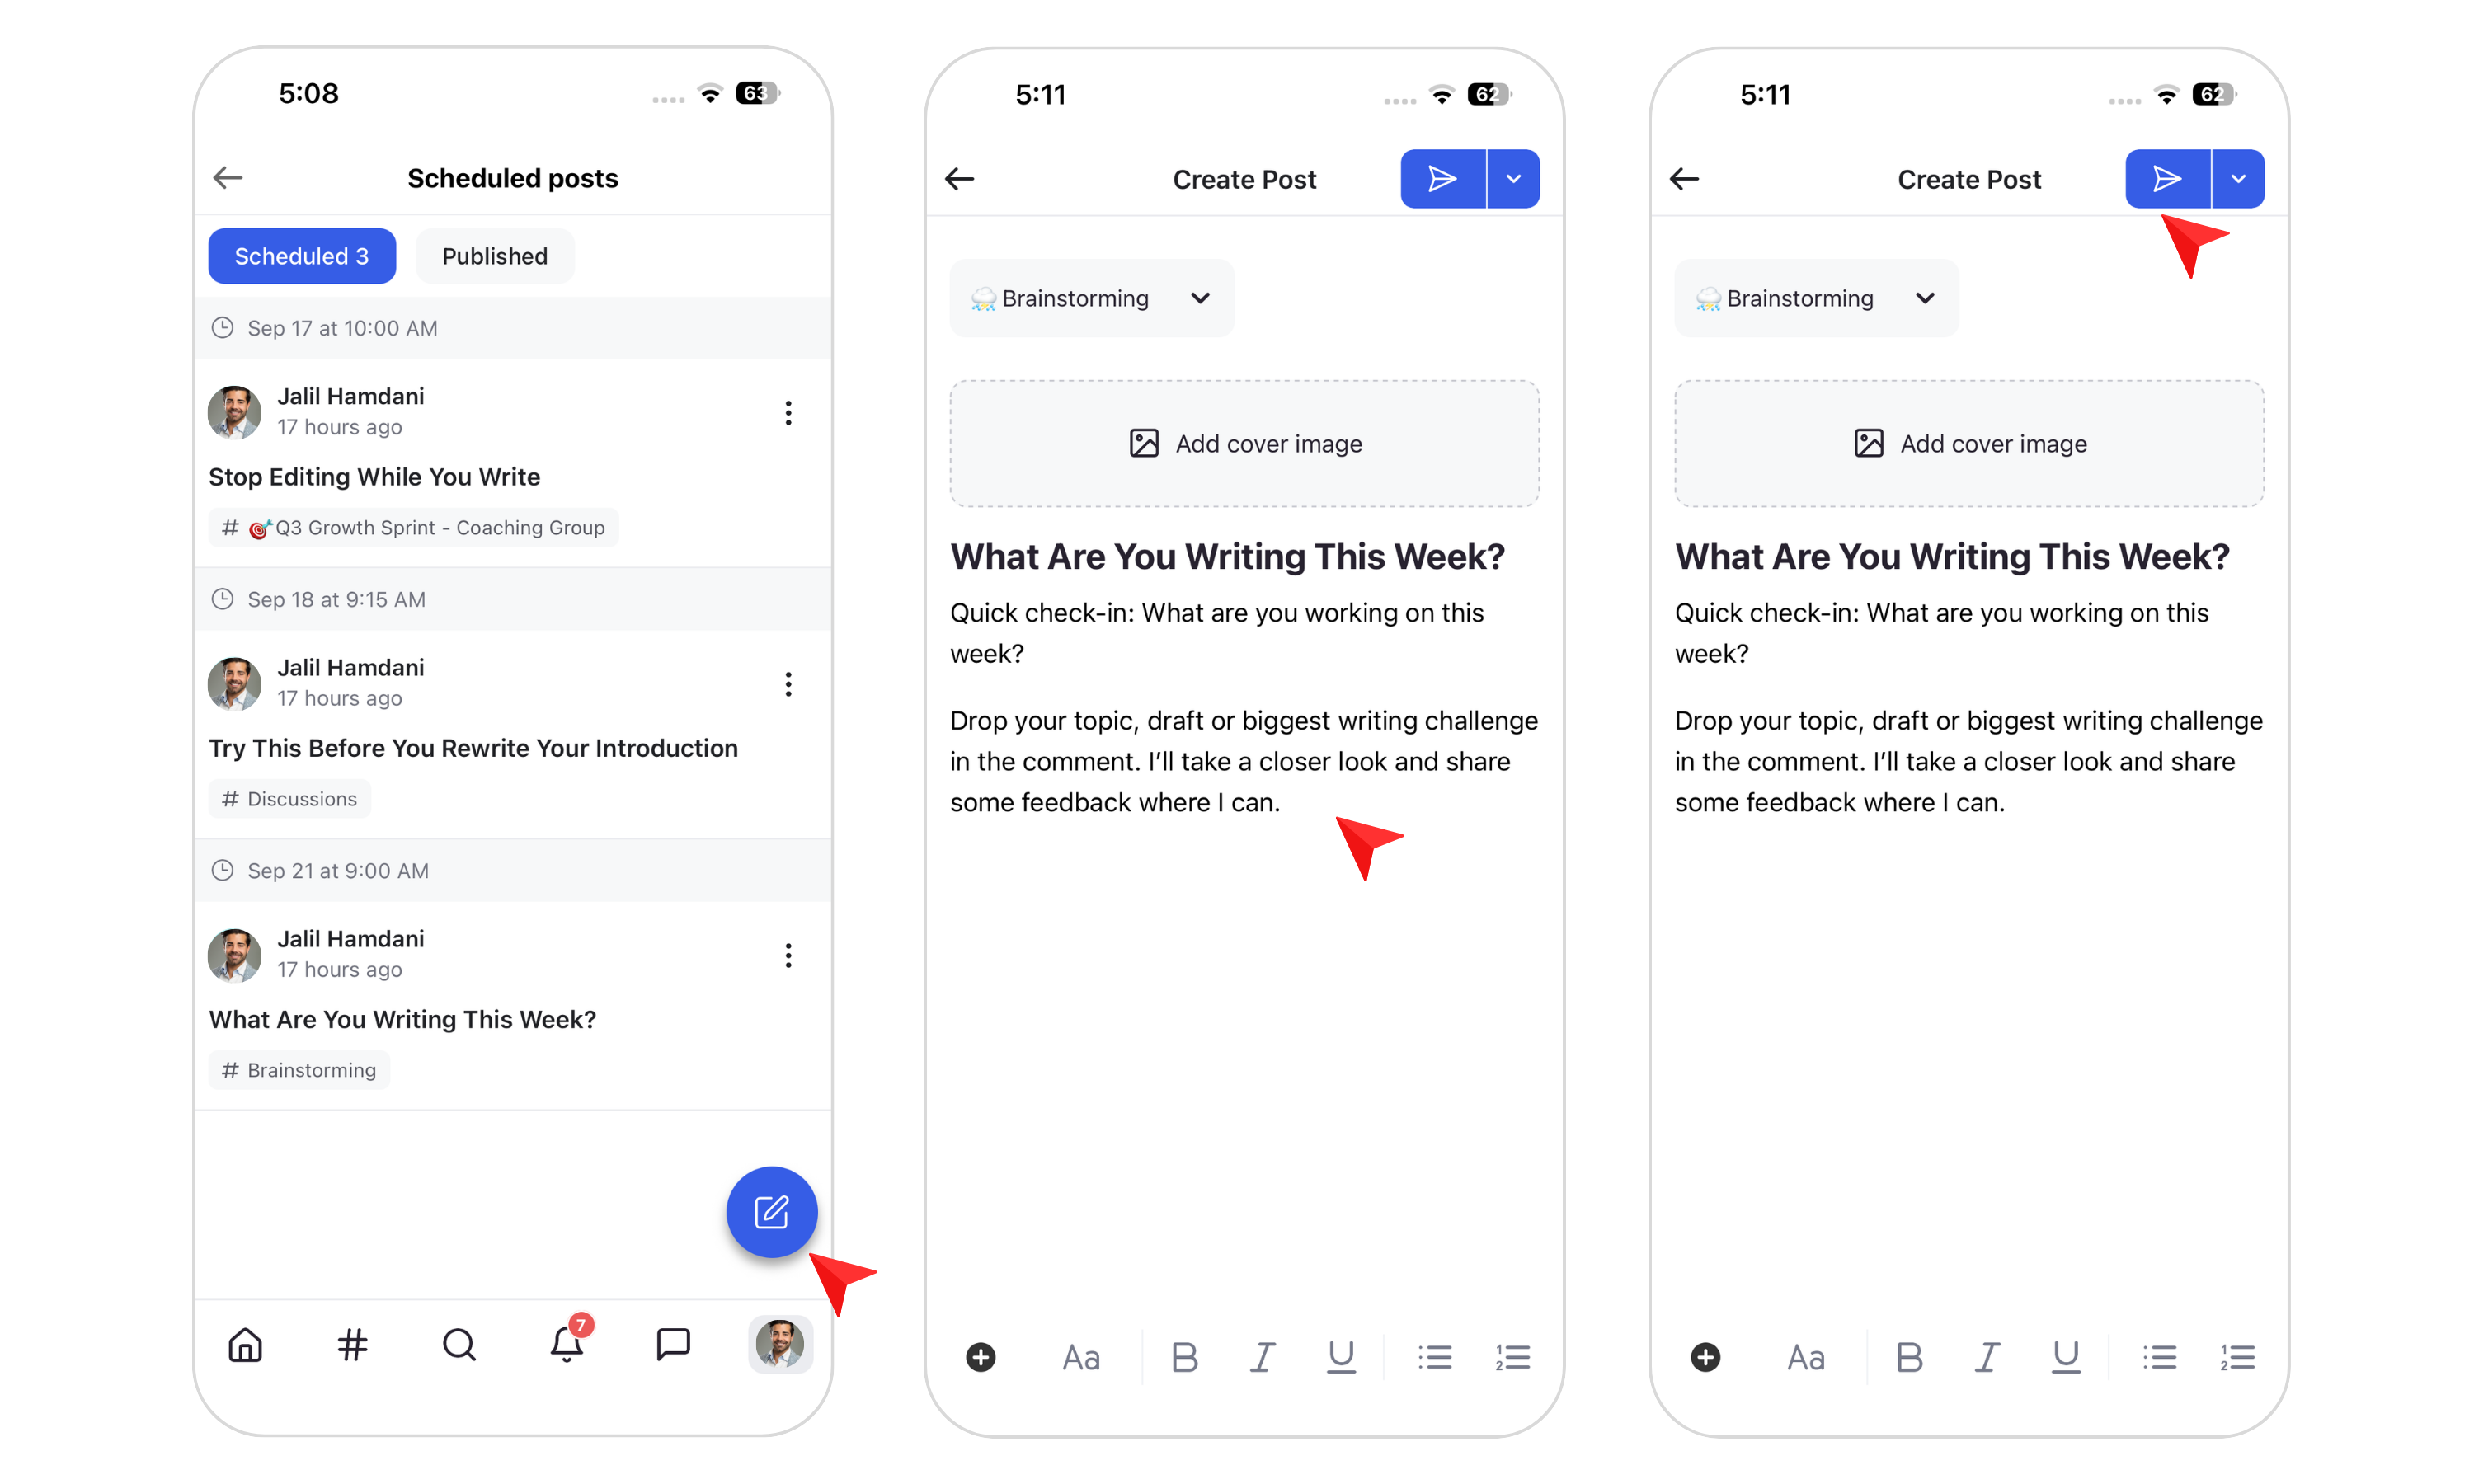
1) Tap the Create Post icon to open the post editor.
2) From the post editor, you can:
Choose the channel where the post will be published
Add a cover image
Write and format your post
Add multimedia content
3) To publish the post immediately, tap the Send icon in the top-right corner.
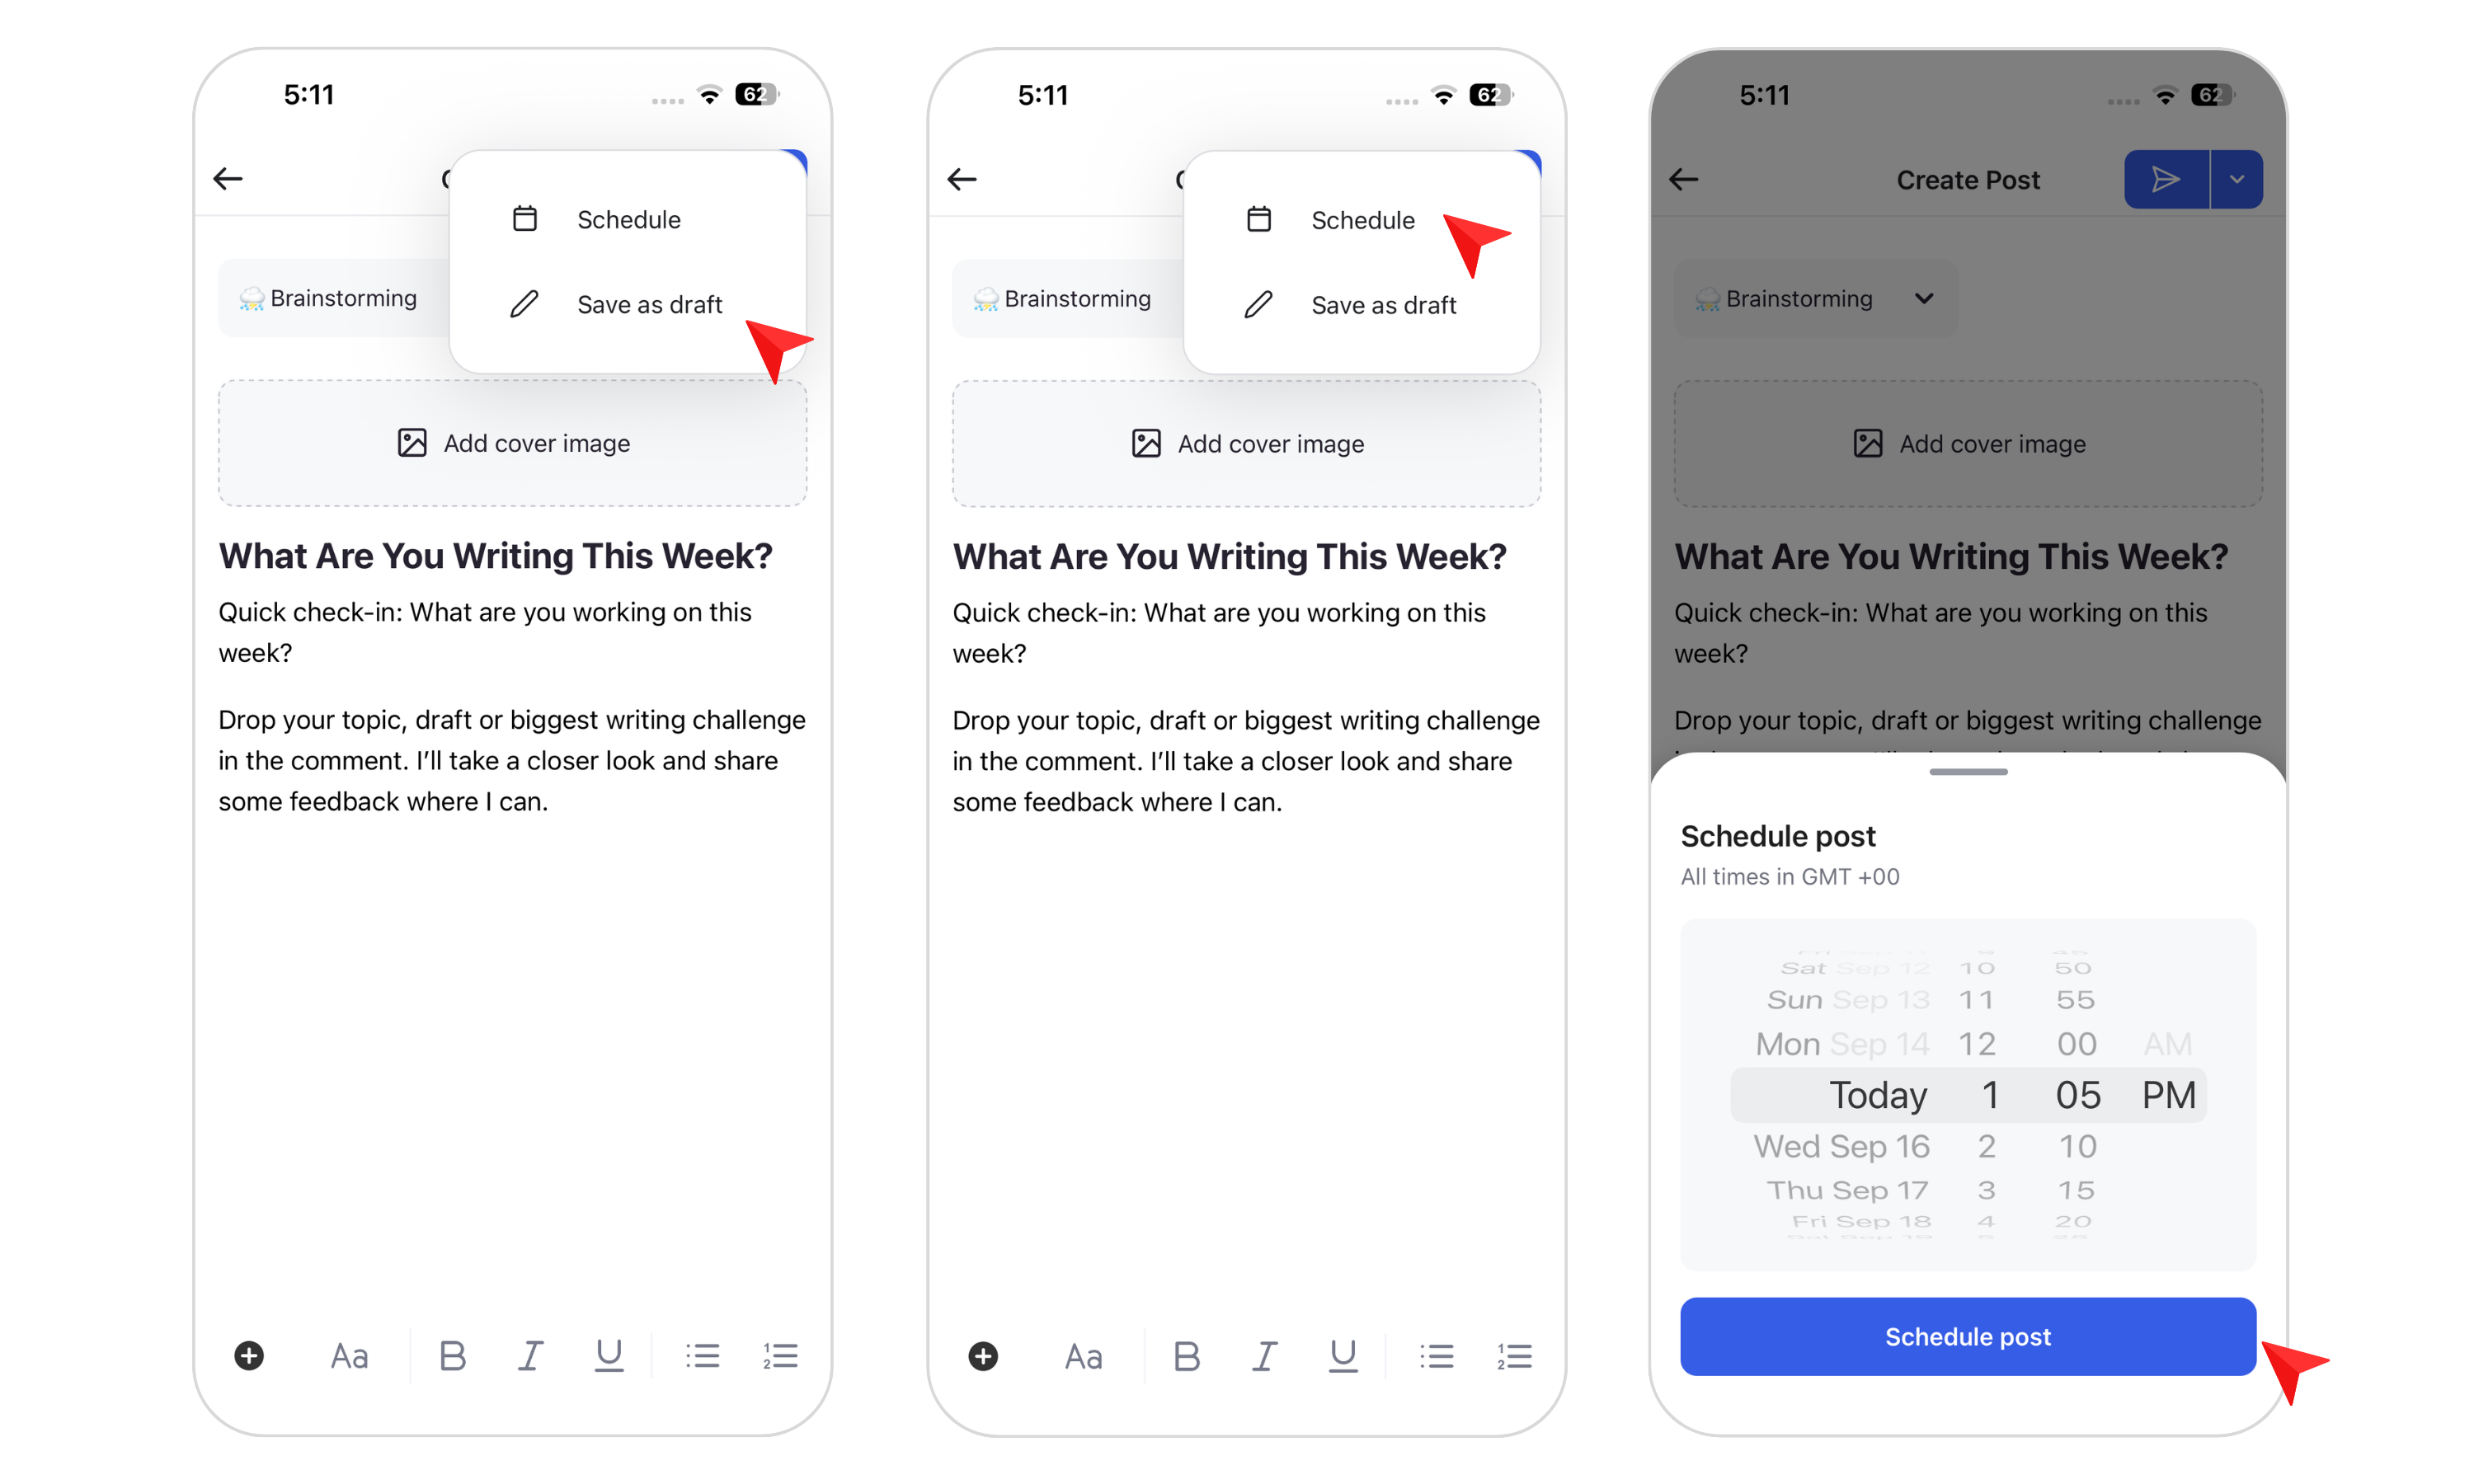
1) To save the post as a draft or schedule it for later, tap the drop-down arrow in the top-right corner.
2) Select Schedule. The post scheduler will slide up from the bottom of the screen.
3) Choose when you want the post to be published.
4) Tap Schedule Post.
The post will now appear in your scheduled posts until it is published.
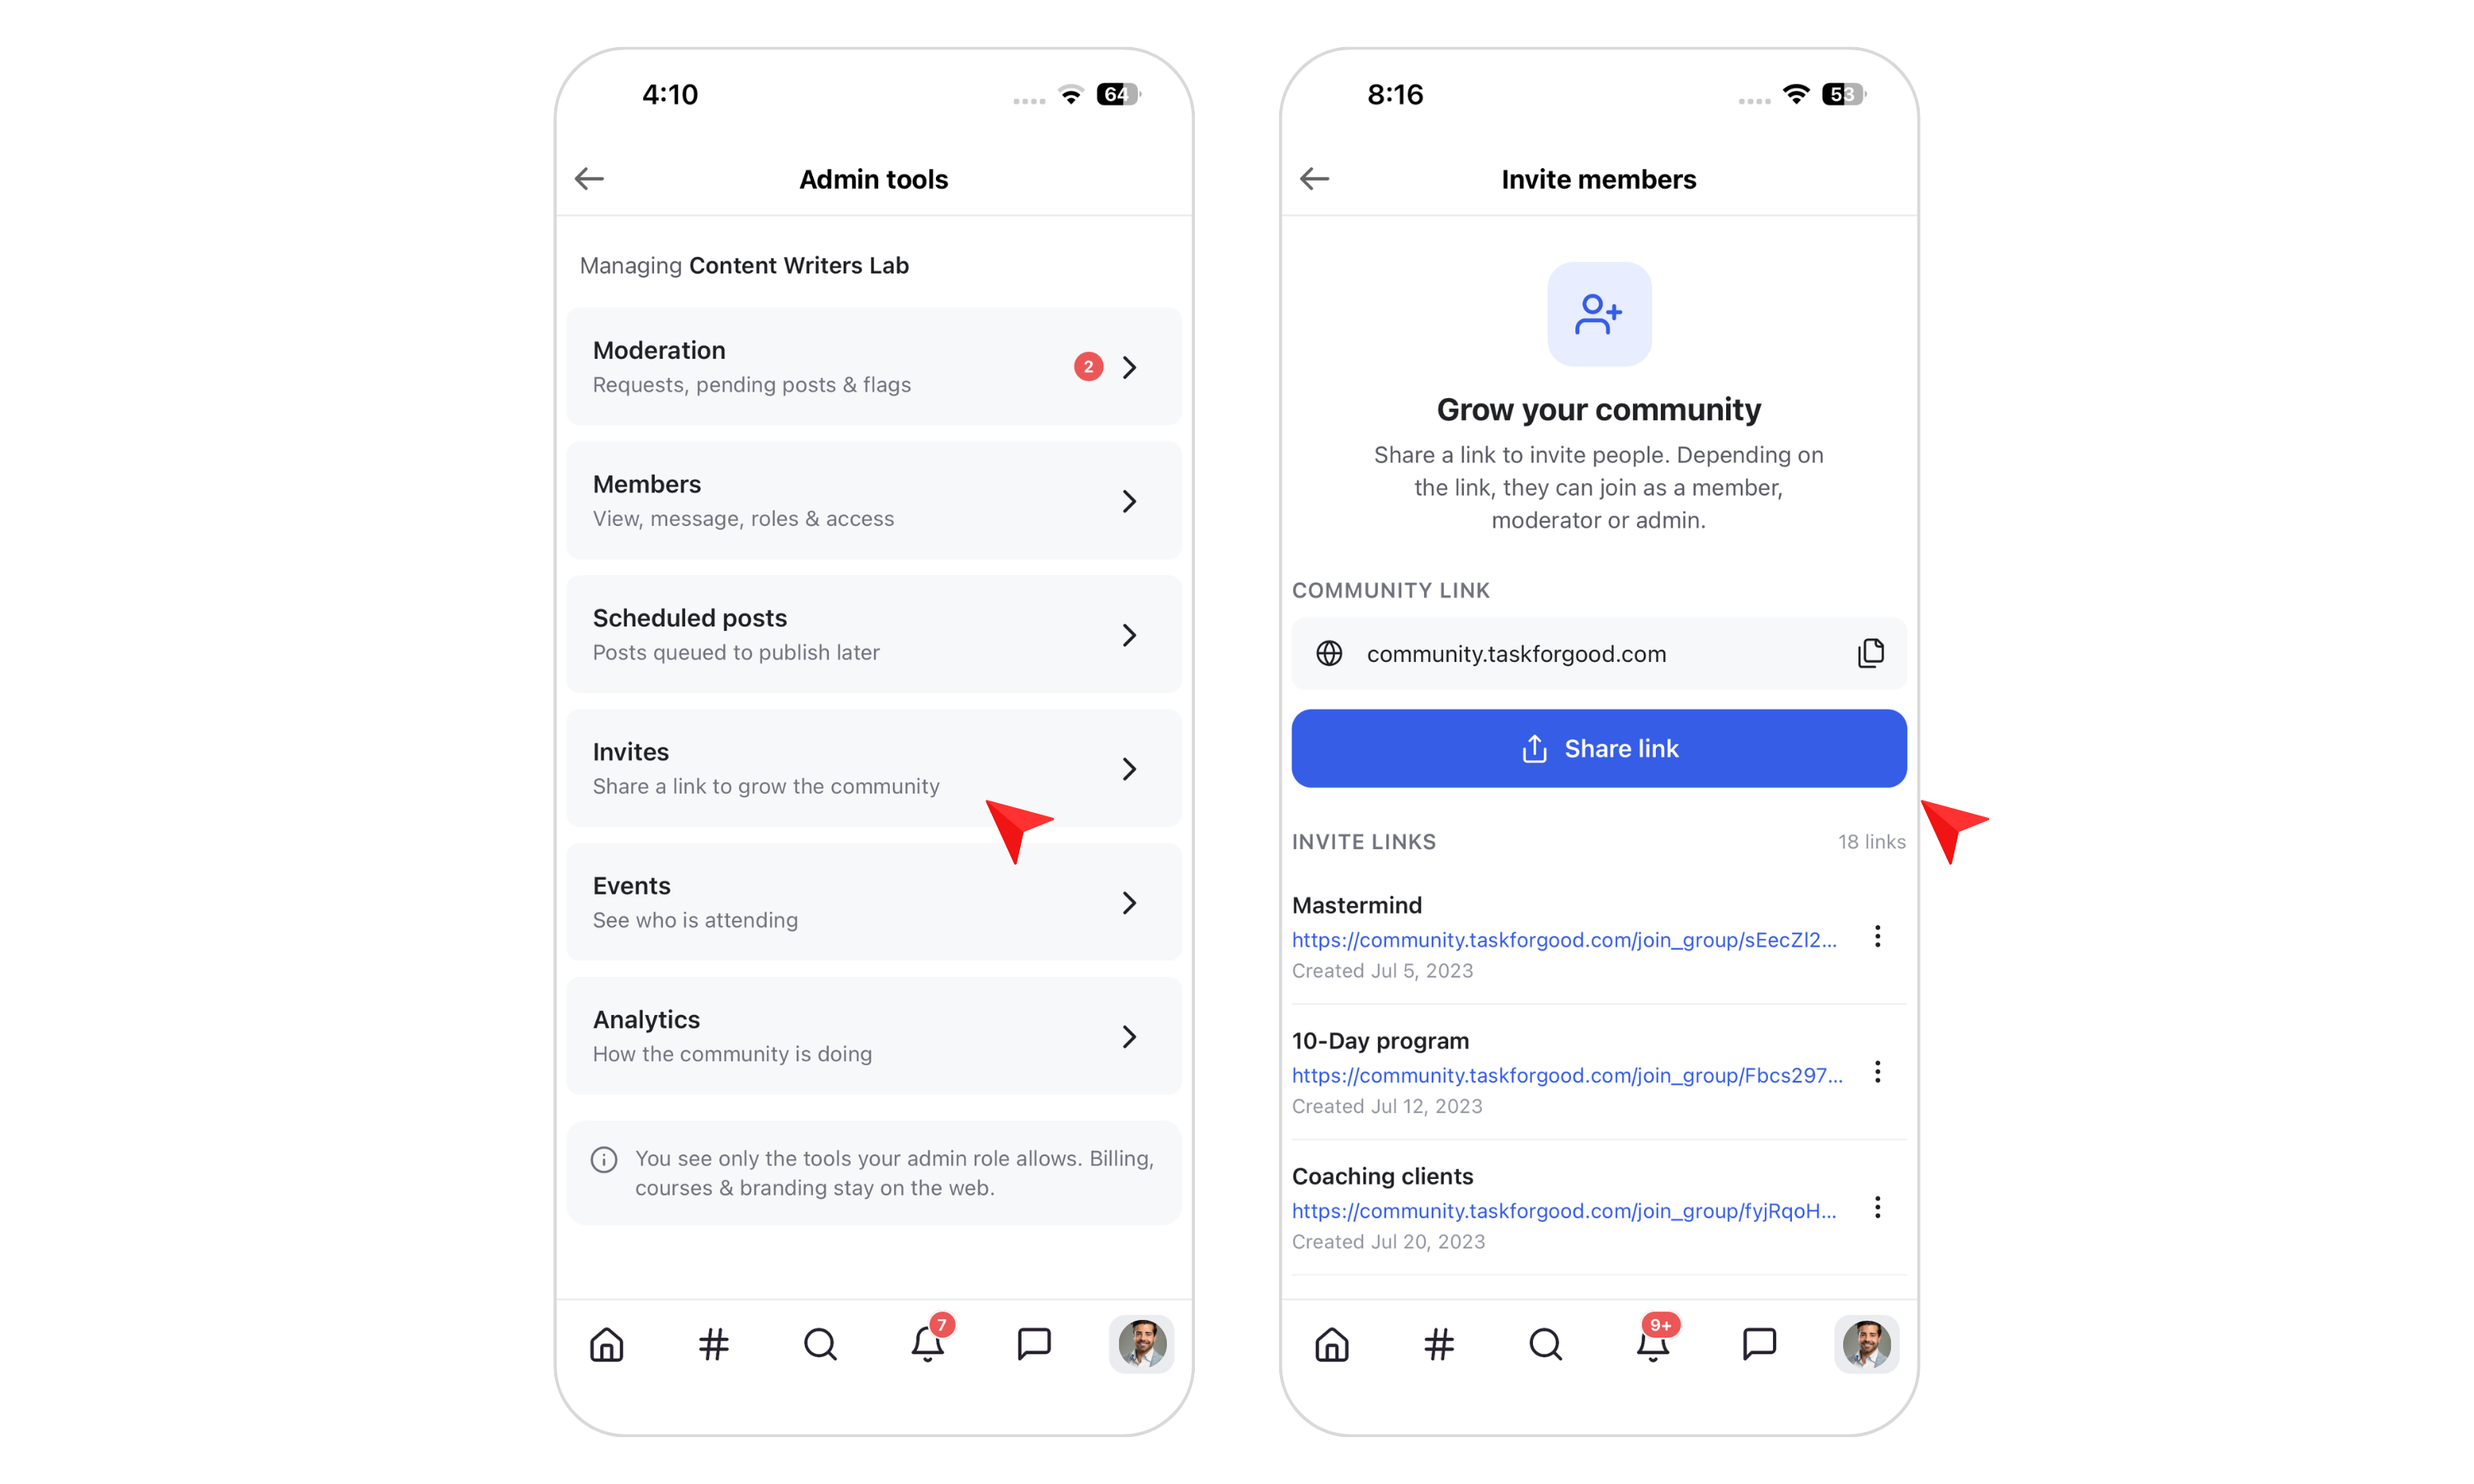
The Invites section gives you access to the invite links for your community.
At the top, you'll see your main community invite link, which you can copy or share with others.
Below it, you'll see your existing invite links. For each invite link, you can:
Copy the link
Share the link
Delete the link
The Events section is your Events Manager within the mobile app.
Here, you can see both upcoming and past events from your community.
To view the management options for an event, tap the three-dot menu next to it.
Depending on the event, you'll have access to options including:
Manage Event
Feature or Unfeature
View Event
Invite
RSVP List
Delete
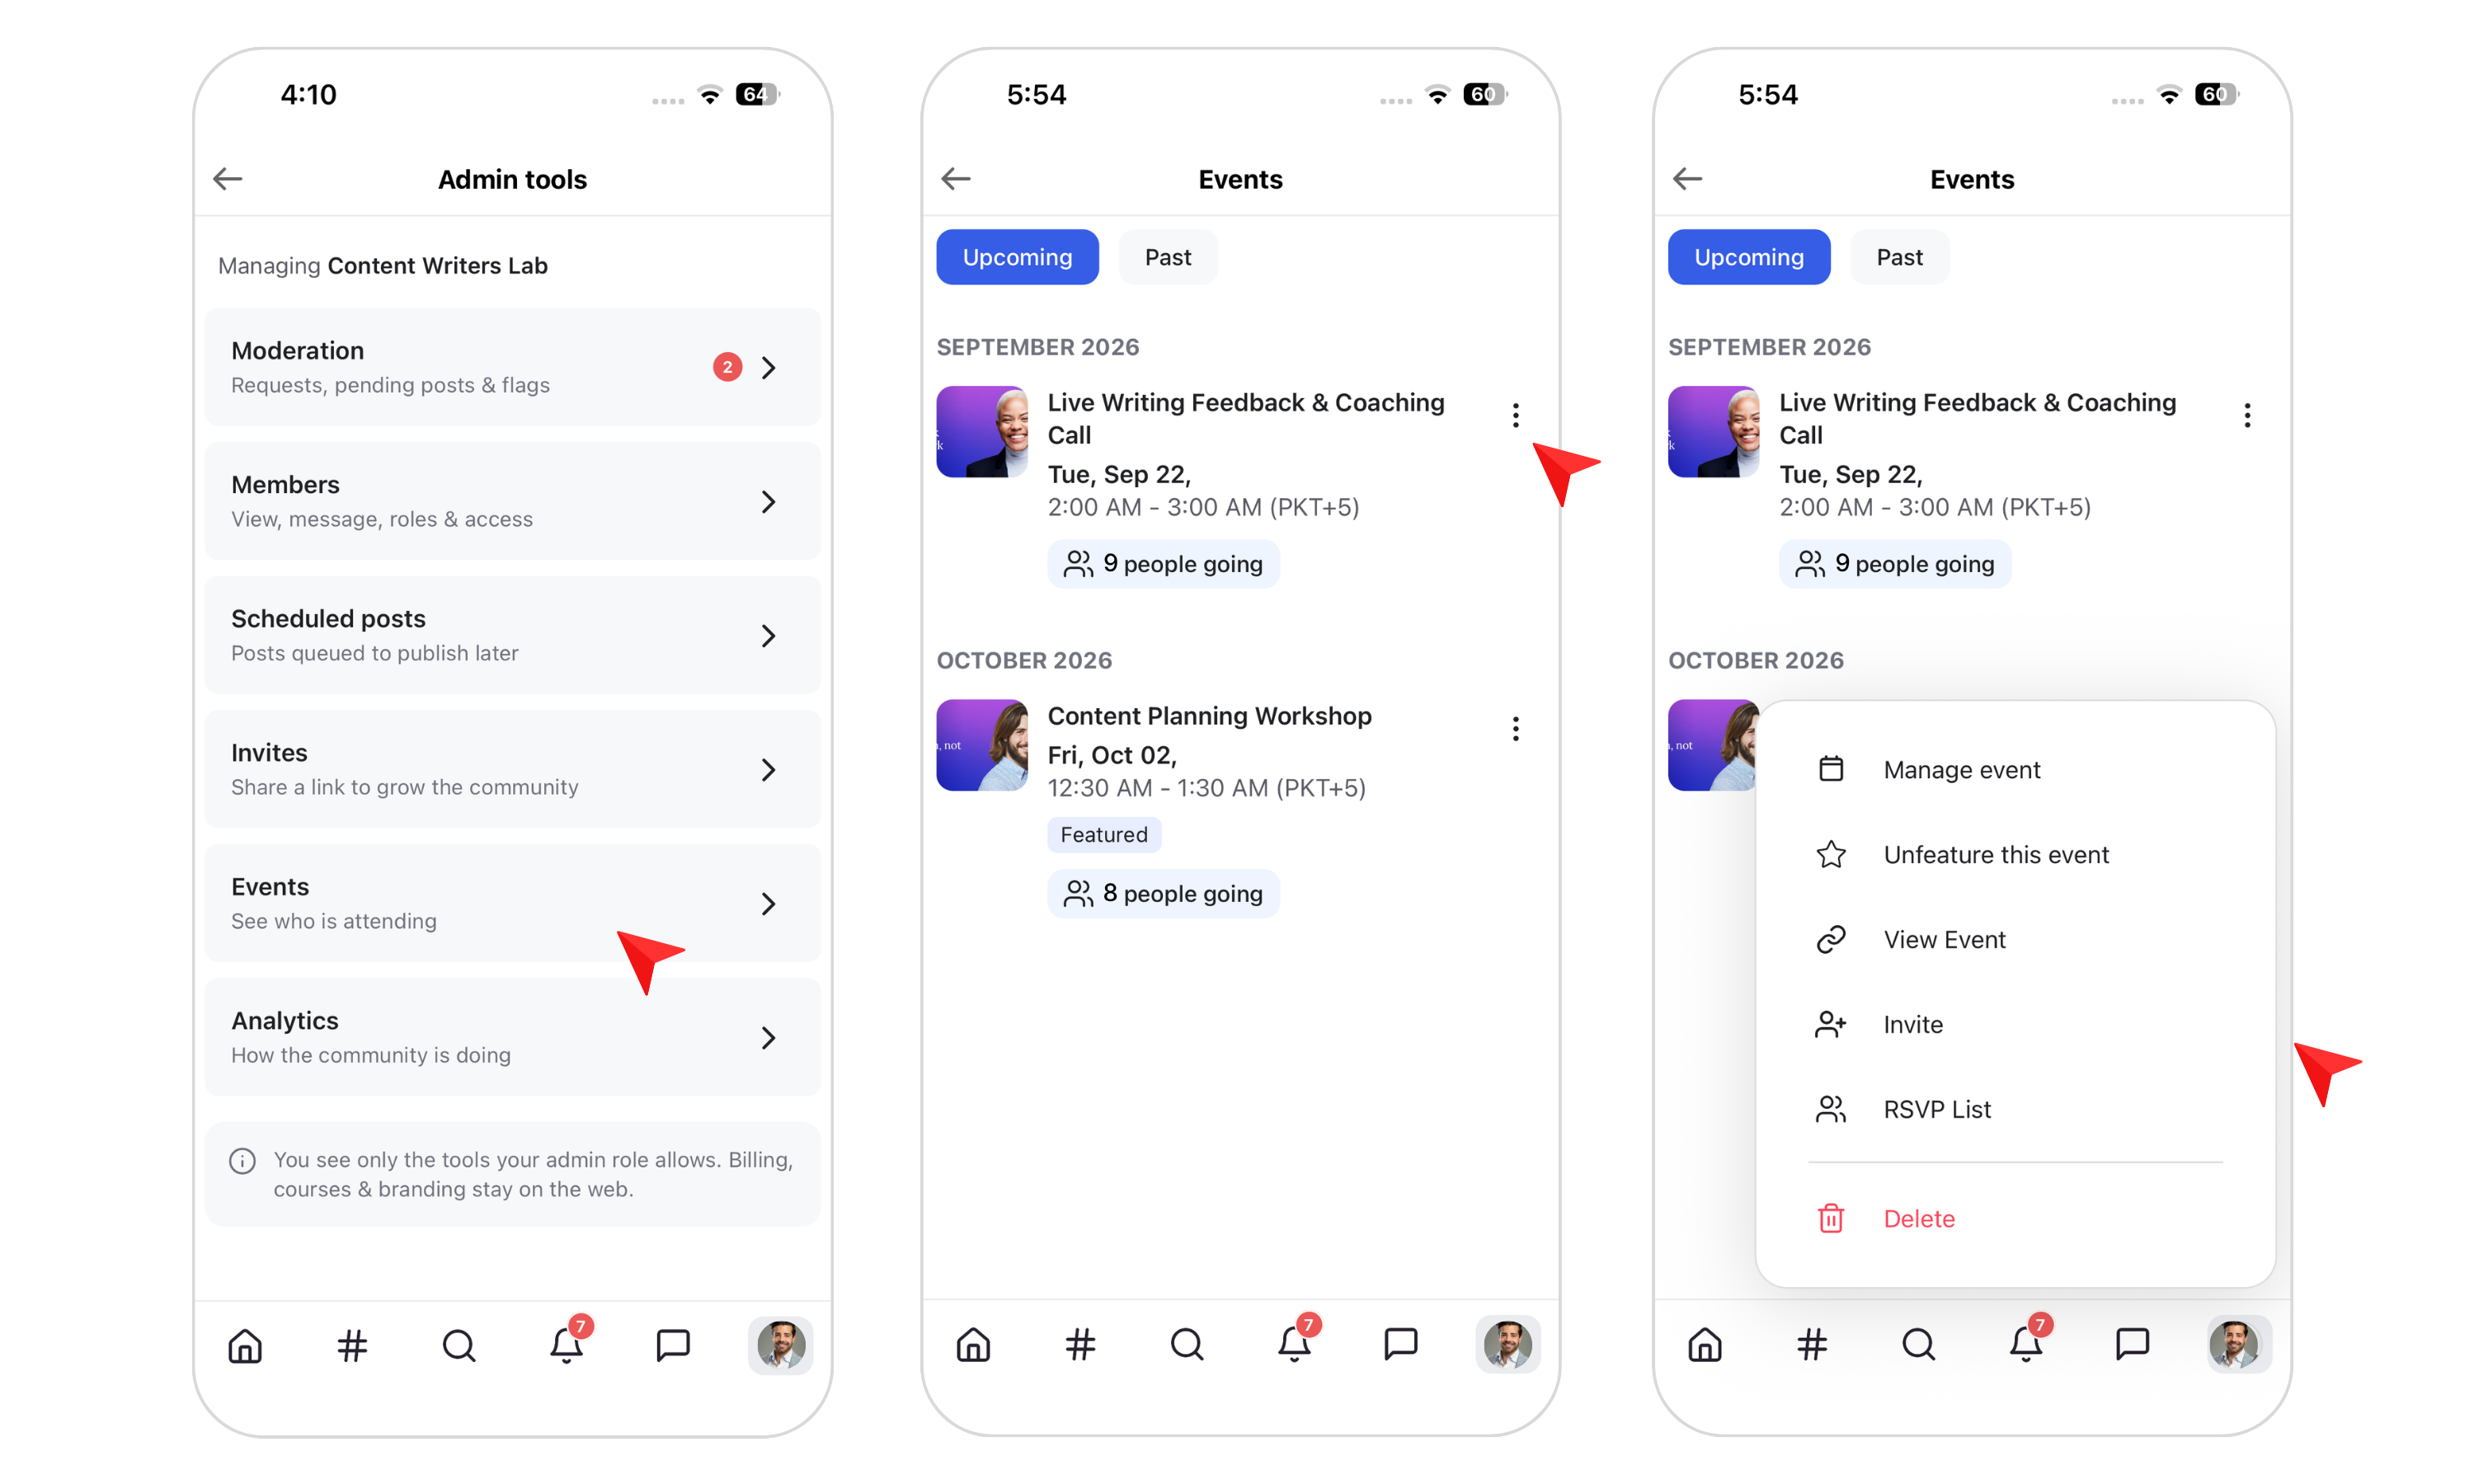
Tap Manage Event to access additional event management options.
From here, you can:
Share the event
Invite members
Delete the event
View members who have confirmed or RSVP'd
View the dedicated list of invited members
Get the event share link
To invite members, tap Invite Members.
This opens your community member list. You can select members directly from the list or use the search field to find specific members you want to invite.
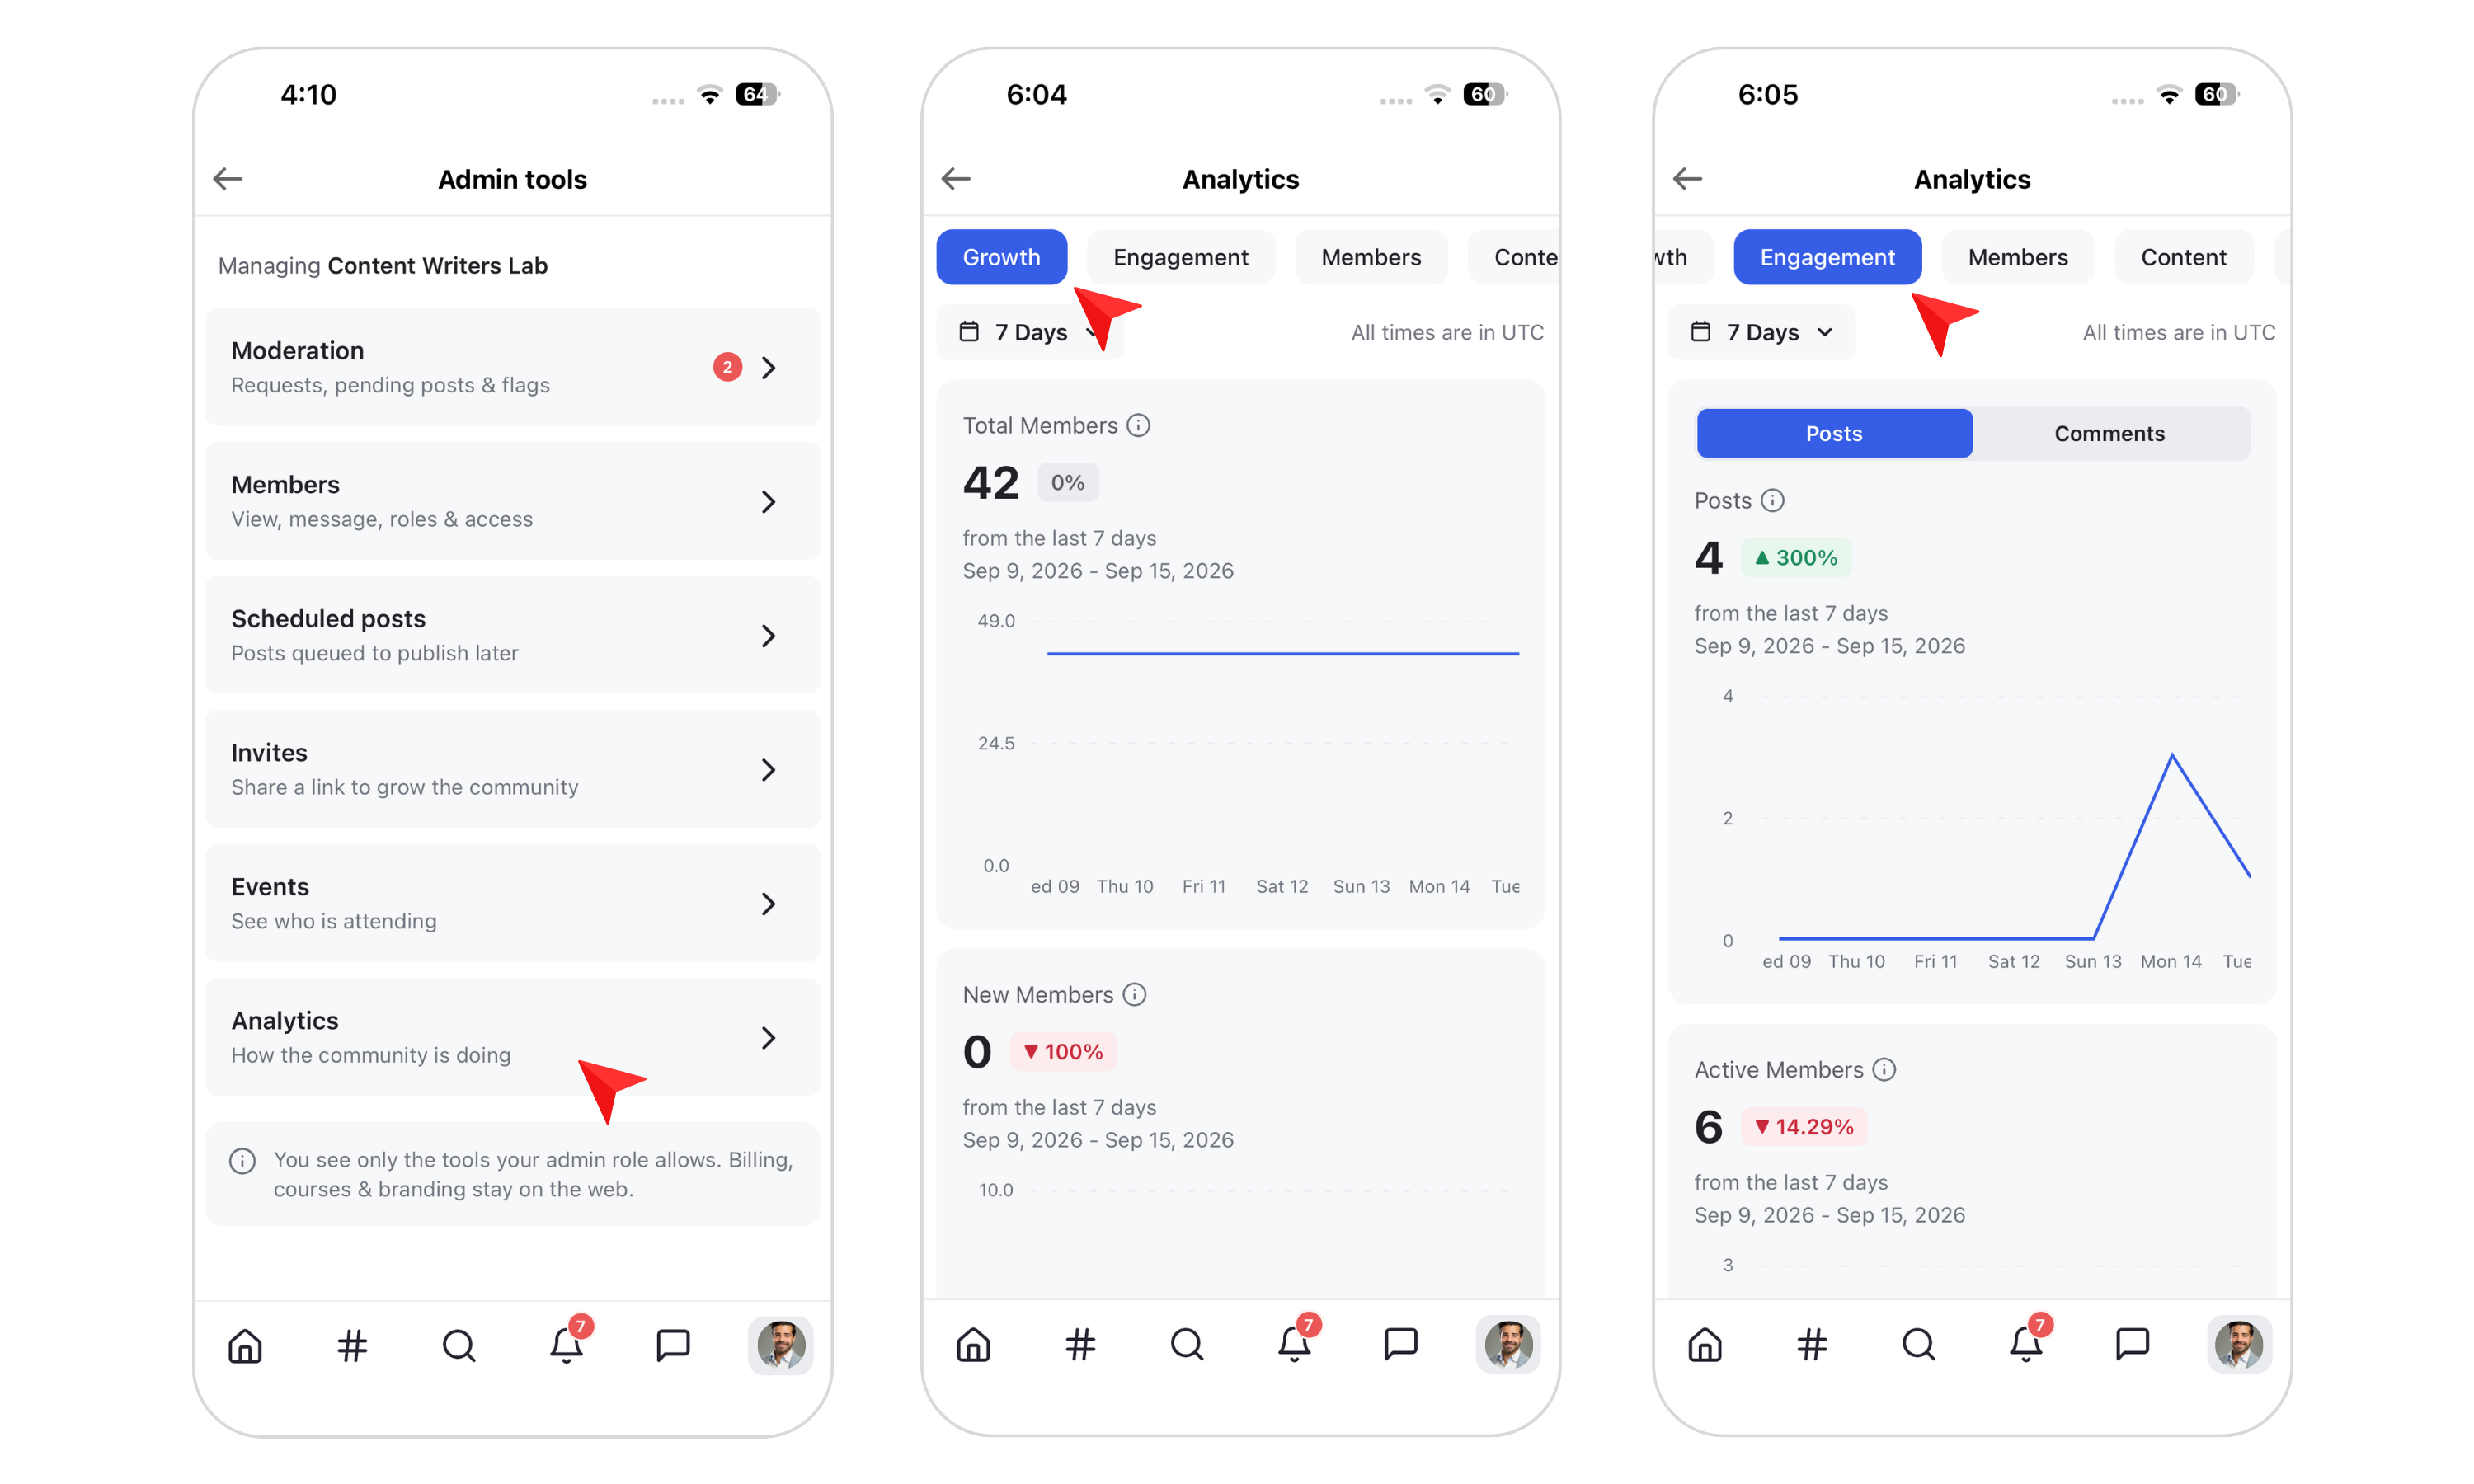
The Analytics section lets you check your community performance directly from the mobile app.
Analytics are organized into the following areas:
1) Growth: View total members, new members, and new membership requests.
2) Engagement: Track posts, comments, active members, and direct messages.
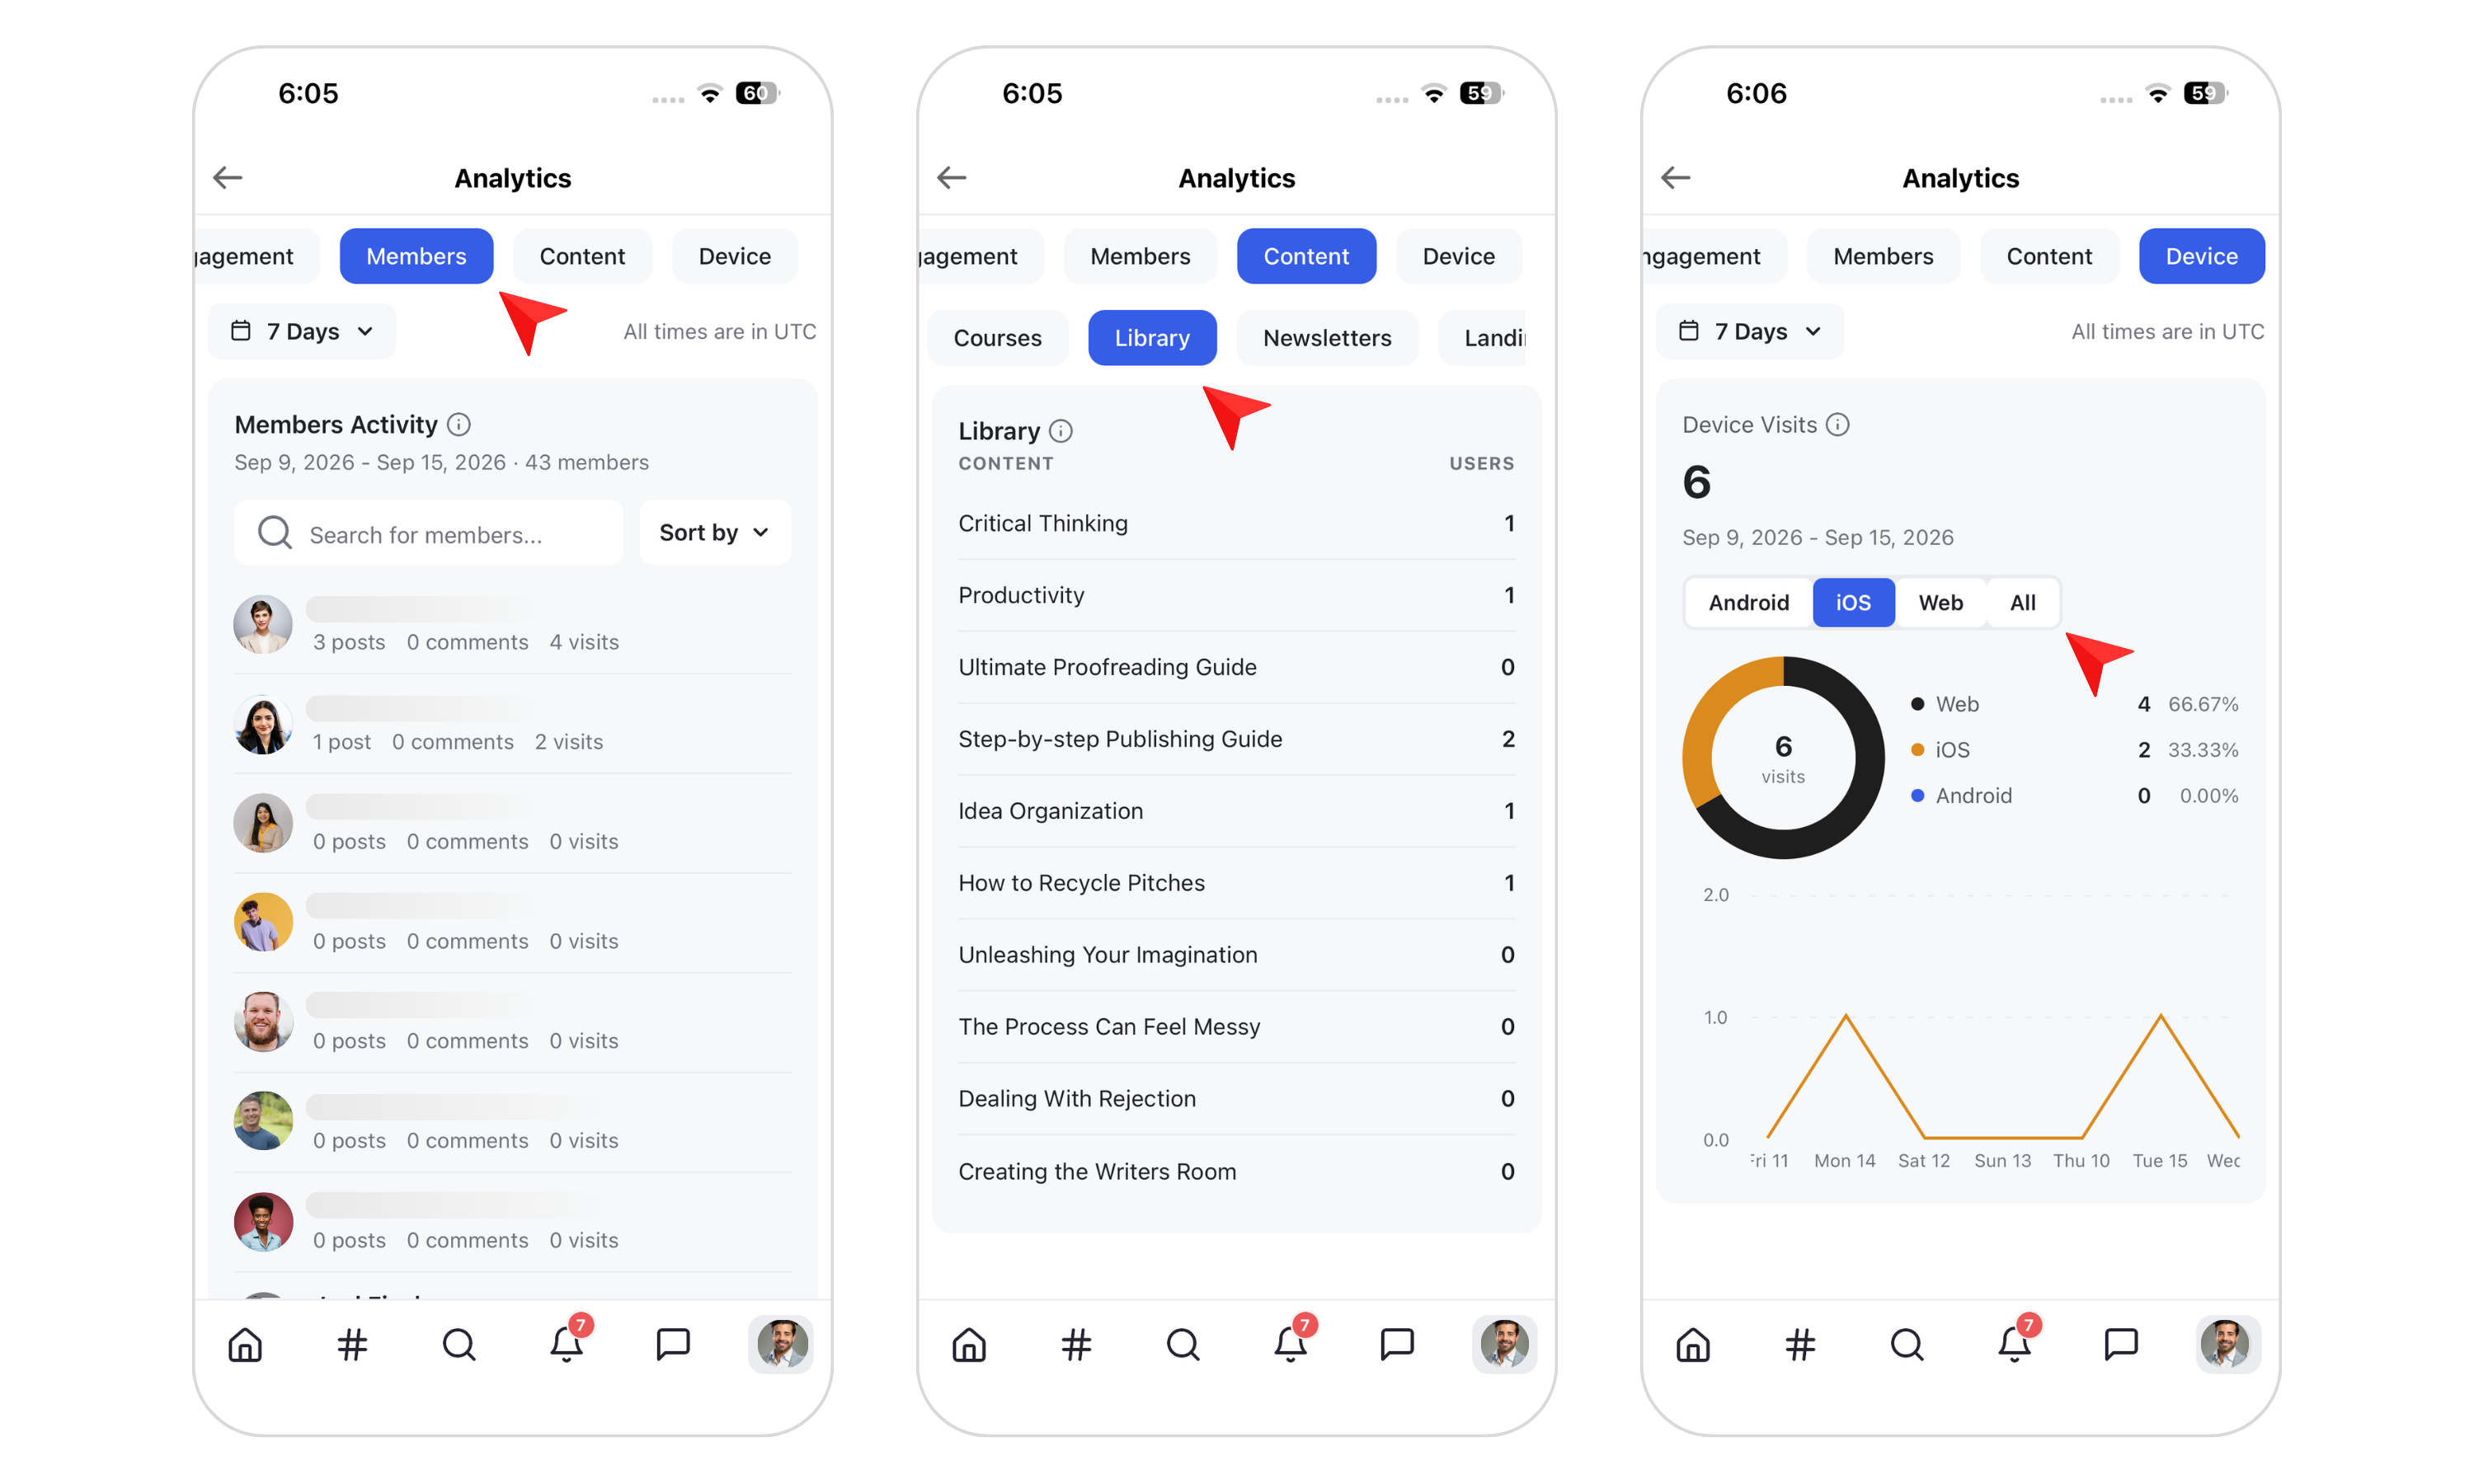
3) Member Activity: View individual member activity by opening their profiles.
4) Content Performance: View performance data for Courses, Resource Library content, Newsletters, and Landing Pages.
5) Device: See how members access your community across Web, Android, and iOS.
These Admin Tools give you access to the most common community management tasks from your phone, making it easier to moderate your community, manage members and content, and keep track of activity when you're away from your computer.