This guide explains how to enable billing address and tax information collection, what customers see during checkout, and how this helps you keep accurate records.
Some businesses are required to collect billing and tax details at checkout. GroupApp makes this easy by allowing you to collect both billing address and tax information directly on the checkout page. Once collected, the information is securely stored in your connected Stripe account and can also be exported for reporting purposes.
You can enable these options for both subscriptions and one-time payments, including courses, events, and library content.
Note: Collecting billing addresses and collecting tax information are separate, independent settings that can be enabled individually.
Cleaner invoices, fewer follow-ups: Finance teams receive billing addresses and tax IDs upfront, ensuring invoices are compliant from day one.
Faster approvals and reimbursements: Many companies require tax details to approve payments; collecting them at checkout speeds up internal procurement.
Accurate records for reporting and taxes: Information is stored in Stripe and exports cleanly, making accounting and audit preparation easier.
Reduced support workload: Members don’t need to email their billing address or tax ID later. The checkout form captures everything automatically.
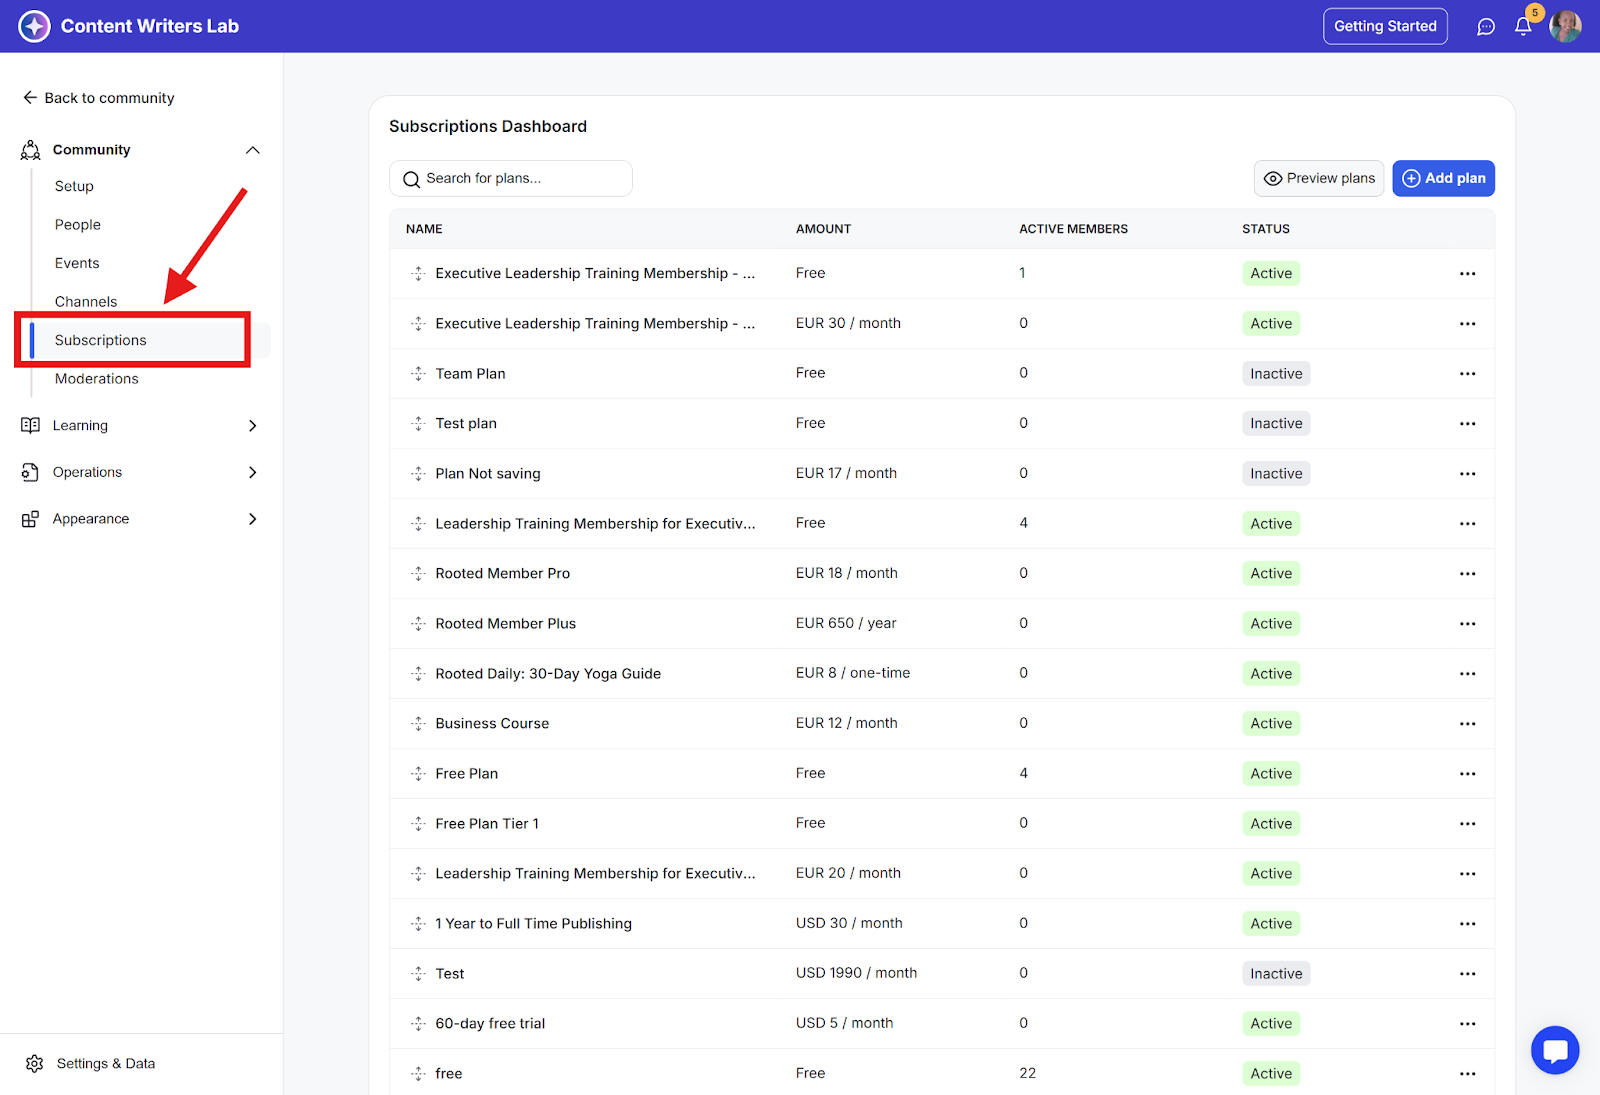
Step 1: Go to your Admin Panel and click Subscriptions on the side menu. This opens your Subscriptions Dashboard, where you can view and manage all of your existing and new plans.
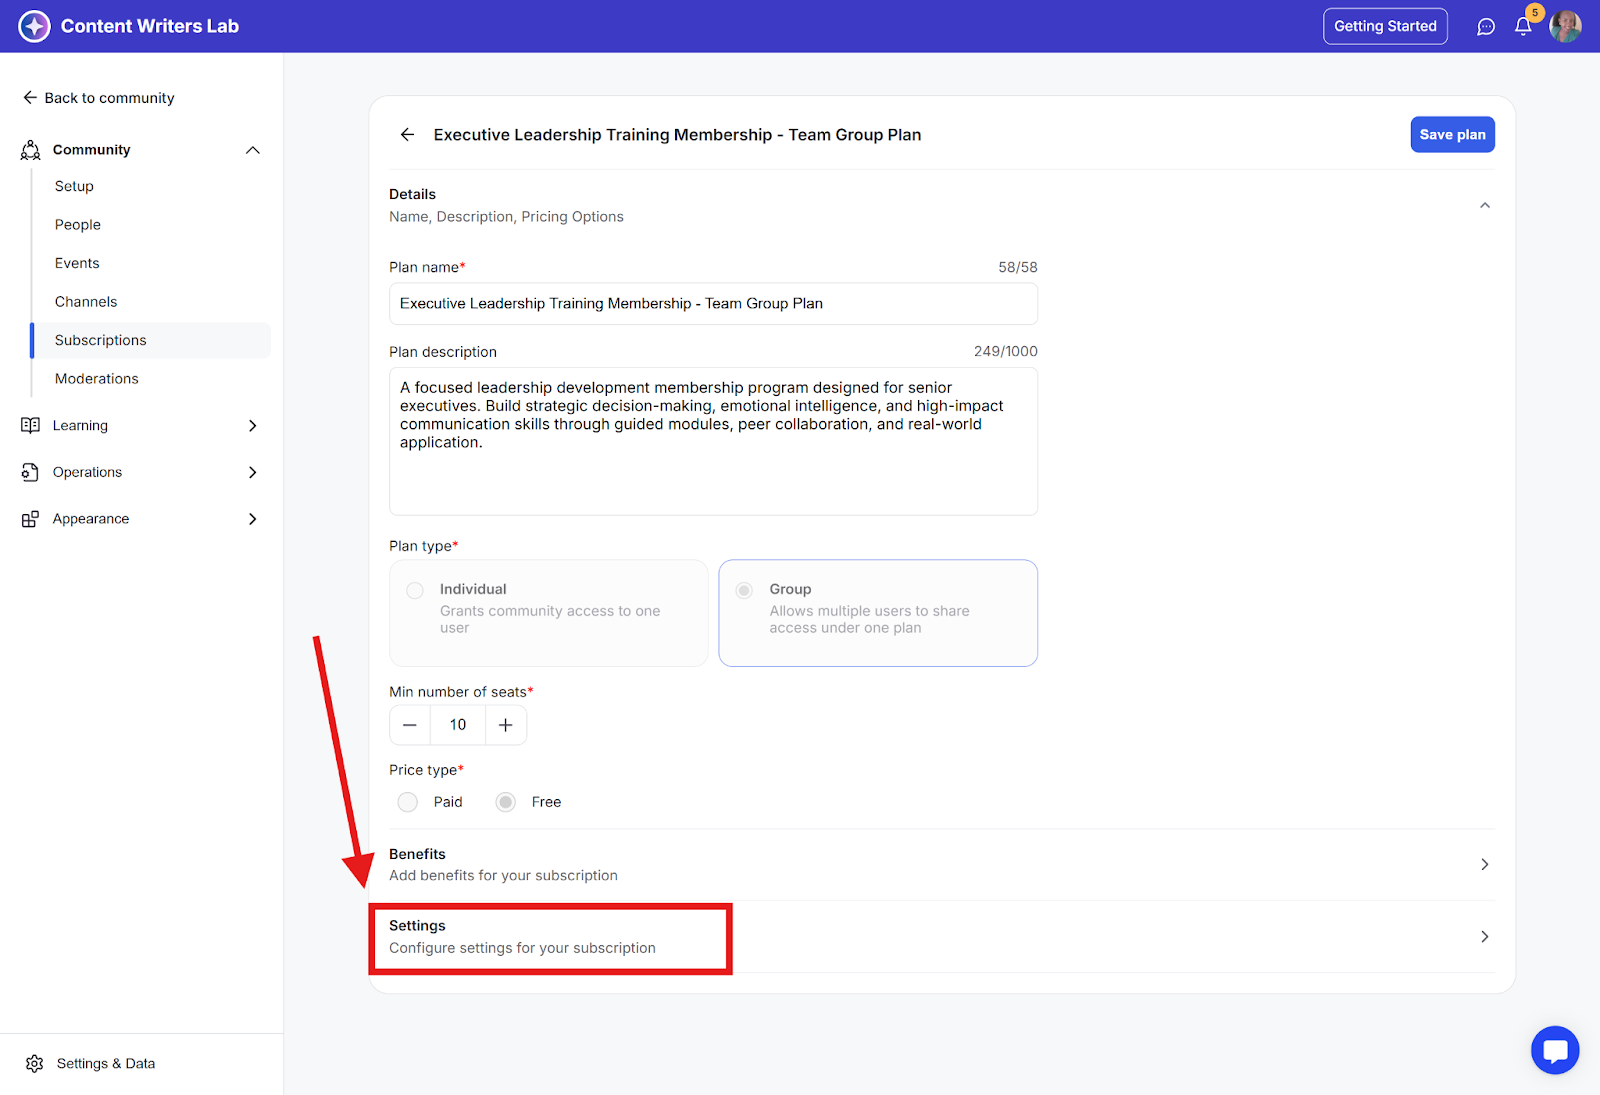
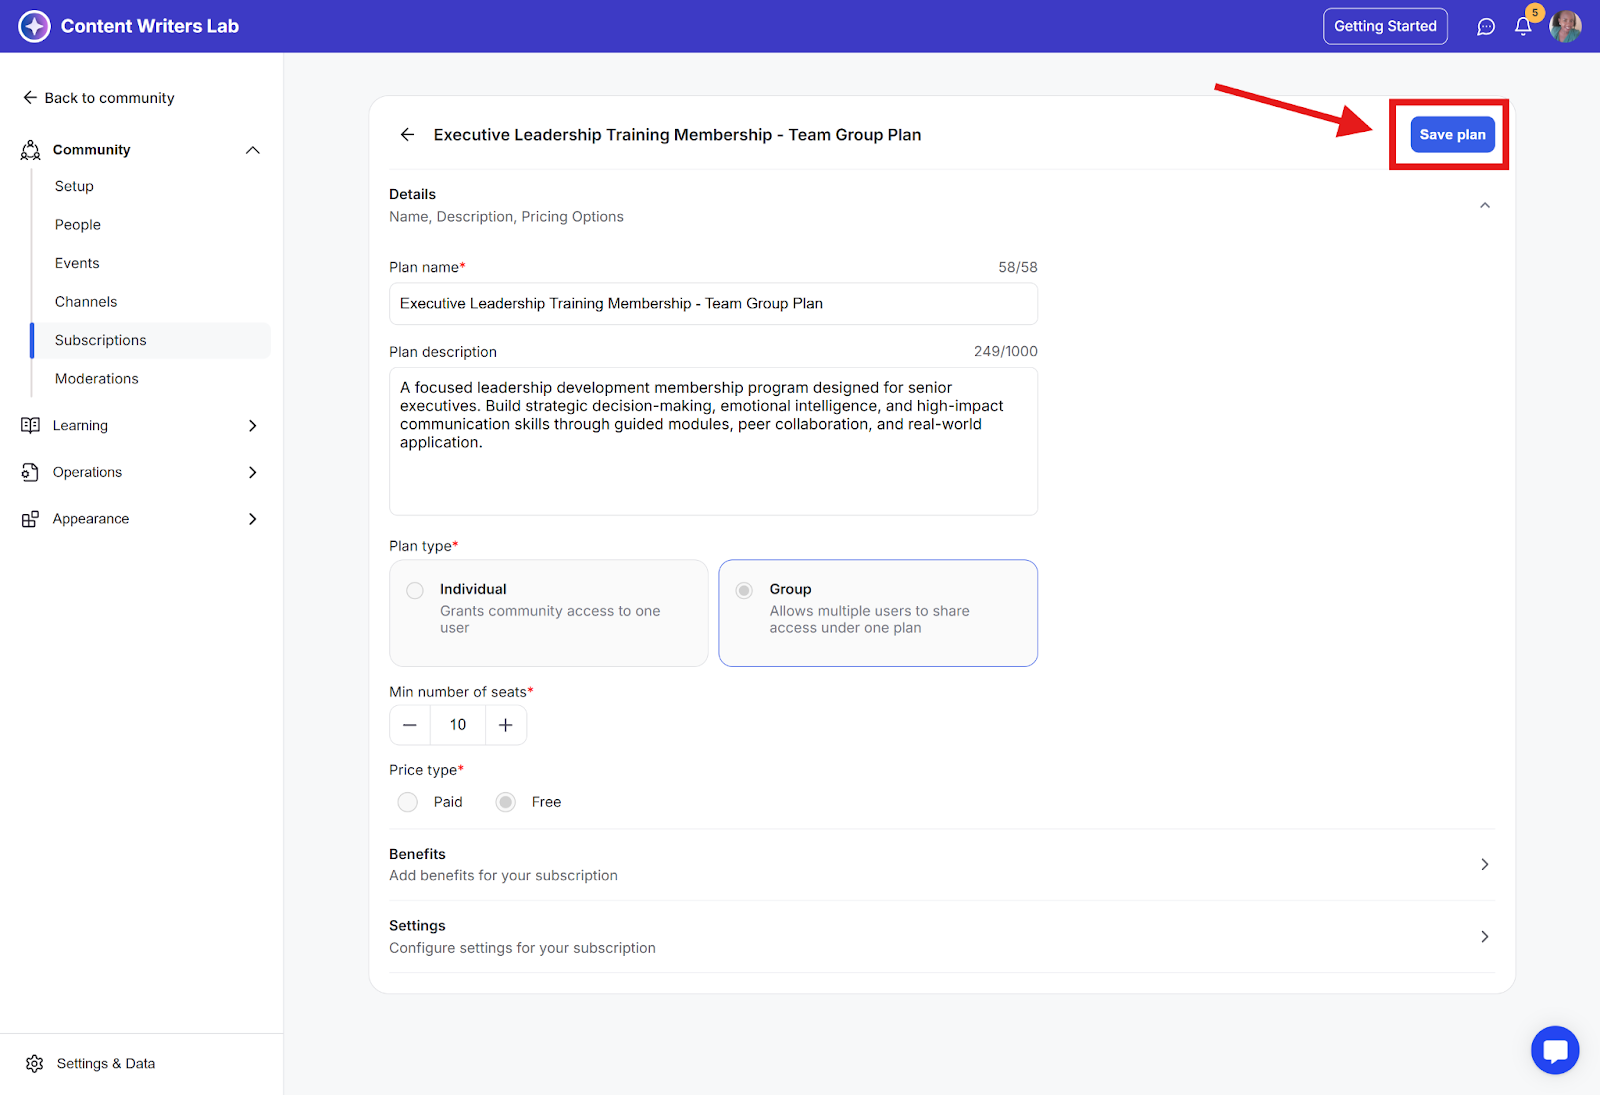
Step 2: Click on the plan you want to configure or create a new one. After setting up your plan details, scroll down to Settings.
Step 3: In this tab, toggle on the following options:
Collect Billing Address
Collect Tax Information (you can mark it as required or optional)
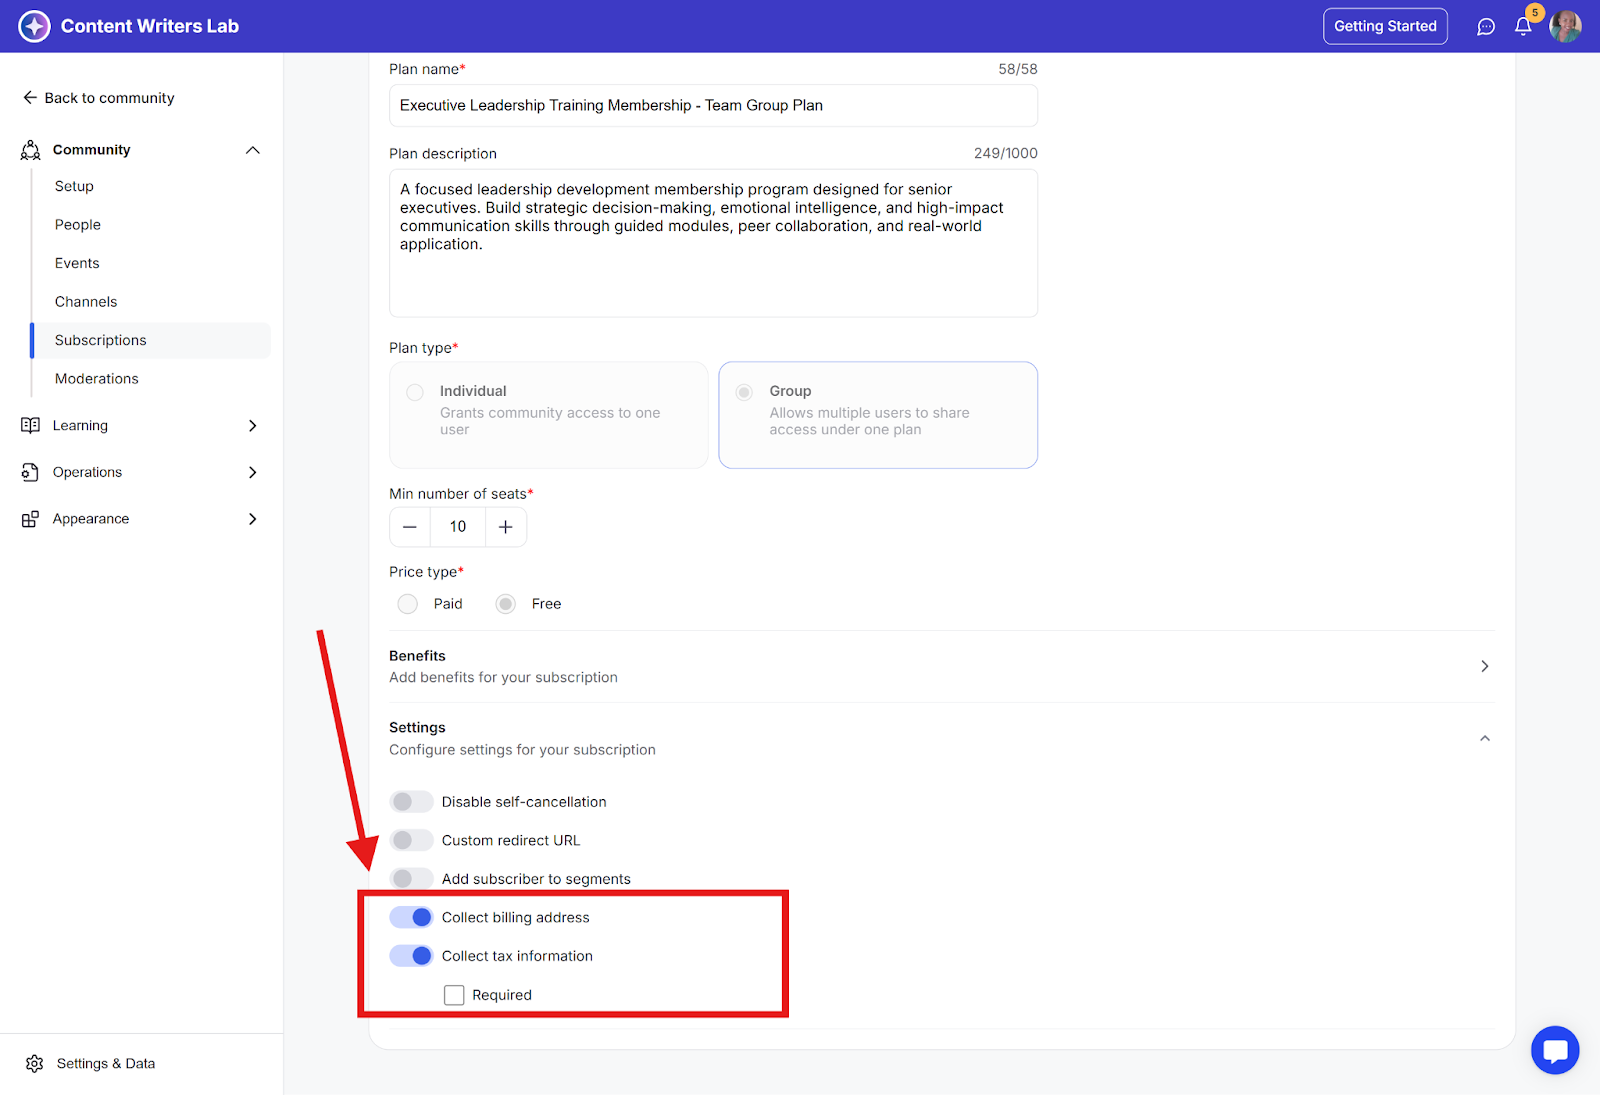
Step 4: Once enabled, click Save Plan. The checkout page for that plan will now include fields to collect both billing and tax details. You can enable both options for courses, library content, and events in the pricing tabs.
Here’s what the checkout page experience looks like for your customers when billing address collection is enabled.
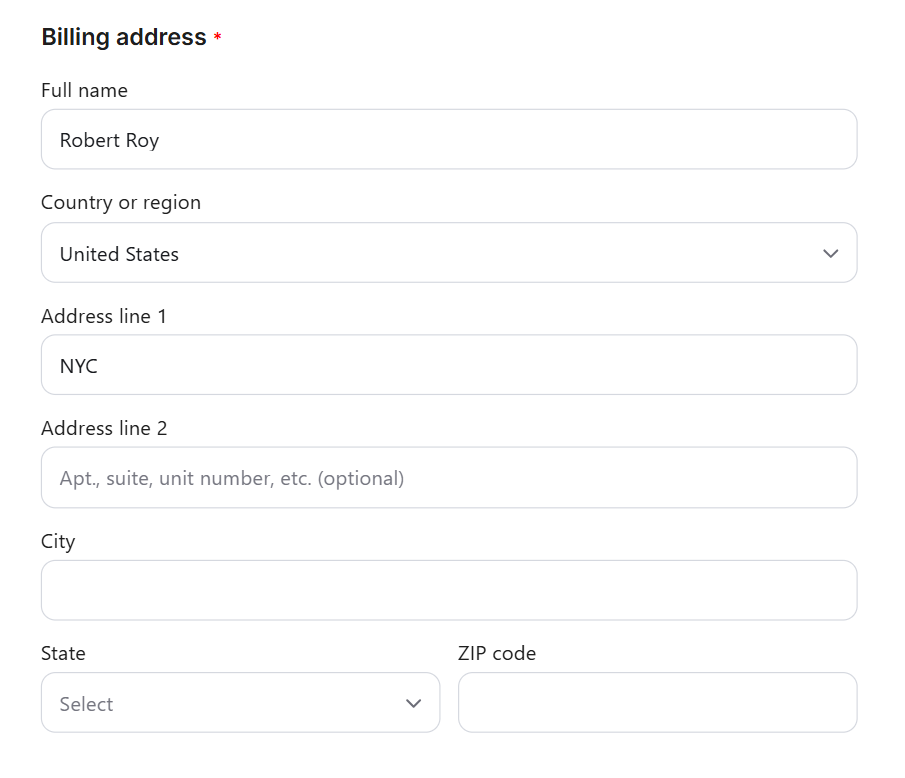
The checkout page now includes fields for:
Your Name: Enter full name
Country or Region: Select from the drop-down menu
Address Line 1: Once filled, the Address Line 2 field appears
City: Enter city name
State and Zip Code: Enter both details to complete the address
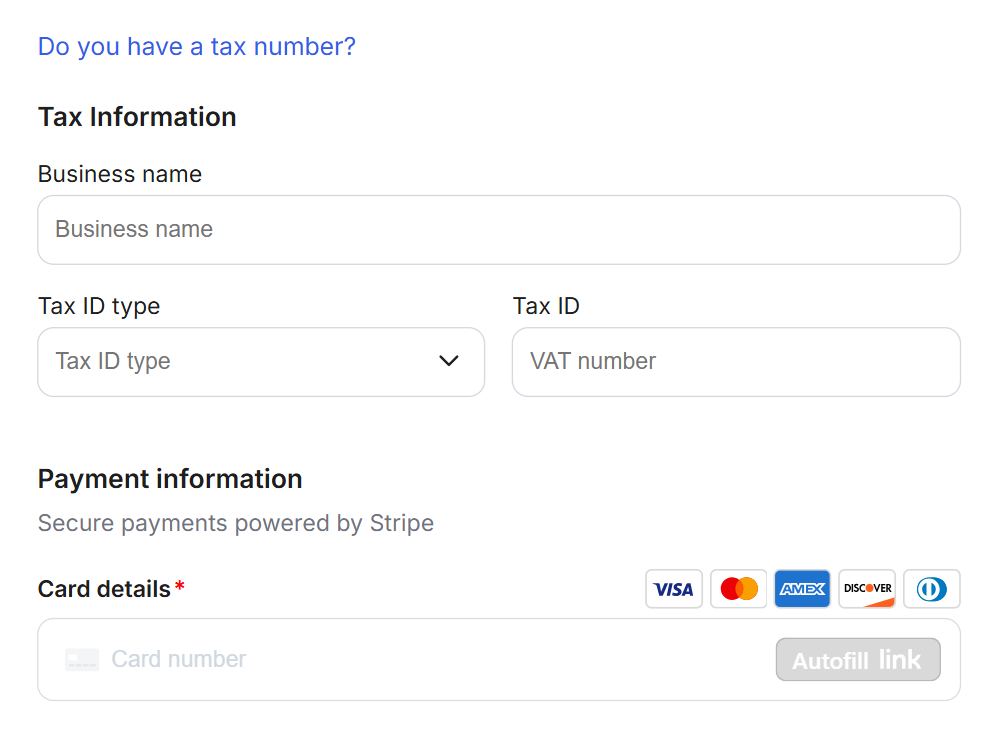
The checkout page also displays the clickable question: “Do you have a tax number?” only if the tax information is not marked “Required”.
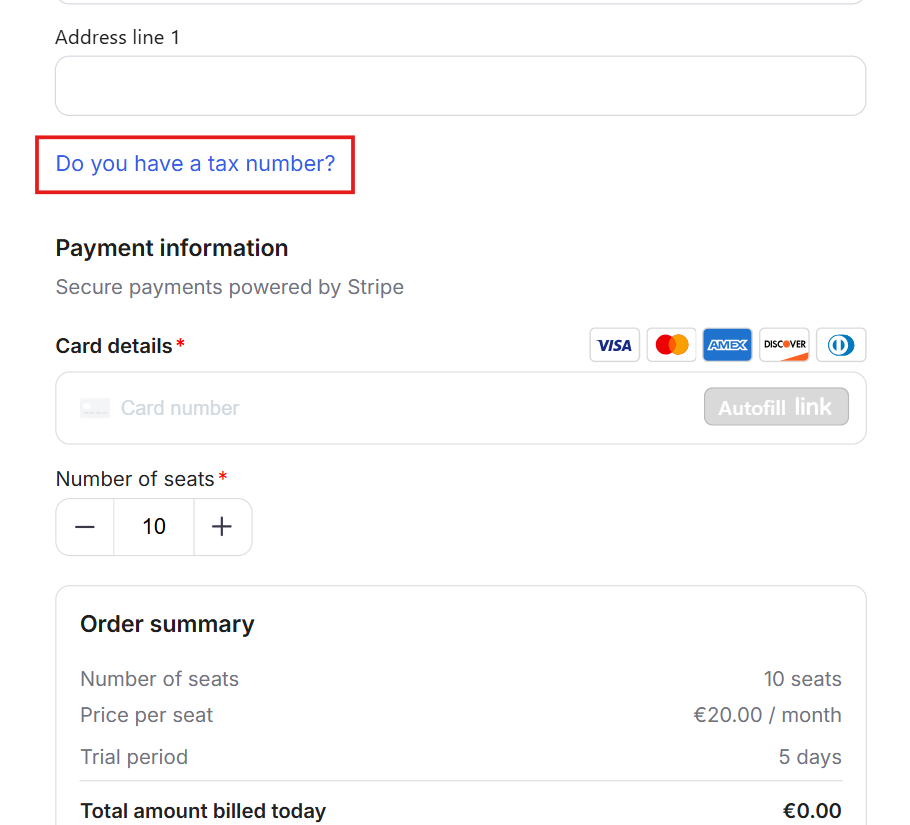
When selected, the following fields appear:
Business Name
Tax ID Type
Tax Number
Here’s how the tax information collection fields show up on the checkout page when clicked.