Recurring Events let you schedule one event that repeats on a set cadence (daily, weekdays, or a specific weekday) so members can register once and follow a clear rhythm. They’re ideal for ongoing sessions like office hours, weekly workshops, or multi-week programs.
Weekly Office Hours: Host a standing Q&A every Thursday at 2 PM; members RSVP once for all upcoming sessions.
Weekday Cohort Sessions: Run a 10-day challenge Monday to Friday with a fixed “ends after 10 occurrences” setup.
Daily Study or Co-Working: Create a daily focus session to build habits and consistent engagement.
Monthly Onboarding Webinars: Offer a recurring “Getting Started” call that new members can join any month.
Hybrid Tours or Roadshows: Schedule limited-capacity in-person sessions across dates while keeping a single, clean series.
This guide will take you through how to create, publish, RSVP to, and edit recurring events in GroupApp.
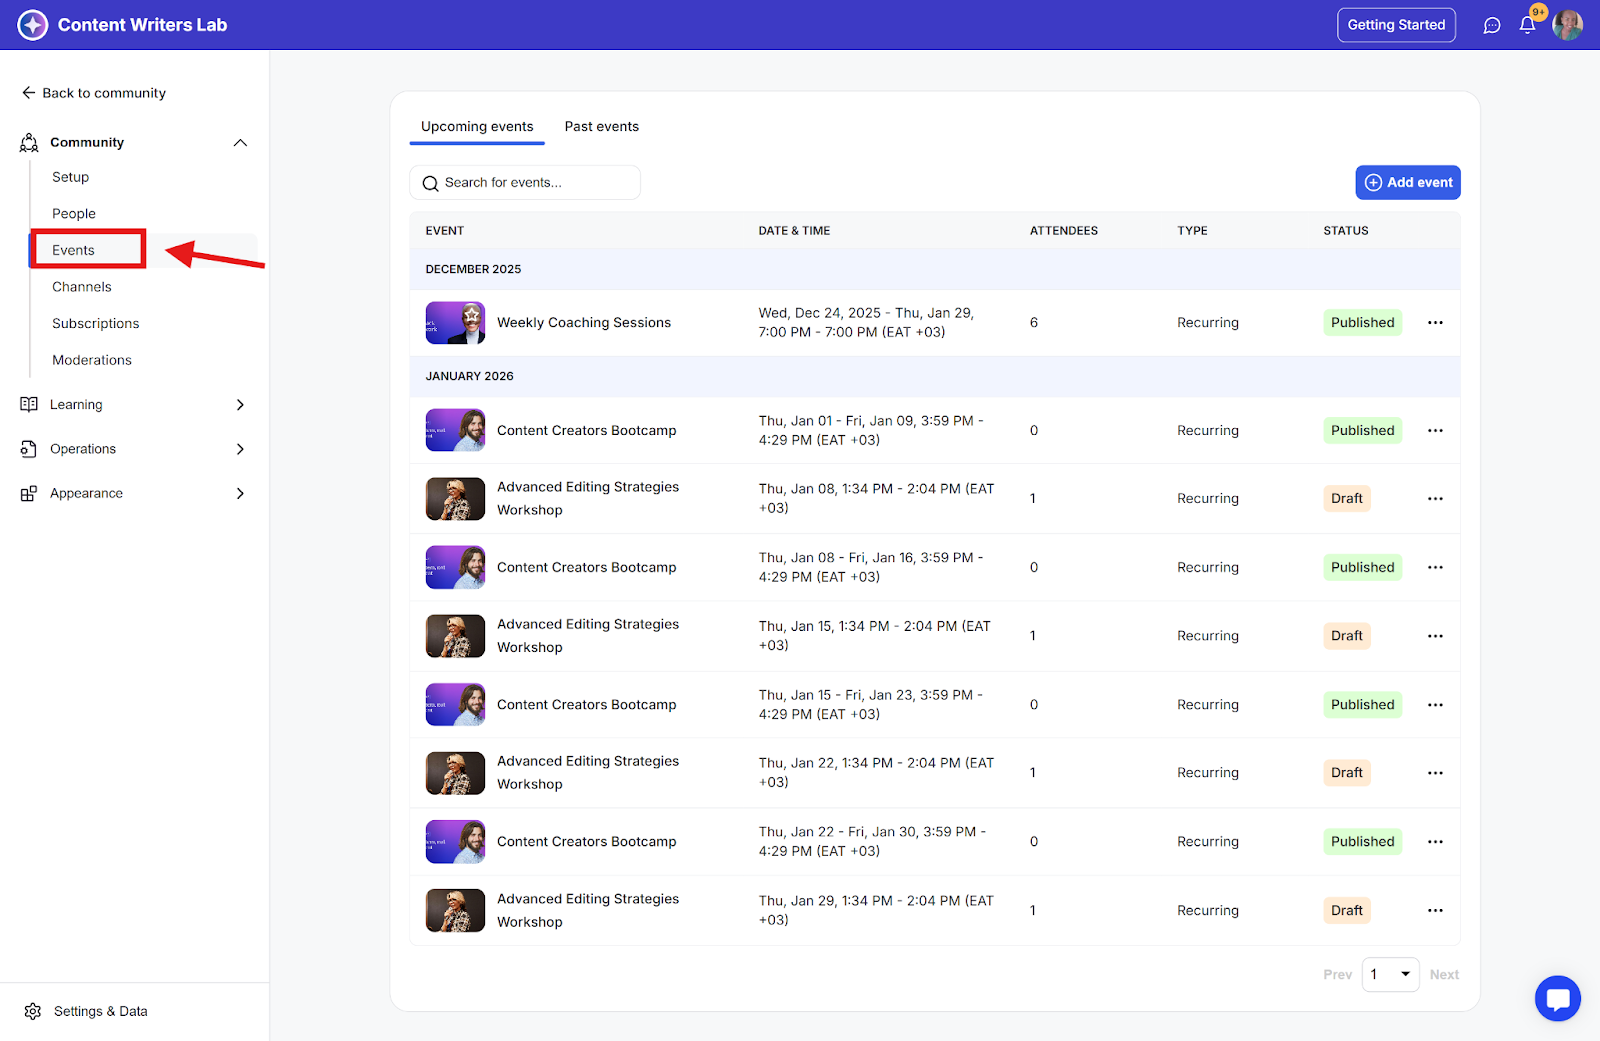
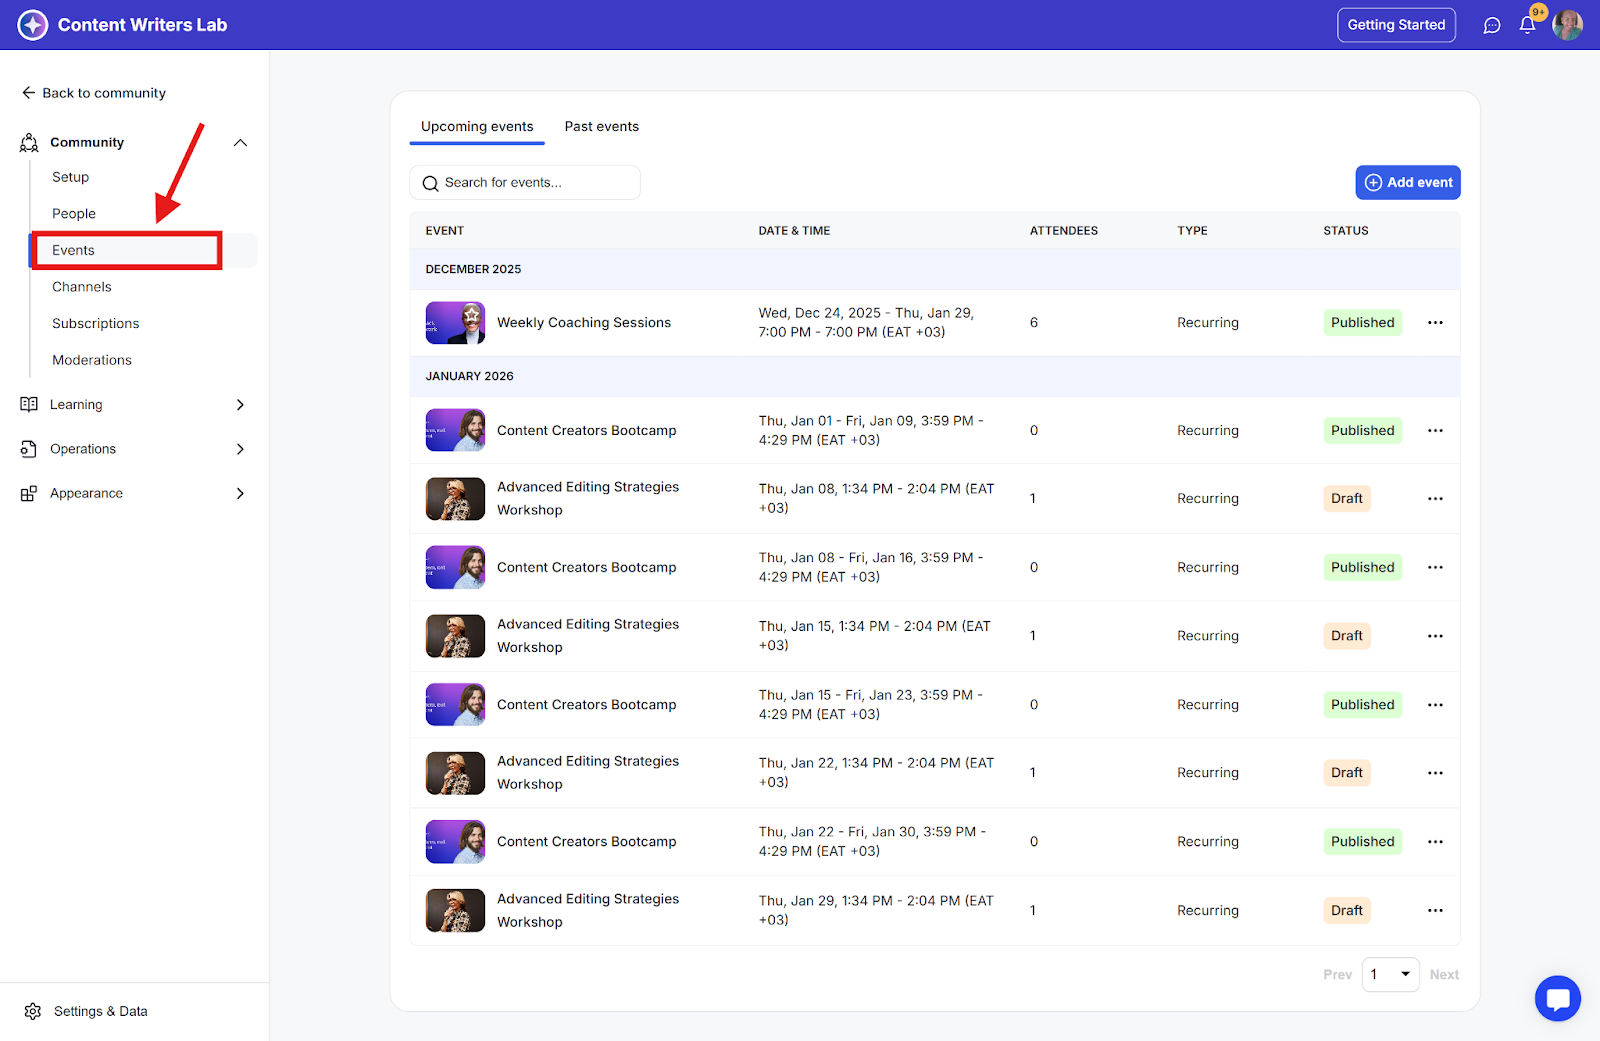
Step 1: Go to your Admin Panel and click Events on the left-side menu bar. This opens the Events Manager.
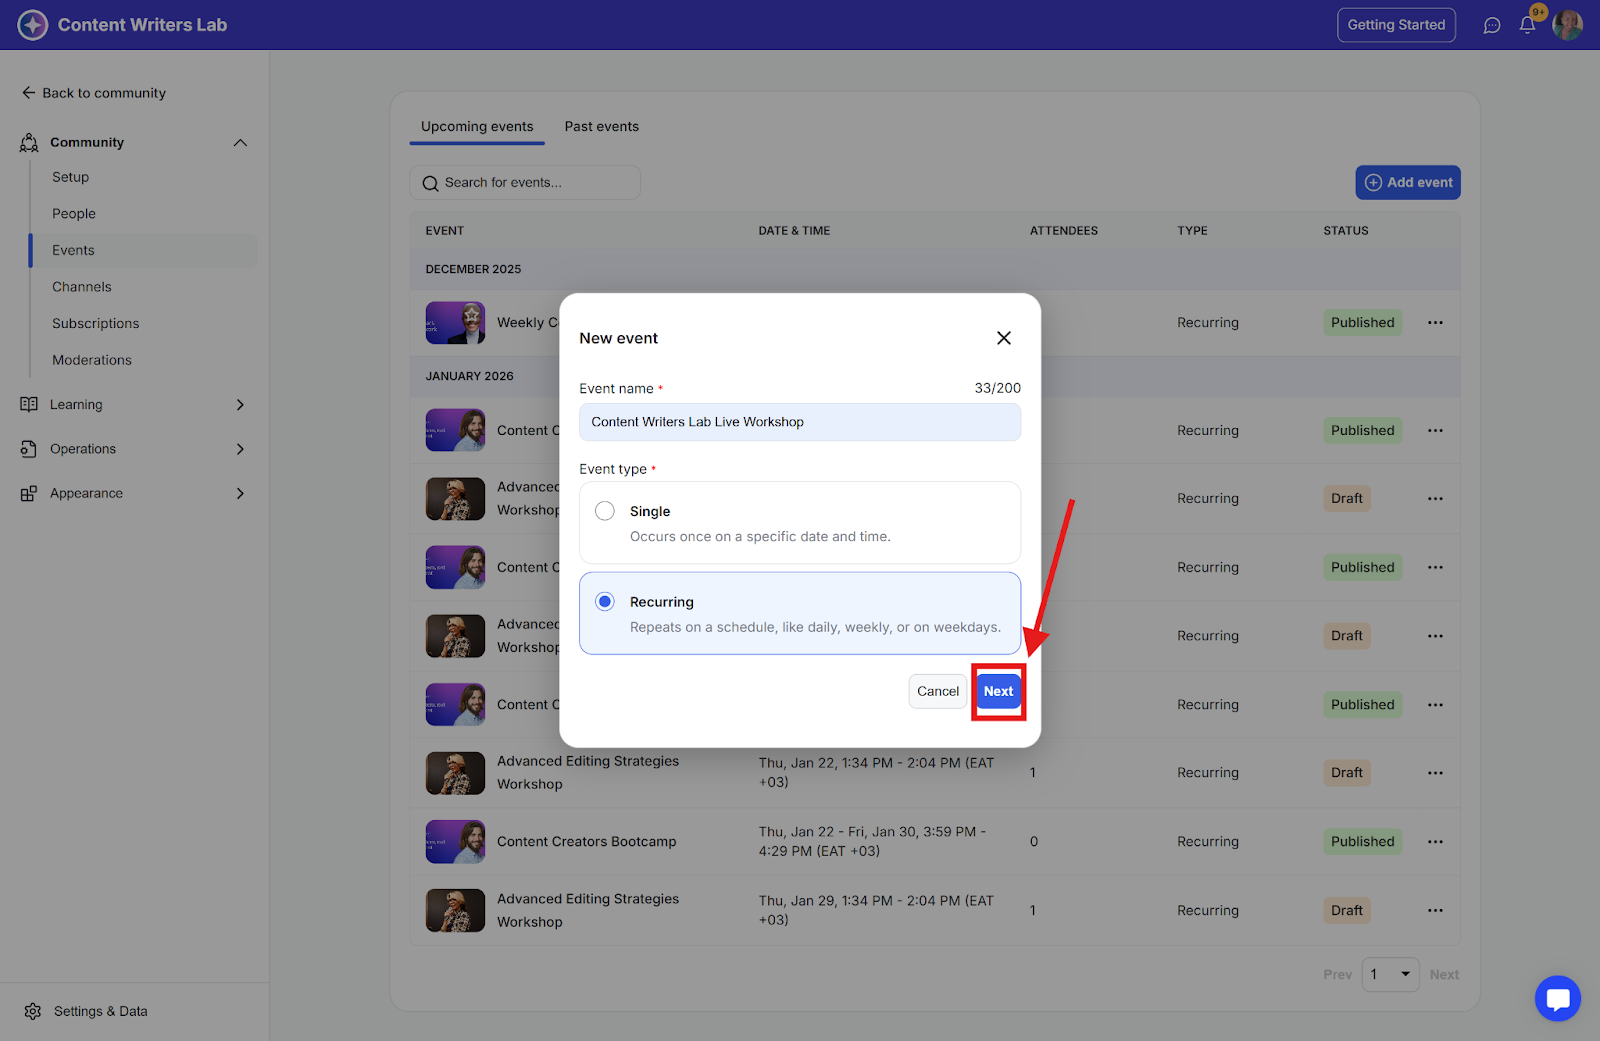
Step 2: Click the blue Add Event button (top-right). A New Event pop-up appears. Enter a name for your event.
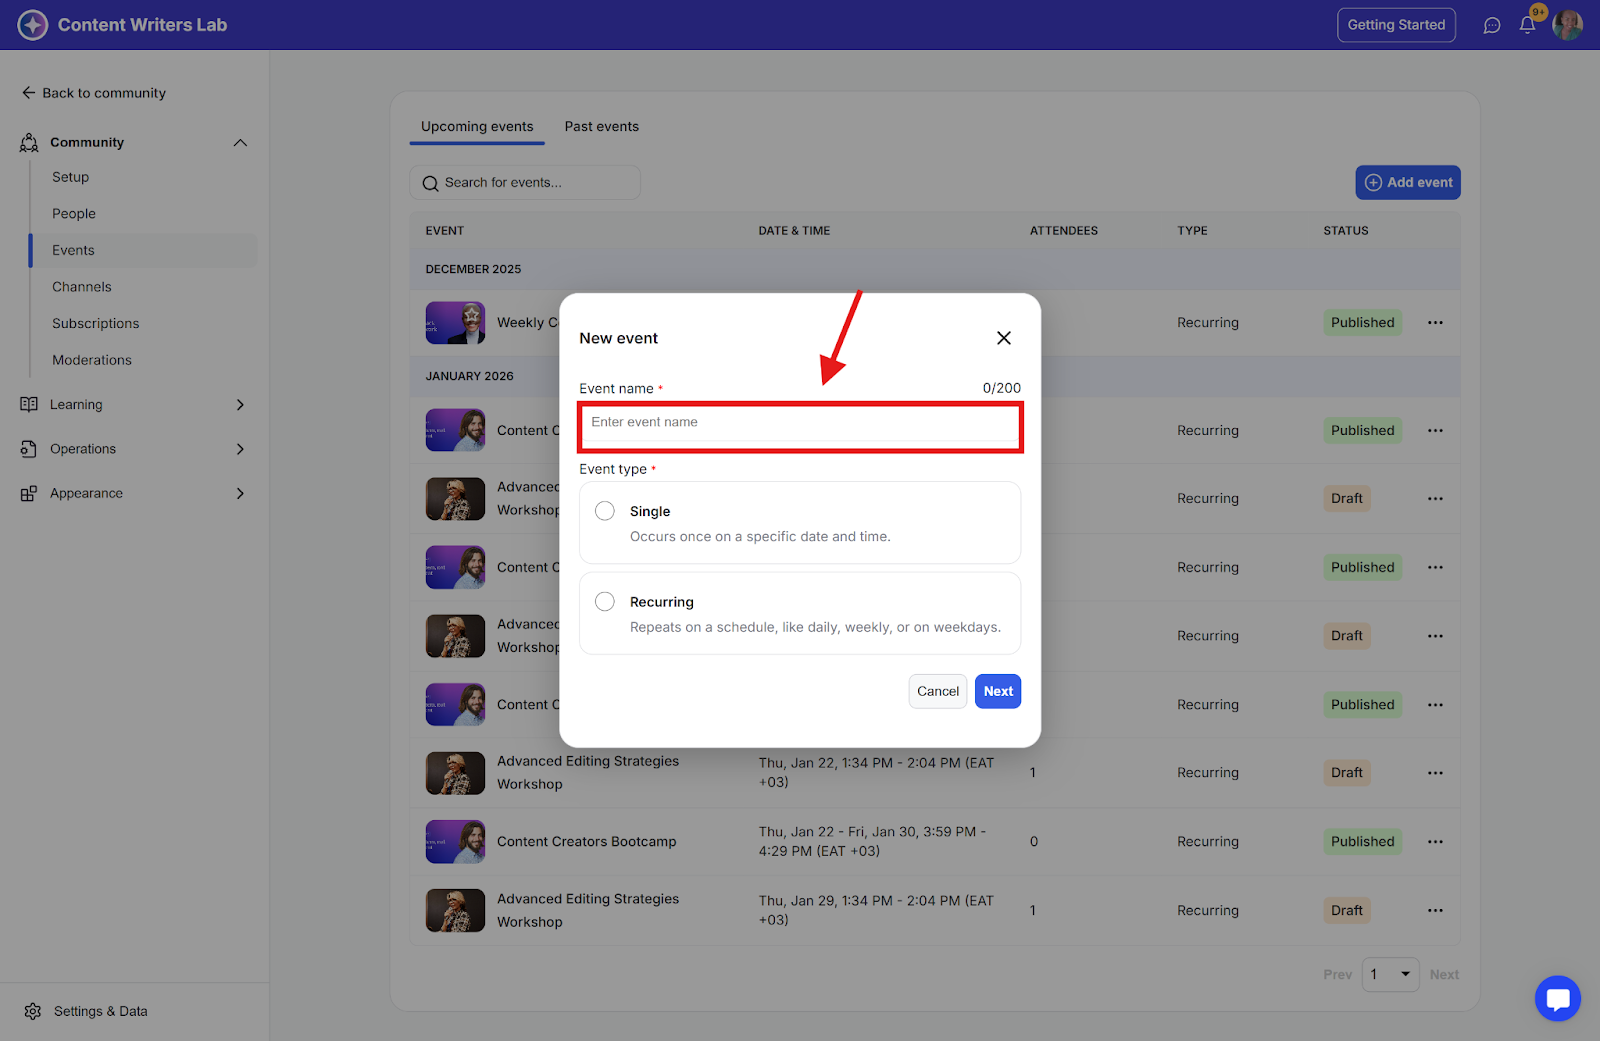
Step 3: On the pop-up, select one of the two event types:
Single: Occurs once on a specific date and time.
Recurring: Repeats on a schedule (daily, weekly, or weekdays).
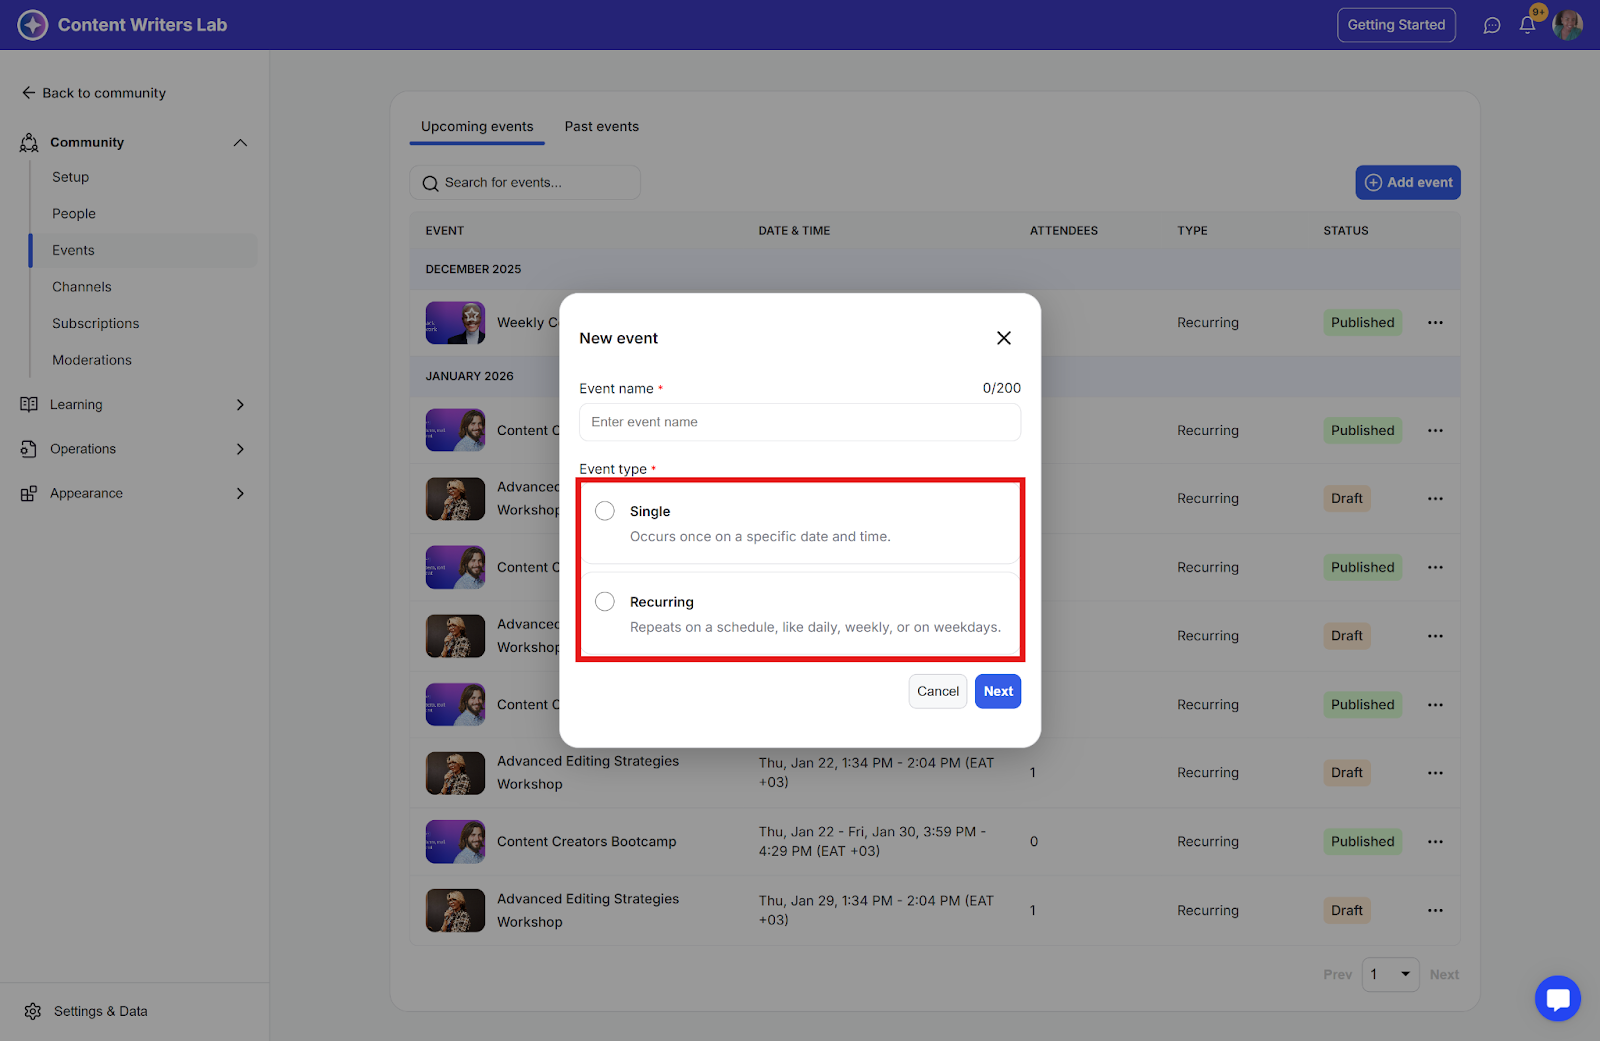
Step 4: Choose Recurring and click Next to open the Events Builder.
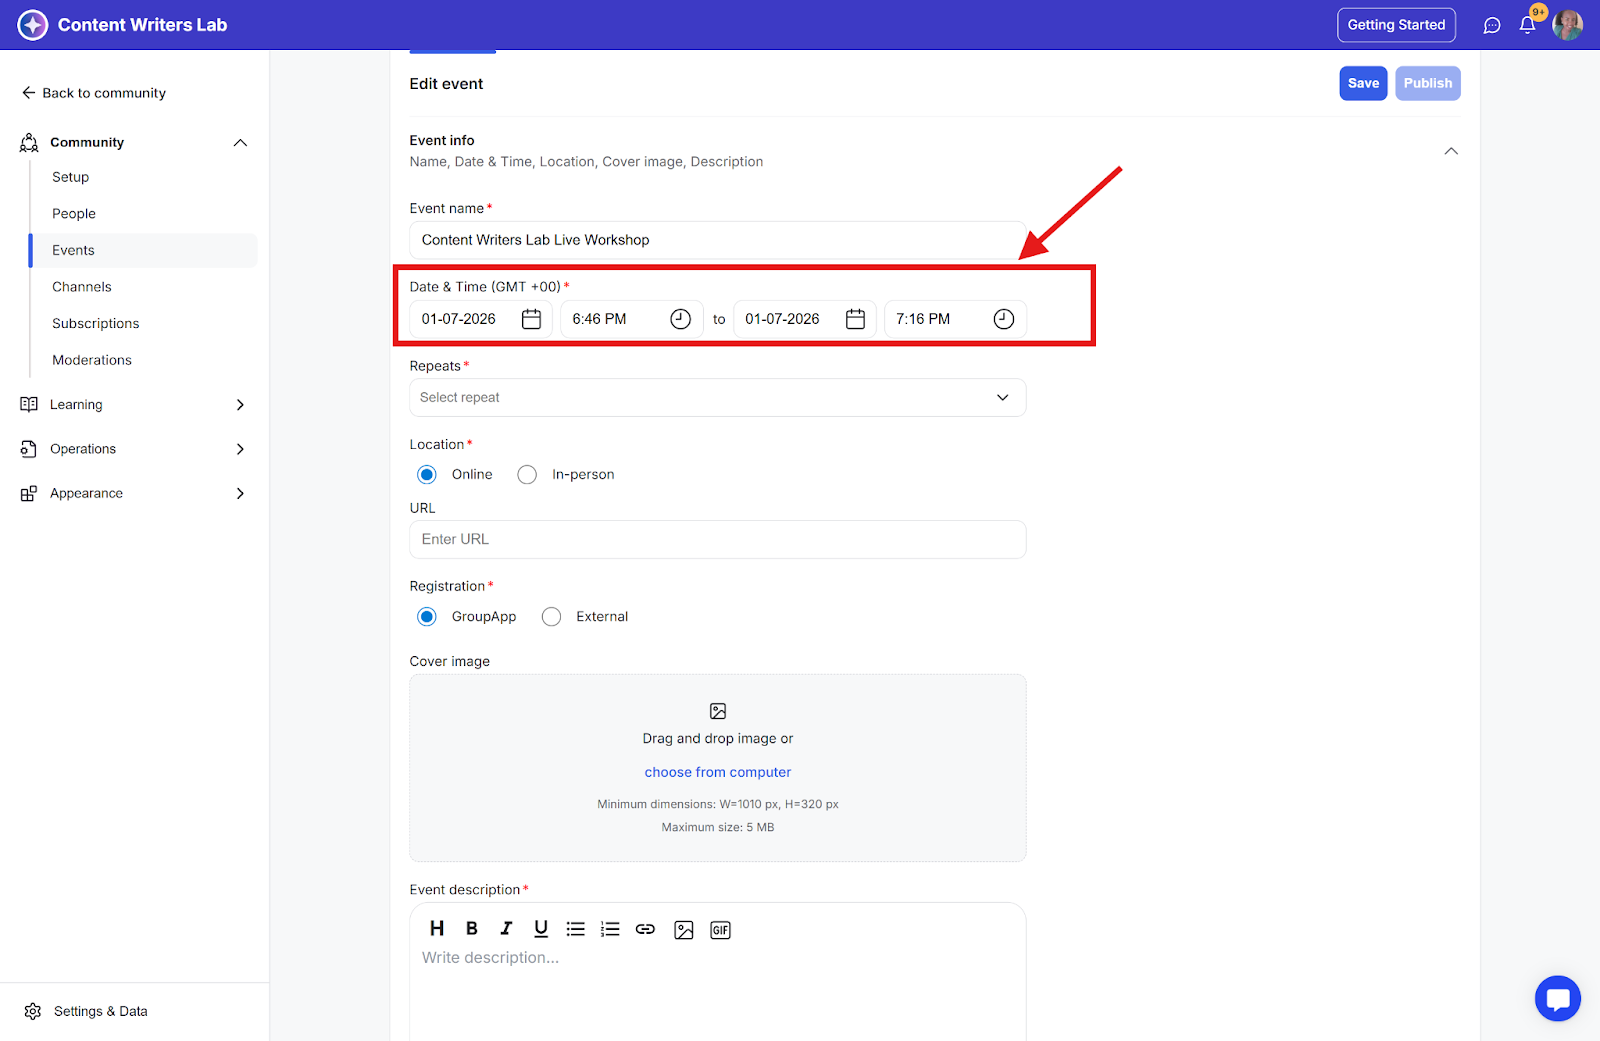
Step 5: Specify the starting date and time for your recurring event series.
Step 6: Set Repeat Intervals (from the drop-down). Here are the options:
Daily: Runs every day at the scheduled time.
Every Weekday (Monday to Friday): Runs Monday through Friday at the scheduled time.
Weekly on a specific day: Runs once a week on the same weekday as your selected start date.
Bi-weekly on a specific day: Runs every two weeks on the same weekday as your selected start date.
Monthly on a specific weekday: Runs monthly on the same weekday and week number as your selected start date (for example, the first Wednesday of the month).
Monthly on a specific date: Runs monthly on the same calendar date as your selected start date.
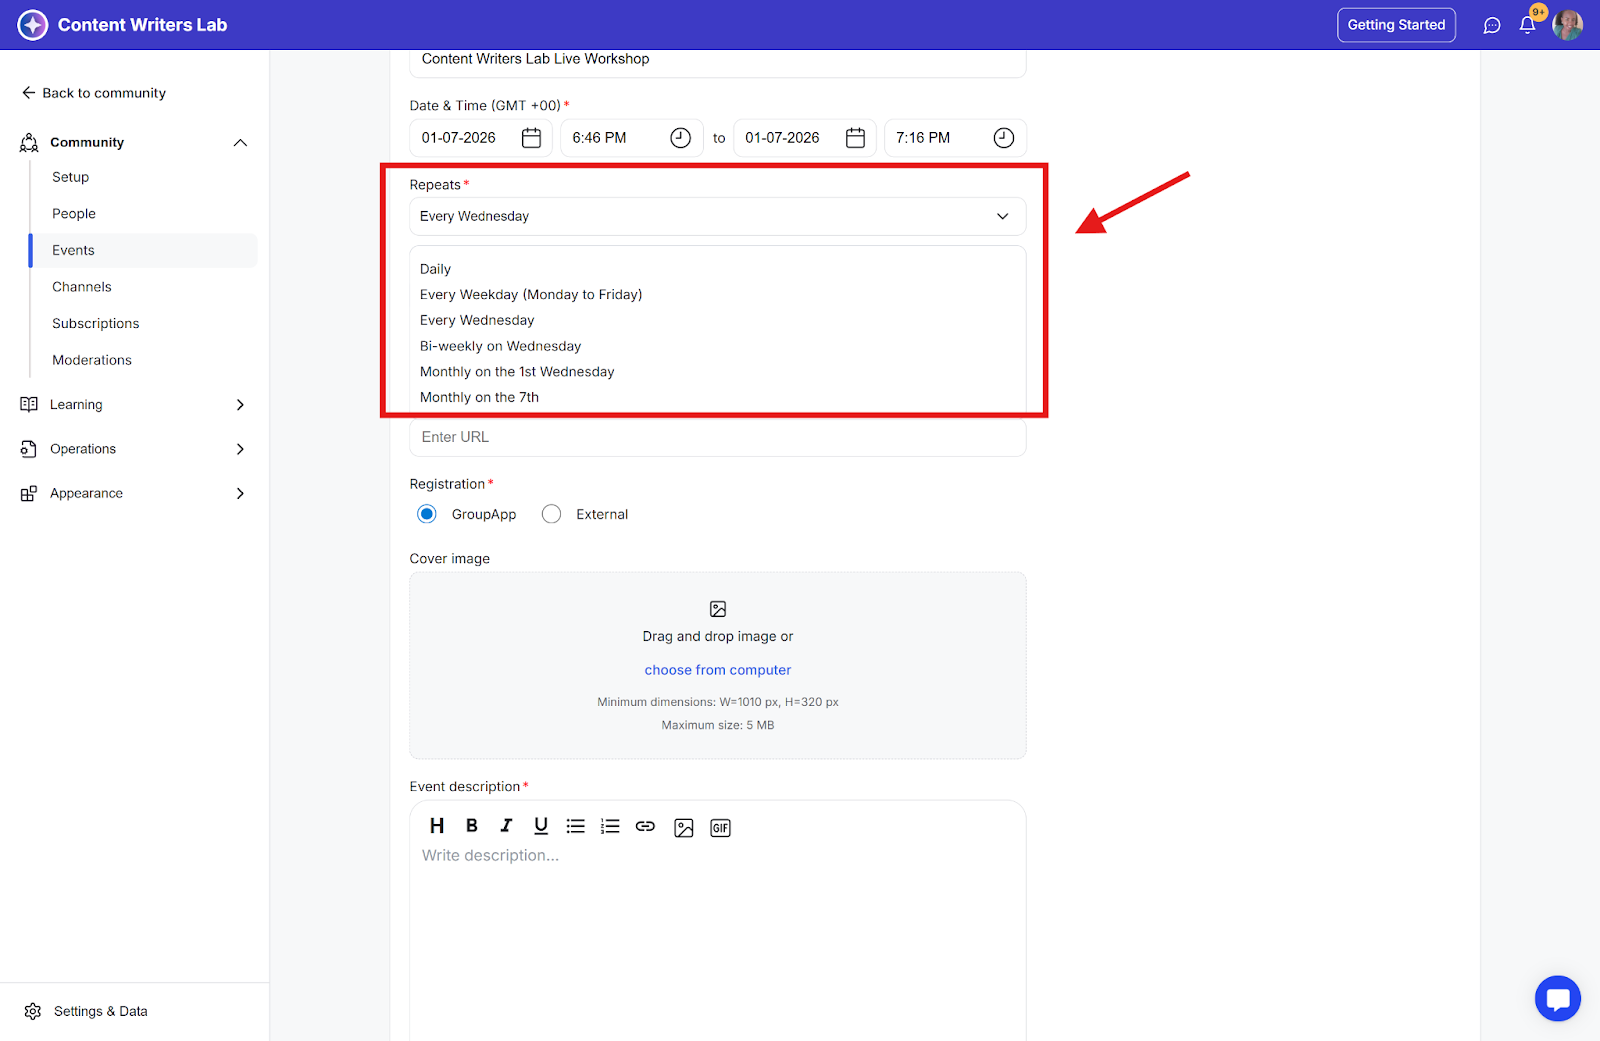
Please note: Once a repeat interval is set and the event is published, it CANNOT be changed.
Step 7: Next, set the series end: Choose an ending option:
Event ends ON: Pick a fixed date and time when the series ends.
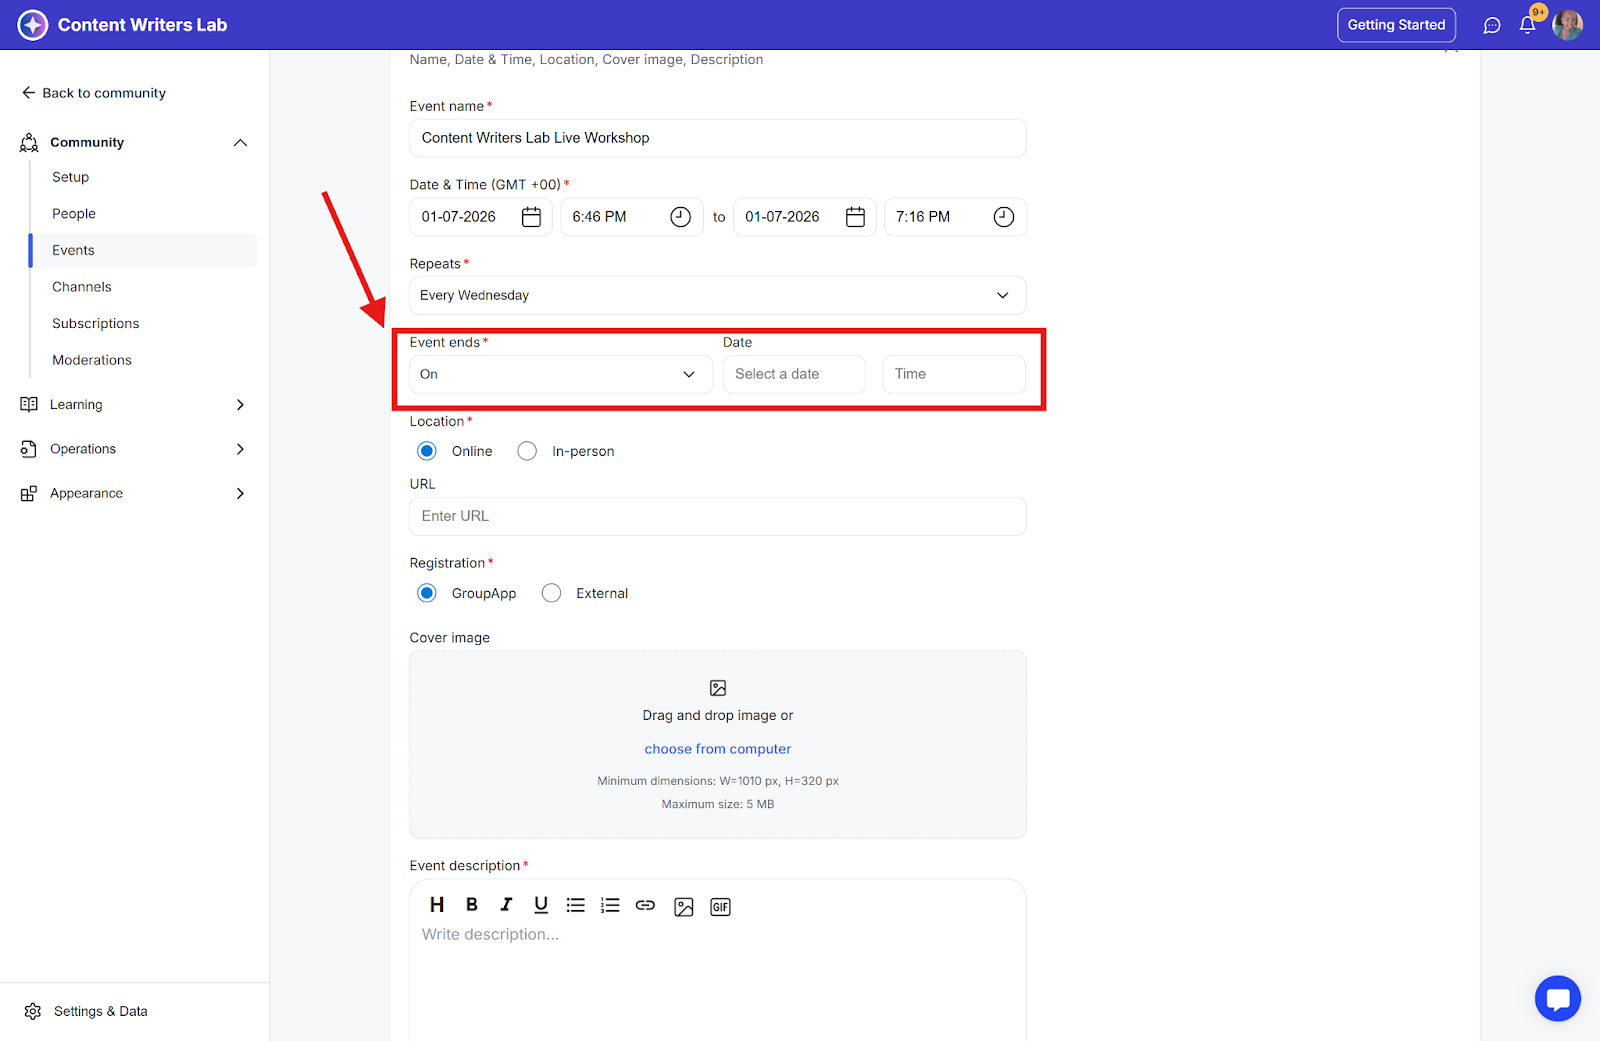
Event ends AFTER: Choose the number of occurrences (the series runs that many times).

Note: that after a recurring series is published, you cannot change the number of occurrences.
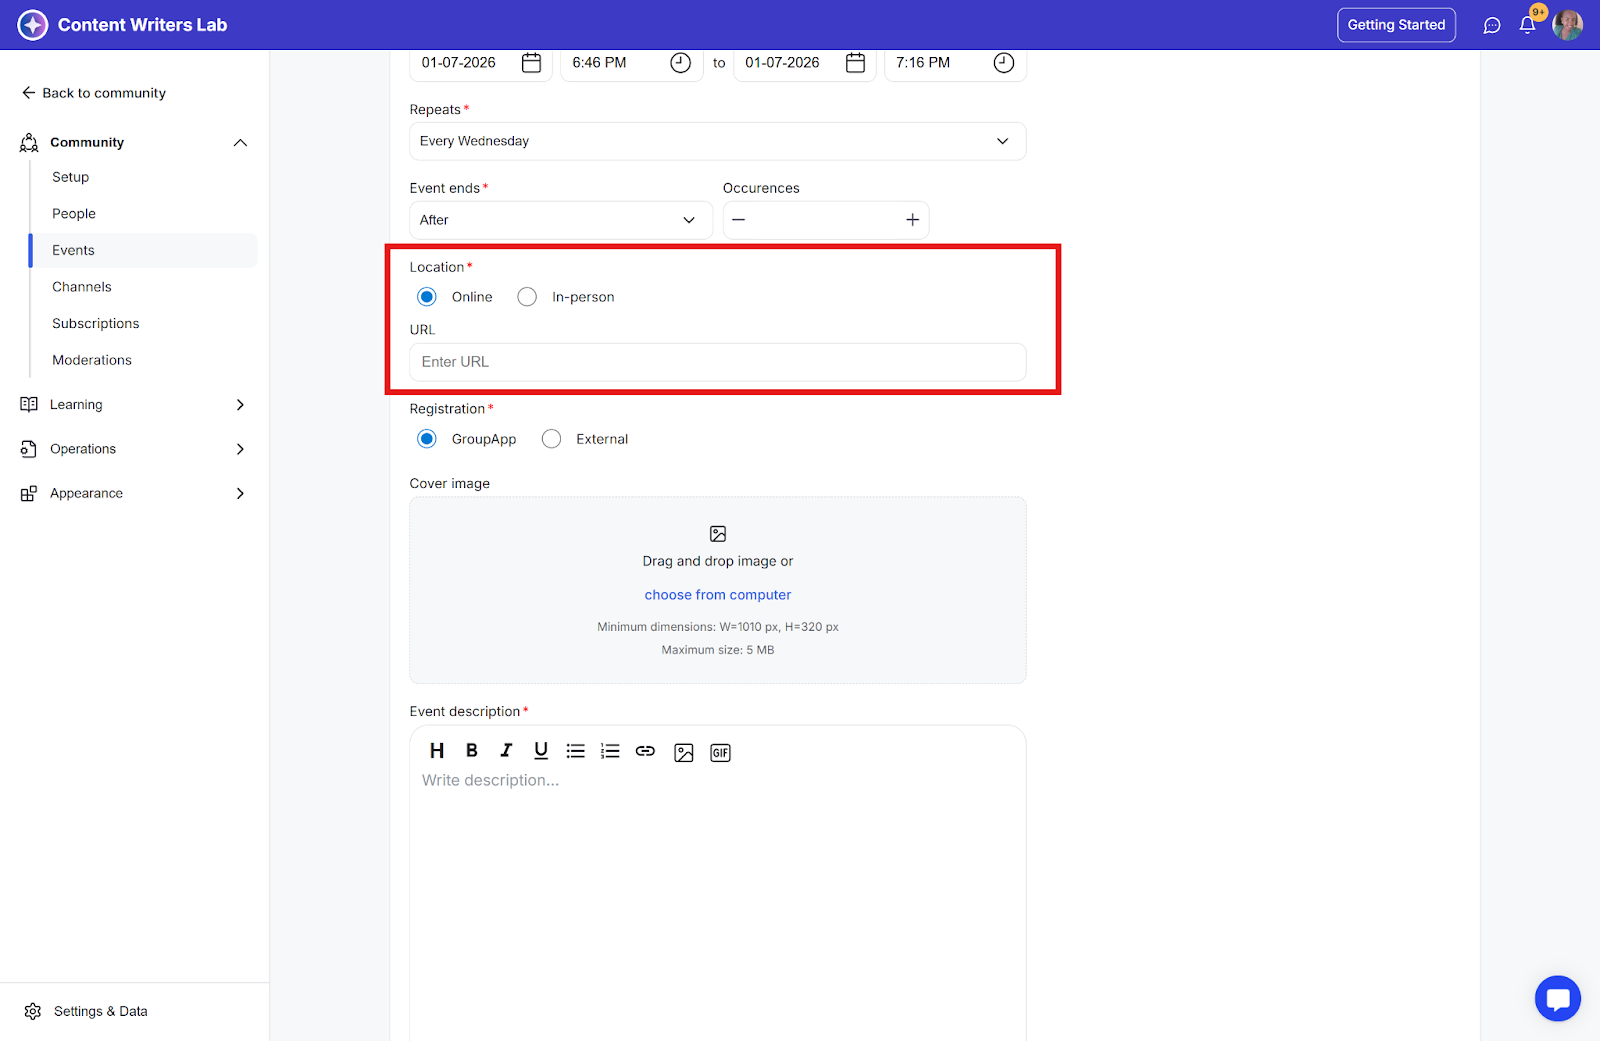
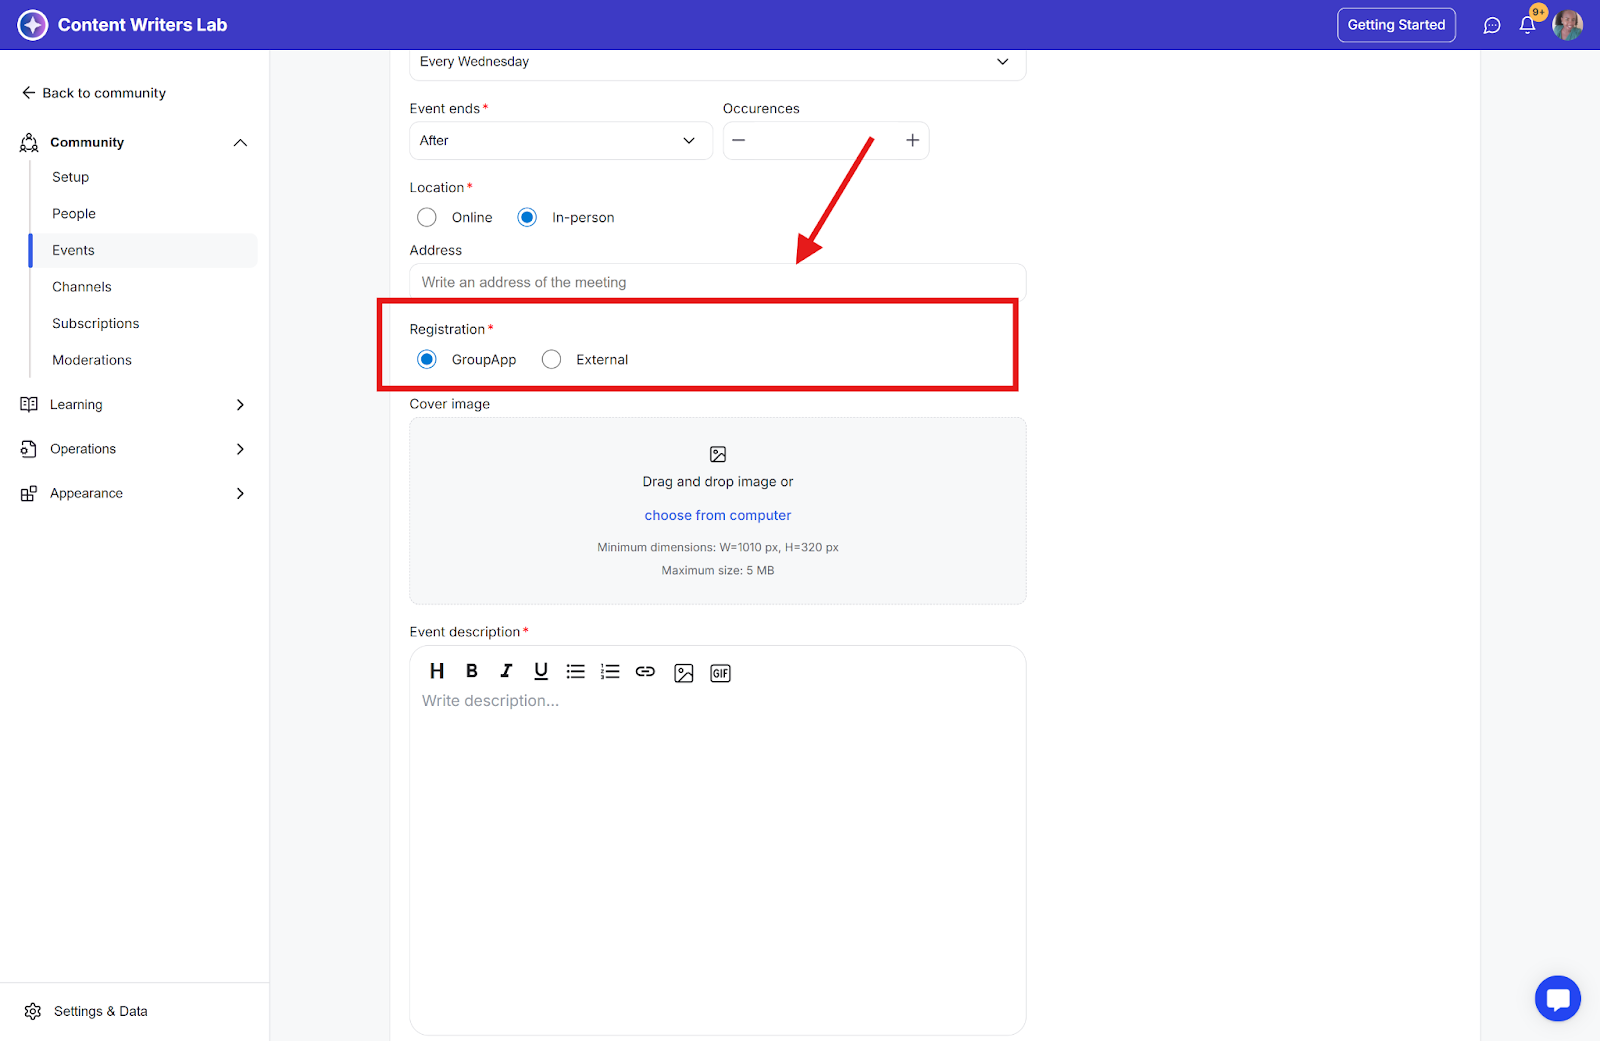
Step 8: Choose the location for your event. You have two options:
Online: Provide the event URL (e.g., Zoom or Google Meet).
In-person: Enter the physical address.
Step 9: Select the registration type from the following two options:
GroupApp: GroupApp manages registrations and checkout (free or paid).
External: Provide the URL to your external event or ticket form.
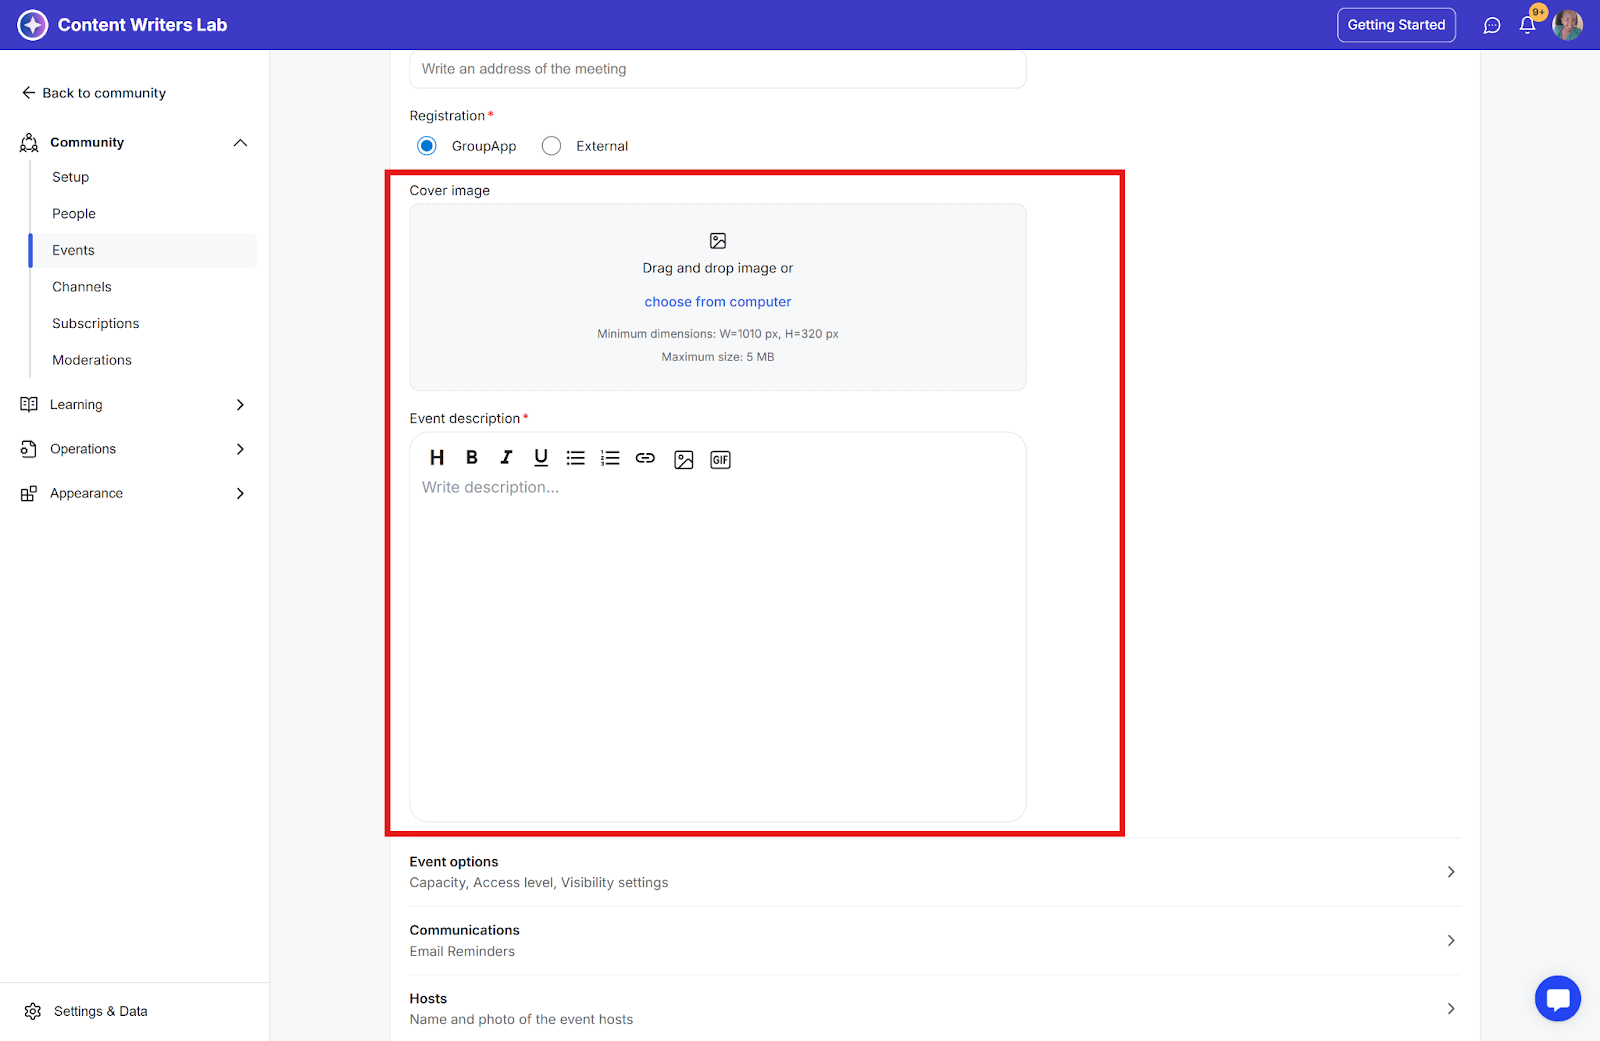
Step 10: Upload an event cover image and write your event description using the editor.
Step 11: Next, configure Event Options. Set access level, visibility, lockscreen, link to channel, and link to course.
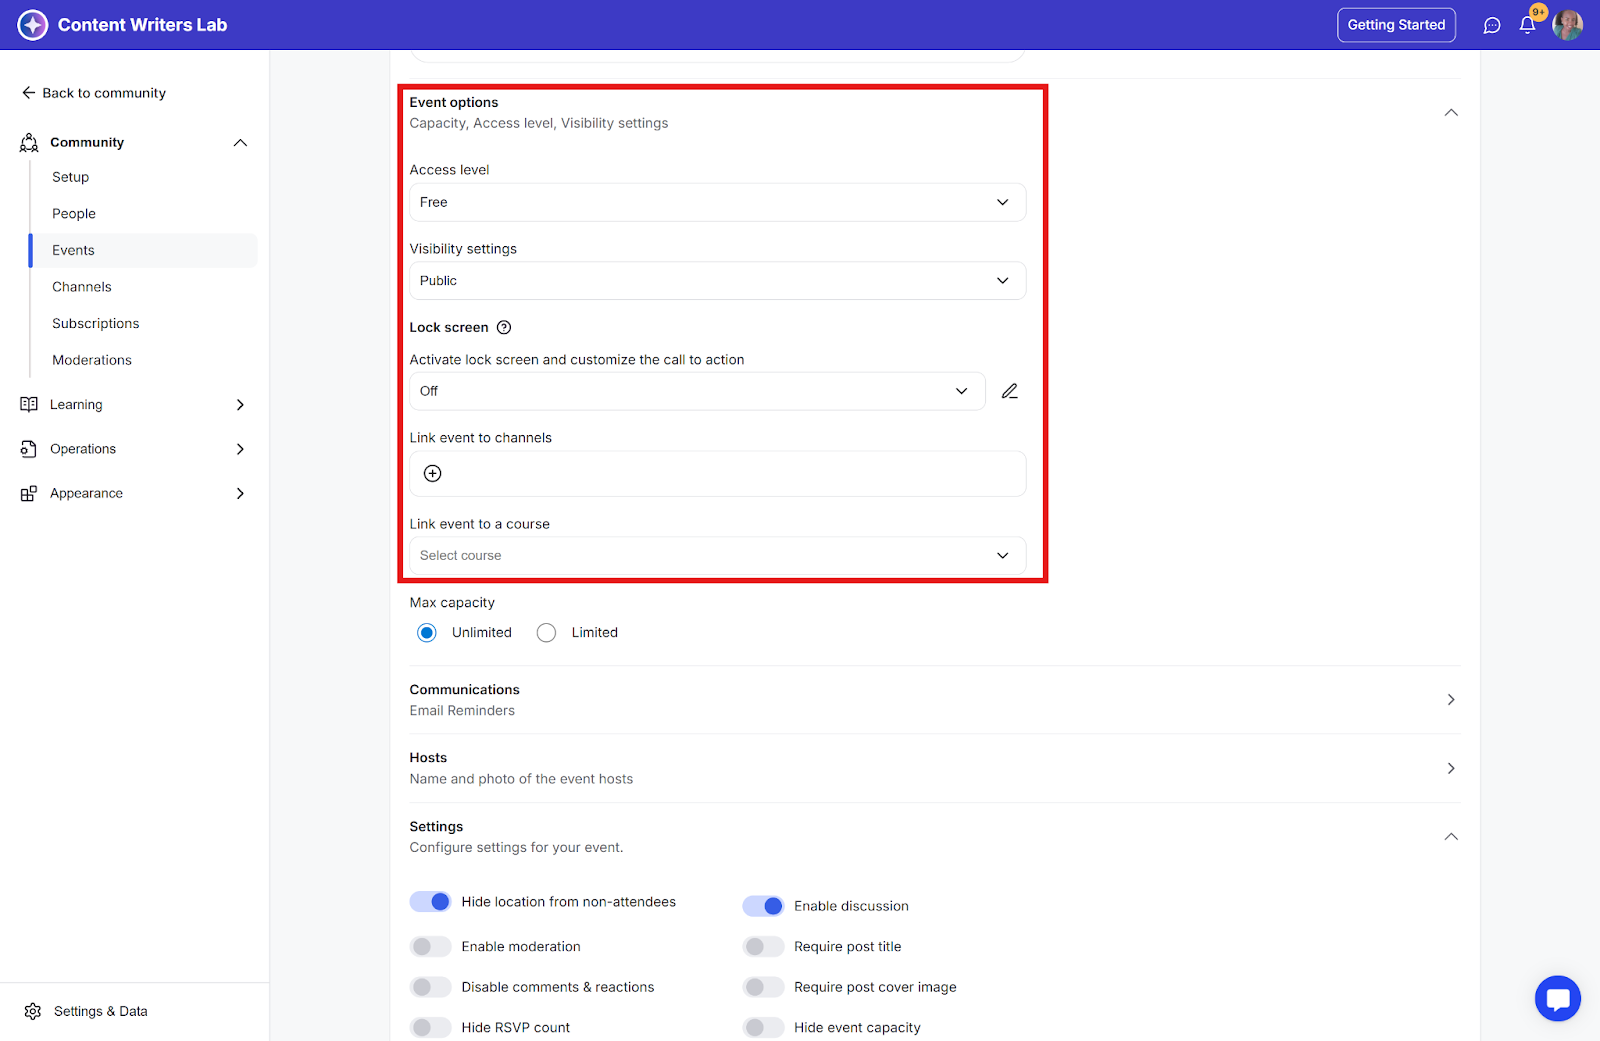
Note: Once a recurring event is published, its access level cannot be updated.
Step 12: Choose the maximum capacity from unlimited or limited. If limited, set the maximum attendees.
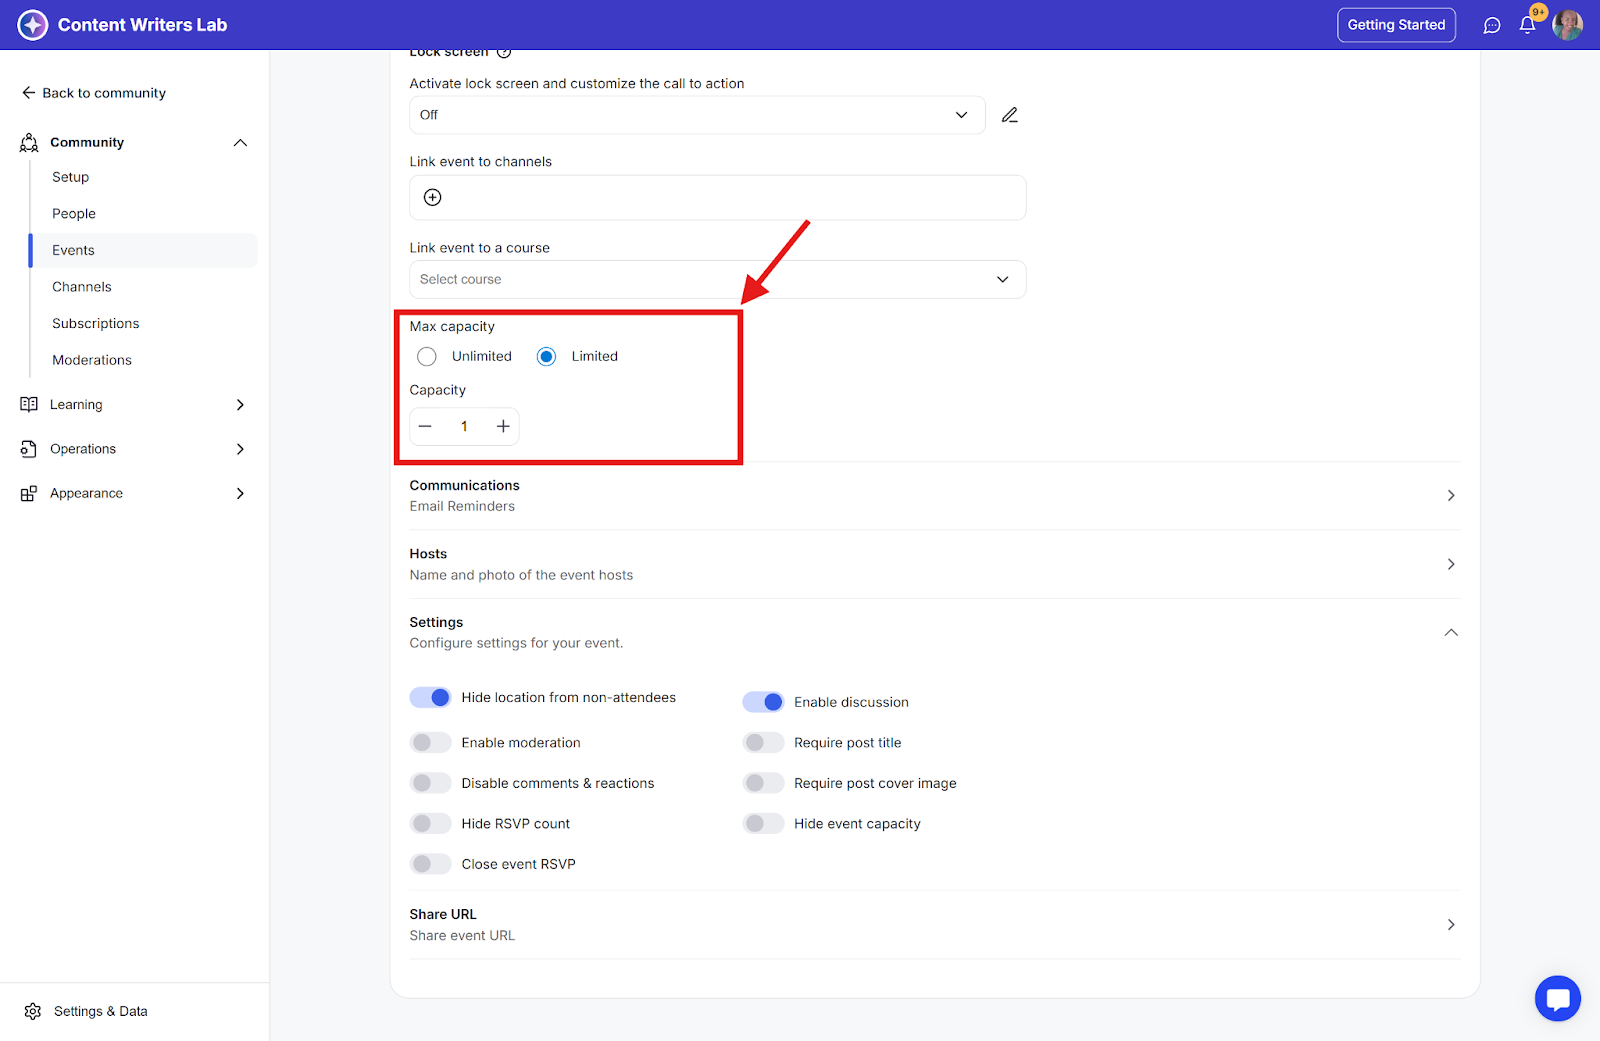
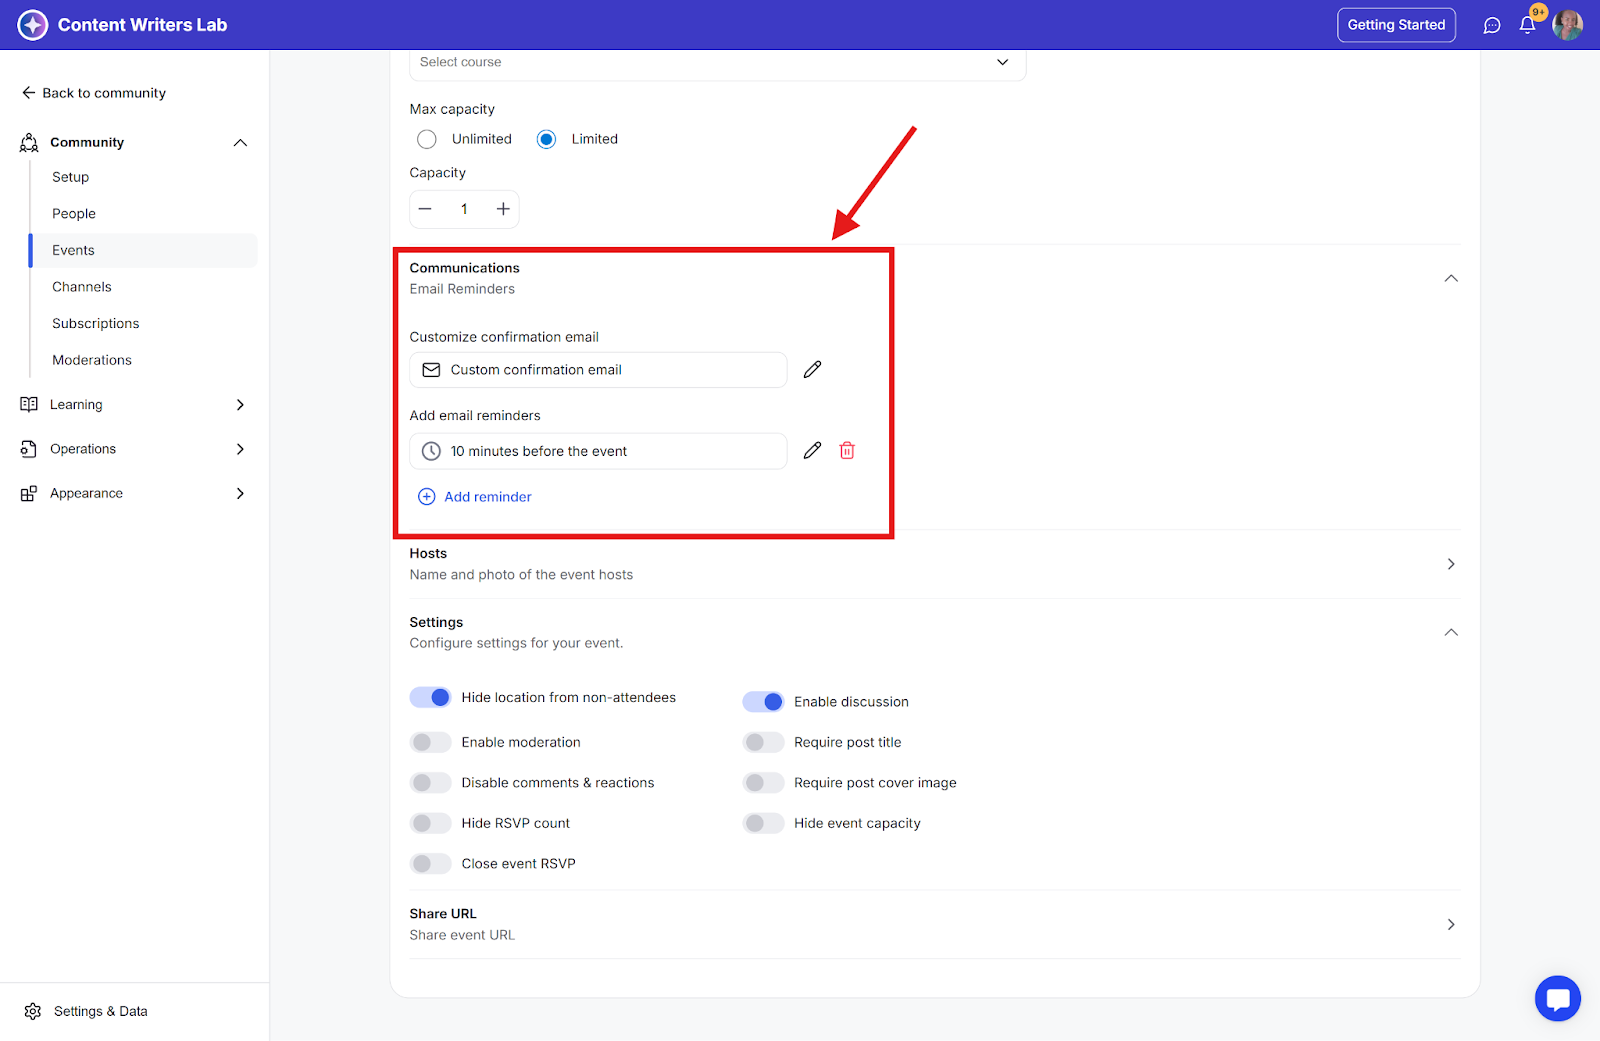
Step 13: You can also set custom reminders for your events. Note: The set custom reminders will be sent for each event as per the time set before the event.
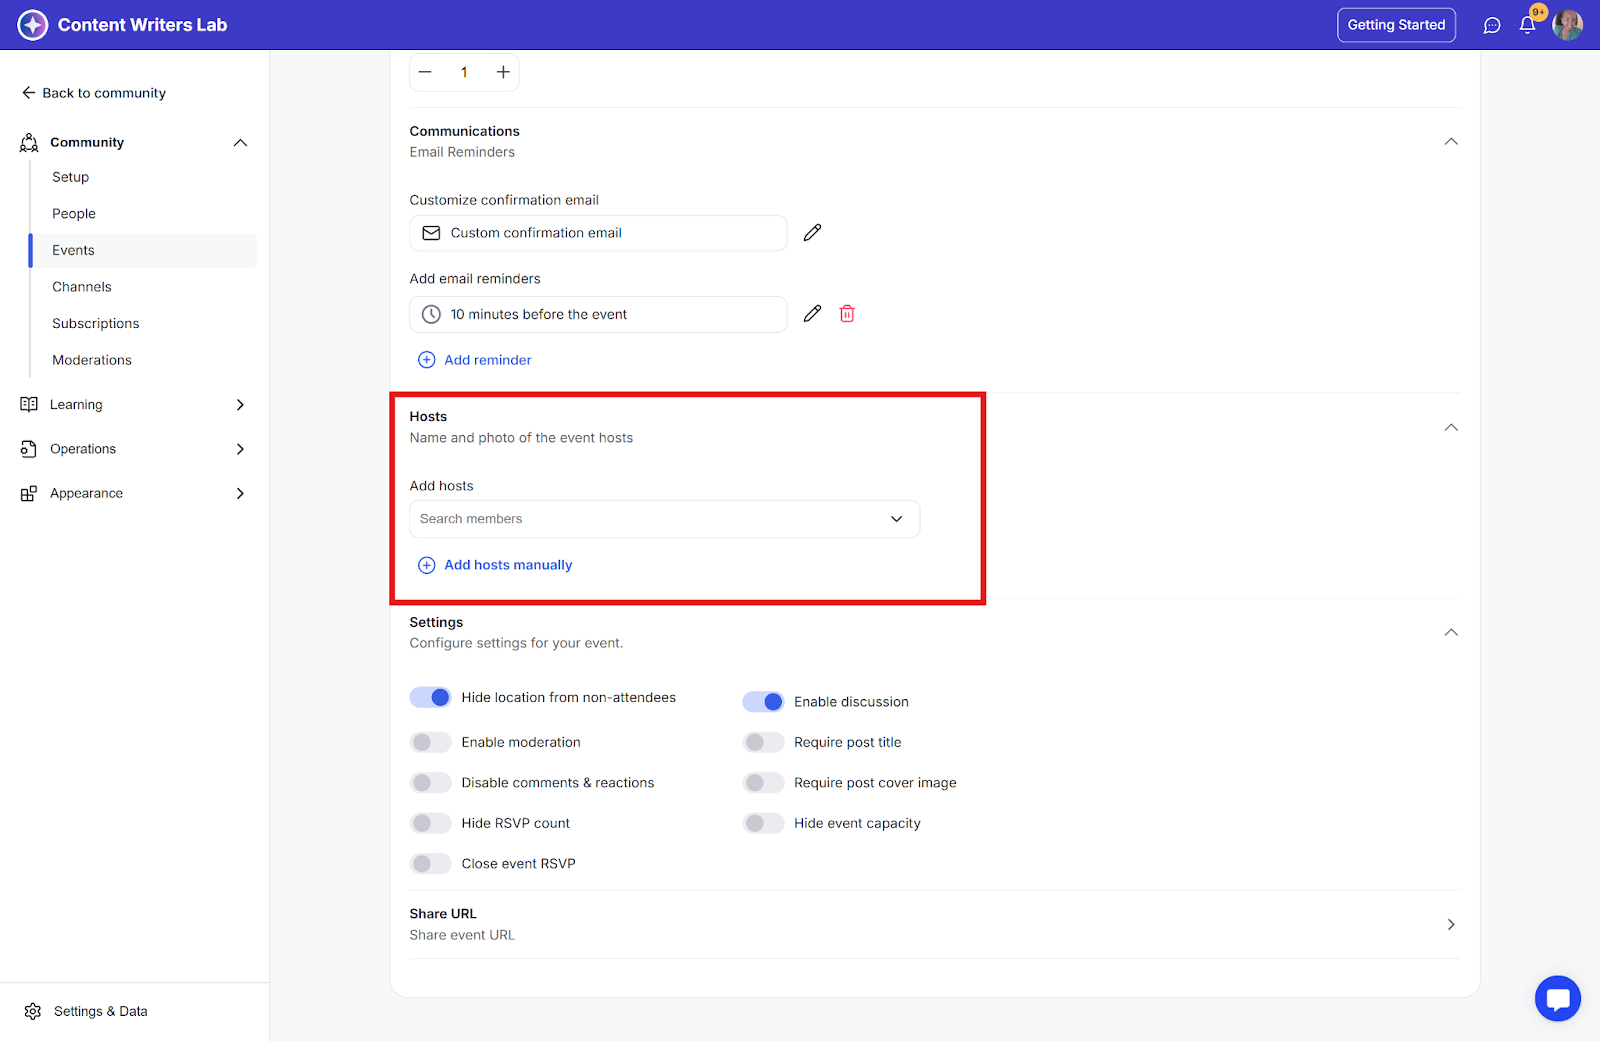
Step 14: Add your Event Hosts and configure any remaining settings.
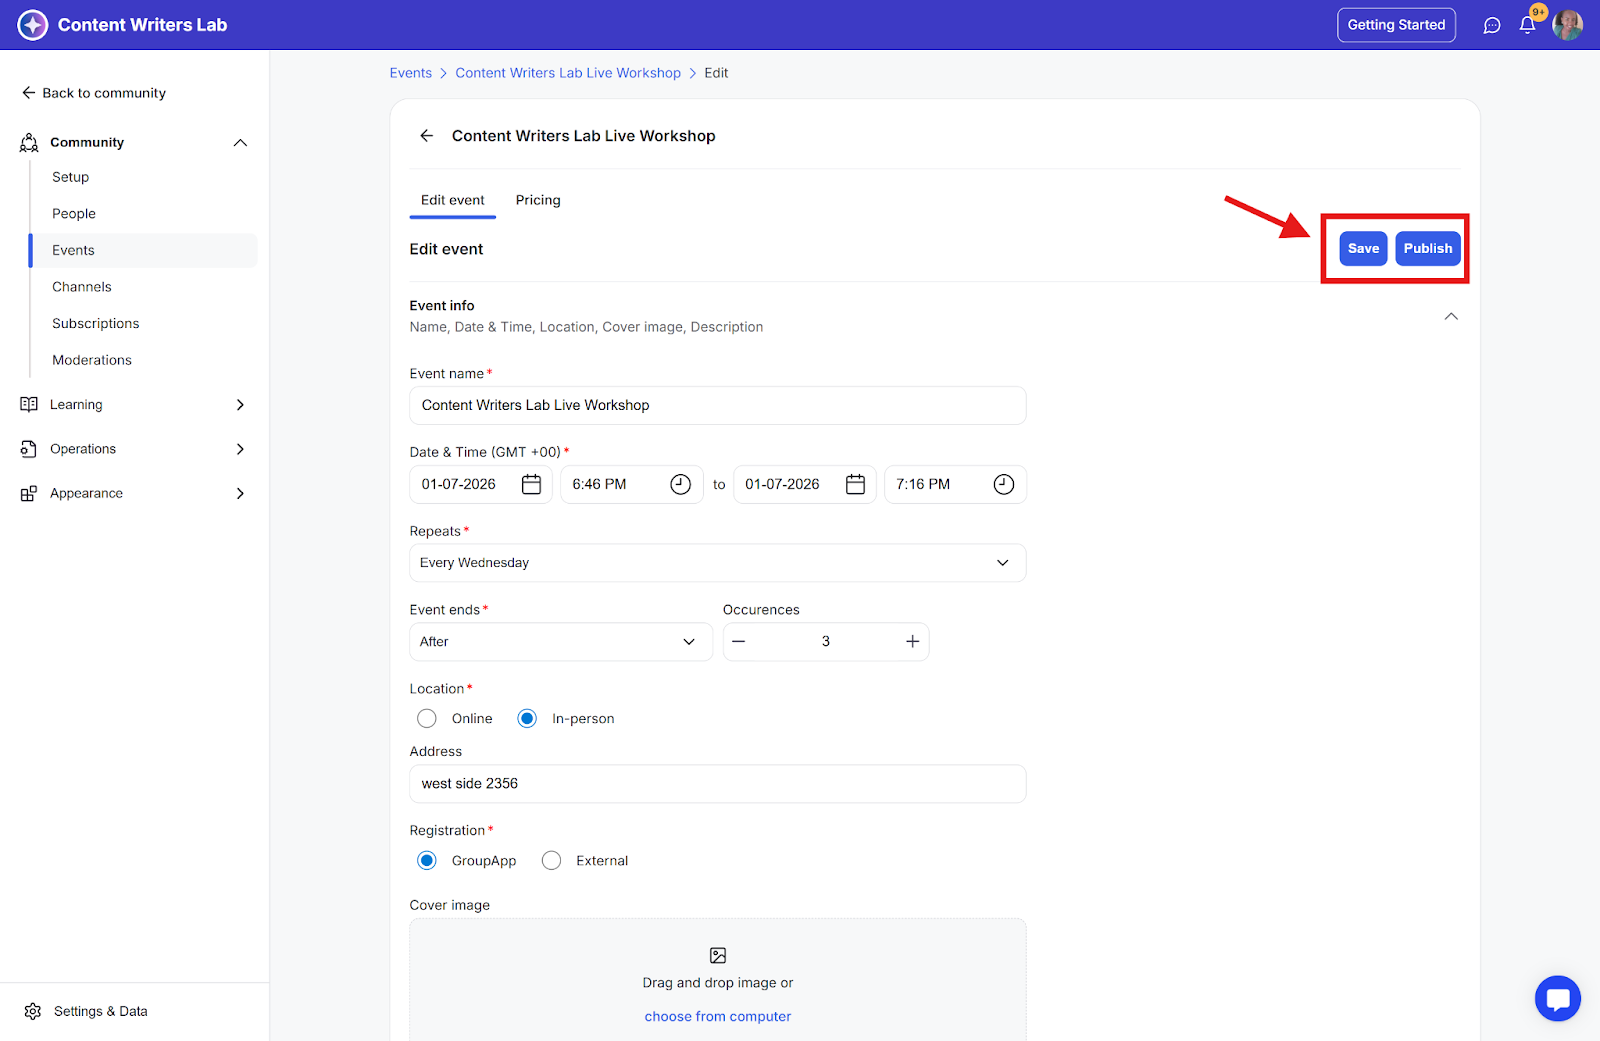
Step 15: Click Save and Publish. This immediately publishes all instances of the recurring event series.
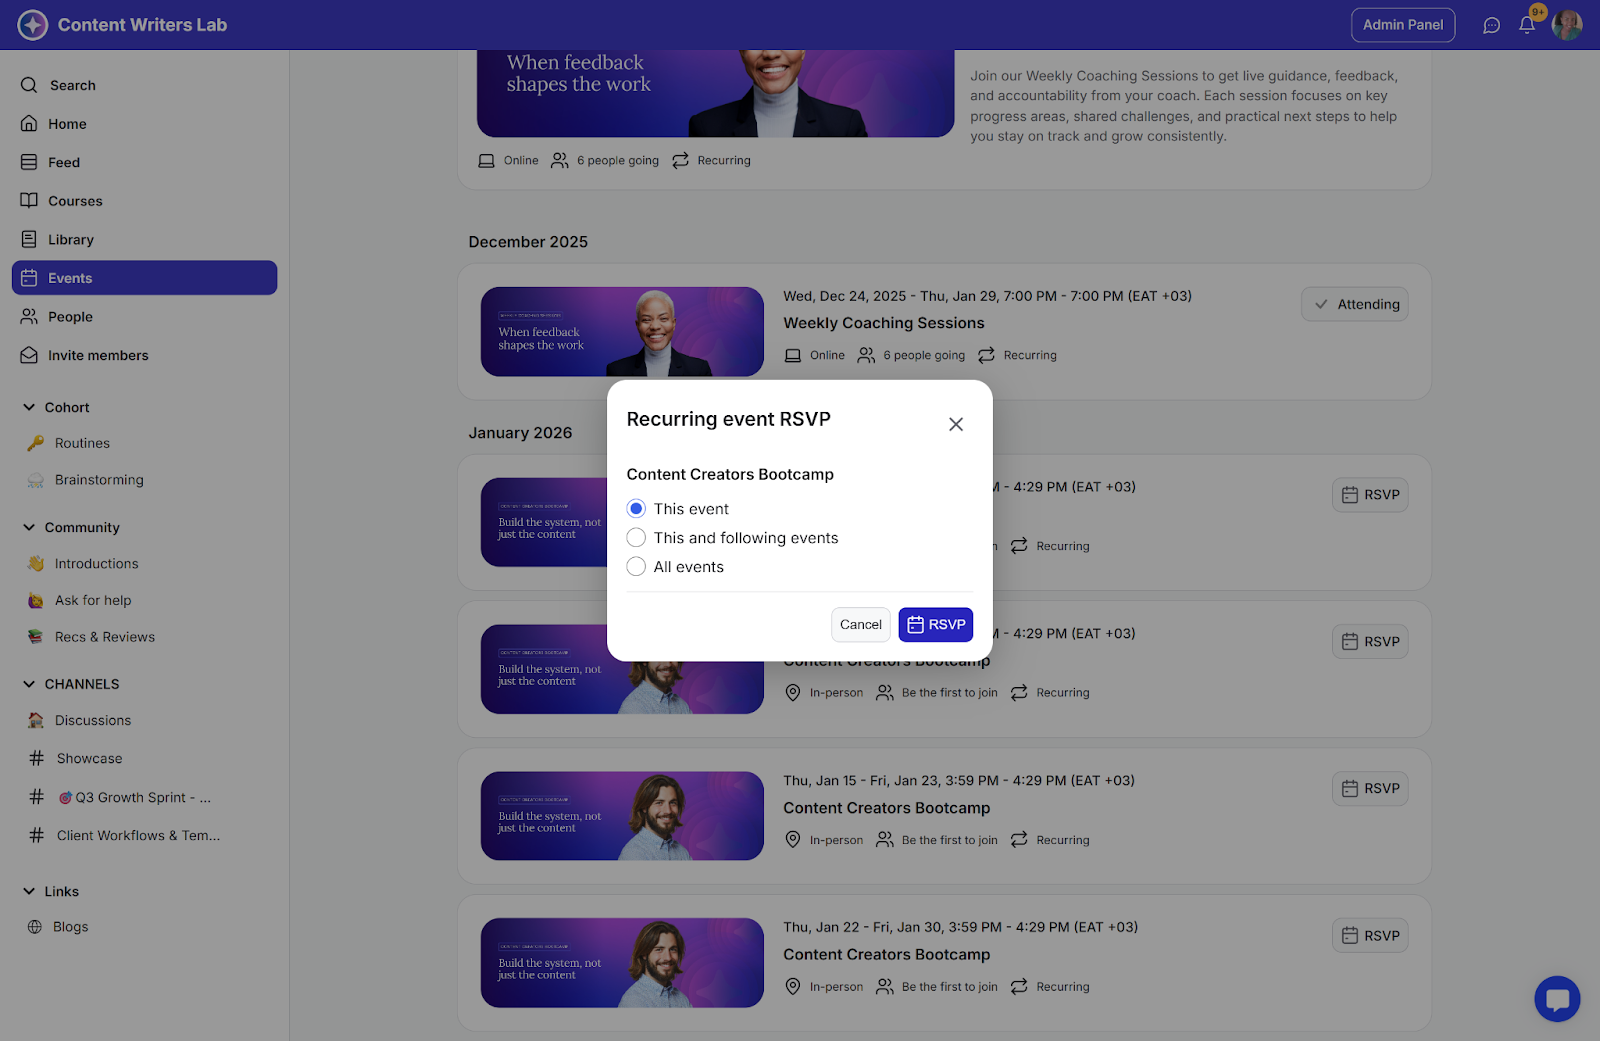
Recurring Events appear in the community event calendar. Members with access can RSVP with:
This Event: RSVP only to the single occurrence selected.
This and the Following Events: RSVP to the selected occurrence and all upcoming ones in the series.
All Events: RSVP to every occurrence or all events in the series
Step 1: Go to your Admin Panel and click on Events on the left-side bar.
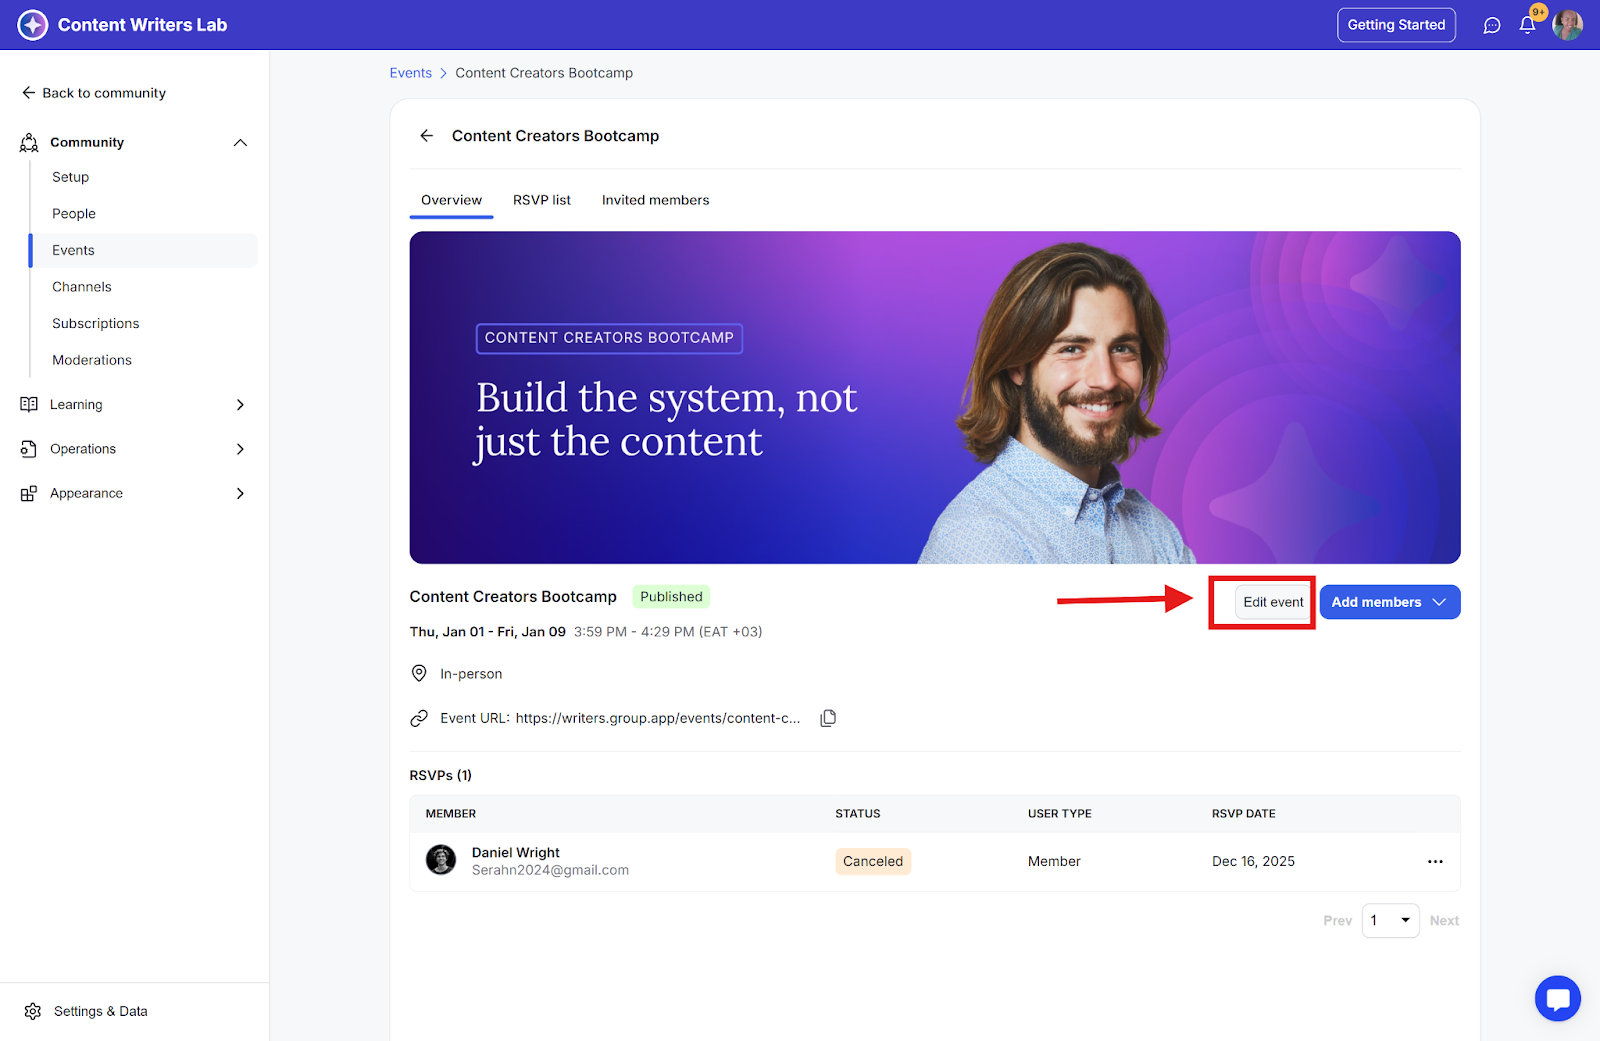
Step 2: Click the recurring event you want to edit to open the event page.

Step 3: Click Edit Event (top-right). You can edit all options except those that appear turned off.
Step 4: Click Save and Publish.
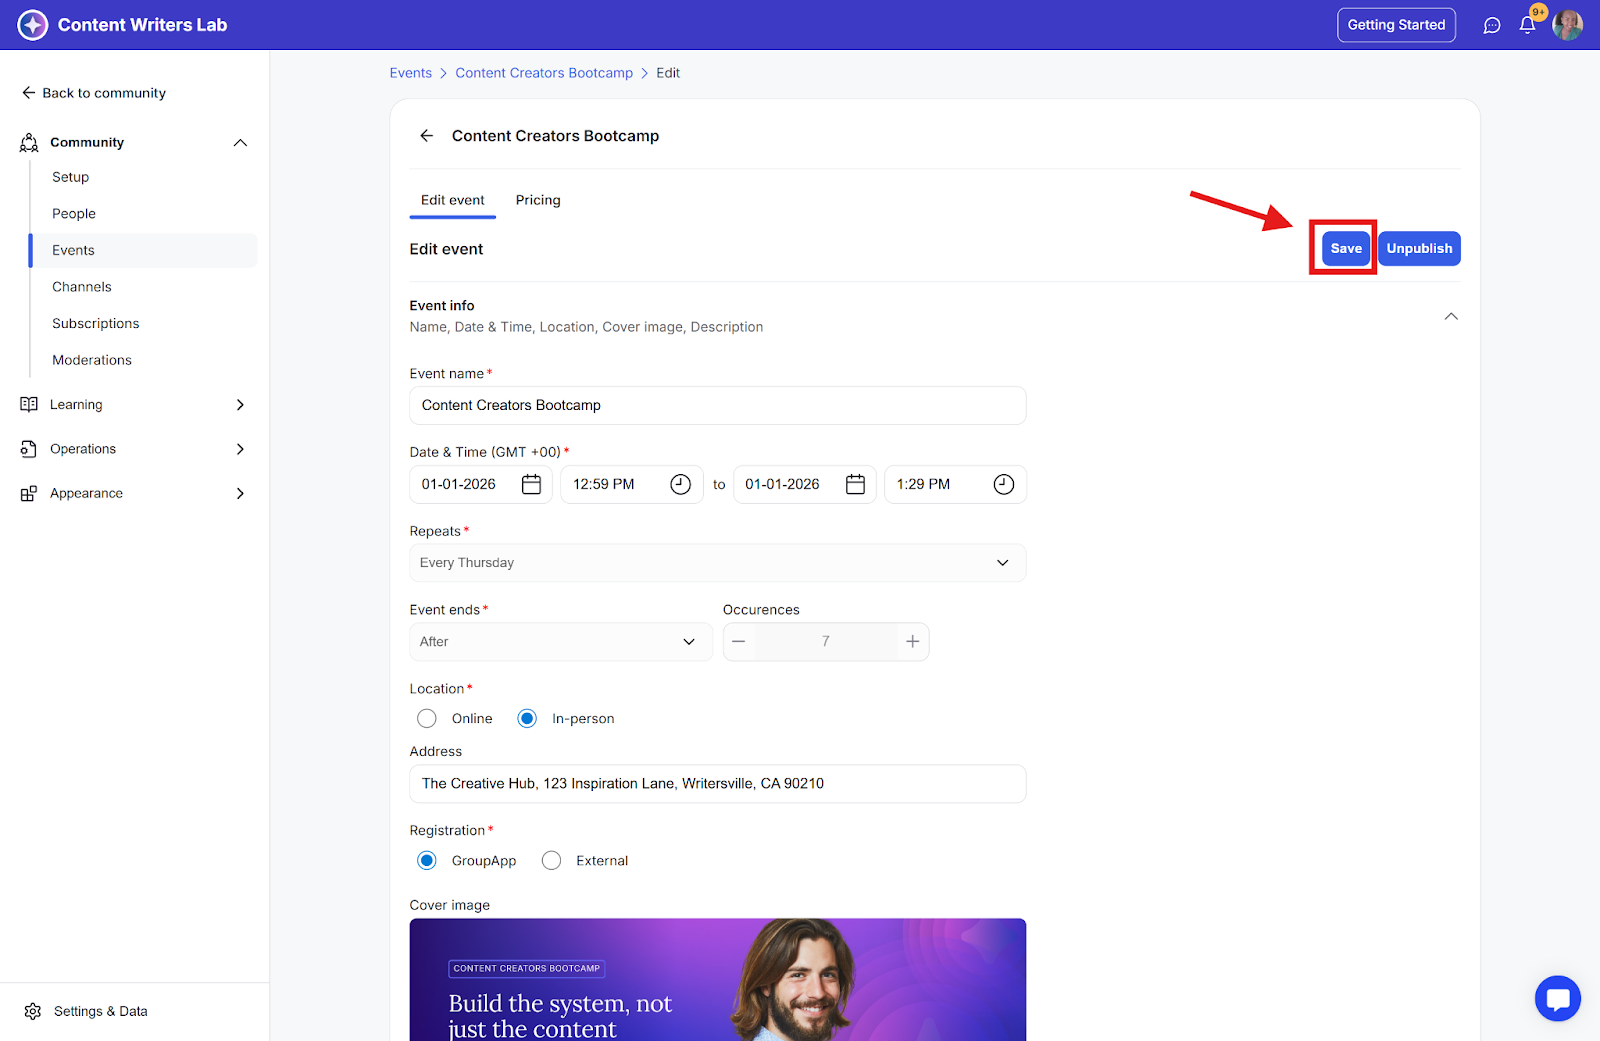
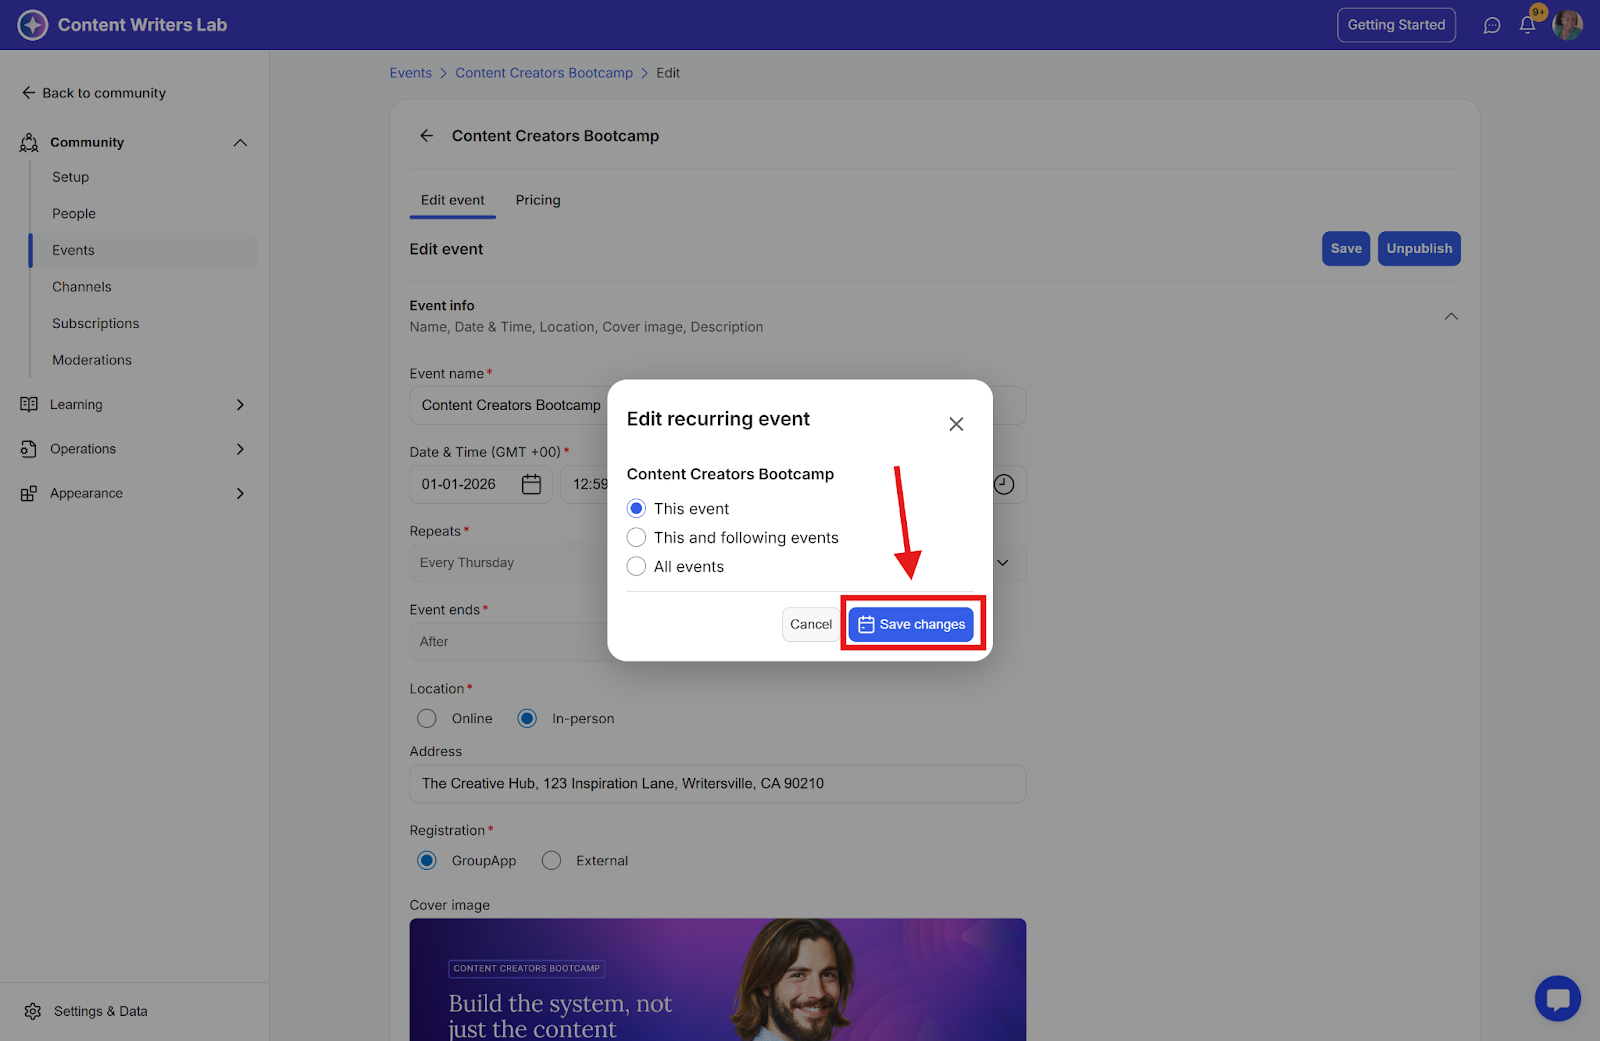
Step 5: A pop-up titled Edit [Event Name] appears with three options:
This Event
This and the Following Events
All Events

Step 6: Choose one and click Save Changes; your edits apply based on the selection.