Group Subscriptions allow a single buyer to purchase multiple seats under one subscription plan. The buyer can invite their team members, manage seats, and handle billing, while you retain full control over pricing, access levels, and onboarding rules.
In this guide, you’ll learn how to create and manage Group Subscriptions in GroupApp. We’ll walk through the roles and permissions of the subscription owner and their sub-accounts, explaining what each role can and cannot do. You’ll also learn the exact steps to set up a group plan, define seat limits, configure pricing, and manage ongoing changes such as invites, seat adjustments, and subscription updates.
Group Subscription Use Cases
Corporate training cohorts: Offer a 10–50 seat plan to a company buying leadership or compliance training, with one invoice and an invite link that the manager can share internally to fill seats fast.
School or department access: Sell a yearly, seat-based plan to a university department or K–12 district, allowing teachers or students to join under a single subscription, with seats easily reassigned each term.
Agency or franchise networks: Offer a group plan to agencies or franchise owners who onboard multiple staff across locations. They manage who’s added, while you keep billing and access rules consistent.
Client success or partner programs: Offer your B2B clients a team plan that includes courses, community, and resources. As their team grows, they can add seats instantly, allowing you to capture expansion revenue.
Professional associations: Bundle member benefits into a single organizational plan, allowing a chapter or company sponsor to cover access for members with centralized billing and simple invites.
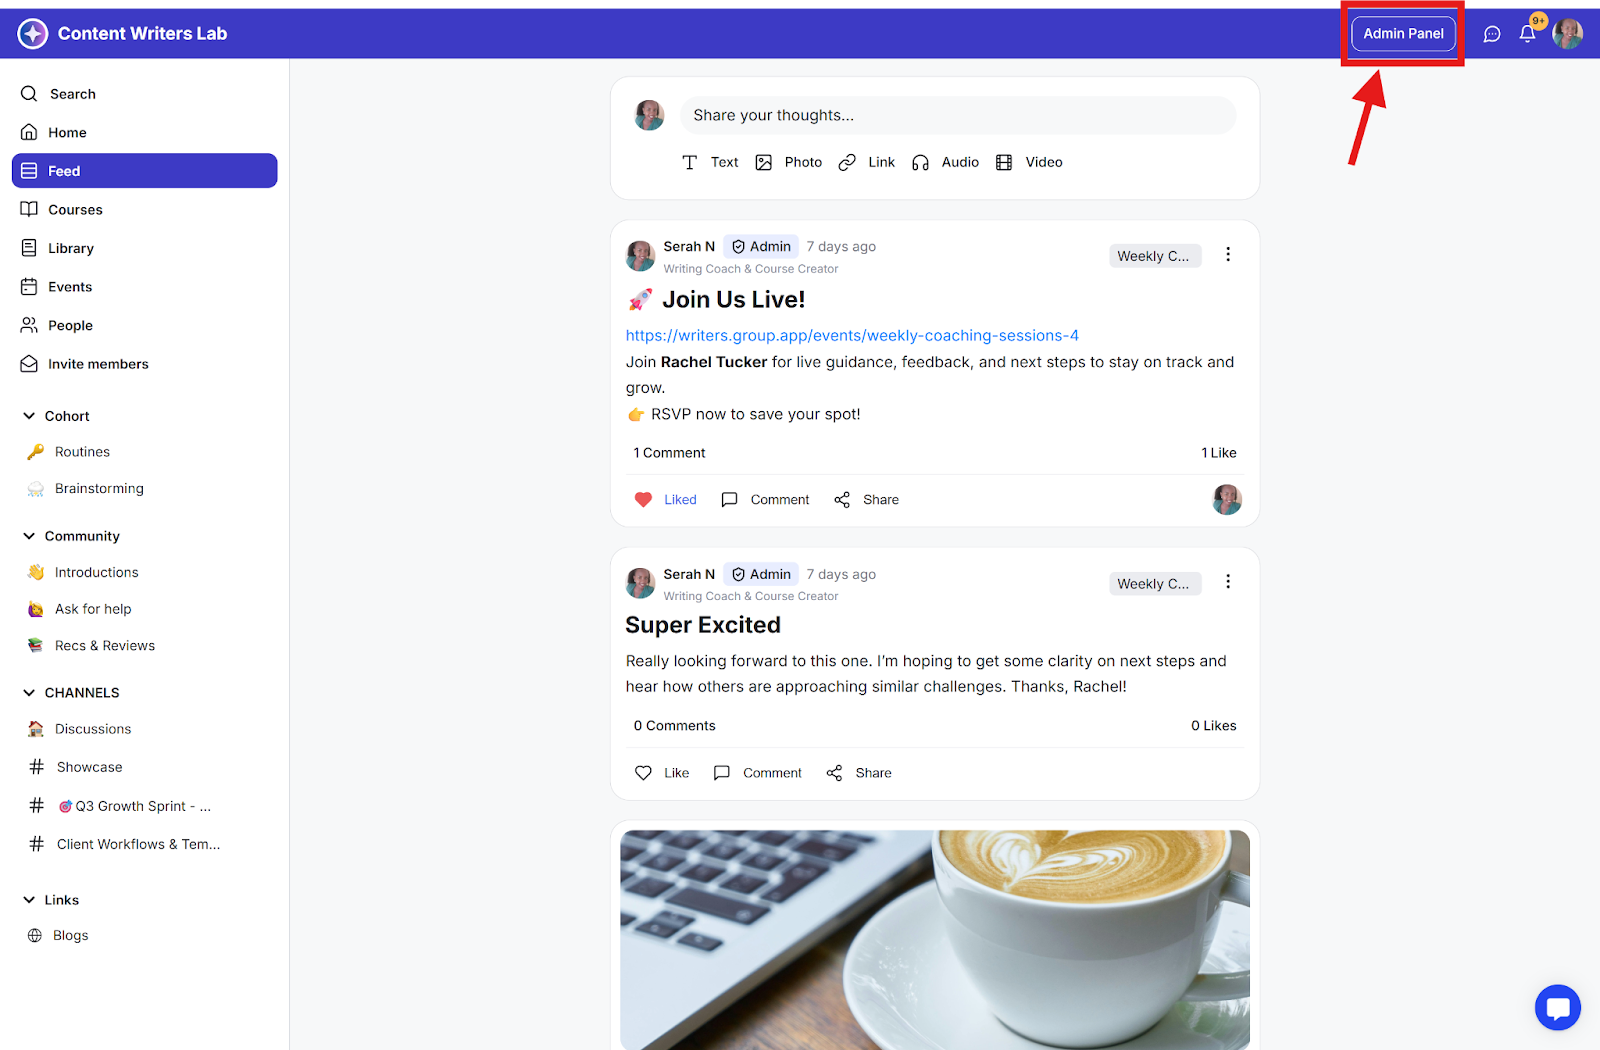
Step 1: Go to your community and click on Admin Panel.
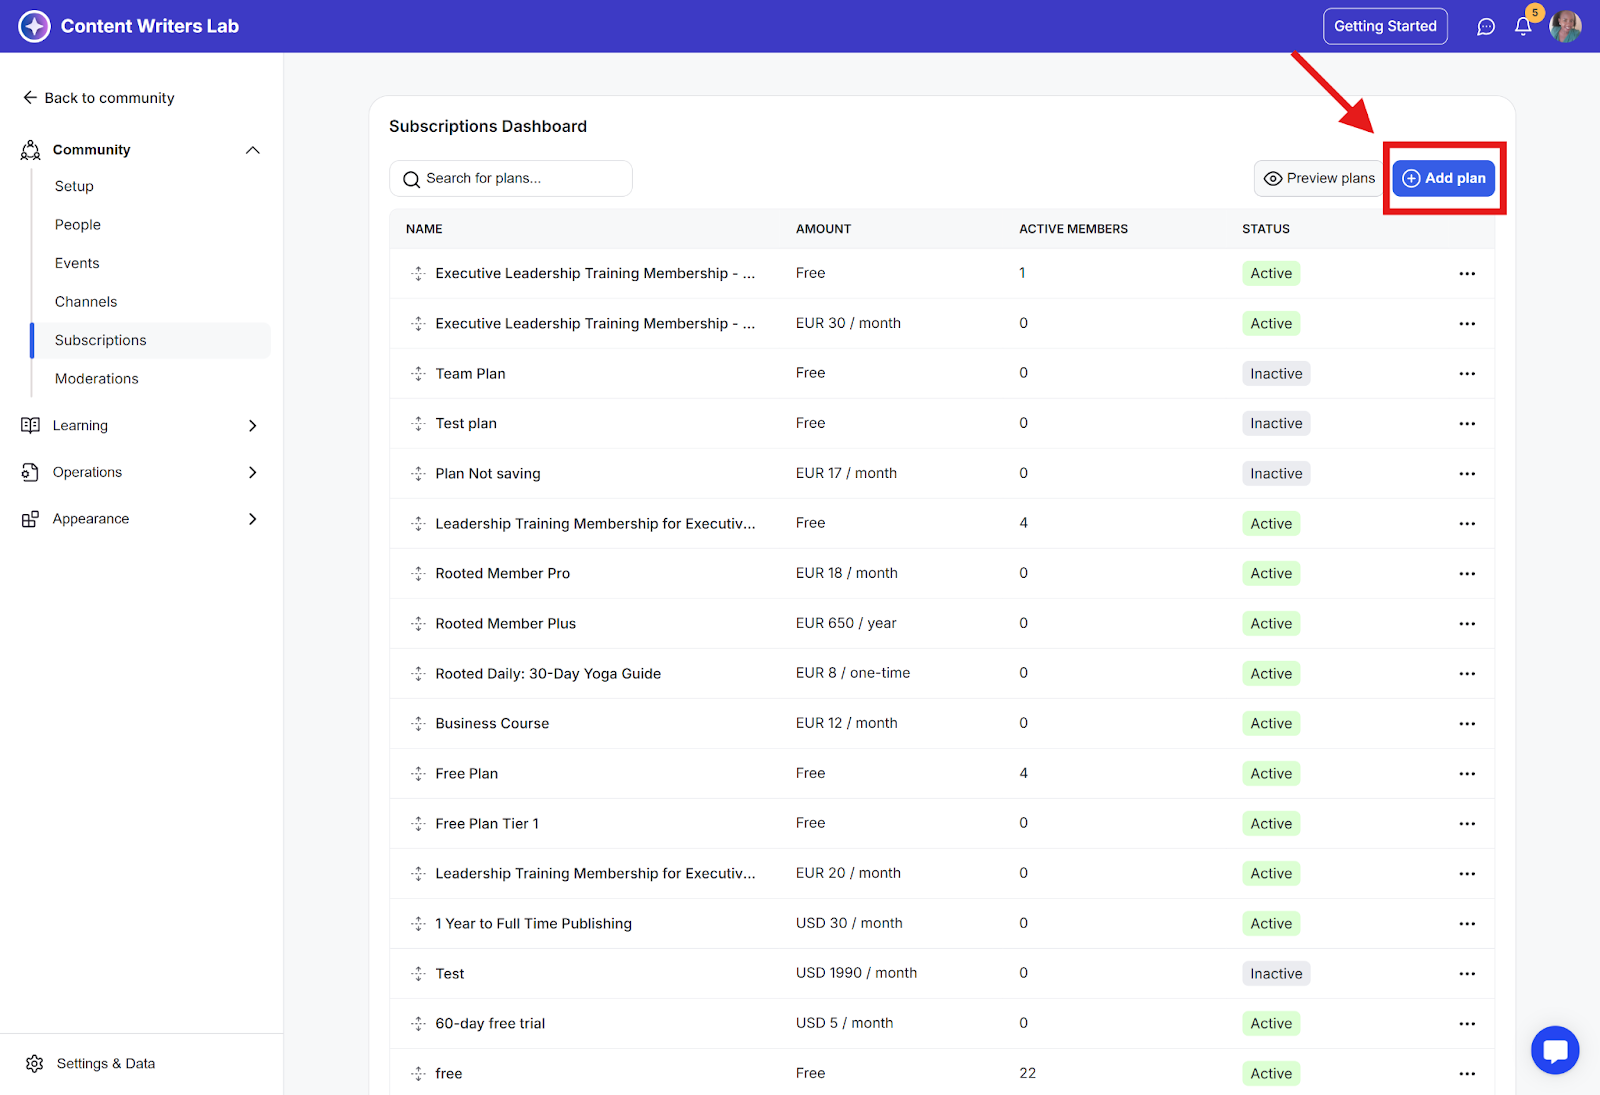
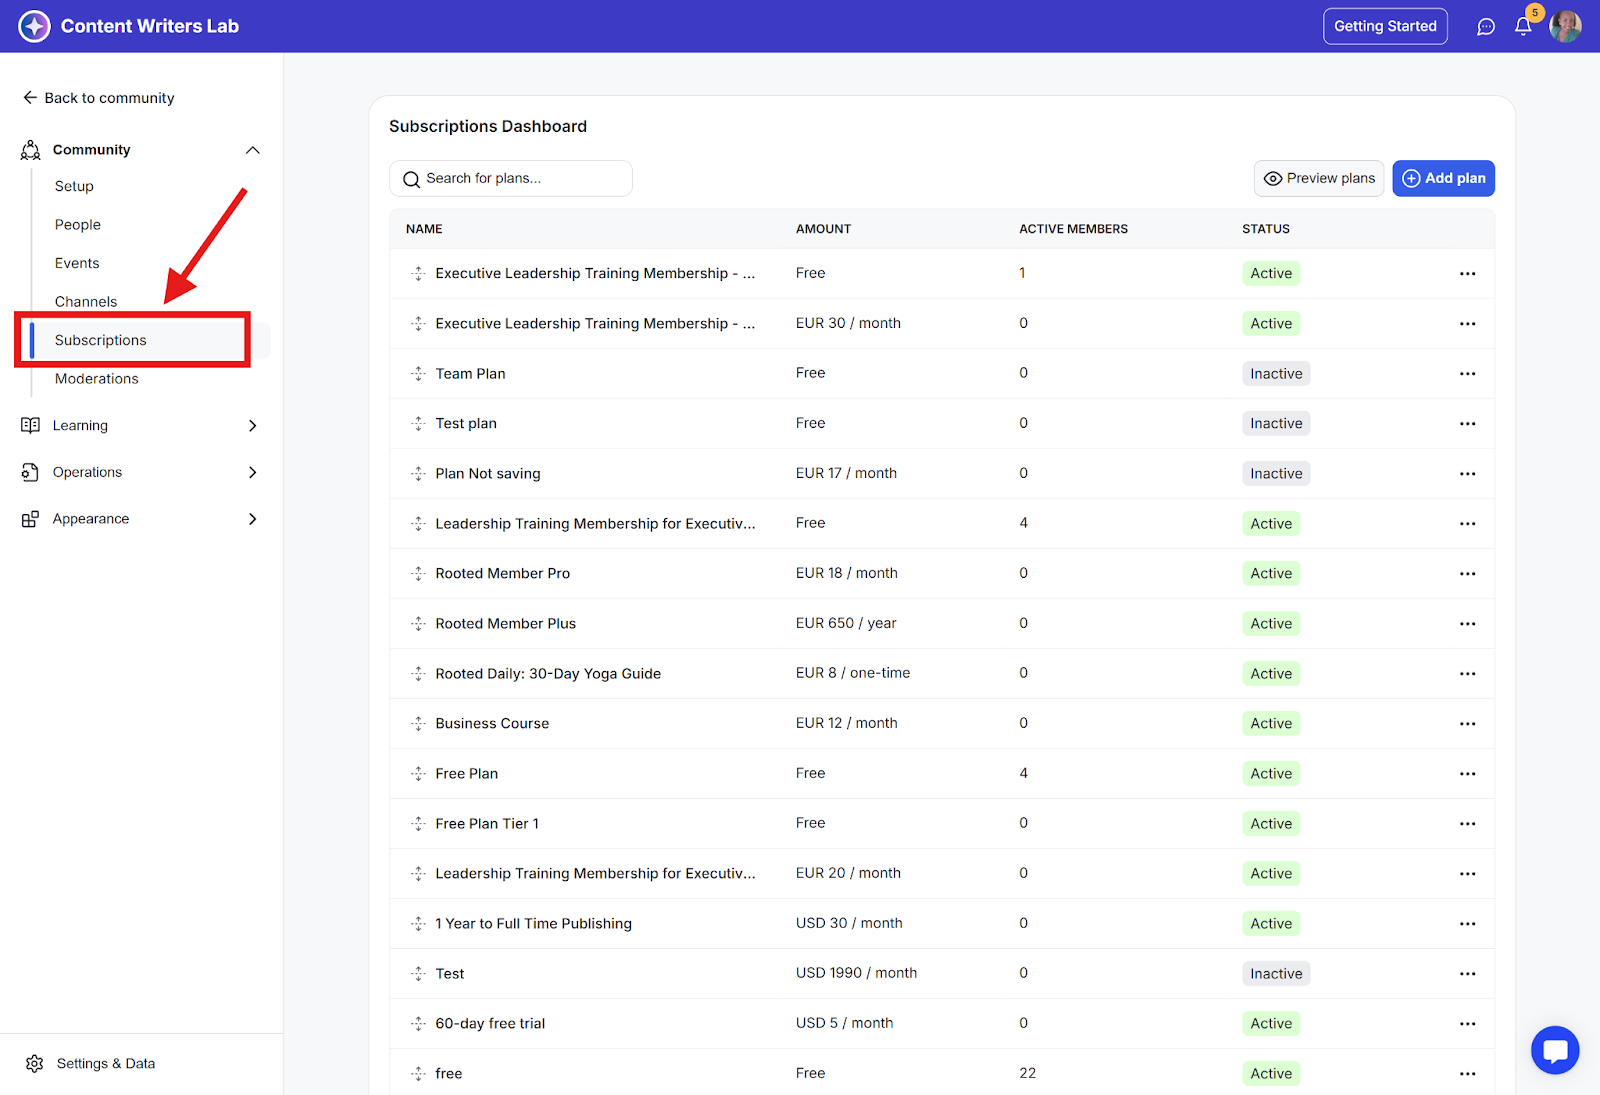
Step 2: Click on the Subscriptions option on the left-side bar menu. This takes you to the latest Subscriptions Dashboard.

Step 3: Click on the blue +Add Plan button on the top-right of the dashboard to open the Subscription Builder.
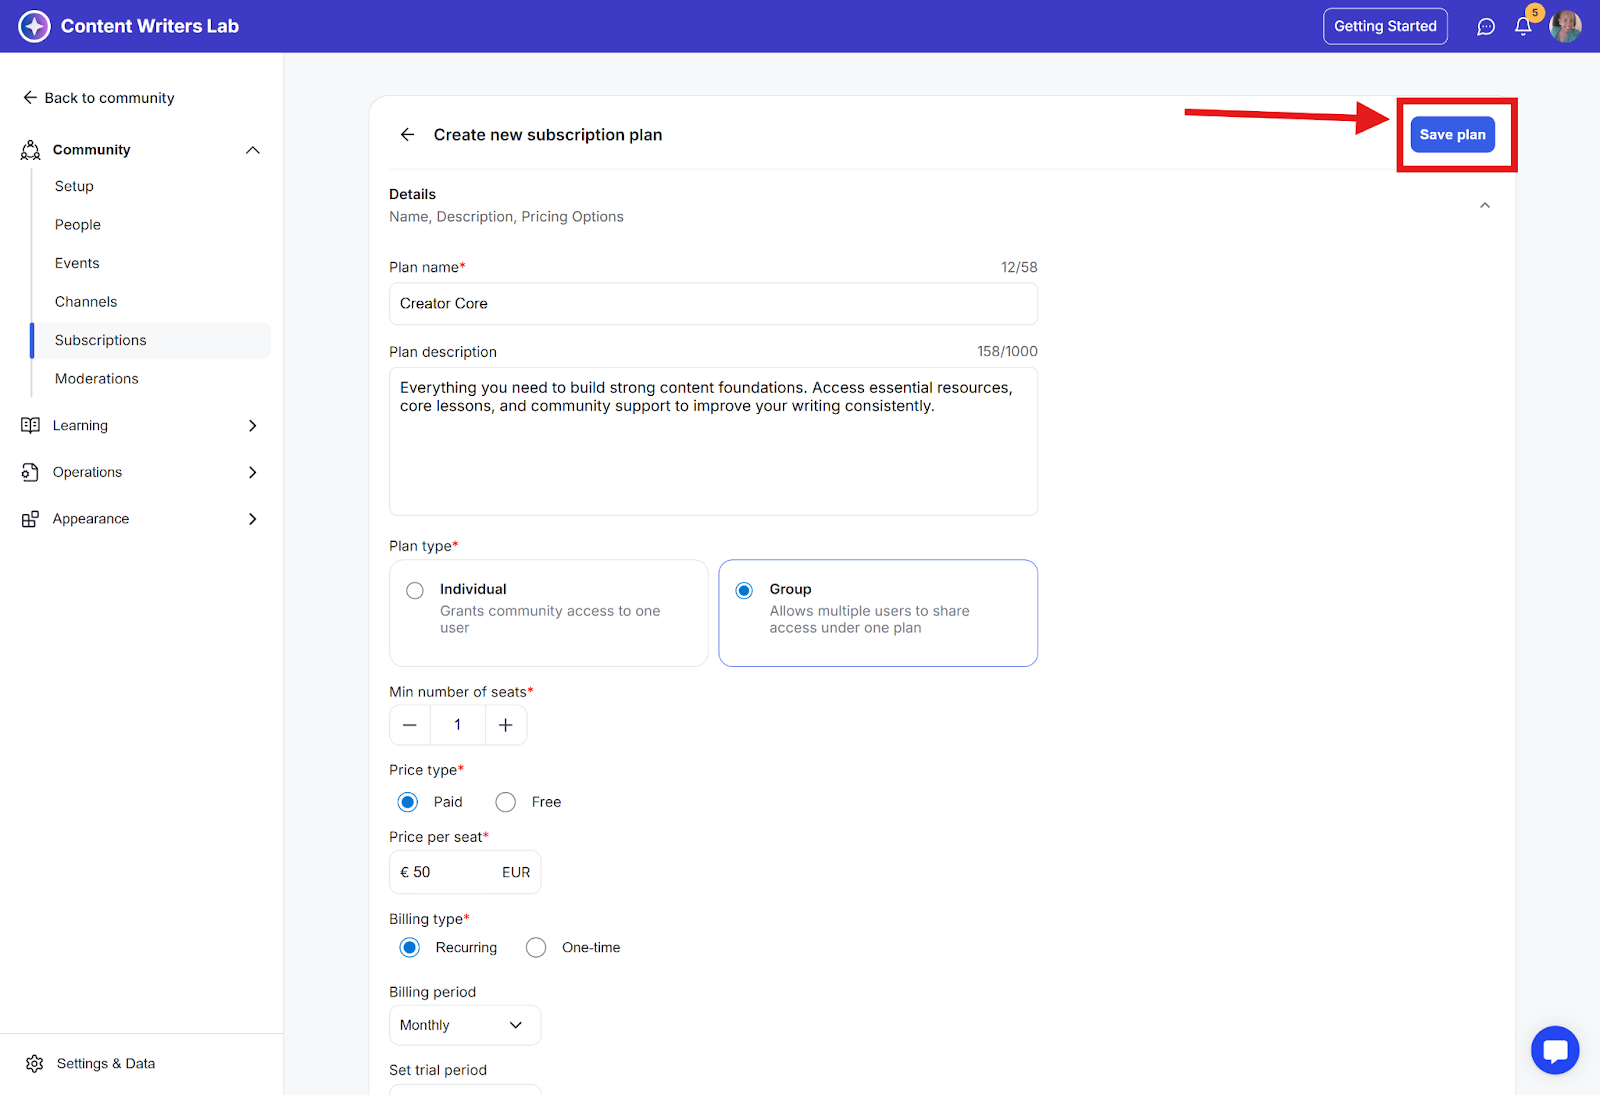
Step 4: Enter the Name and Description.
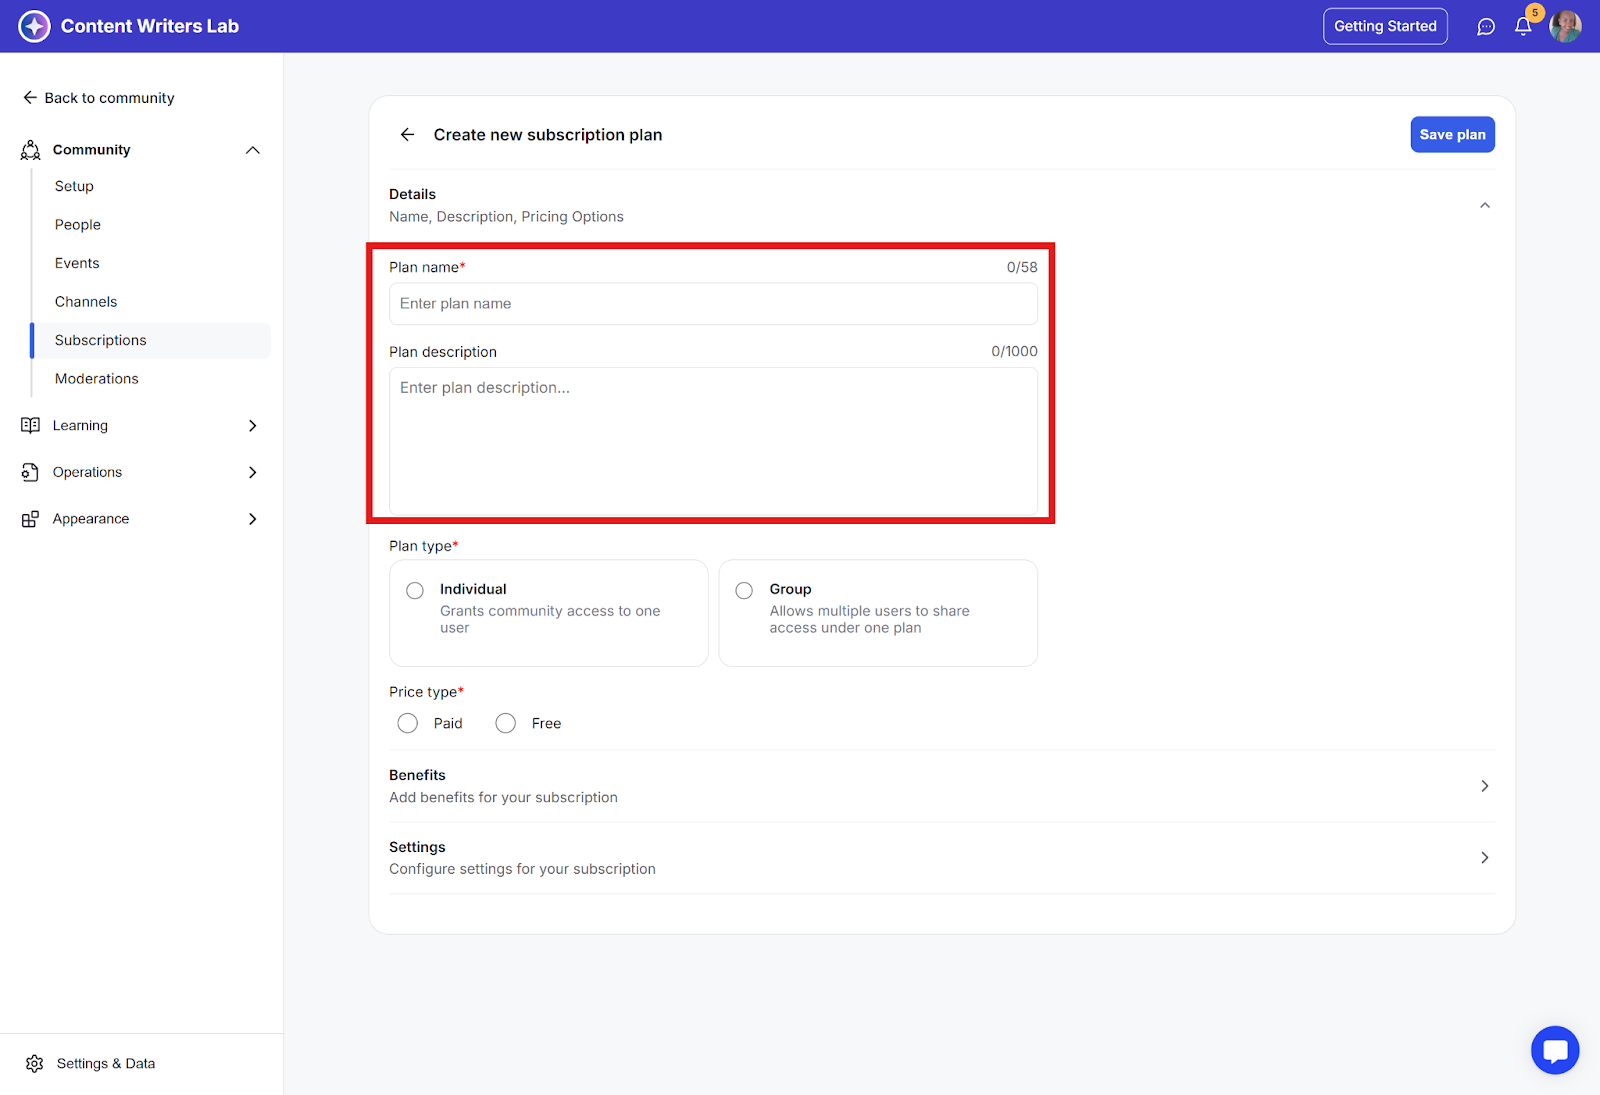
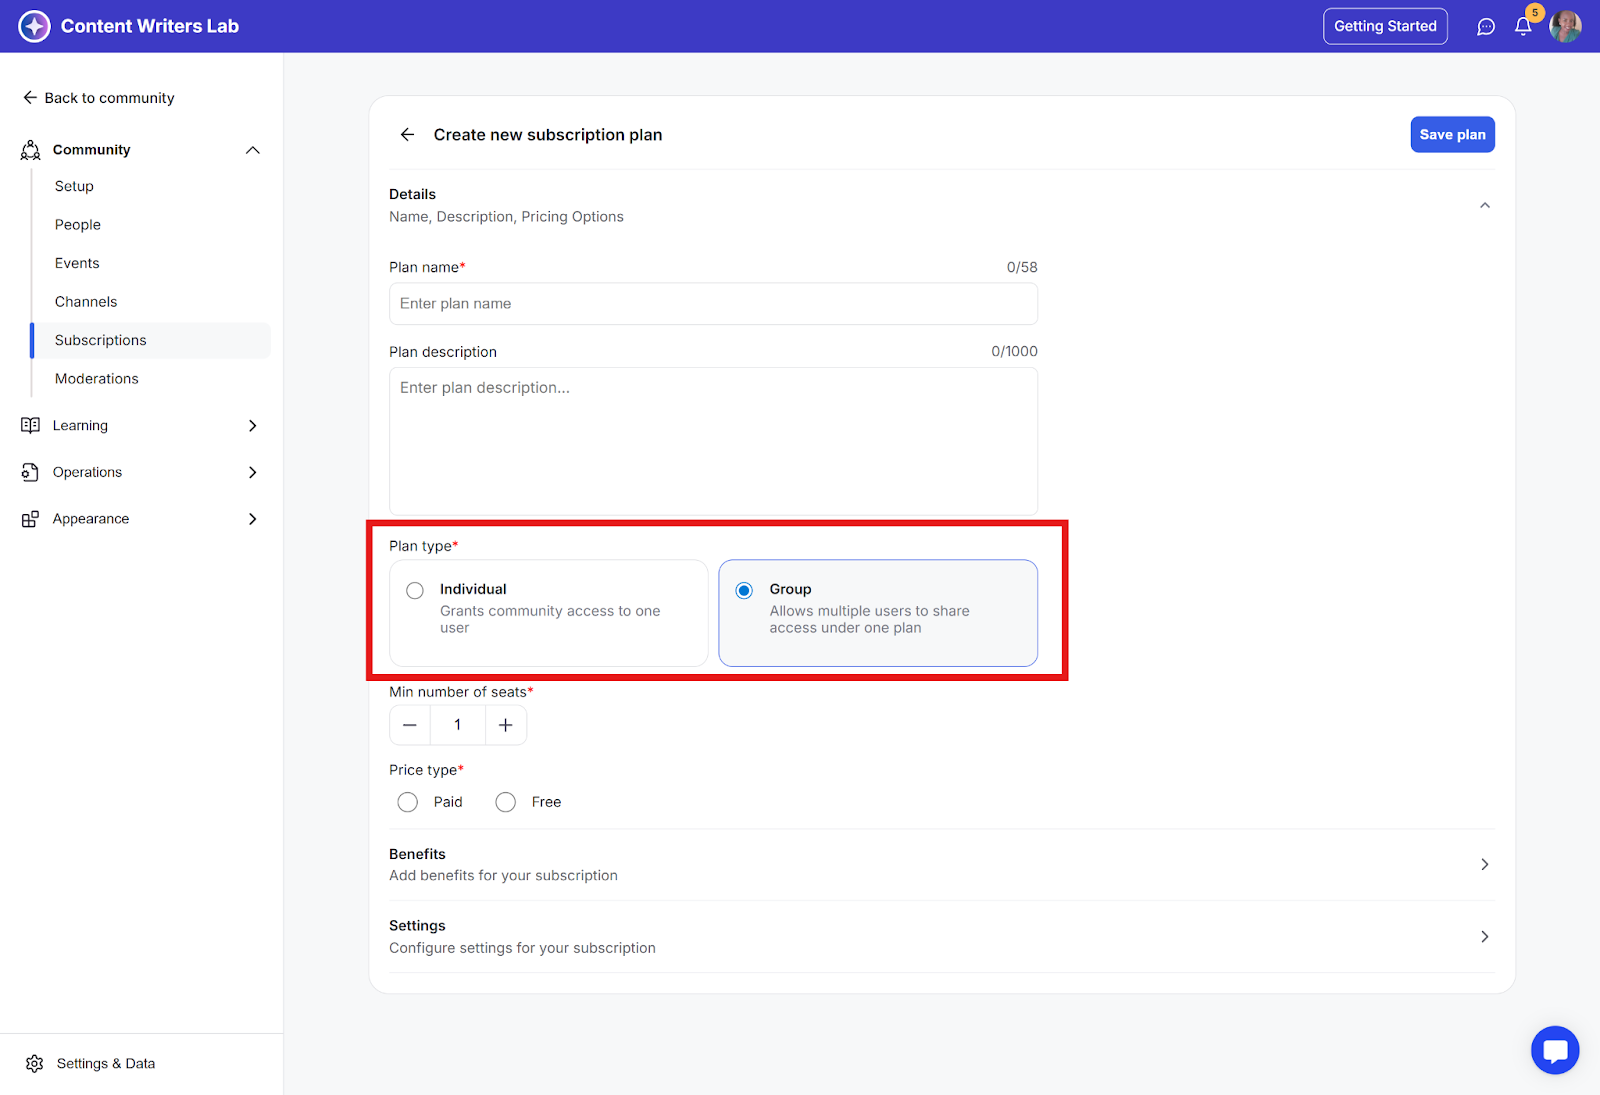
Step 5: Choose a Plan Type between Individual and Group:
Individual: Grants access to one user and is best for solo buyers.
Group: Unlocks multi-seat access under a single subscription, ideal for teams, departments, partner schools, or client companies that need a shared plan and a single invoice.
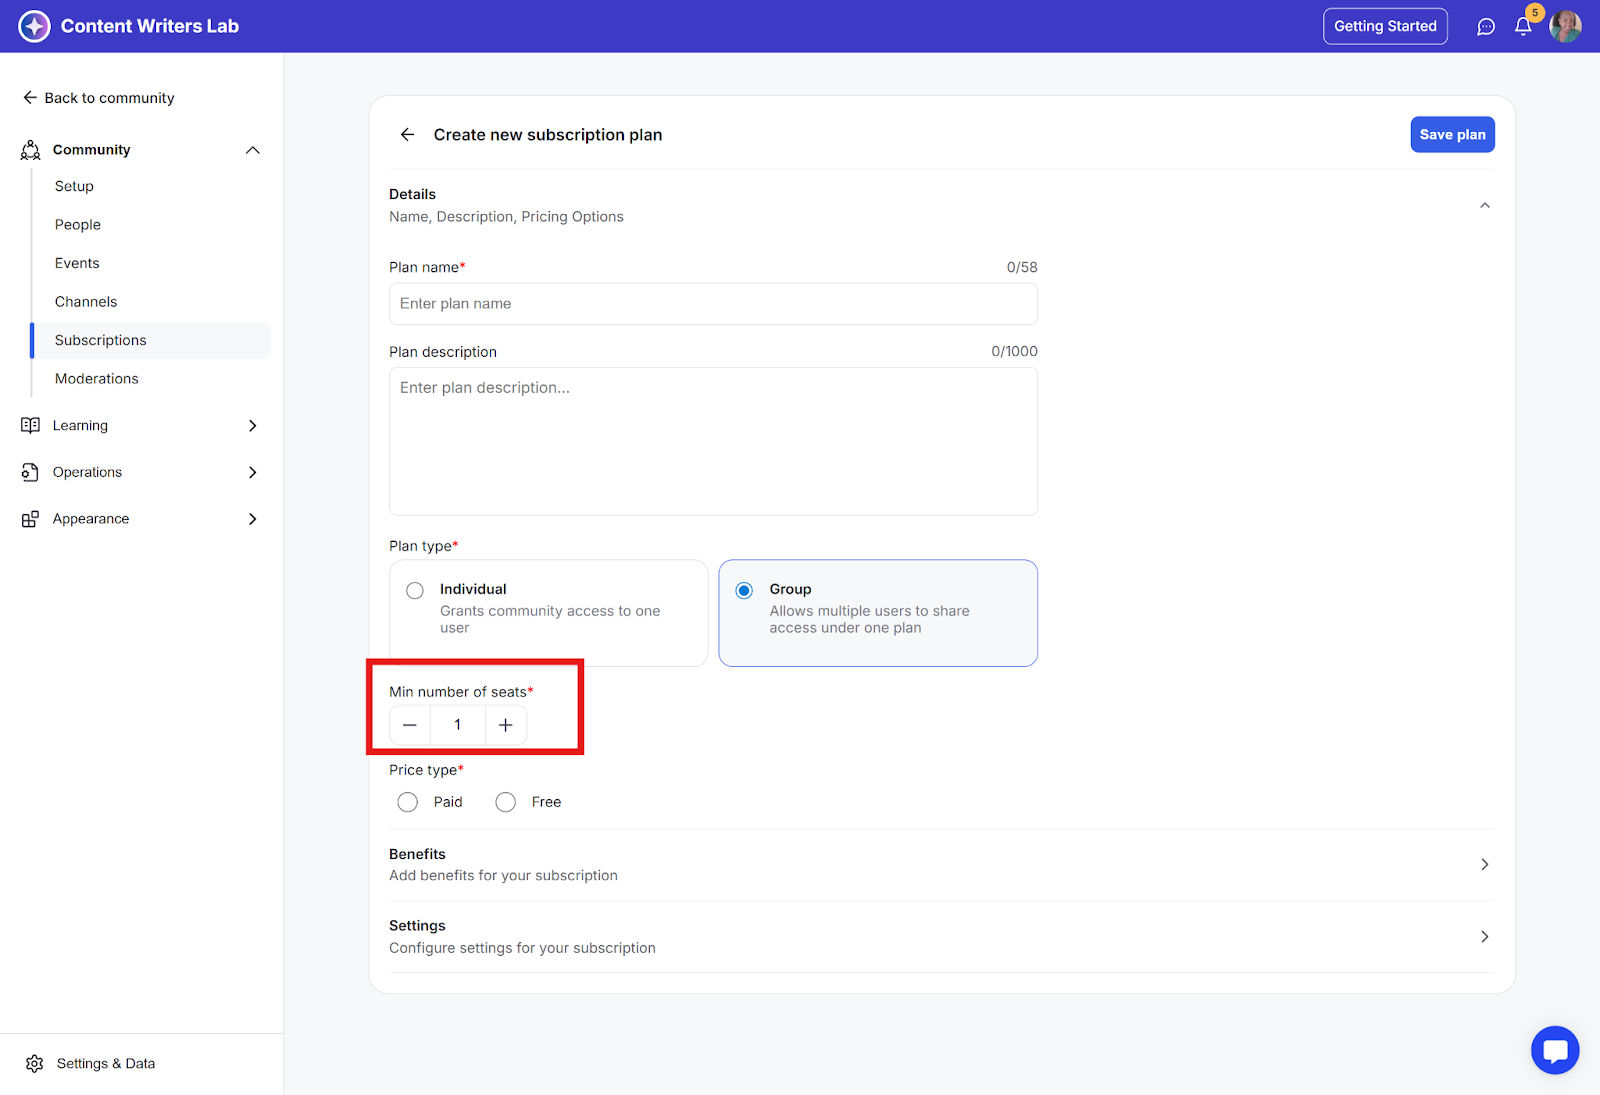
Step 6: Pick the smallest group size you’ll allow (e.g., 5, 10, or 25). At checkout, the buyer can increase the seat count, but they can’t go below your minimum, which protects your pricing and keeps contracts consistent.
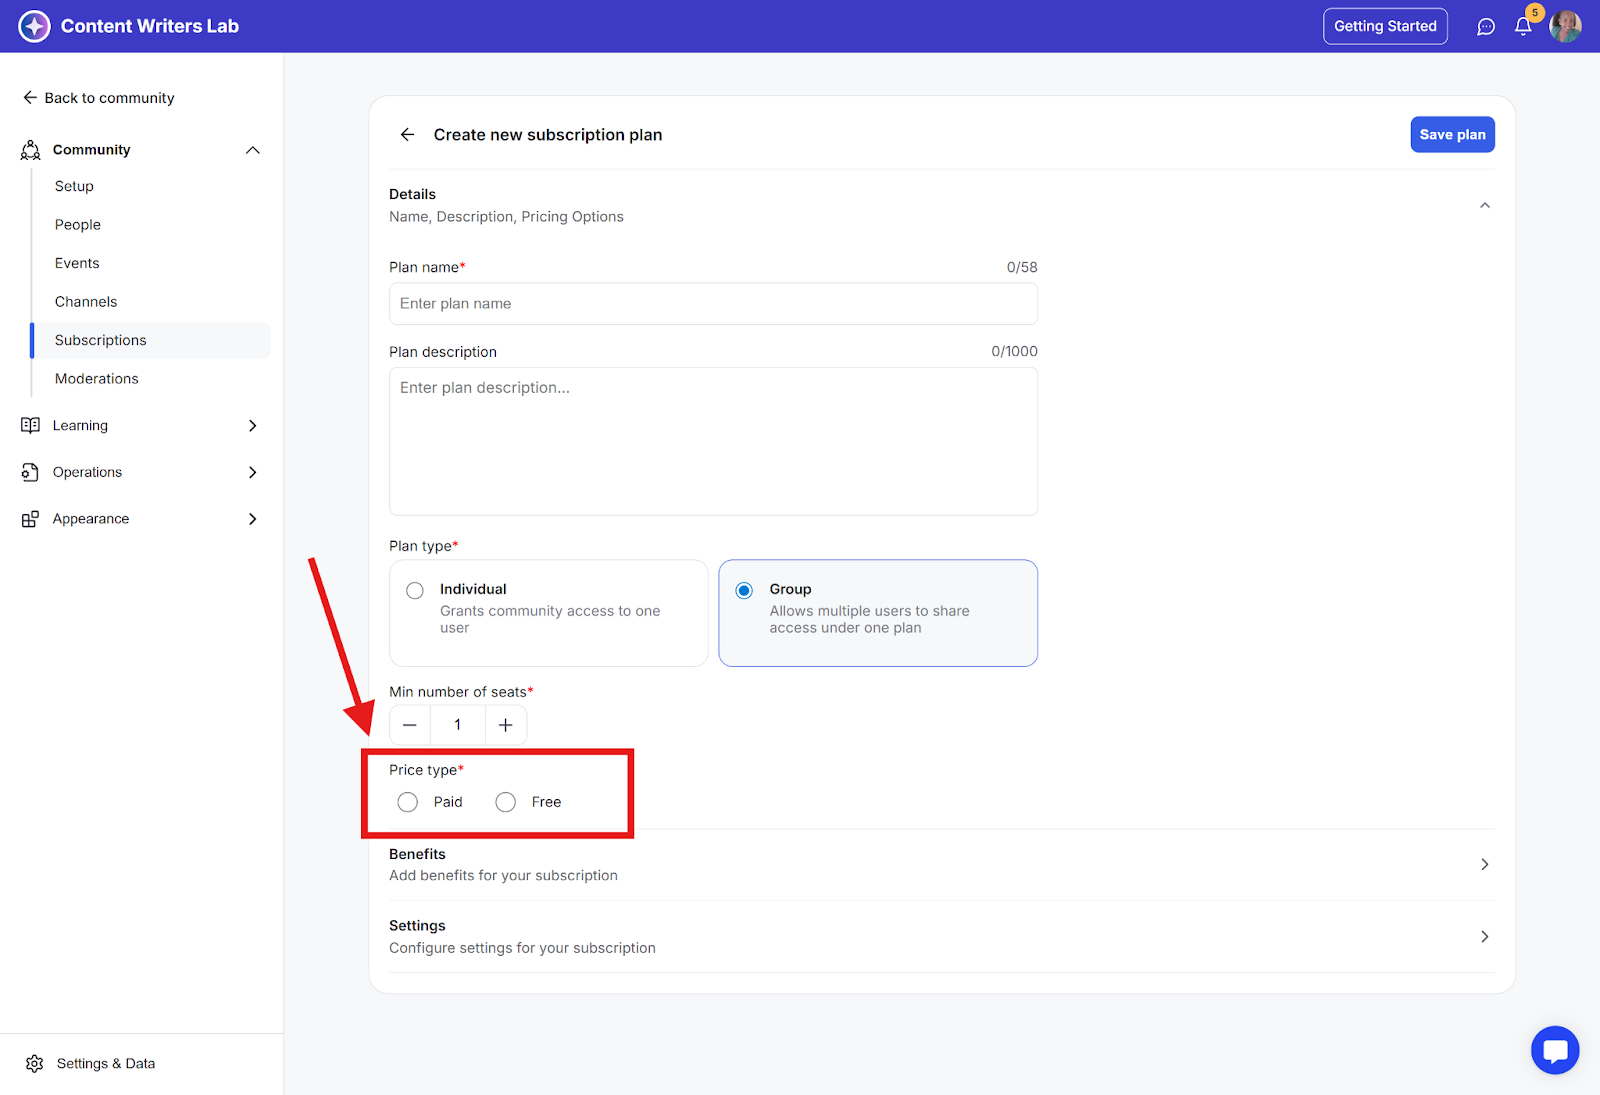
Step 7: Choose the plan type: Free or Paid.
Free: Useful for sponsored cohorts or partner programs where you cover the cost.
Paid: Charges per seat.
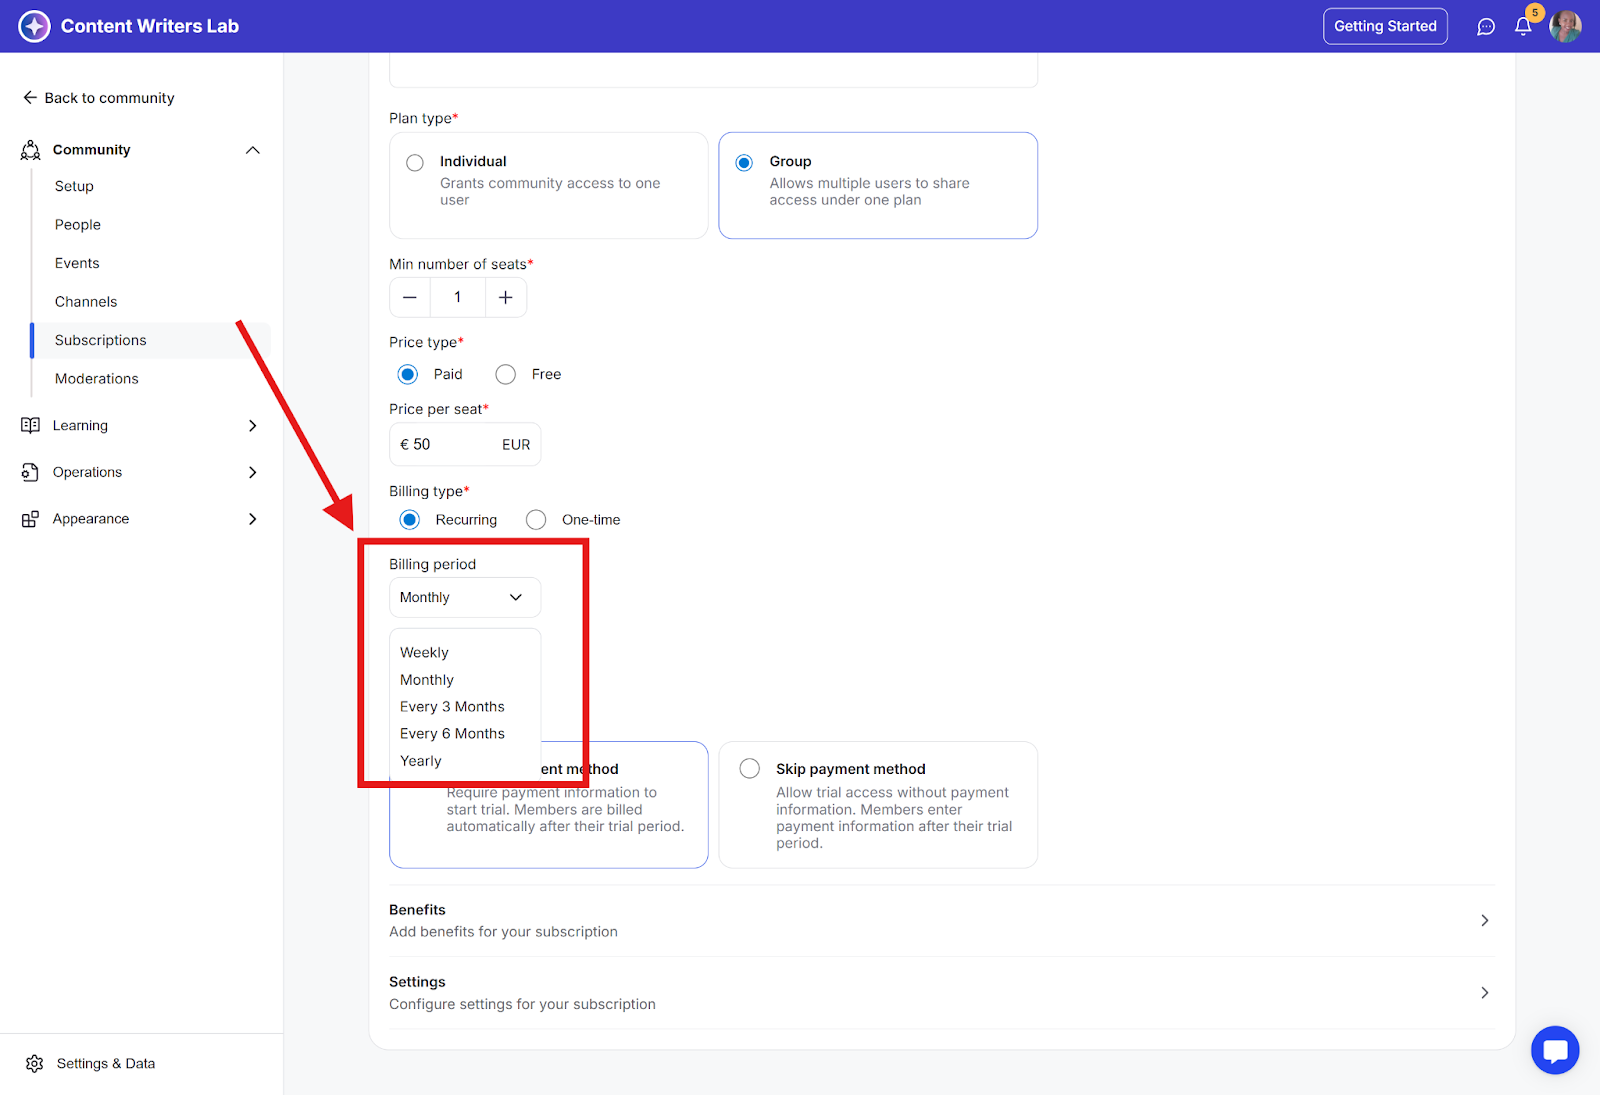
Step 8: Choose a pricing type: recurring or one-time.
One-time: Charges only to access the product, either for a set period or unlimited access. This works best for digital downloads, workshops, or standalone training programs.
Recurring: Charges a fee on set intervals as per the billing period.
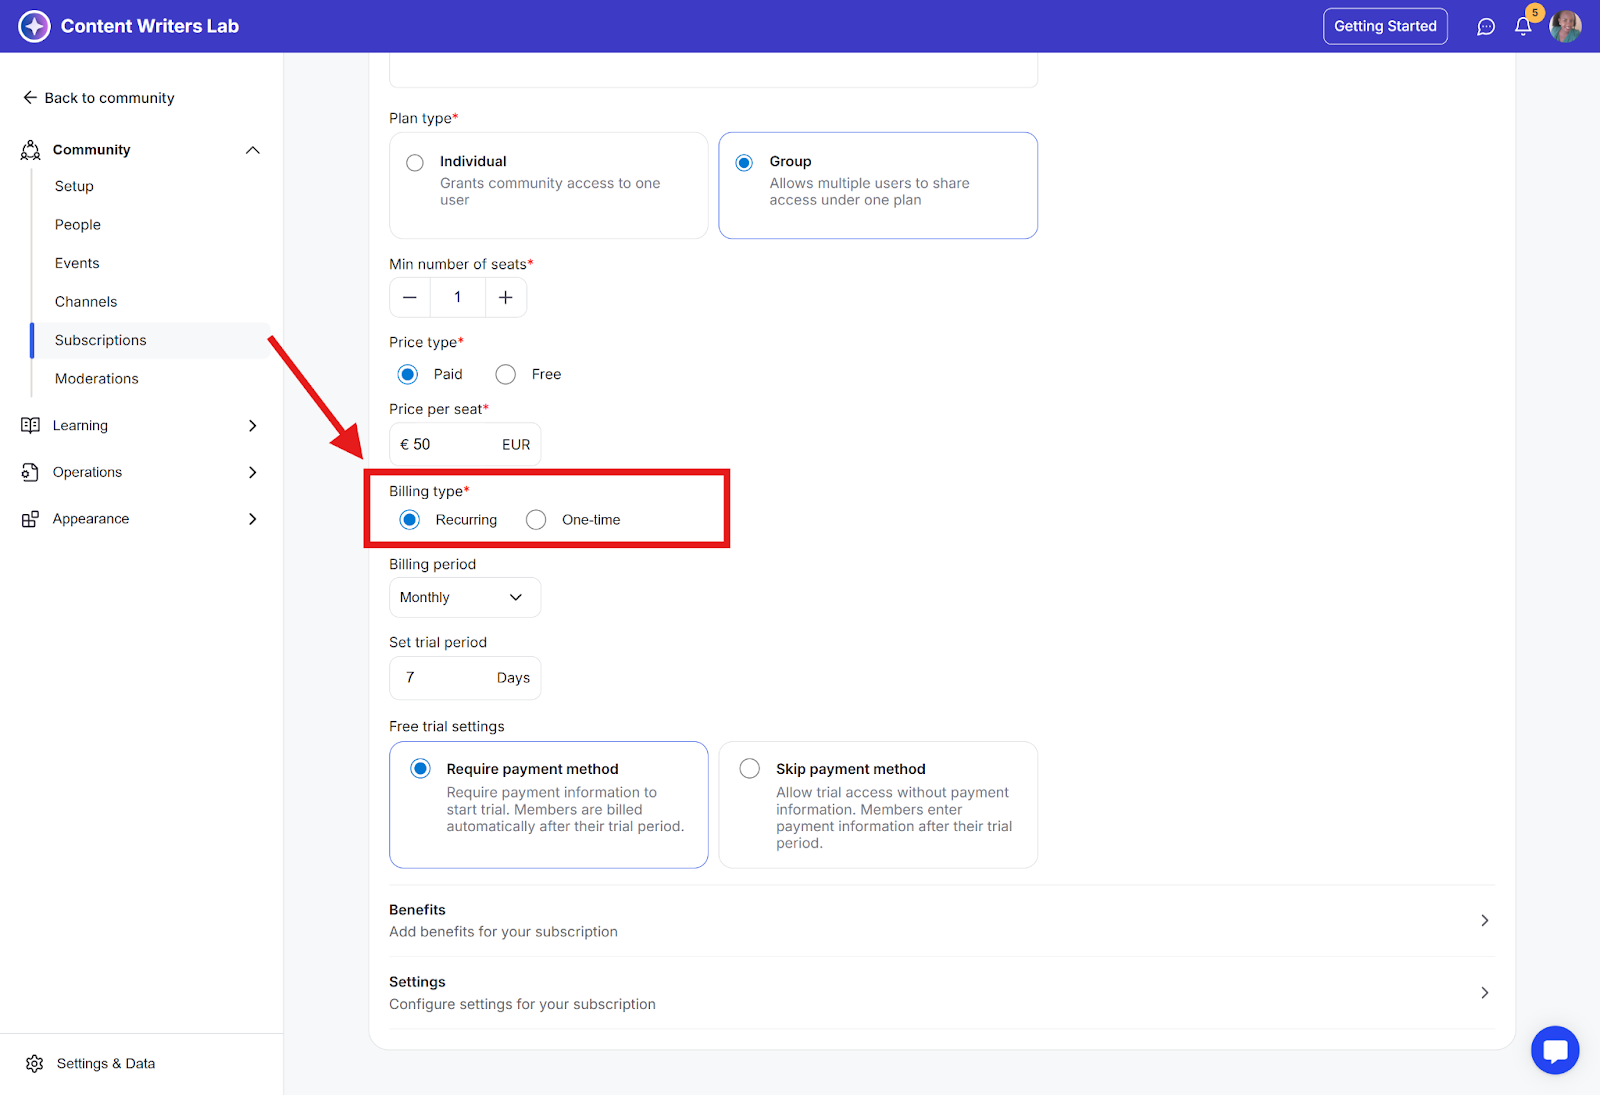
Step 9: If you chose a recurring pricing type, set the billing period (weekly, monthly, every 3 months, biannually, or yearly).
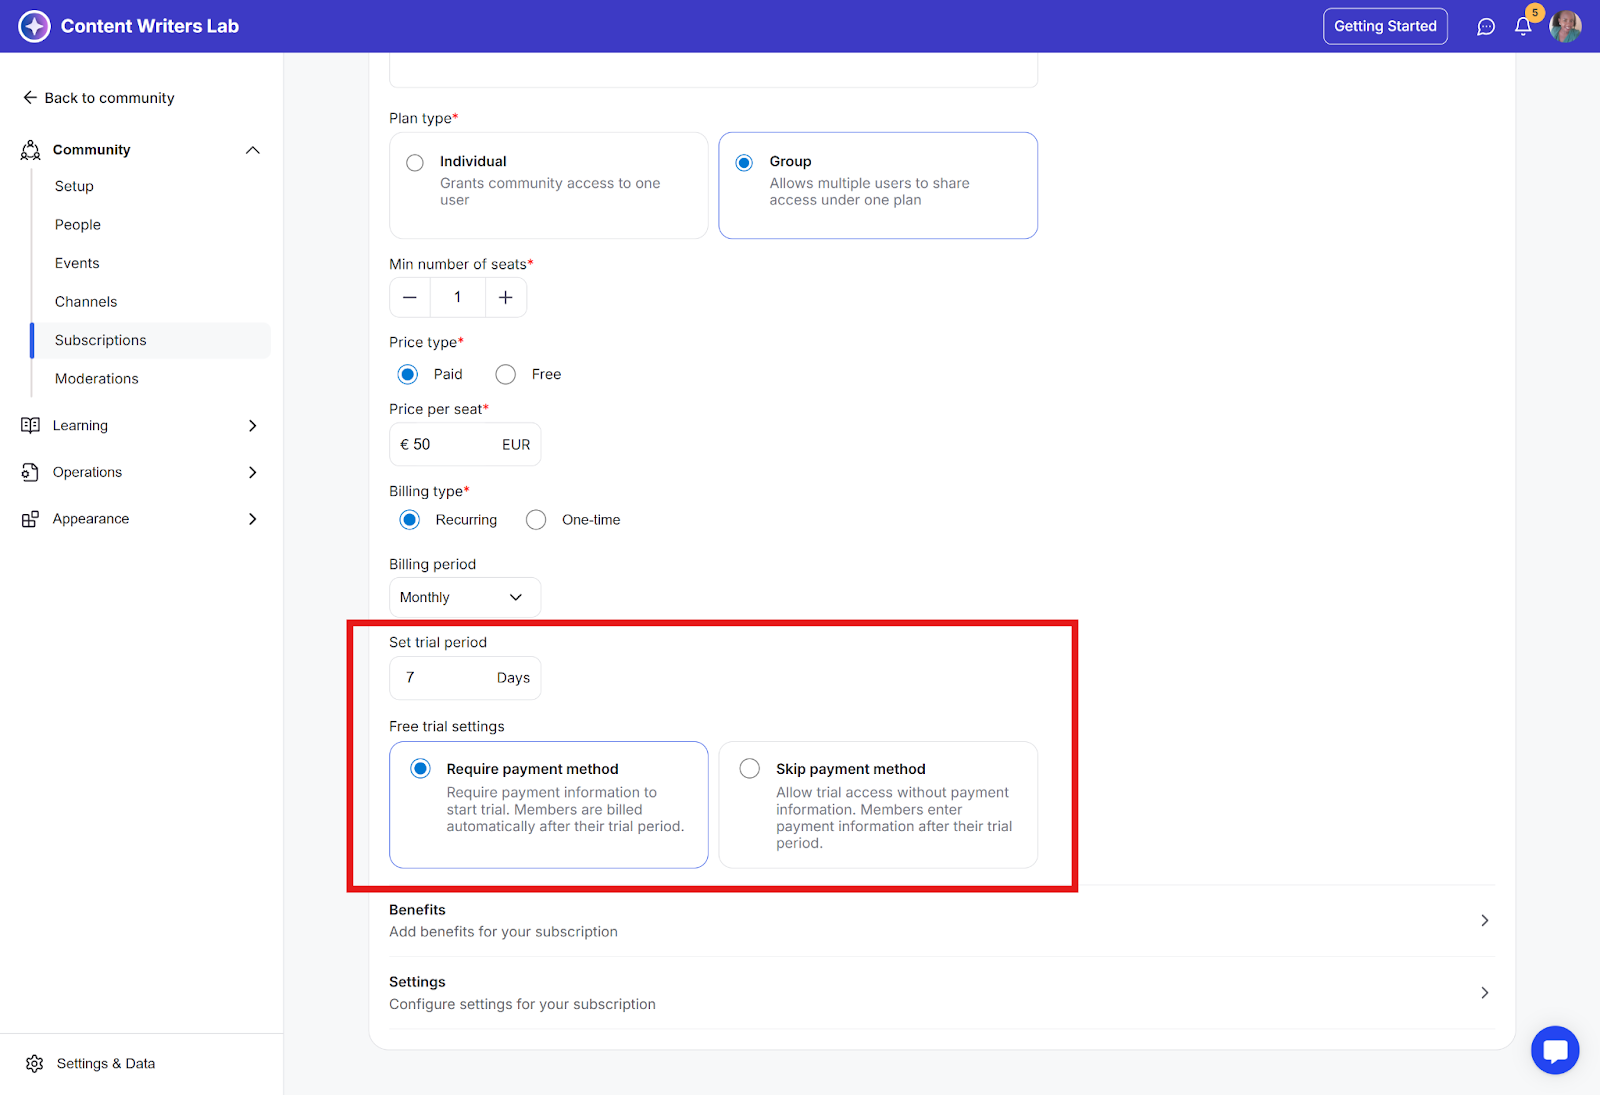
Step 10 (Optional): You can offer a trial with or without a payment method. No-card trials reduce friction for corporate buyers, while card-required trials help qualify buyers and prevent drop-offs later.
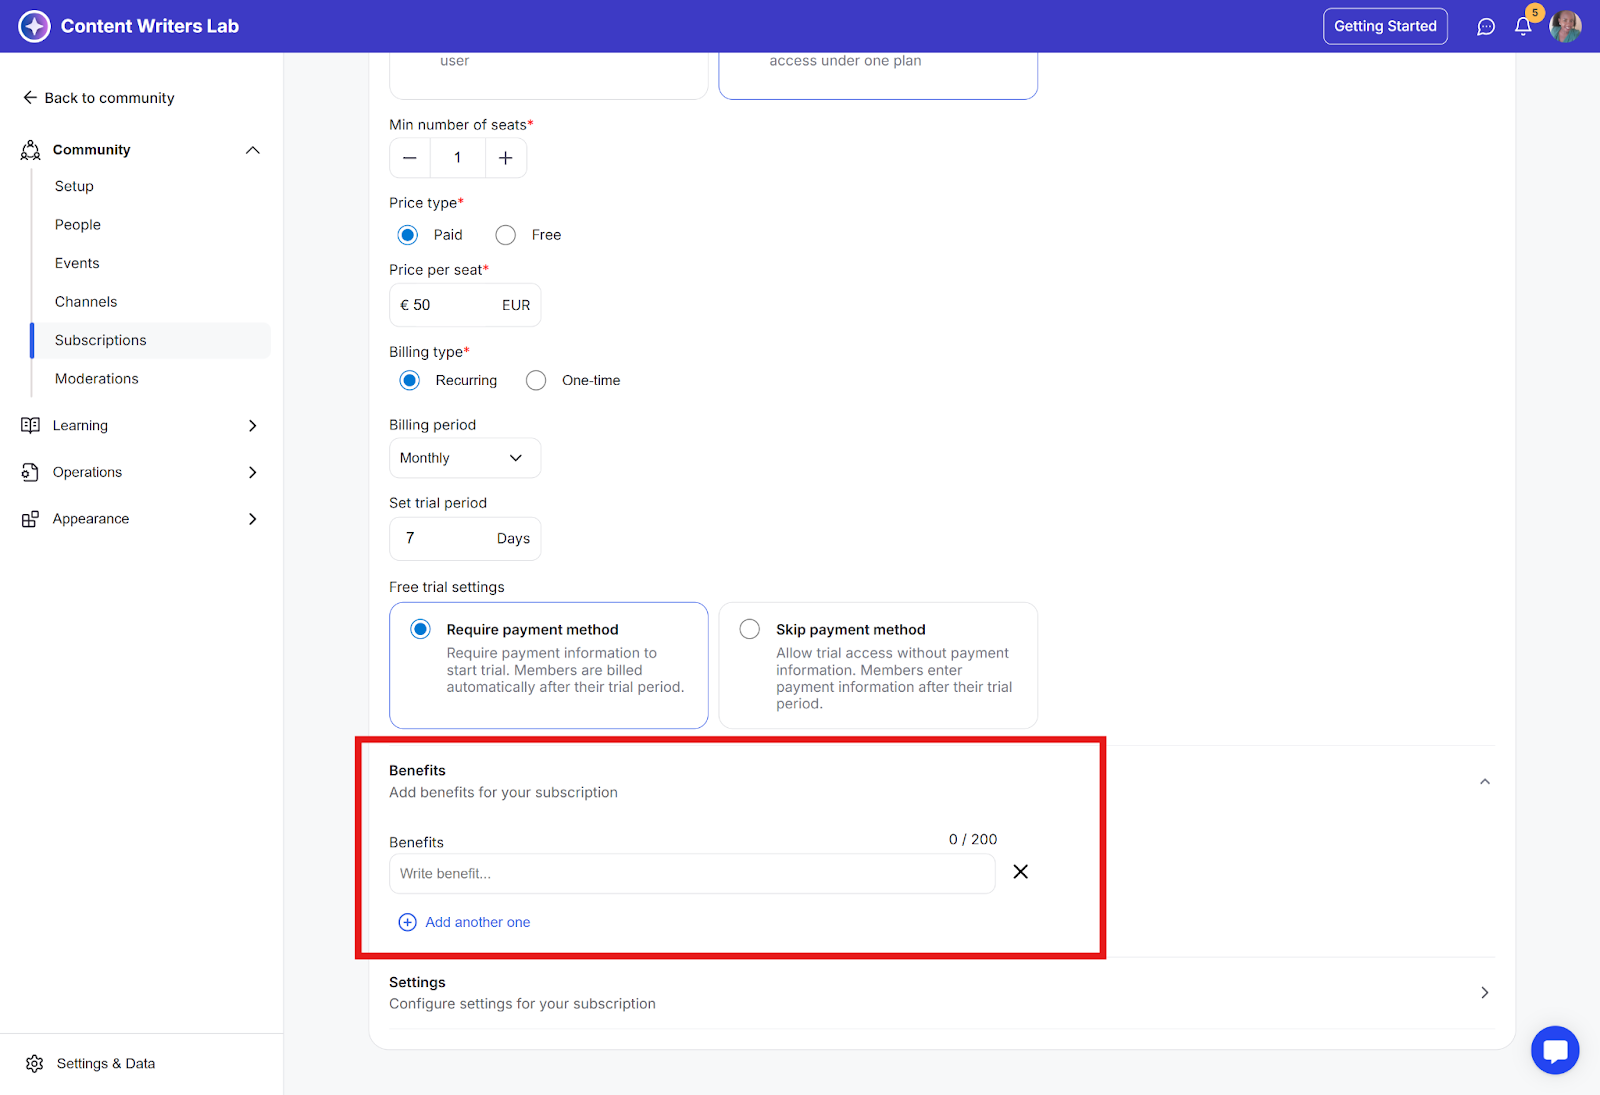
Step 11: List the plan benefits shown at checkout. Use clear, outcome-focused bullets (for example, one invoice for multiple seats or team onboarding with role-based access) to help buyers quickly understand the value without needing a sales call.
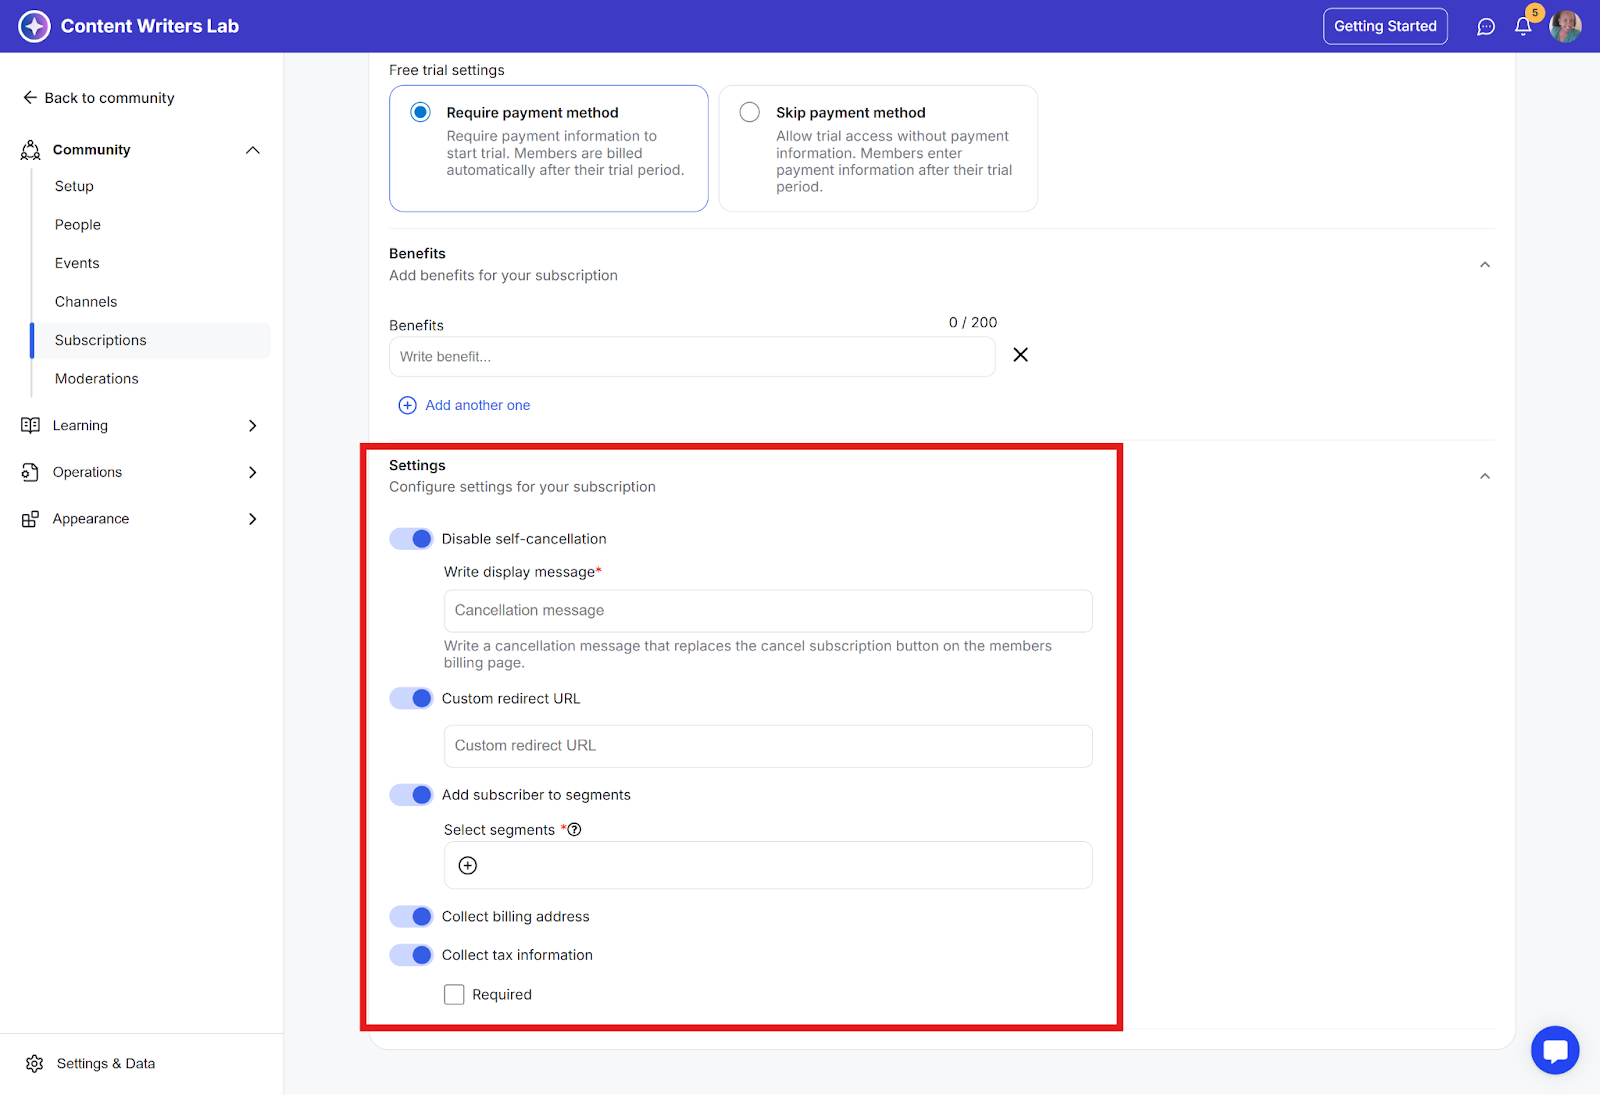
Step 12: In Settings, you can configure advanced options like:
Disable self-cancellation: Stops end users from canceling when billing is managed by a company. You can also display a custom message.
Custom redirect URL: Sends buyers to a welcome or setup page after checkout to speed up onboarding or support upsells.
Add subscriber to segments: Automatically adds members to selected segments with predefined access.
Collect billing address and tax information: Collects both directly on the checkout page.
Step 13:Click on the Save Plan button on the top-right of the dashboard, and it will appear in your subscriptions dashboard, ready to sell.
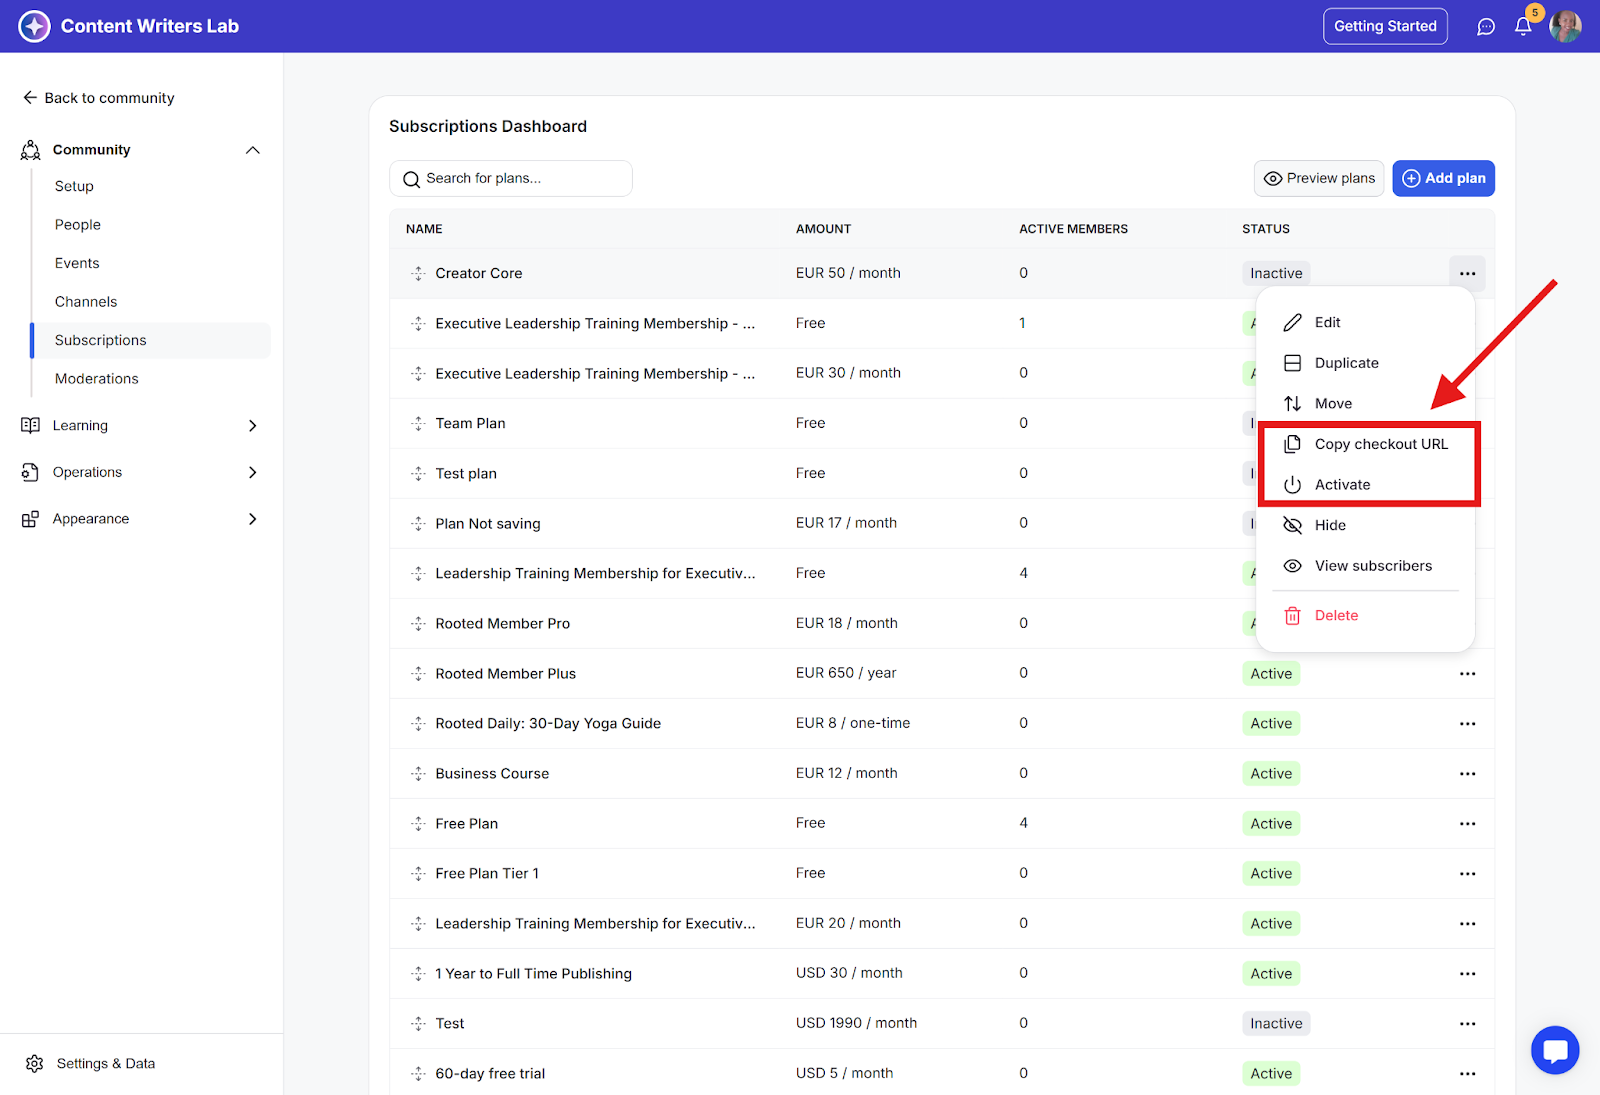
Step 14: Click on the three-dot icon to activate the plan and copy the checkout link to share.
💡Pro tip: Keep the plan name and description brief, simple, and value-focused. Use a name buyers instantly recognize (for example, Team Plan or Group Plan – 10 Seats) and a short description that clearly states who it’s for and what’s included, so the purchase feels obvious and reduces pre-sale questions.
Group subscriptions include two types of members:
Account Owner (Main Subscription Buyer)
Sub-Accounts (Invited Members)
The account owner is the primary buyer who purchases the group plan for their team and manages billing and seats.
Account owners can:
Activate the first seat at checkout (for example, 1/10 seats used).
Access the program immediately and complete standard onboarding.
View invoices, payment methods, plan details, and seat usage.
Increase or decrease the number of seats, with charges or prorated credits applied automatically.
Invite members using secure invite links and generate new links that disable older ones.
Manage all subscription settings, including billing, seats, and invite links.
Sub-accounts are team members who join under the account owner’s plan and occupy one of the purchased seats.
Sub-accounts can:
Join using the owner’s invite link without making a payment.
Complete onboarding and start using the program.
Access permitted content, courses, channels, and member tools.
Cancel their own access to free up a seat for reassignment.
Remain active as long as the owner’s subscription is active, and seats are available.
Sub-accounts cannot:
Access invoices, payment methods, or seat and billing settings.
Account owners have a different Billing dashboard than sub-accounts.
Here’s what the experience looks like for the account owner. At checkout, the buyer selects the number of seats they want, fills in the required details, and completes the purchase.
After completing the purchase, they become the account owner and go through the community’s onboarding process.
Once onboarded, the account owner can access the product or community included in the plan and is ready to invite new members (sub-accounts) to join.
Account owners can directly manage the group subscription through the billing details.
Here’s how to do it and what the experience looks like:
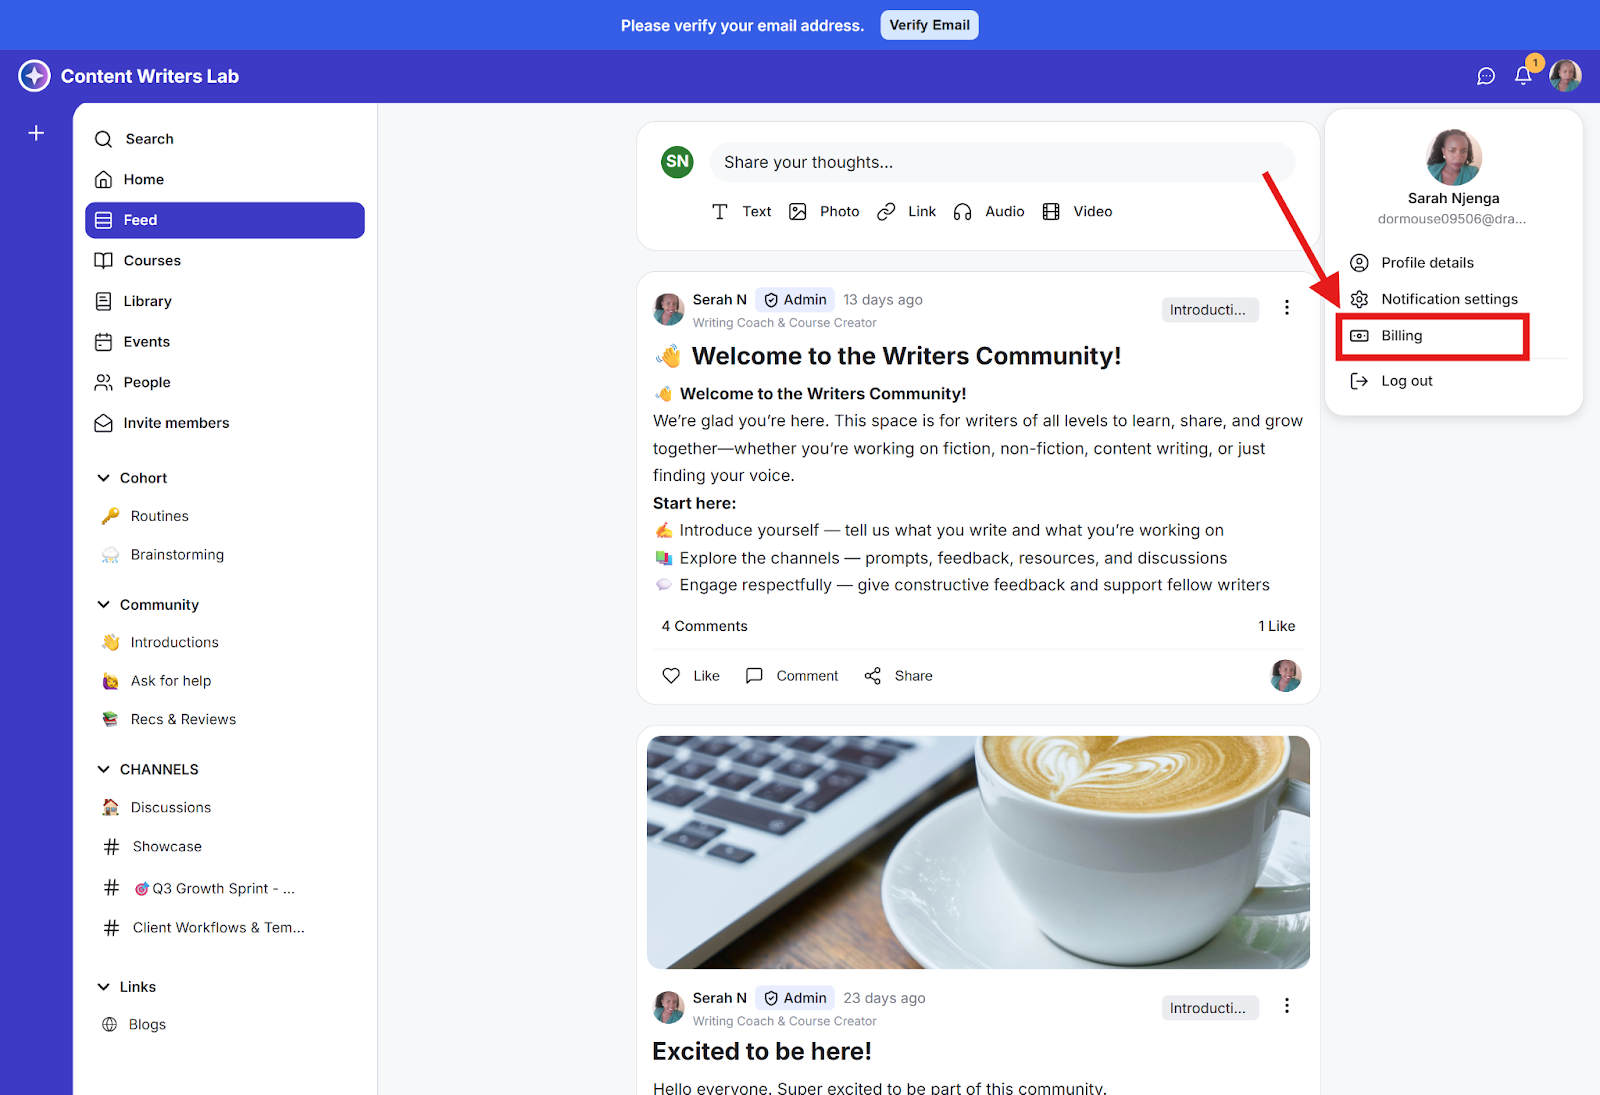
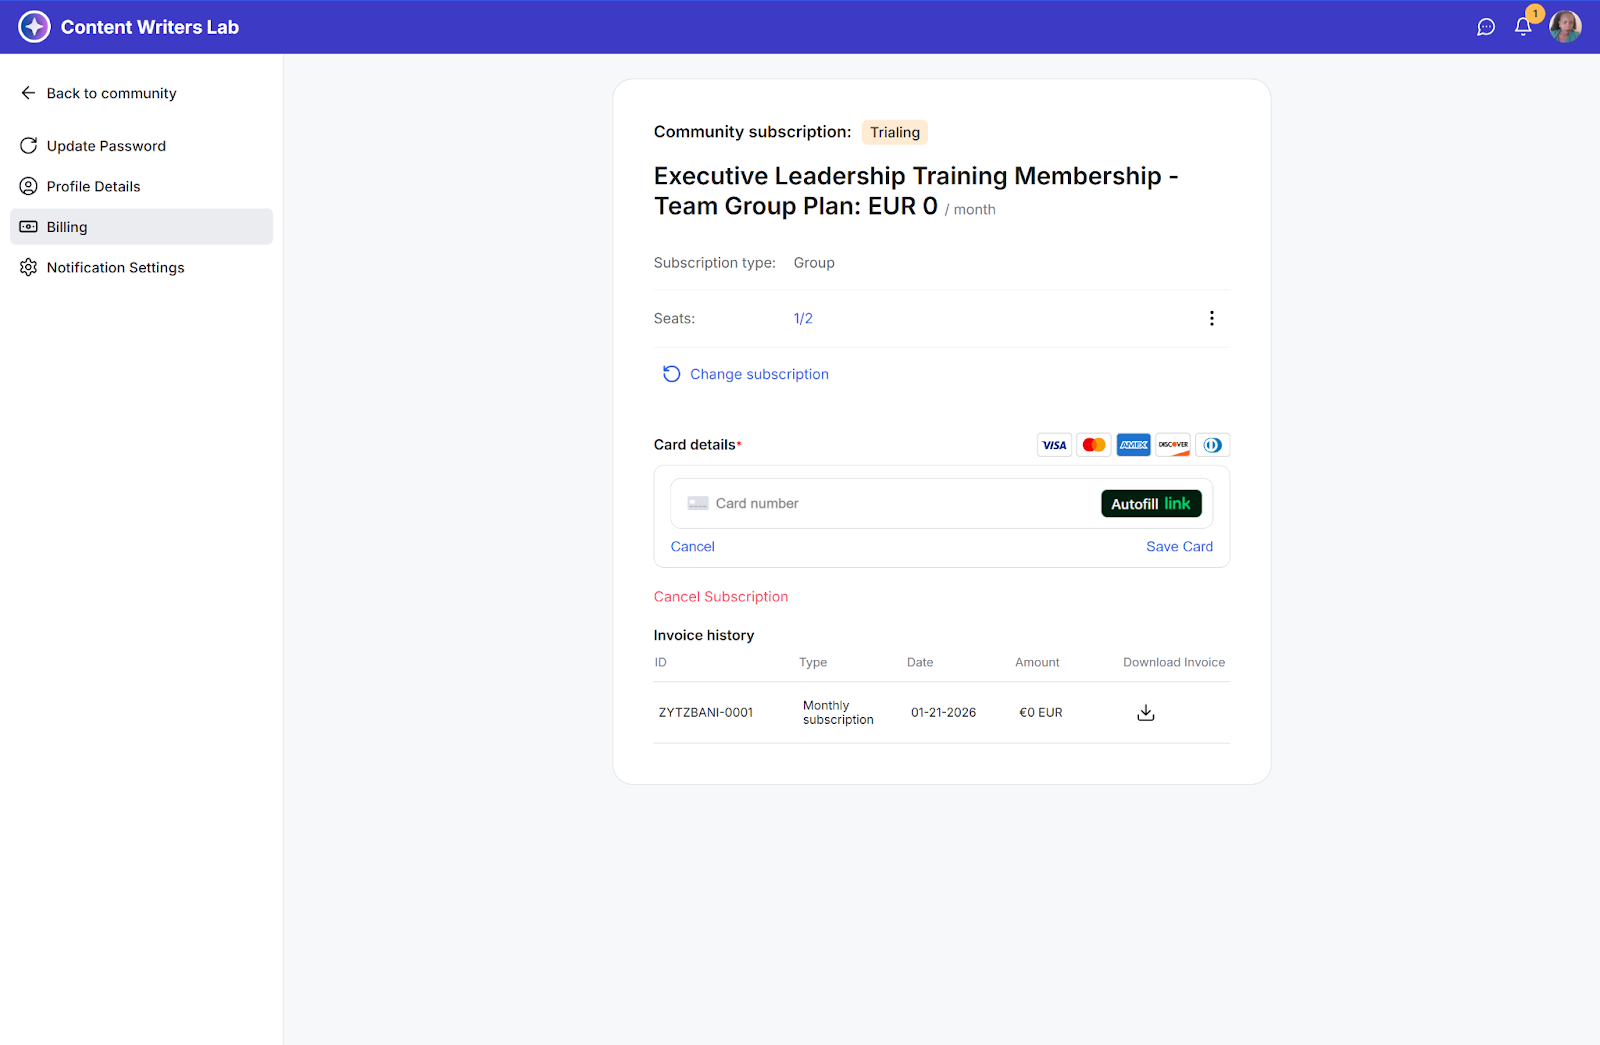
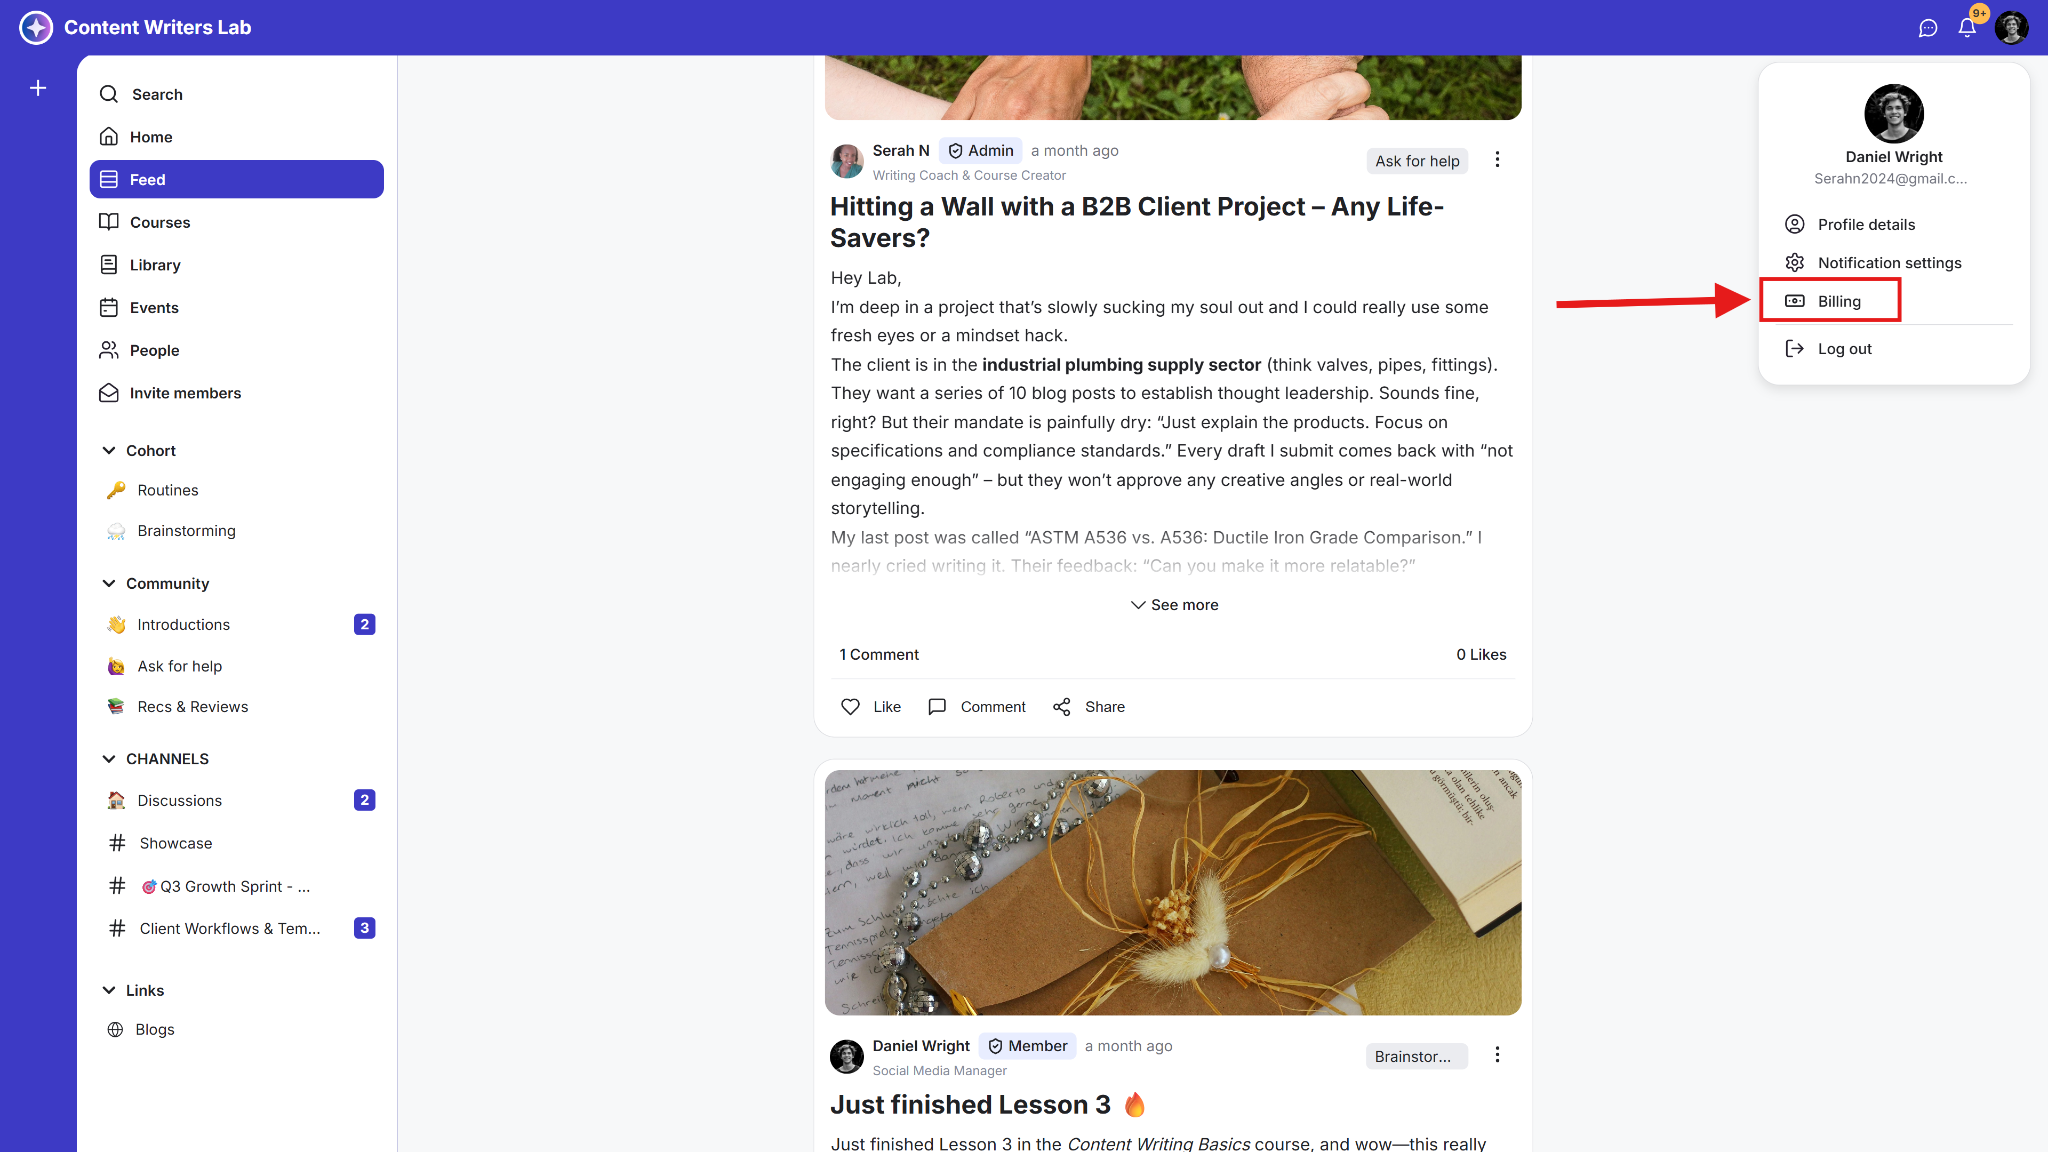
Step 1: Click your profile icon in the top-right corner of your community. From the drop-down, click Billing.
Step 2: This opens your Billing Dashboard, where you can view all the billing details, manage your group subscription, invite your sub-accounts, and manage your seats.
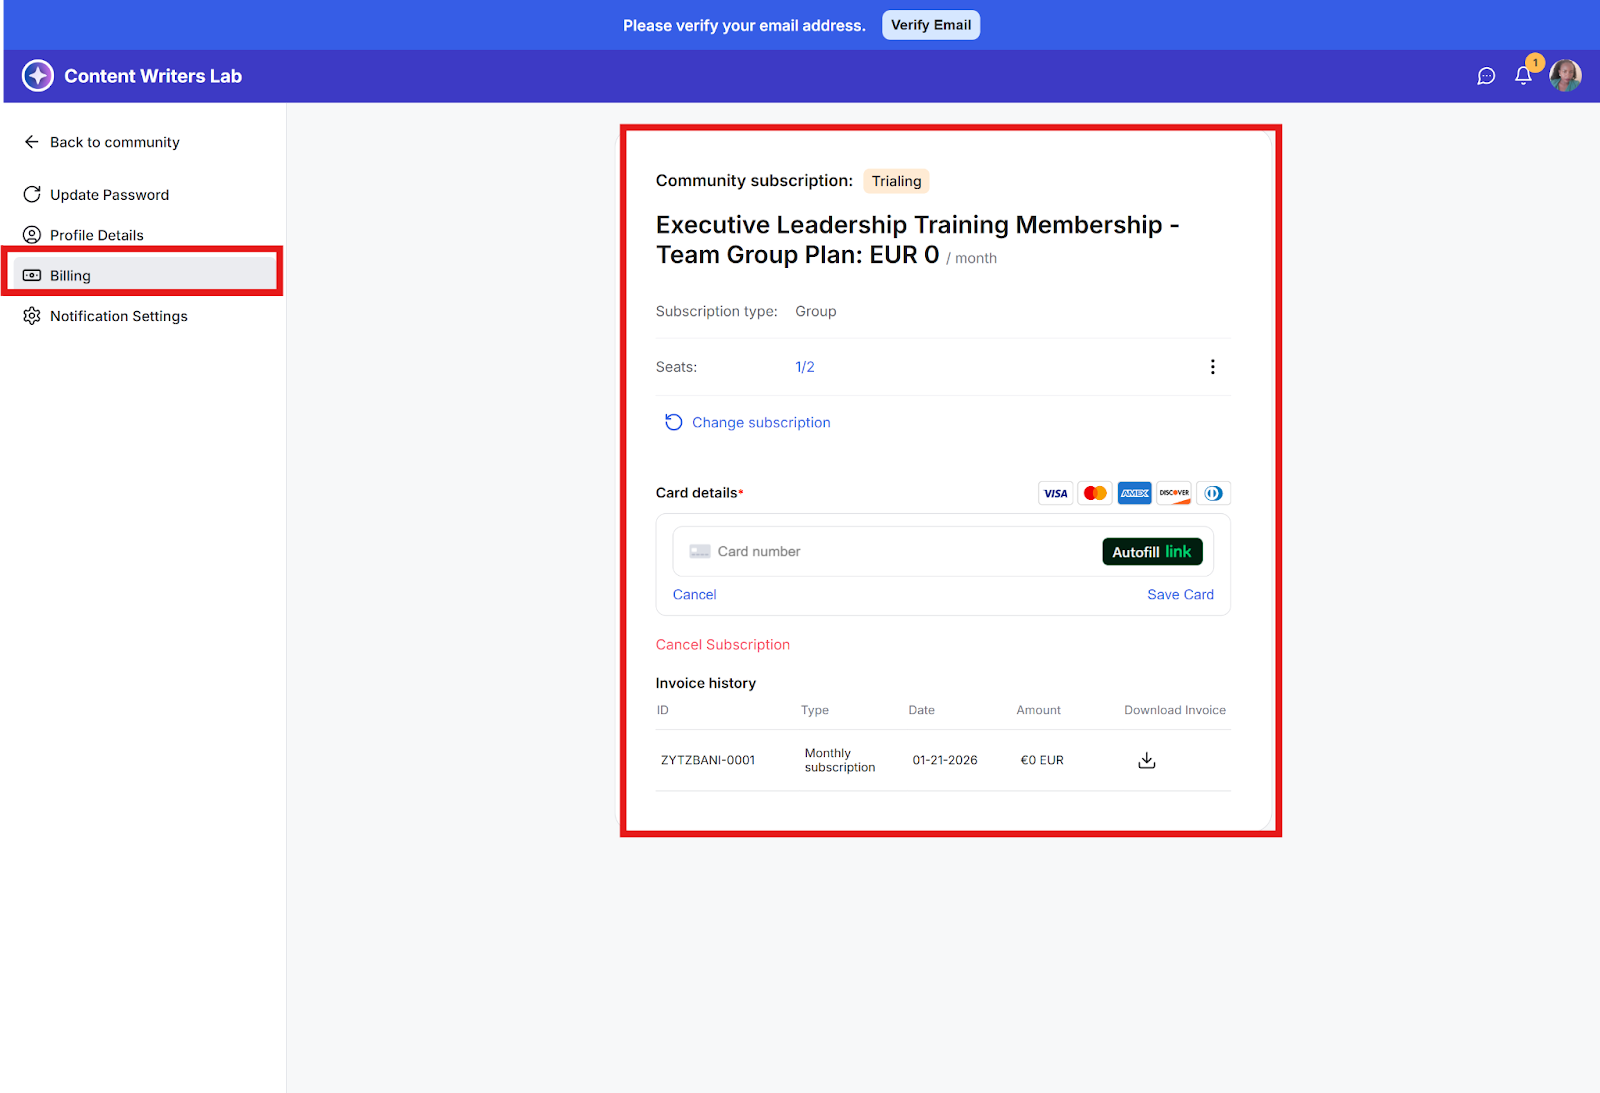
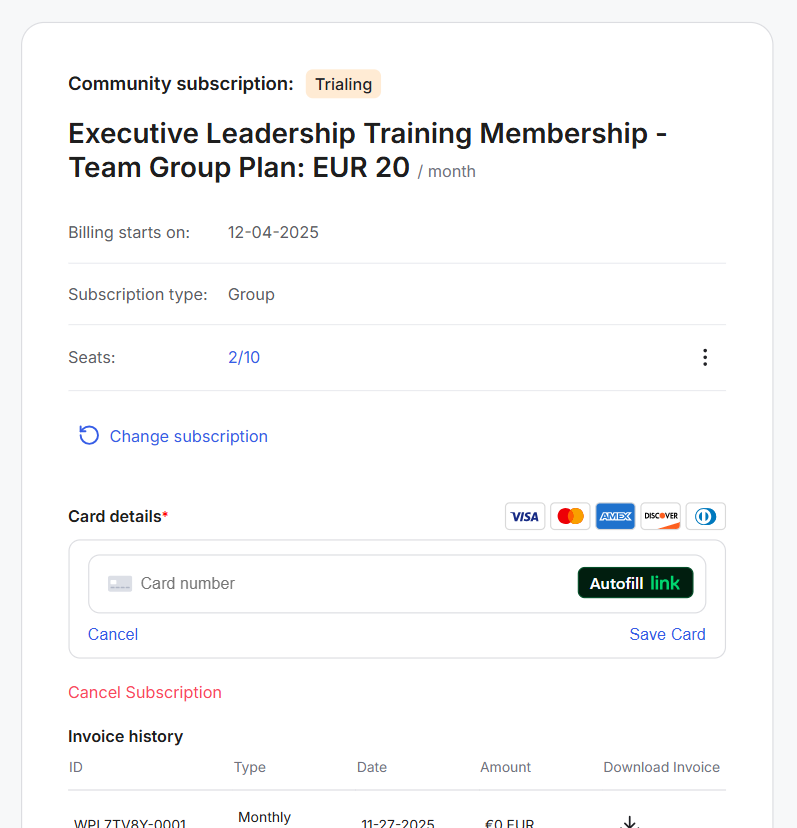
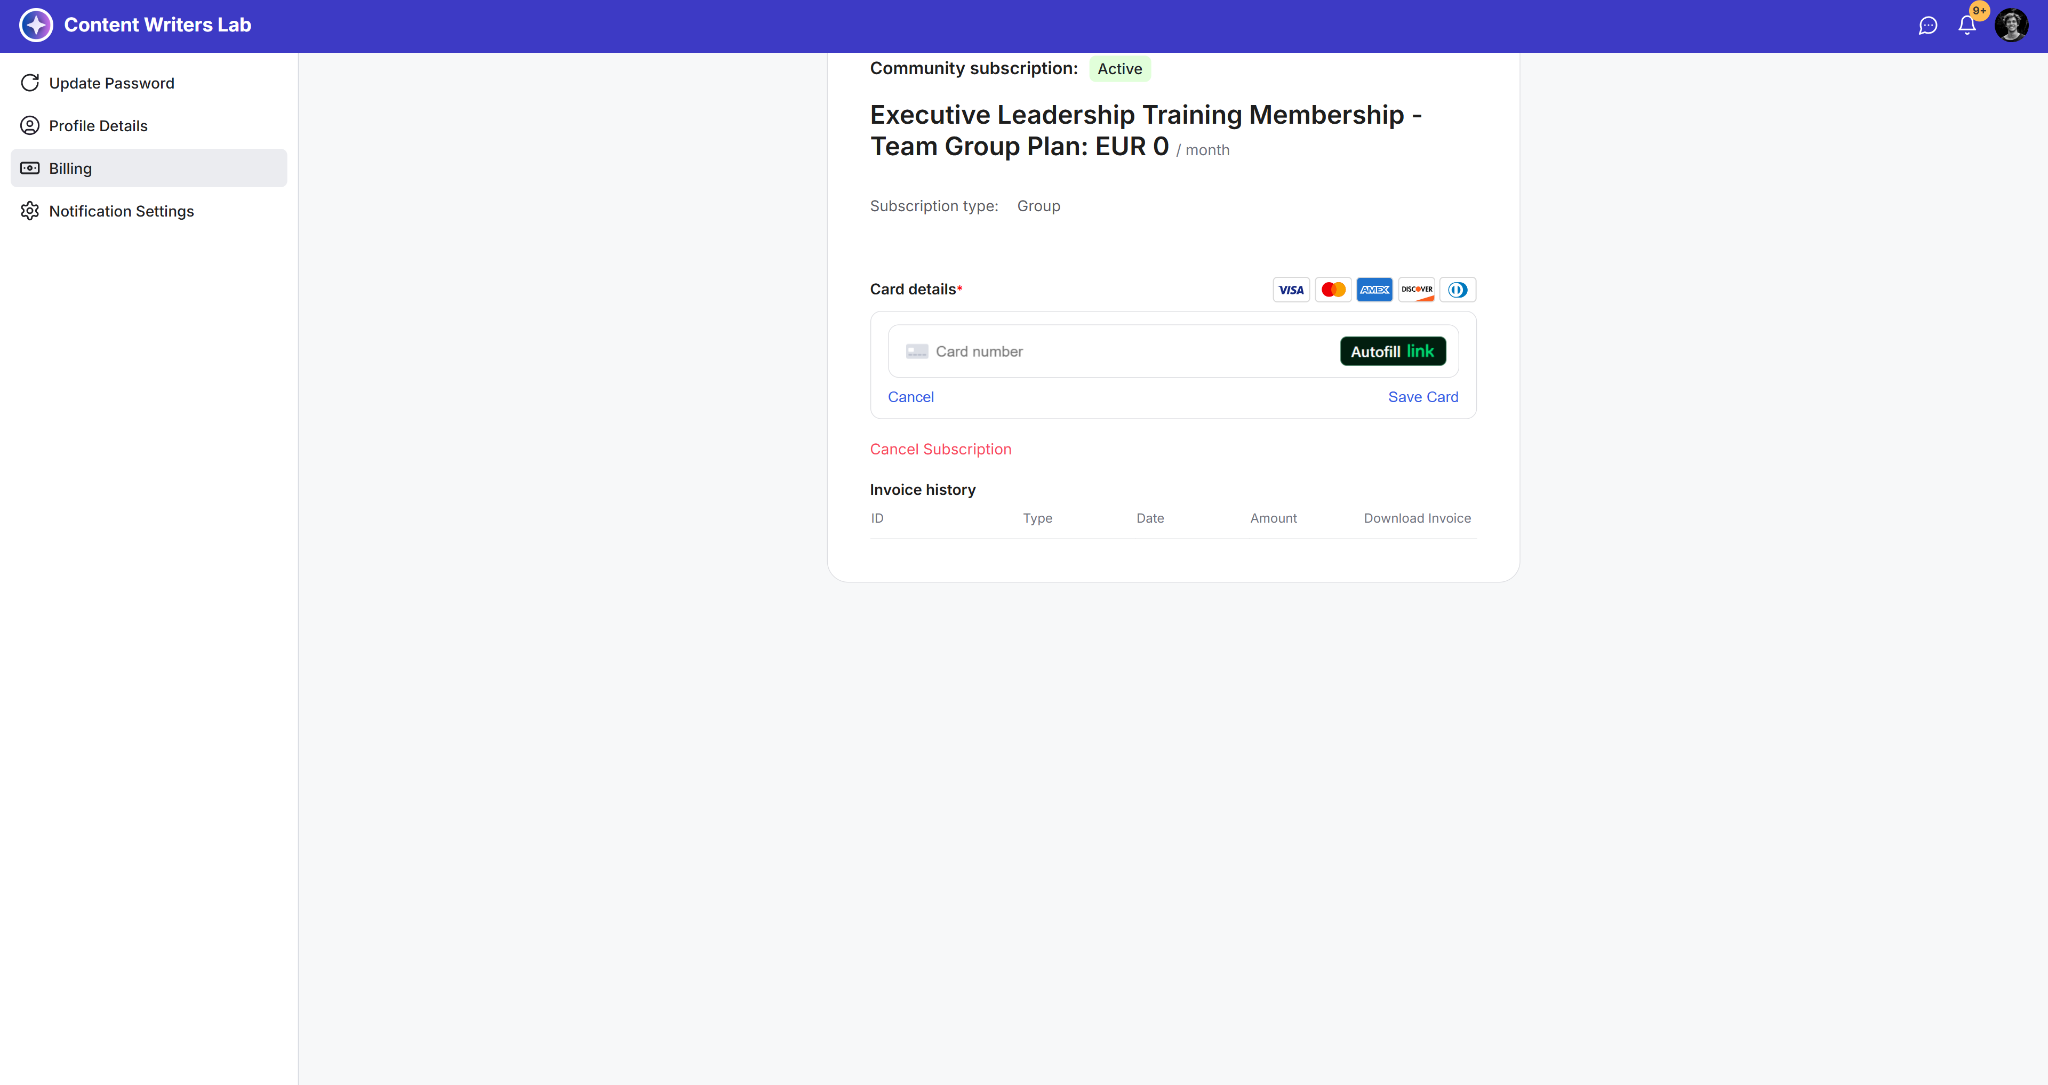
The account owner takes the first seat in the plan. You will be counted as one of the members who take a seat from the total seats you paid for. On the Billing Dashboard, you will see your subscription type and the total number of seats taken. The counter shows 1/total seats right away (e.g., 1/10) because you take the first seat.
As the account owner, you have full visibility and control over billing and subscription details. You will see:
All payment and card information, with the option to cancel your subscription.
The Invoices tab, where you can view and download all invoices.
Seat usage status and other subscription details.
Sub-accounts, however, do not have access to any of this information on their Billing Dashboard.
Now, let’s learn how you can invite sub-accounts (your fellow plan members) to join the plan and access the product/membership they collectively paid for.
Step 1: Click your profile icon in the top-right corner of your community and select Billing.

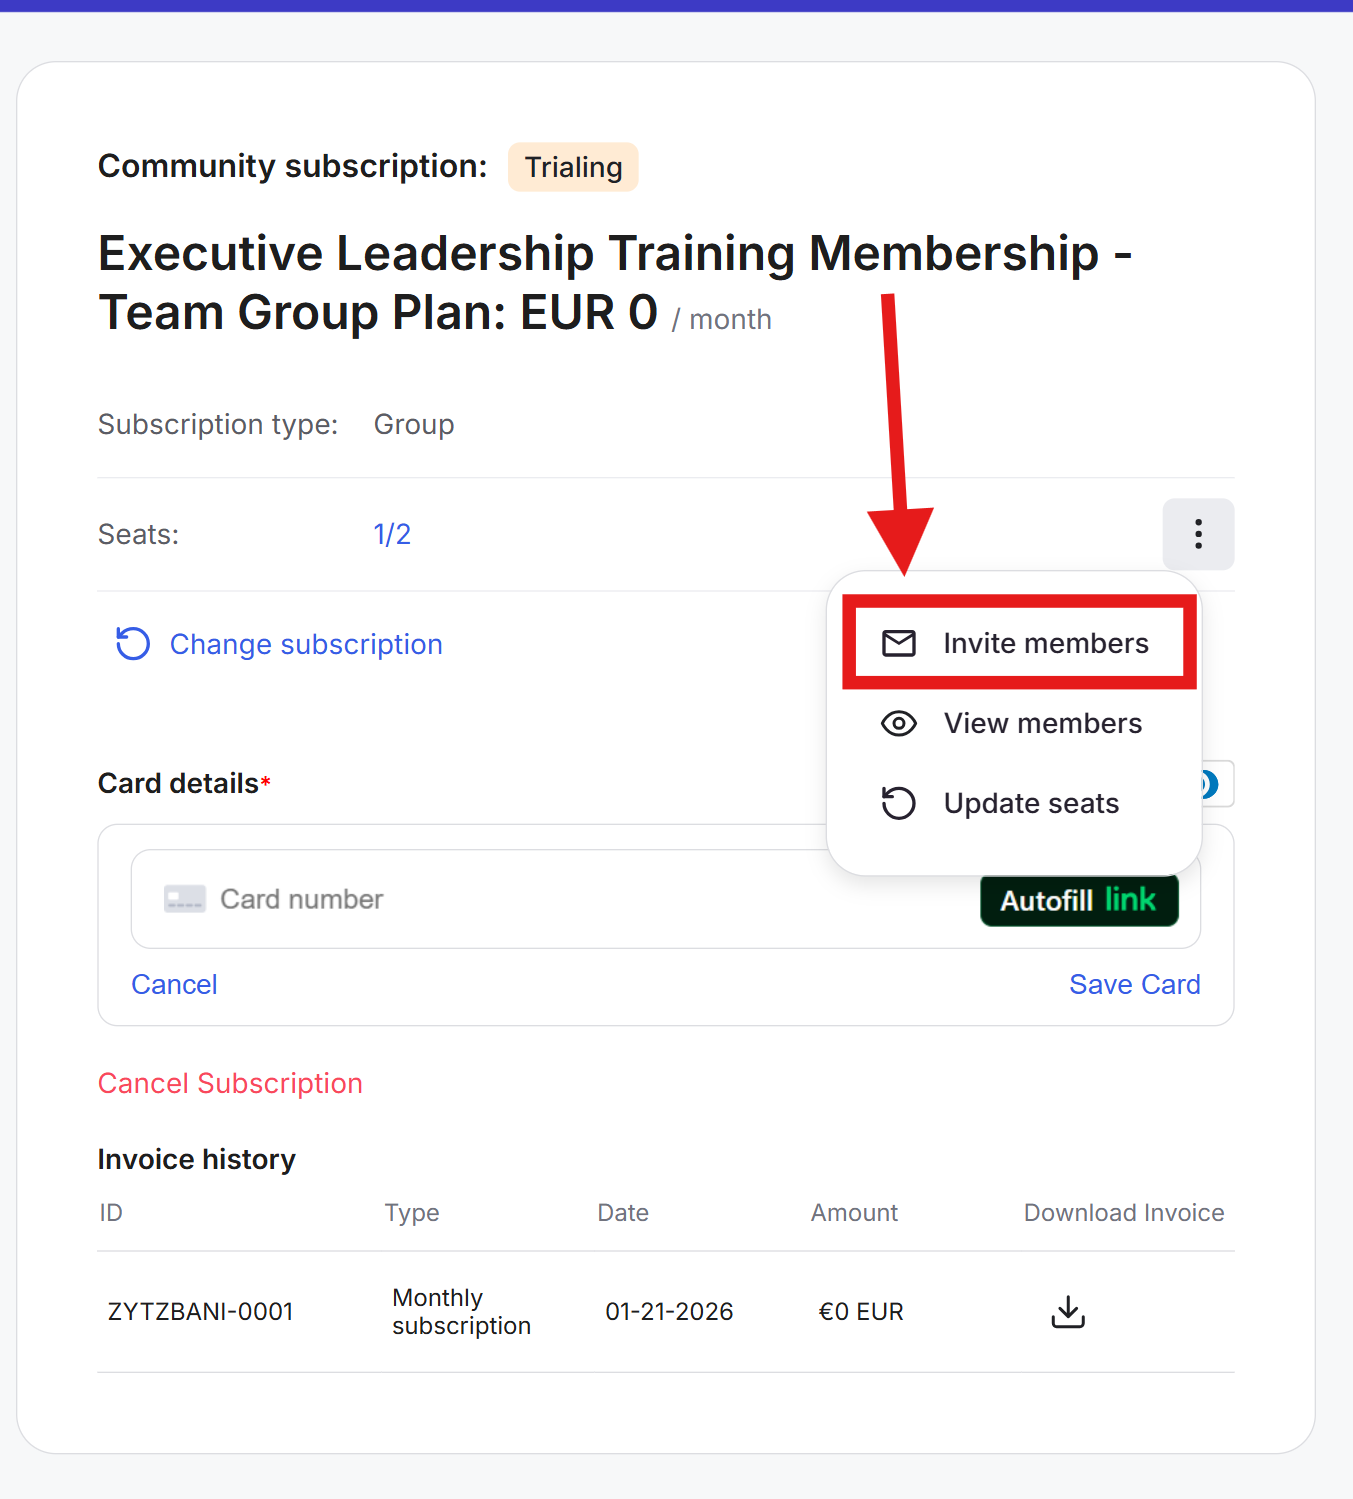
Step 2: You’ll see the seat usage status showing the current number of occupied seats out of the total you paid for. Click the three-dot icon on the right to open a drop-down menu. Select Invite Members.
Step 3: A pop-up appears with the invite link. Click the copy icon to copy the link. Share this link with other members so they can sign up for the subscription for free and take a seat.
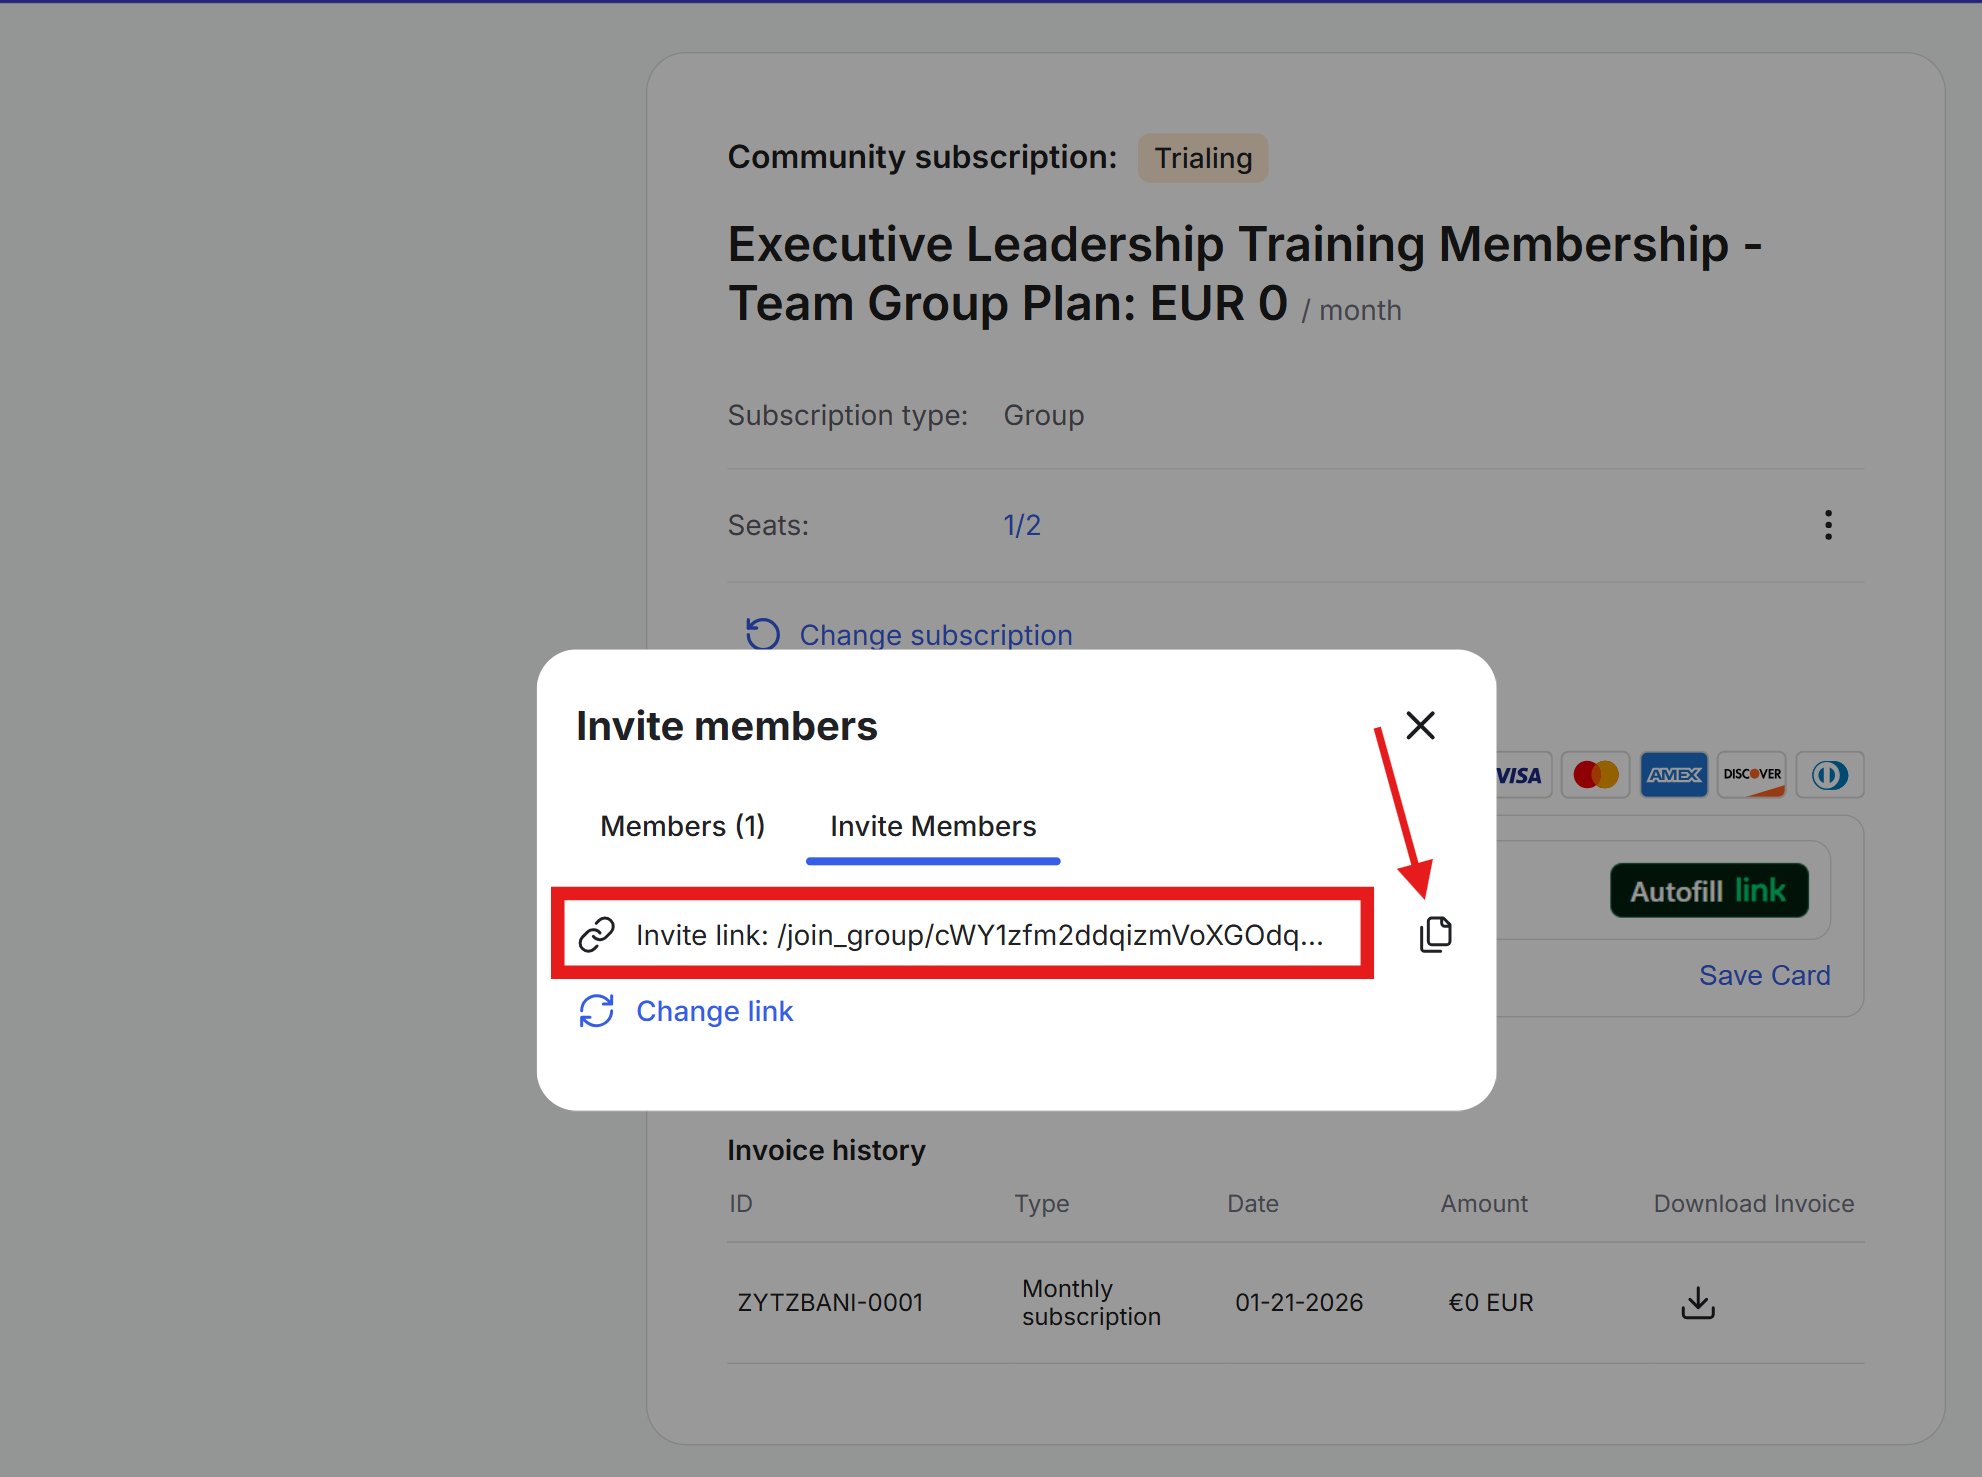
Step 4: You can also create a new invite link by clicking the change link option in the same pop-up.
Note: When a new link is created, the older link is deactivated immediately.
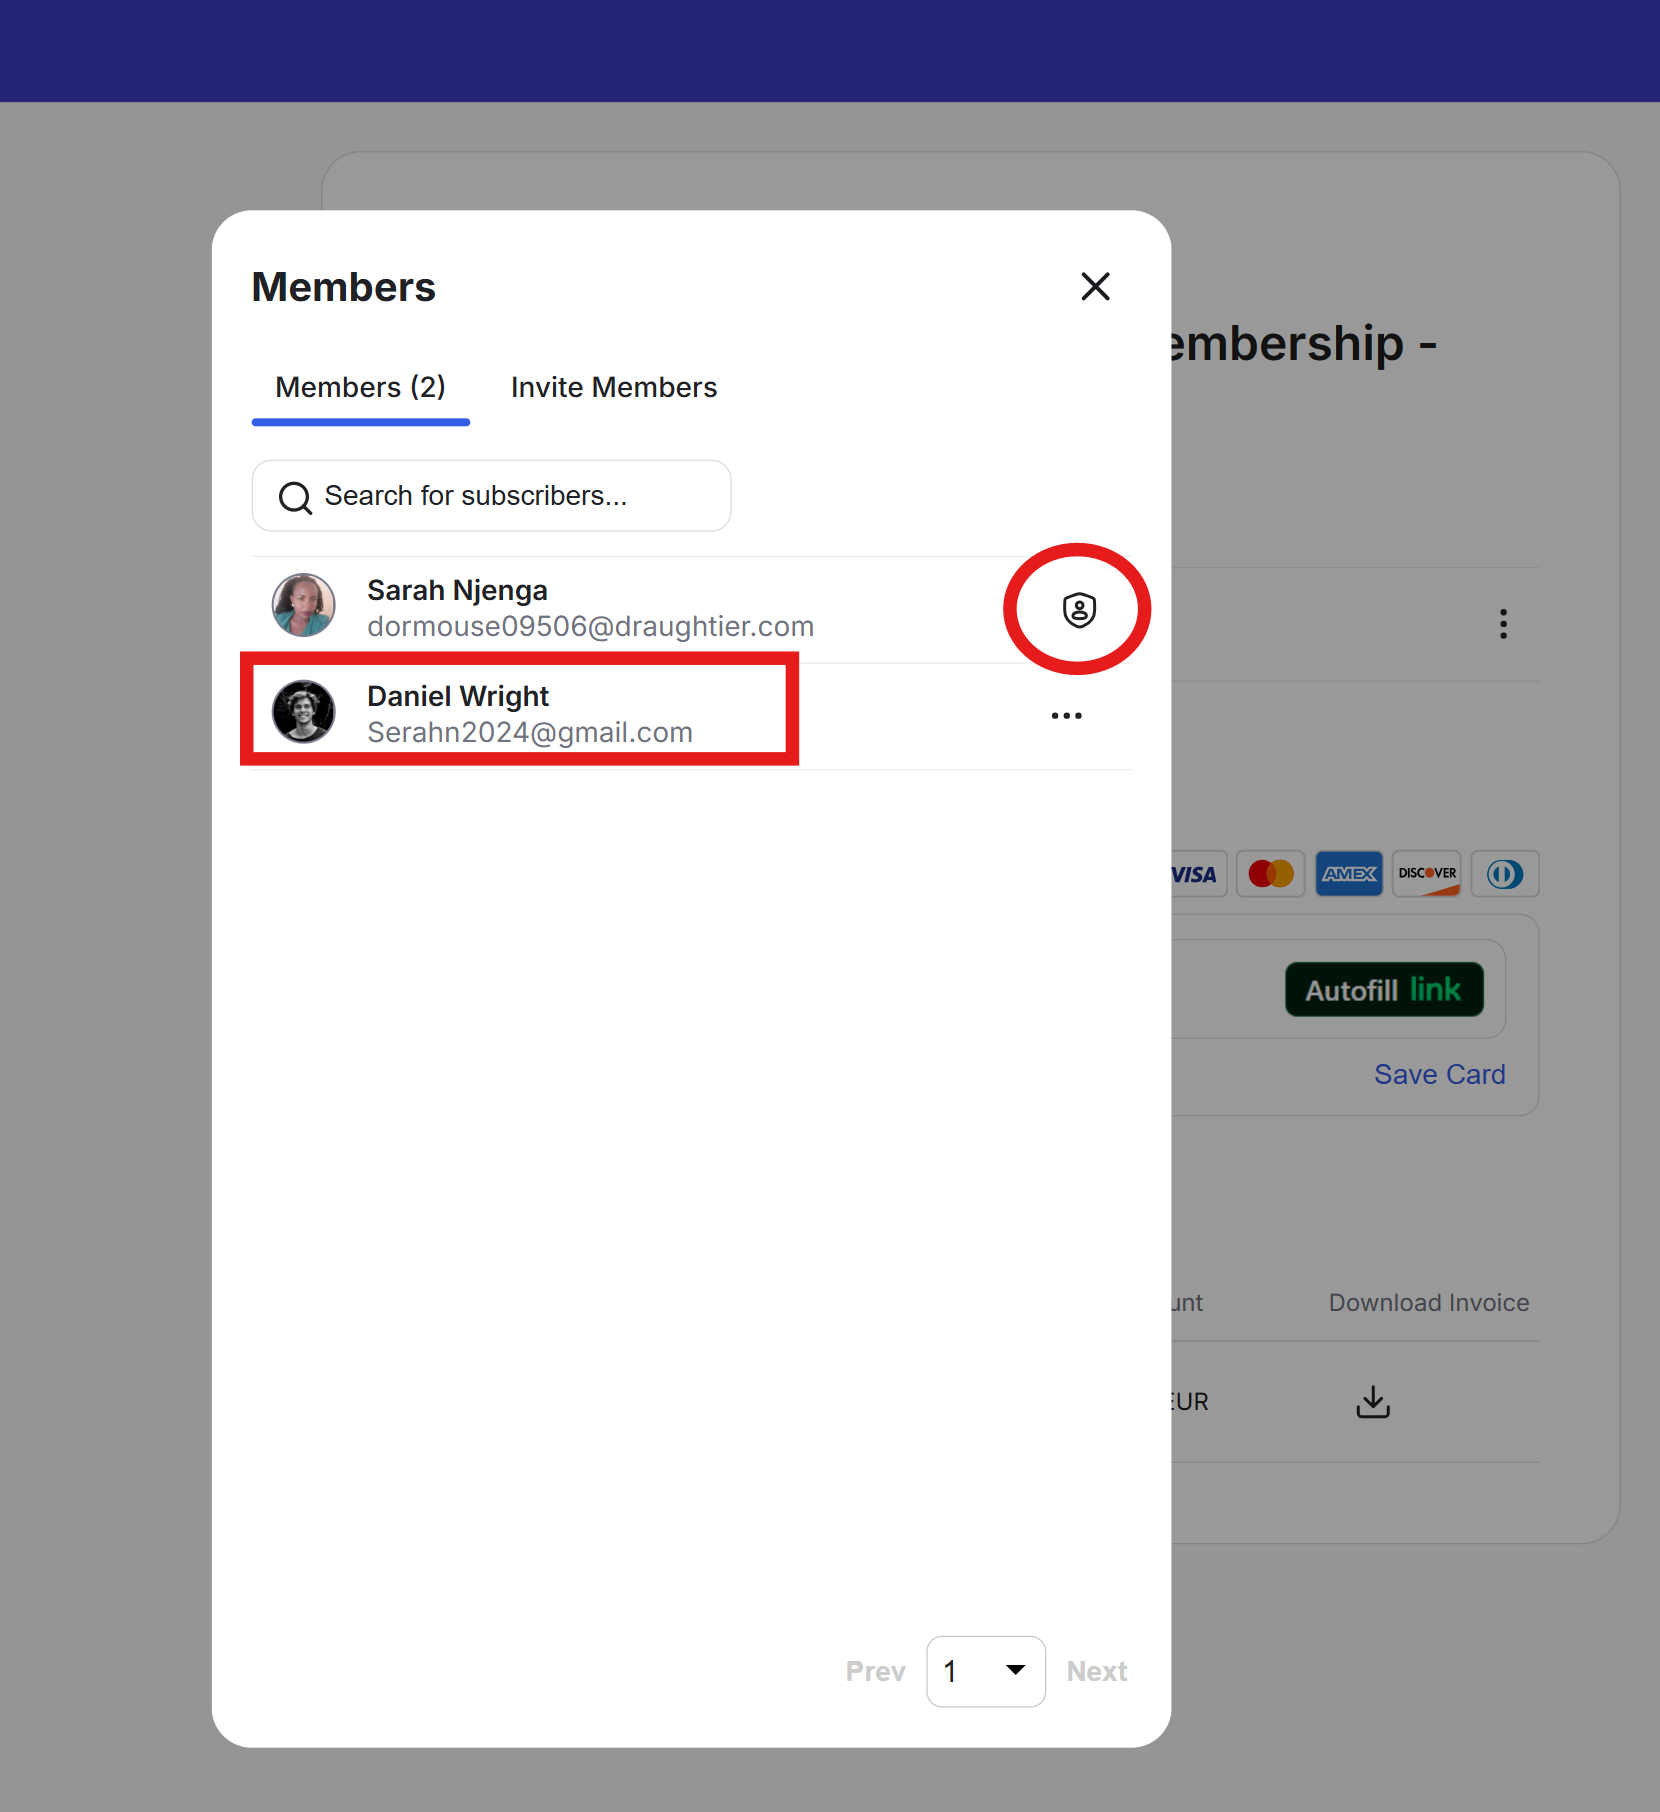
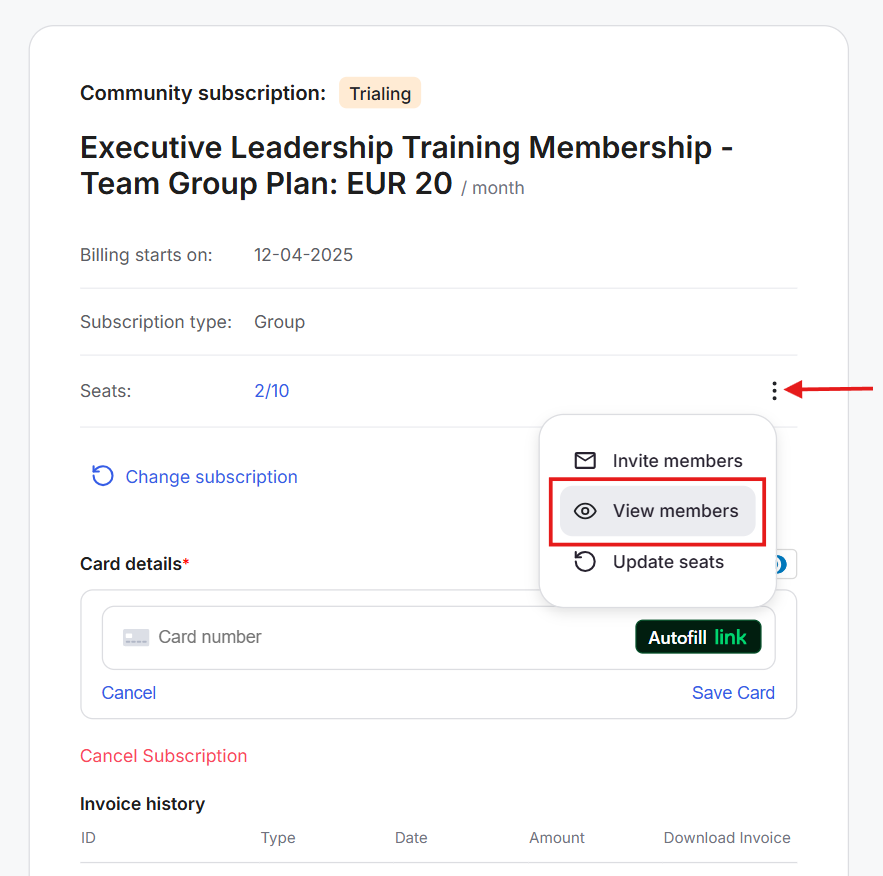
Step 5: When a new member joins as a sub-account, they occupy a seat, which updates in your seat usage status. To see all sub-accounts, click the three-dot icon and select View Members from the drop-down.

Step 6: A pop-up opens with a search bar. You will see your name first, with an account owner icon next to it. Below your name, you will see all sub-accounts that have joined the subscription and taken a seat.
As an account owner, you can adjust the number of seats in your group subscription, either increasing or decreasing them.
Note: You cannot reduce the seat count below the minimum set by the community for your group subscription.
Here’s how to update the number of seats:
Step 1: Click your profile icon in the top-right corner of your community. From the drop-down, select Billing.

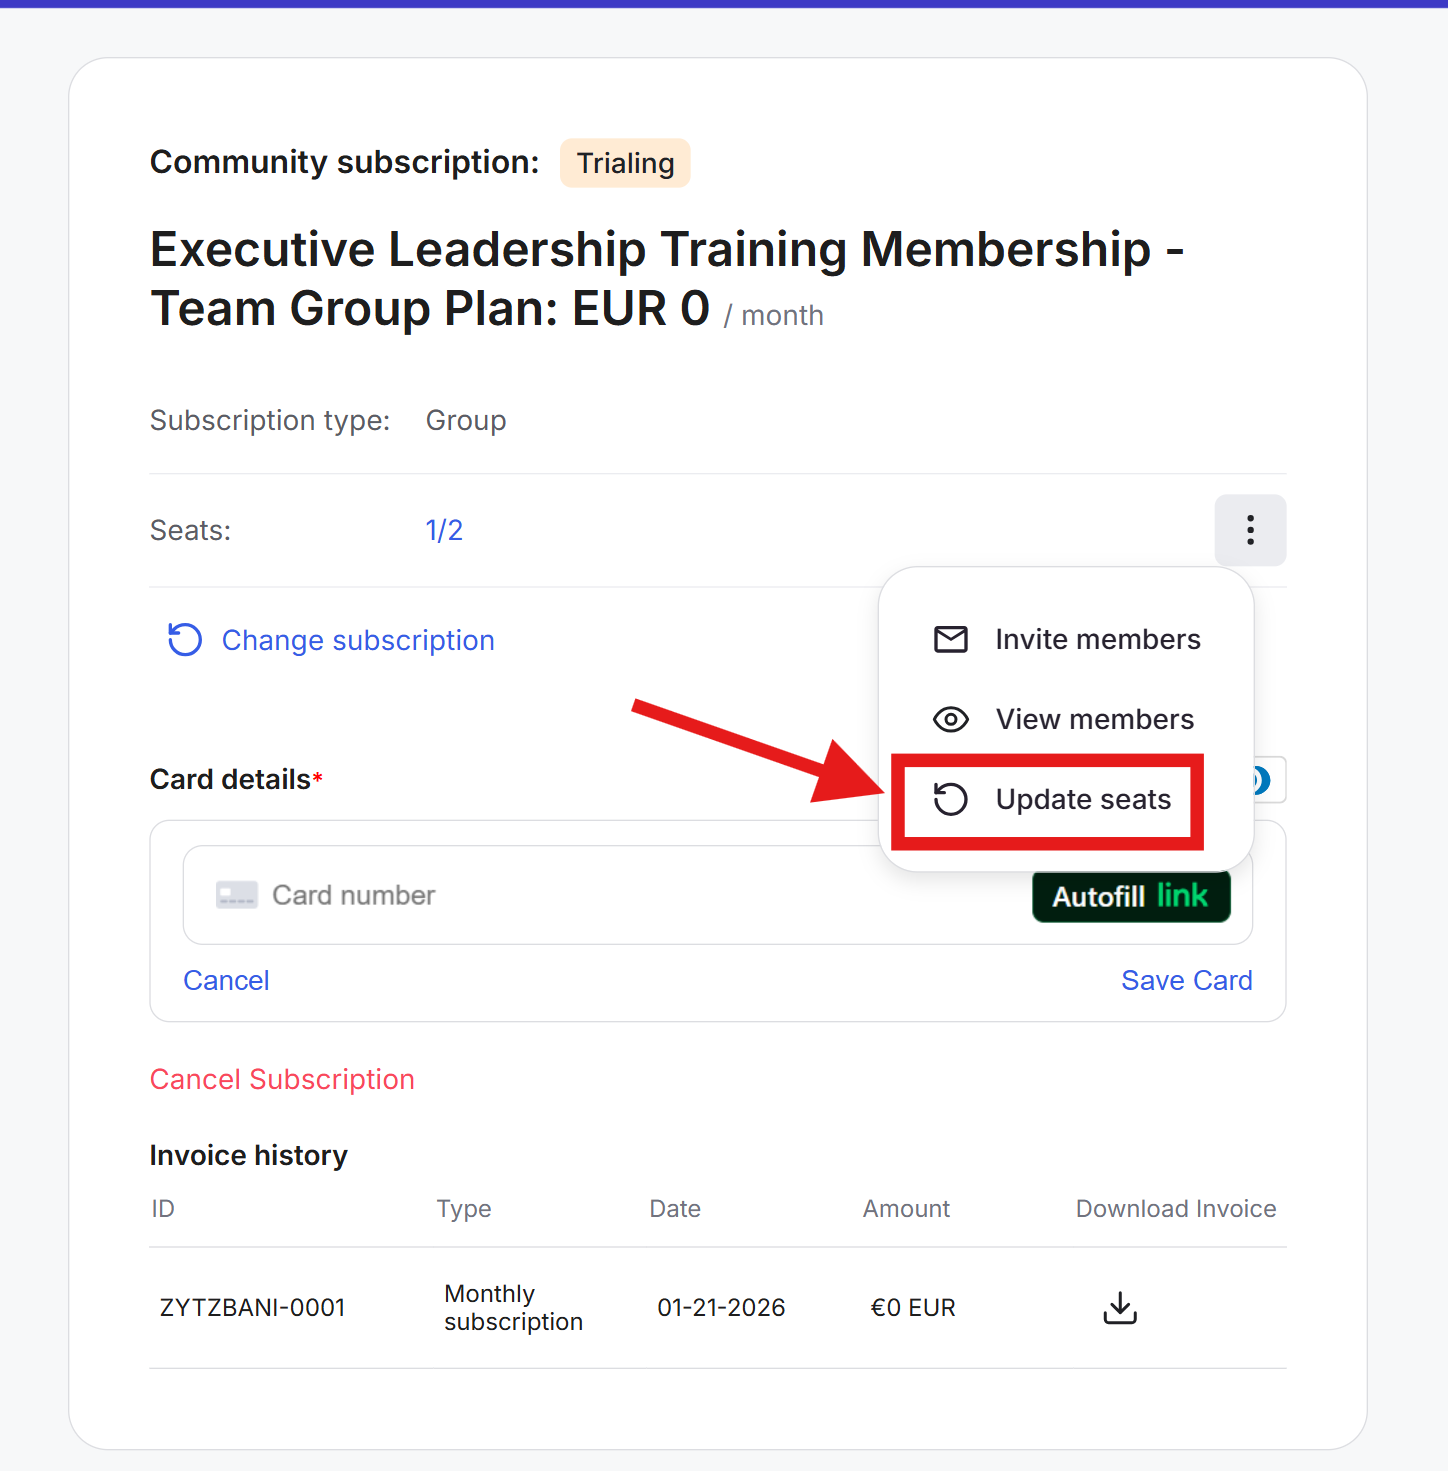
Step 2: This opens your Billing Dashboard, where you’ll see the seat usage status that shows the current number of occupied seats out of the total you paid for.
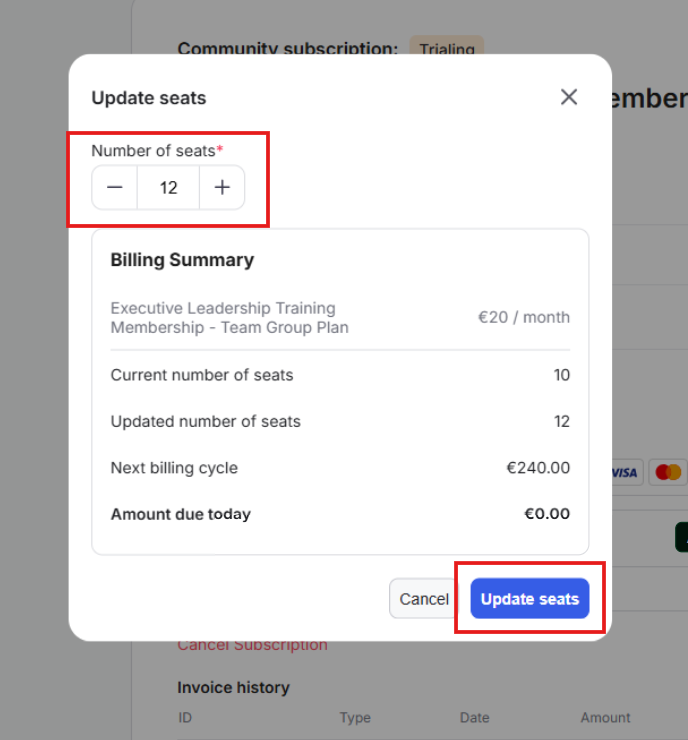
Step 3: Right next to the counter, click the three-dot icon to open a drop-down menu. Select Update Seats.
Step 4: A pop-up opens with a seat number adjuster. Update the number of seats here. The pop-up will show the amount due.
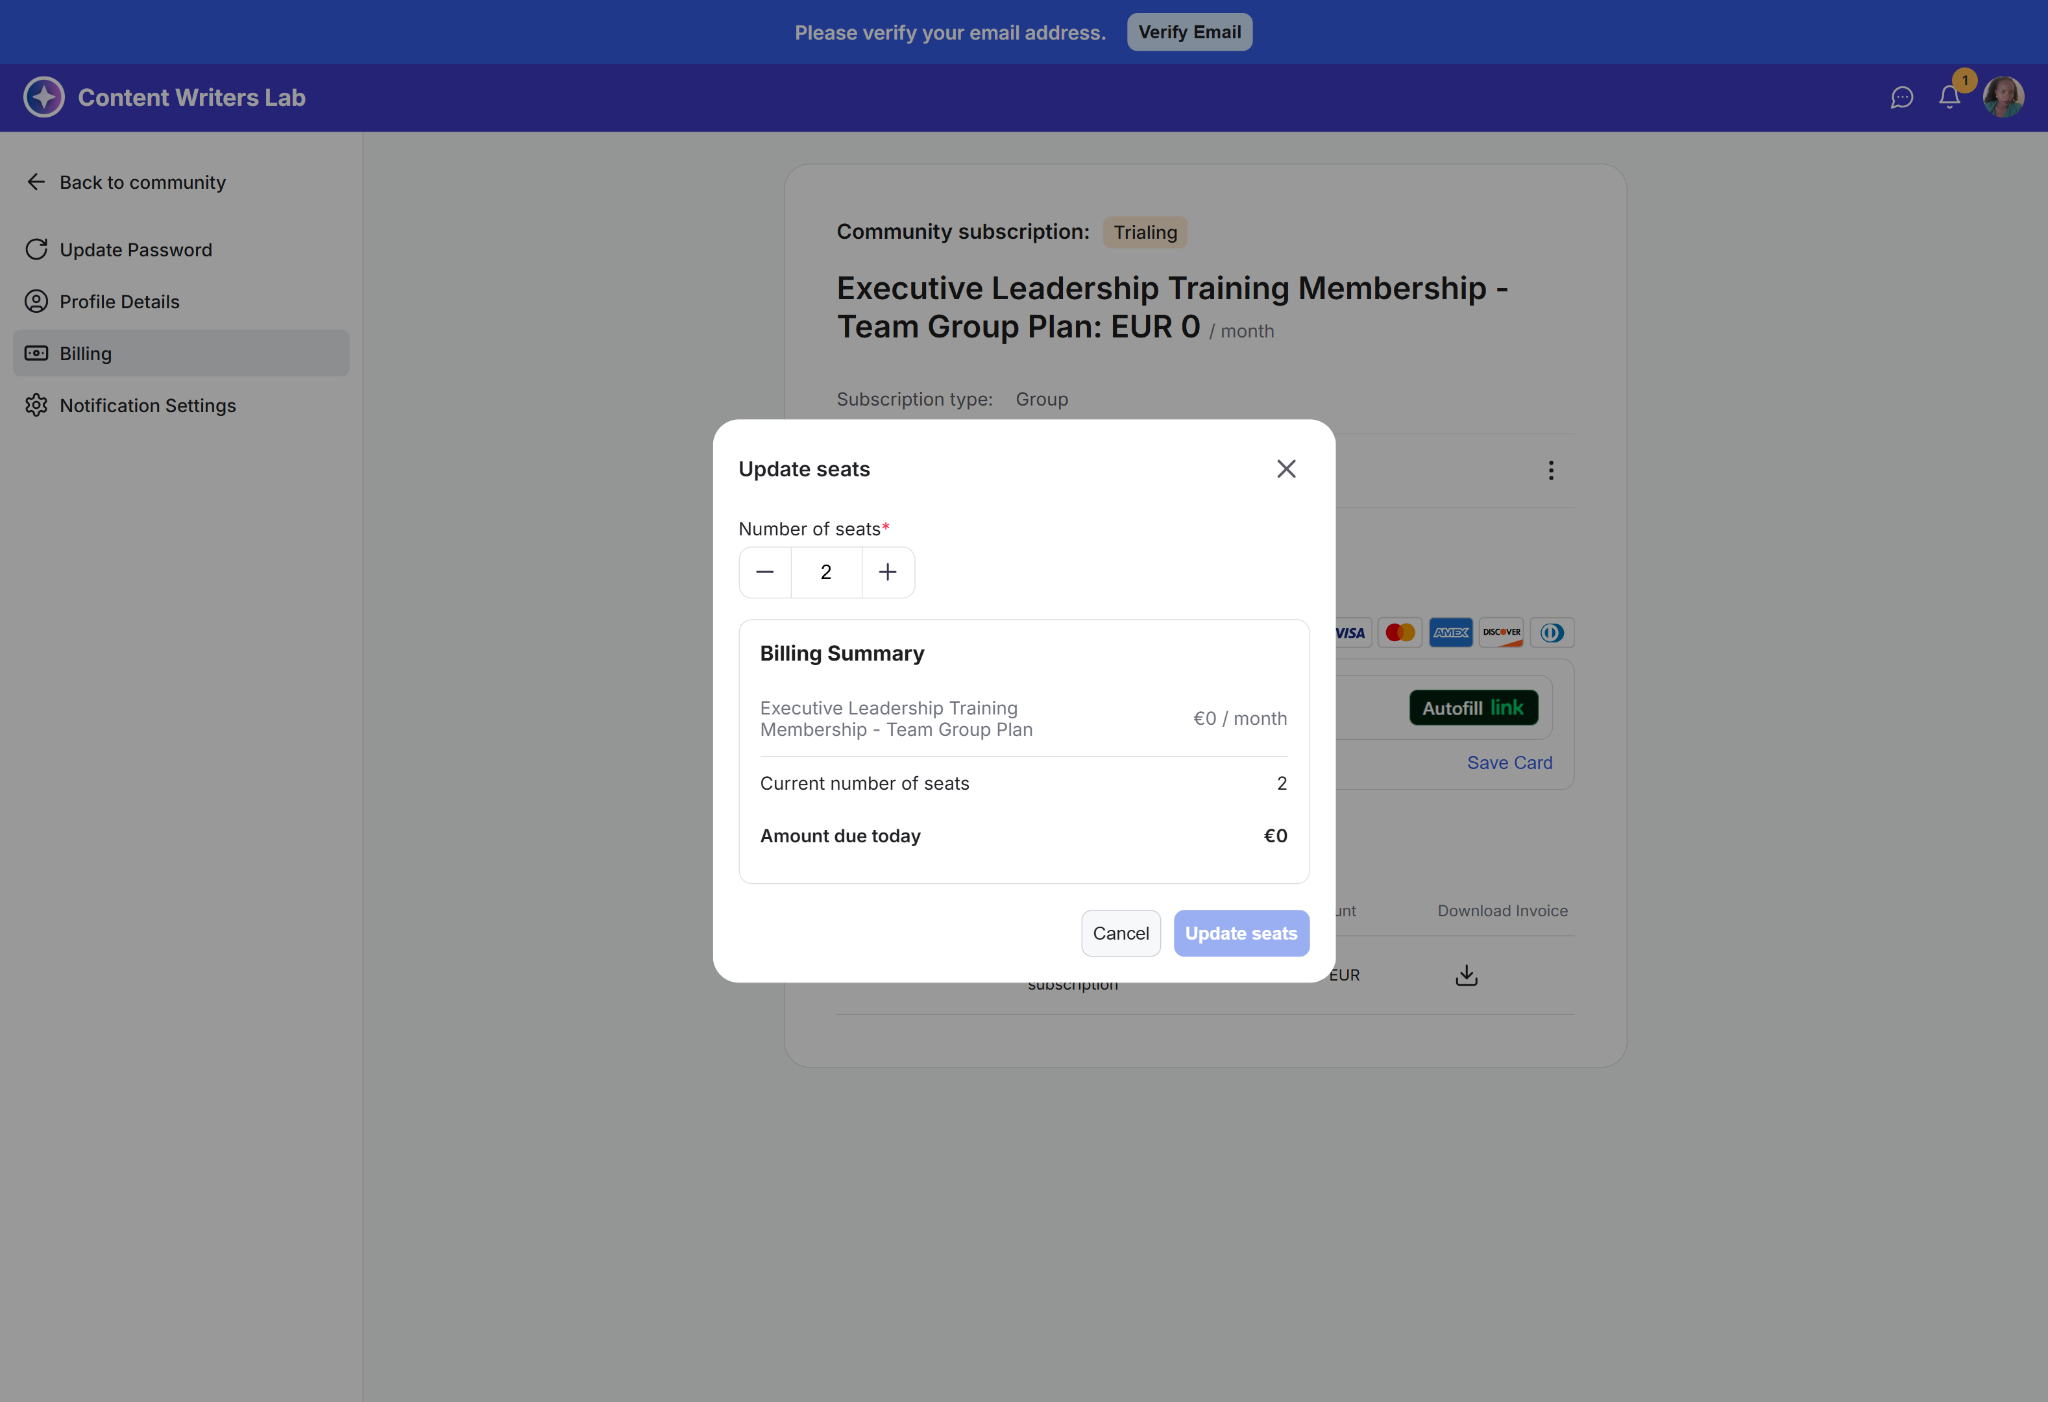
Step 5: If you increase or decrease the number of seats, you’re pro-rated. The payment processor will handle prorated credits automatically. Once done, click on Update Seats.
As an account owner, you can also remove sub-accounts from the subscription.
Here’s how:
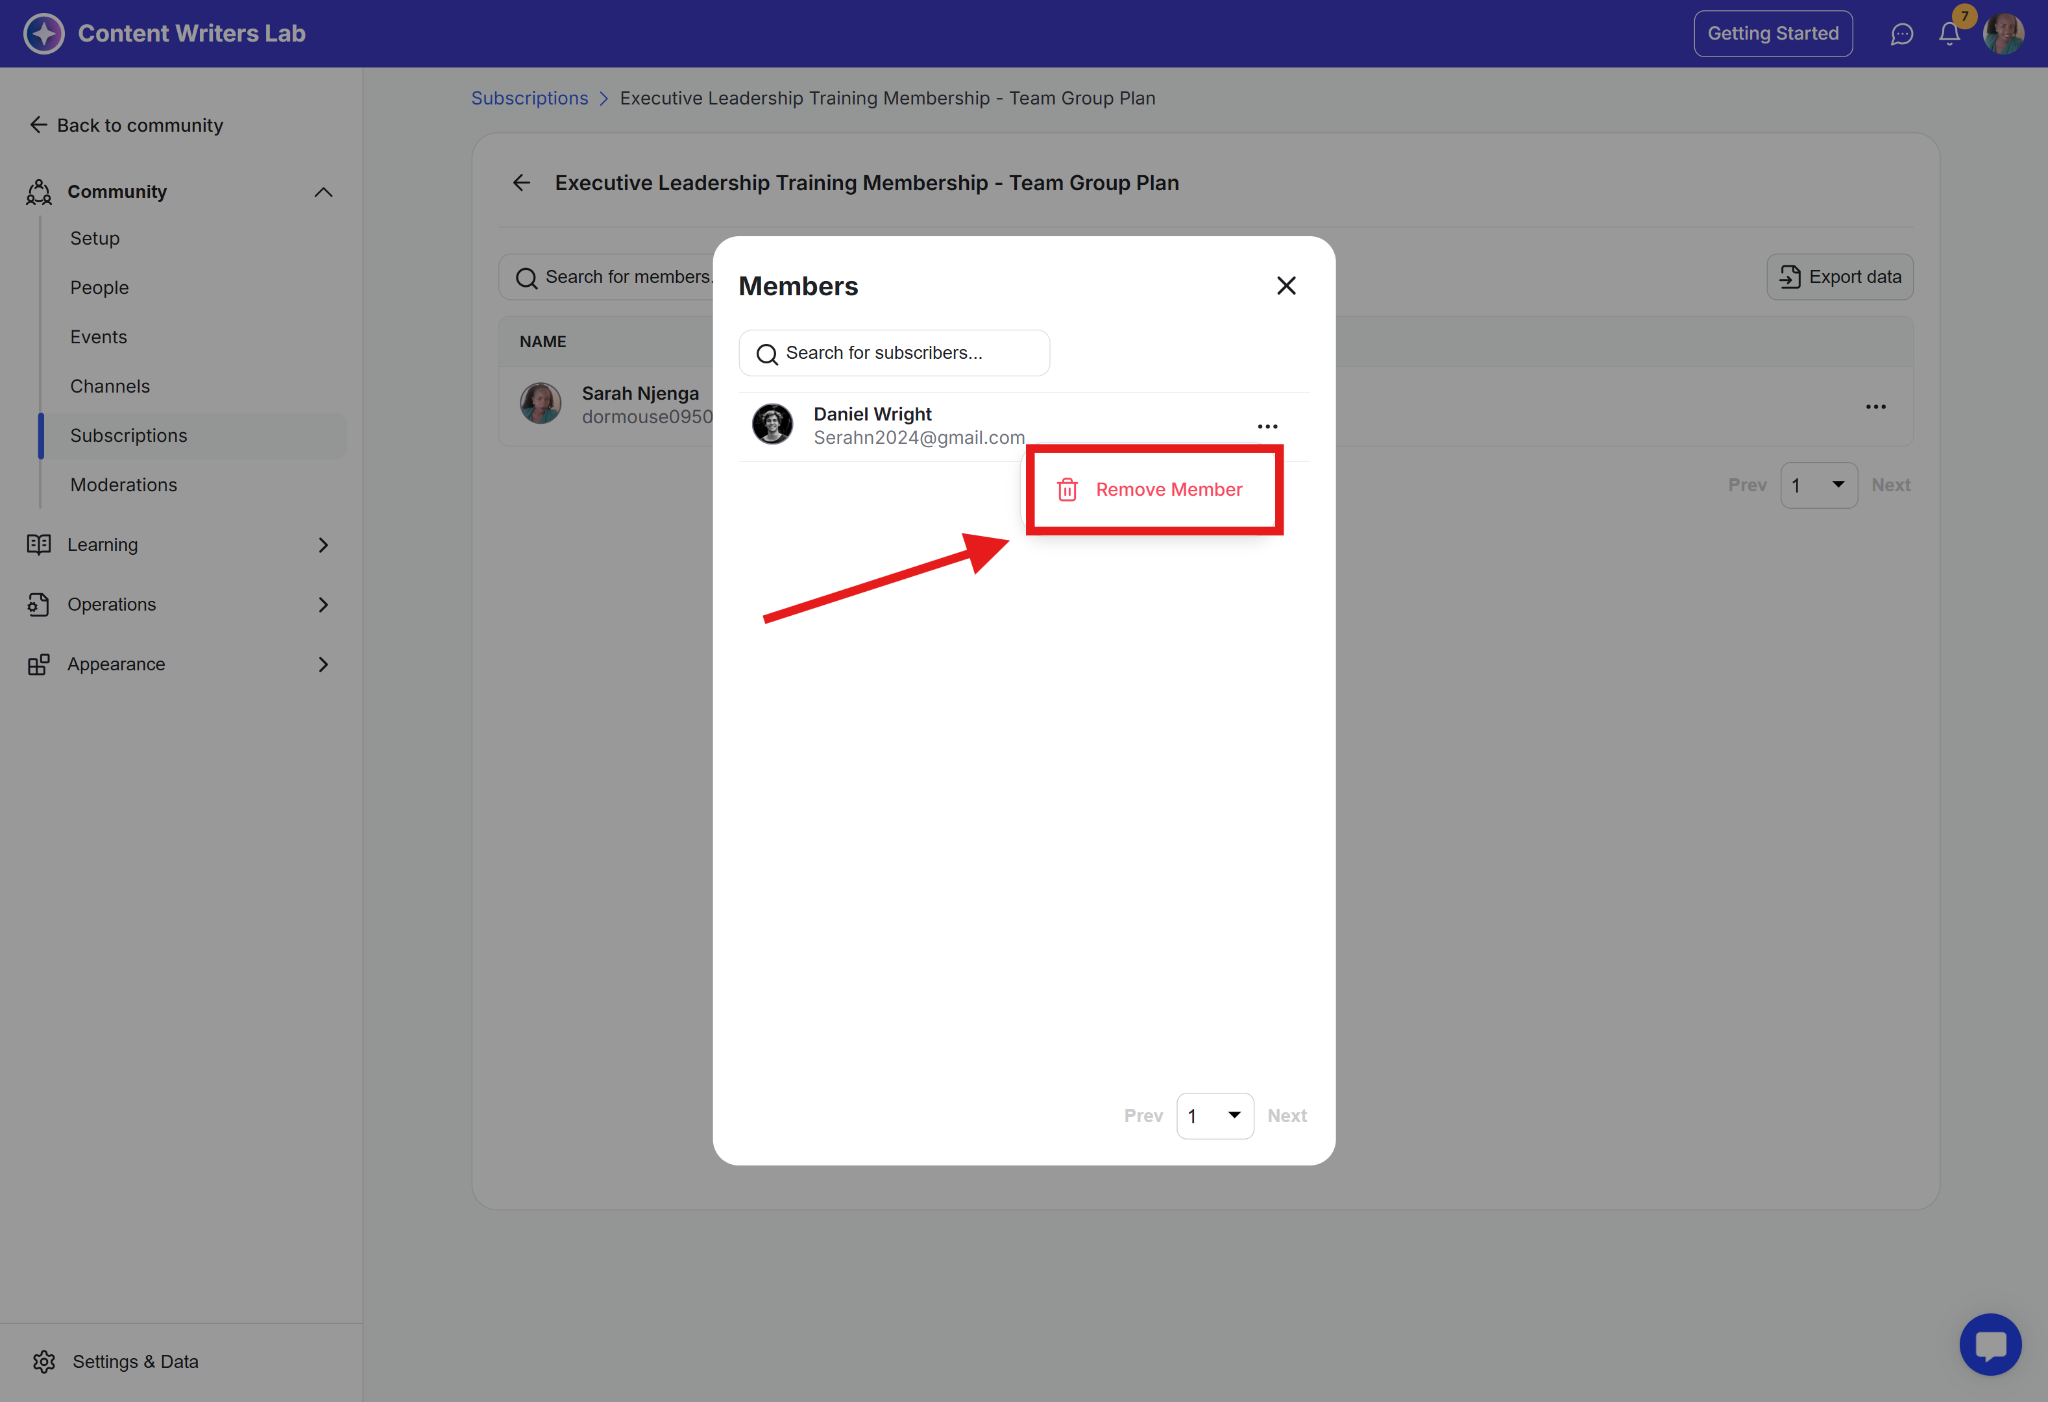
Step 1: To view the sub-accounts, click on the three-dot icon on the billing dashboard. From the drop-down, click on View Members.
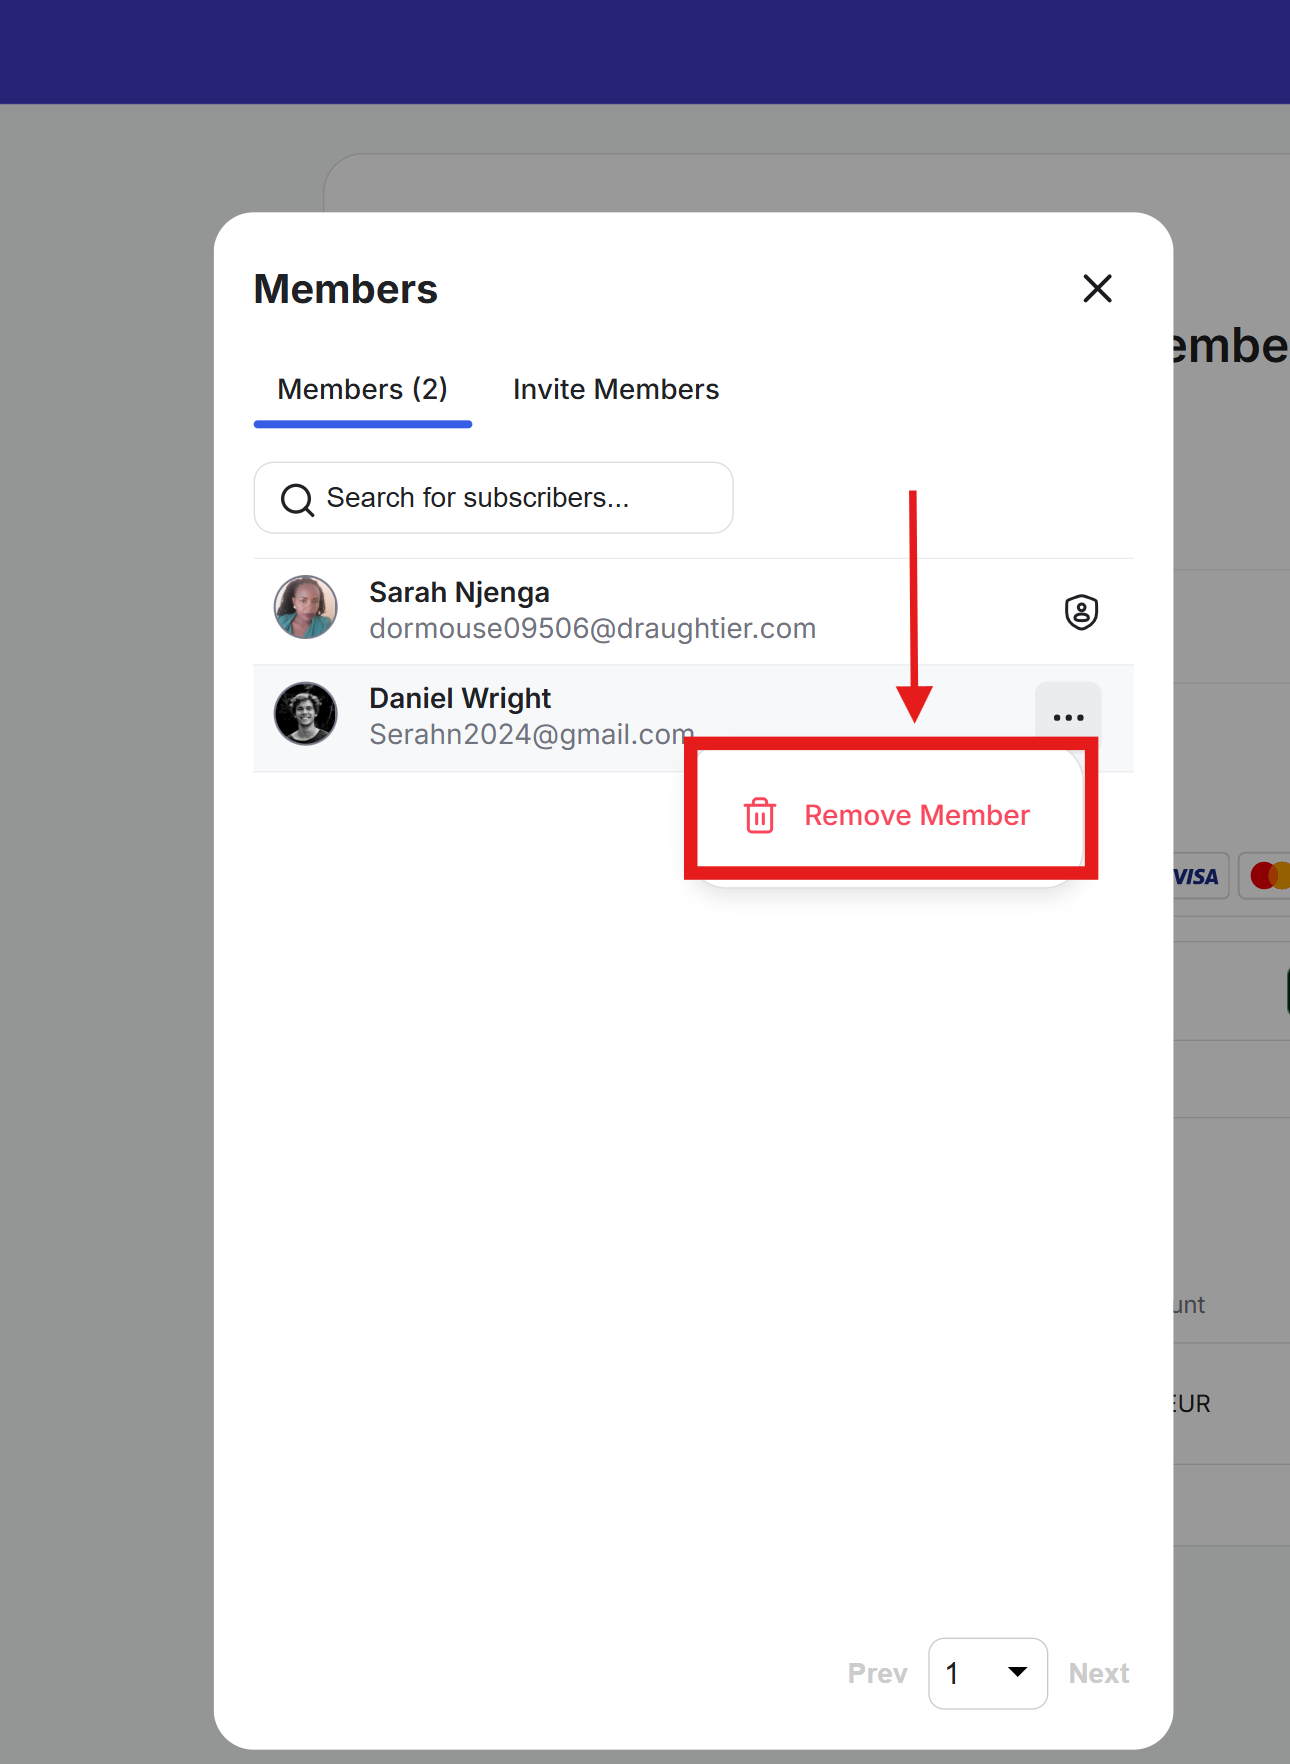
Step 2: This opens a pop-up with a search bar. You’ll be able to see all sub-accounts that have joined the subscription and taken a seat.
Step 3: Next to a sub-account name, click on the three-dot icon. This will show the option to Remove Member. Once you click, the sub-account will be removed from the subscription, and the seat will become vacant.
Sub-accounts have fewer controls and limited viewing permissions compared to the account owner.
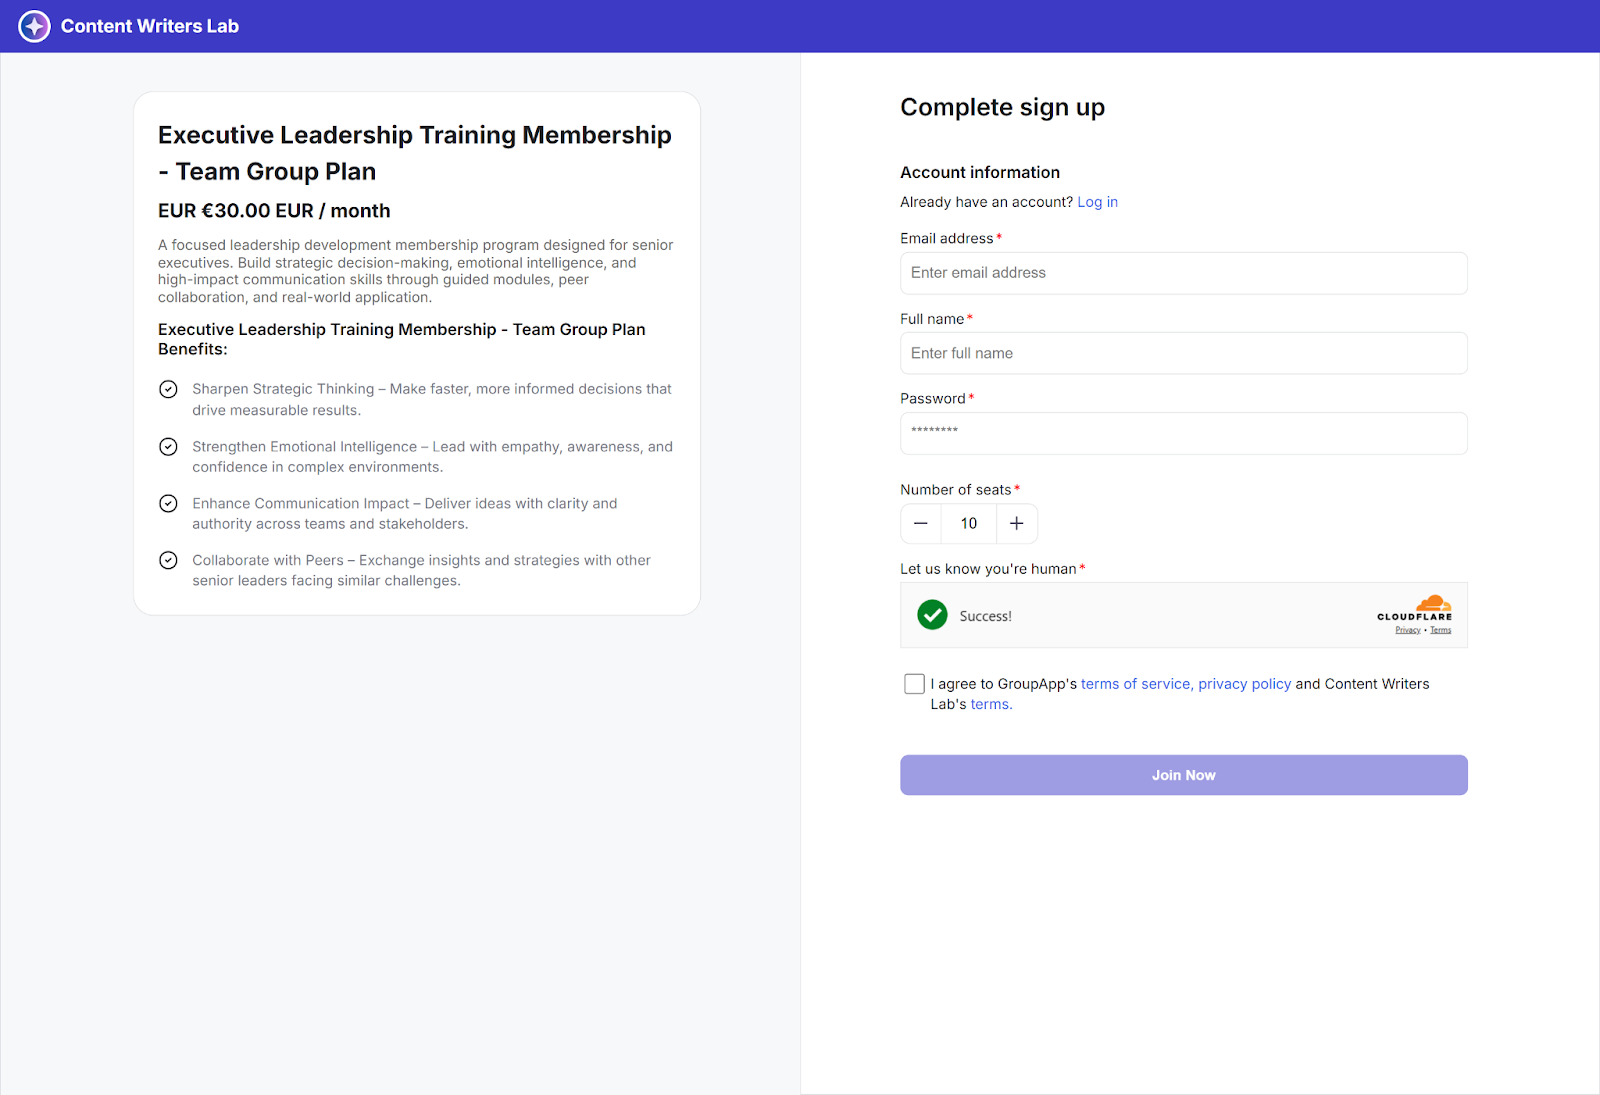
You will sign up using the invite link shared by the account owner (the main subscription buyer). Since the owner has already paid, you will not be charged and can sign up for free.
Here’s what the checkout page will look like for you:
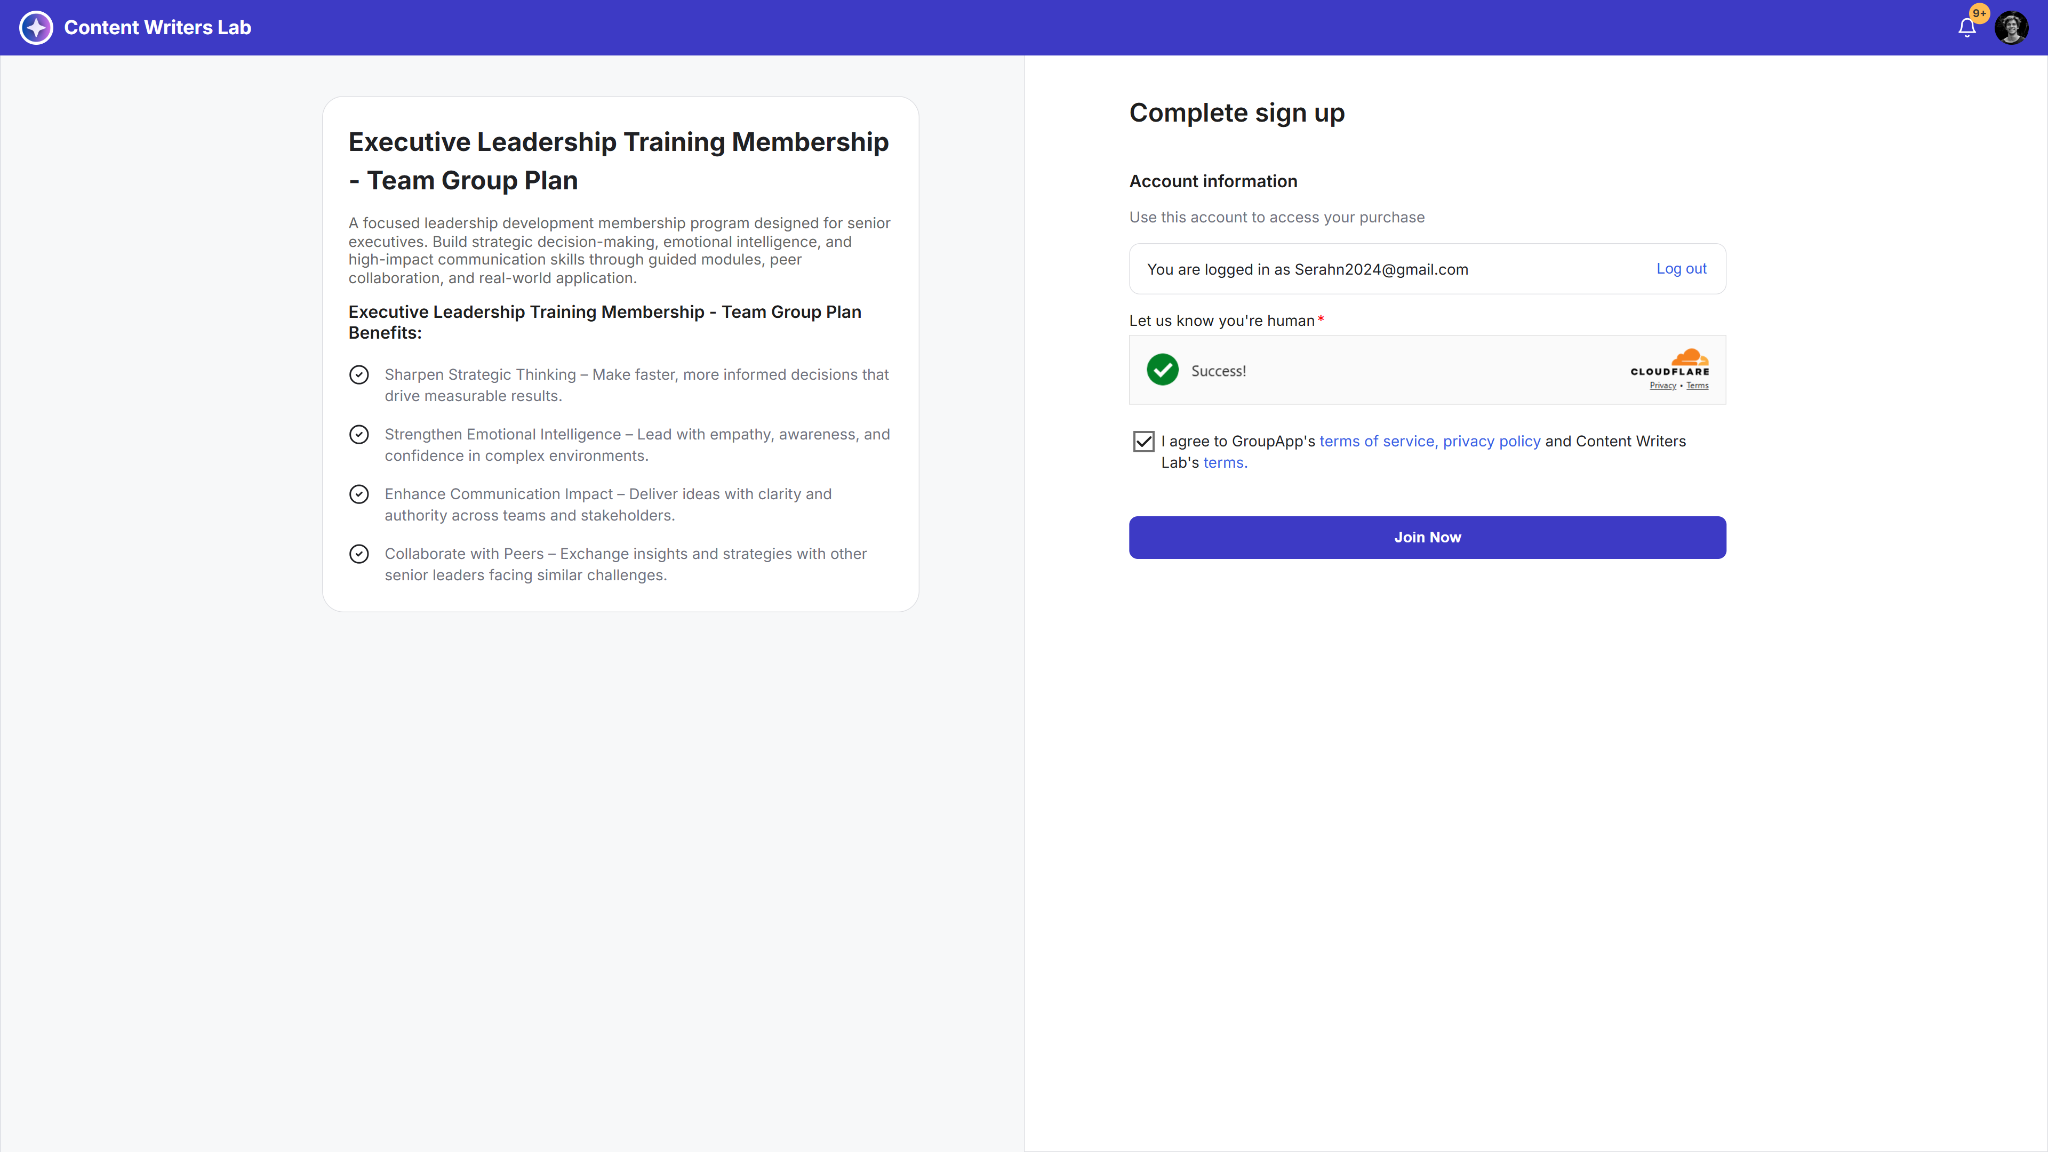
After completing the signup, you become a sub-account in the subscription and occupy a seat. You will go through the same onboarding process that the account owner completed.
Once onboarded, you can access the community or products that the owner paid for as part of the group plan.
Your Billing Dashboard is limited as a sub-account. To access it:
Step 1: Click your profile icon in the top-right corner. From the drop-down, select Billing.
Here’s what it looks like:
You can use your content, courses, and channels, but you cannot access invoices, payment methods, or seat settings, because all subscription controls stay with the owner.
You can cancel your individual subscription seat. When you cancel, you are removed from the subscription, and your seat becomes vacant.
When a sub-account cancels its subscription, it is removed from the plan, and the seat becomes immediately available. This allows the account owner to invite a new member without admin assistance.
As a community admin, you can manage certain aspects of a group subscription and view members within a specific plan.
What you can do:
Remove sub-accounts from a group subscription.
View the Account Owner reference and group subscription details on a sub-account’s member profile.
What you cannot do:
Change the minimum number of seats in an existing group subscription.
Remove the Account Owner from a group subscription.
Step 1: Go to your Admin Panel and click Subscriptions on the left-side bar.
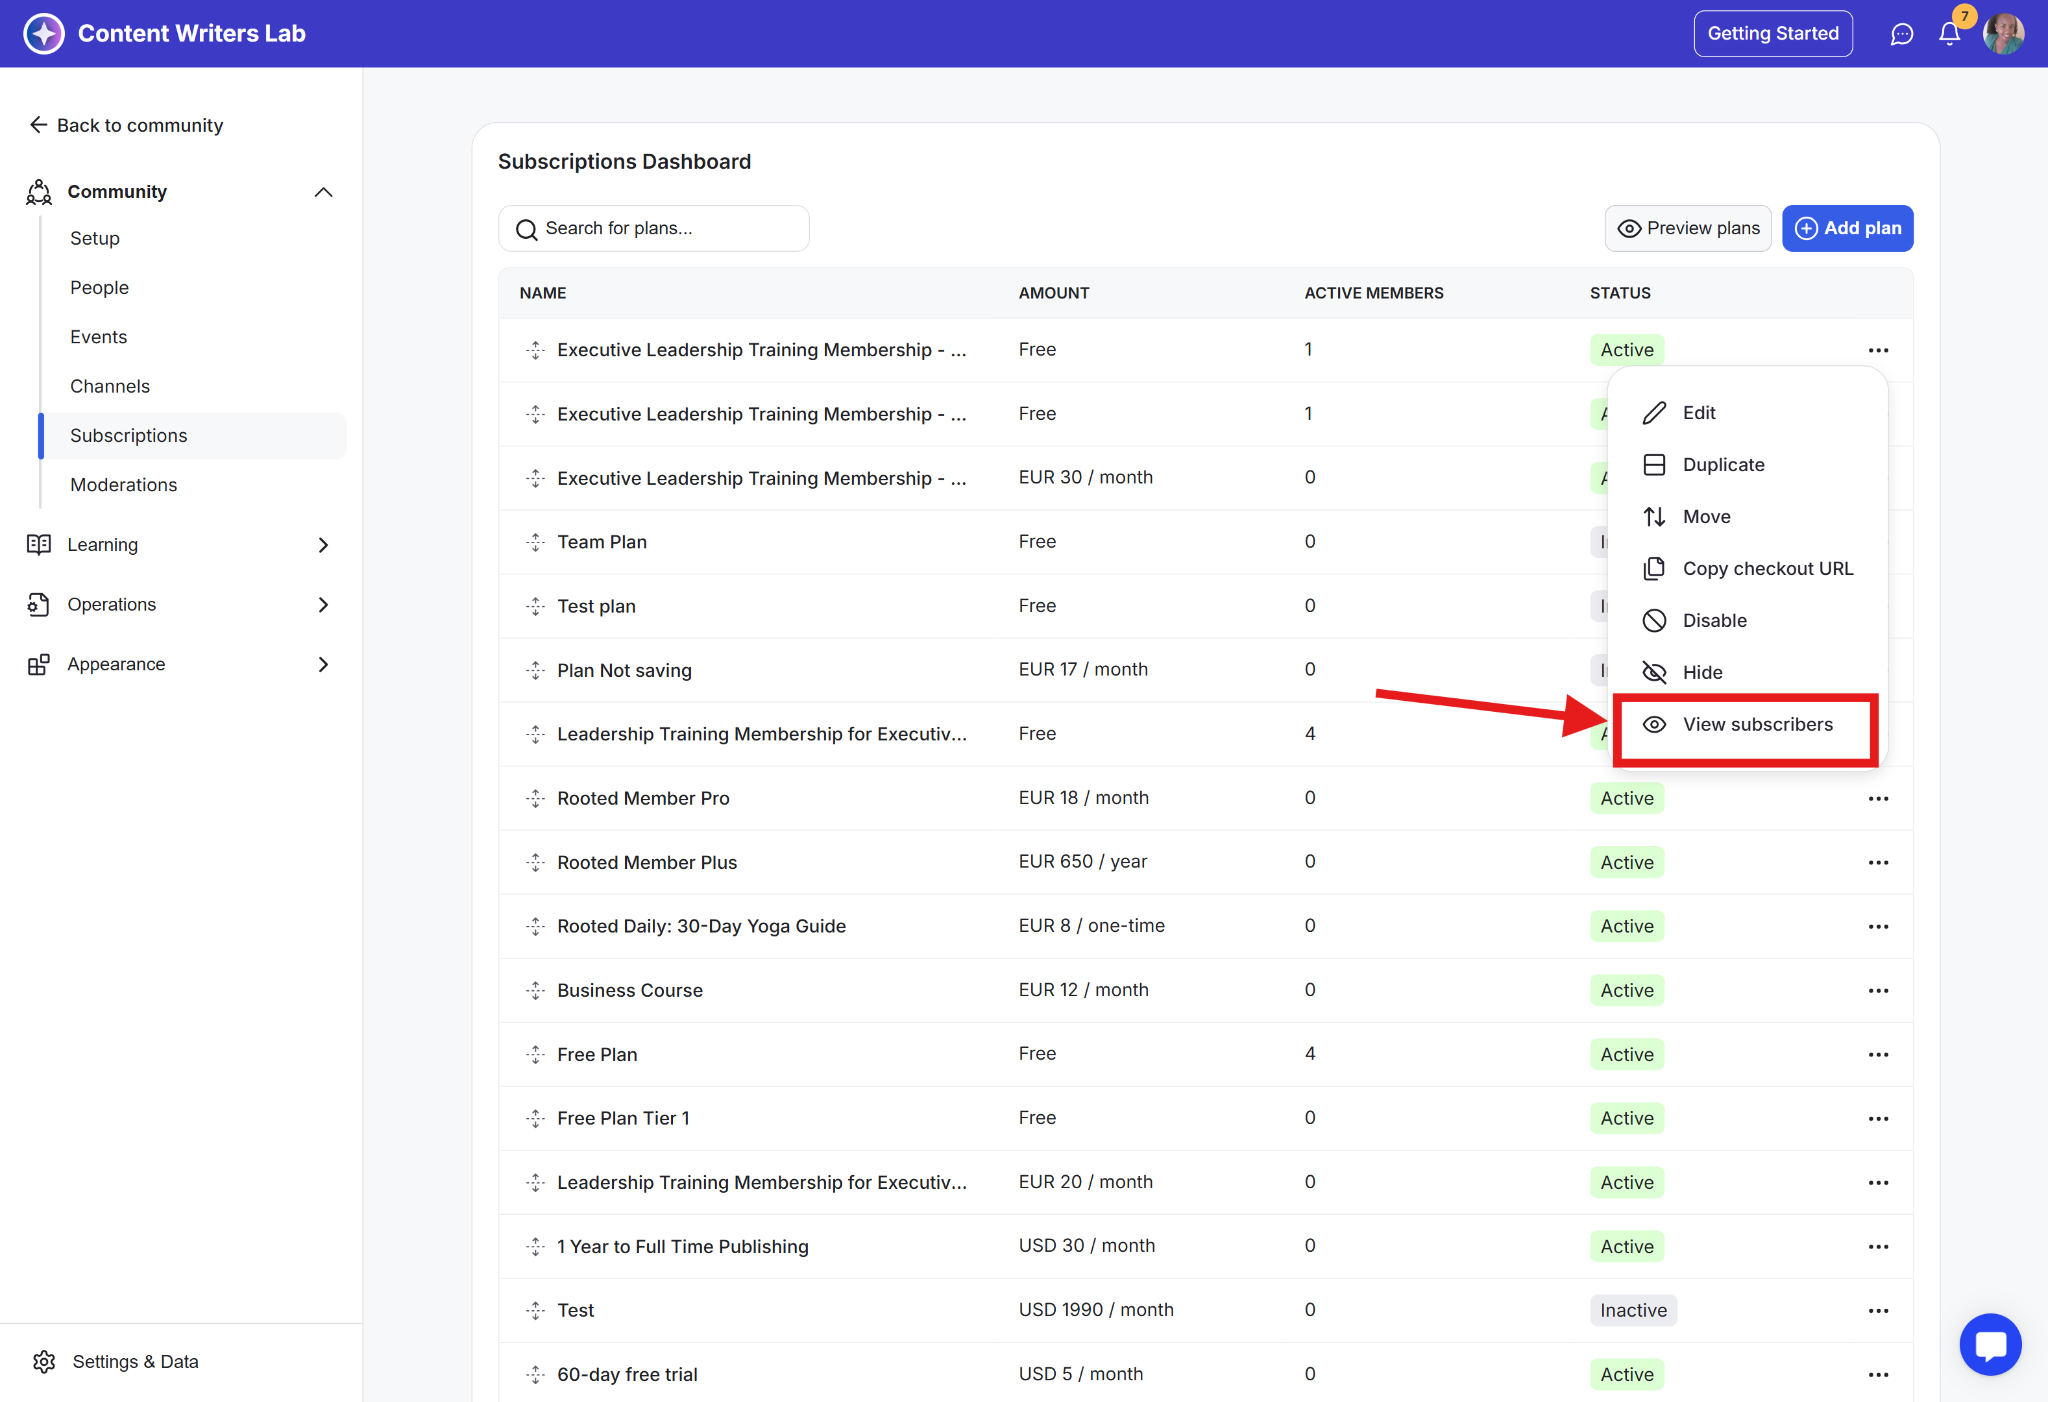
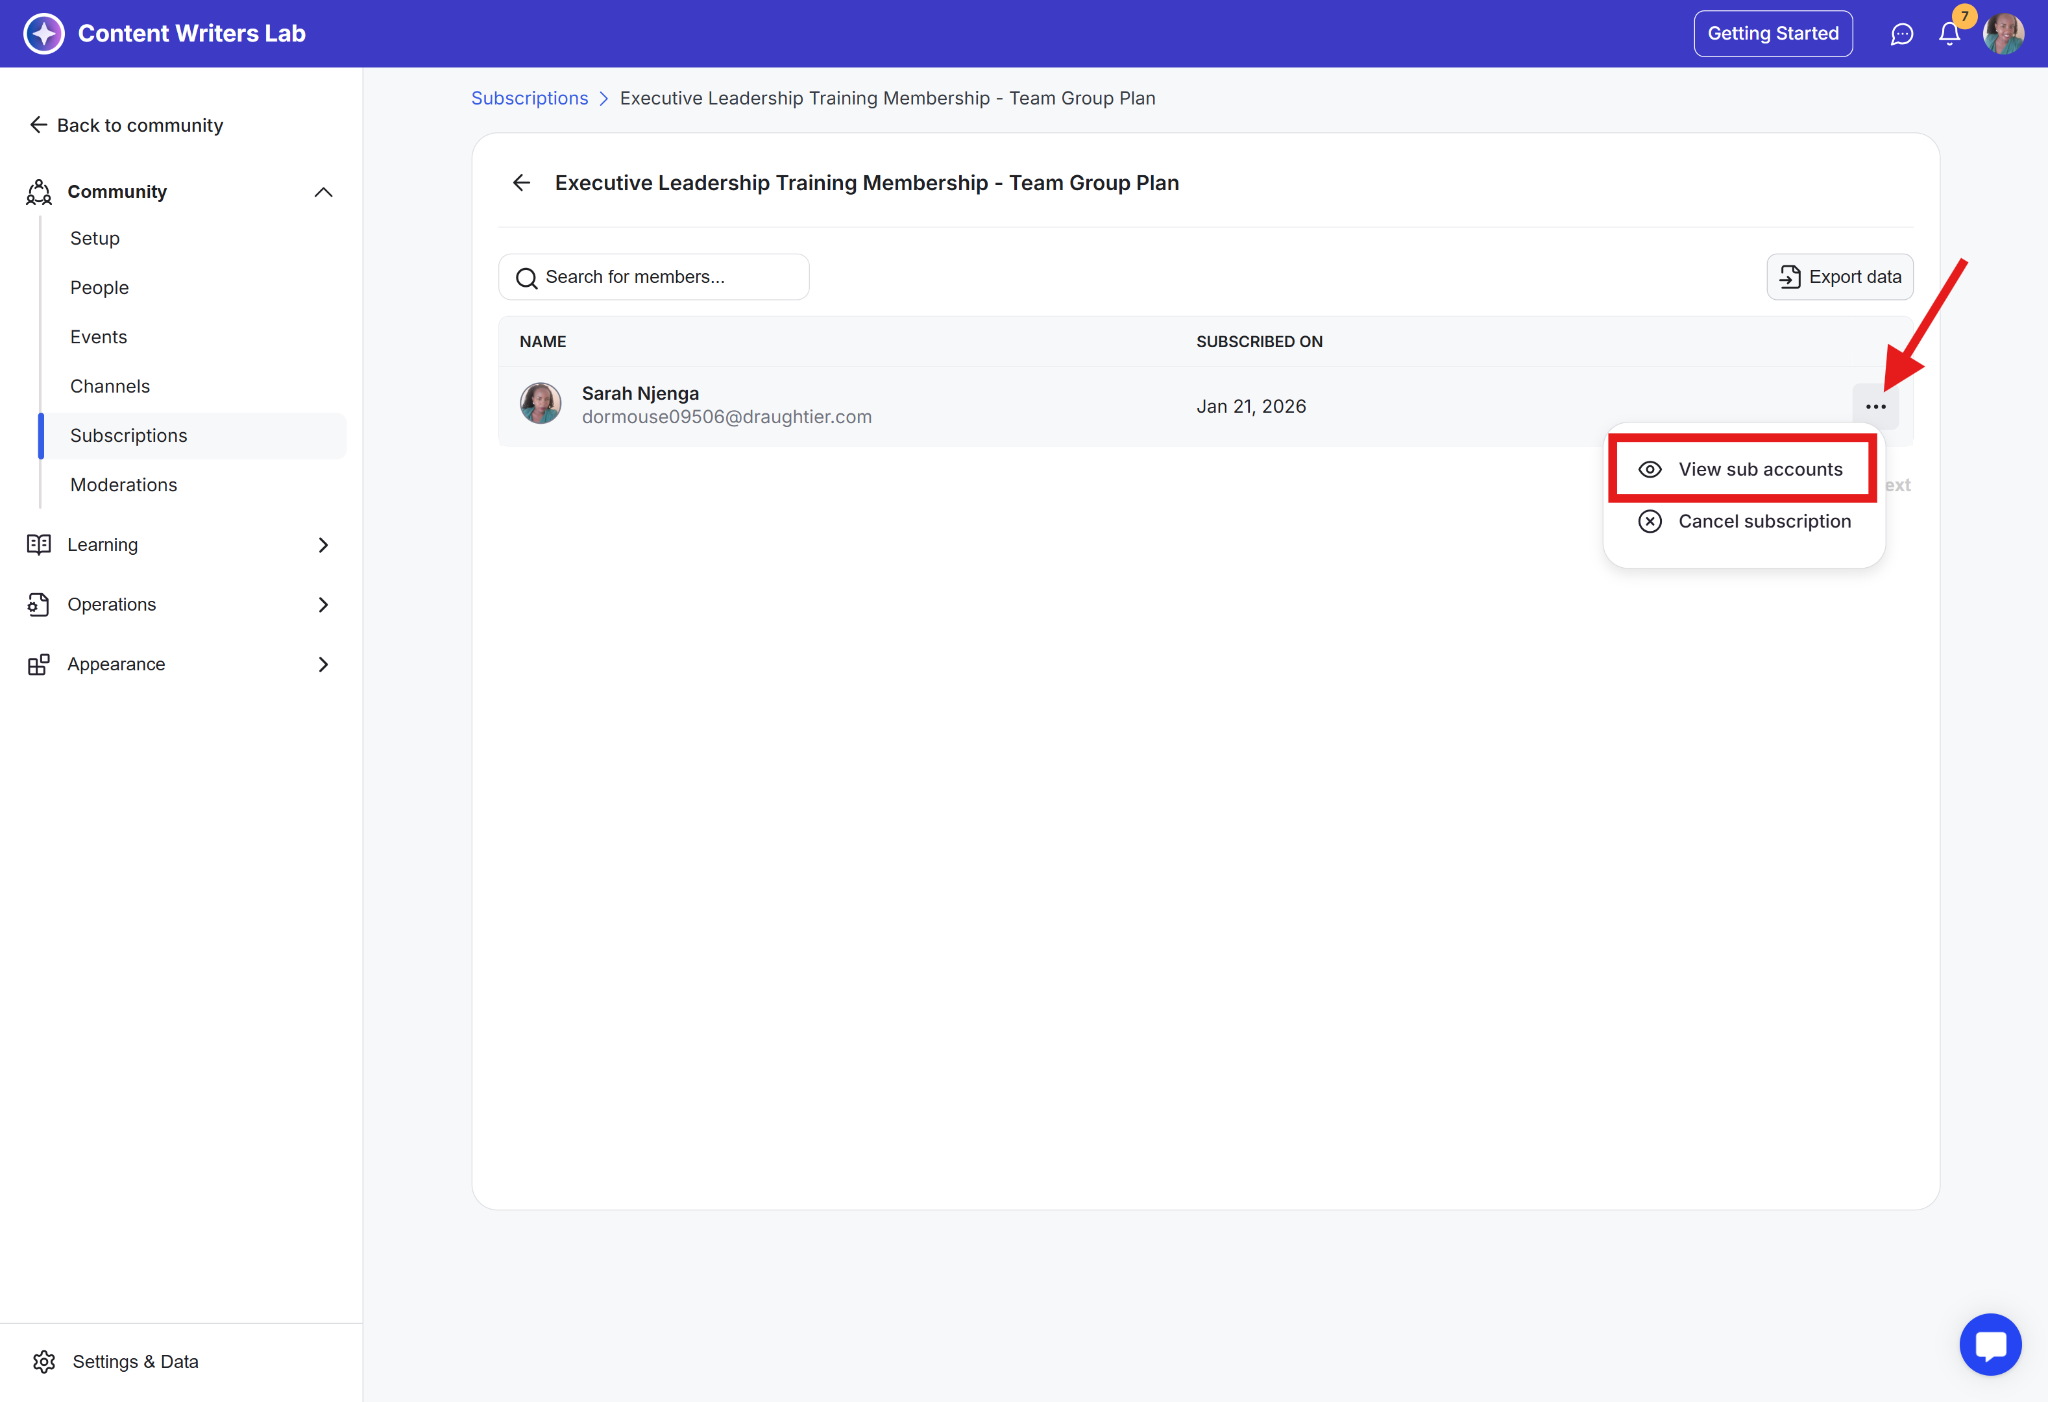
Step 2: Locate the group subscription plan and click the three-dot icon. Select View Subscribers.
Step 3: This opens the Plan Members Dashboard, and you’ll see the account owners’ member profiles. These are the account owners who have purchased this particular group subscription for their groups. Click the three-dot icon and click View Sub-accounts.
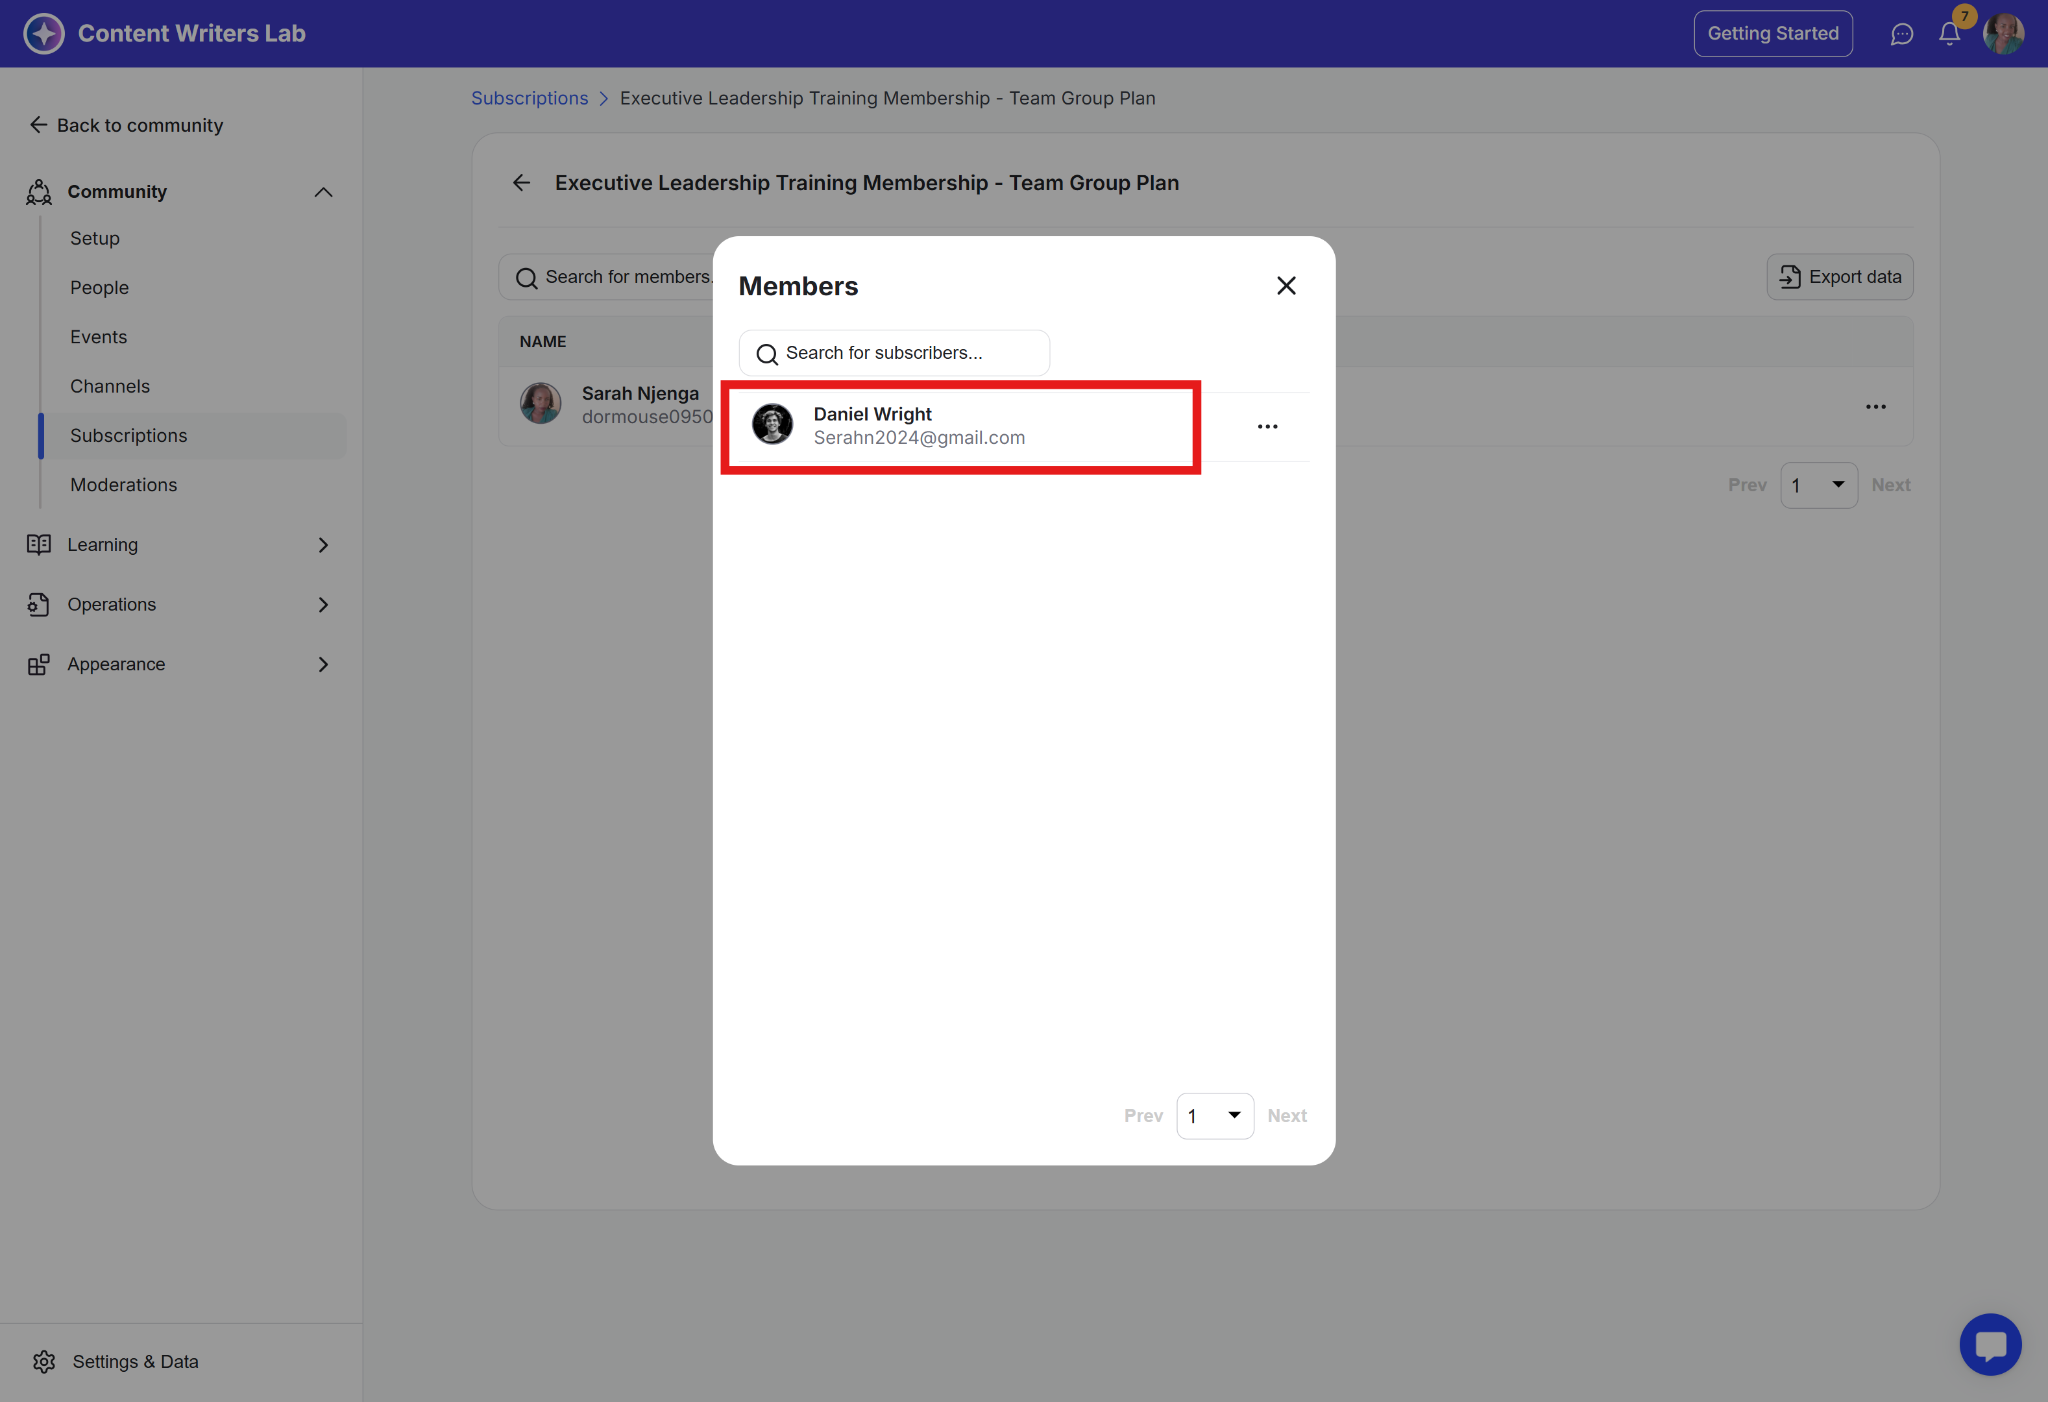
Step 4: A pop-up opens with the list of sub-accounts that are part of this group subscription.
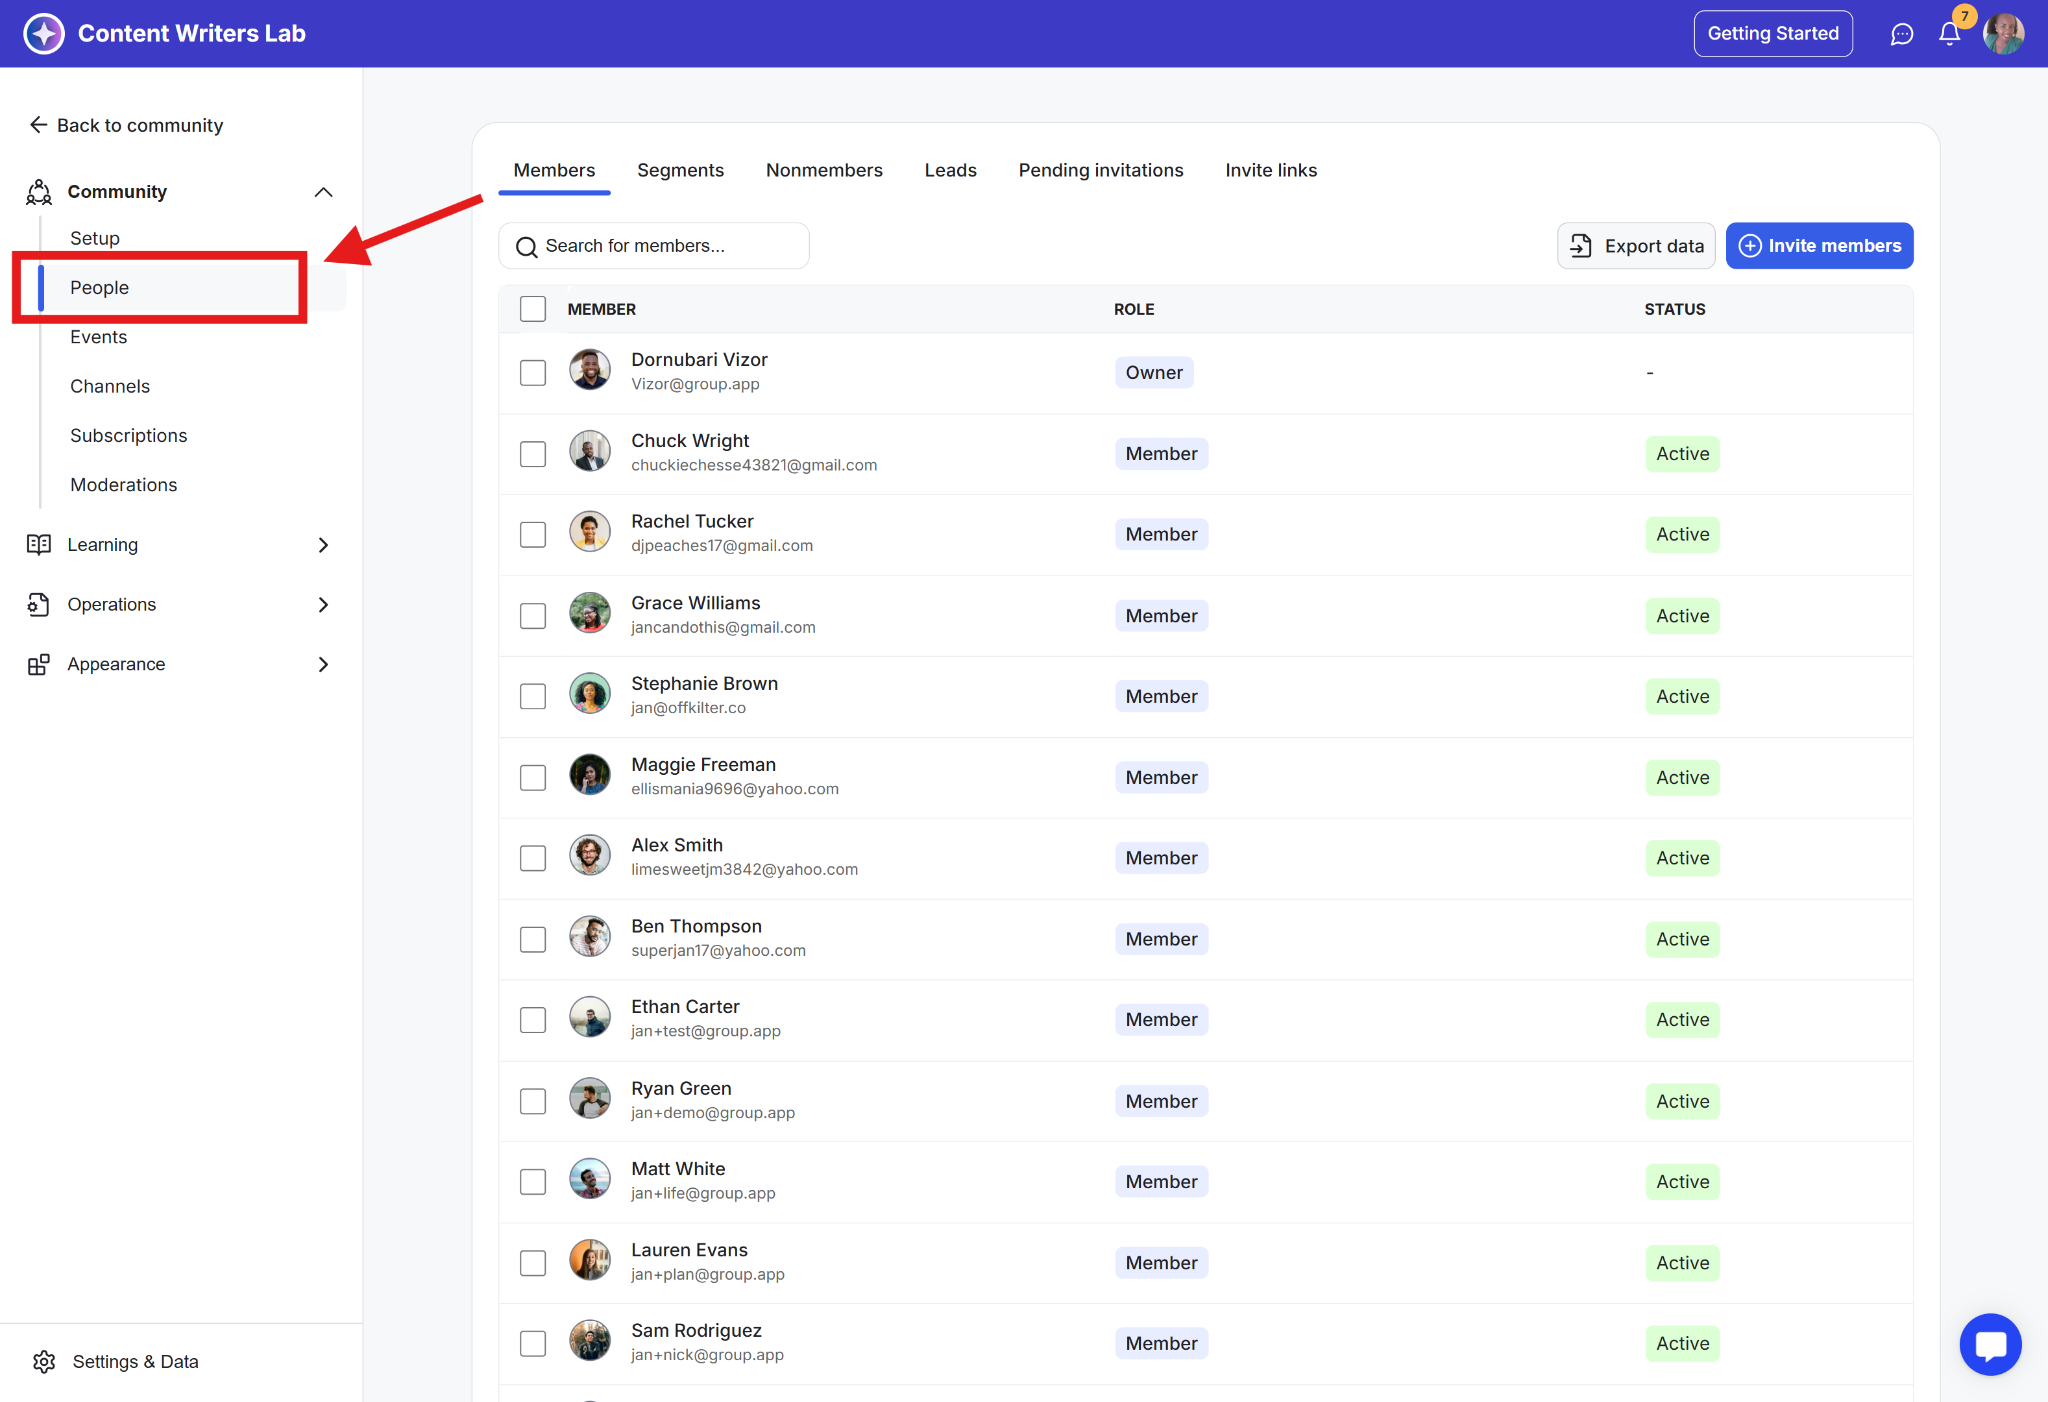
Step 1: Go to your Admin Panel and click People on the left-side bar. This opens your People Dashboard, and you’ll see the Members tab.
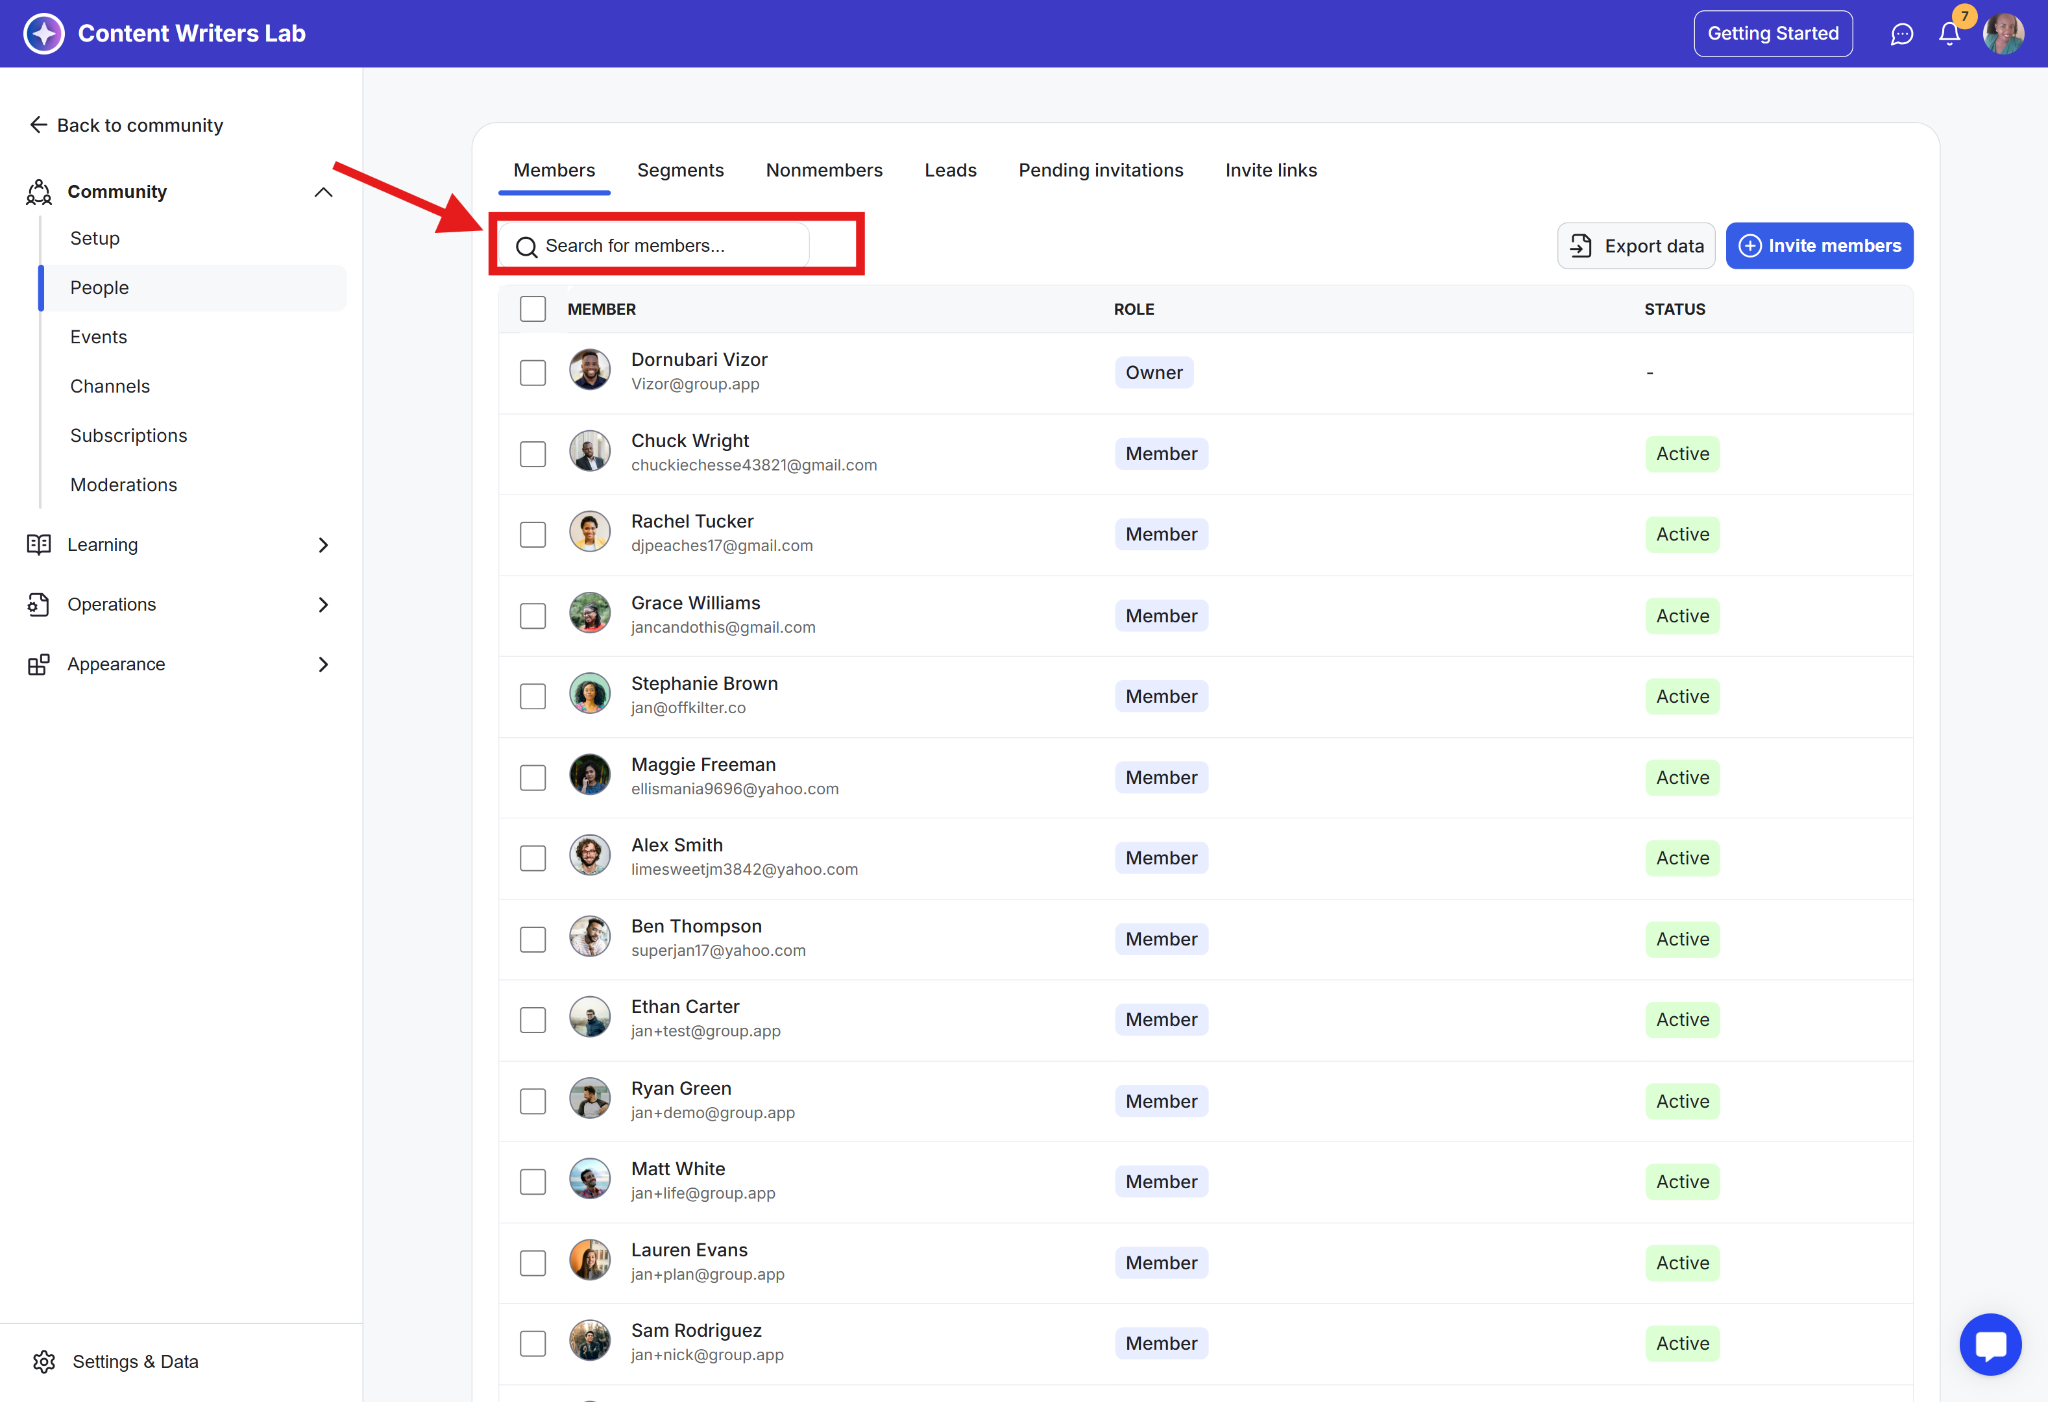
Step 2: Use the search bar to look up members by name.
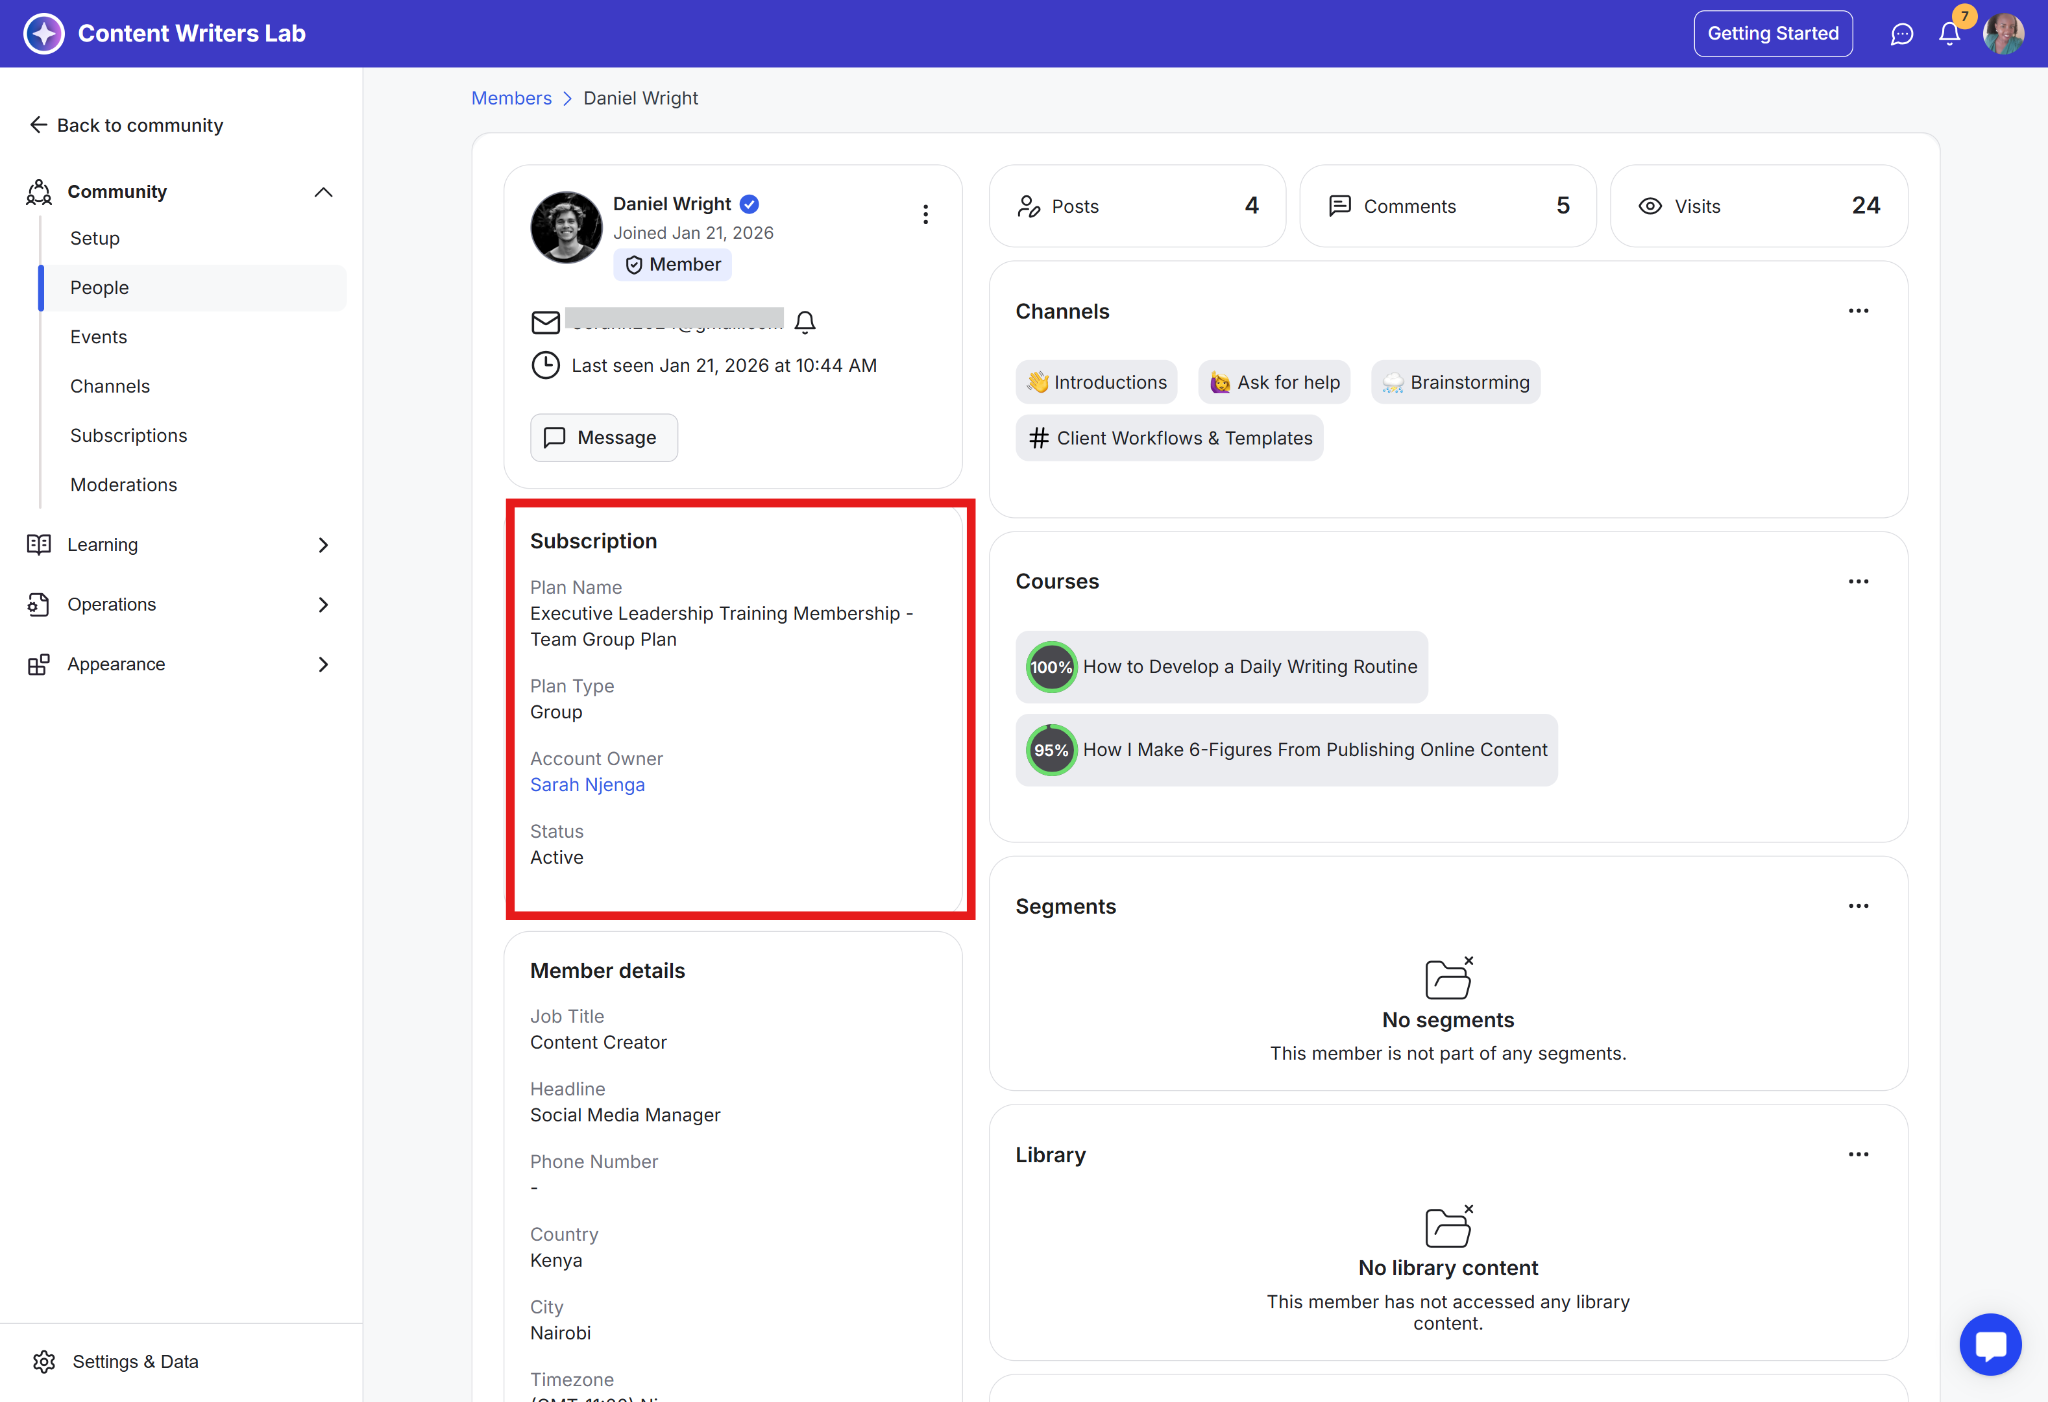
Step 3: Click a member to open their profile. If the member is a sub-account, you’ll see the Account Owner field along with the plan type as Group, on their profile with the owner’s name. This shows that the member is a part of a group subscription bought by the specified account owner.
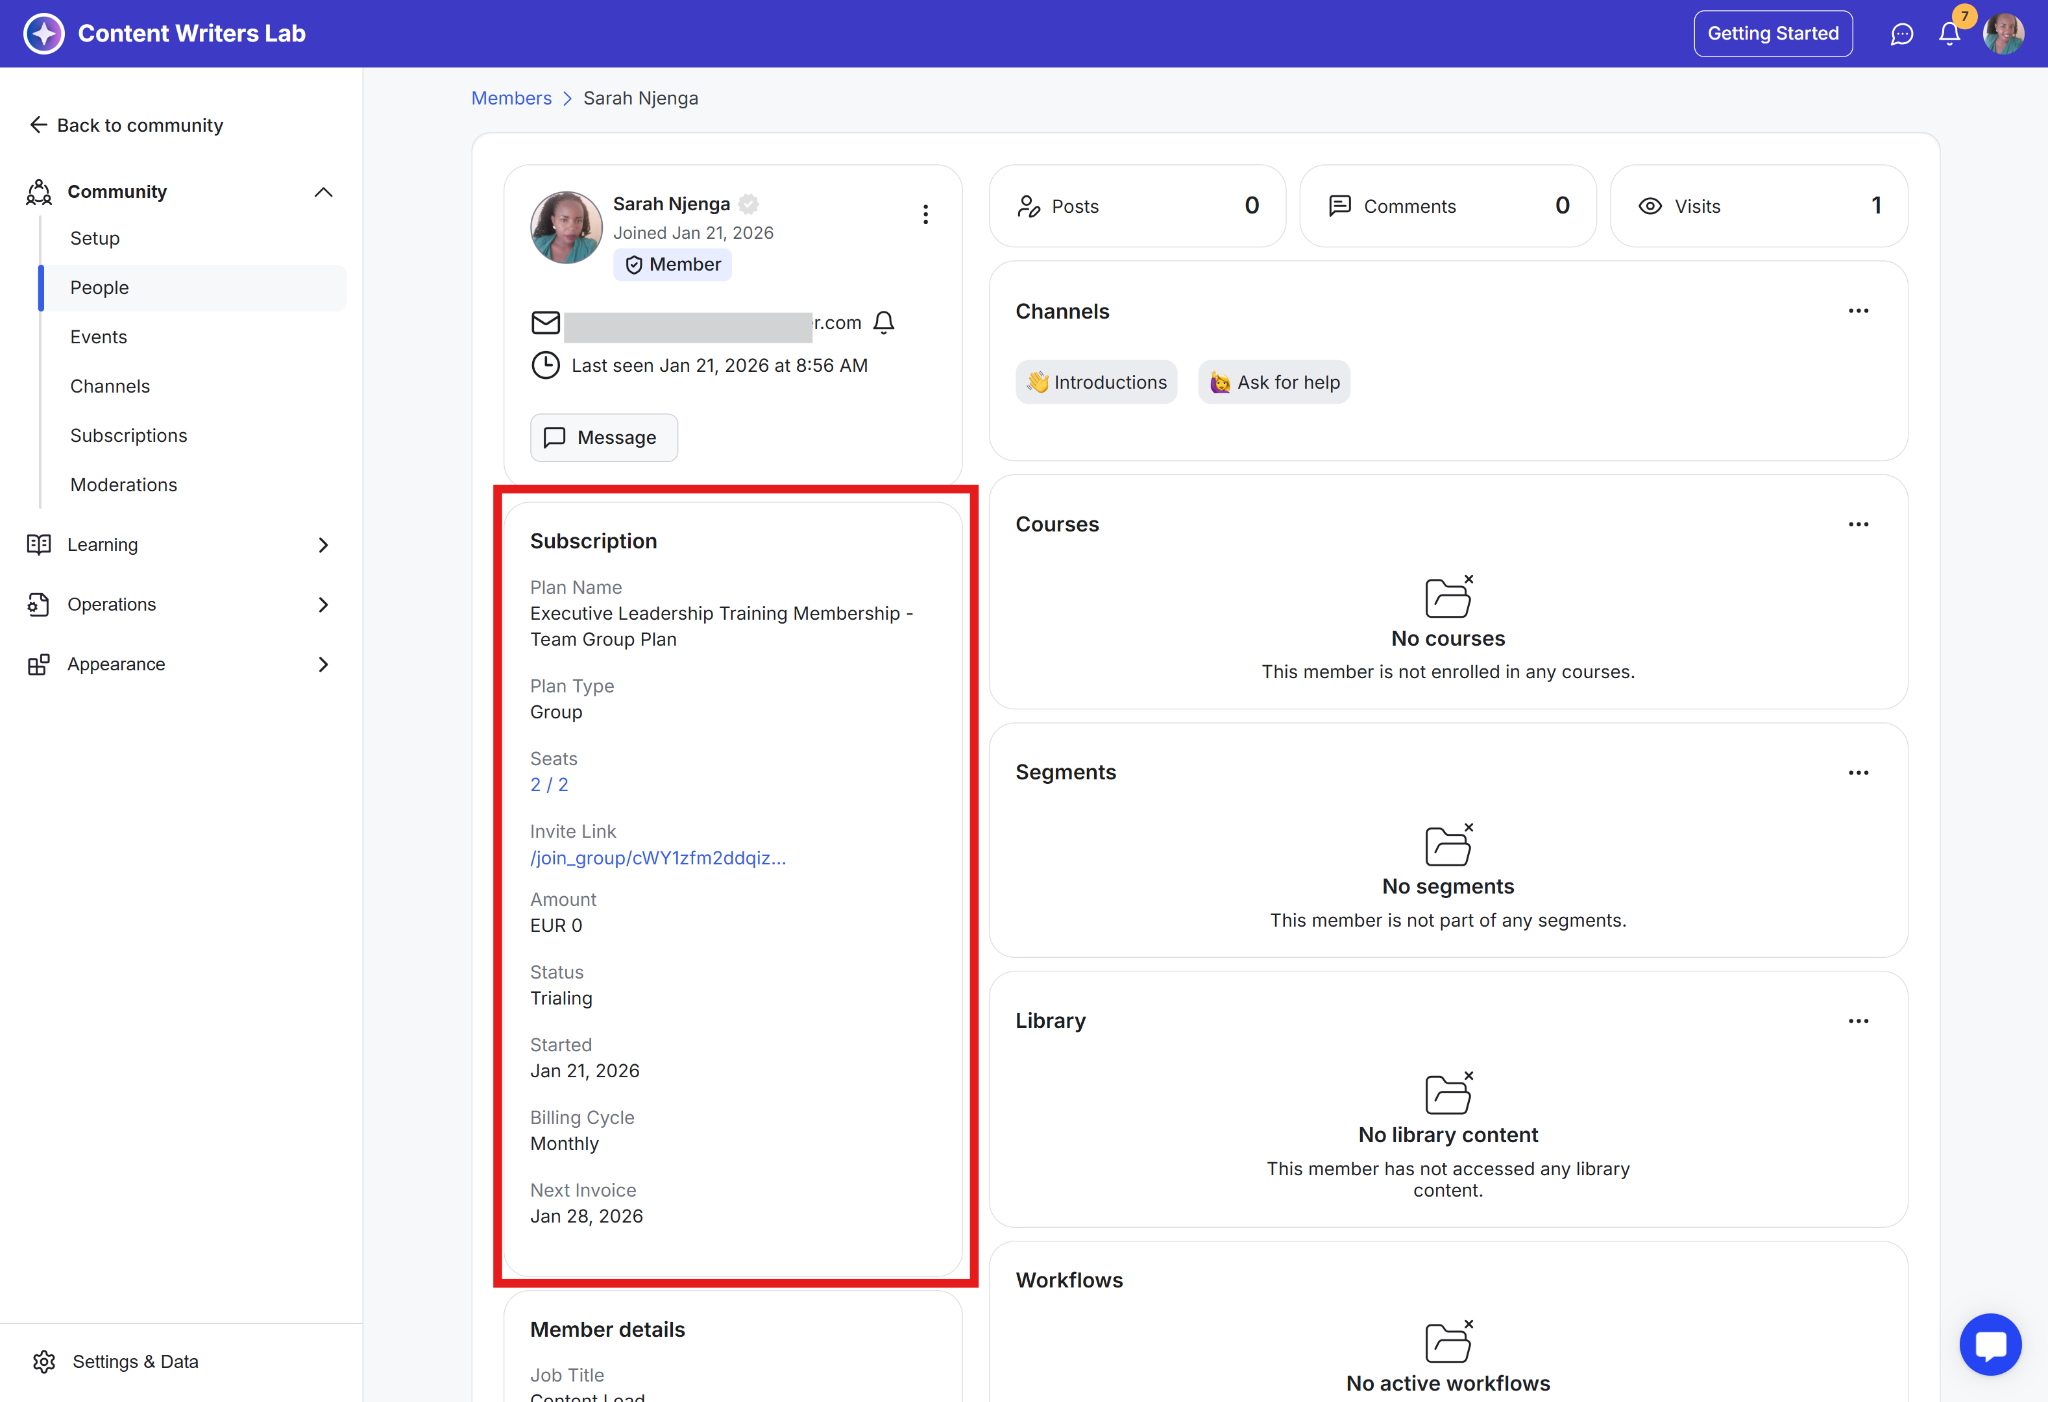
Step 4: Click the Account Owner name. This takes you to the account owner’s member profile with all the group subscription details and the number of seats occupied out of the total.
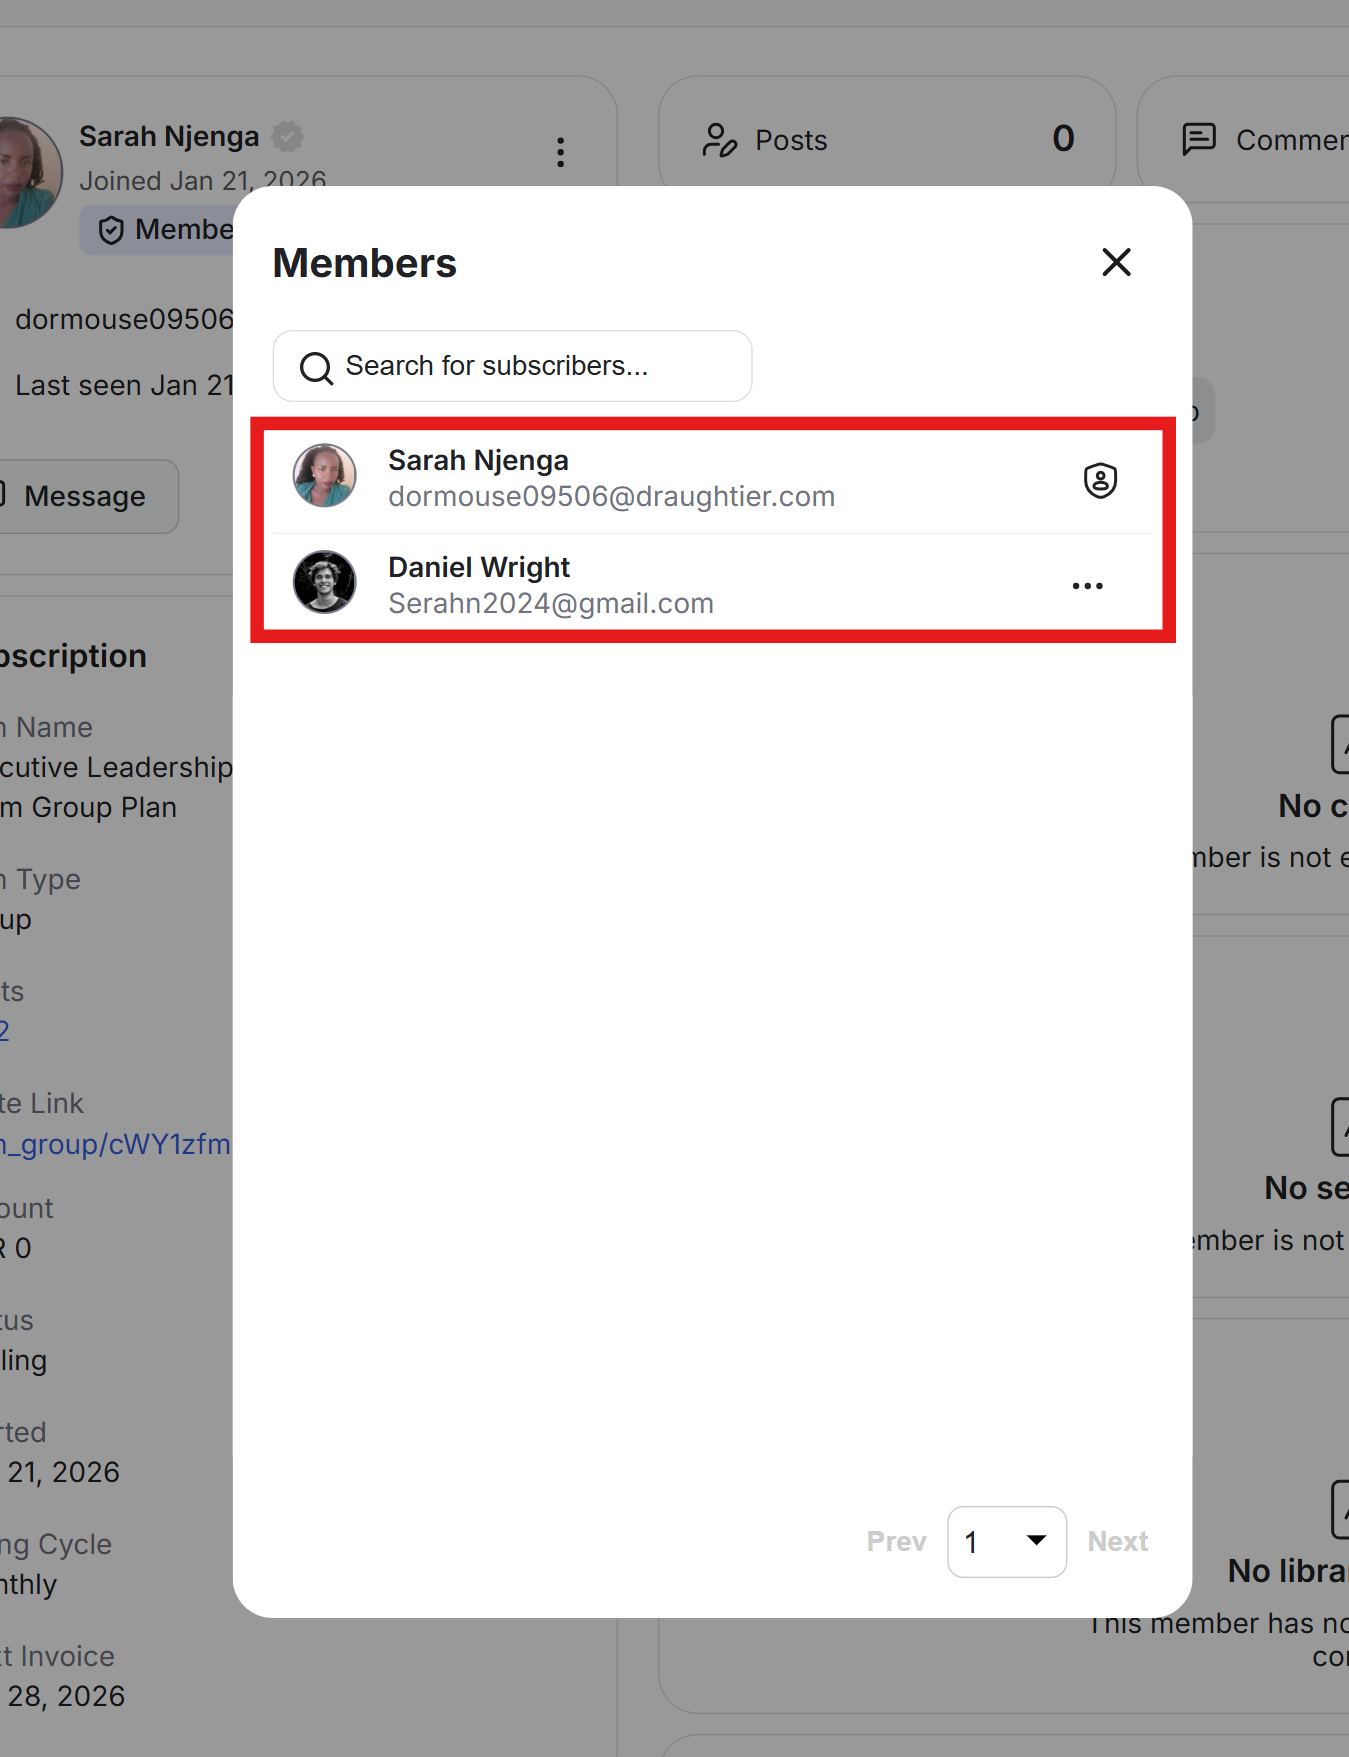
Step 5: If you click the seat count, a pop-up opens with the list of all members. The account owner’s name appears at the top with the owner icon.
Step 1: Go to your Admin Panel and click Subscriptions on the left-side bar.

Step 2: Locate the group subscription and click the three-dot icon. From the drop-down, click View Subscribers.

Step 3: This opens the Plan Members Dashboard, and you’ll see the account owner’s member profile. Click the three-dot icon and click View Sub-accounts.

Step 4: A pop-up opens with the list of sub-accounts. Click the three-dot icon next to a sub-account’s name.
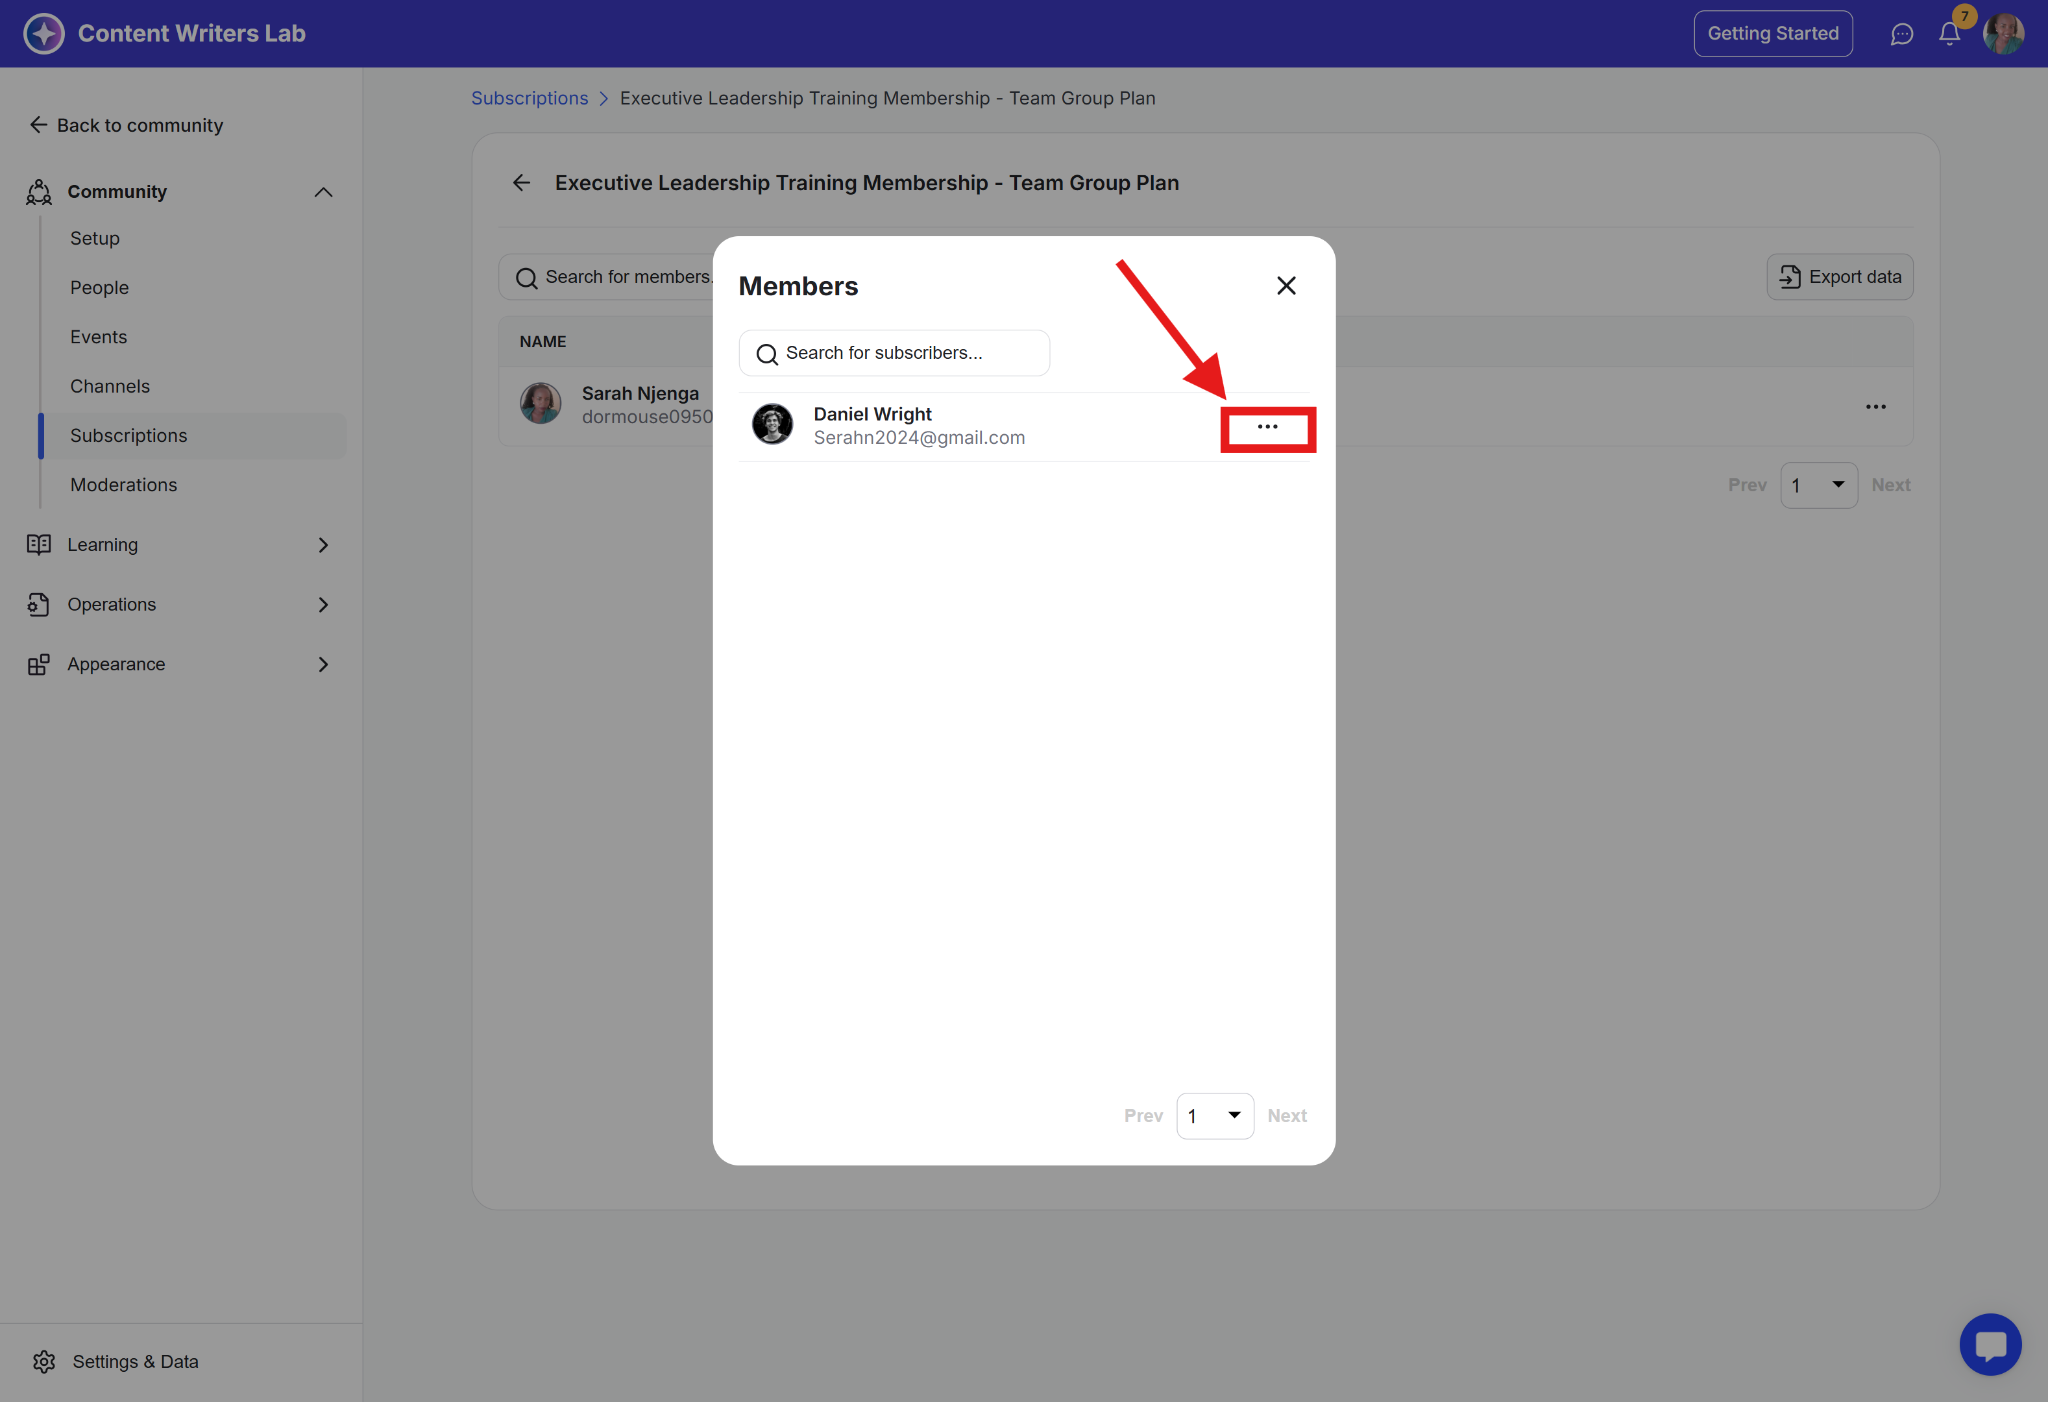
Step 5: Click Remove Member. The sub-account will be removed from the group subscription, and the seat will become vacant.