GroupApp provides a direct Stripe integration, allowing you to collect payments within your community. However, if you want to use another checkout (like PayPal, ThriveCart, or any external payment processor), you can do that too.
In this guide, we’ll show you how to collect payments for your courses, memberships, digital products, and other services using an external payment processor. You’ll also learn how to add members to your community with the right access and channels, all through a simple, repeatable process.
External Checkout Link: The order form from your payment tool (PayPal, ThriveCart, or another processor).
Automation Tool: Zapier, Pabbly, or Integrately integration platform, you connect directly through the GroupApp Integrations.
Before we dive into the setup steps, here’s a quick overview of how this works. This will help you see the big picture before you go step-by-step.
The process is fully automatic as GroupApp offers a direct Stripe Integration. An admin pre-configures channels, product access, and segments.
When someone pays through Stripe using a GroupApp checkout page, they’re instantly added to your community, granted access to the product they purchased, and placed in the right channels and segments.
When you use an external checkout (like PayPal or ThriveCart), the payment happens outside of GroupApp. Because of this, you need automation to connect everything. Tools like Zapier, Pabbly, or Integrately help pass the payment details to GroupApp so the right actions happen automatically.
Here’s what happens once it’s set up:
A buyer completes their payment on your external order form.
An automated workflow creates their account inside your GroupApp community.
The buyer is given access to the product or membership plan they purchased.
The workflow also assigns them the correct course, library resource, or membership subscription.
Now, let’s look at how this works in different cases.
This setup is designed for creators who sell courses or digital library resources through a dedicated sales page. It works whether you’re using GroupApp’s Landing Page Builder, your own website, or an external landing page tool.
Here’s how the process will look:
Step 1: Go to your external checkout processor (PayPal, ThriveCart, or any other tool) and copy the URL of your order form for the product you’re selling.
Step 2: Open your sales page and locate the main call-to-action (CTA) button that buyers will click to purchase.
Step 3: Link the CTA button directly to your external checkout order form URL.
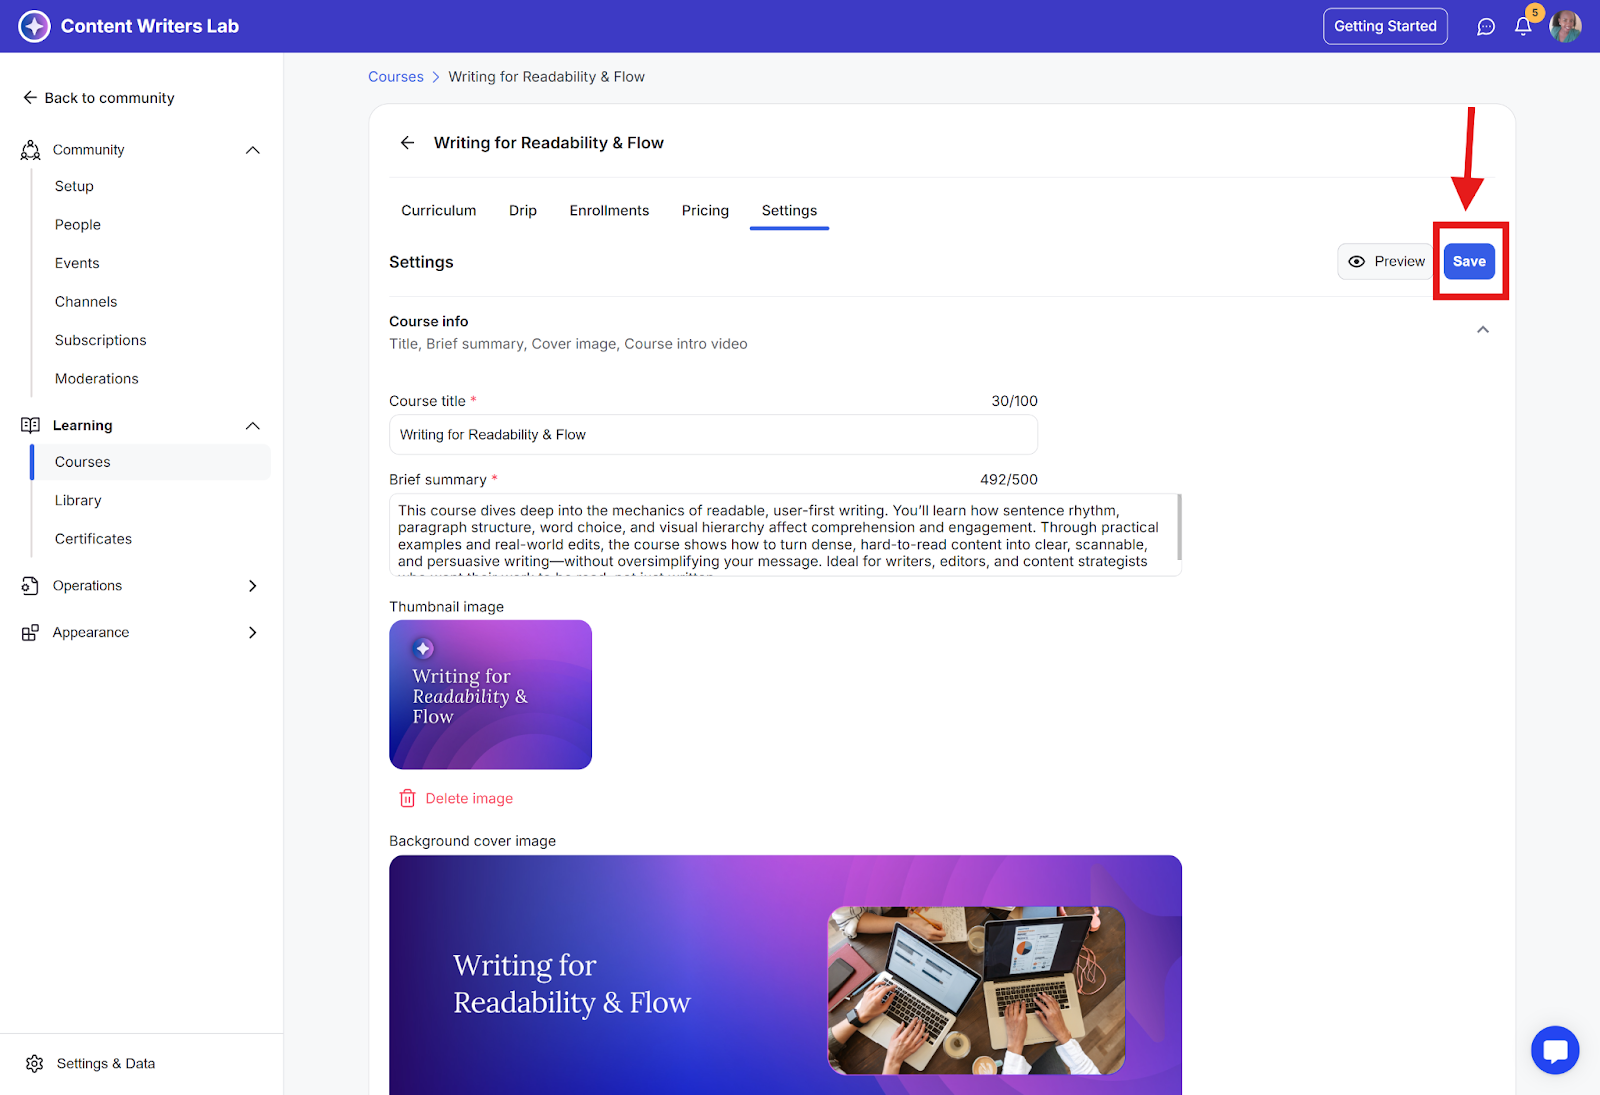
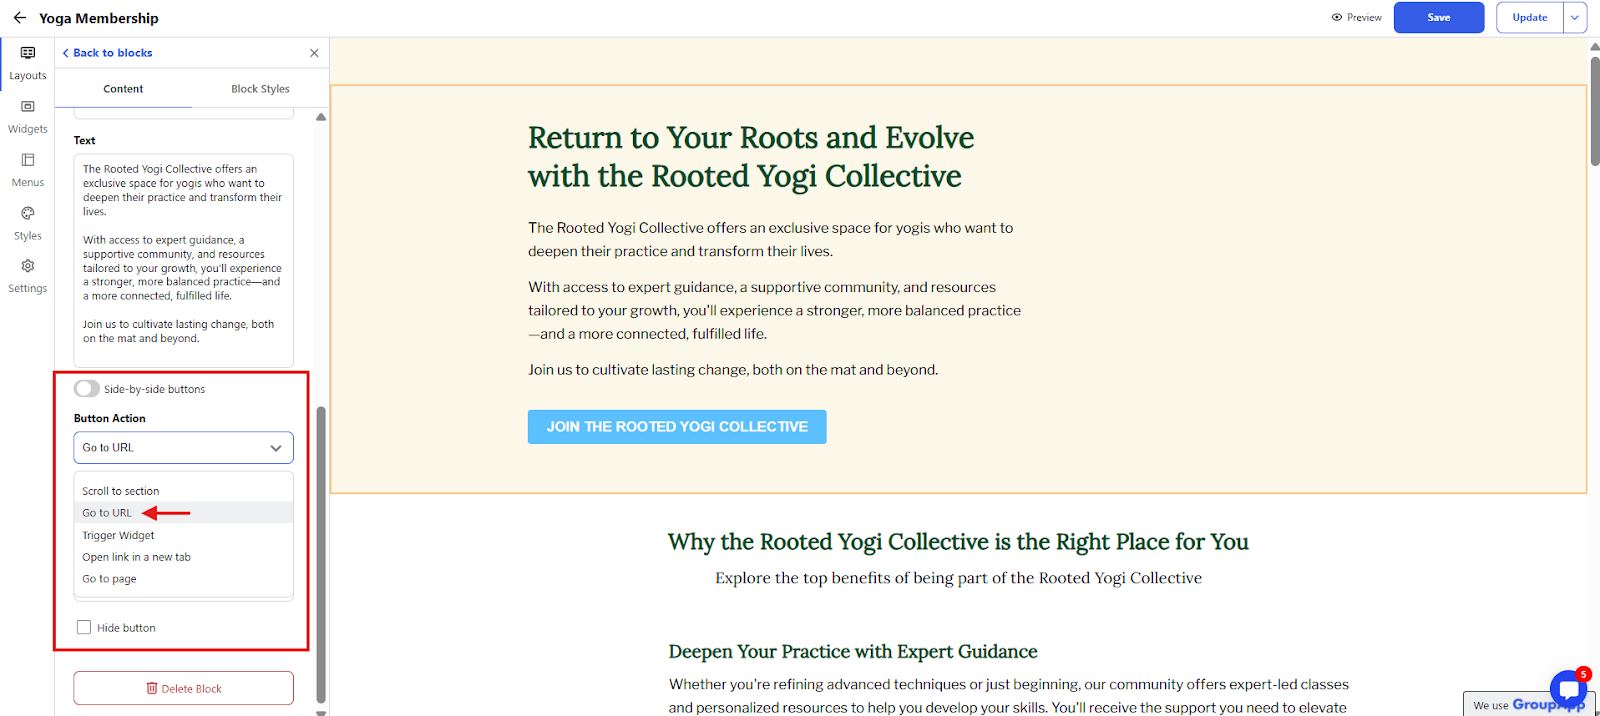
Step 4: If you’re using GroupApp’s Landing Page Builder, open the sales page for your offer (course or learning resource)
Step 5: Click on the button settings for your CTA, set the button action to Go to URL.

Step 6: Paste the external checkout form URL in the field.
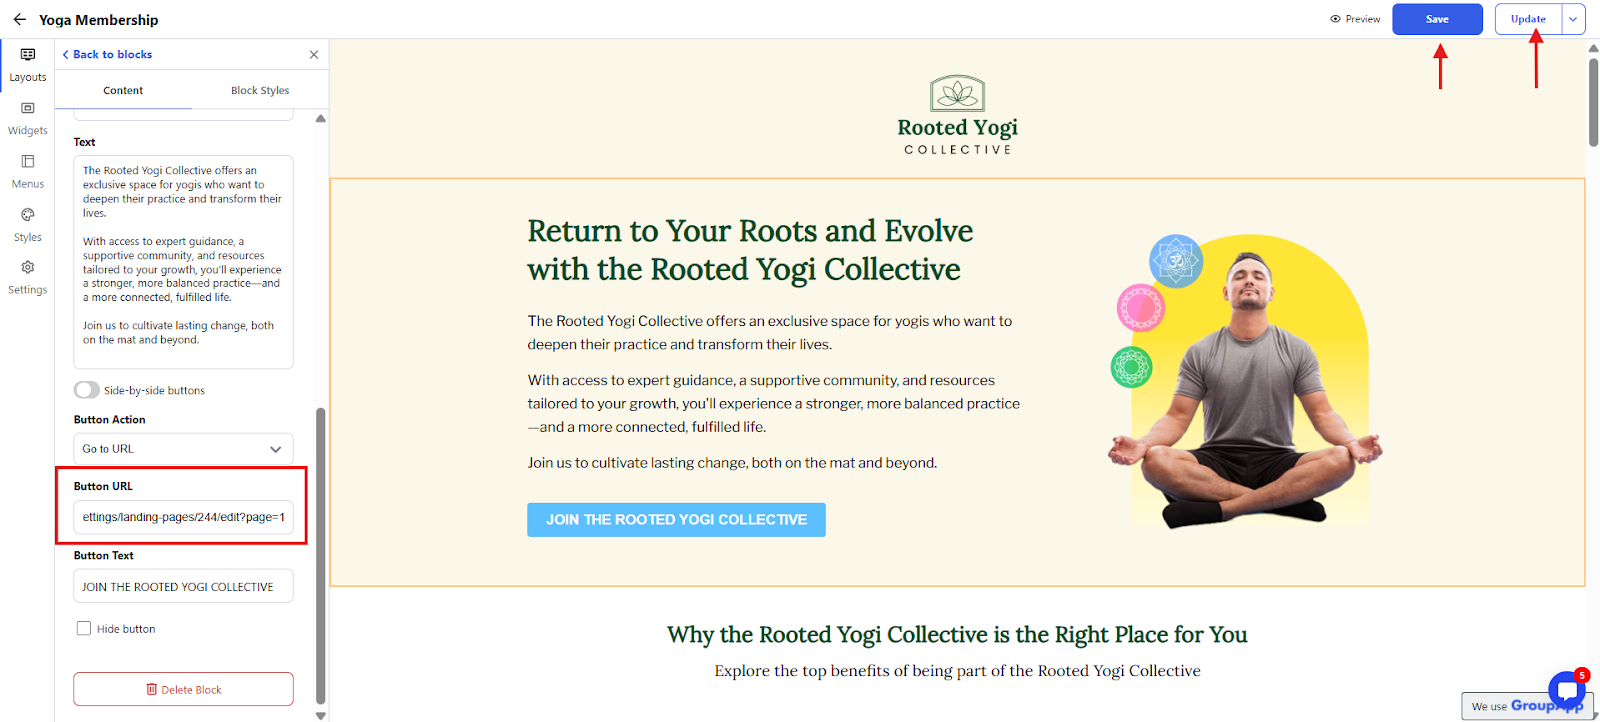
Step 7: Save and update your page (as shown above) so the new button action is live. When a visitor clicks the button, they’ll be taken directly to your external checkout form.
Now, we’ll create a free subscription, because access to the community is linked to subscriptions. We set it as free since the member has already paid using an external payment processor.
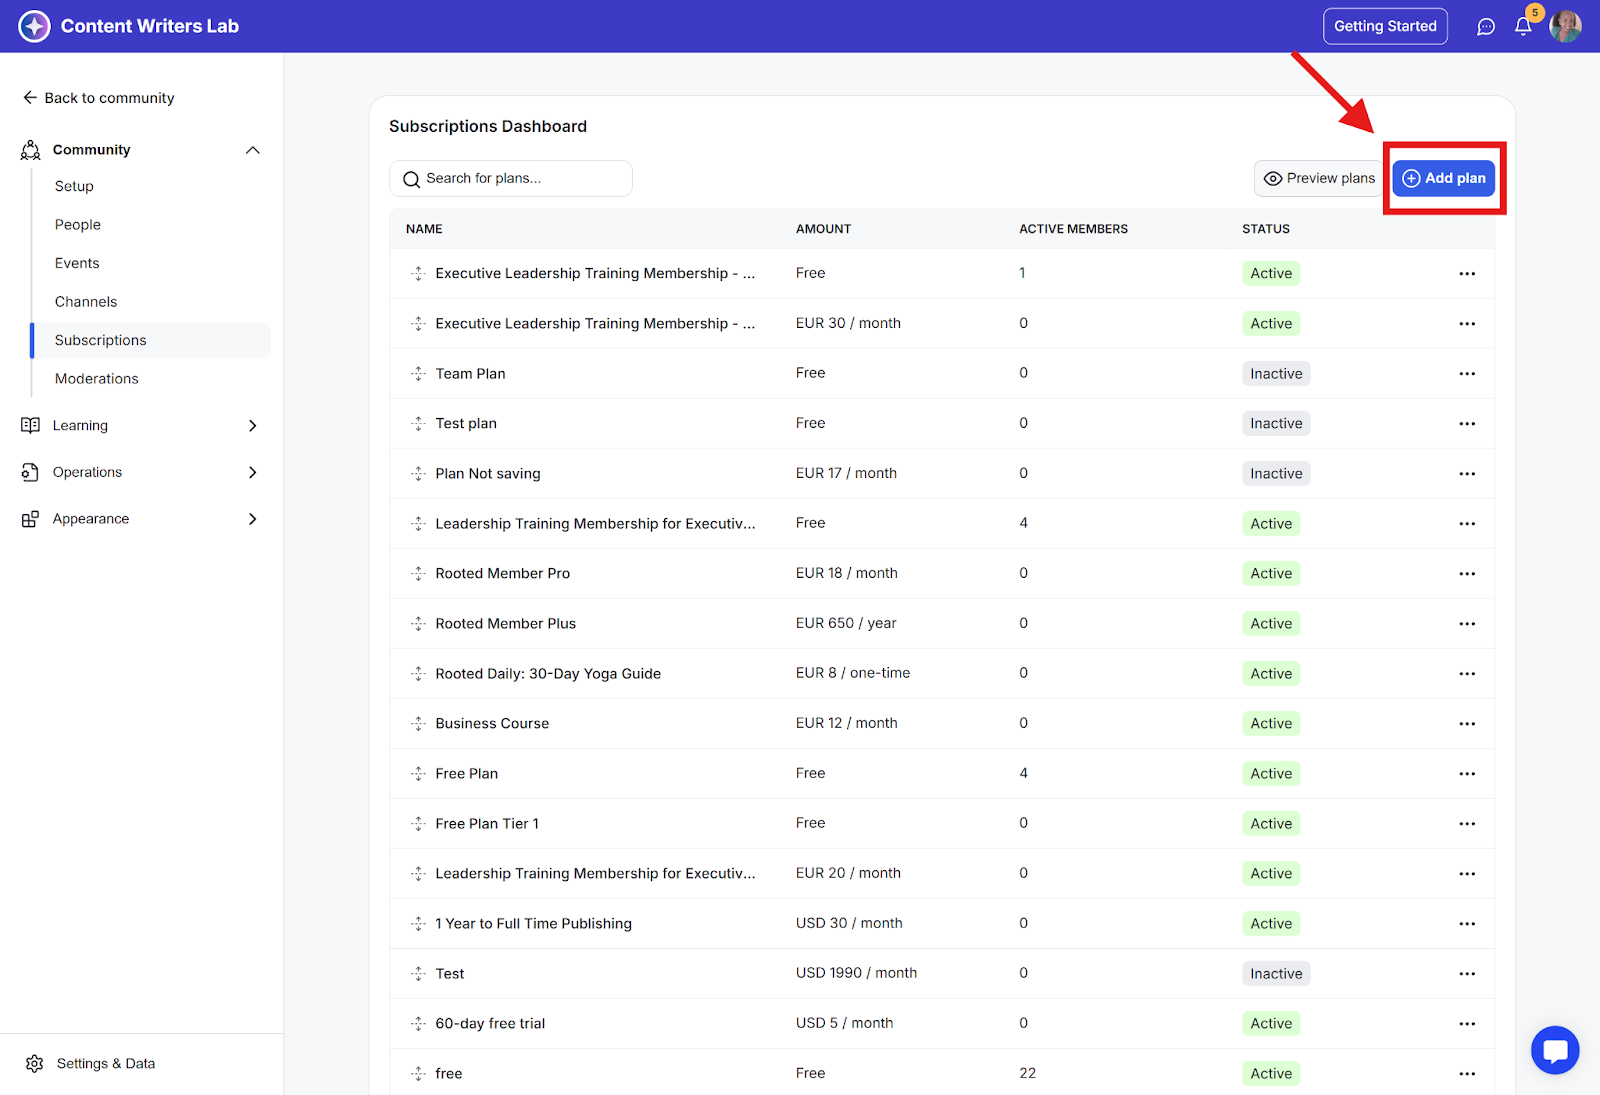
Step 1: Go to your Admin Panel and then click on Subscriptions in the left-side menu.

Step 2: Click Add Plan on the top-right to open the pop-up.

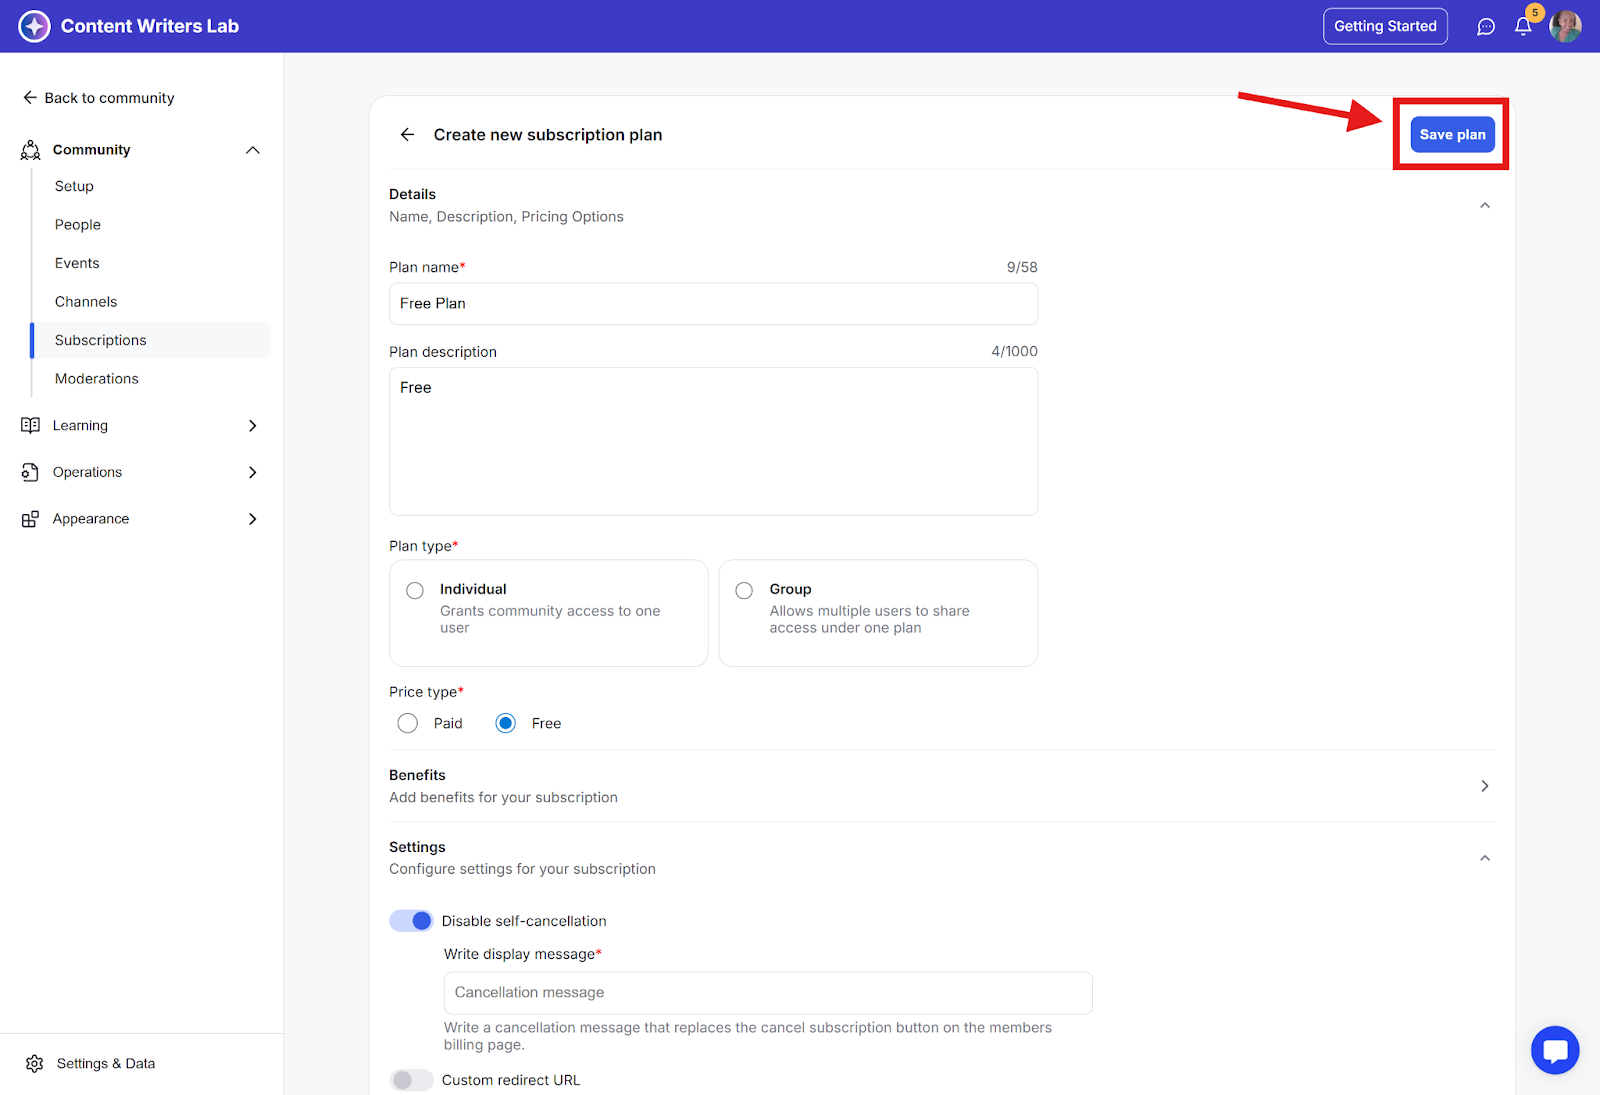
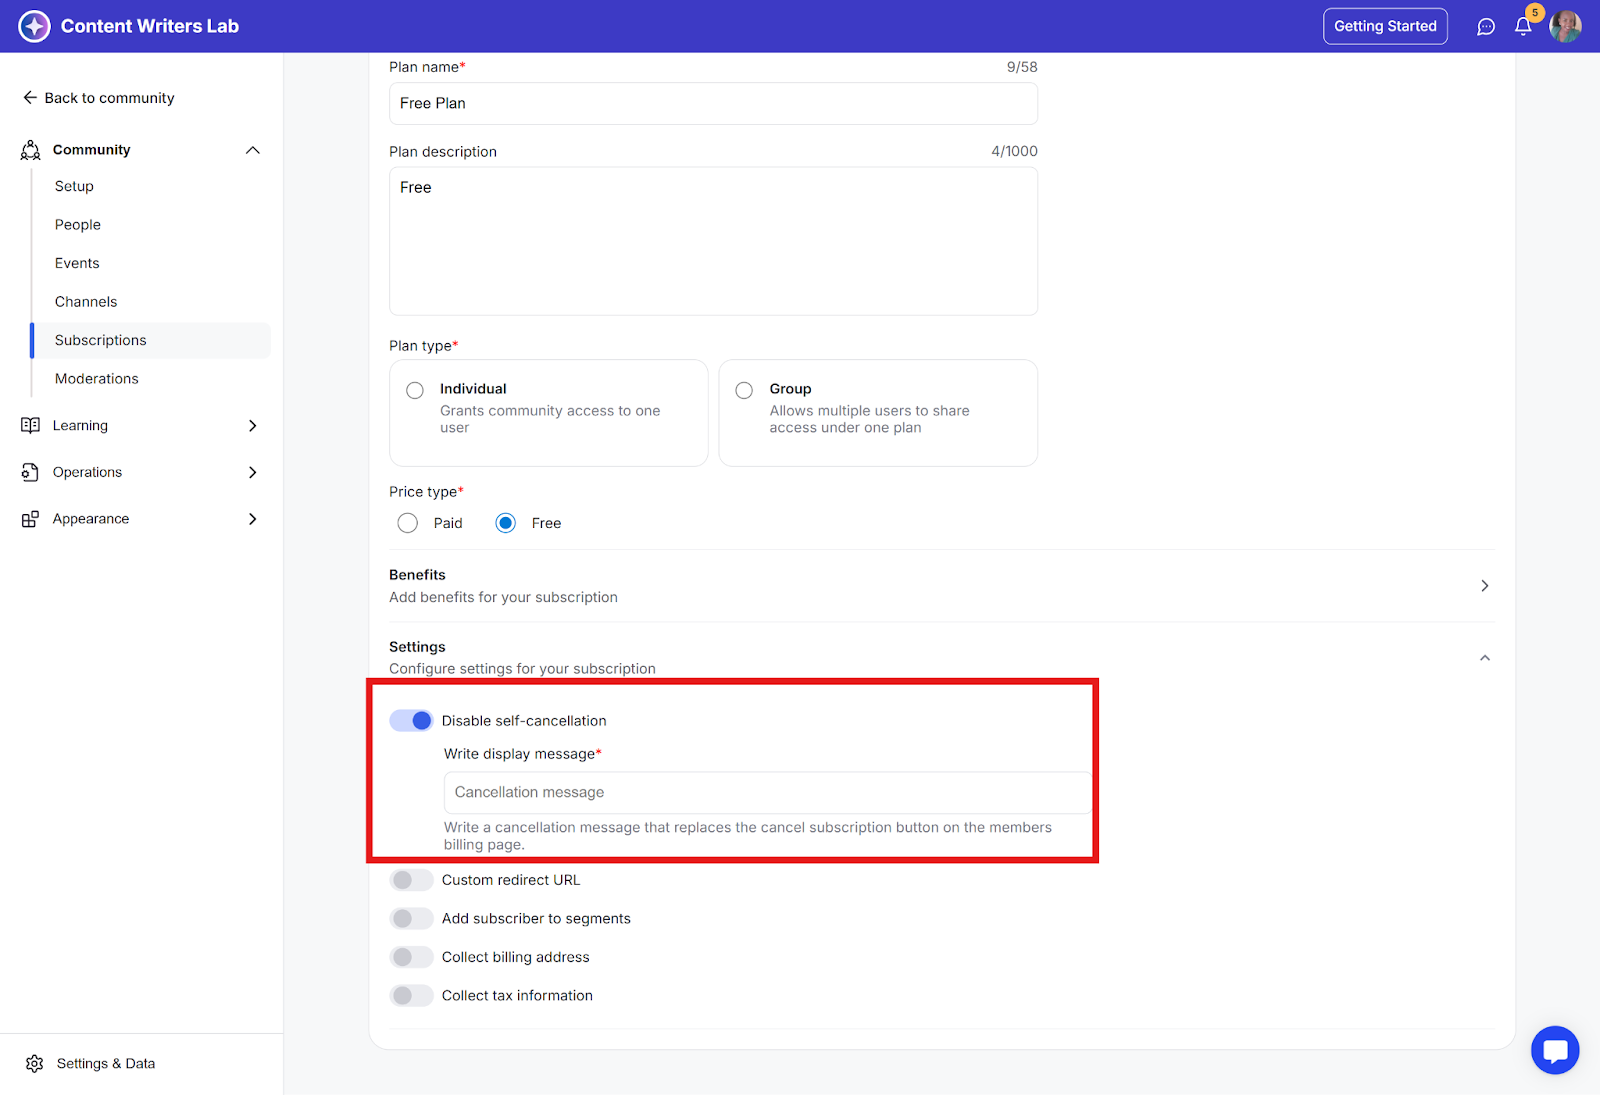
Step 3: Name the subscription as Free Plan and set the plan type as Free.

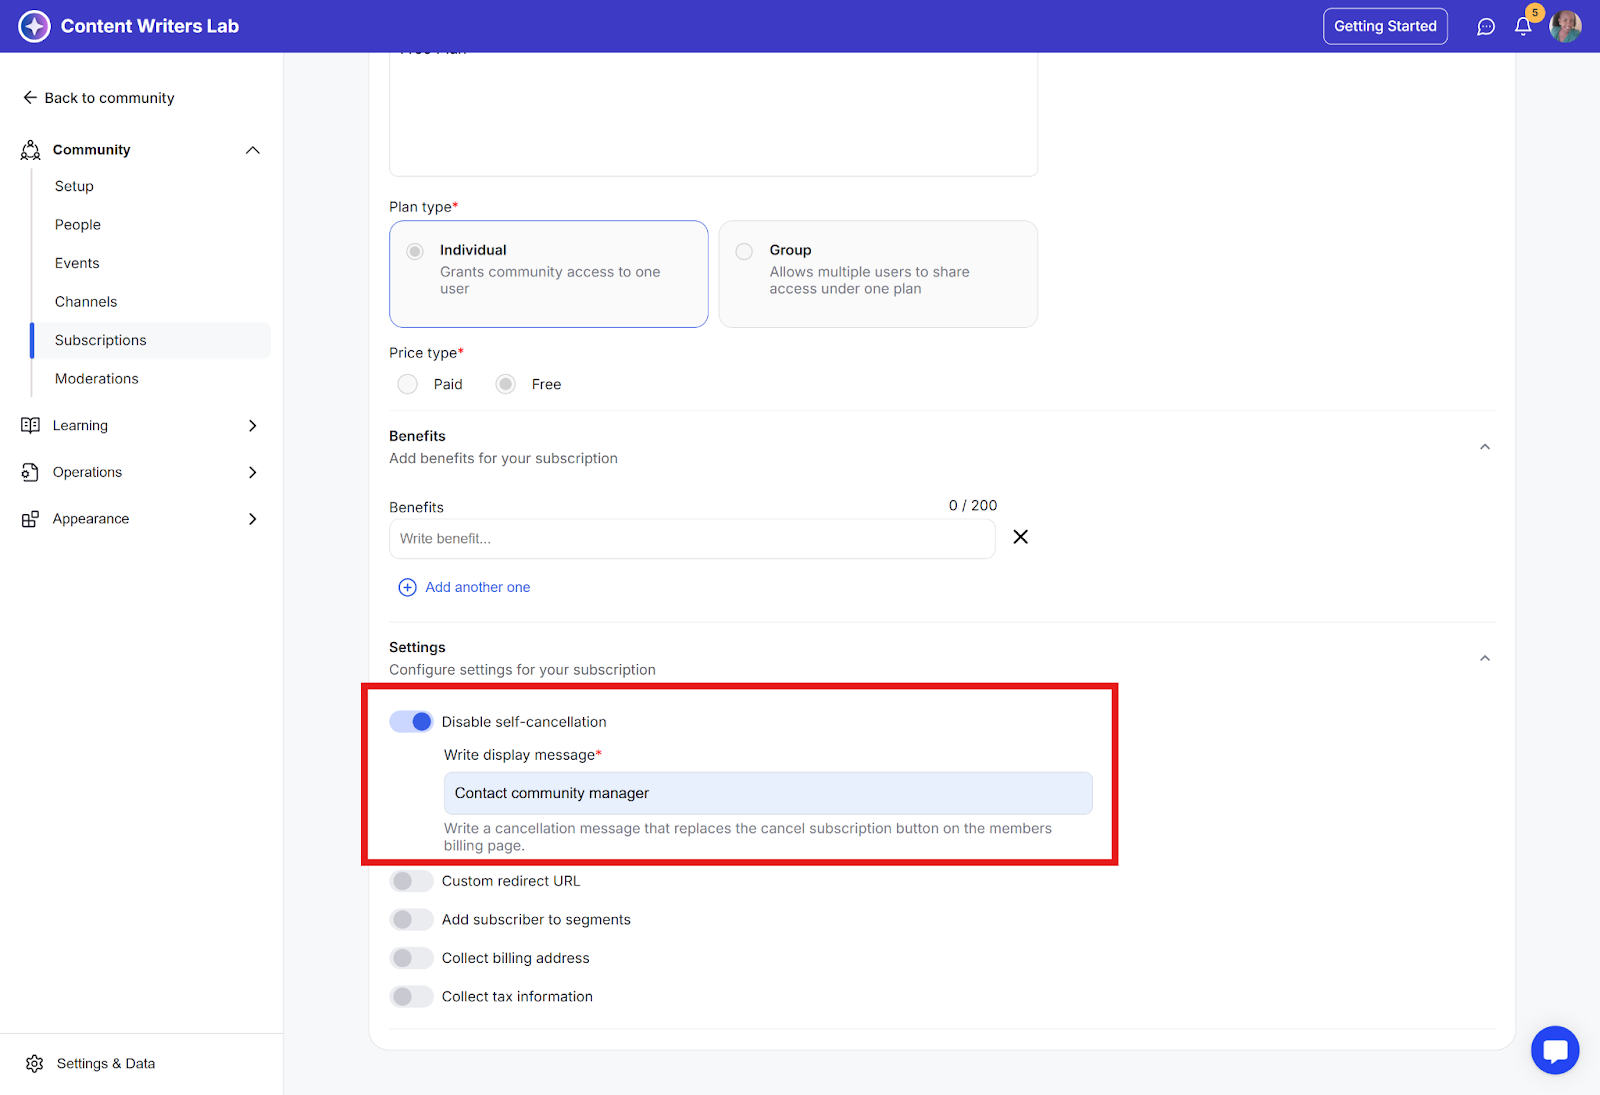
Step 4: Scroll down to Settings and turn on Disable self-cancellation. You can also add a custom message that replaces the cancel subscription button on the member’s billing page.

Step 5: Finally, click on the Save Plan button.
Step 1: Click Admin Panel, and go to Learning on the side menu.
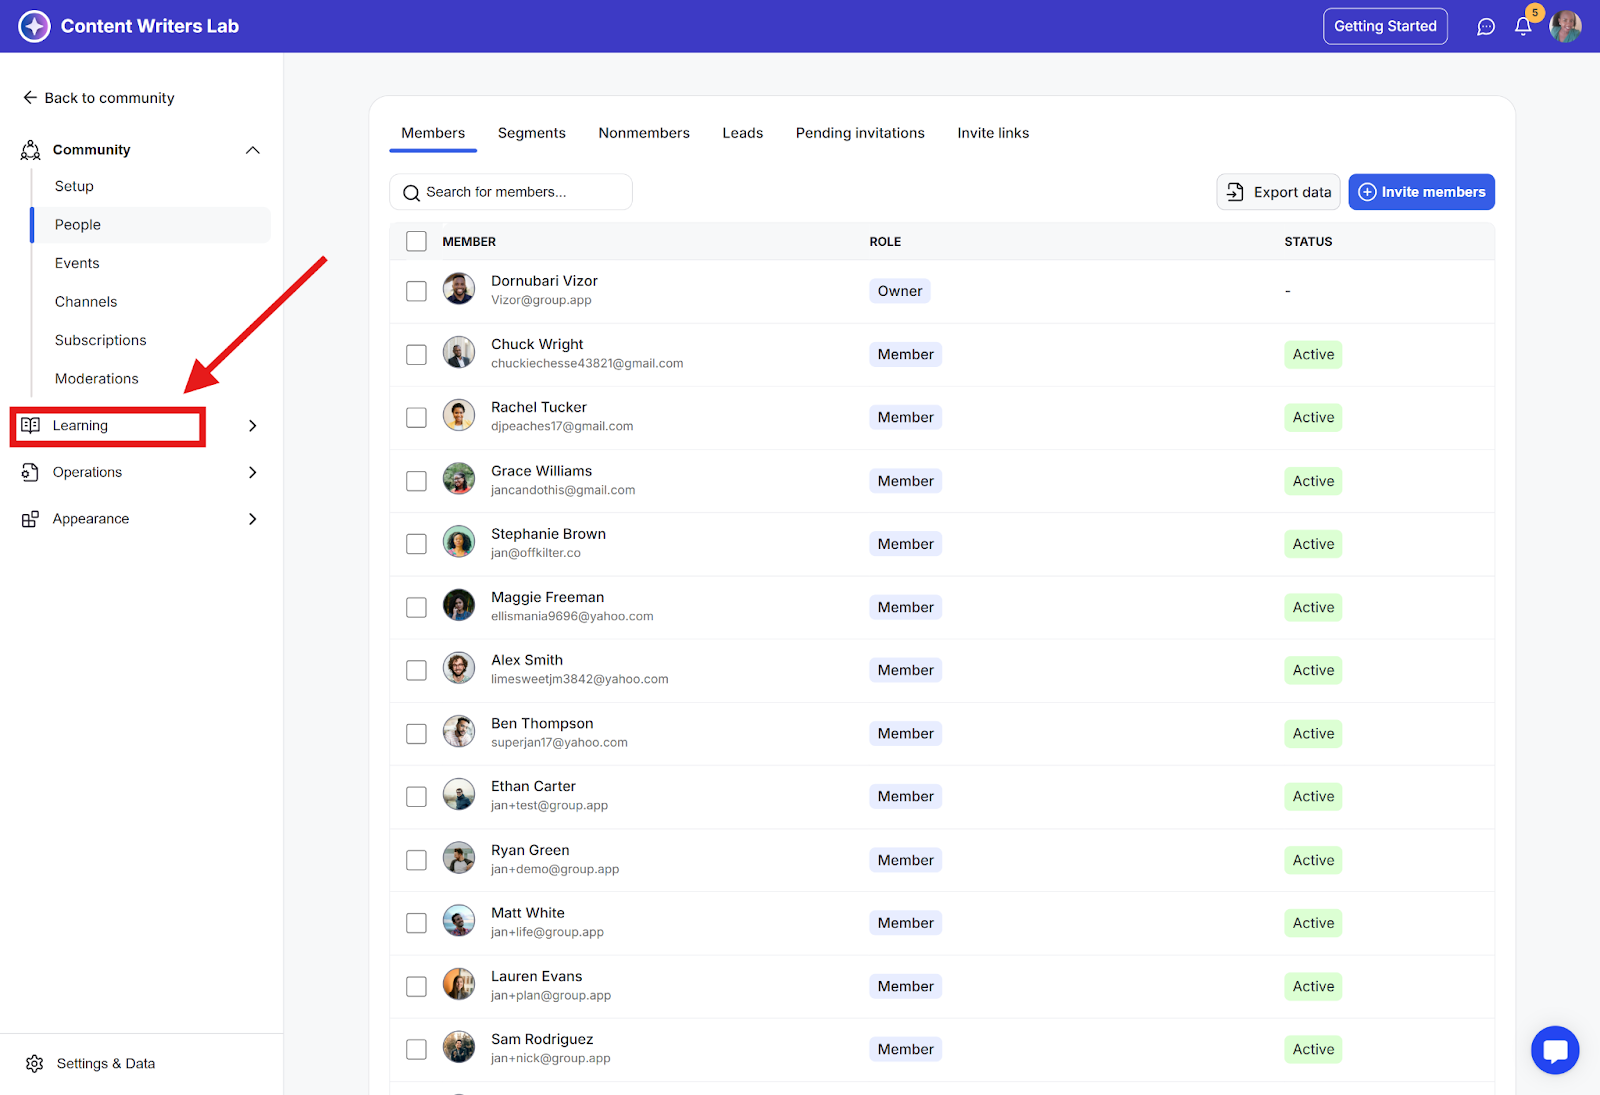
Step 2: Select Courses and open the course you want to configure.
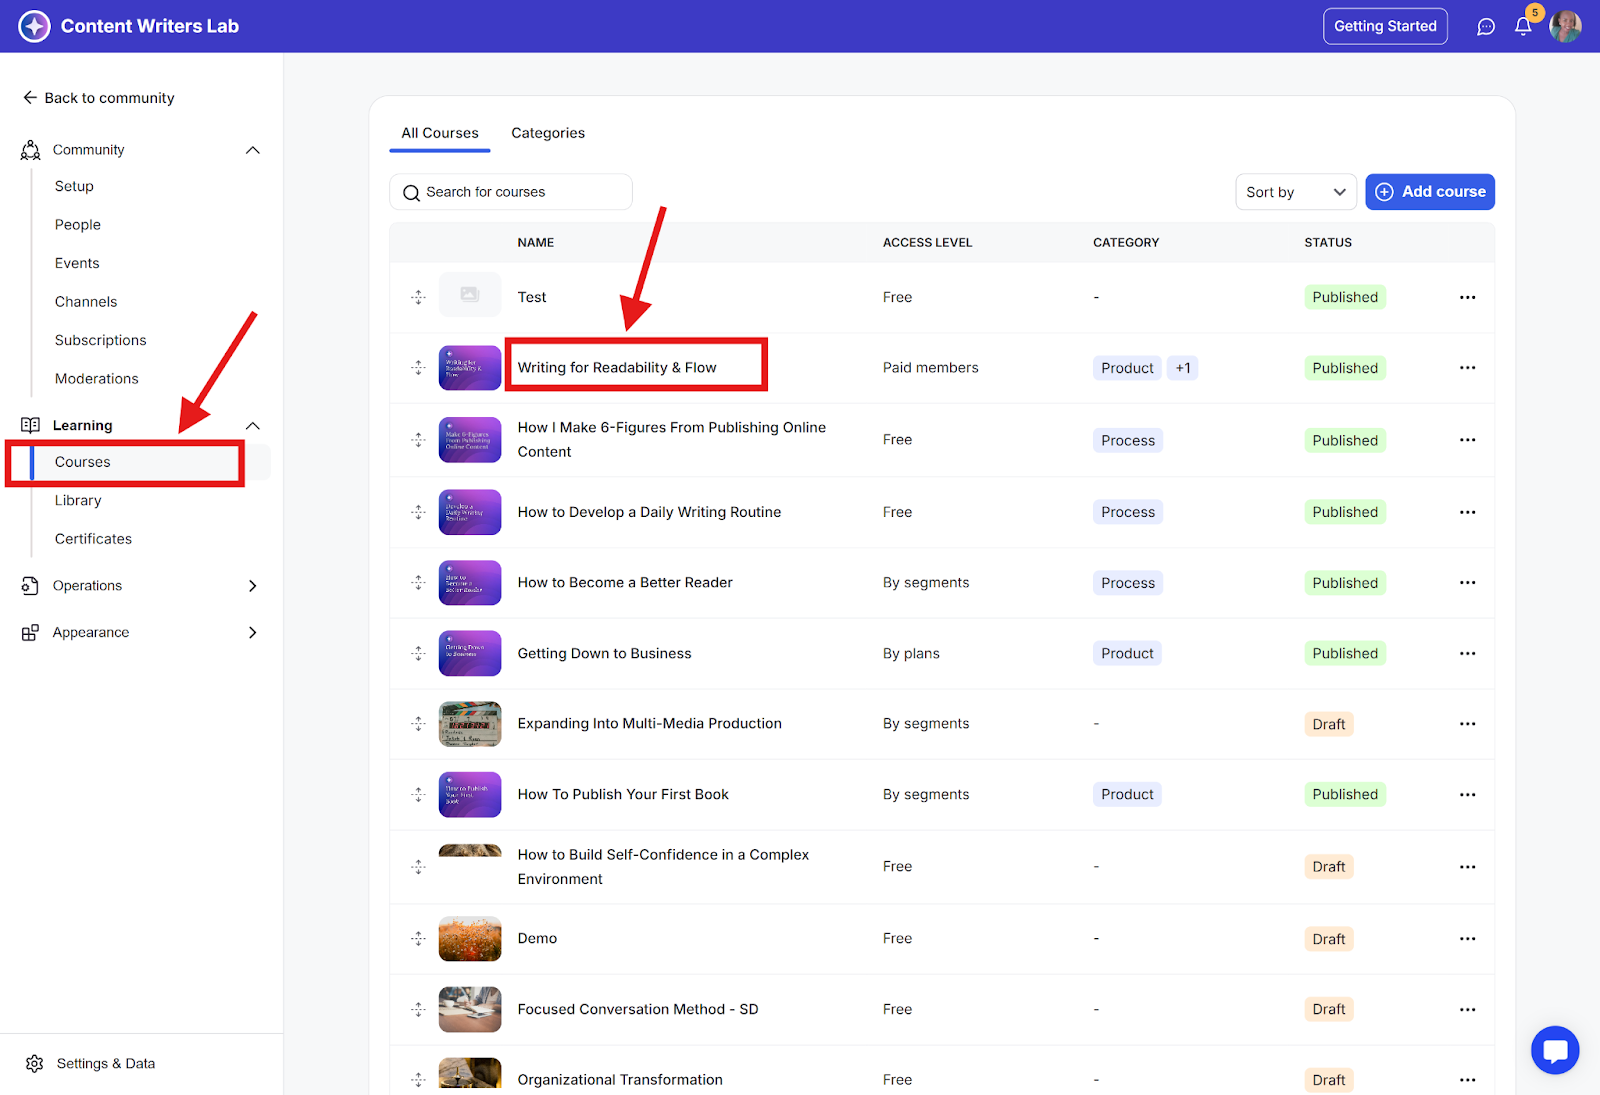
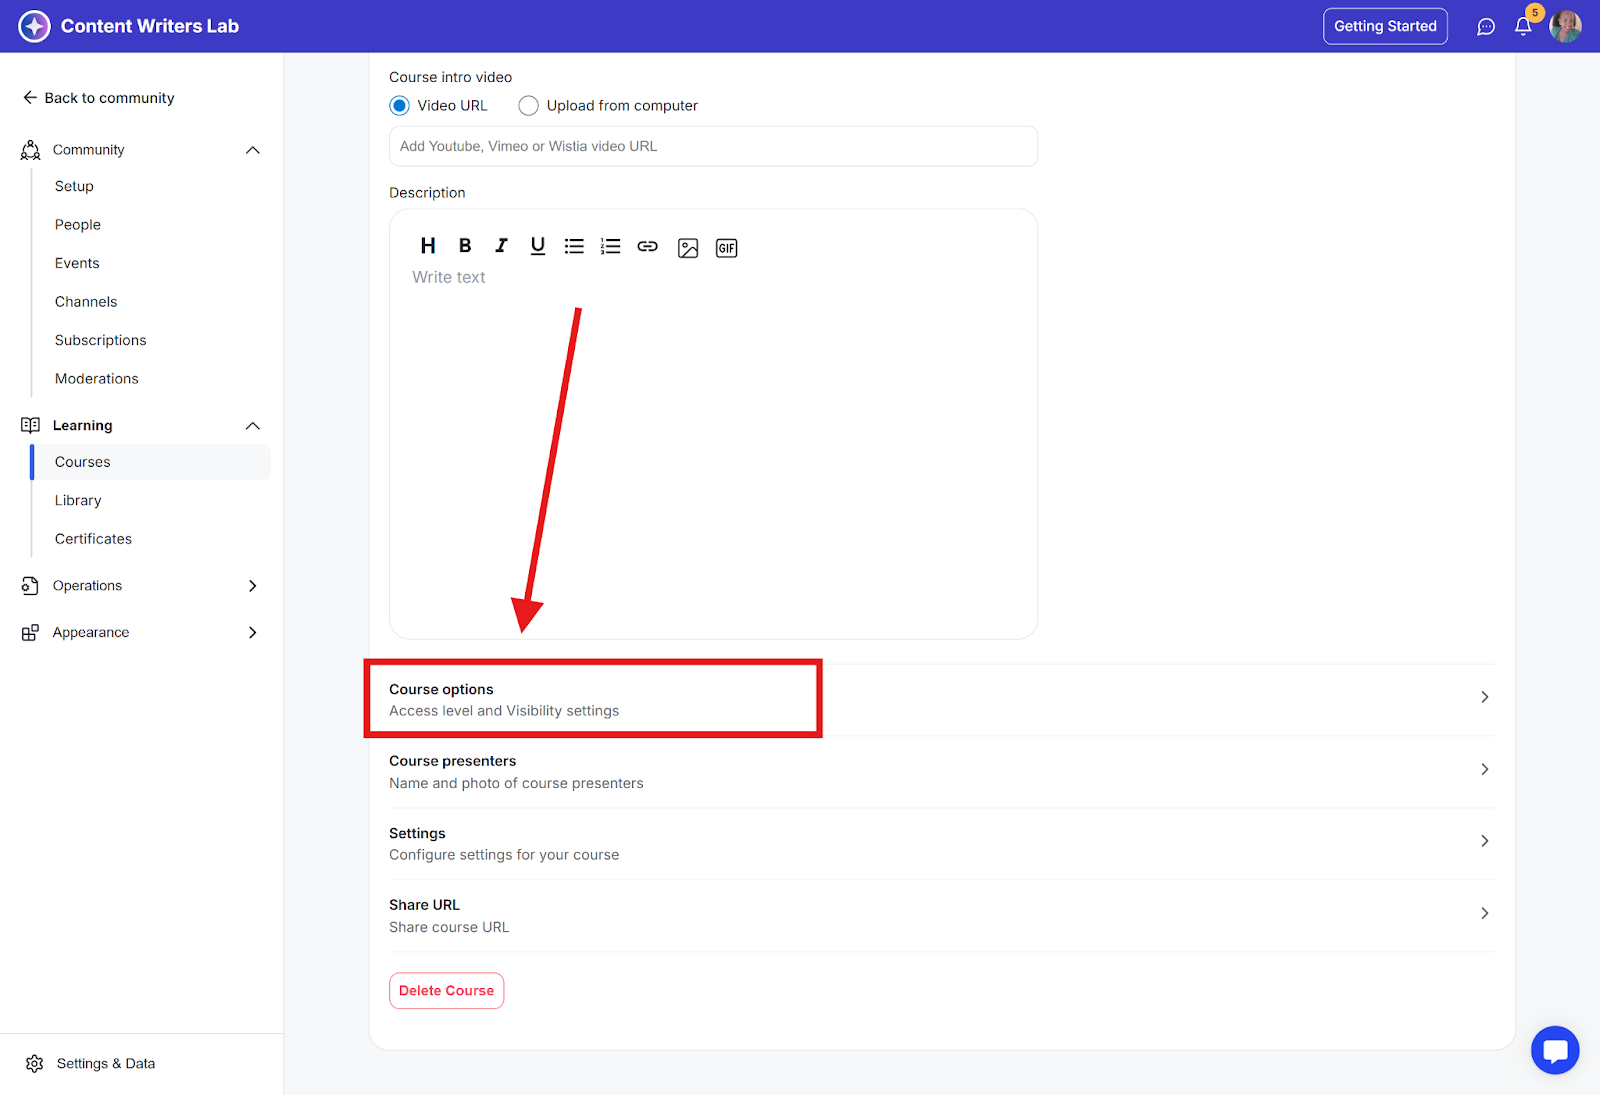
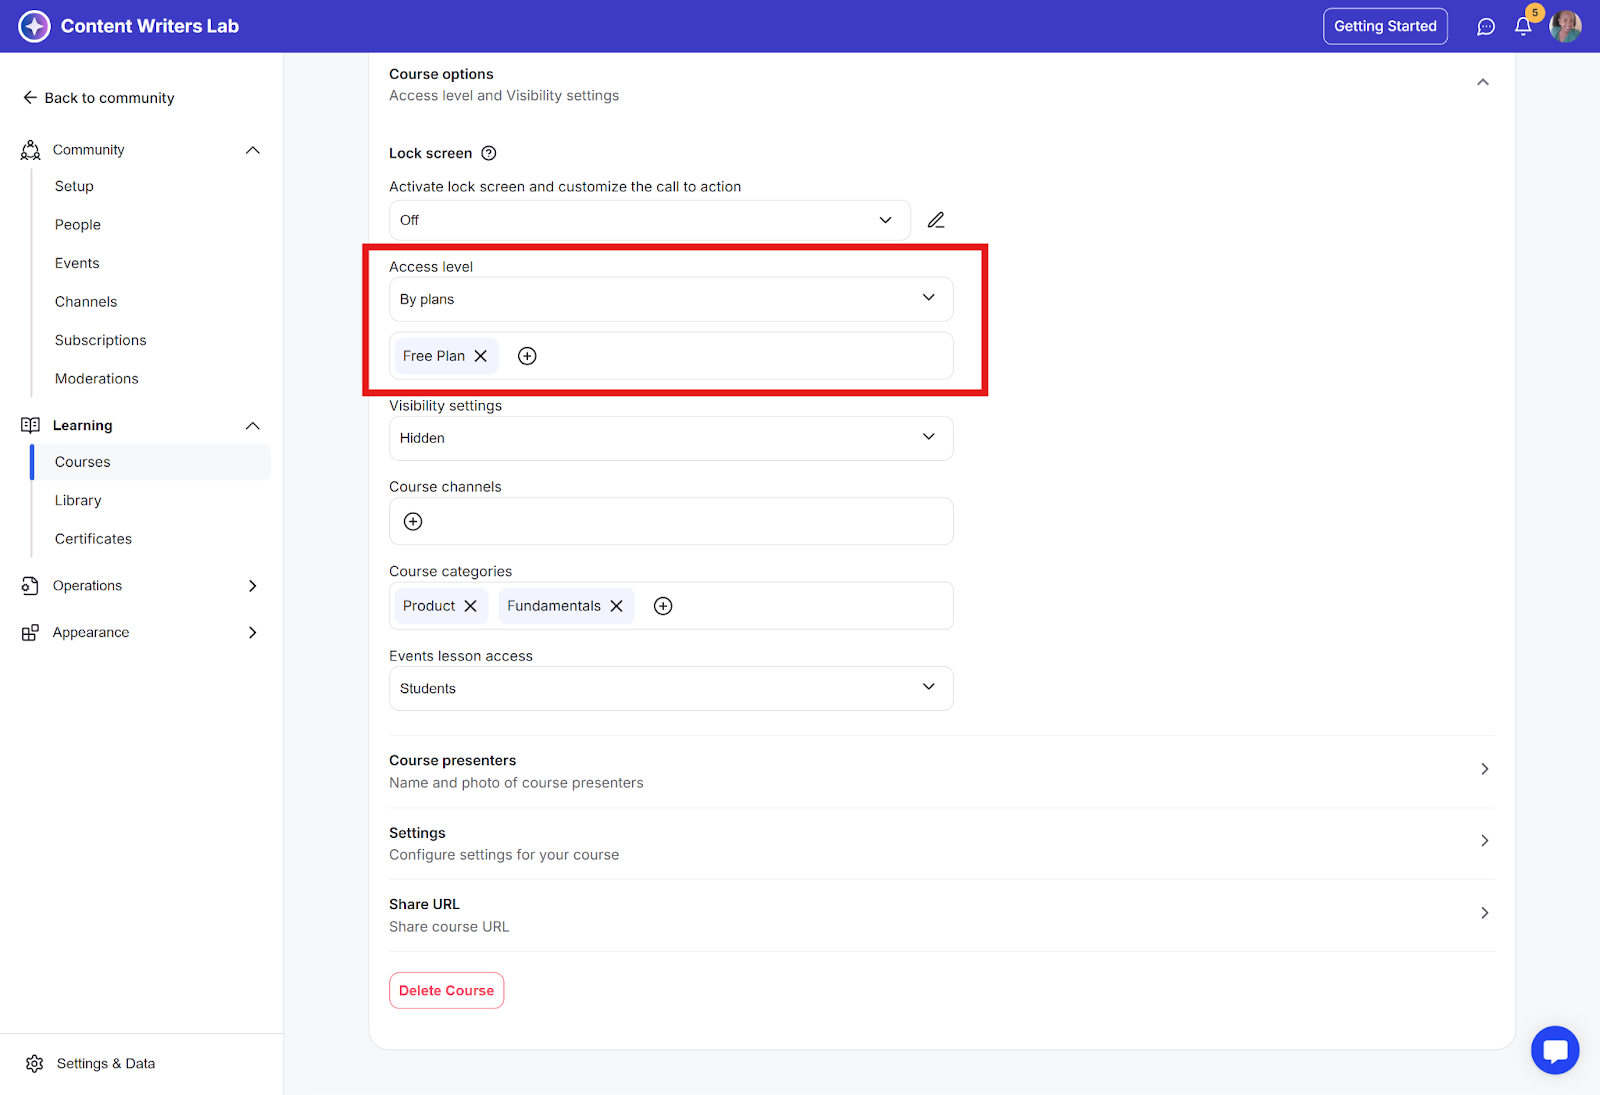
Step 3: Click the Settings tab and scroll to Course Options.

Step 4: Under Access Level, choose access By Plan and select the free plan you just created through the search field below.

Step 5: Finally, click Save.
After the buyer completes payment, use an automation tool to connect your external checkout to GroupApp. This tool acts as the bridge that creates the member account and gives access automatically.
You can use Zapier, Pabbly, or Integrately. The setup process is similar for all of them.
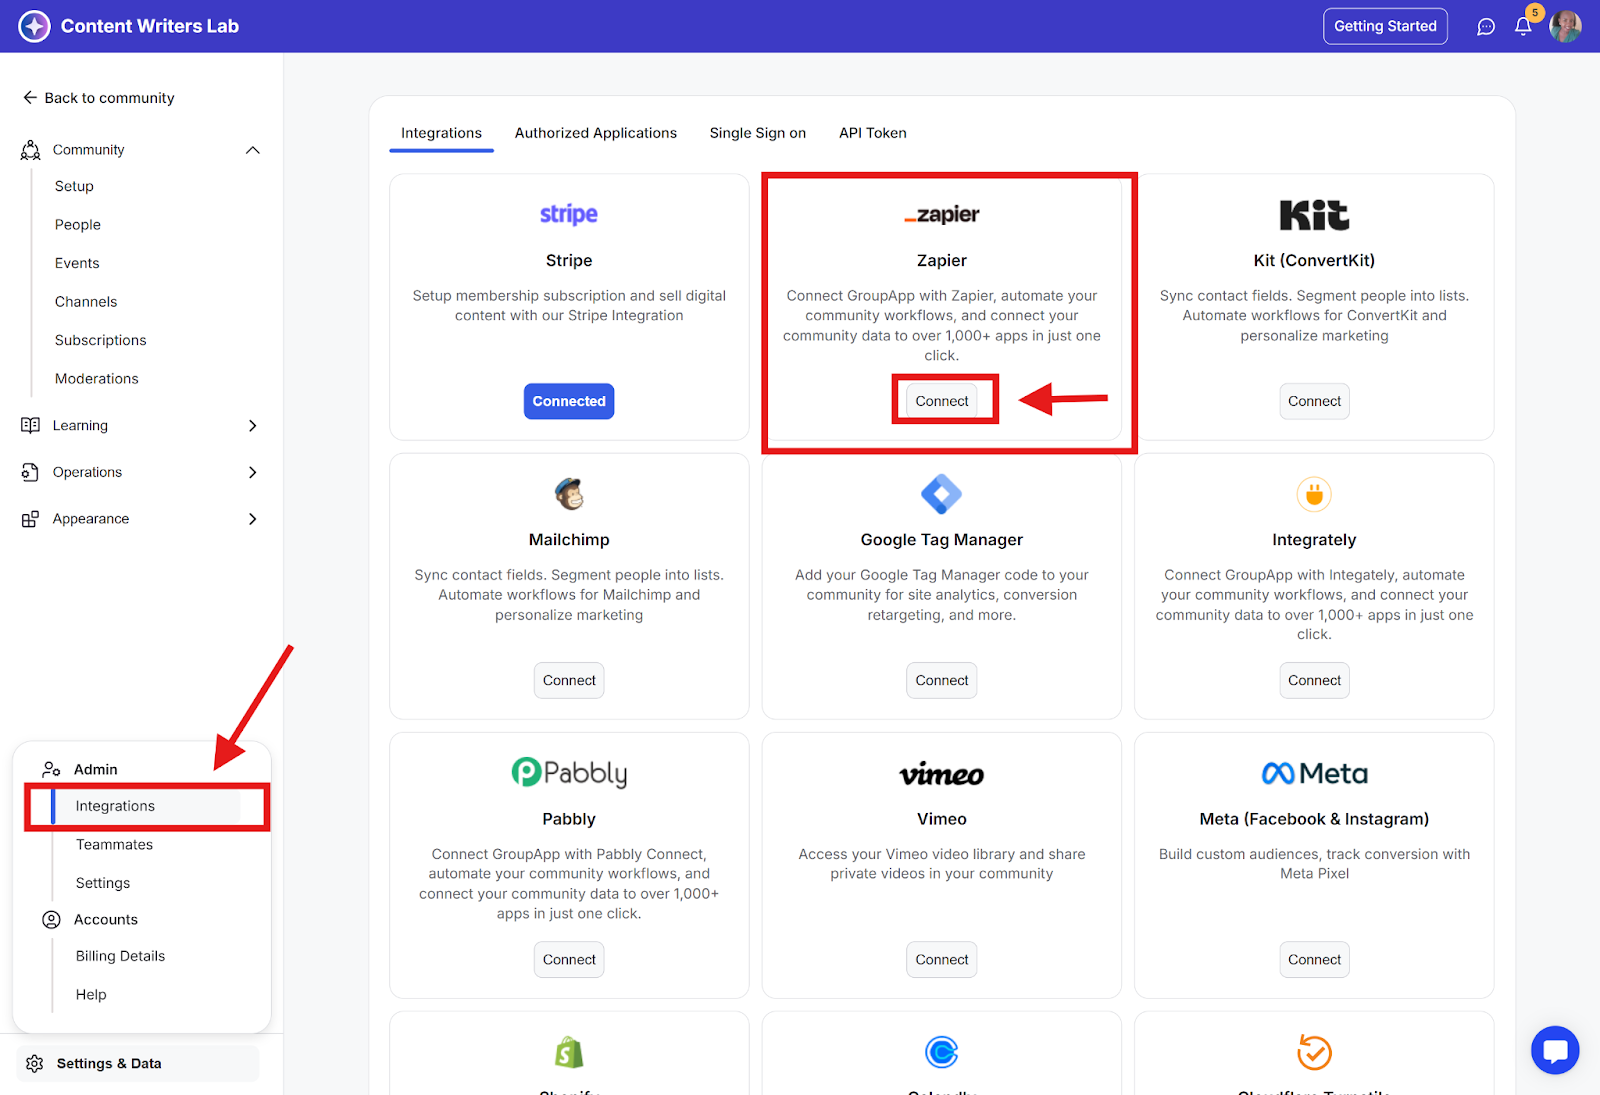
Step 1: In GroupApp, click Admin Panel, go to the bottom of the left side menu, and click Settings & Data.
Step 2: Select Integrations, and click on the Connect button for Zapier.

Step 3: Make sure you’re logged in. Click on Accept Invite & Build a Zap to connect with Zapier. Once connected, the GroupApp Zapier app will be added to your account and ready for use.
In your Zapier workflow, create actions to:
Create a new member in your community using the buyer’s email address (this will generate their GroupApp account).
Assign the free subscription plan to the member to access the community and learning programs.
Enroll the member in the correct product (course, library item, or event) that they purchased.
Add the member to the right channel so they are included in the discussions connected to their product.
Following these steps makes sure that when someone pays through an external checkout, they are automatically added to your GroupApp community with the correct access, just like if you were using Stripe.
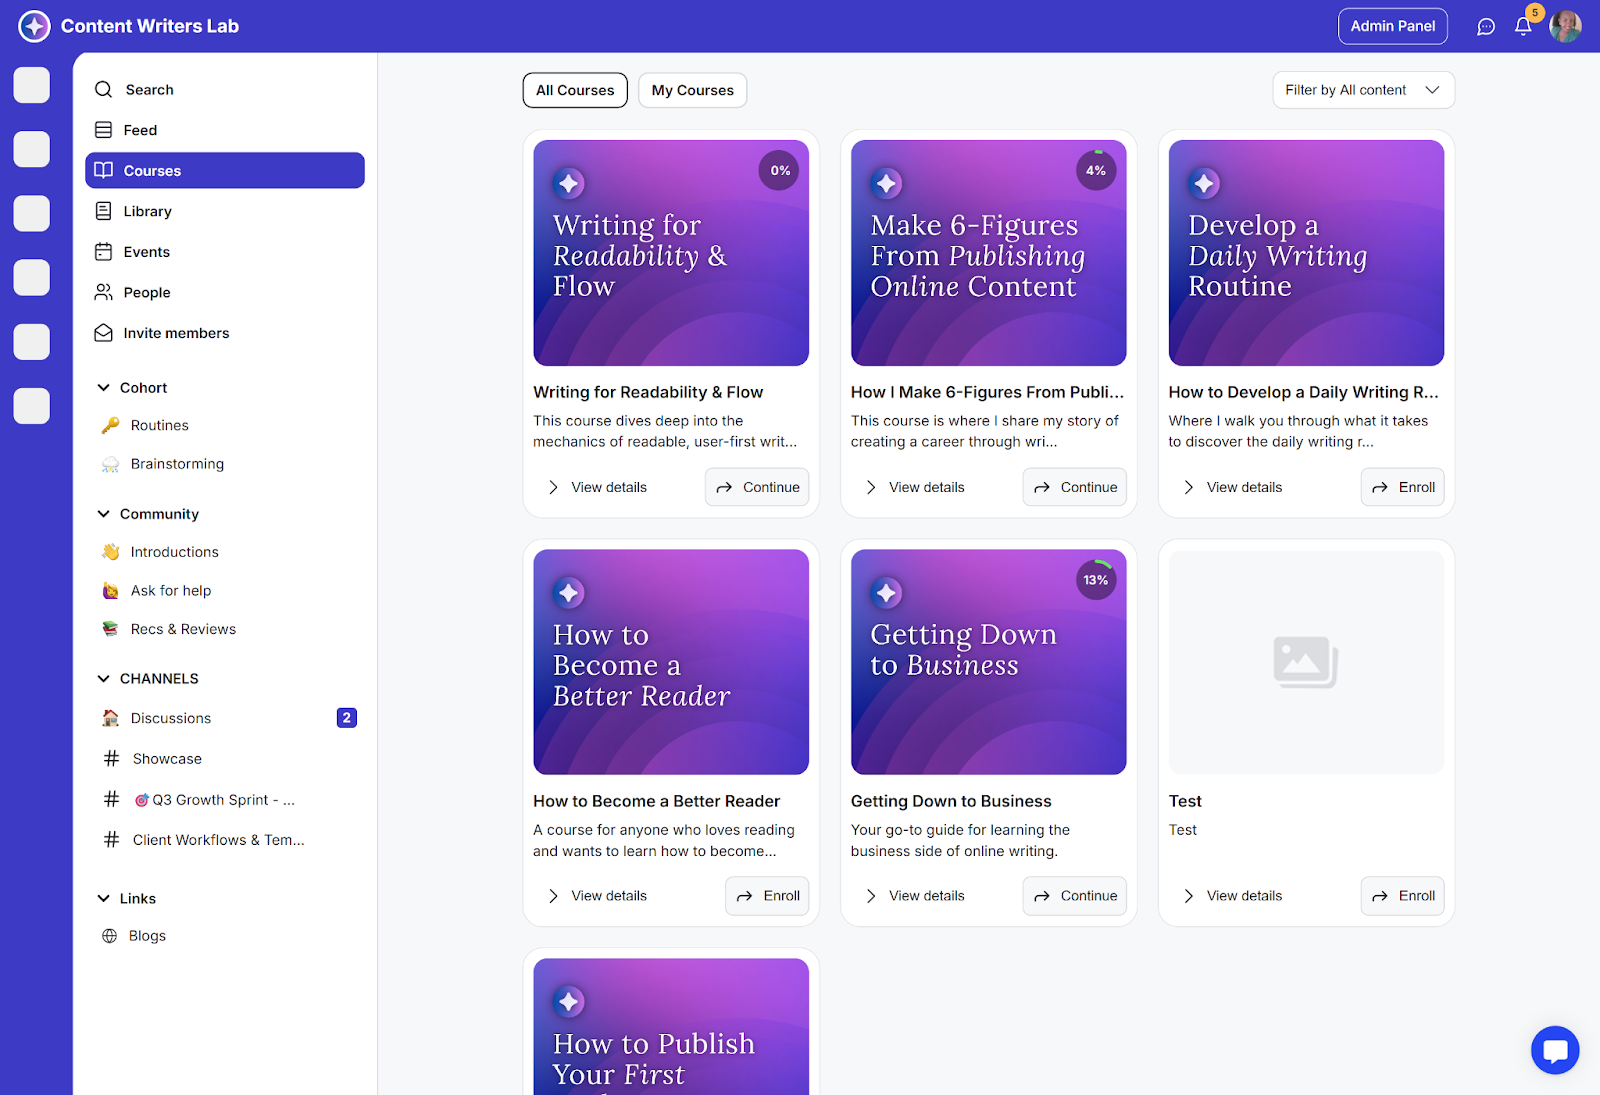
This process works for courses, library content, and events hosted on GroupApp when you’re sending traffic straight to their overview pages.
For example, let’s say you’re directing traffic to your course page hosted on GroupAp (as shown below).
Now, we’ll create a free subscription, because access to the community is linked to subscriptions. We set it as free since the member has already paid using an external payment processor.
Step 1: Go to your Admin Panel and then click on Subscriptions in the left-side menu.
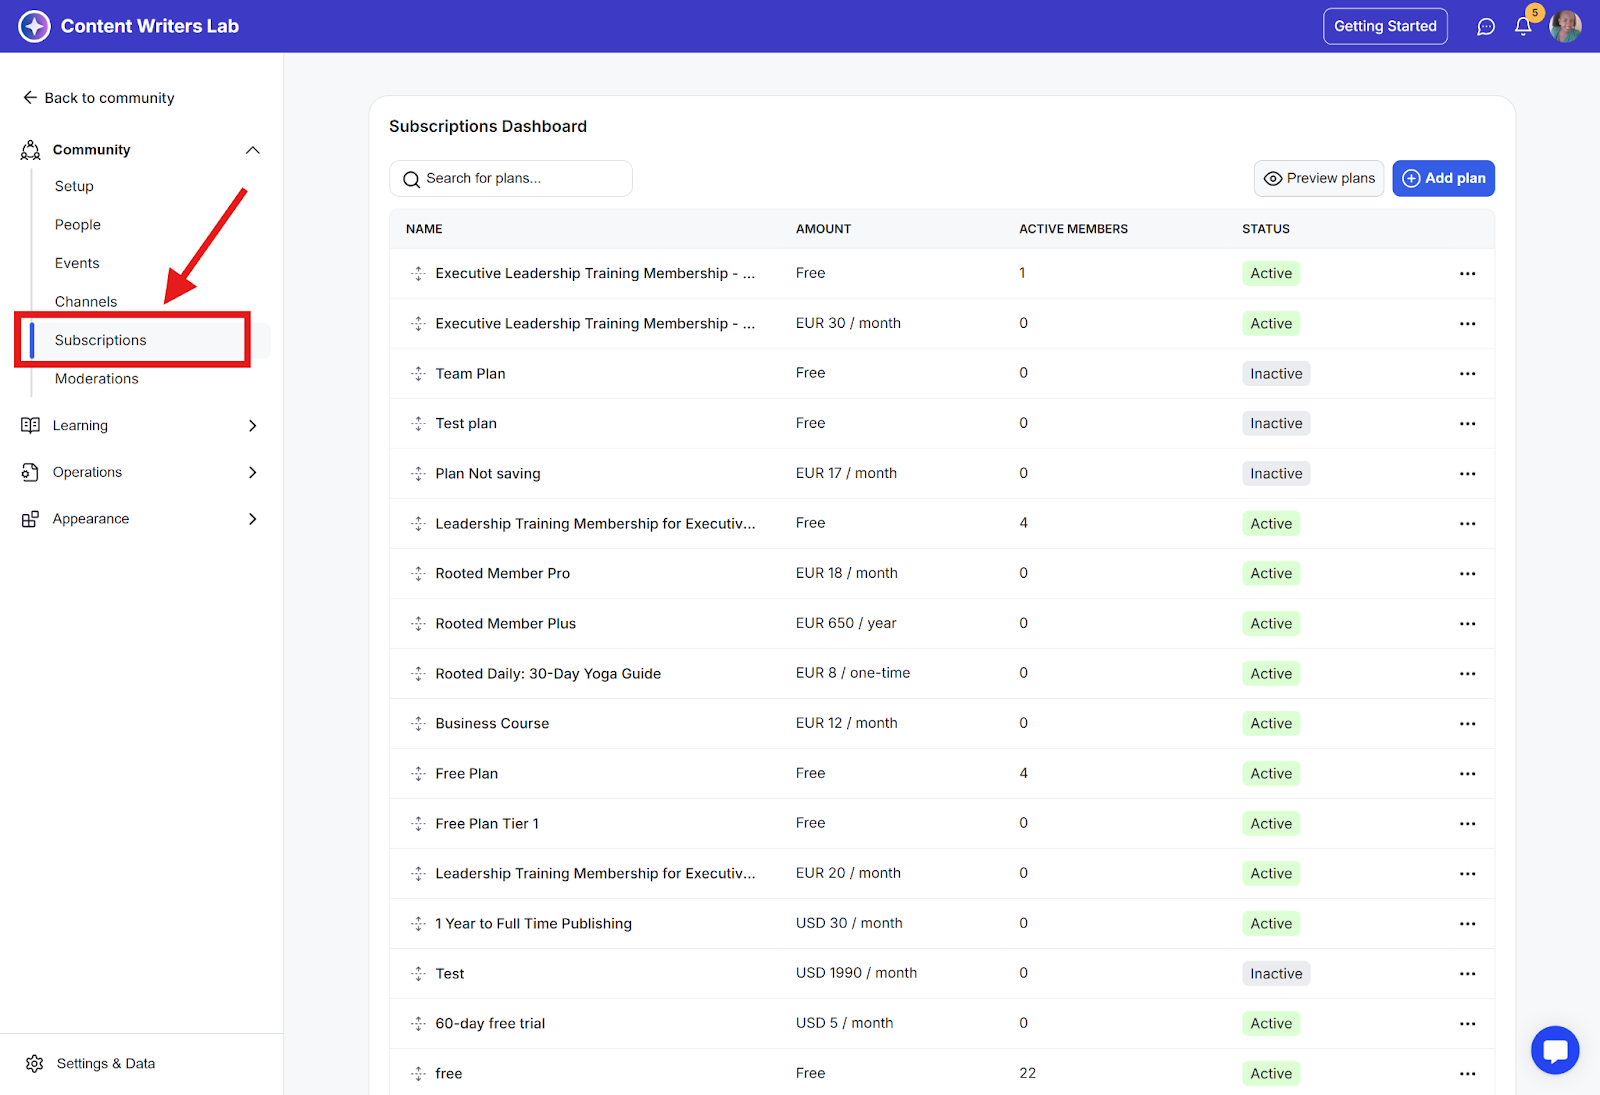
Step 2: Click Add Plan on the top-right to open the pop-up.

Step 3: Name the subscription as Free Plan and set the price type as Free.

Step 4: Scroll down to Settings and turn on Disable self-cancellation.
You can also add a custom message that replaces the cancel subscription button on the member’s billing page.

Step 5: Finally, click on the Save Plan button.

Step 1: Click Admin Panel, and go to Learning on the side menu.

Step 2: Select Courses and open the course you want to configure.

Step 3: Click the Settings tab and scroll to Course Options.
Step 4: Under Access Level, choose access By Plan and select the free plan you just created through the search field below.

Step 5: Finally, click Save.

Step 1: In the same section, turn on the Lock Screen Option. A pop-up will appear.
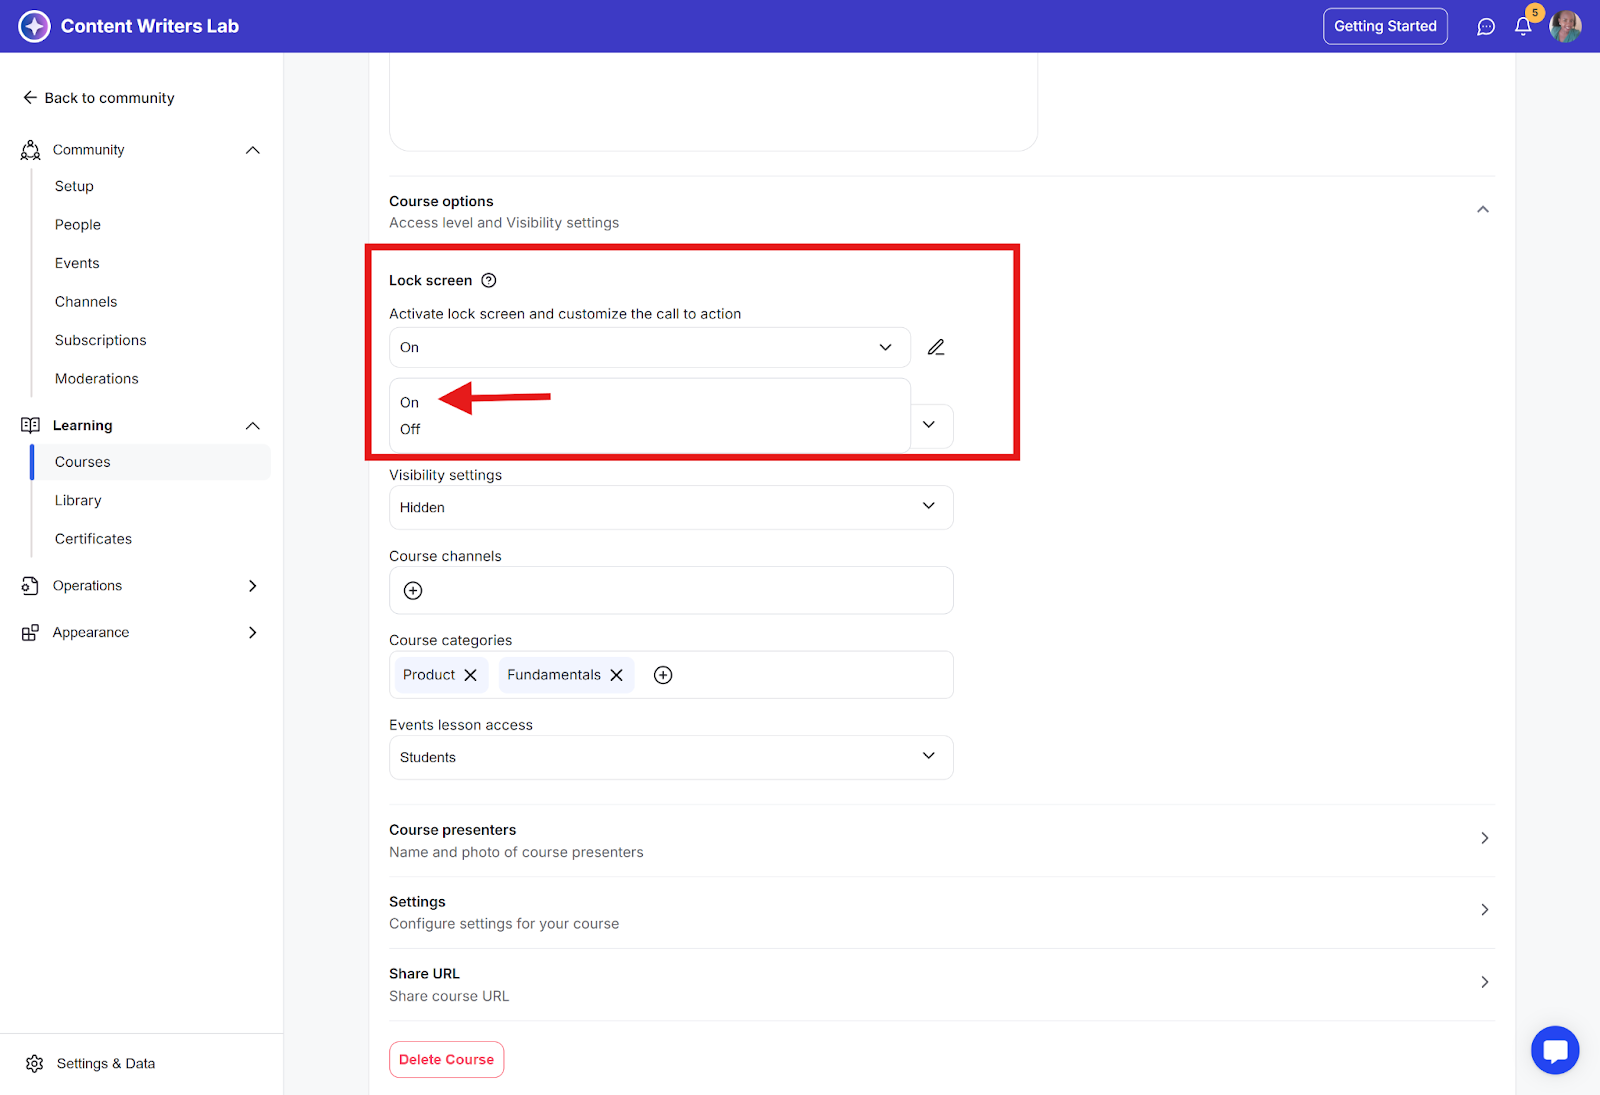
Step 2: Choose the lock screen type: Display a message with a CTA button, or Redirect to a URL.
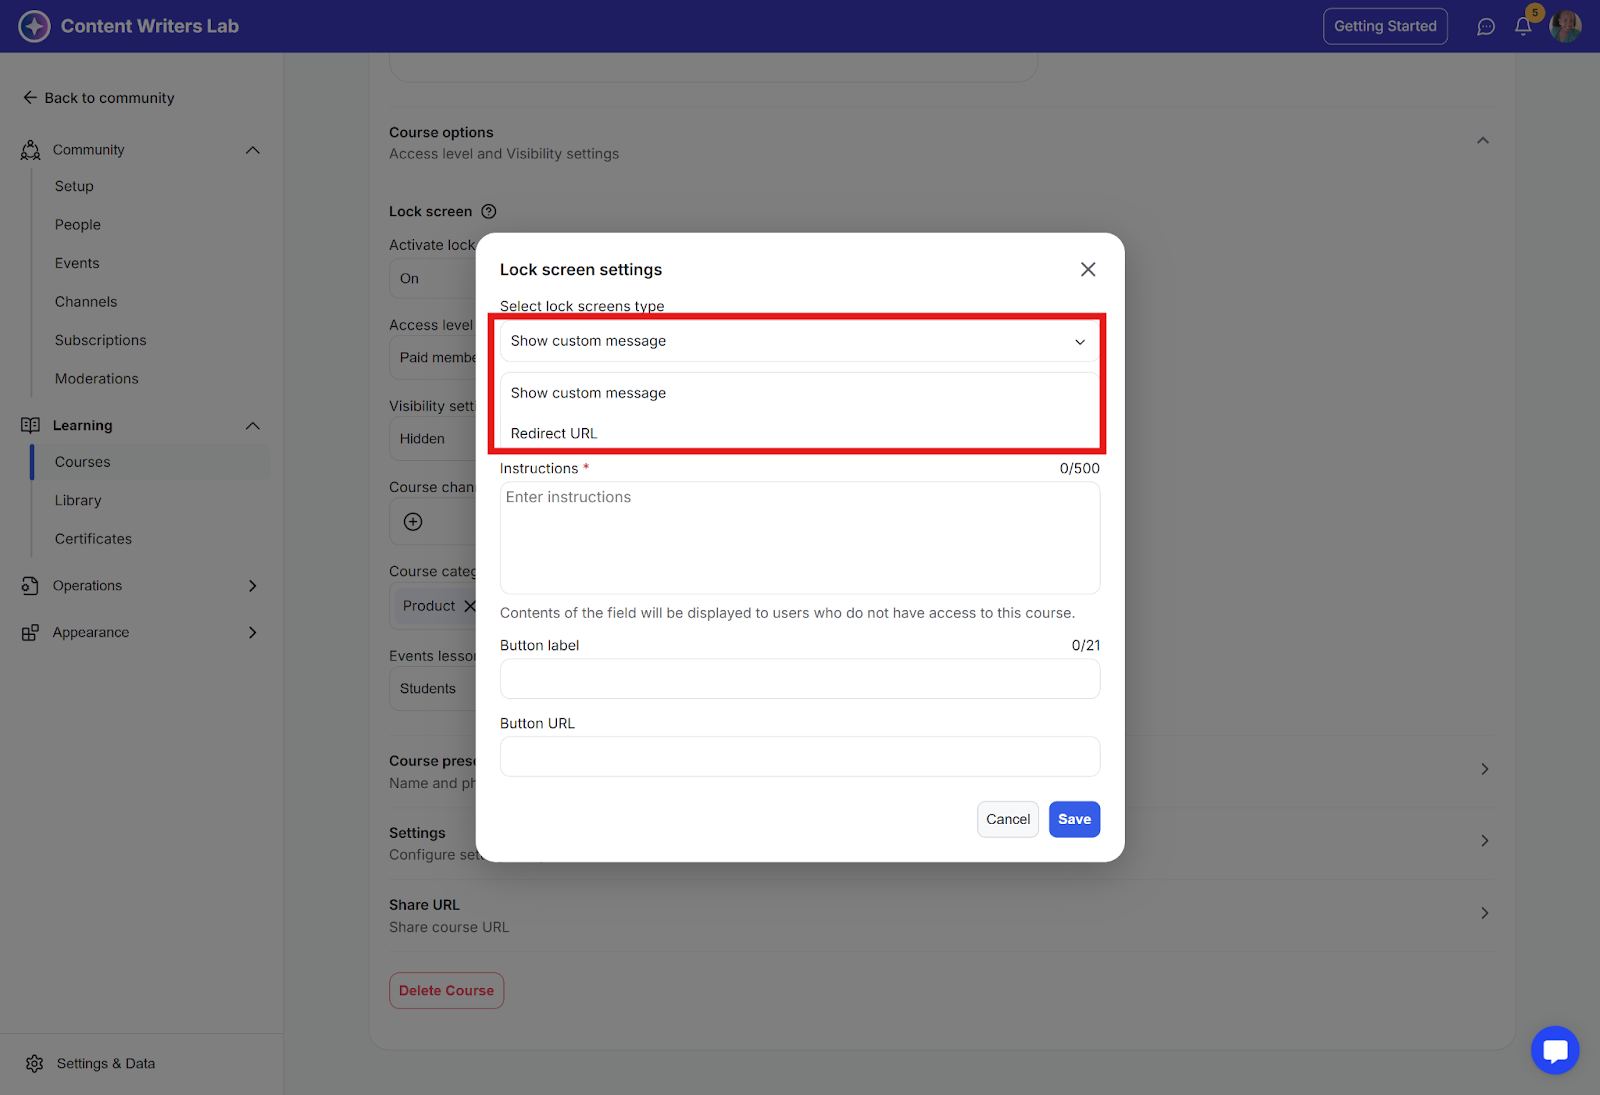
Step 3: Since payment happens externally, choose Redirect to URL and paste your external checkout link (PayPal, ThriveCart, etc.). Save the settings.
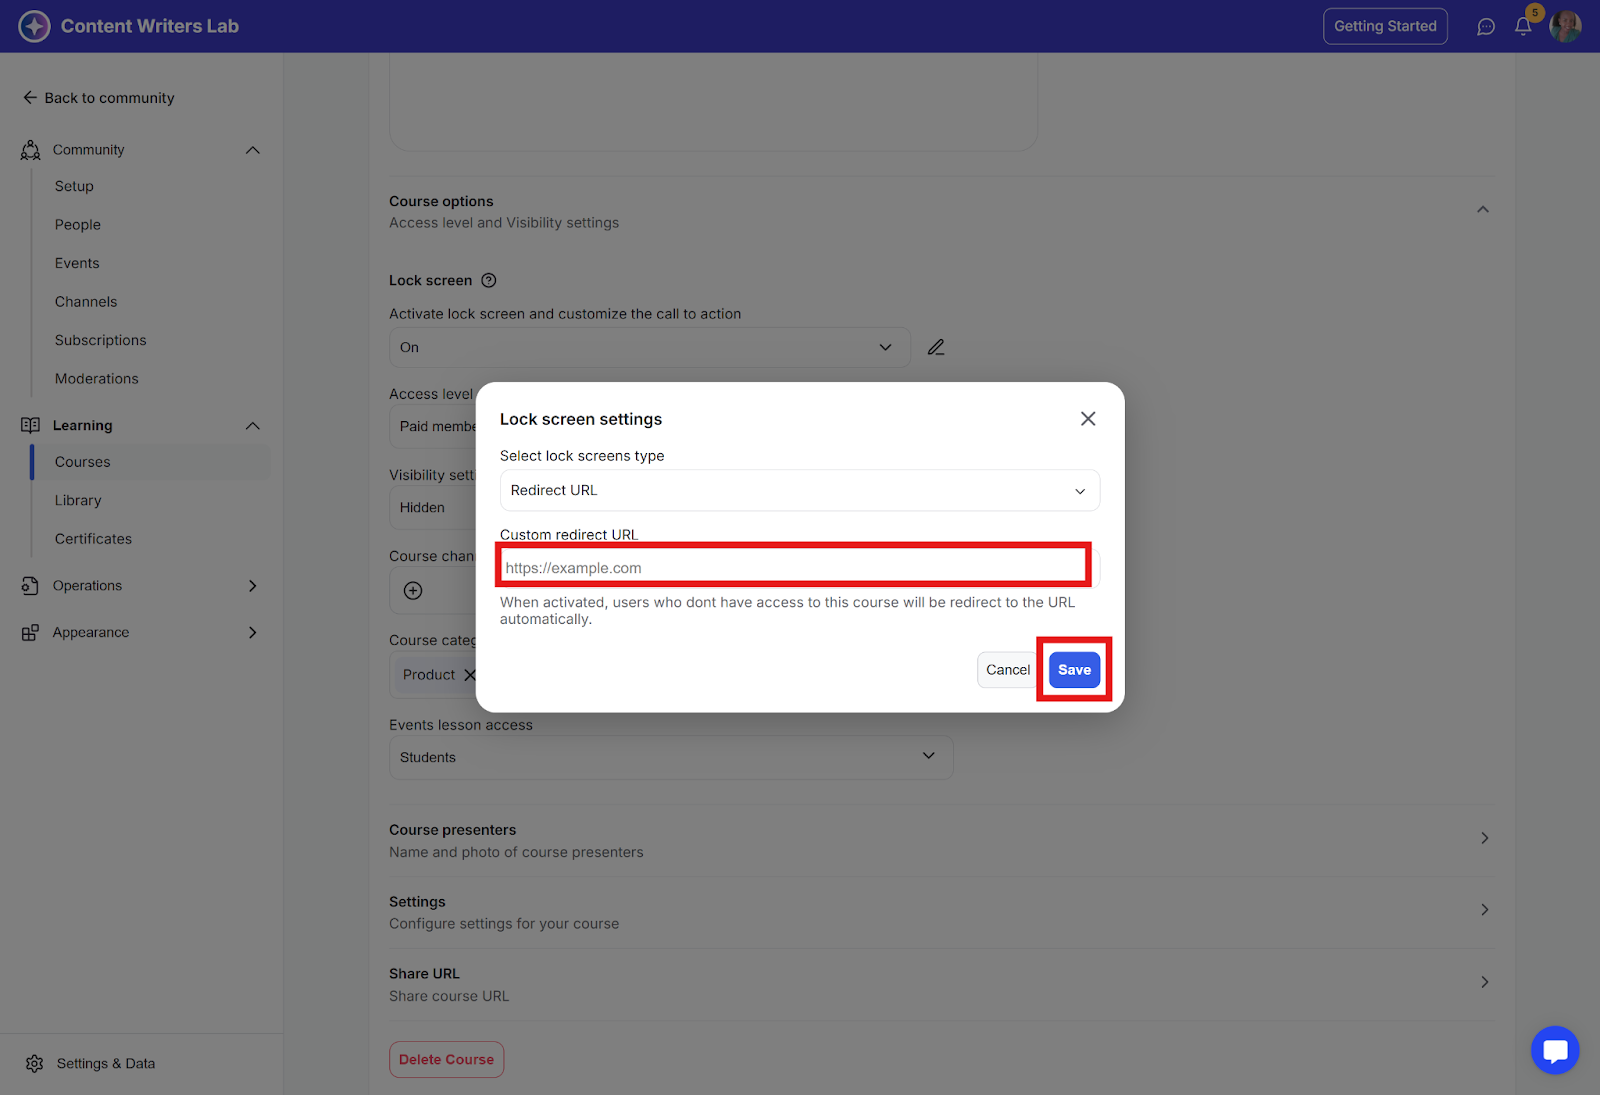
Step 4: Now, when a buyer clicks into the course, they’ll be redirected to your external checkout to pay.
After the buyer completes payment, use an automation tool to connect your external checkout to GroupApp. This tool acts as the bridge that creates the member account and gives access automatically.
You can use Zapier, Pabbly, or Integrately. The setup process is similar for all of them.
Step 1: In GroupApp, click Admin Panel, go to the bottom of the left side menu, and click Settings & Data.

Step 2: Select Integrations, and click on the Connect button for Zapier.
Step 3: Make sure you’re logged in. Click on Accept Invite & Build a Zap to connect with Zapier. Once connected, the GroupApp Zapier app will be added to your account and ready for use.
In Zapier, create actions to:
Create a new member in your community using the buyer’s email (this generates their GroupApp account).
Enroll the member in the course by specifying the course name. They’ll automatically get access, tied to the free subscription plan you created earlier.
This setup is for membership subscription plans that you promote through a sales page. It works whether you build your sales page with GroupApp, your own website, or a third-party landing page tool.
Step 1: Go to your Admin Panel and then click on Subscriptions in the left-side menu.

Step 2: Click Add Plan on the top-right to open the pop-up.
Step 3: Name the subscription as Free Plan and set the plan type as Free.

Step 4: Scroll down to Settings and turn on Disable self-cancellation.
You can also add a custom message that replaces the cancel subscription button on the member’s billing page.
Step 5: If you include the URL of your external subscription cancellation process in the message field, it will automatically become a clickable hyperlink. Finally, click on the Save Plan button.
Step 6: Repeat this process to create a separate free subscription for every membership tier you offer.
Decide which courses, learning resources, channels, and events are included in each membership plan.
For each item you include, open its settings and set the access level By Plan. Search and select the Free Plan Tier 1 you created that will include the particular product.
Repeat until every plan has the correct products linked to it. These subscriptions will now provide controlled access to paid members according to the membership plan.
Step 1: In your external checkout (PayPal, ThriveCart, or another tool), copy the order form URL for each membership plan.
Step 2: Open your membership sales page and locate the CTA buttons for each plan.
Step 3: Link each CTA button directly to its matching external checkout order form URL.
Step 4: If you’re using GroupApp’s Landing Page Builder, open the page, click the button settings, set the action to Redirect to URL, paste the checkout URL, and save. Repeat for all plans.

Step 5: Publish your updates so the new button actions are live. Clicking a plan’s button now takes visitors straight to that plan’s external checkout form.
Step 6: The buyer completes payment on your external checkout processor (for example, PayPal or ThriveCart).
Step 1: After payment, connect an automation tool to act as the bridge between your checkout and GroupApp so that account creation and access happen automatically.
Step 2: You can use Zapier, Pabbly, or Integrately; all work the same way. In the GroupApp Admin Panel, go to Integrations and click on the Connect button for Zapier.

Step 3: Make sure you’re logged into your Zapier Account. Next, click Accept Invite & Build a Zap in Zapier. Once connected, the GroupApp app will be added to your Zapier account.
Step 4: Create Automation Actions.
Step 5: In your Zapier workflow, add an action to create a new member in your community using the buyer’s email address (this generates their GroupApp account).
Step 6: Add an action to add the member to the correct subscription plan, so they receive the right access level, perks, and content tied to their membership.
With these actions live, the member is automatically granted access to all courses, events, library resources, and channels included in their plan.
What if automation tools like Zapier, Pabbly, or Integrately don’t work with your external payment processor? Don’t worry, you can still manage the process.
The flow has two phases:
Phase 1: The first part stays the same. The buyer goes from your landing page to the external checkout and completes payment for your course, learning resource, or membership plan.
Phase 2: You then add the member to your community or give them access to the product they paid for. To do this, you’ll use the invite options in GroupApp. This is a simple way to set up access for the member without using automation.
At this stage, you’ve already received the payment confirmation from your external processor. Now, use the buyer’s email address to invite them into your GroupApp community.
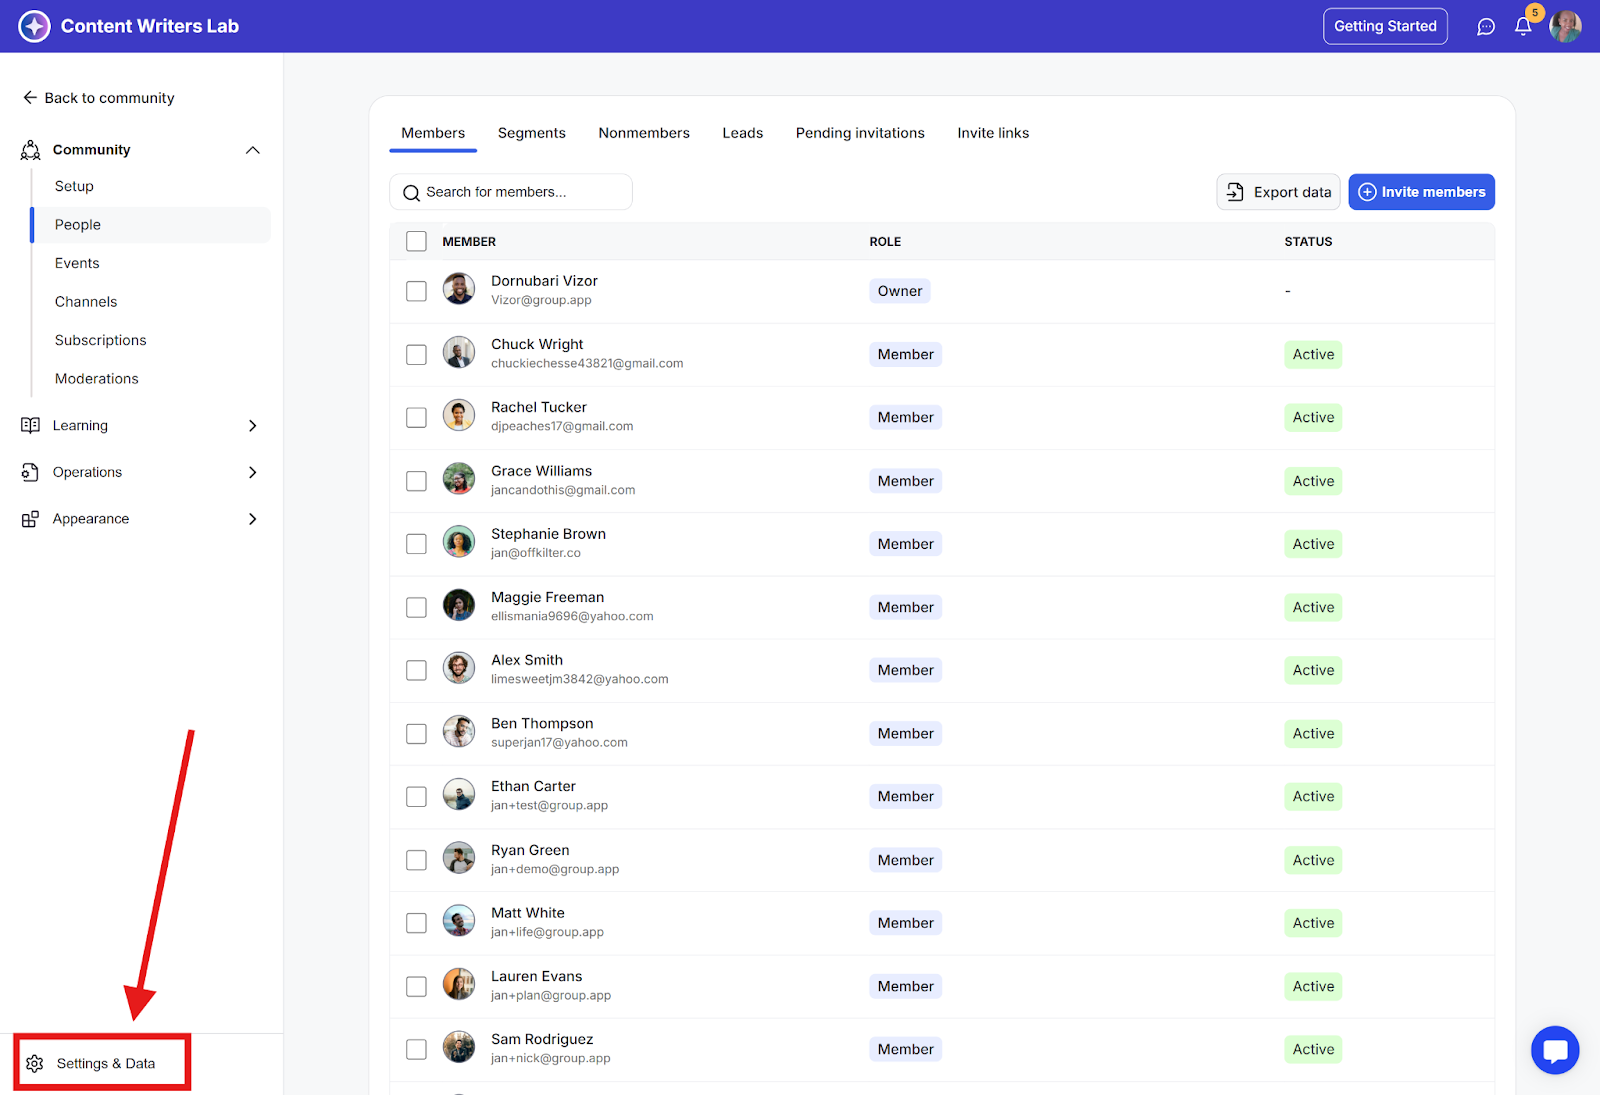
Step 1: Click on the Admin Panel button.
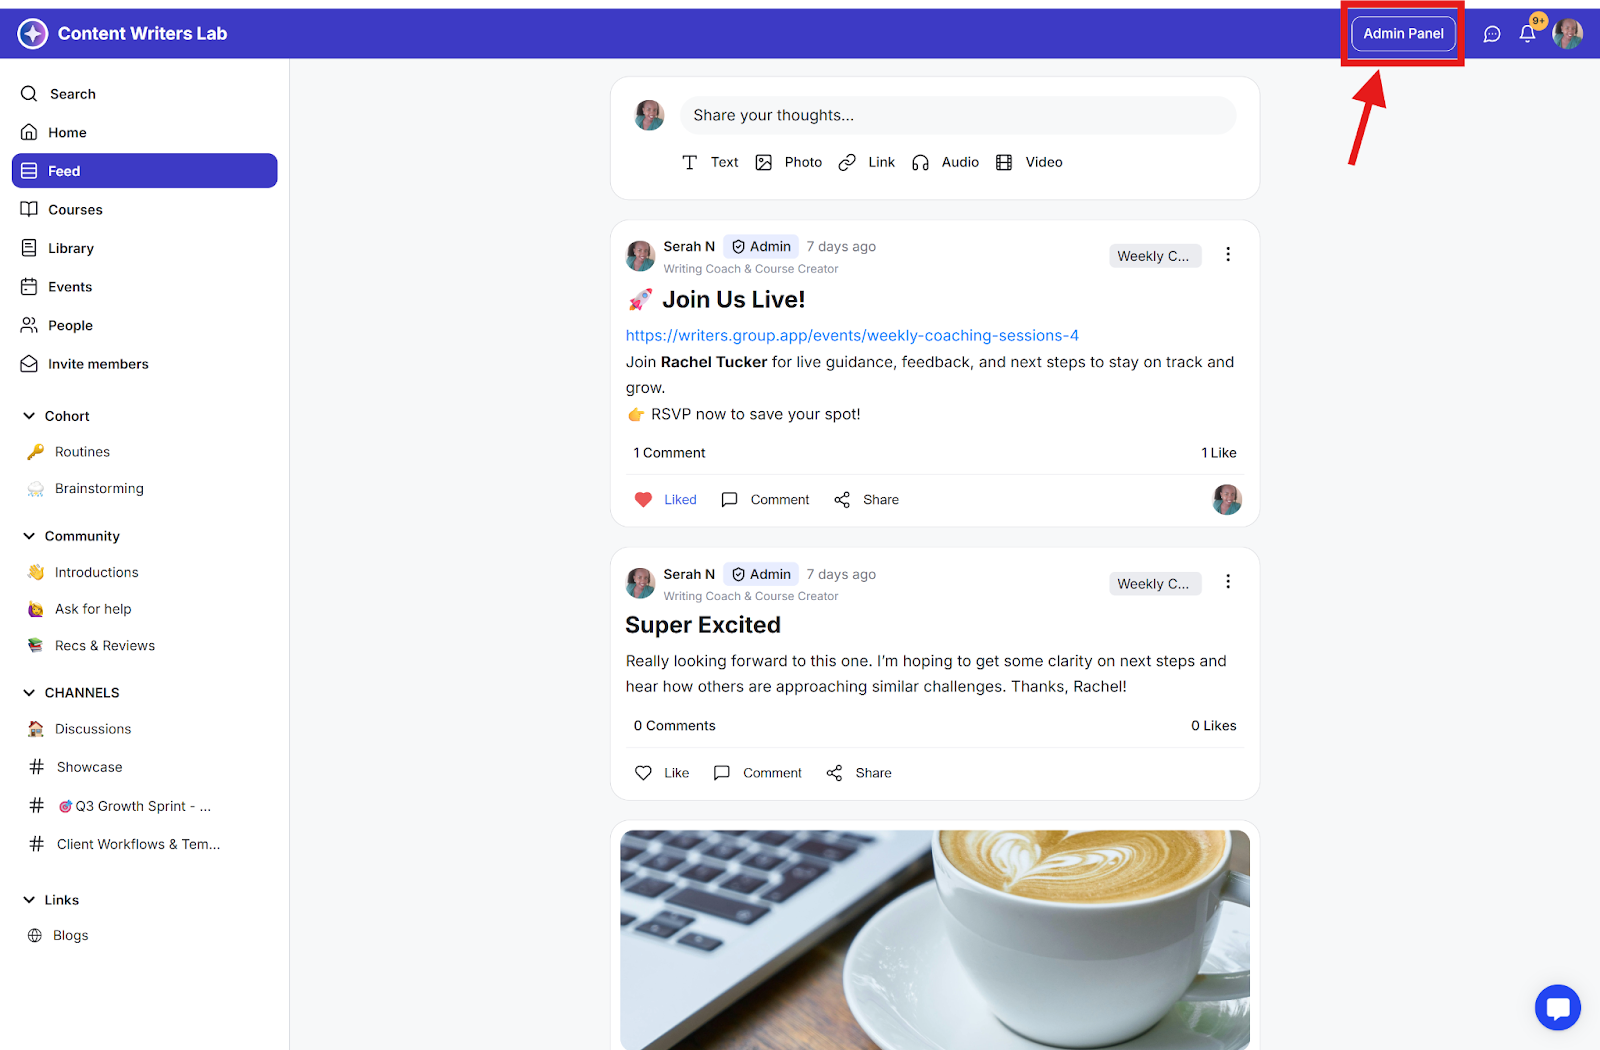
Step 2: Click on People on the left side menu, and on the people page, click on the blue Invite Members button.
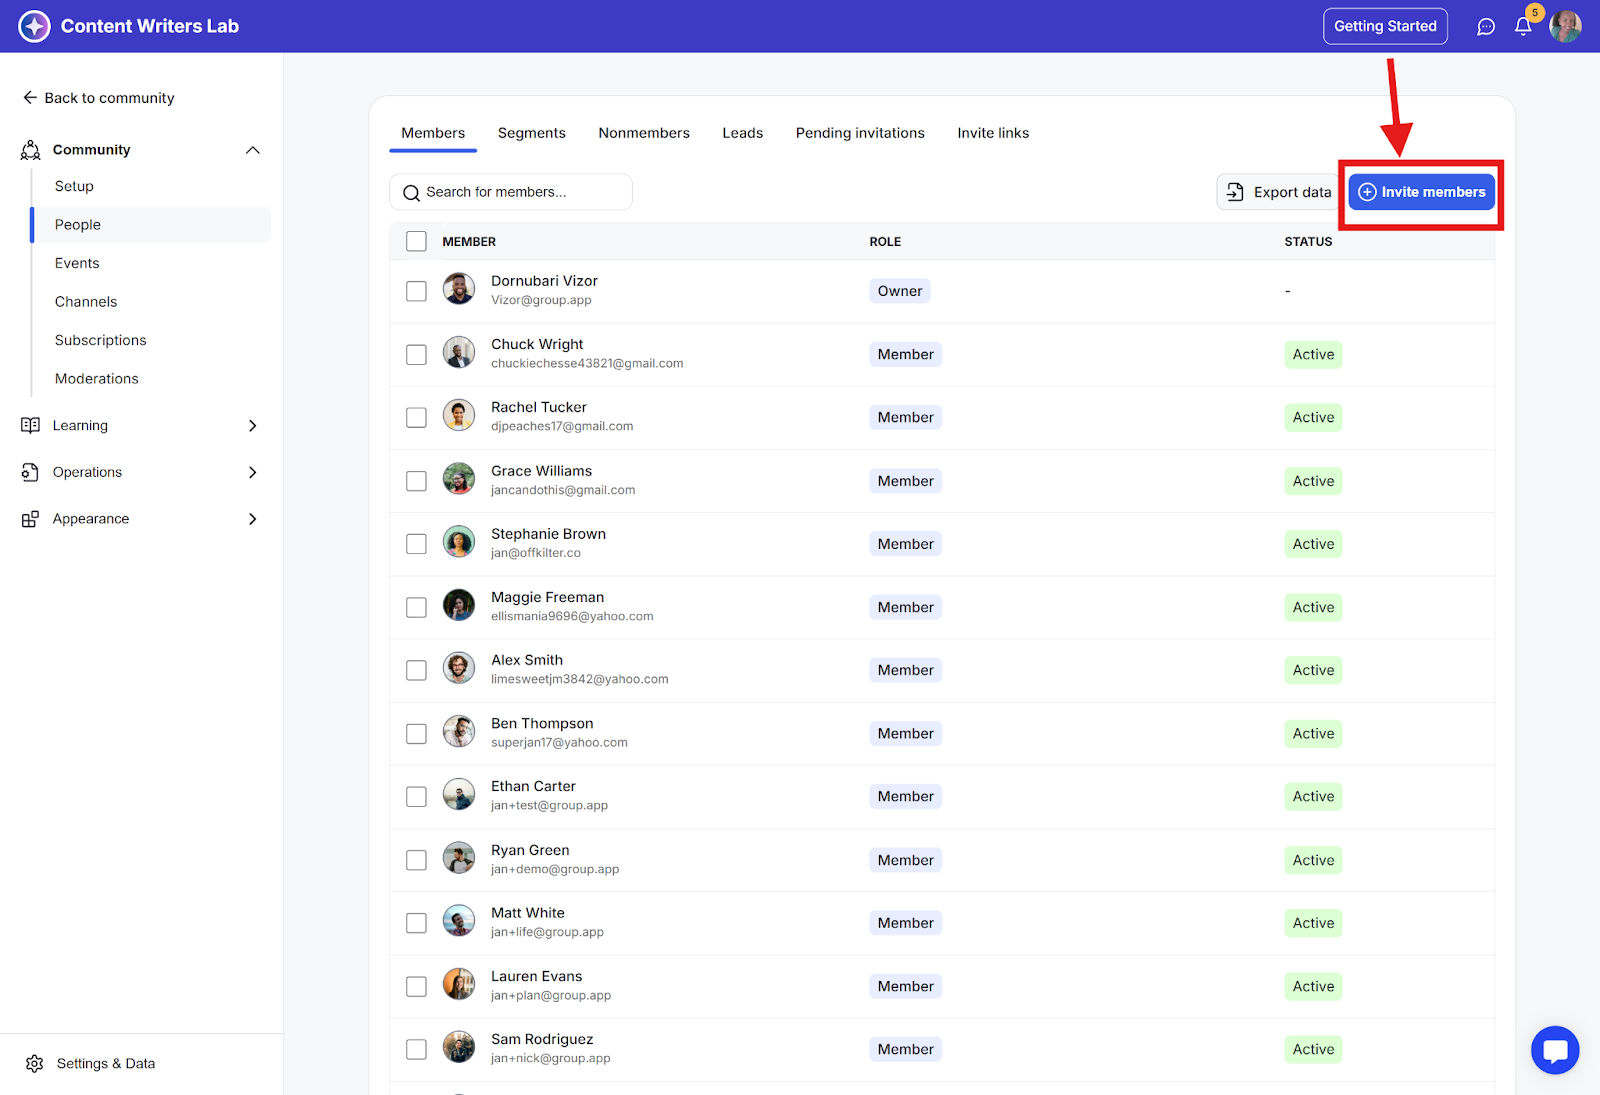
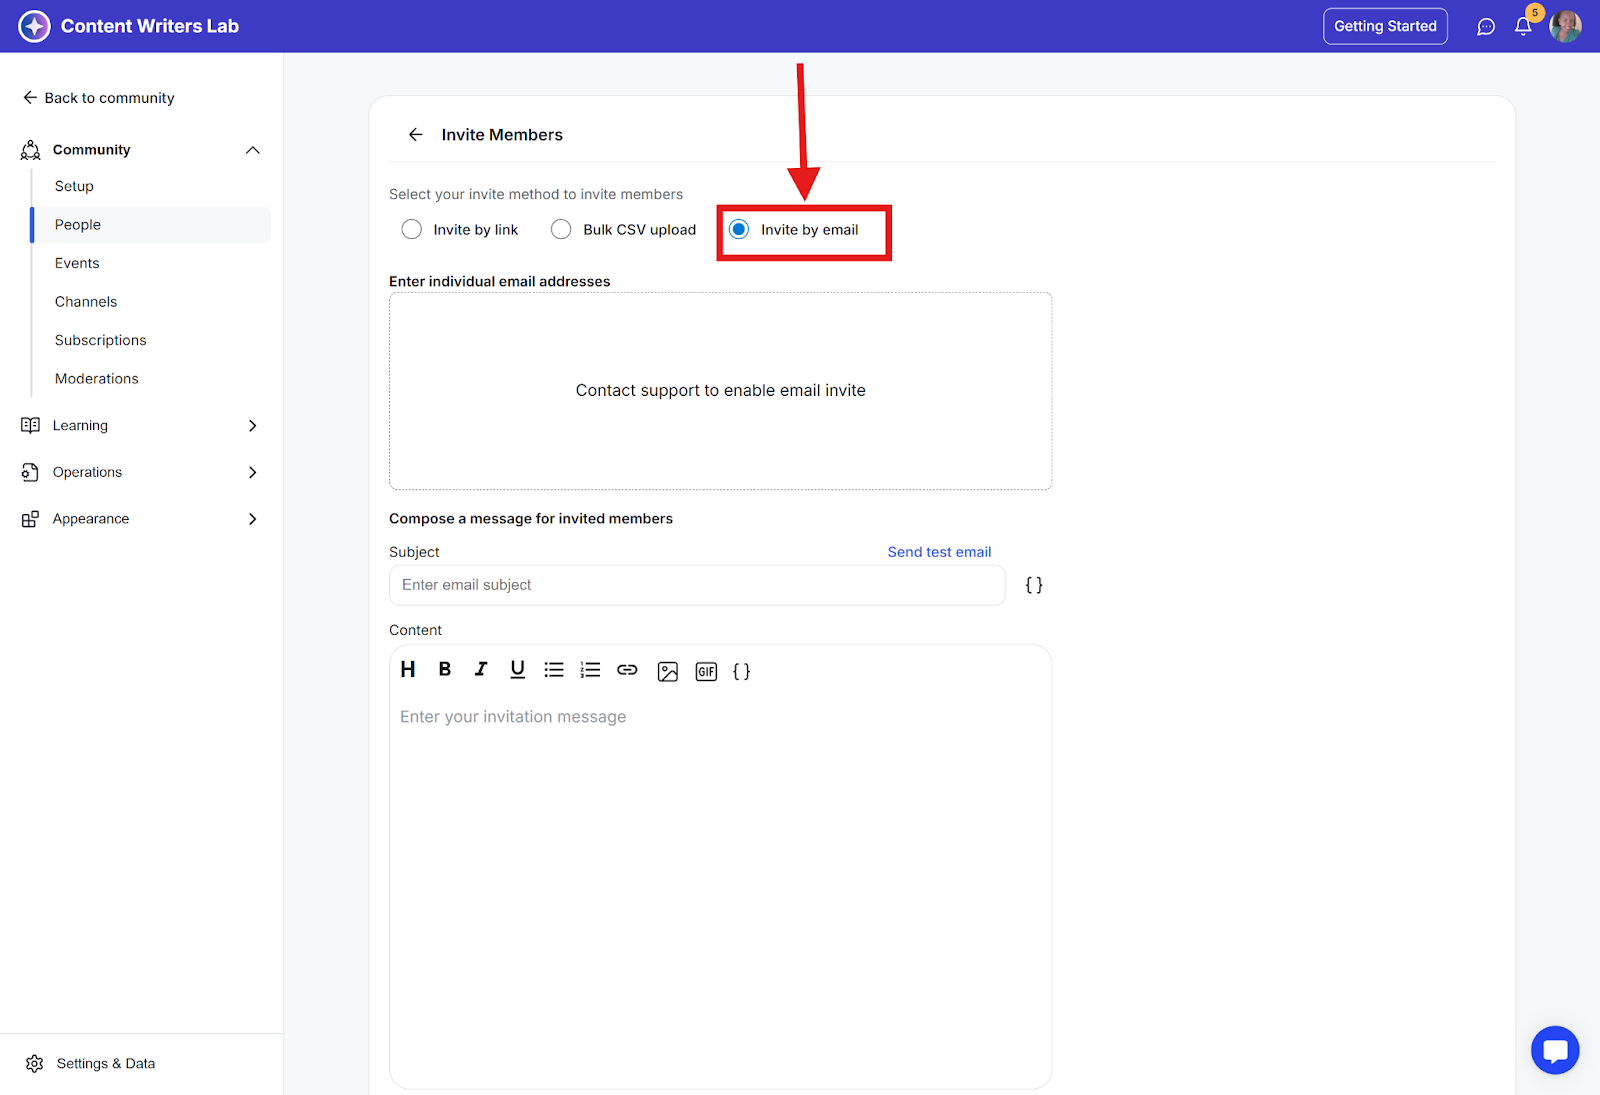
Step 3: On the invite screen, you will have three options to select from to invite members into your community. We’ll work with the following:
Individual Invite by email: Send personalized invites to individual buyers
Invite by link: Create reusable invite links for specific products or membership plans.
Step 1: Enter the buyer’s full name and email address.
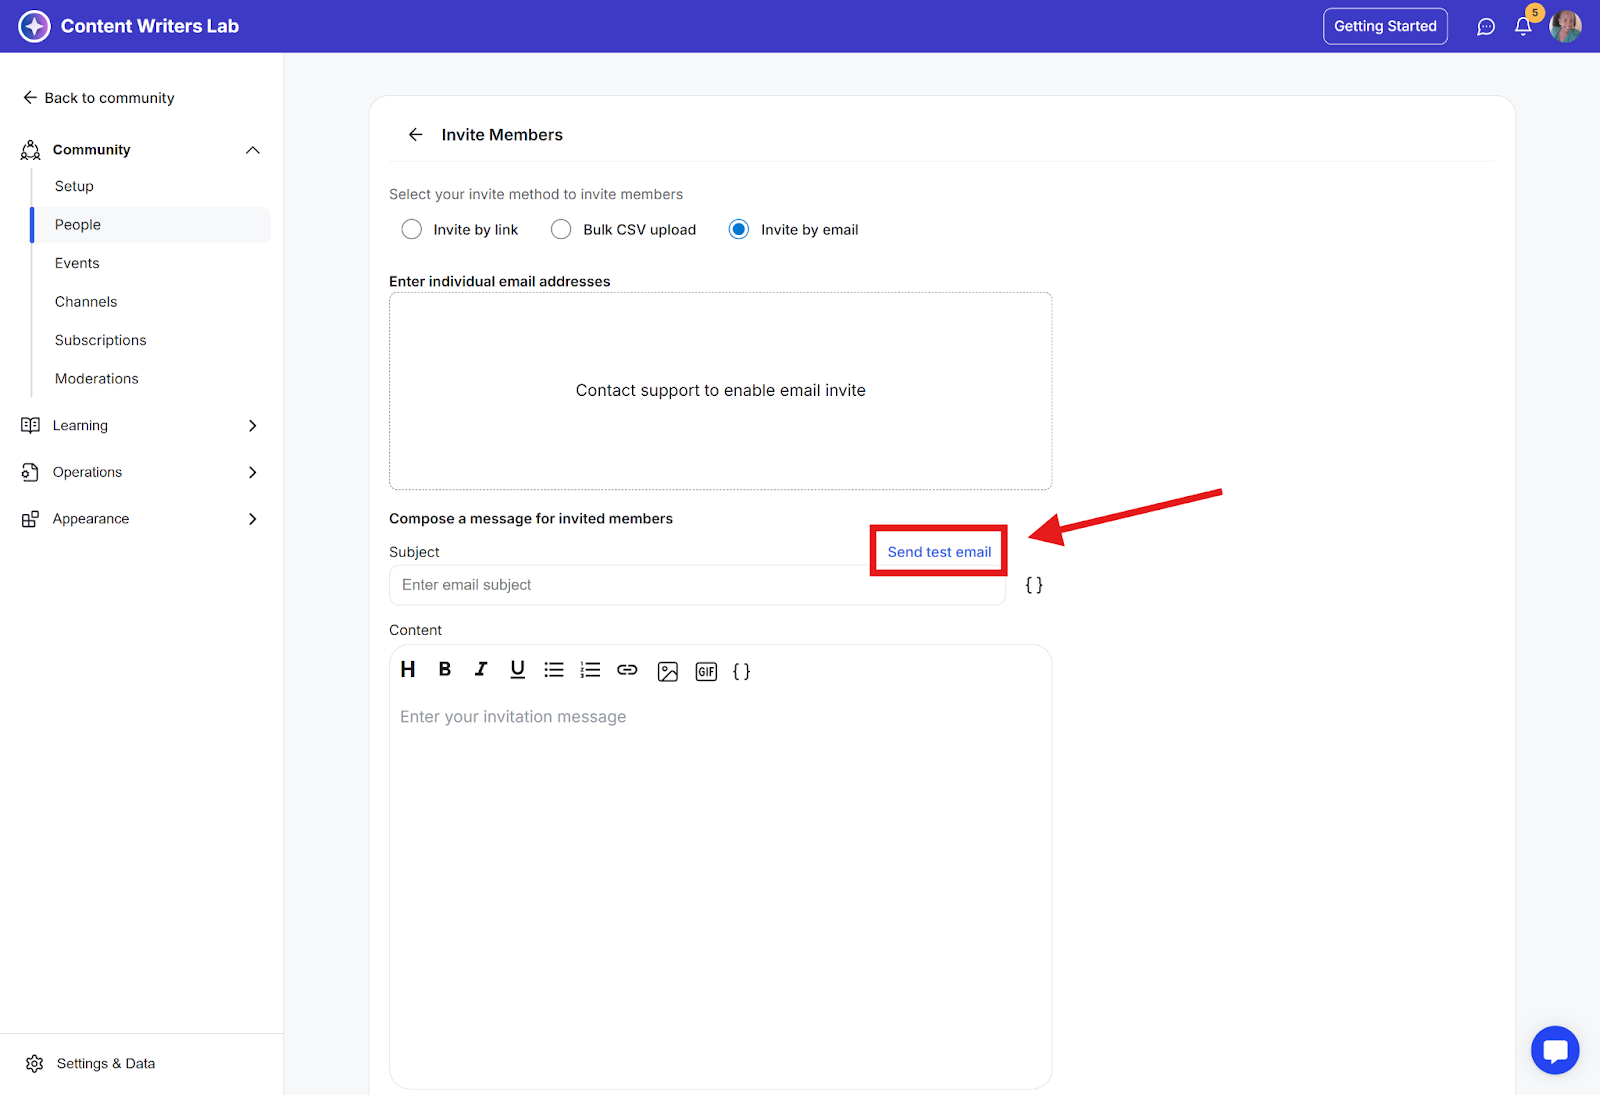
Step 2: Write your invite email, including a subject line, and format it with the editor options. You can also send a test email before finalizing.
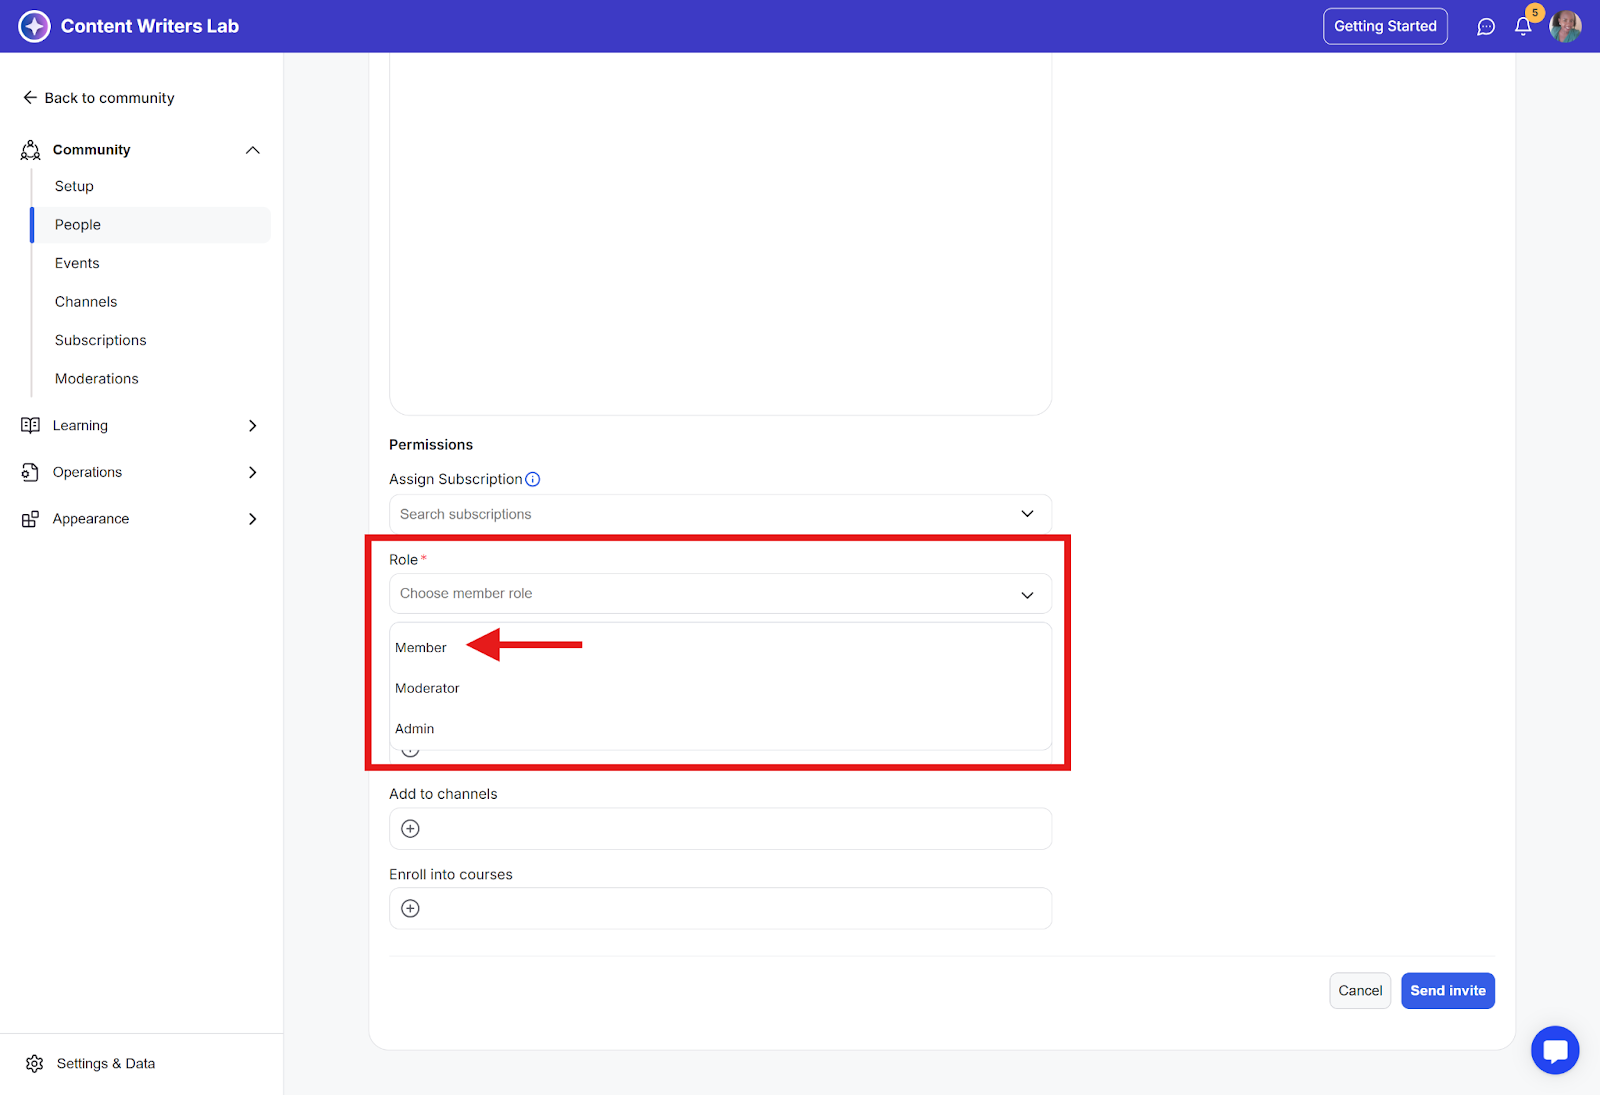
Step 3: Specify the buyer’s role as Member from the dropdown list.
Step 4: Assign the free subscription you created for the product (course, library resource, or membership plan).
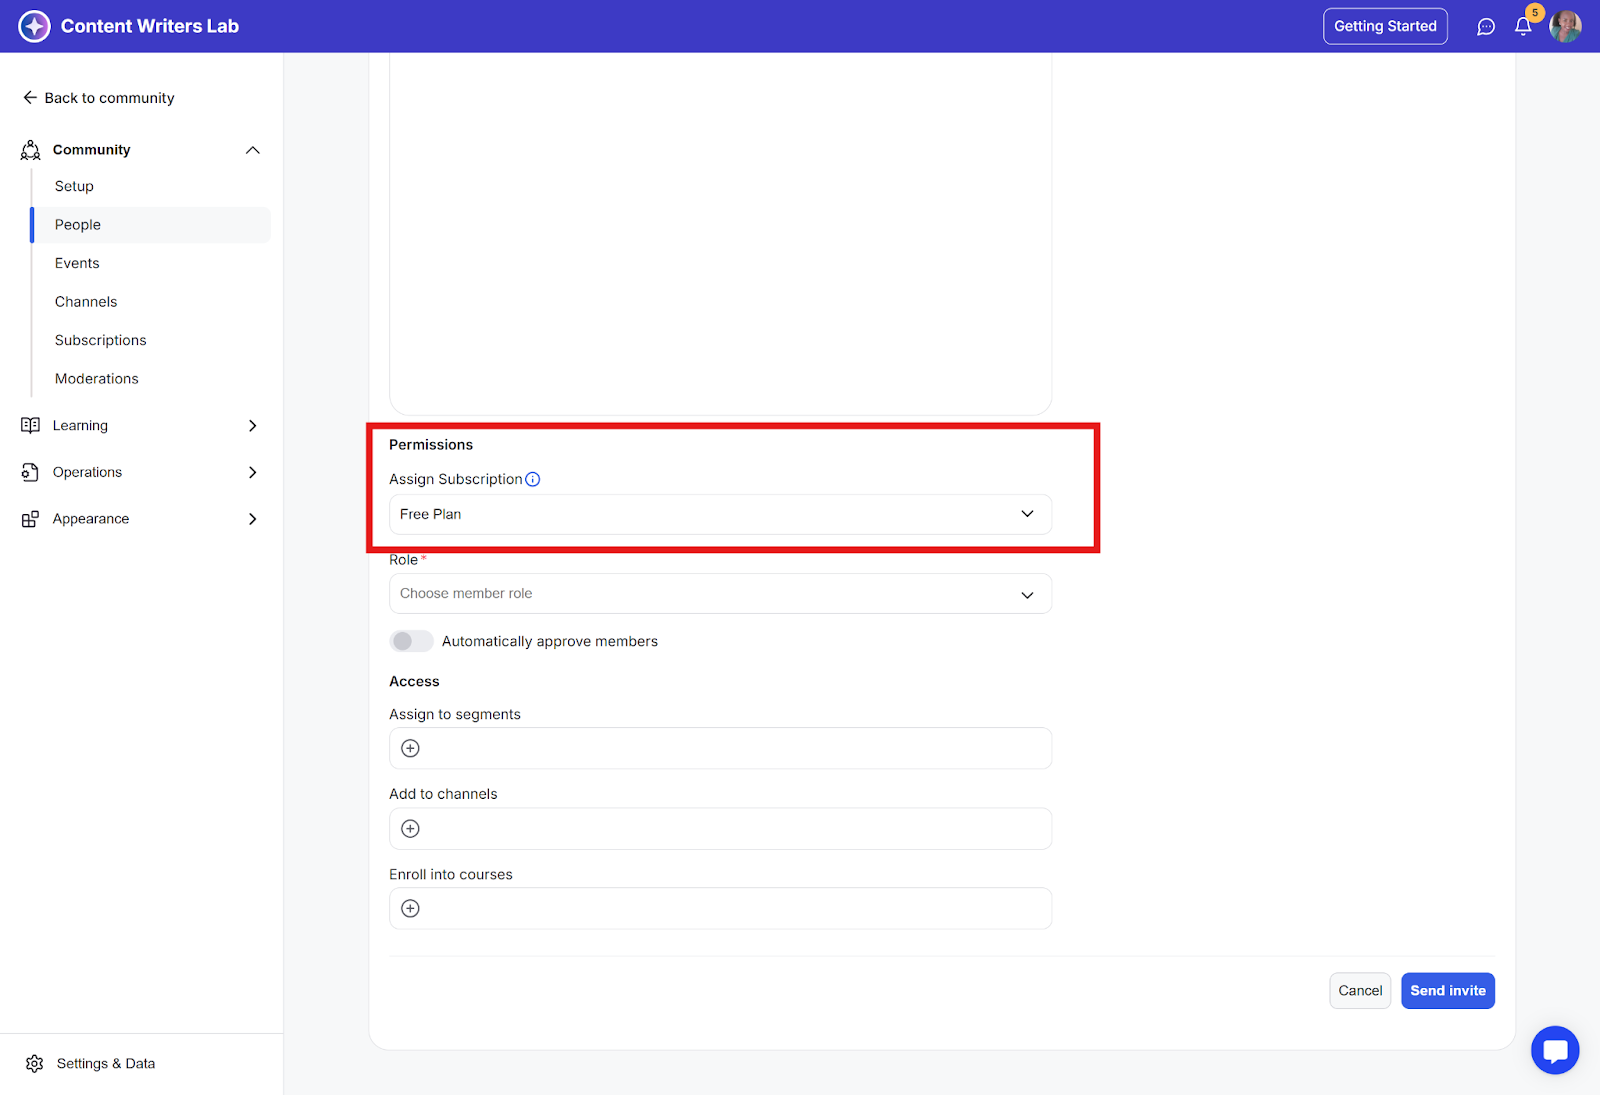
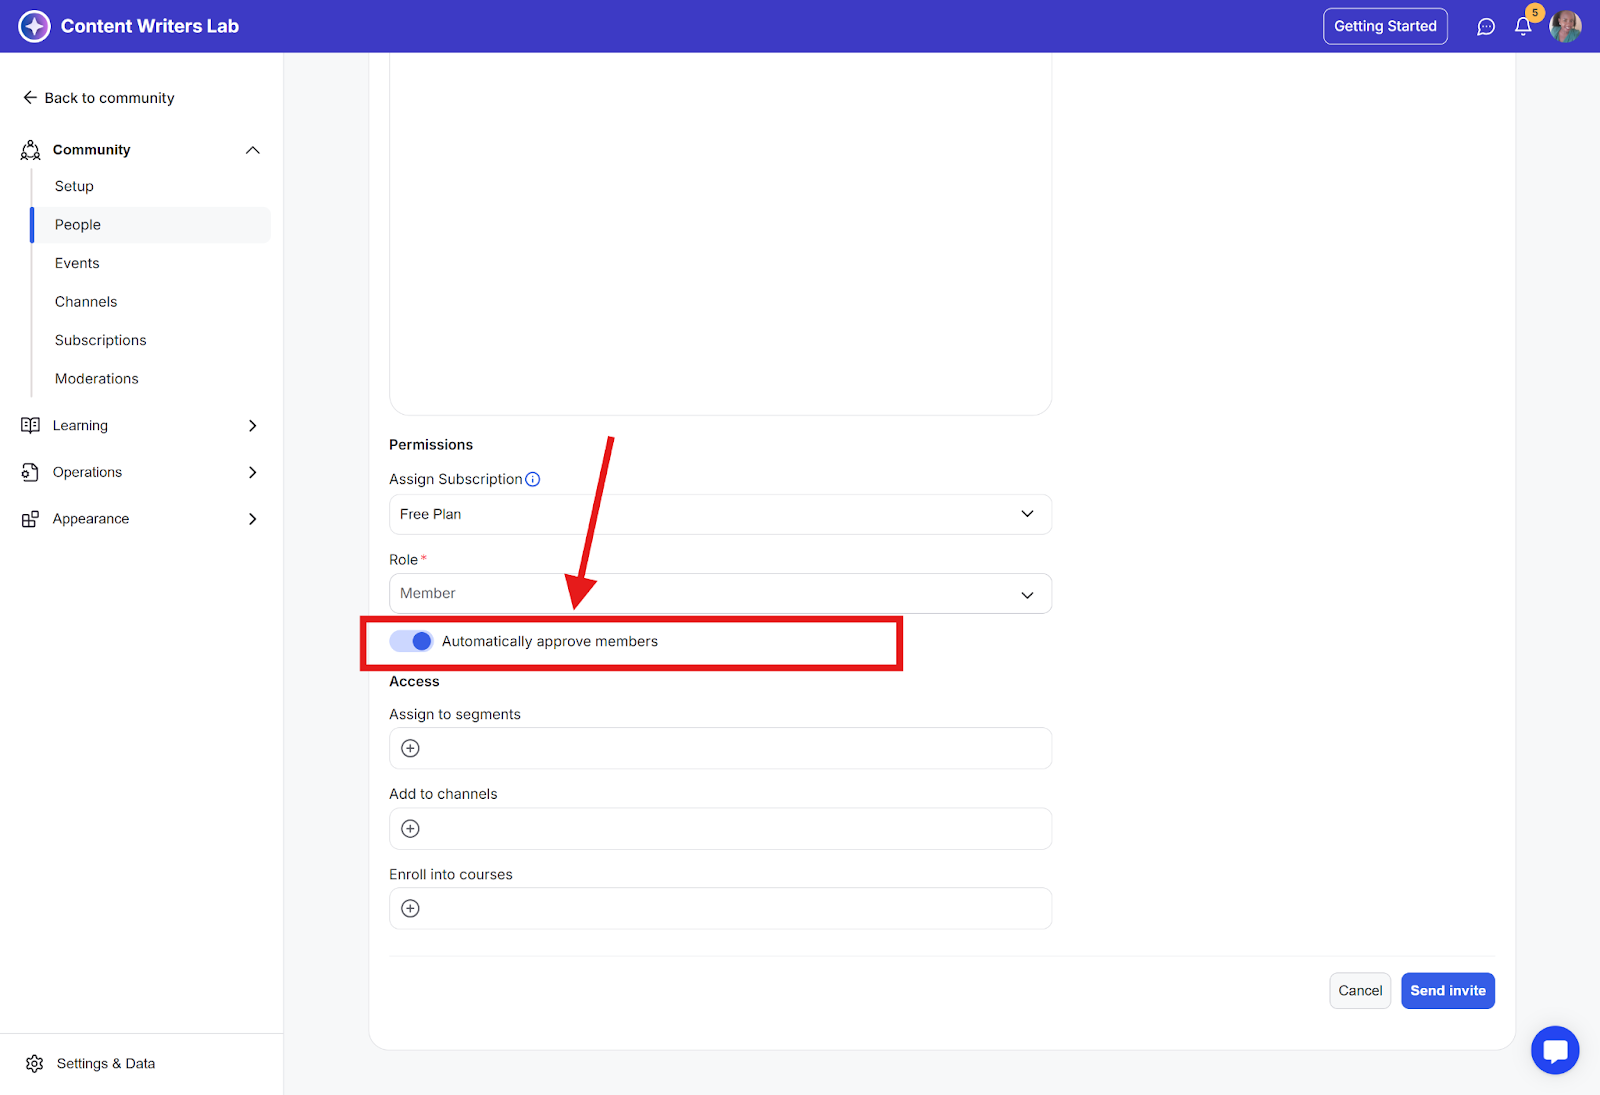
Step 5: Enable the toggle to automatically approve the member when they join (optional).
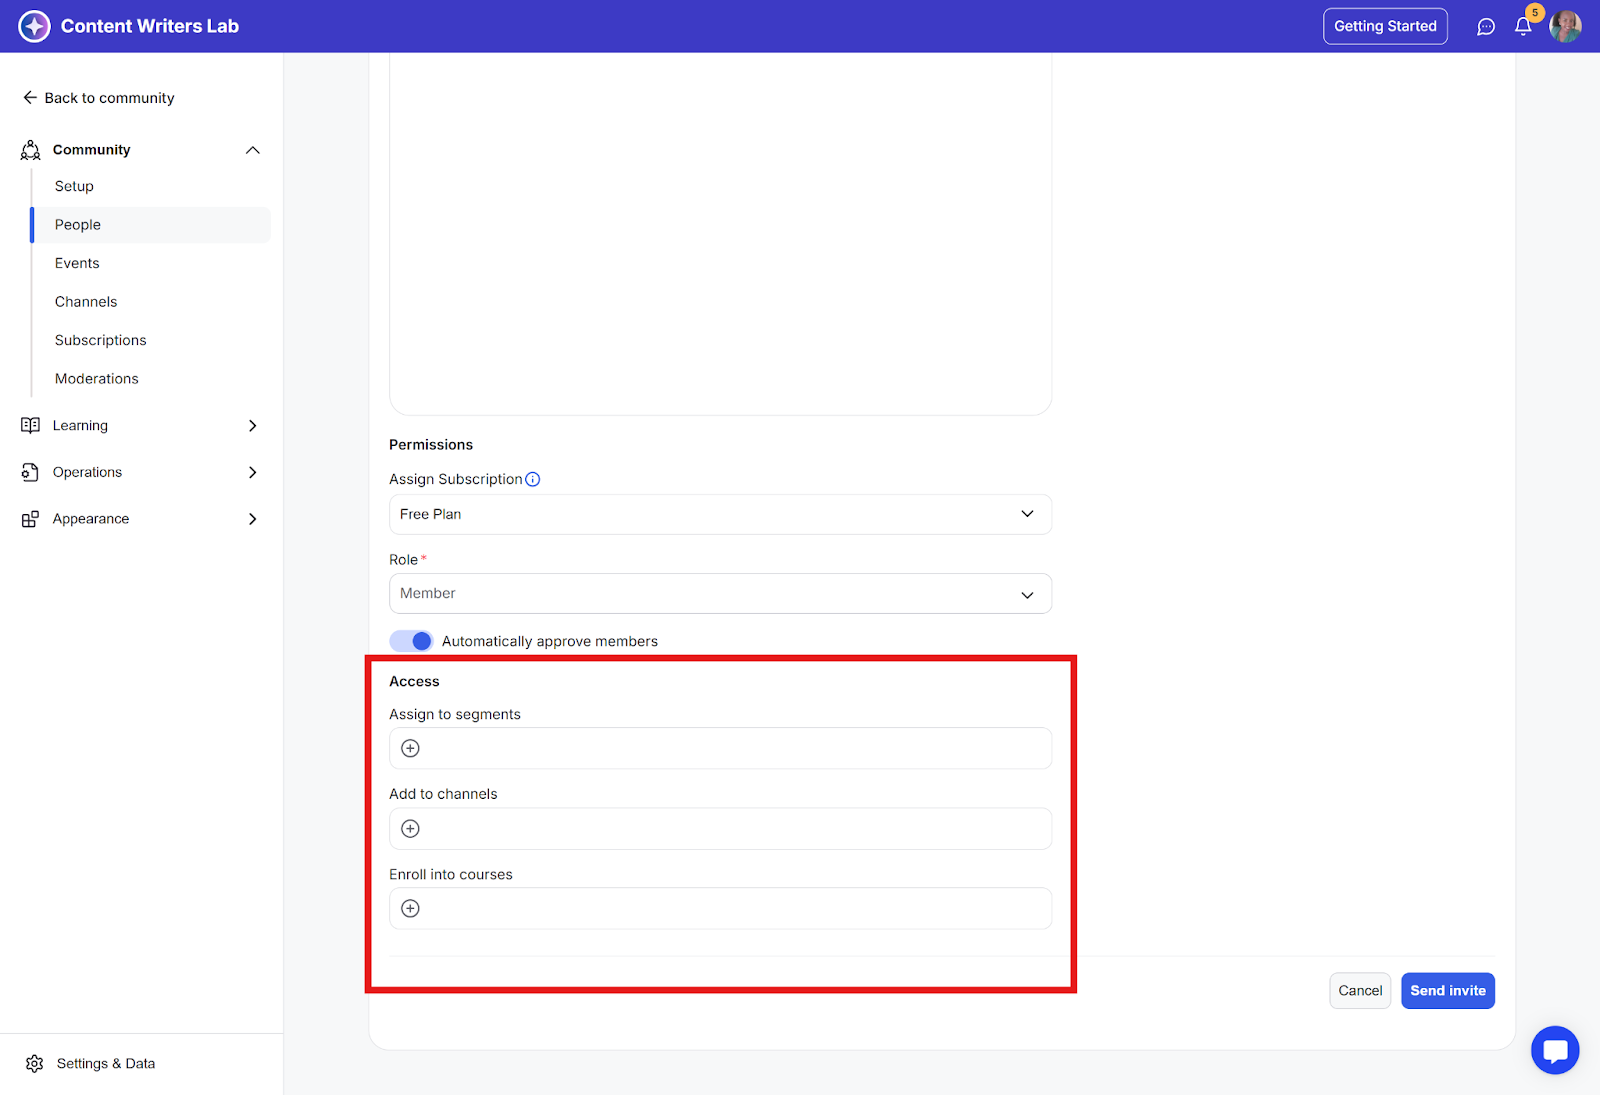
Step 6: Assign specific courses and channels they should be enrolled in.
Step 7: Review all details, then click Send Invite on the bottom-right.
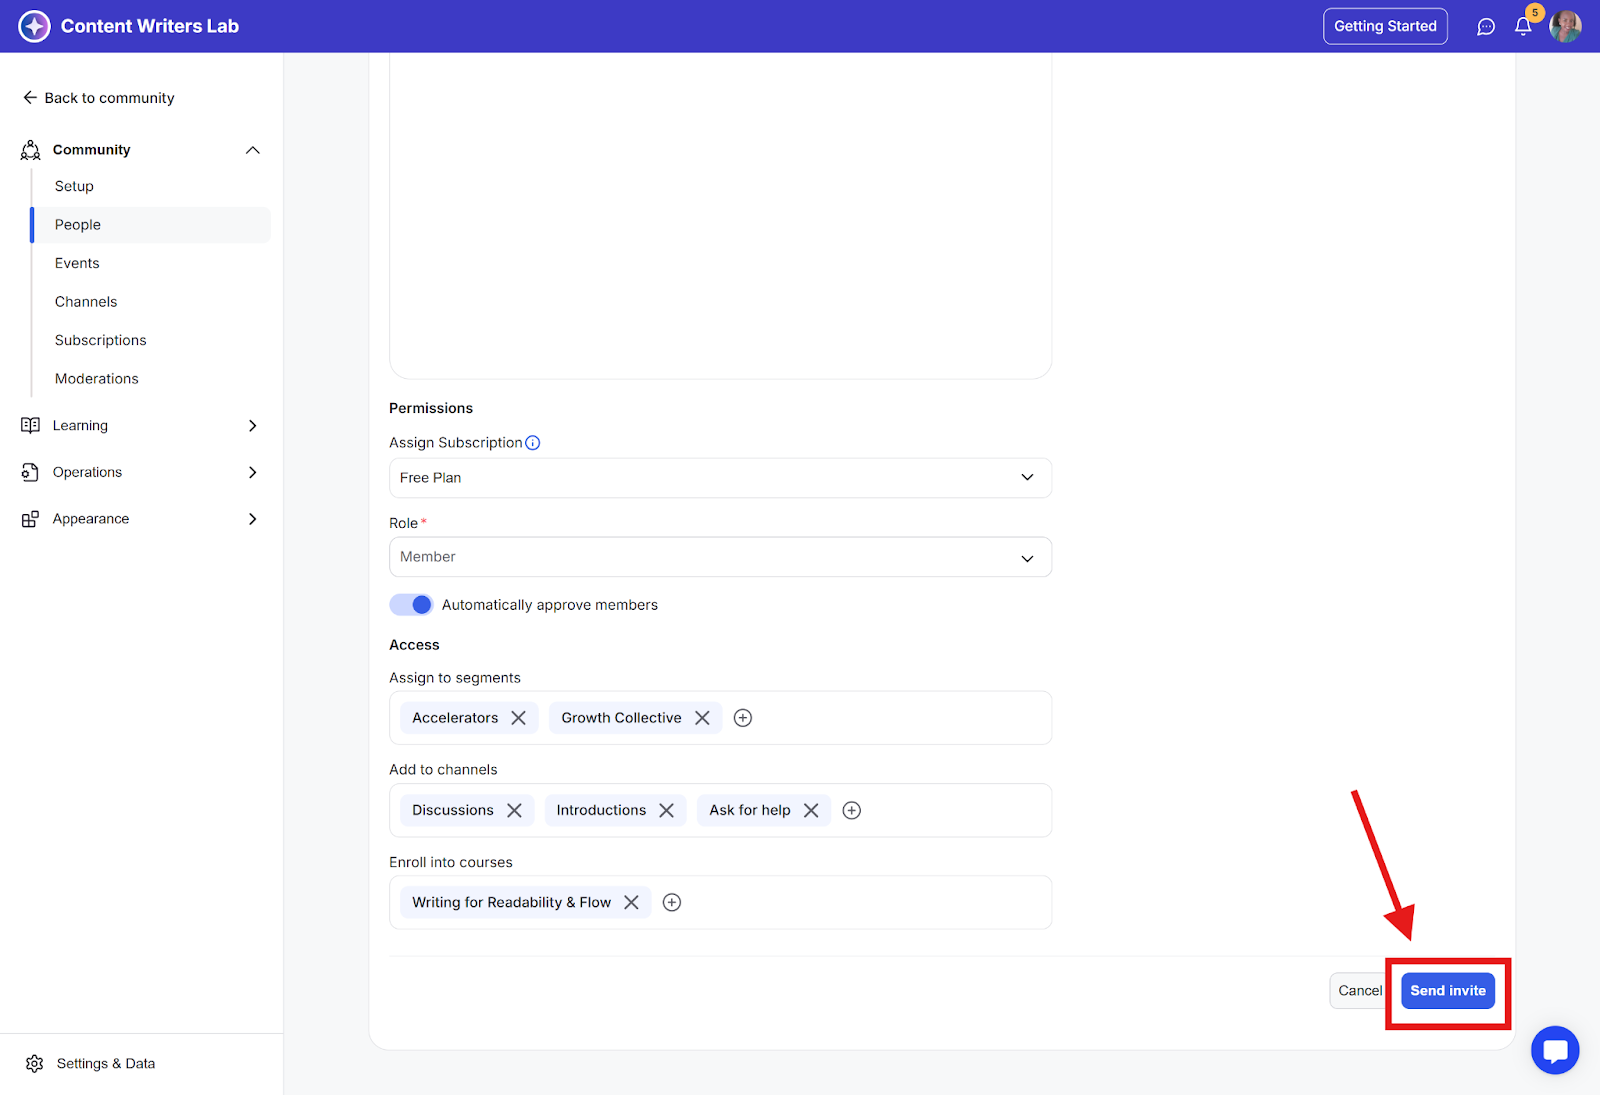
Step 8: GroupApp sends the invite email. Once the buyer accepts and signs up, they’ll automatically have access to everything you configured. You can invite up to 10 email addresses at a time using this method.
Step 1: Select Invite by Link at the top of the dashboard.
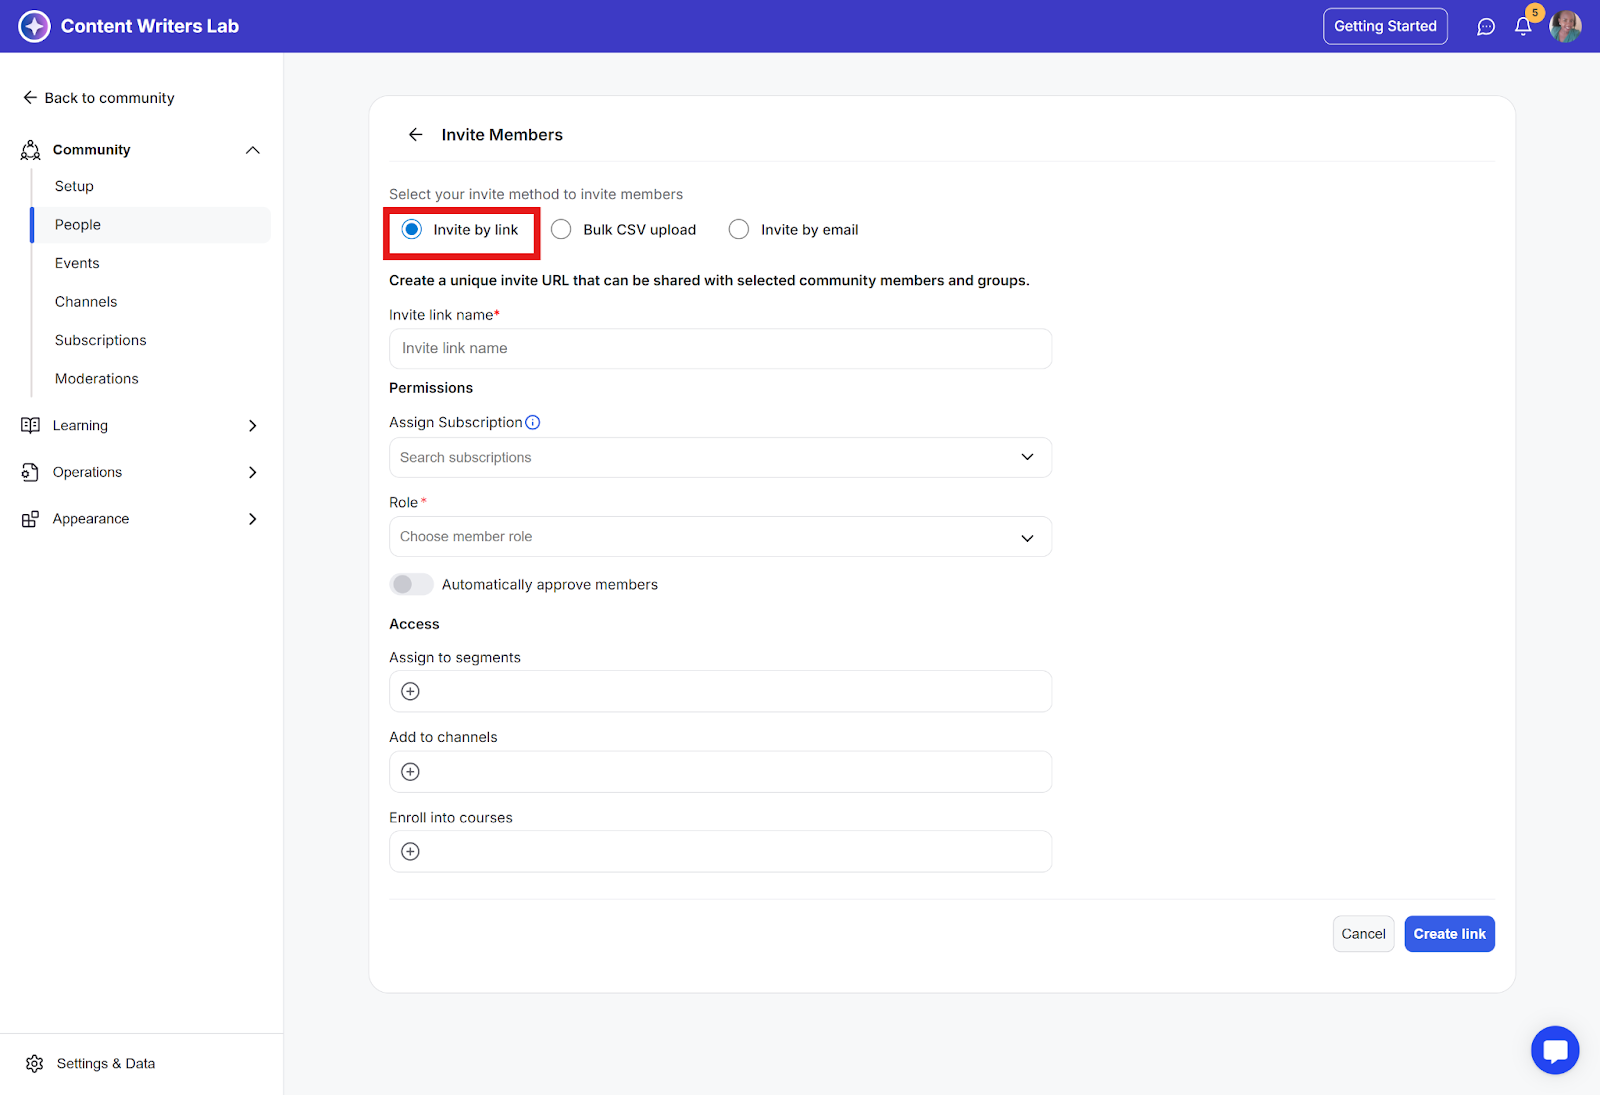
Step 2: Create a name for the invite link that reflects the product or plan (e.g., Basic Membership, Premium Course).
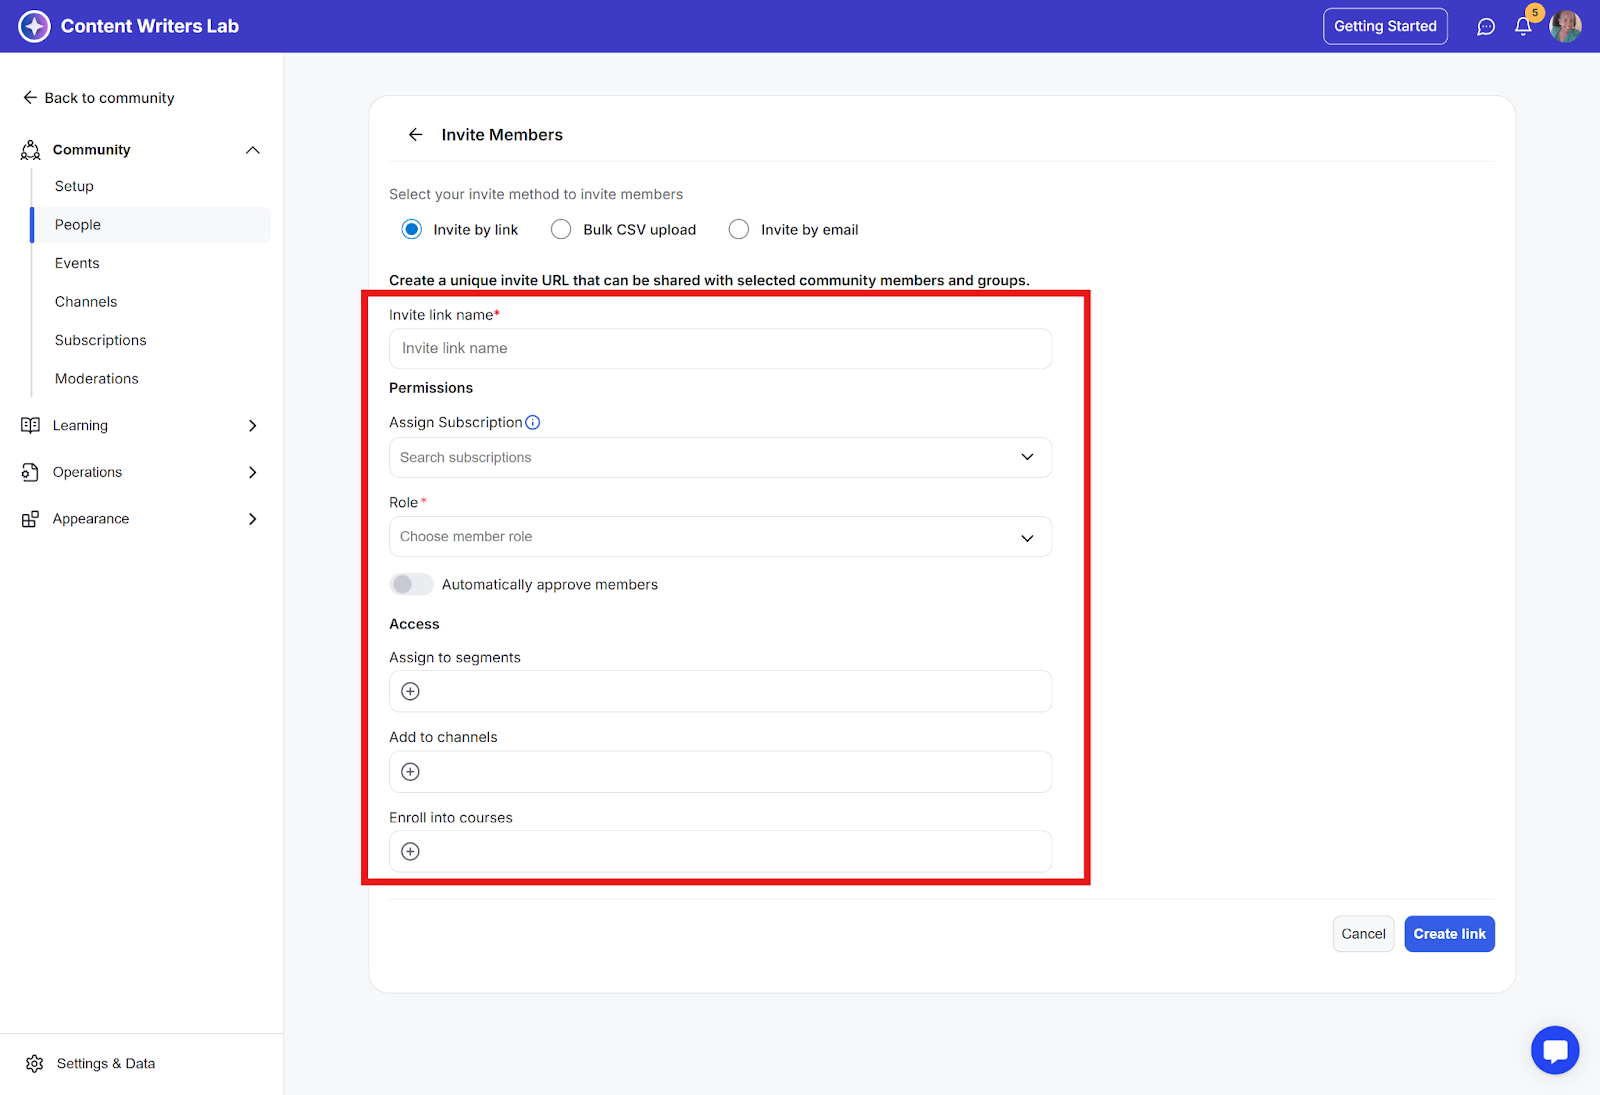
Step 3: Configure the role, subscription, courses, and channels the invite should include.
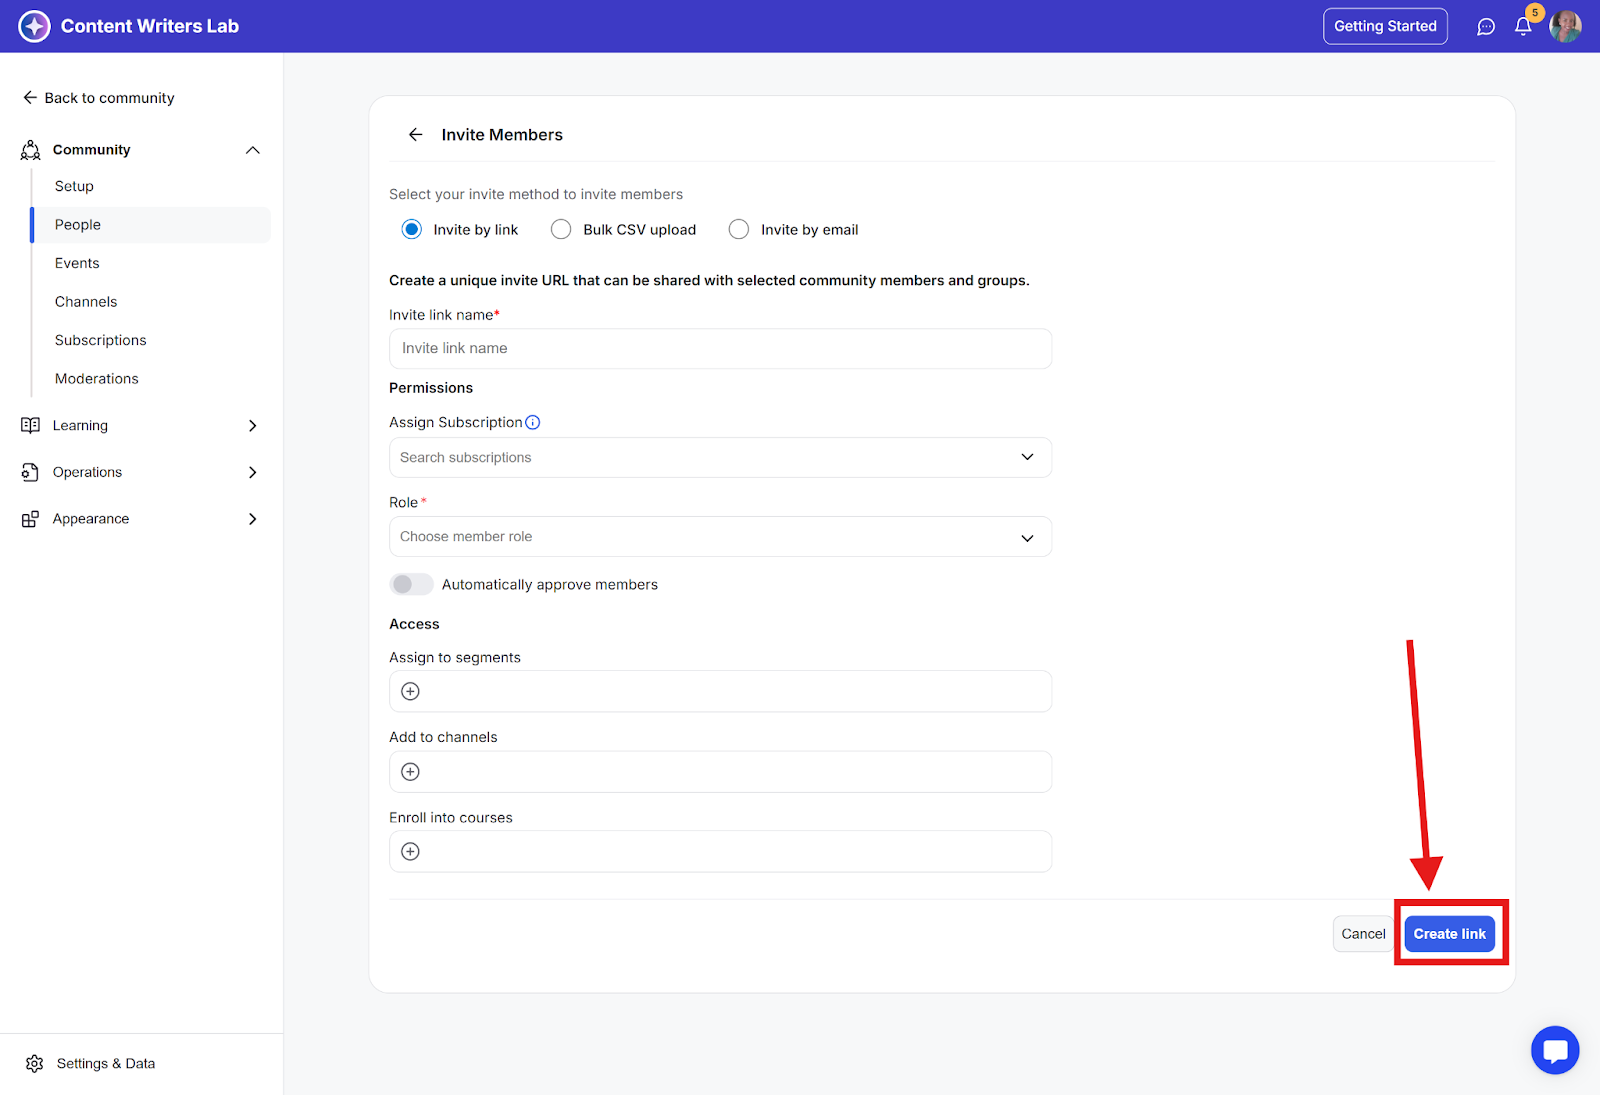
Click Create Link on the bottom-right.
Step 4: A unique custom invite URL will appear on your dashboard under the Invite Links Tab. Copy this link and send it to the buyer via email.
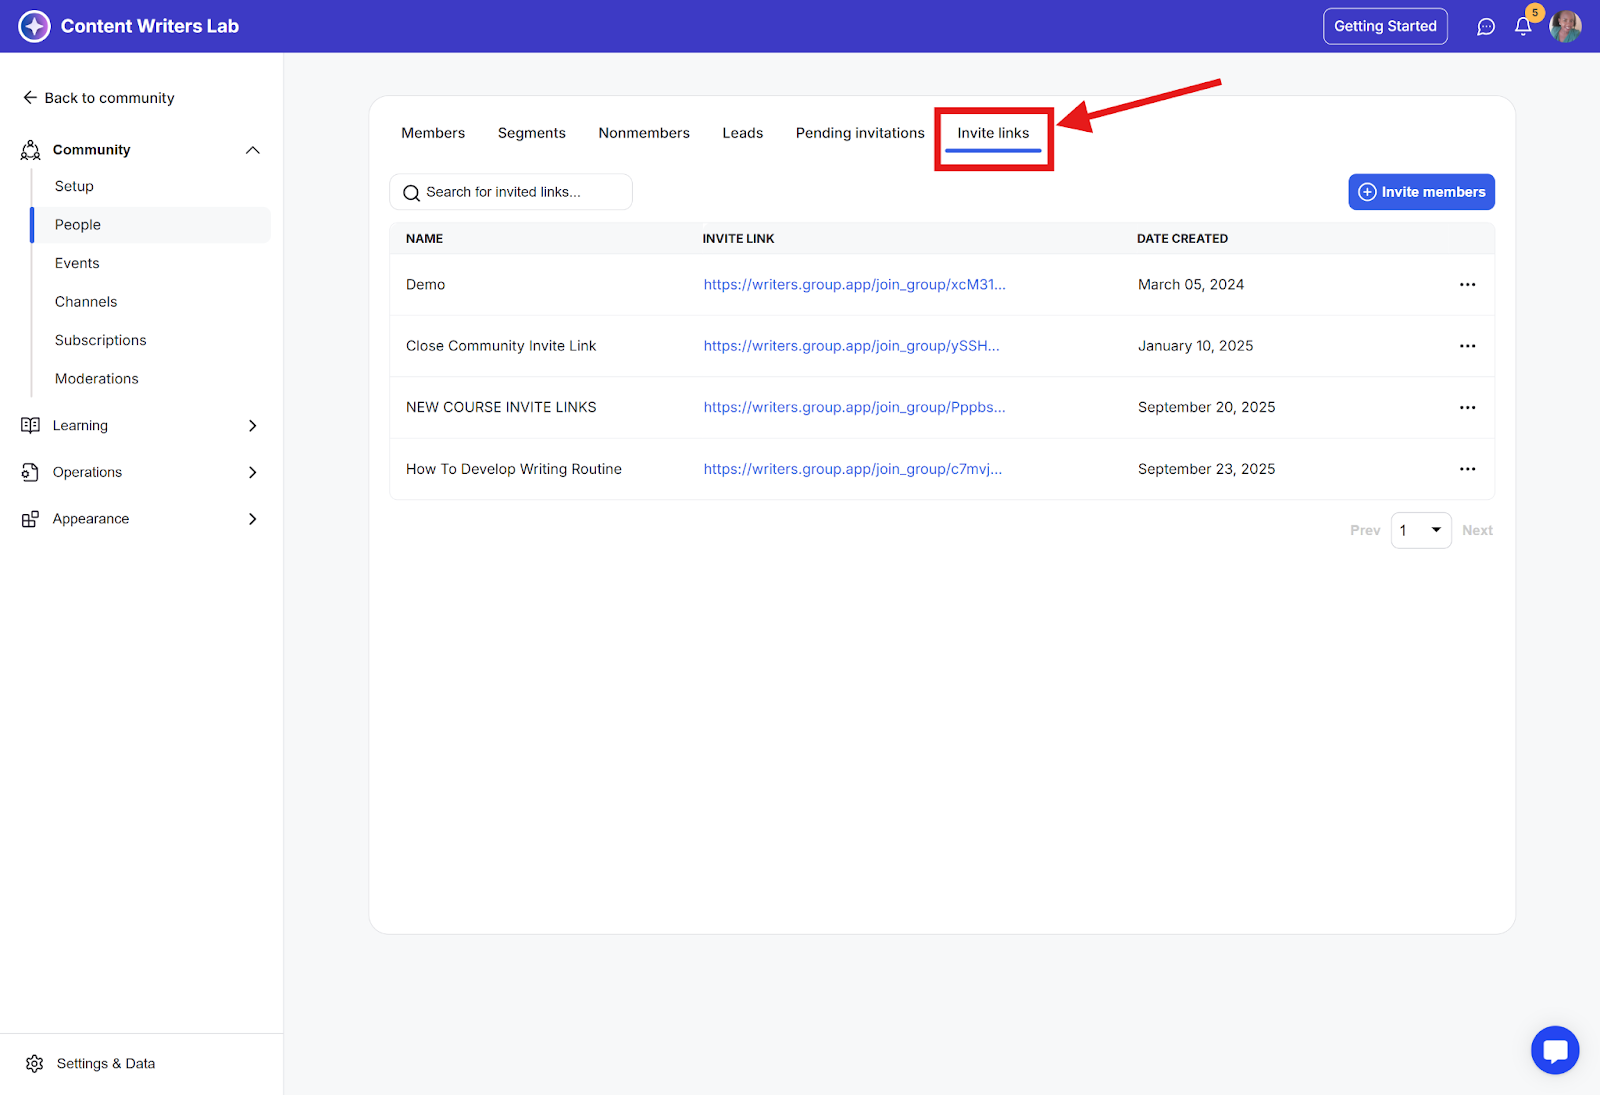
Step 5: When the buyer signs up through the invite link, they’ll be automatically added to your community with the access you pre-configured.
BONUS TIPS
1. Create a free subscription for each membership tier
Set up a free subscription plan for every tier in your community. Link each plan to the products included in that tier. This keeps your setup organized, avoids extra unnecessary tiers, and makes it easy to manage member access.
2. Turn on “Disable Self-cancellation.”
Enable this for all subscription plans. Since payments are handled outside GroupApp, you don’t want members canceling on their own inside GroupApp. Turning on this option prevents confusion and avoids future access issues.
