This guide explains how to set up custom redirects after a purchase. Custom redirects allow you to send members to specific pages or external links immediately after they complete a purchase, helping you guide onboarding, track conversions, and deliver a better post-purchase experience.
Custom redirect allows you to:
Send members to specific pages after purchase
Direct to internal GroupApp pages
Link to external websites
Create custom thank you pages
Set up conversion tracking
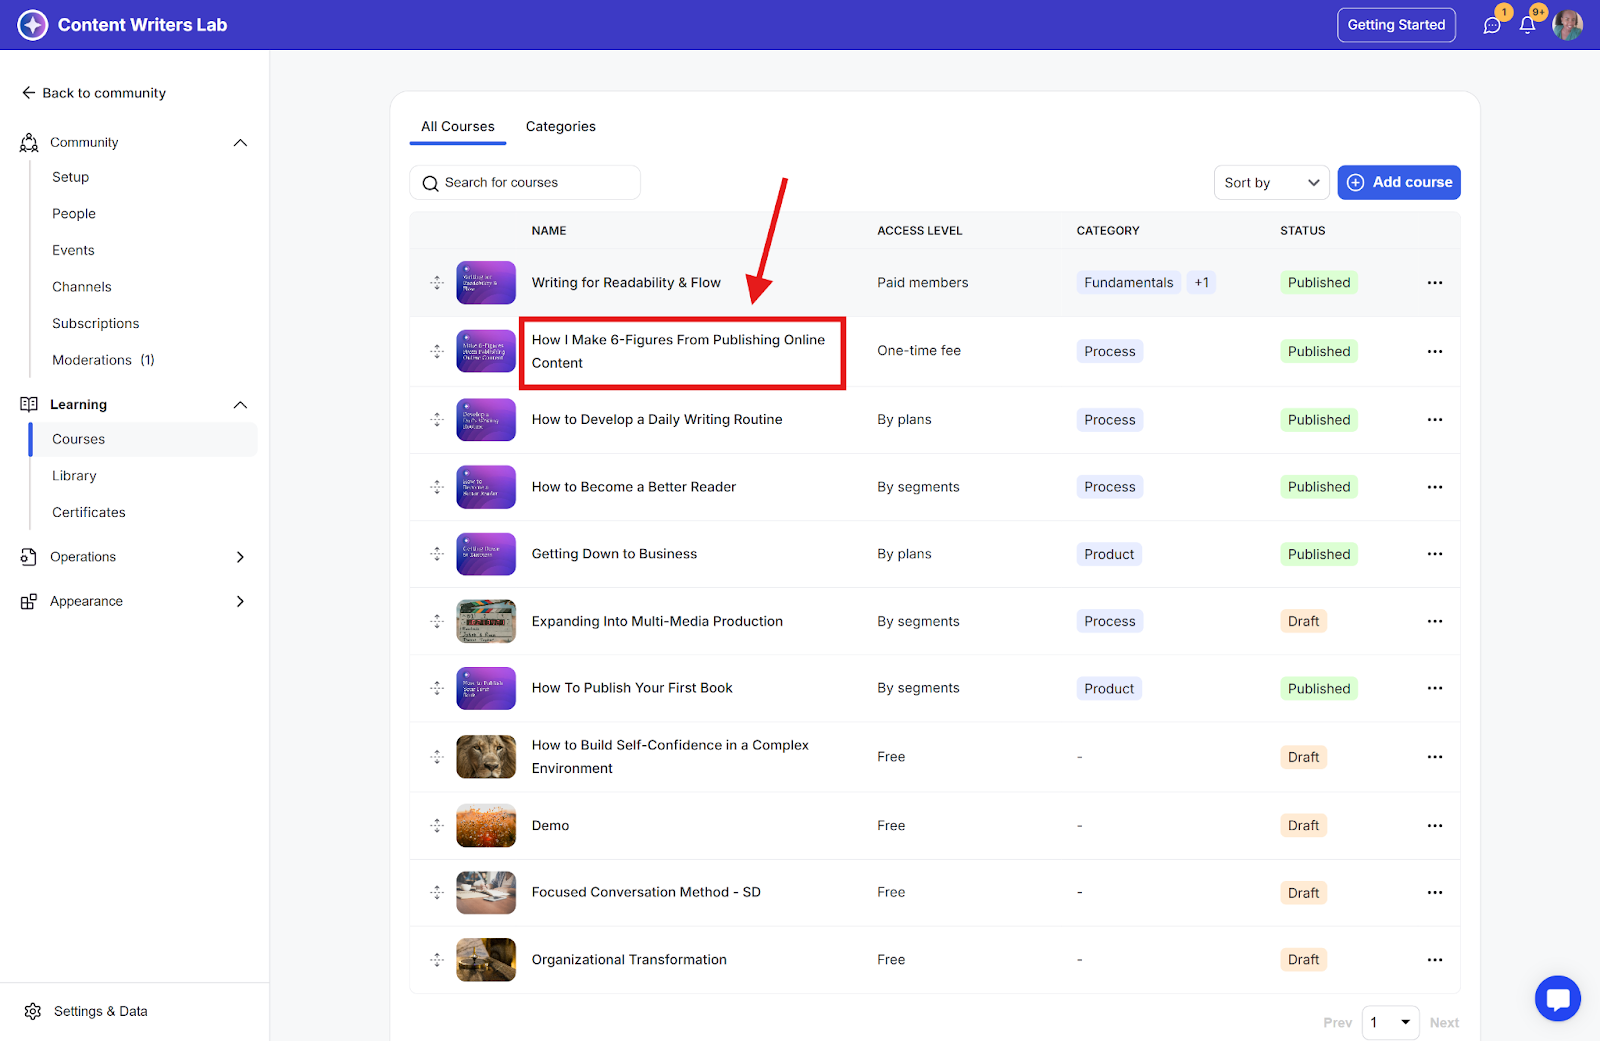
Step 1: Click on the course or library content.
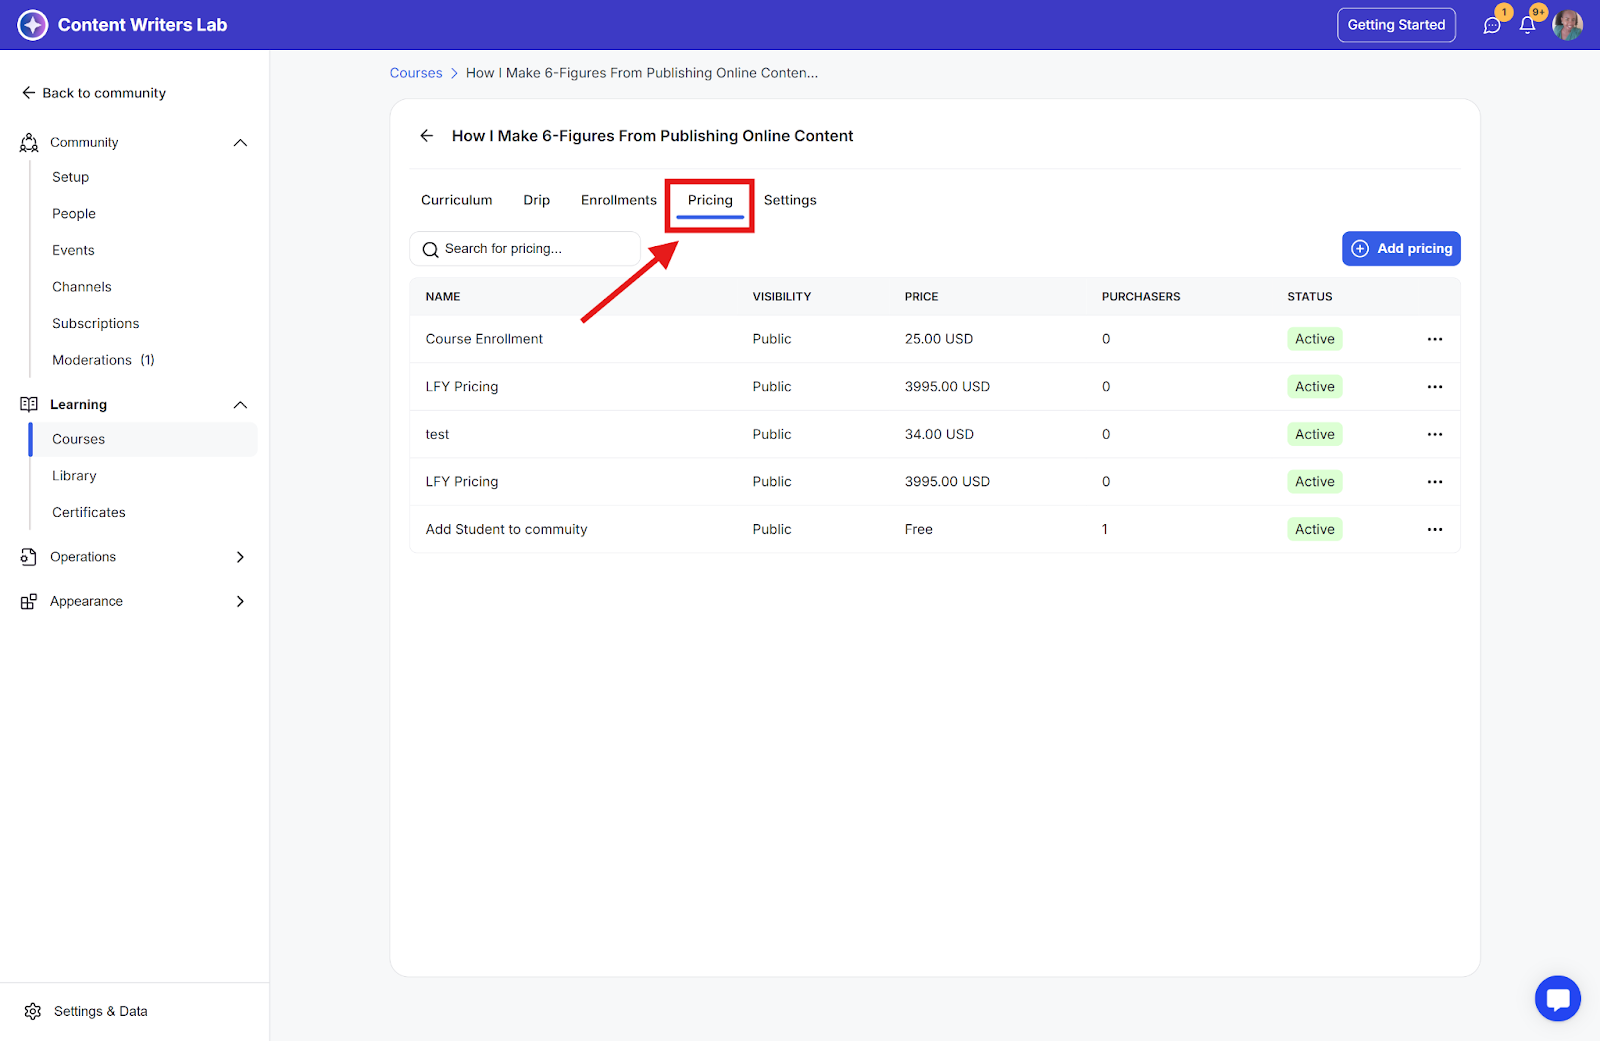
Step 2: Go to the Pricing tab.
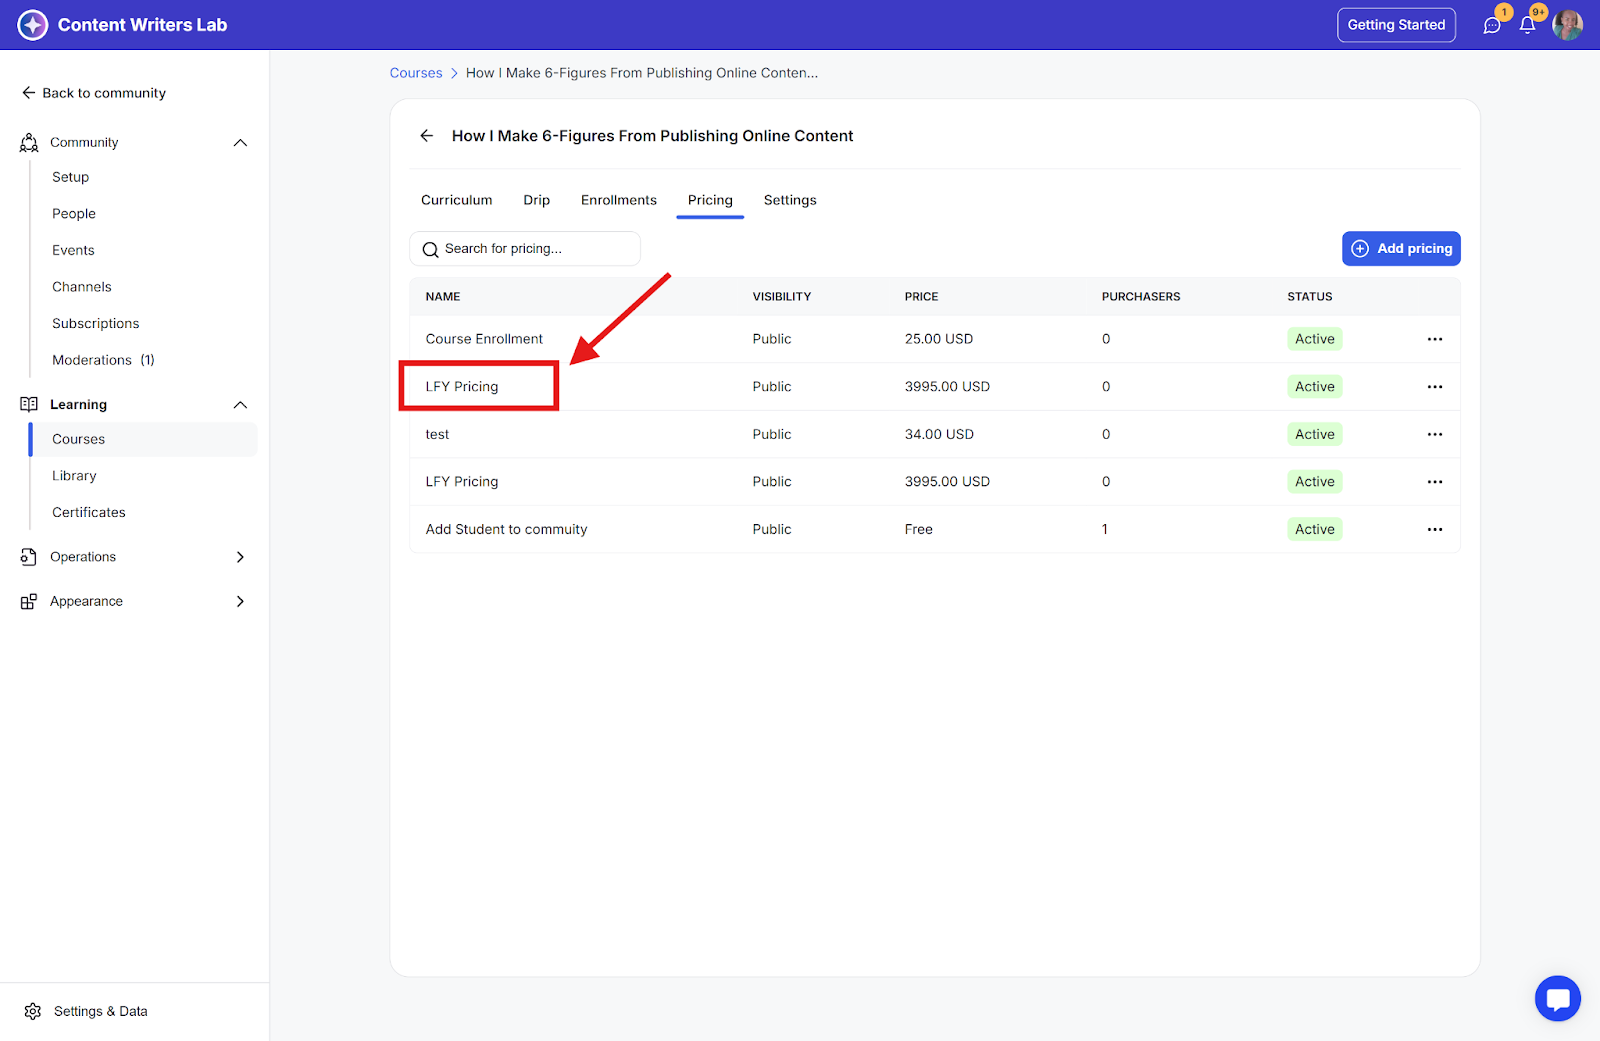
Step 3: Create or click on a pricing option.
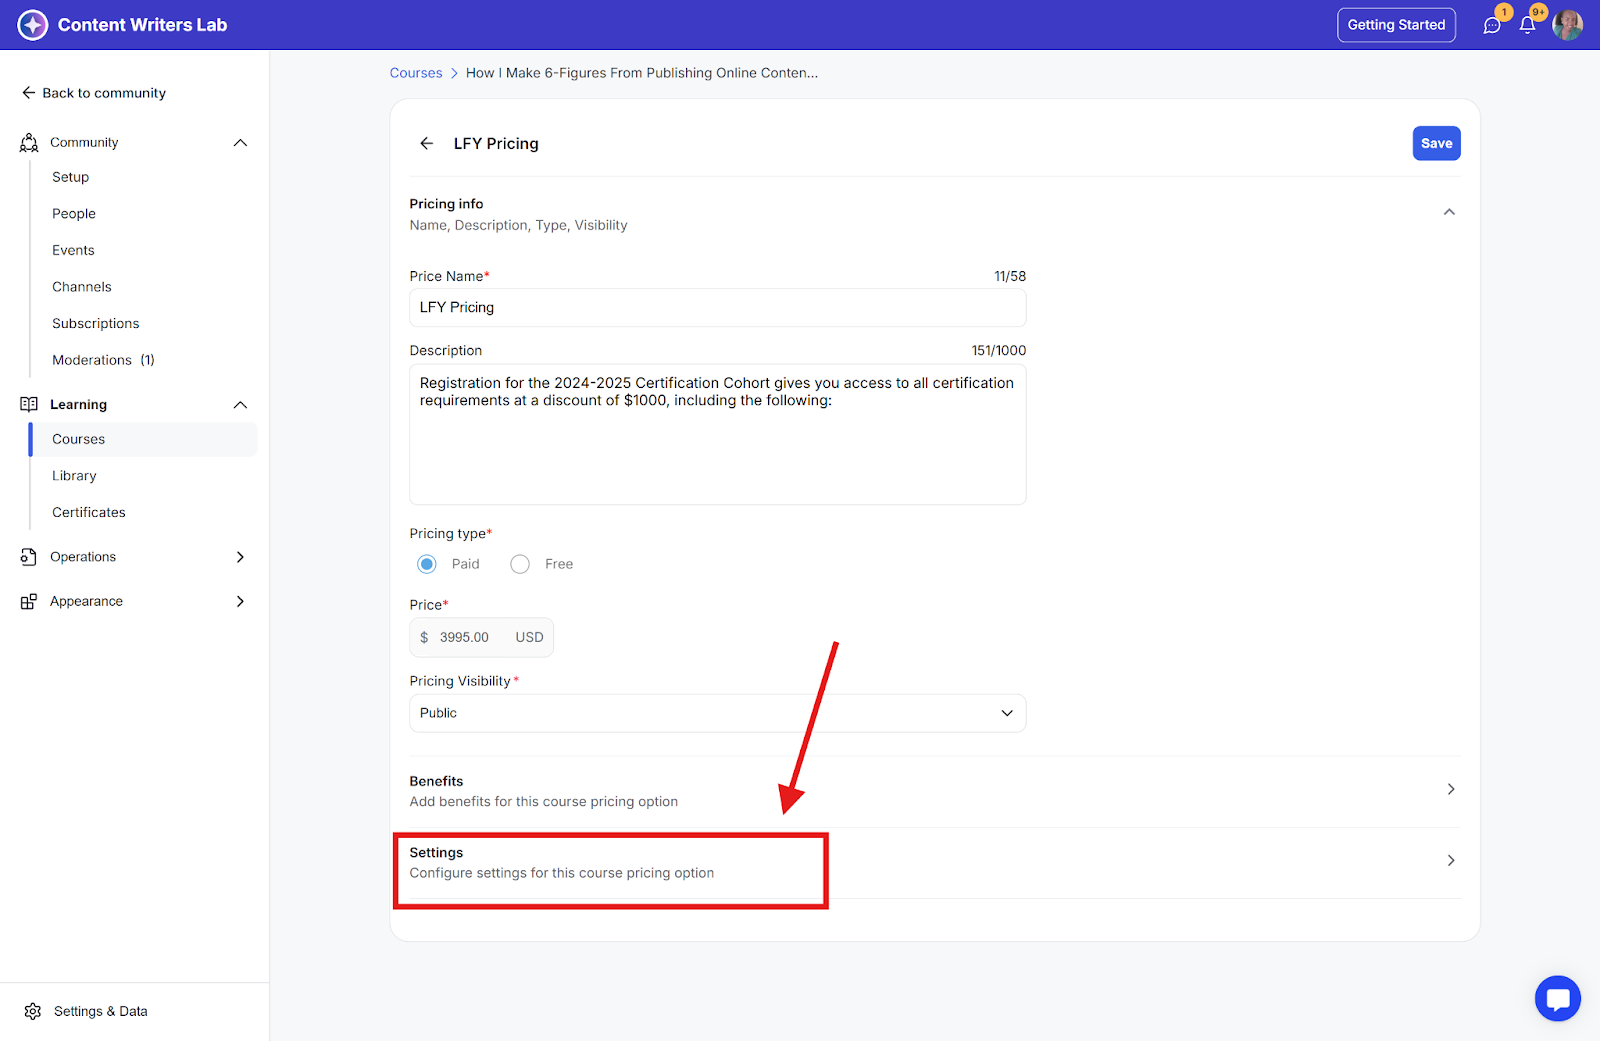
Step 4: Scroll down to the Settings section.
Step 5: Toggle on Custom redirect URL
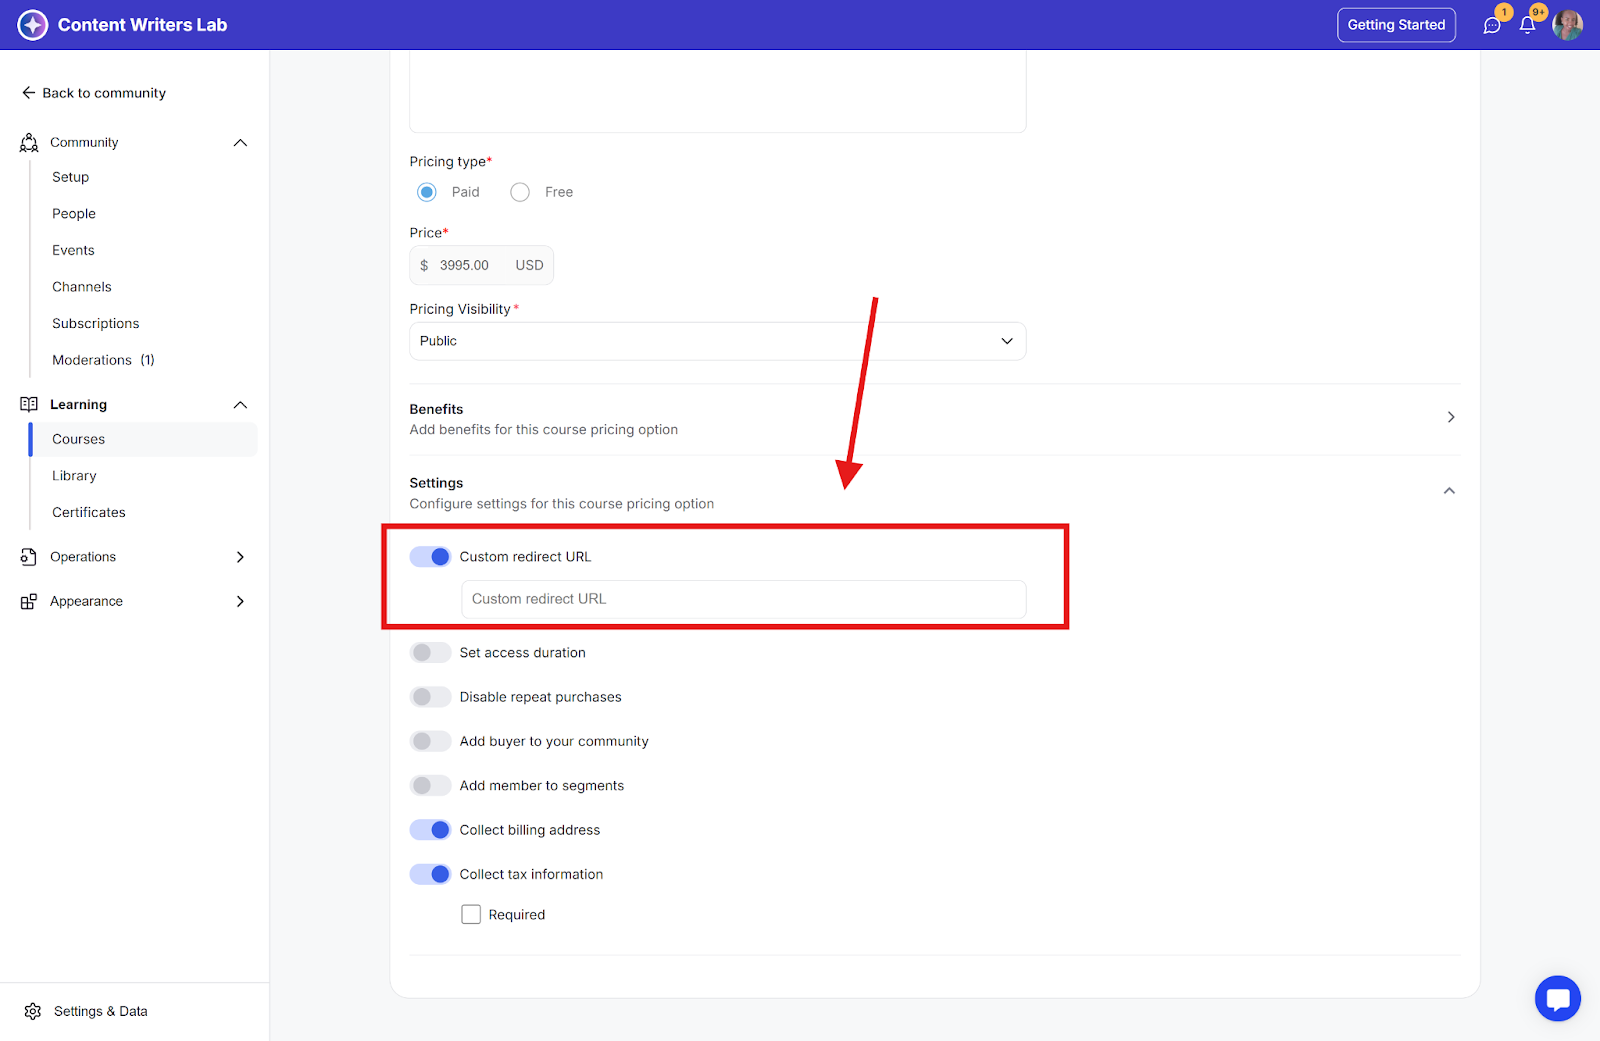
Step 6: Enter your redirect URL.
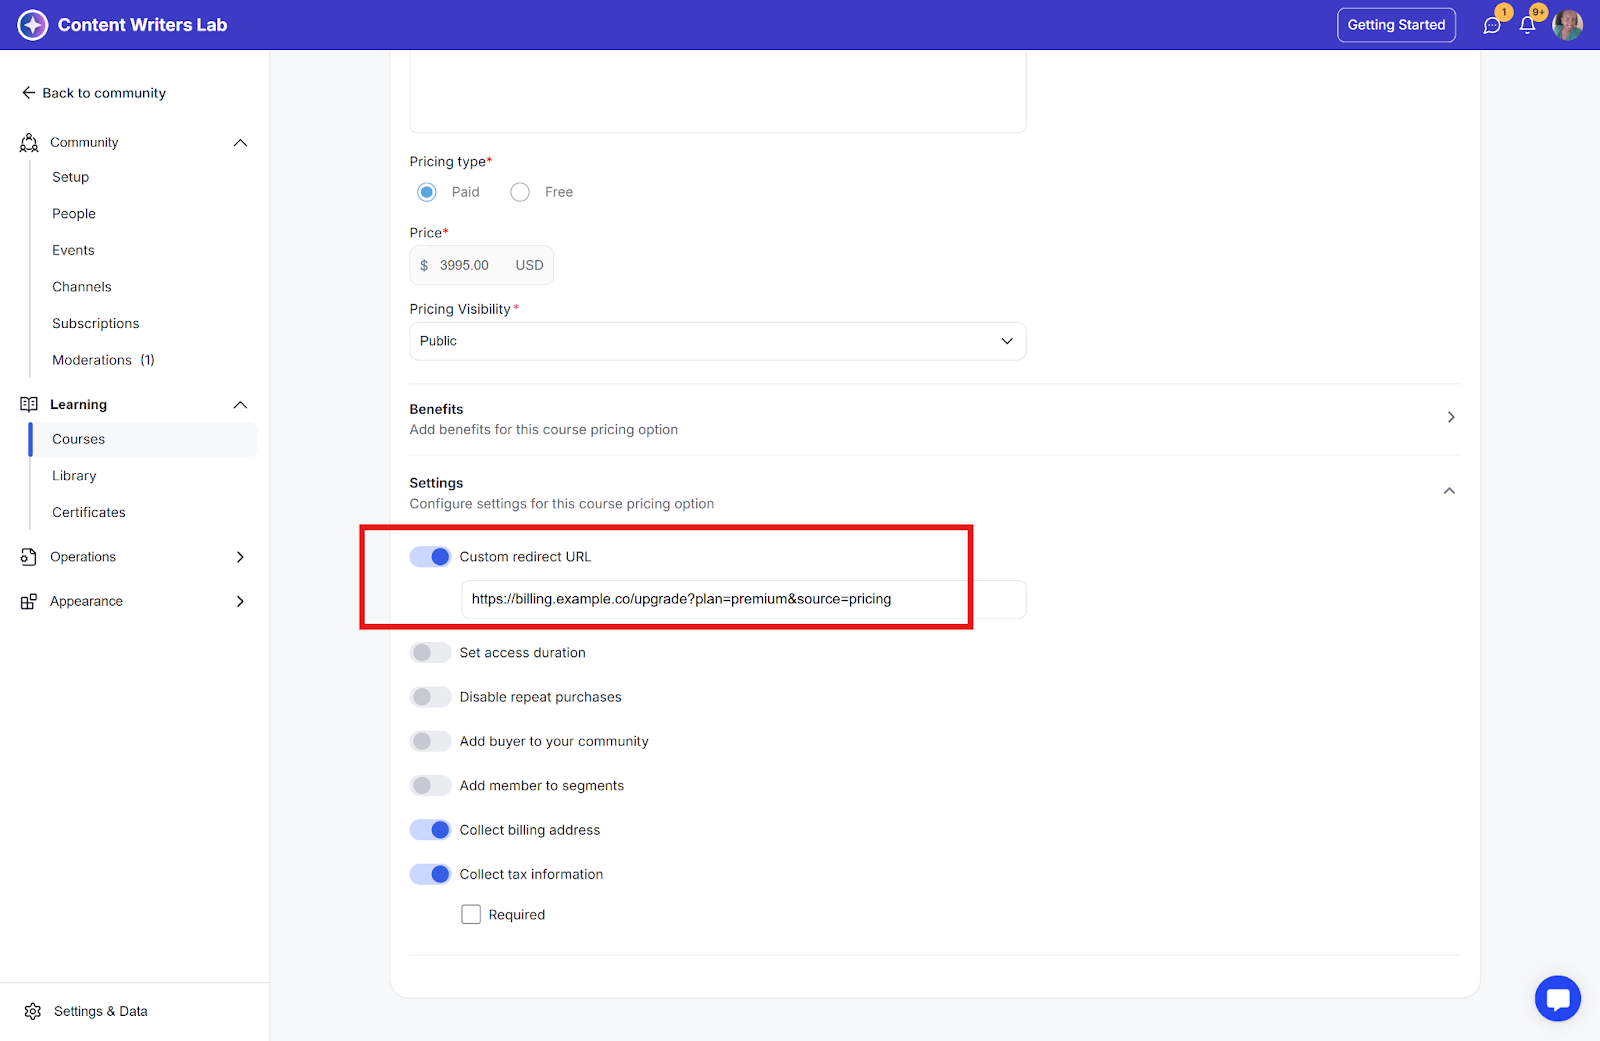
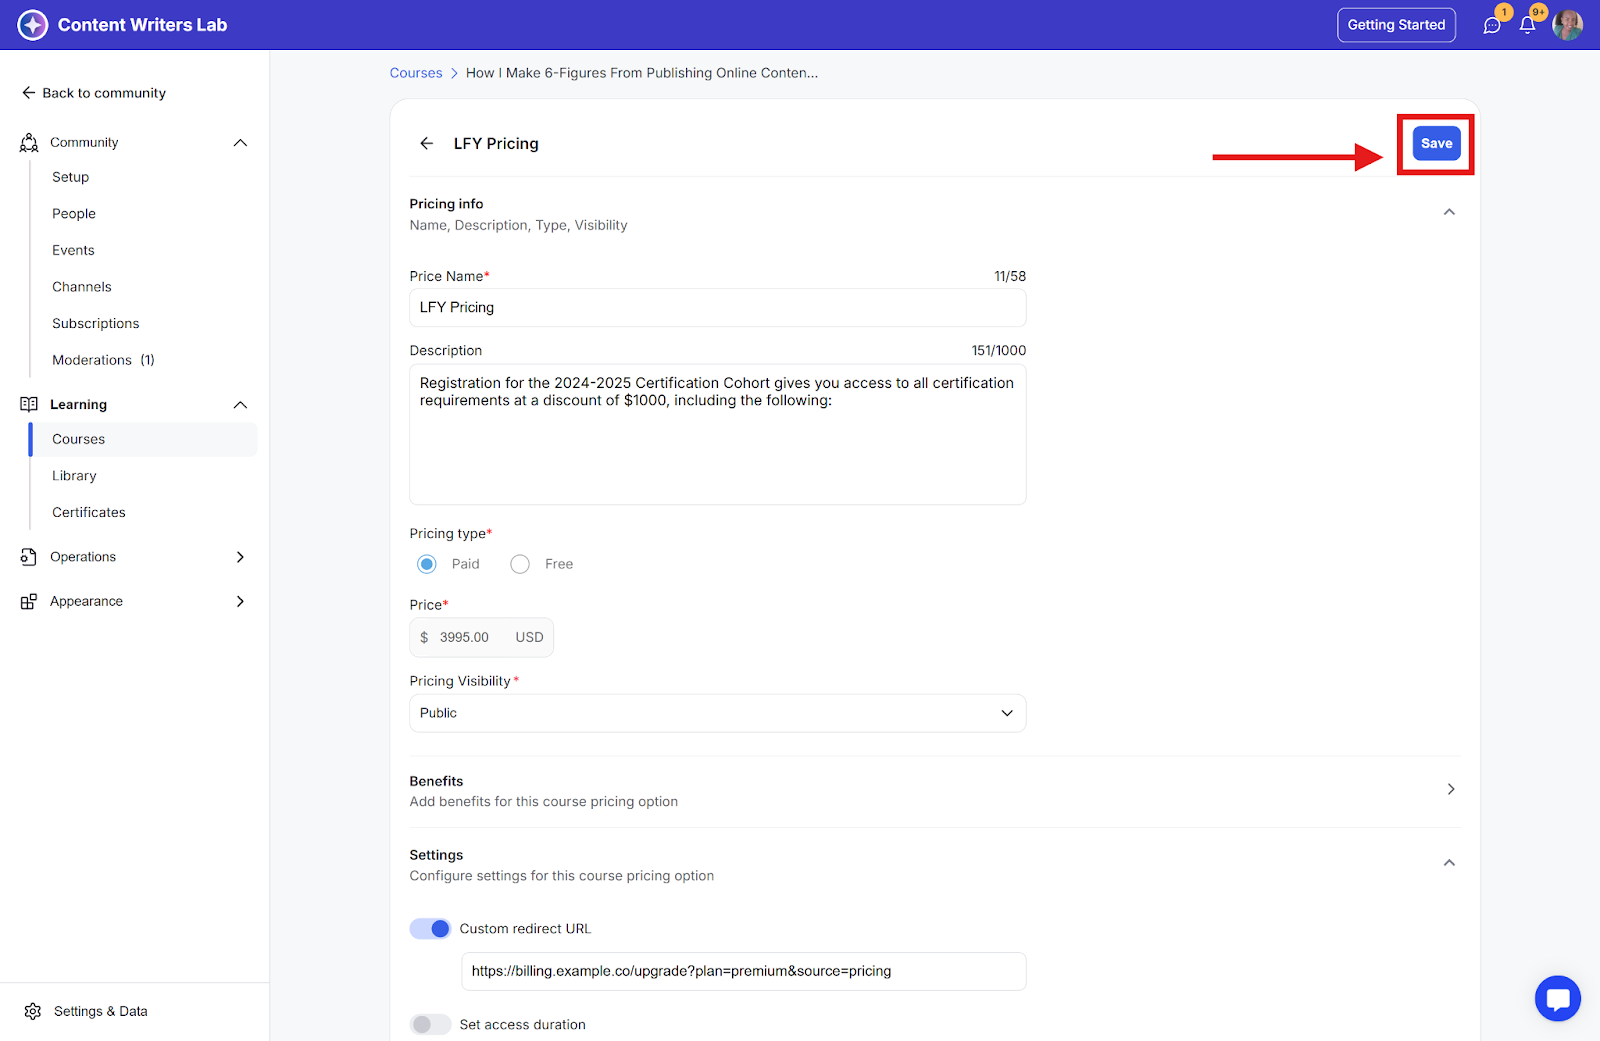
Step 7: Click Save
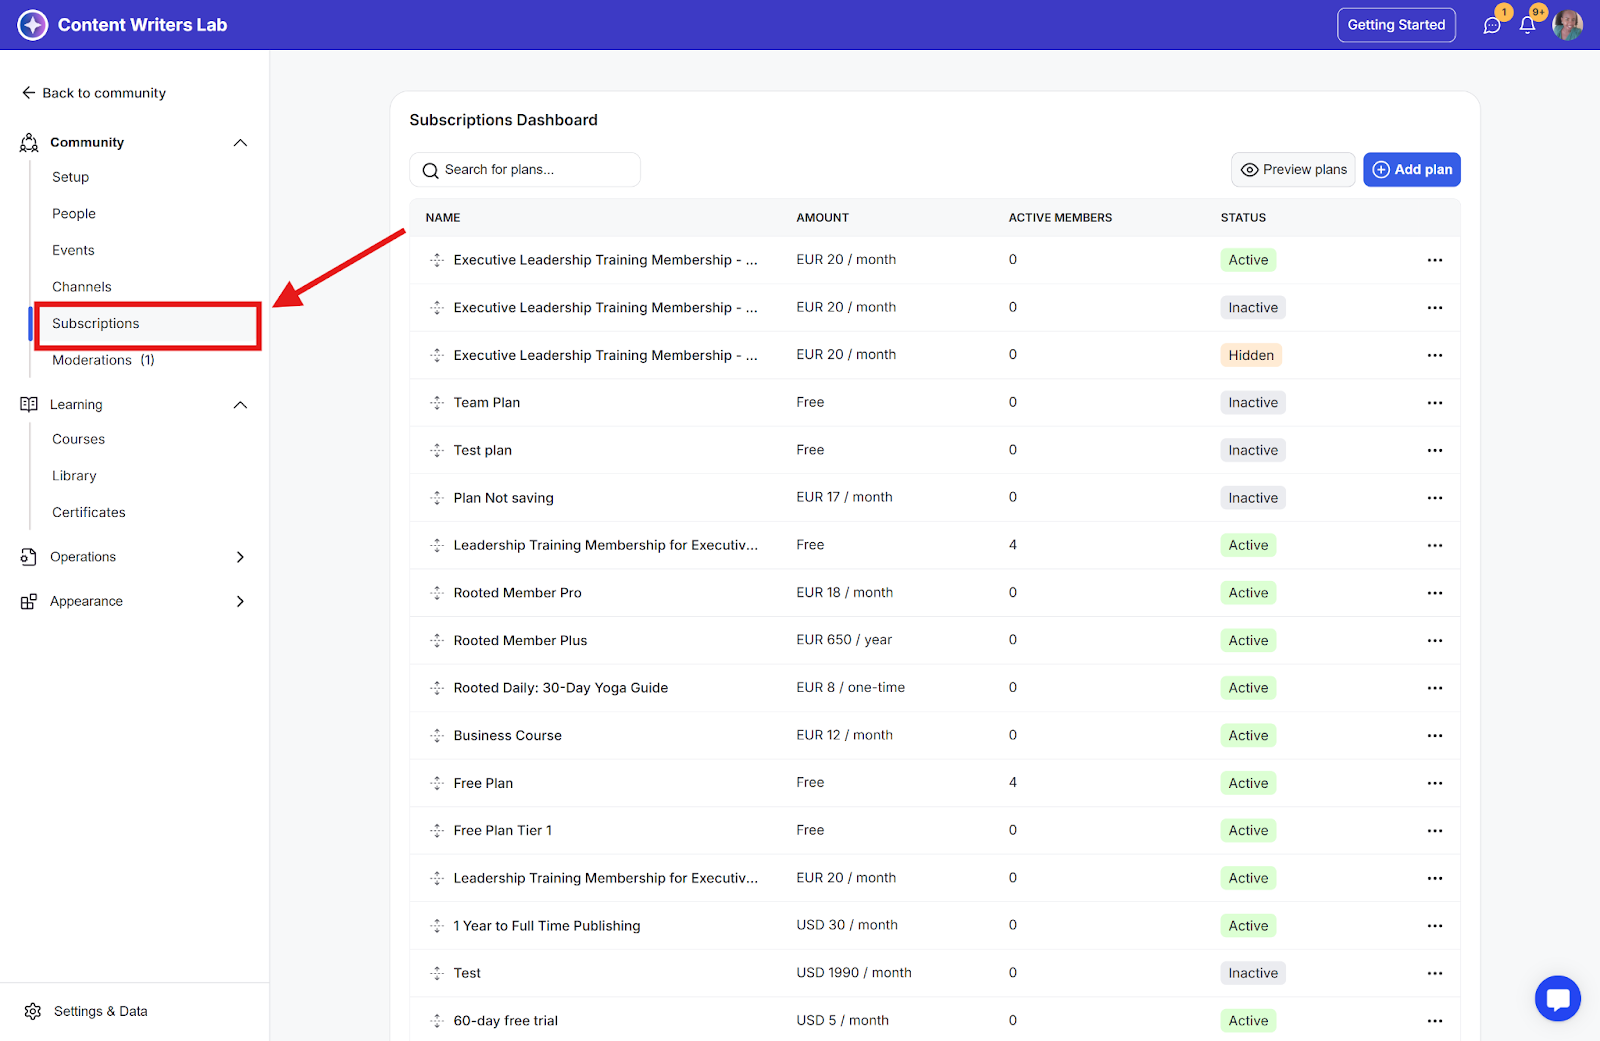
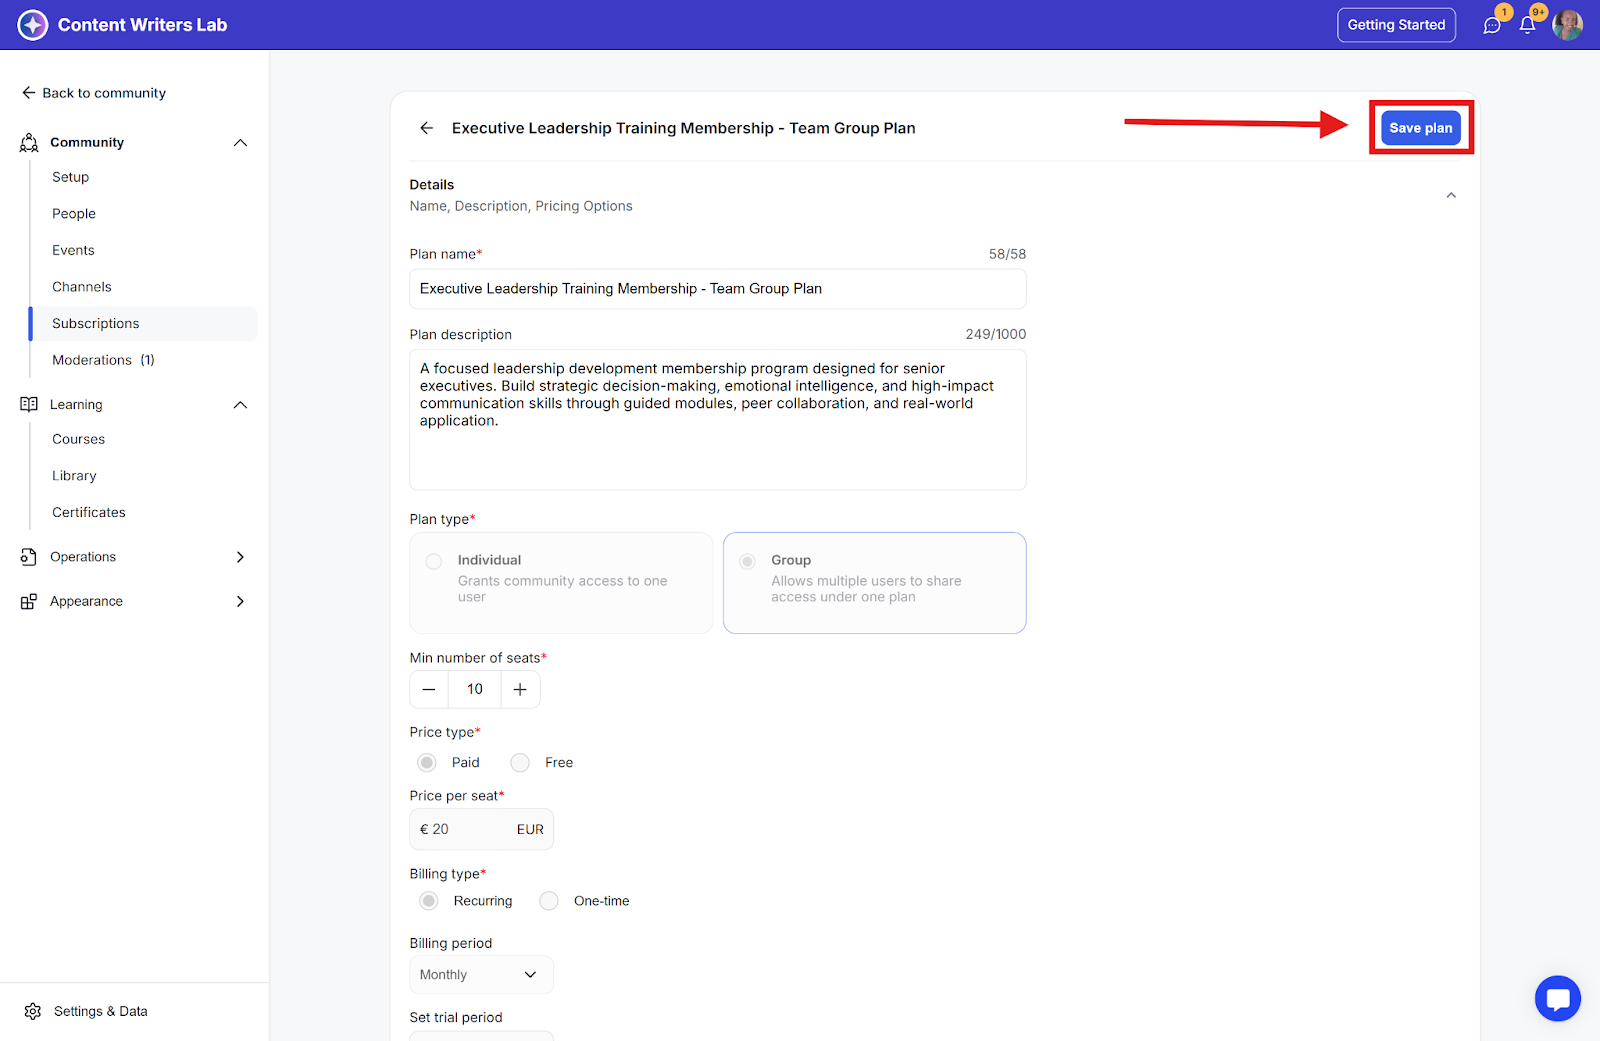
Step 1: Go to the Admin Panel and click Subscriptions in the side menu.
Step 2: Create a plan or click on an existing one.
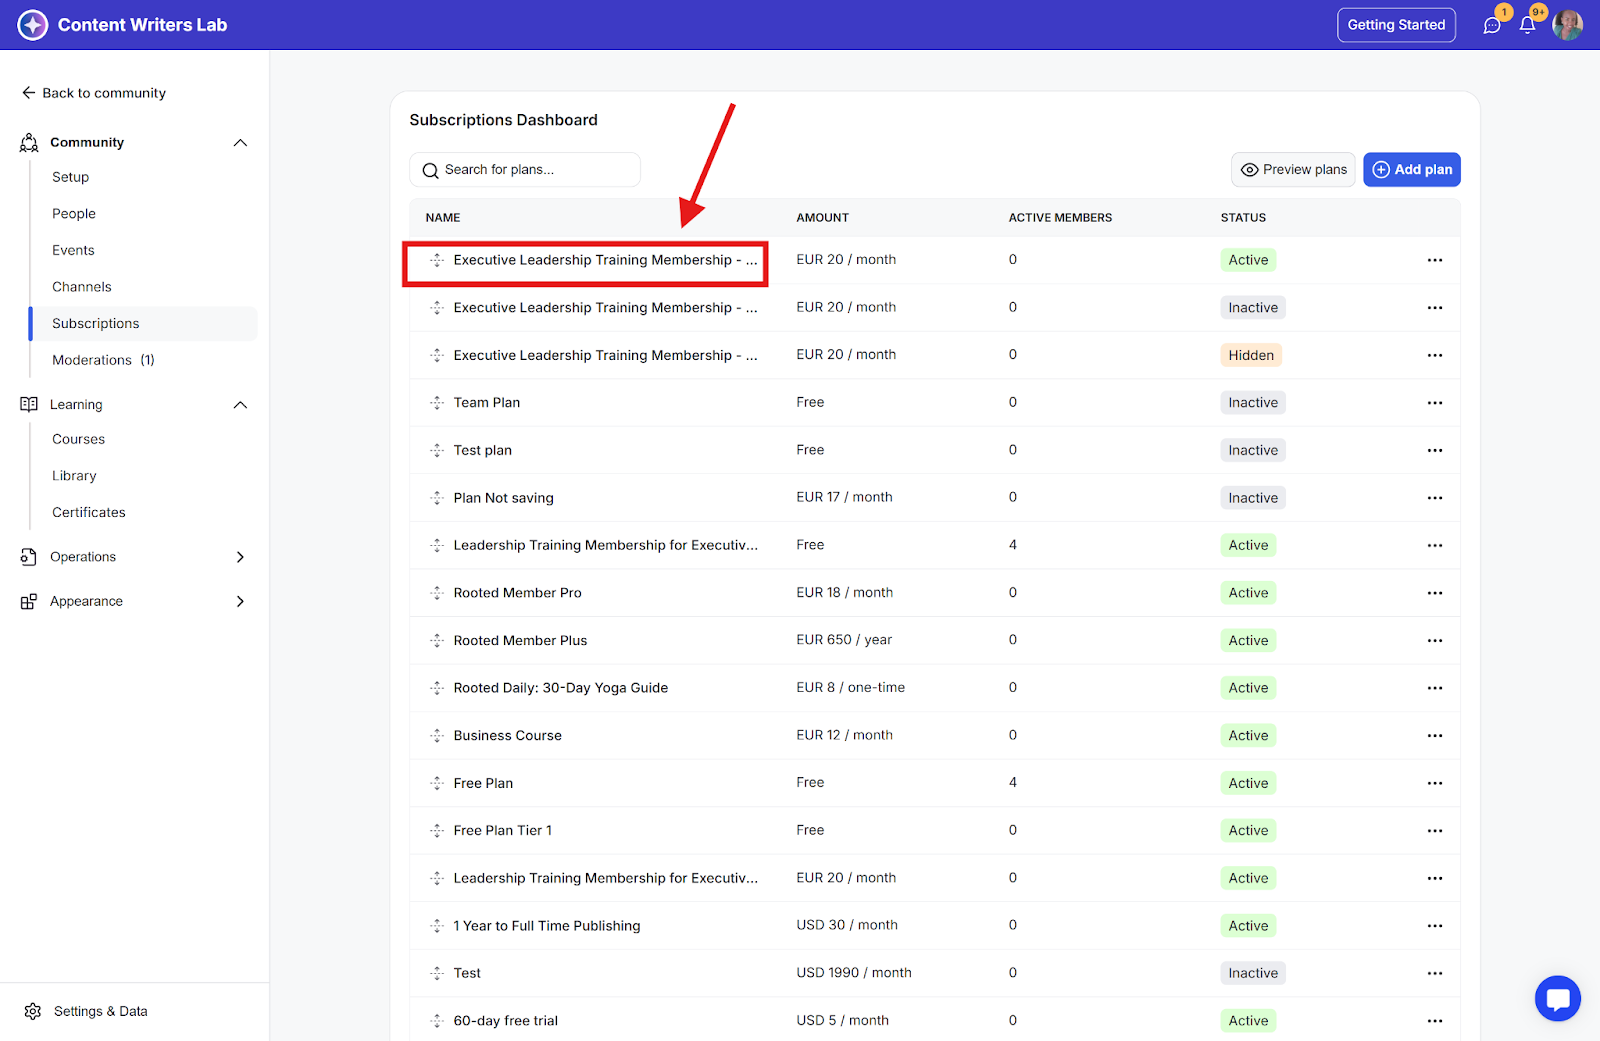
Step 3: Scroll down to the Settings section.
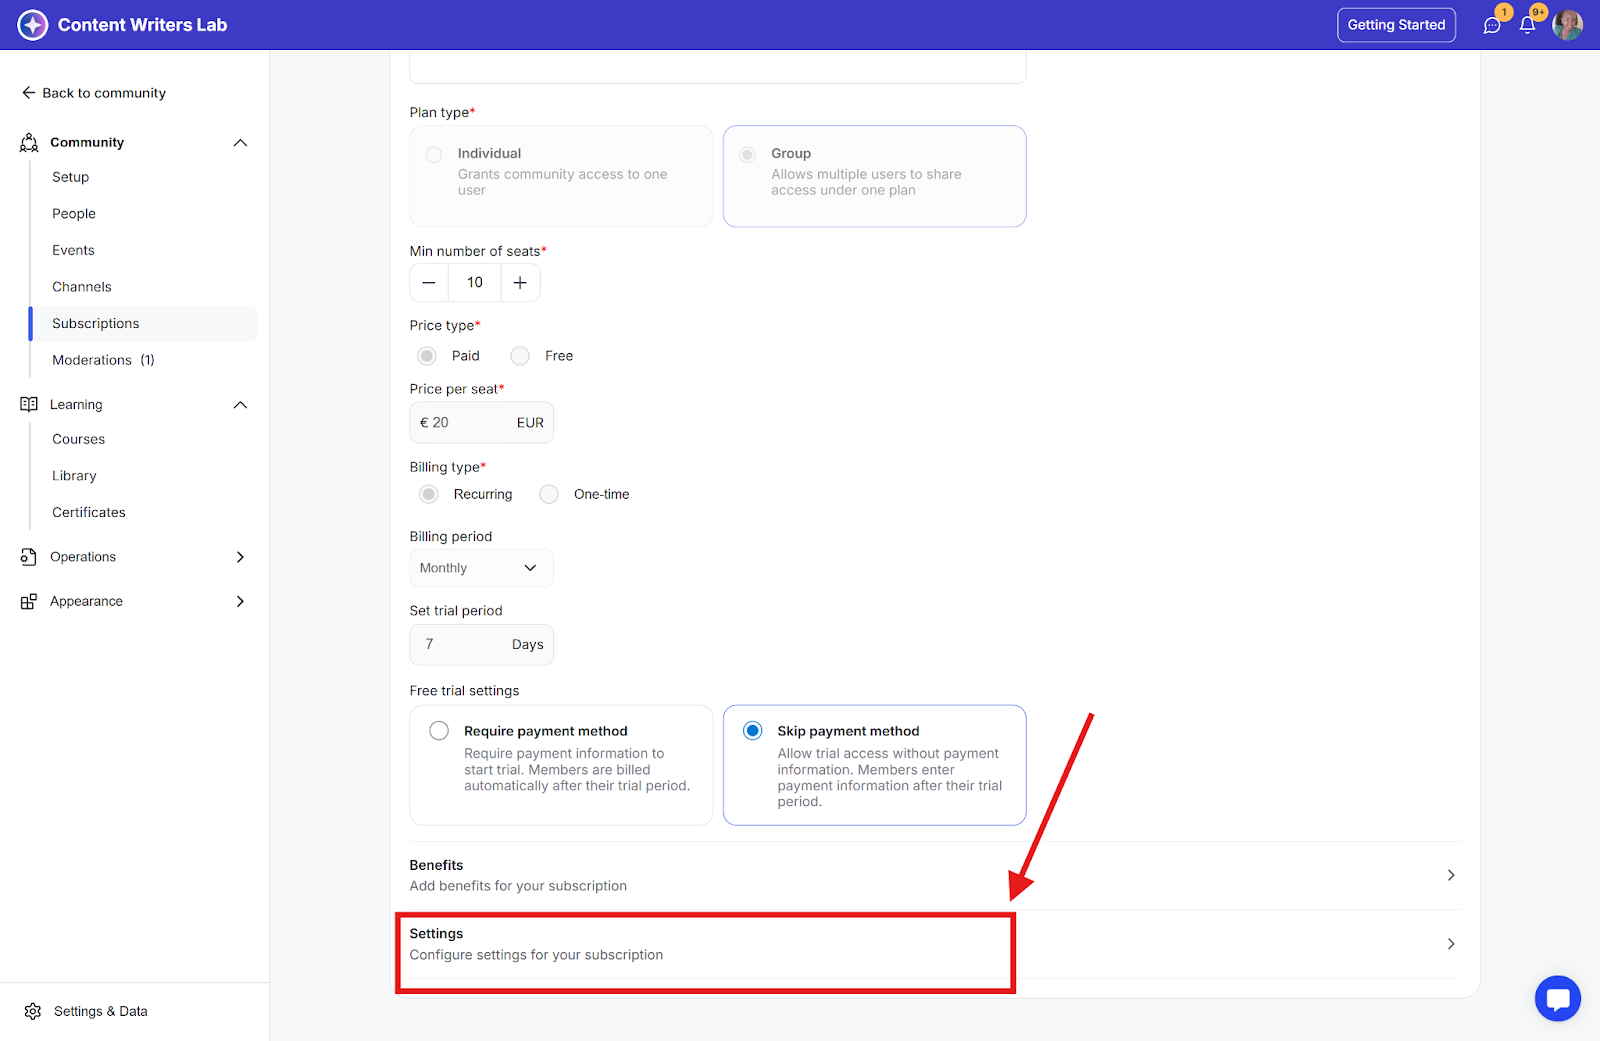
Step 4: Toggle on Custom Redirect URL
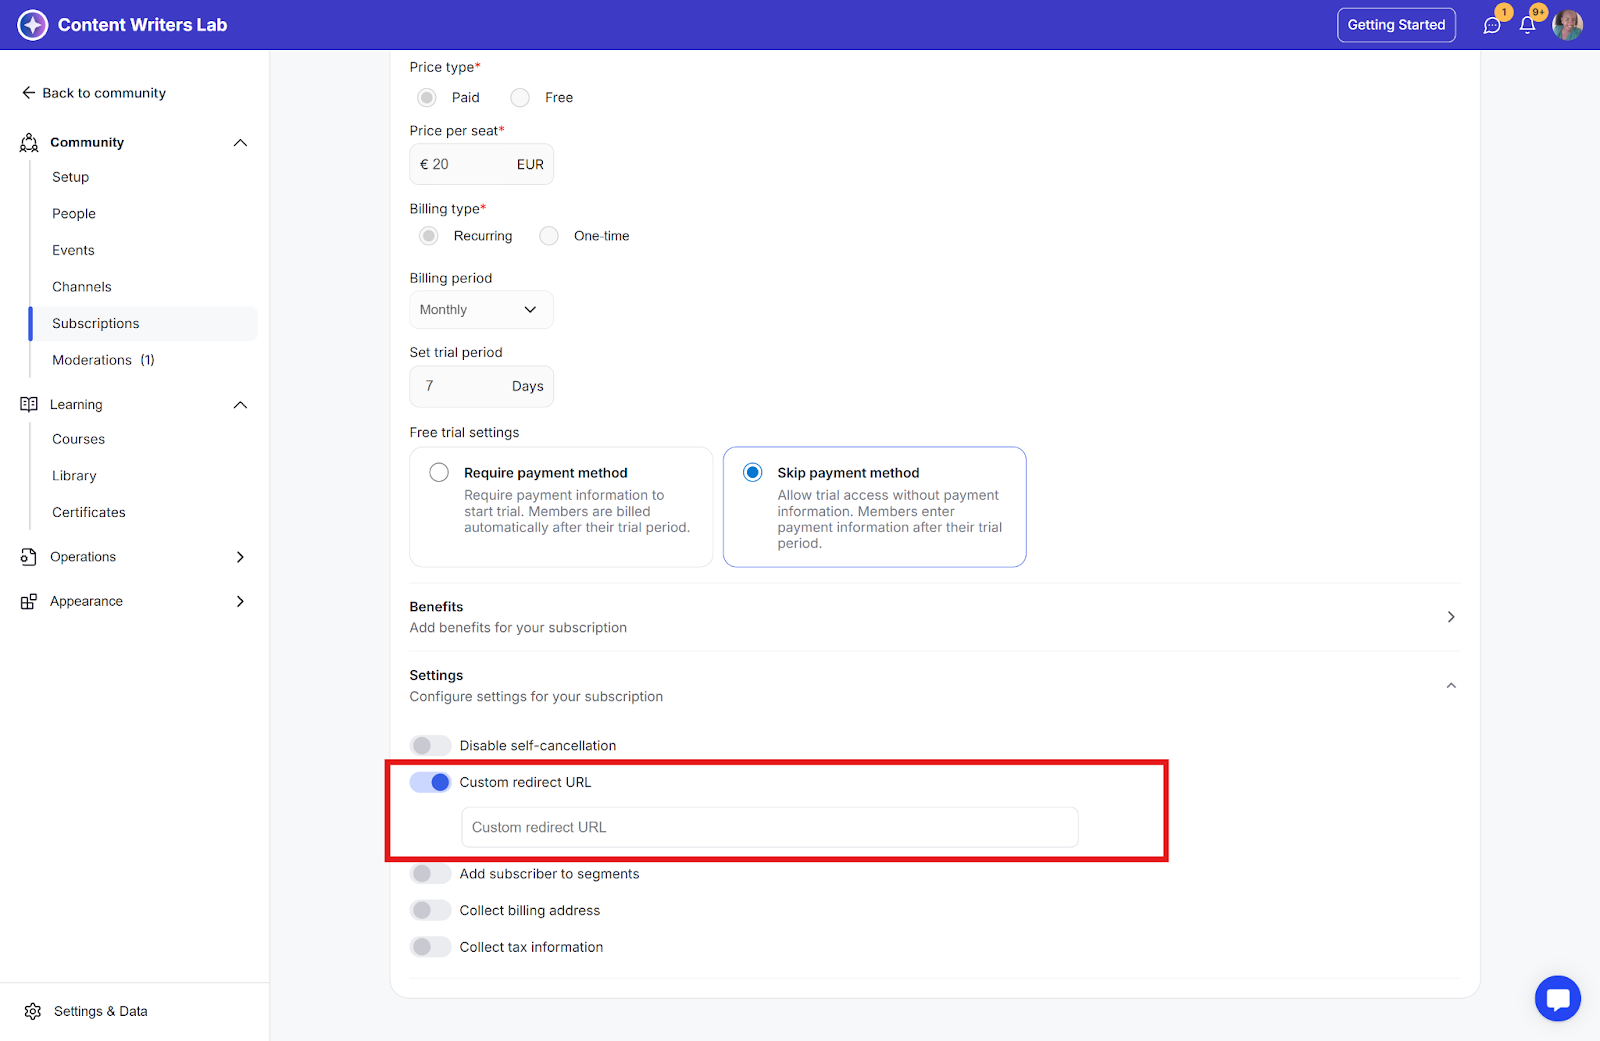
Step 5: Enter your redirect URL
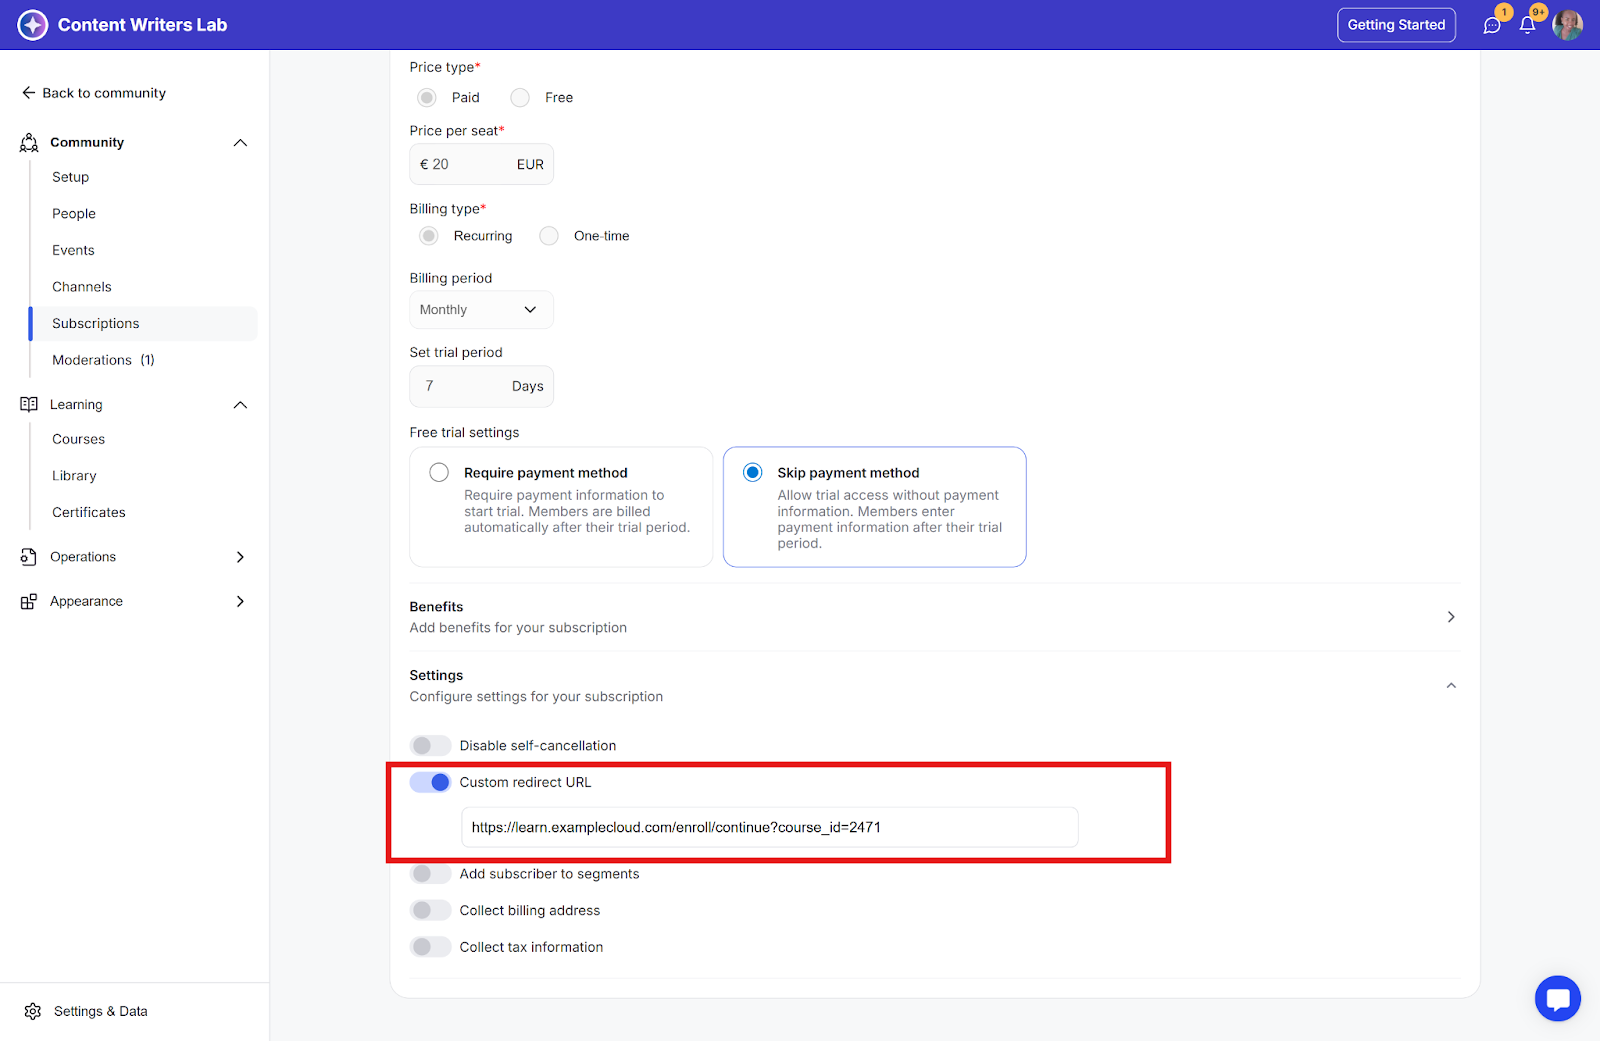
Step 6: Click Save Plan.
Direct to booking calendars for consultation calls
Send to thank you pages for conversion tracking
Guide to onboarding materials
Link to supplementary resources
Redirect to upsell pages
Ensure redirect links are working before activating
Use tracking parameters for marketing campaigns
Create specific thank-you pages for different campaigns
Test the user journey after setting up redirects