
Control how long your students can access your content by setting specific time periods or end dates. Access duration helps you create urgency, manage content availability, and structure your course delivery effectively.
Types of Access Duration
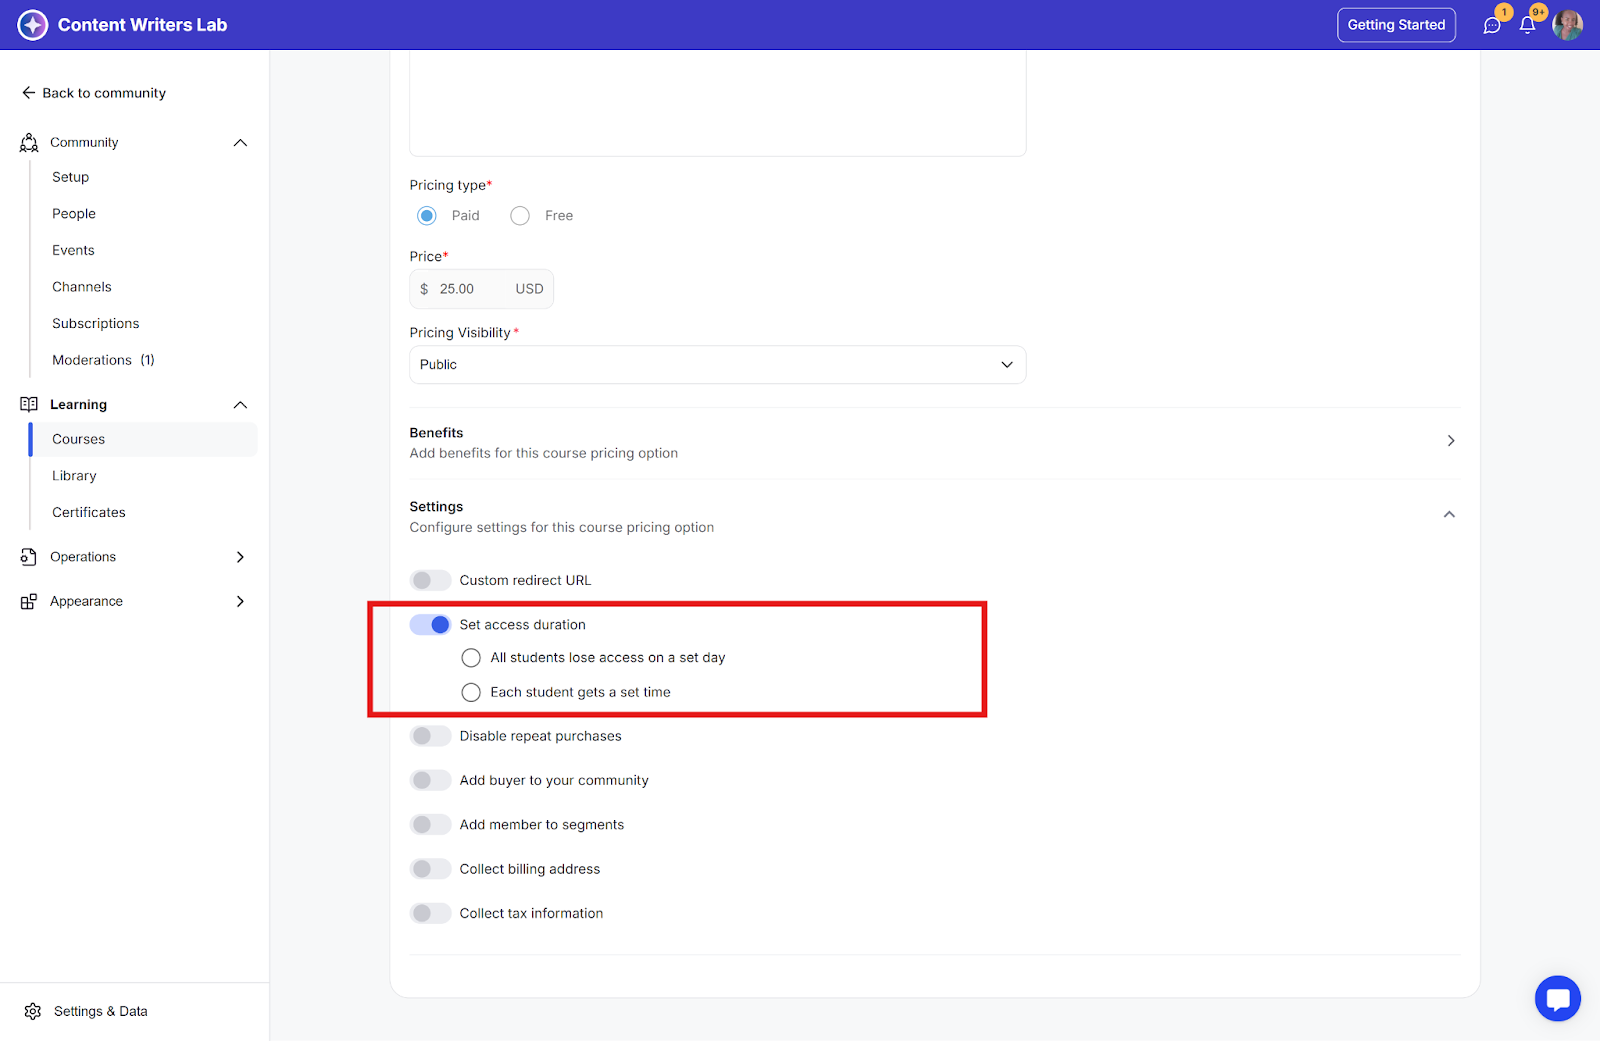
There are two ways to configure access duration:
1. All students lose access on a set day
Choose a specific end date
All students will lose access on that date, regardless of when they purchased
Ideal for cohort-based courses or time-limited offerings
2. Each student gets a set time
Define a specific duration (days, weeks, or months)
The access period starts from the individual purchase date
Each student gets the same length of access
How to Set Access Duration
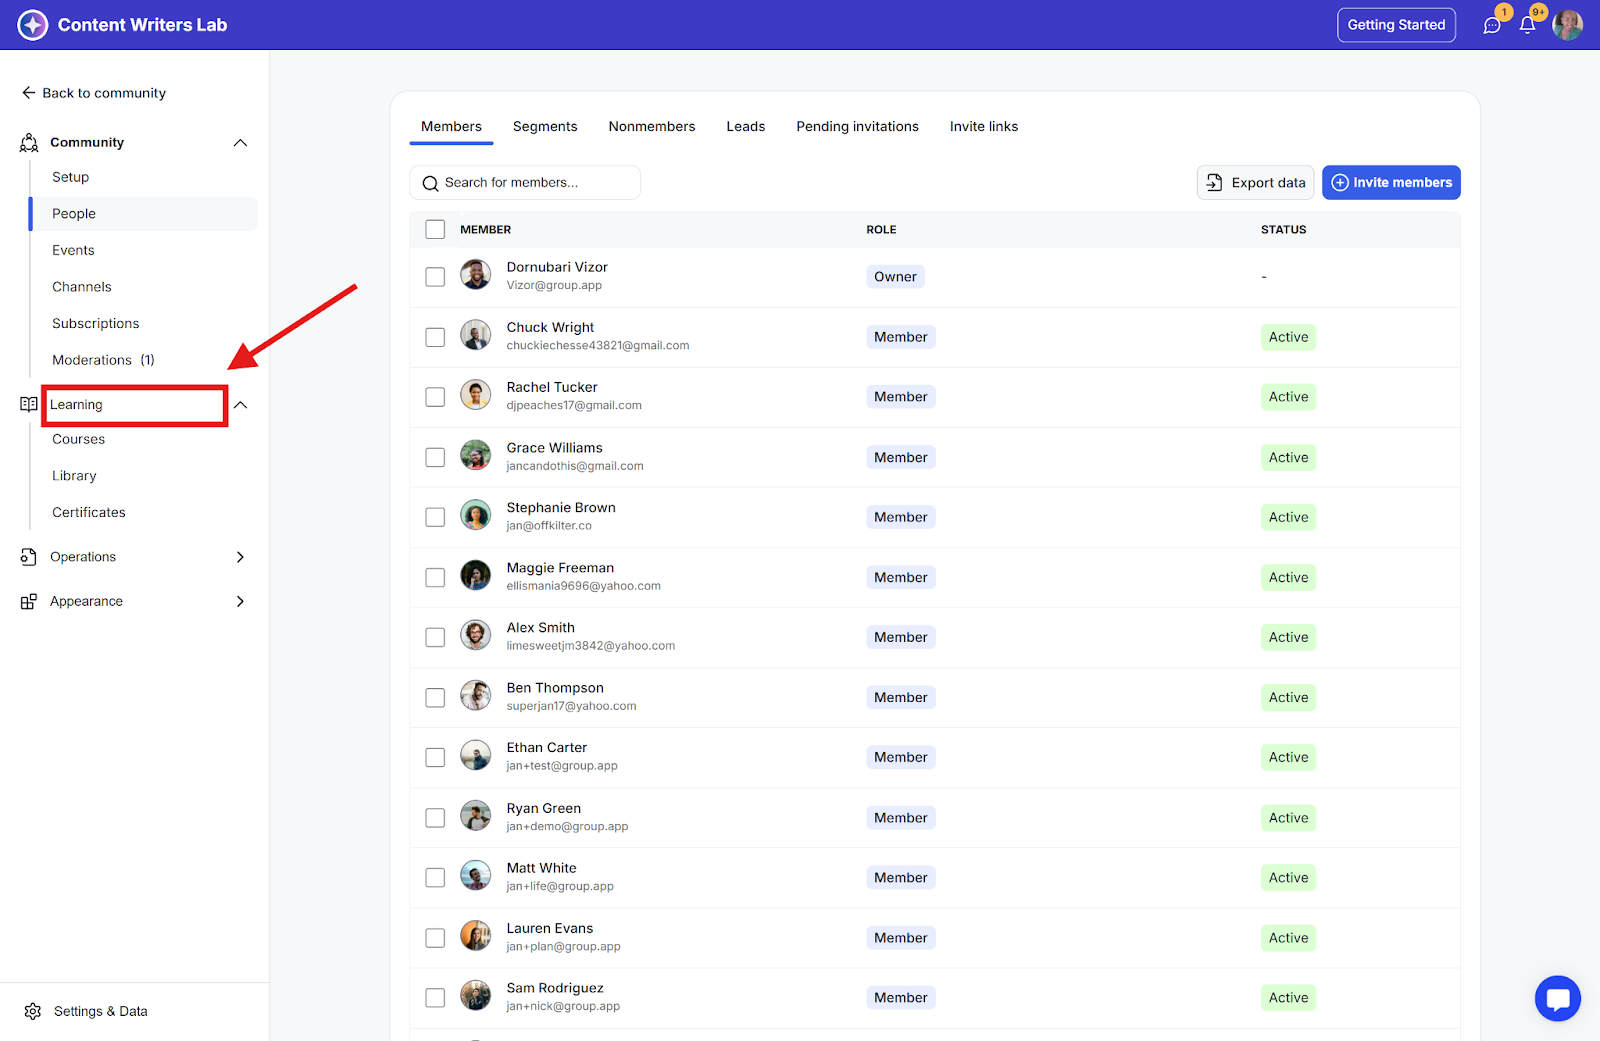
Step 1: Go to the Admin Panel and click Learning on the side menu.
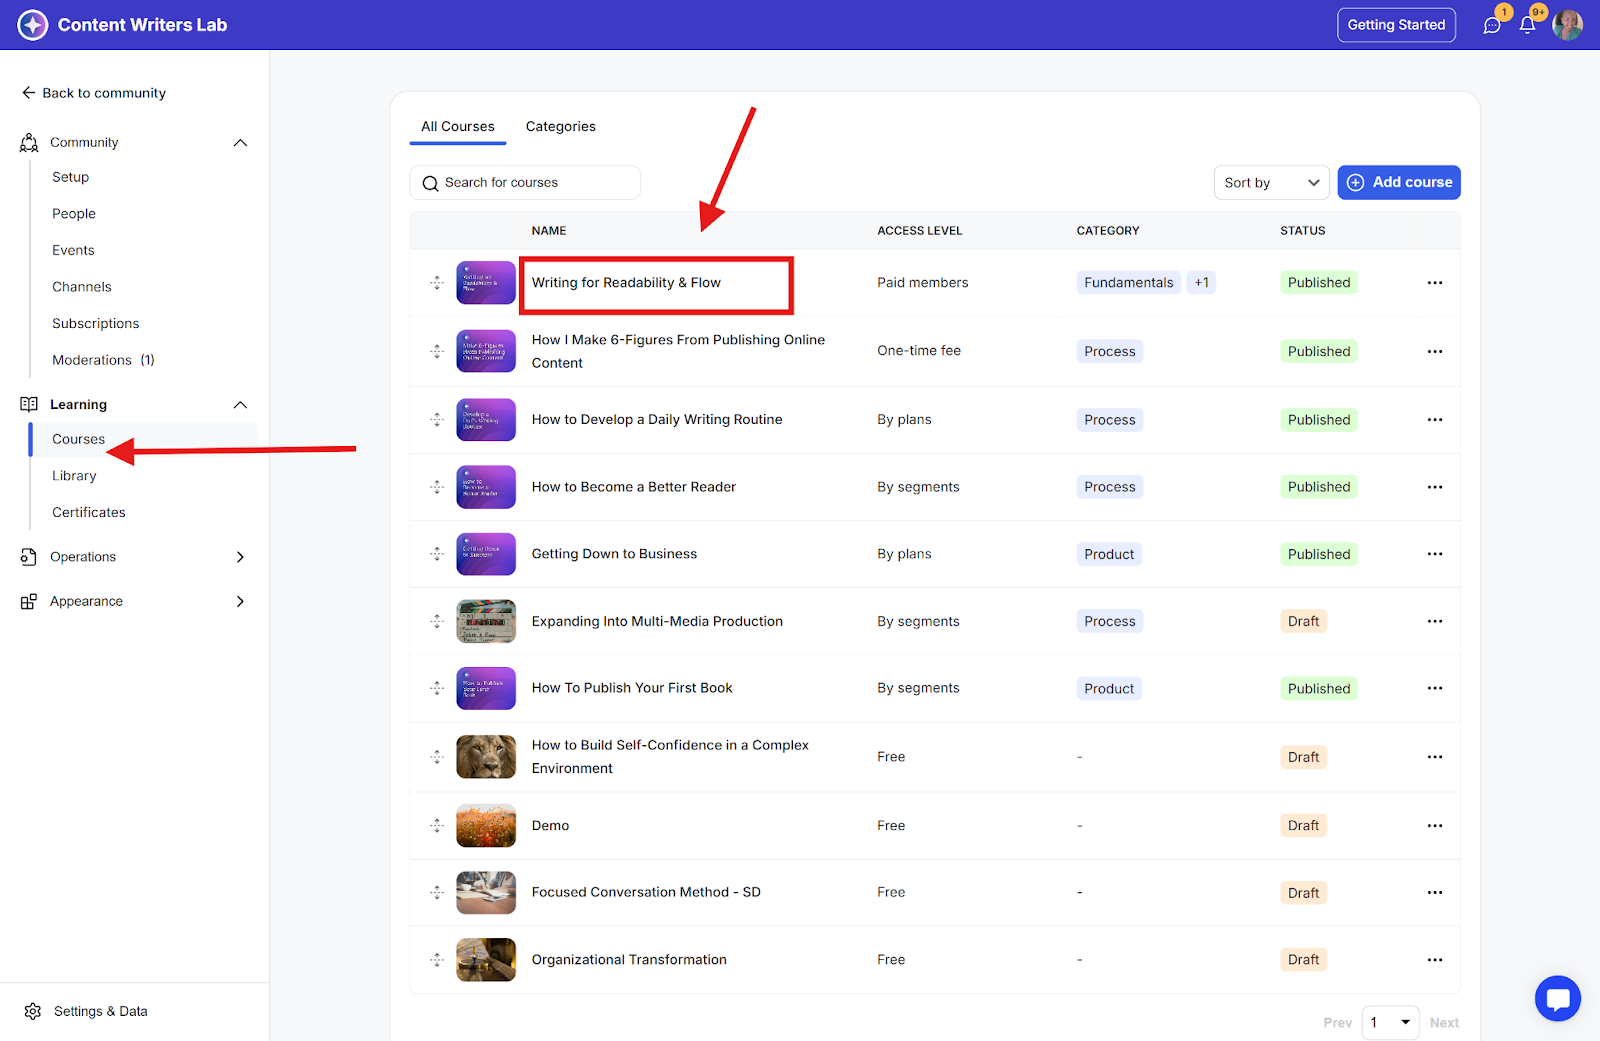
Step 2: Click Course or Library content and locate the one you want to manage.
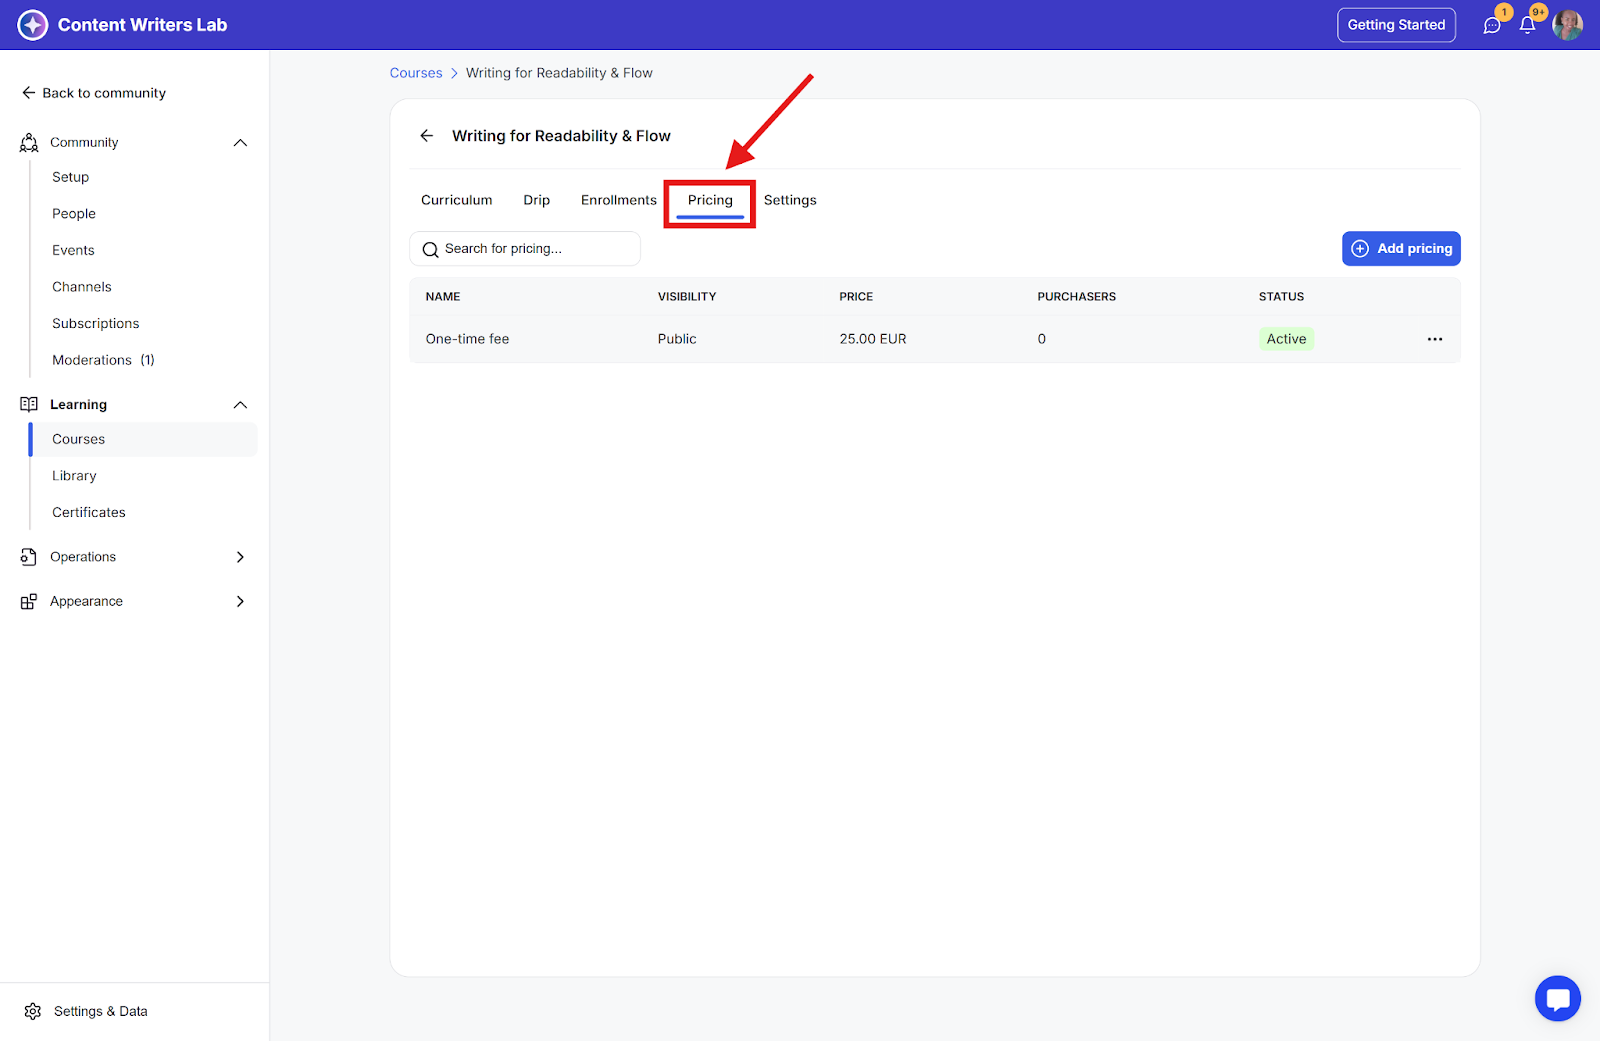
Step 3: Click on the Pricing tab.
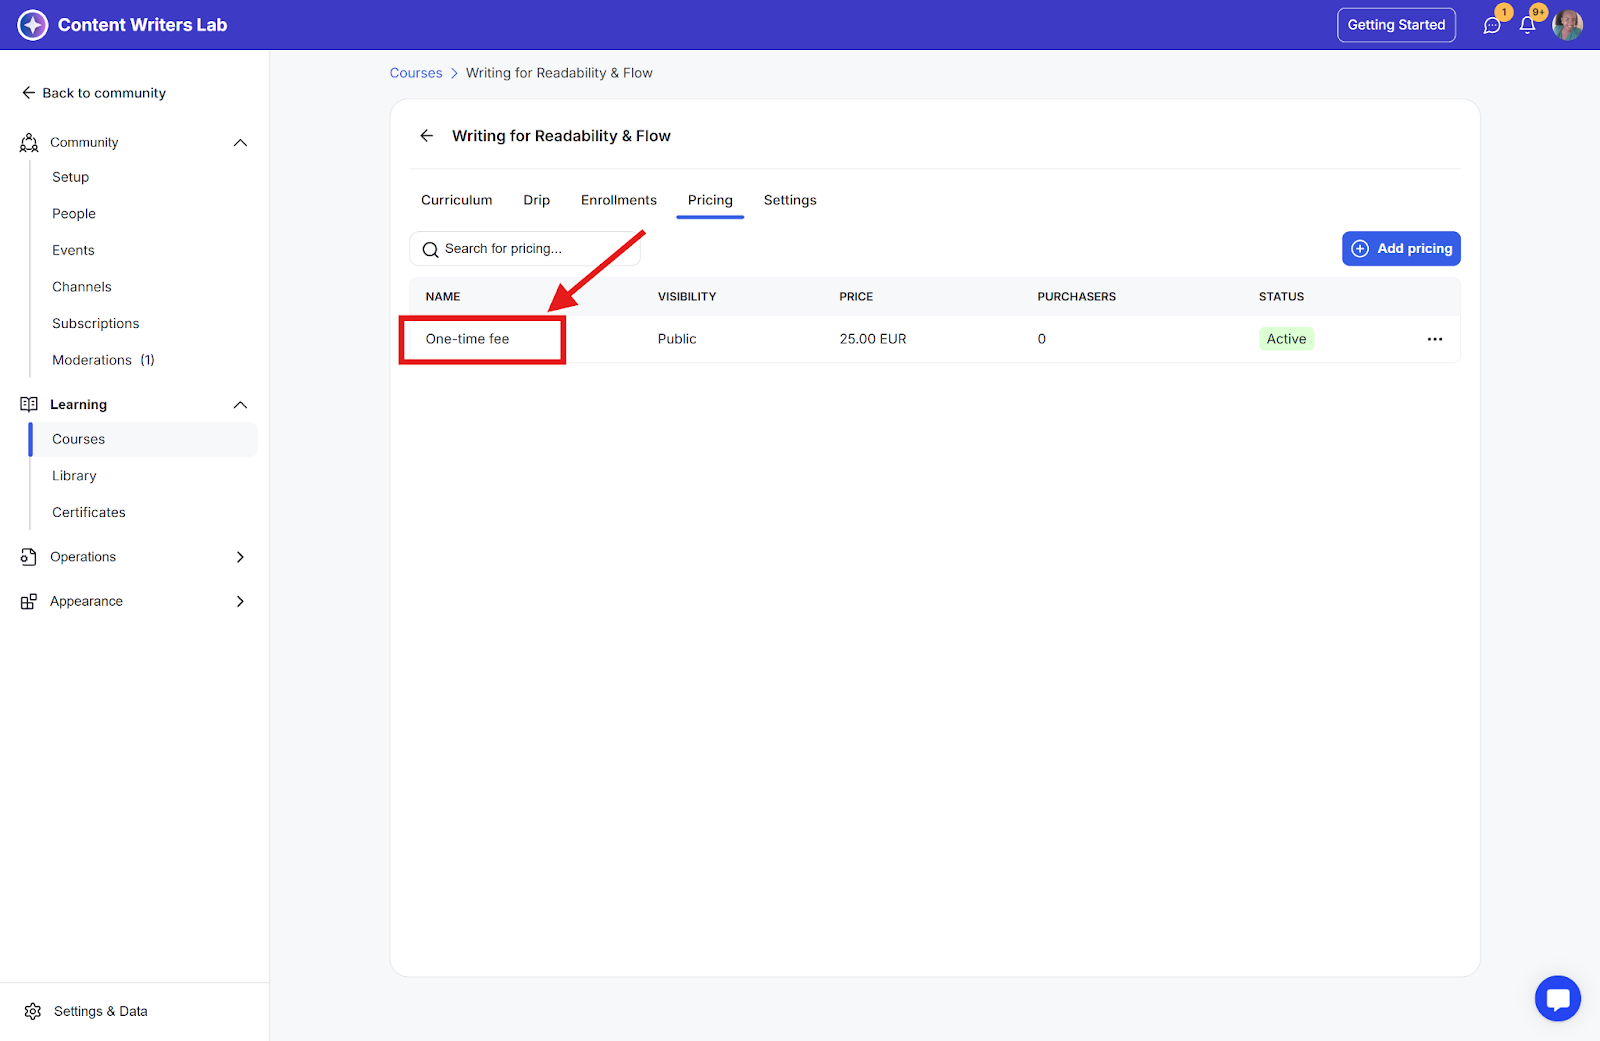
Step 4: Create a new pricing option or select an existing one, then click on it.
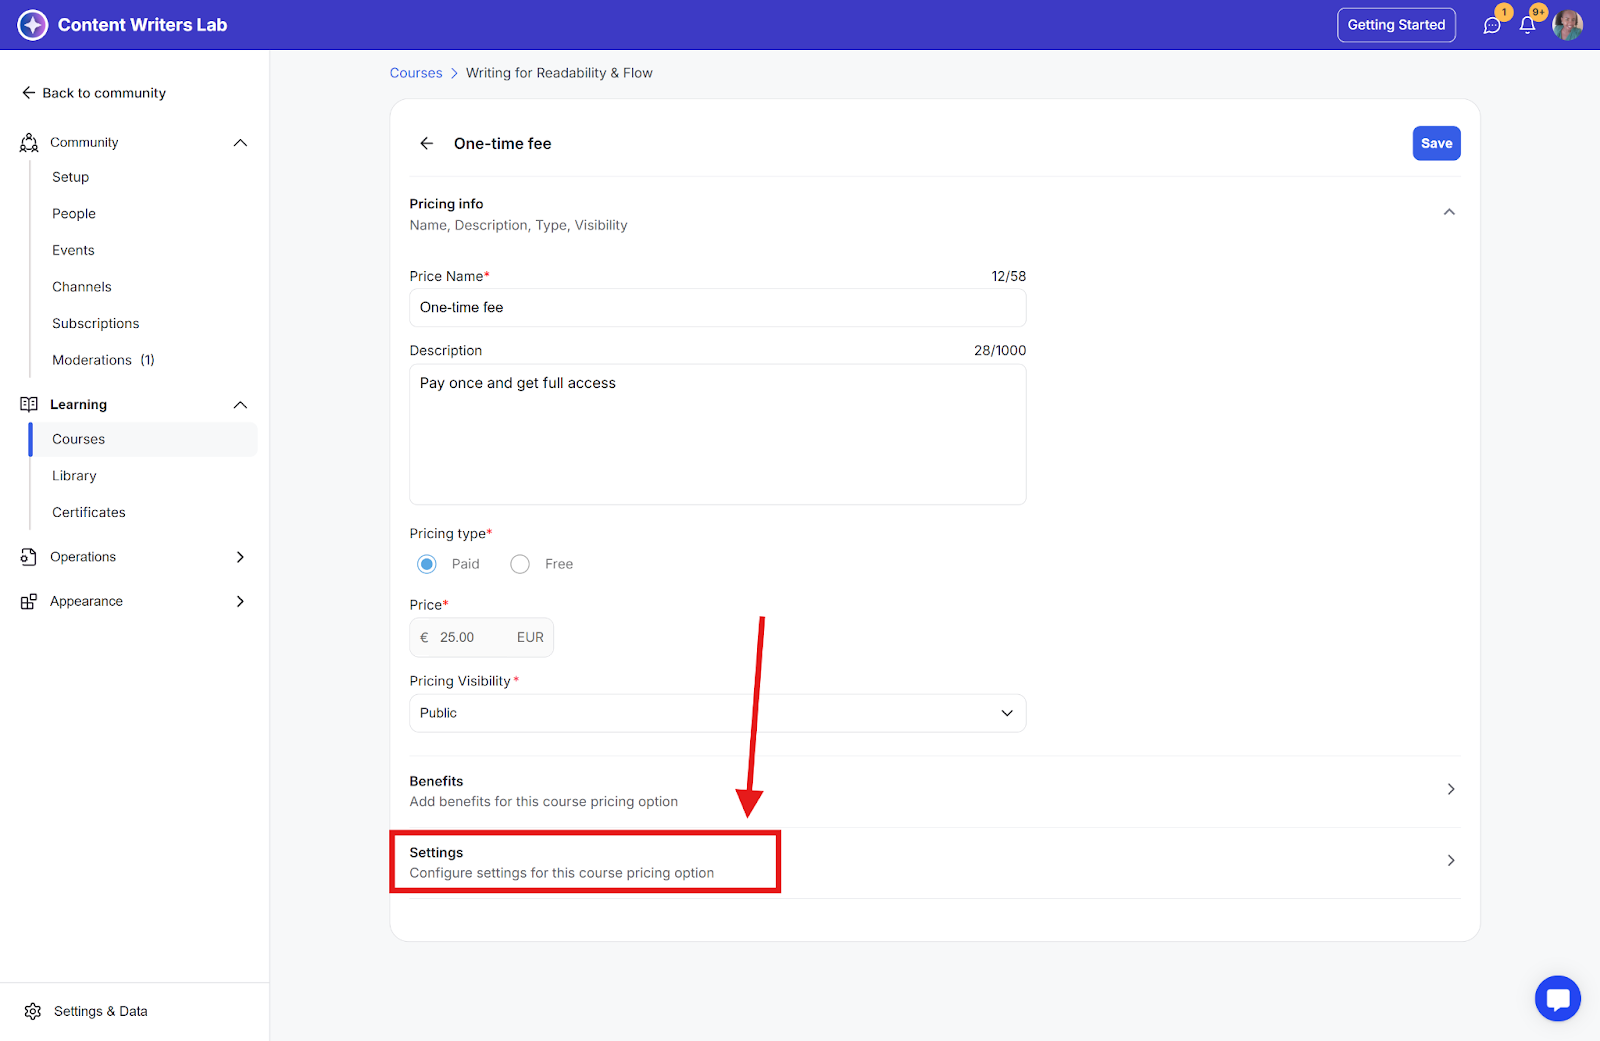
Step 5: Scroll down to the Settings section.
Step 6: Toggle on Set Access Duration and choose your preferred access duration type:
Group-based: Select an end date
Student-level: Enter the duration period
Best Practices
Clearly communicate access duration in your course description
Consider offering different access periods for different price points
Use group-based access for seasonal or cohort-based programs
Use student-level access for self-paced courses