The Landing Page Builder allows you to create professional sales pages and landing pages for your:
Community courses
Events
Digital content
Membership programs
Workshops and training sessions
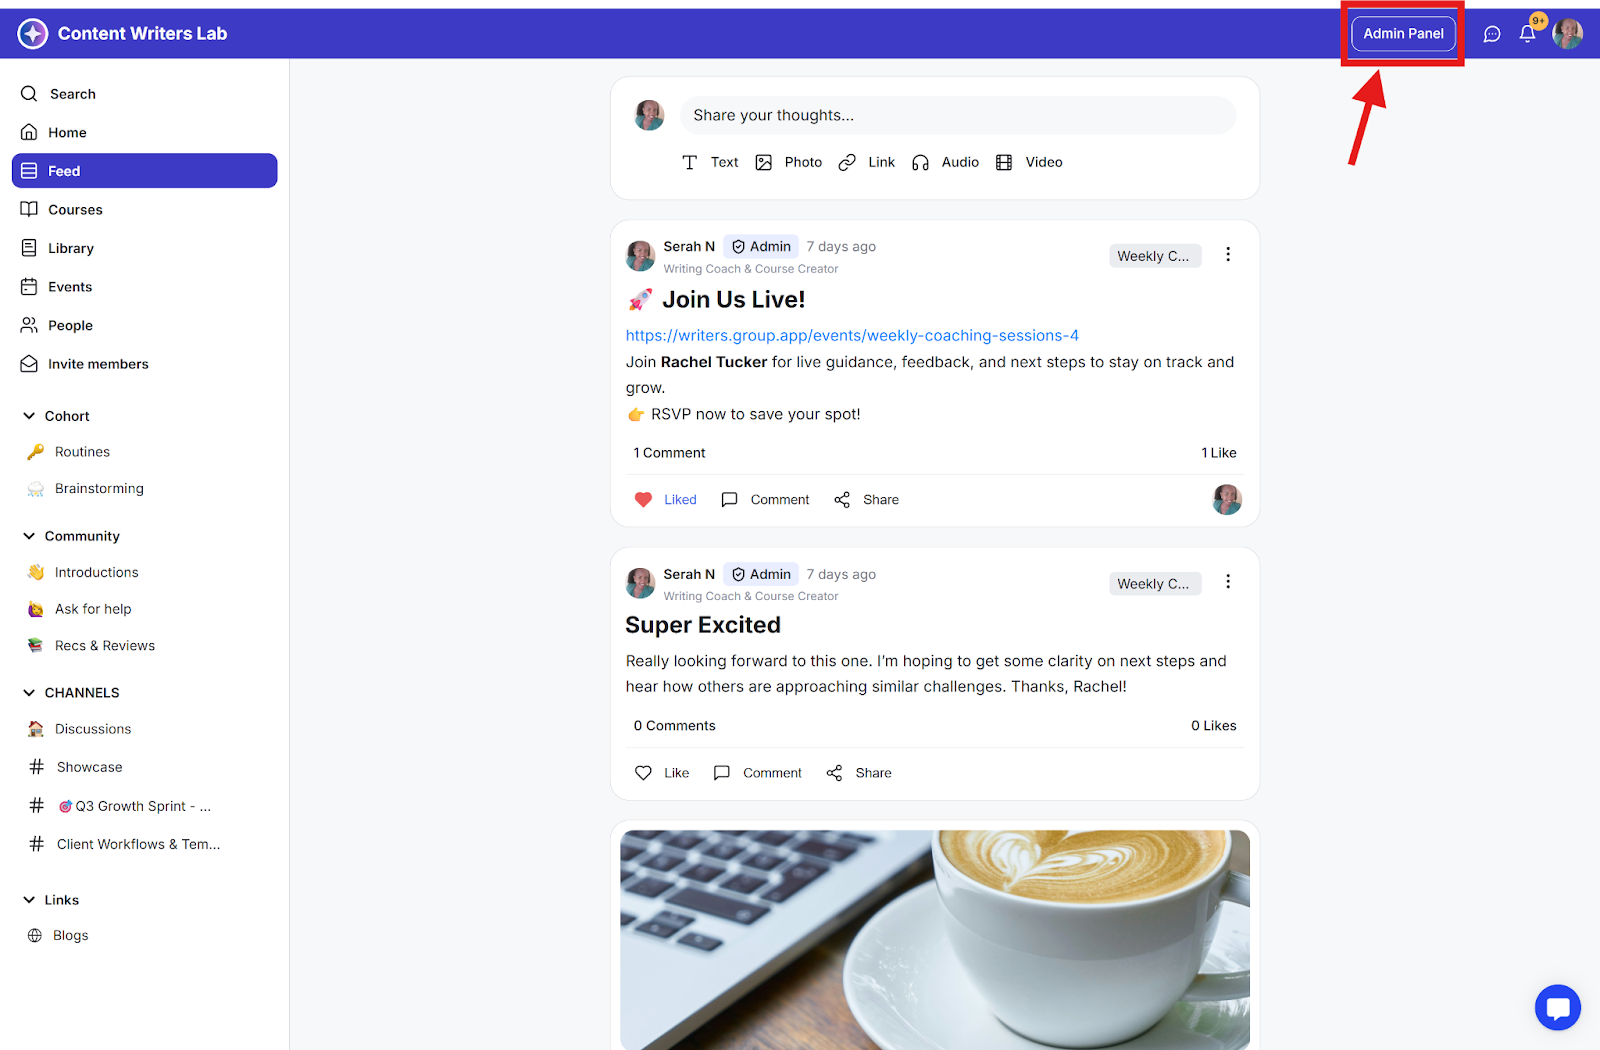
Step 1: Navigate to your Admin Panel.
Step 2: Click on Operations in the side menu and select Landing Pages.
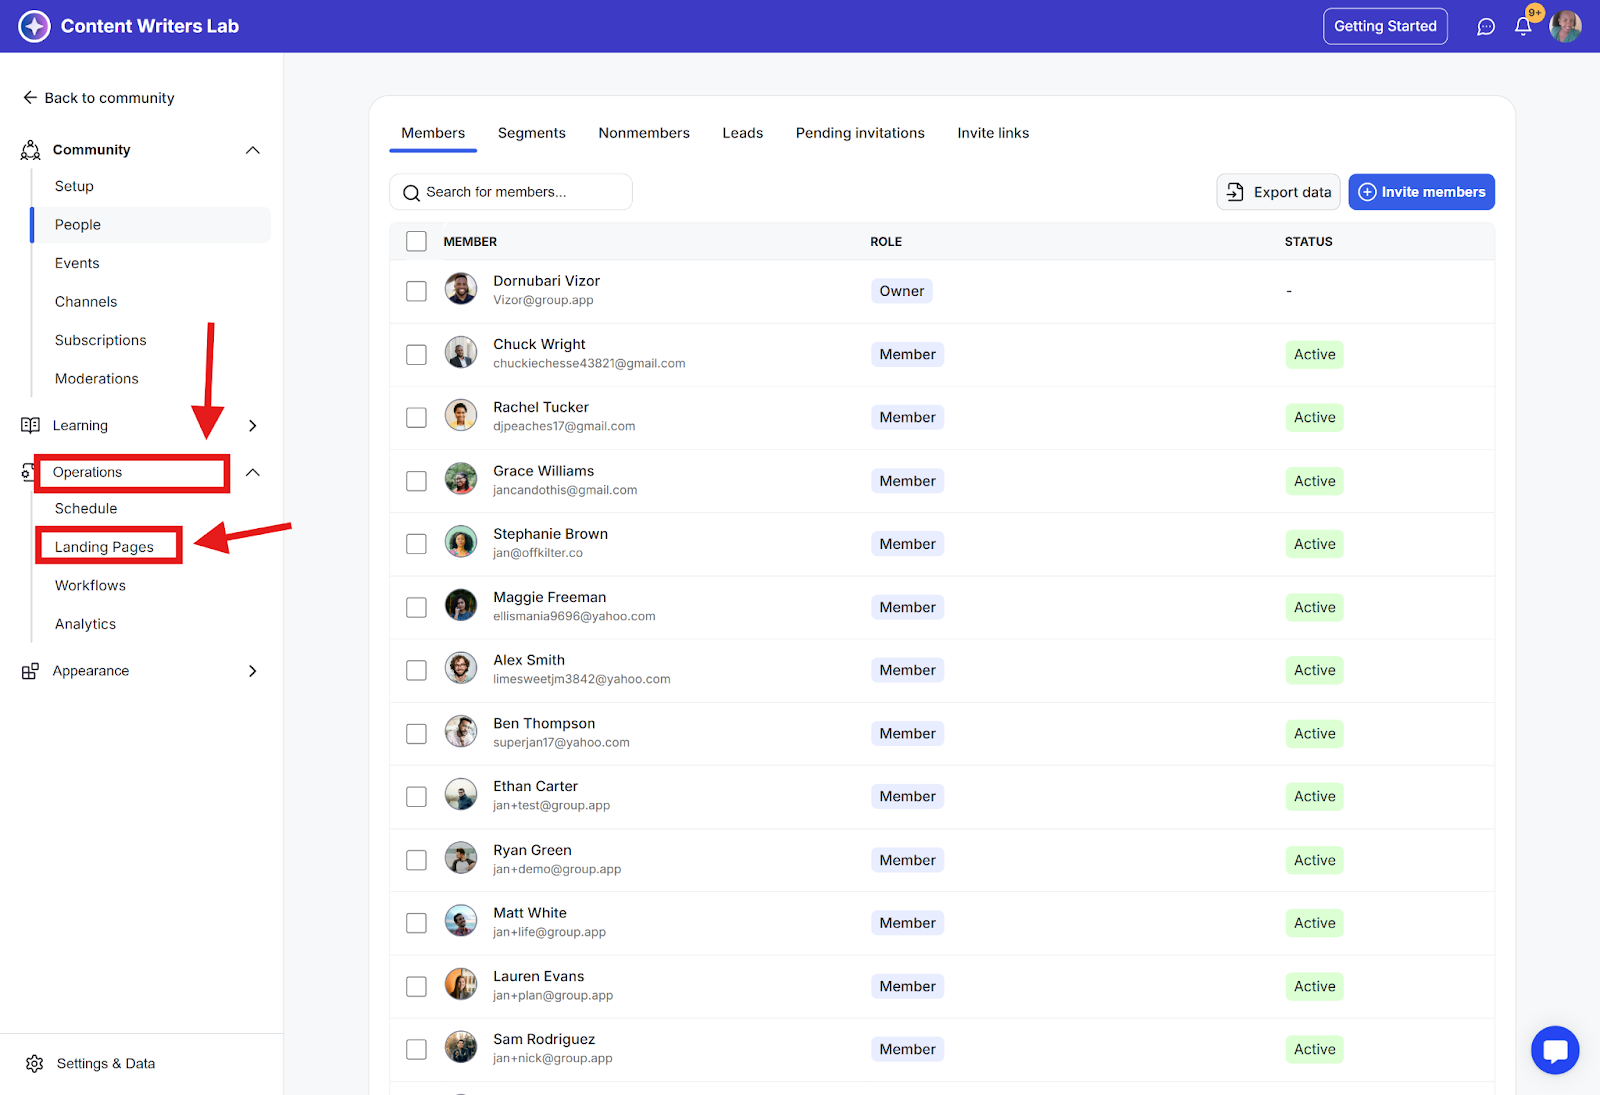
Step 3: You'll be taken to the Landing Page Dashboard.
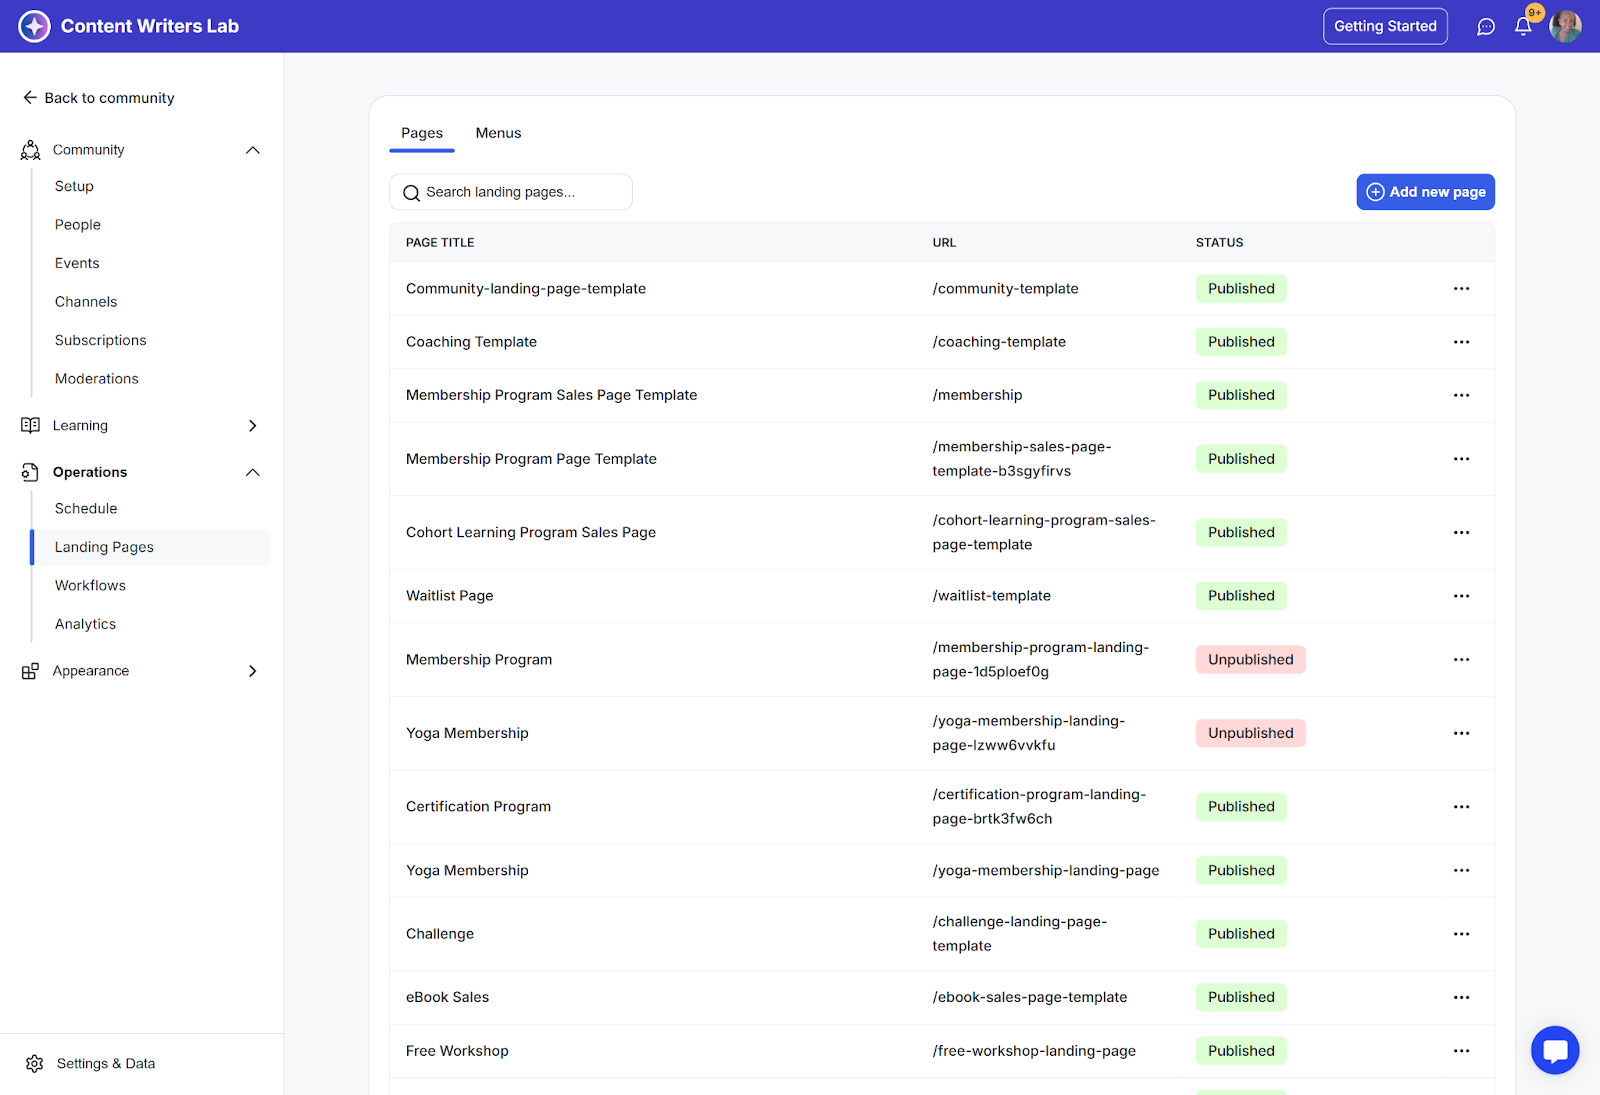
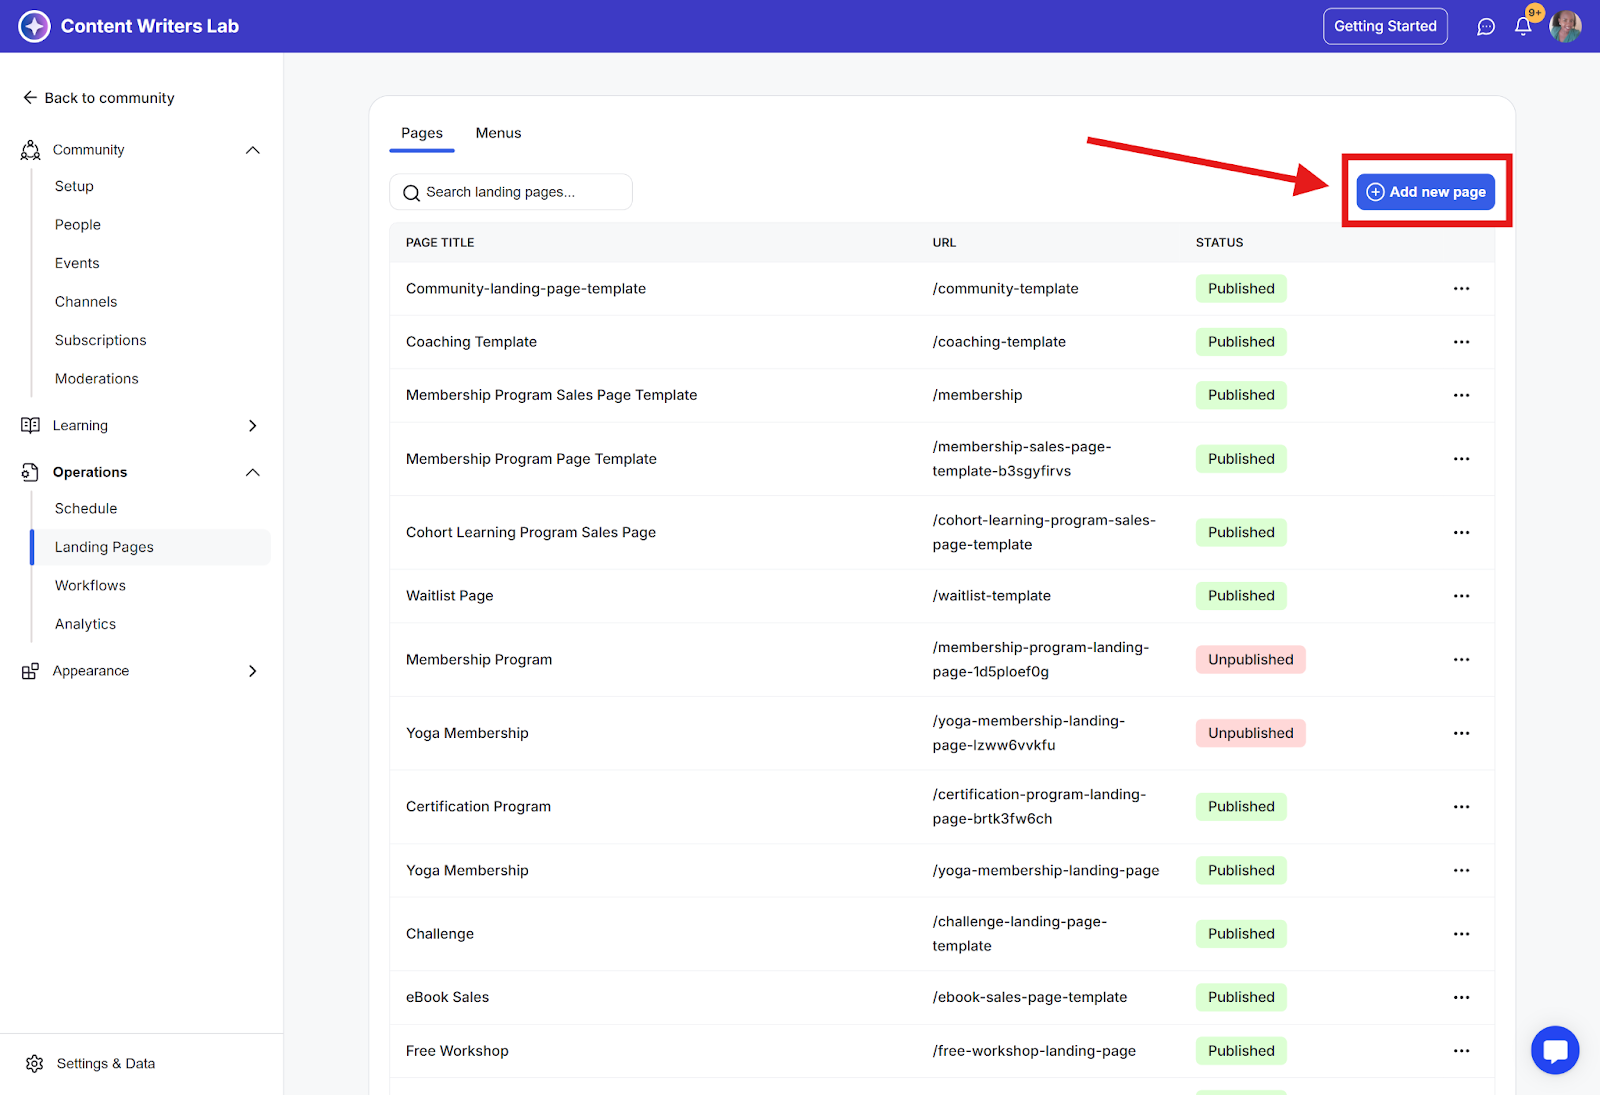
Step 1: From the Landing Page Dashboard, click Add New Page.
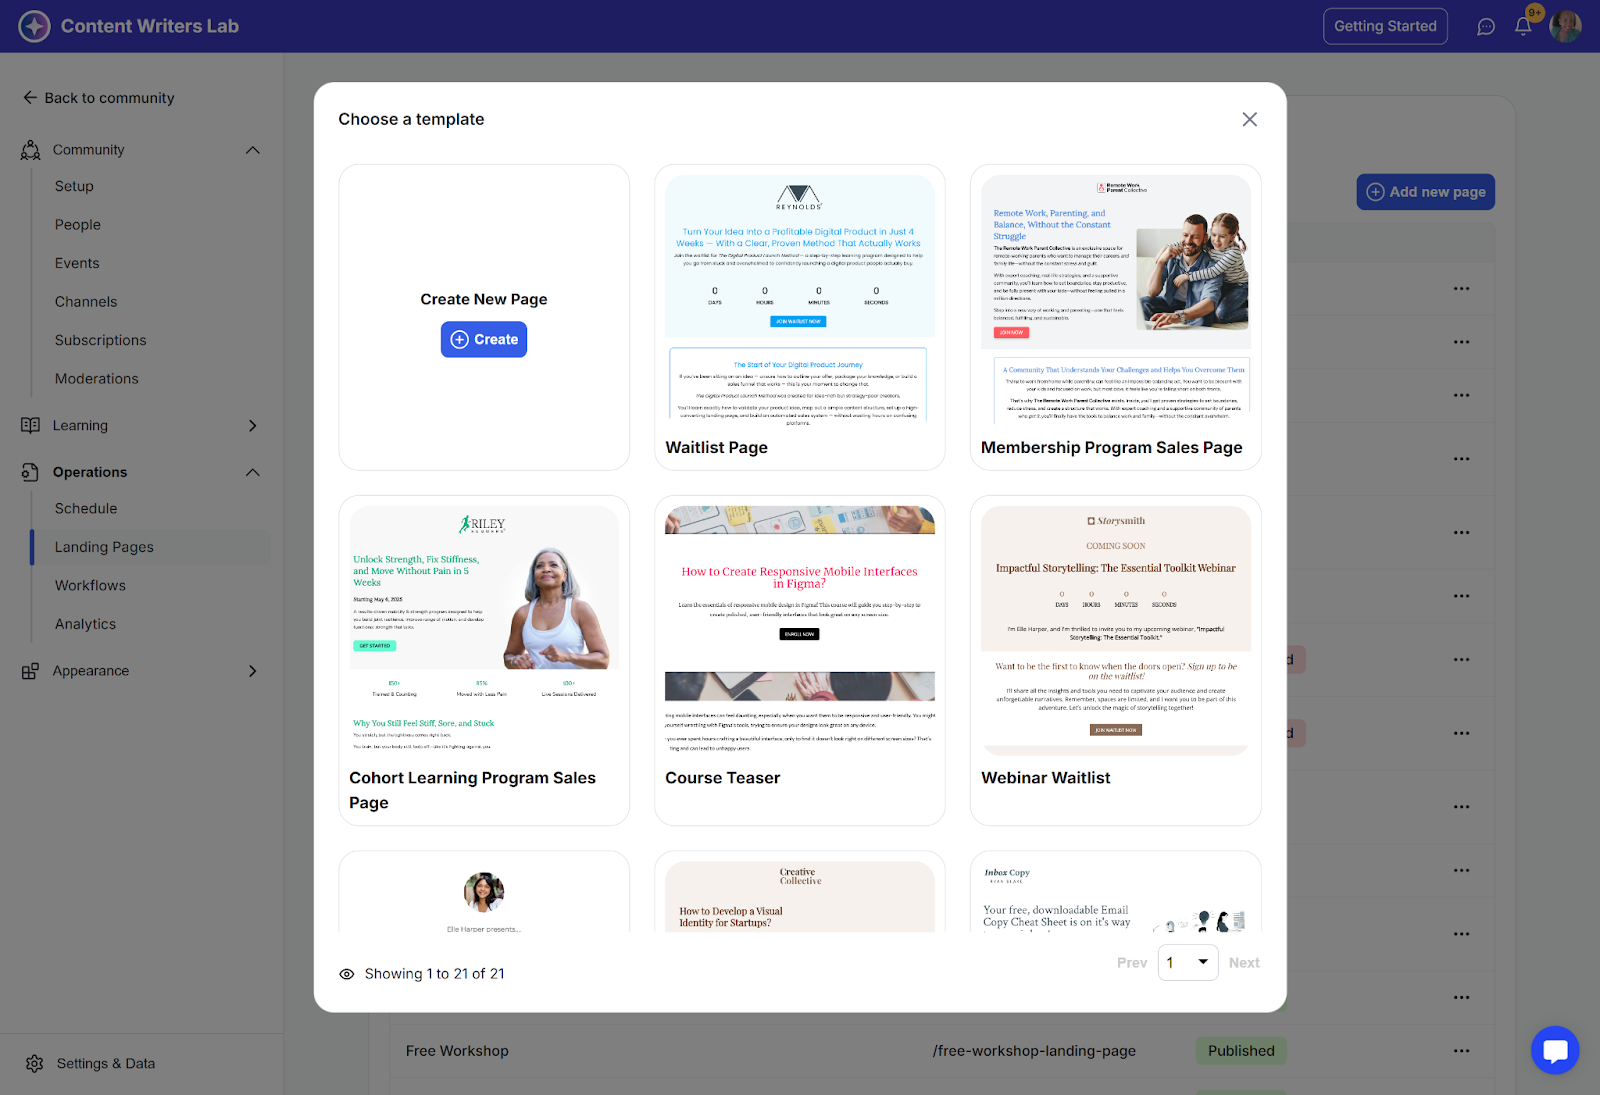
Step 2: Browse available templates, including:
Workshop templates
Webinar pages
Waiting list pages
Course teasers
Membership pages
Video lead capture pages
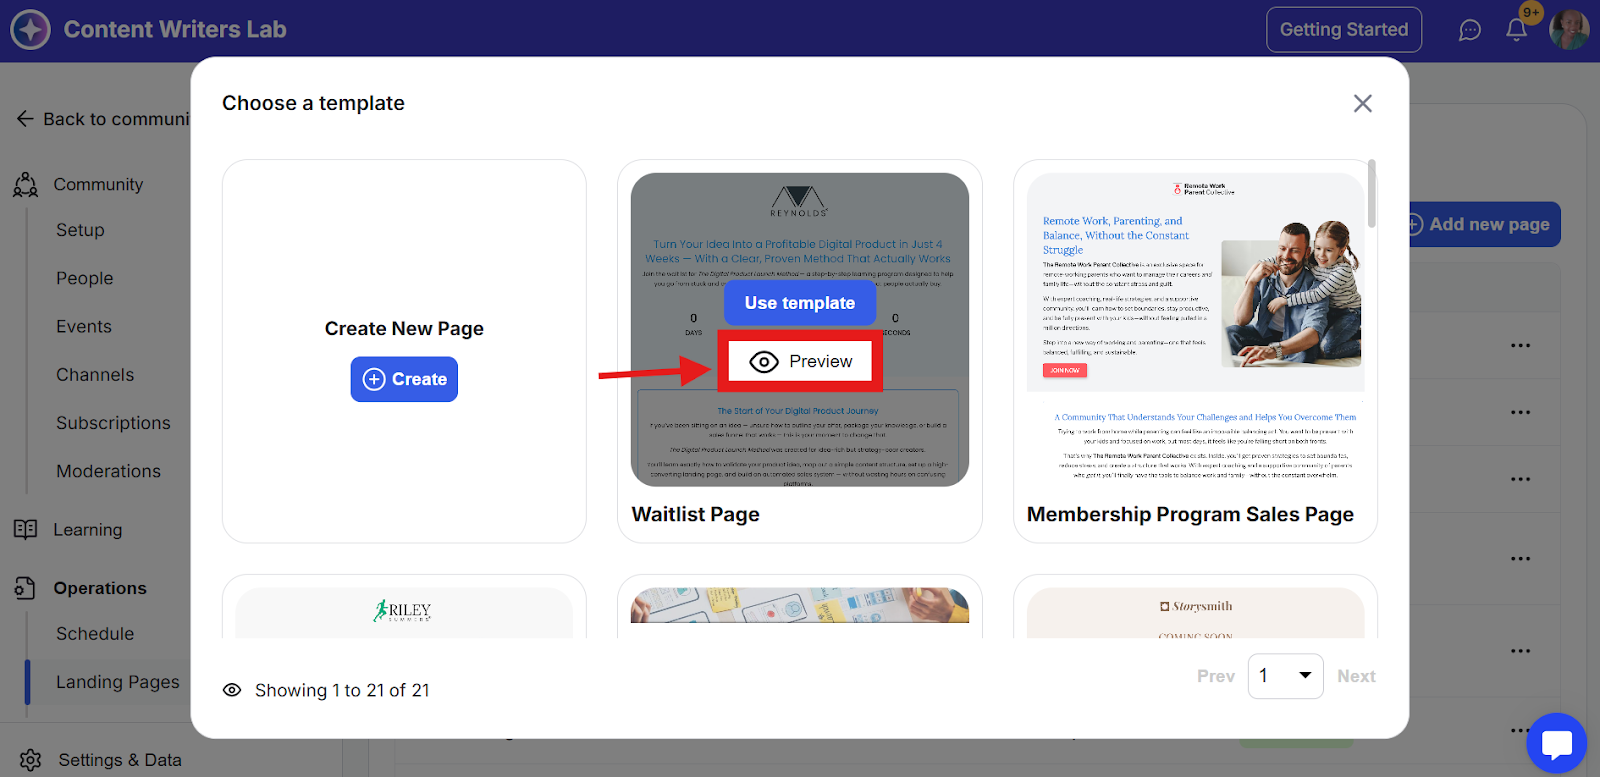
Step 3: Preview templates by clicking the Preview button.
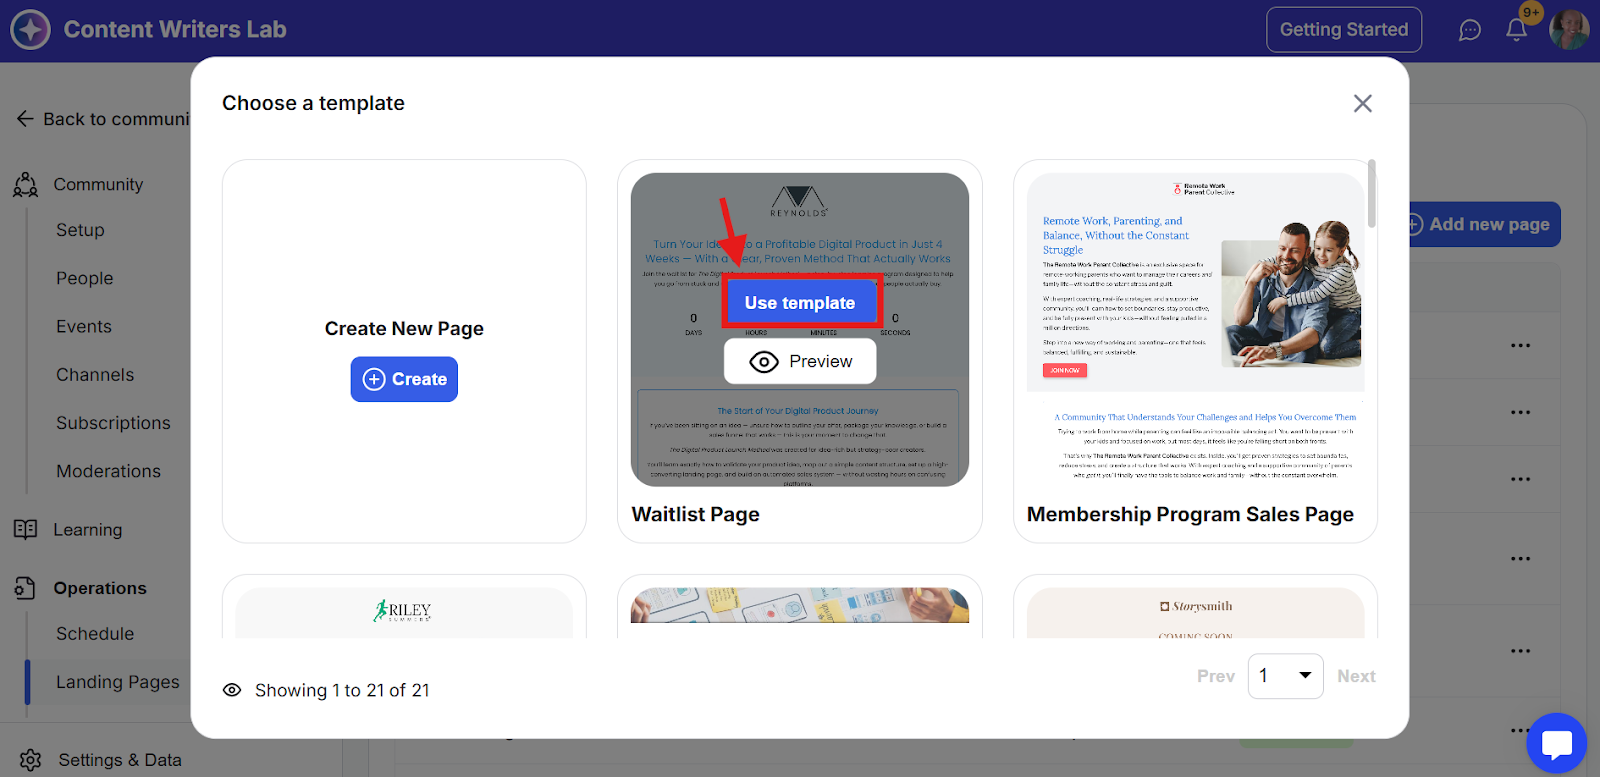
Step 4: Select your template by clicking Use Template.
Contains all content elements and building blocks
Customize page structure and content placement

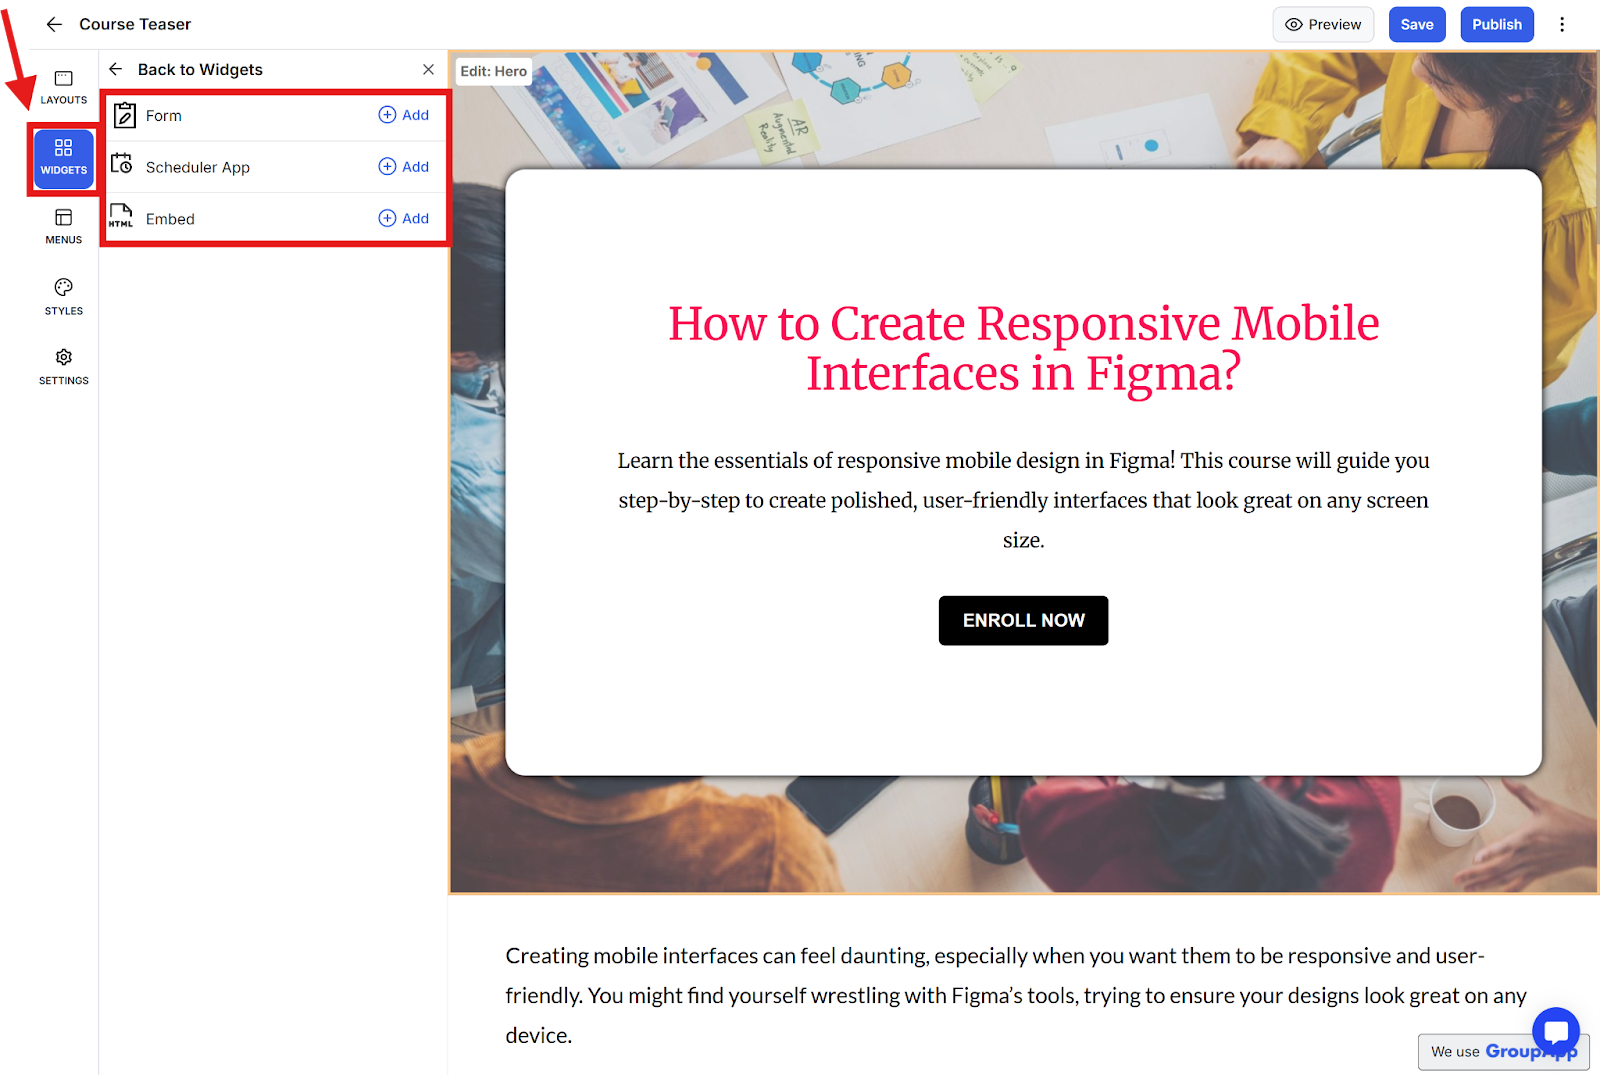
Add interactive elements such as:
Lead capture forms
Scheduling tools (Calendly integration)
Custom HTML embeds (TypeForm, Google Forms, etc.) Note: Widgets appear as pop-ups and must be triggered by buttons.
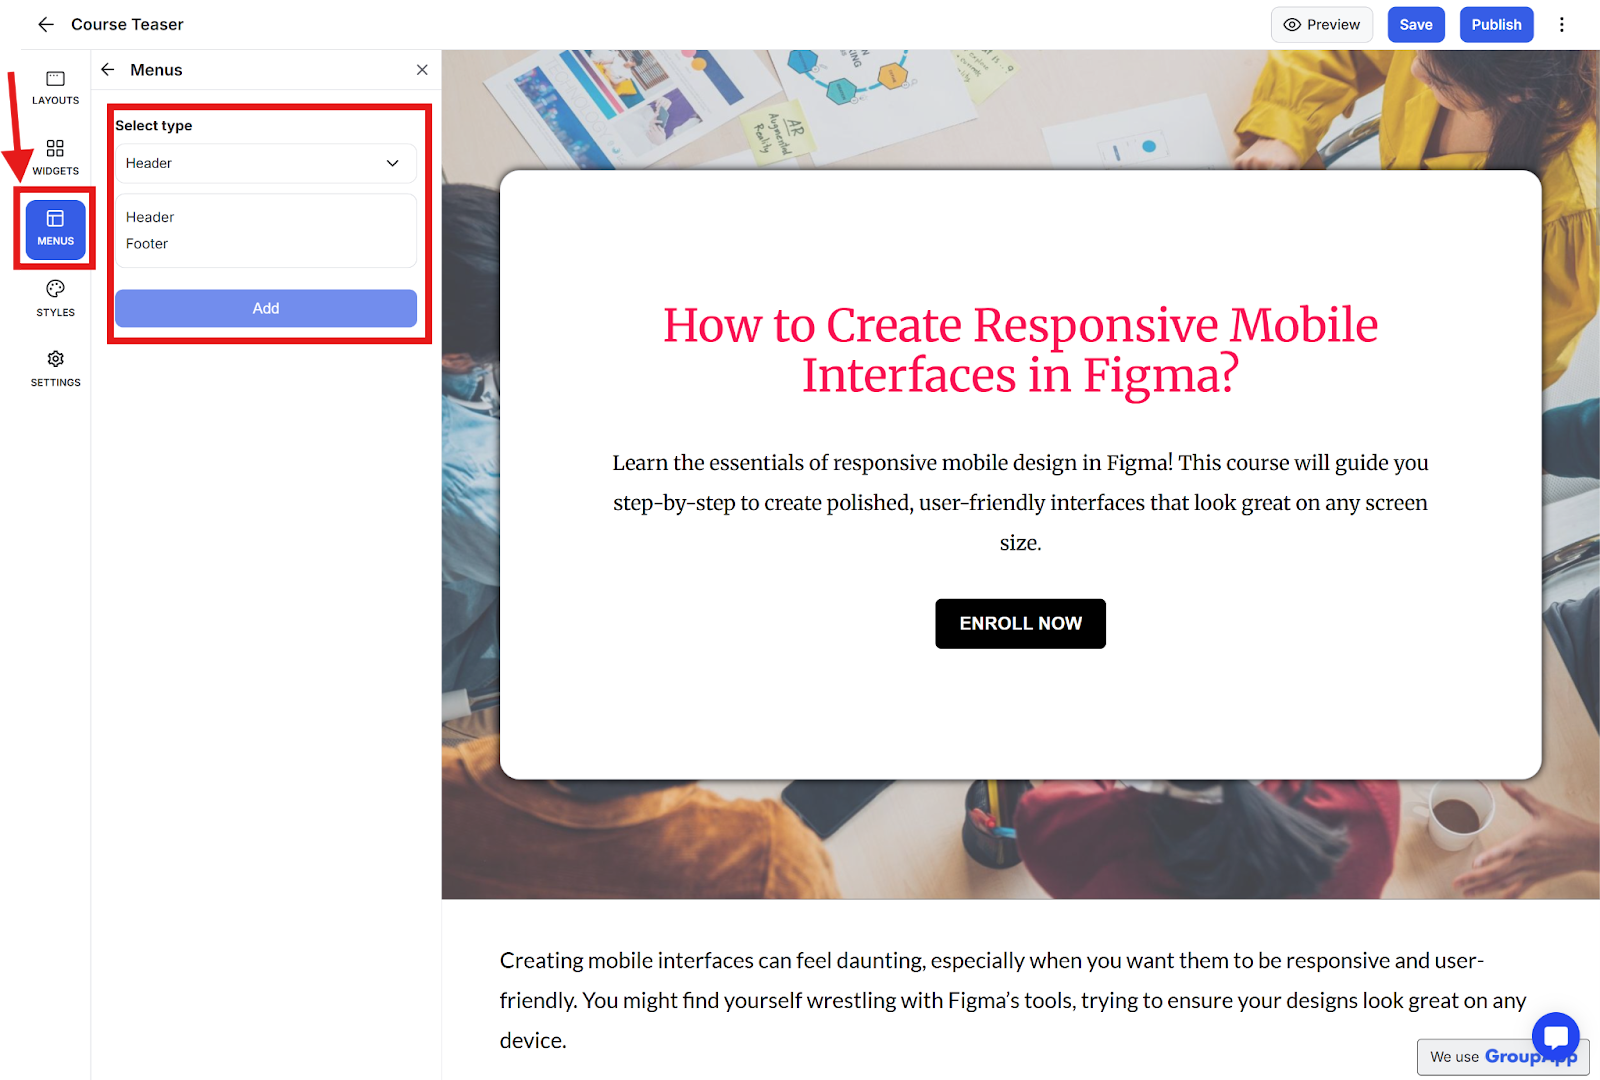
1. Manage your page navigation
2. Customize:
Header menu
Footer menu
Menu links and layout
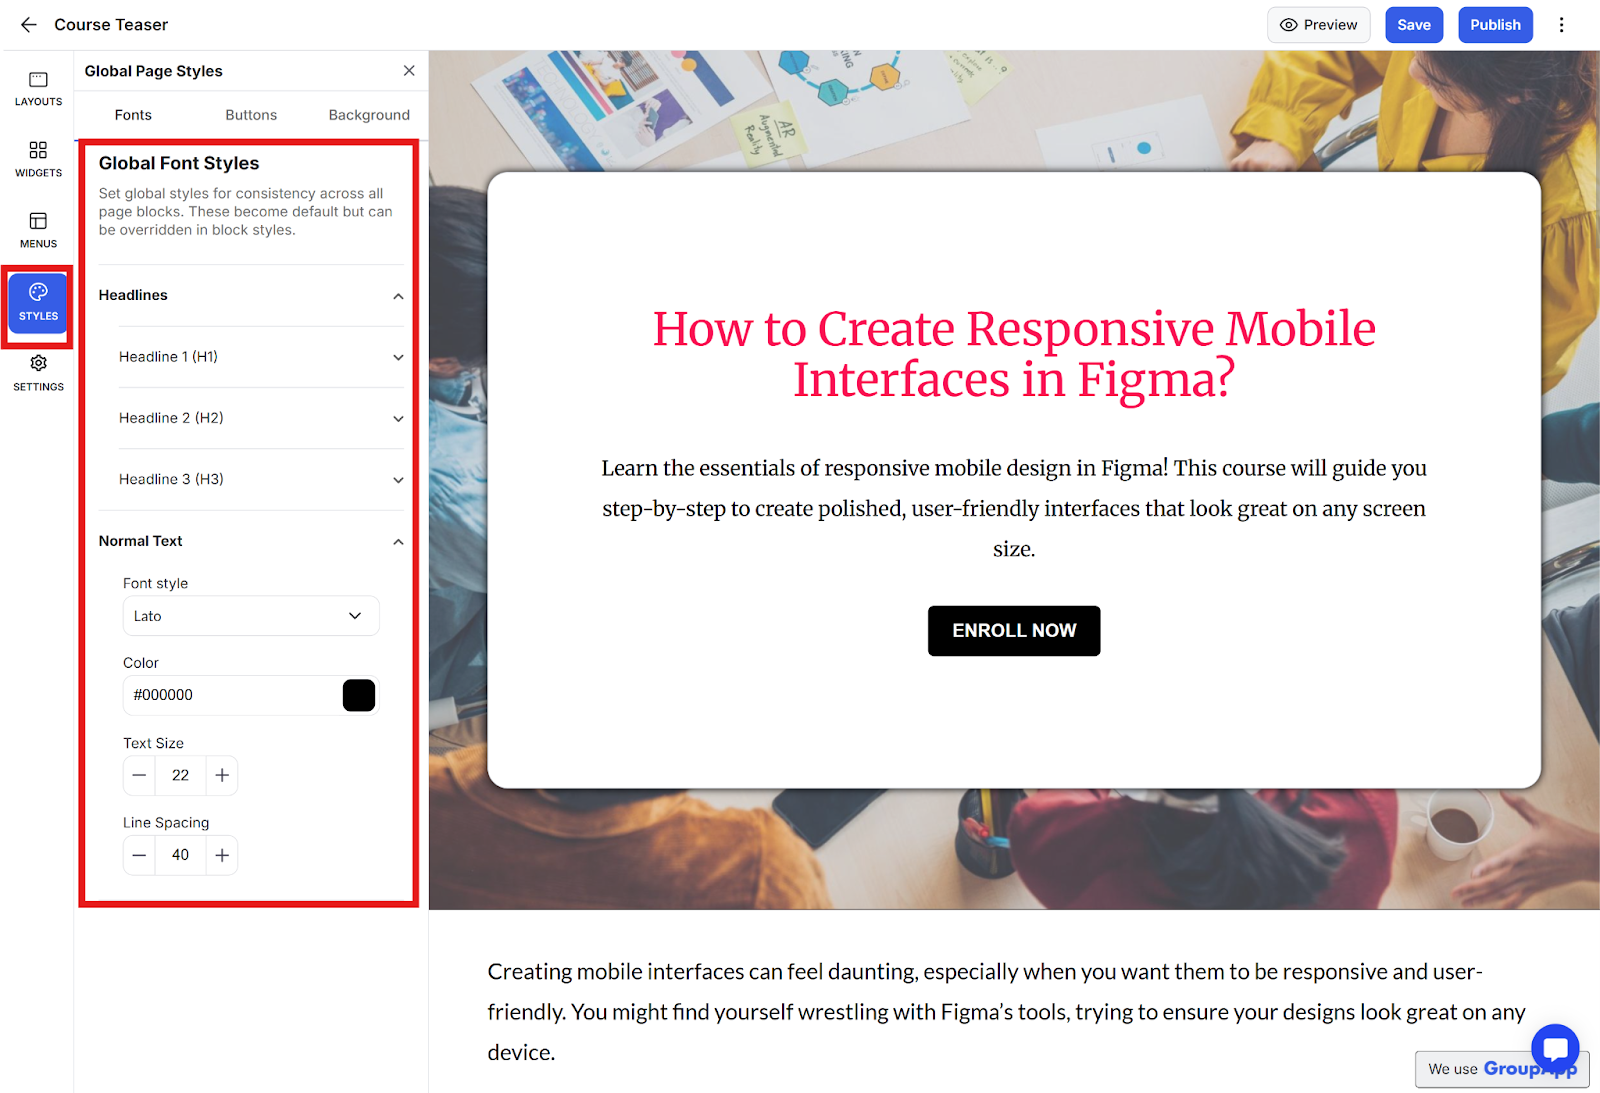
Configure global design settings
Customize:
Font styles and colors
Button designs
Background colors
Changes apply universally across the page
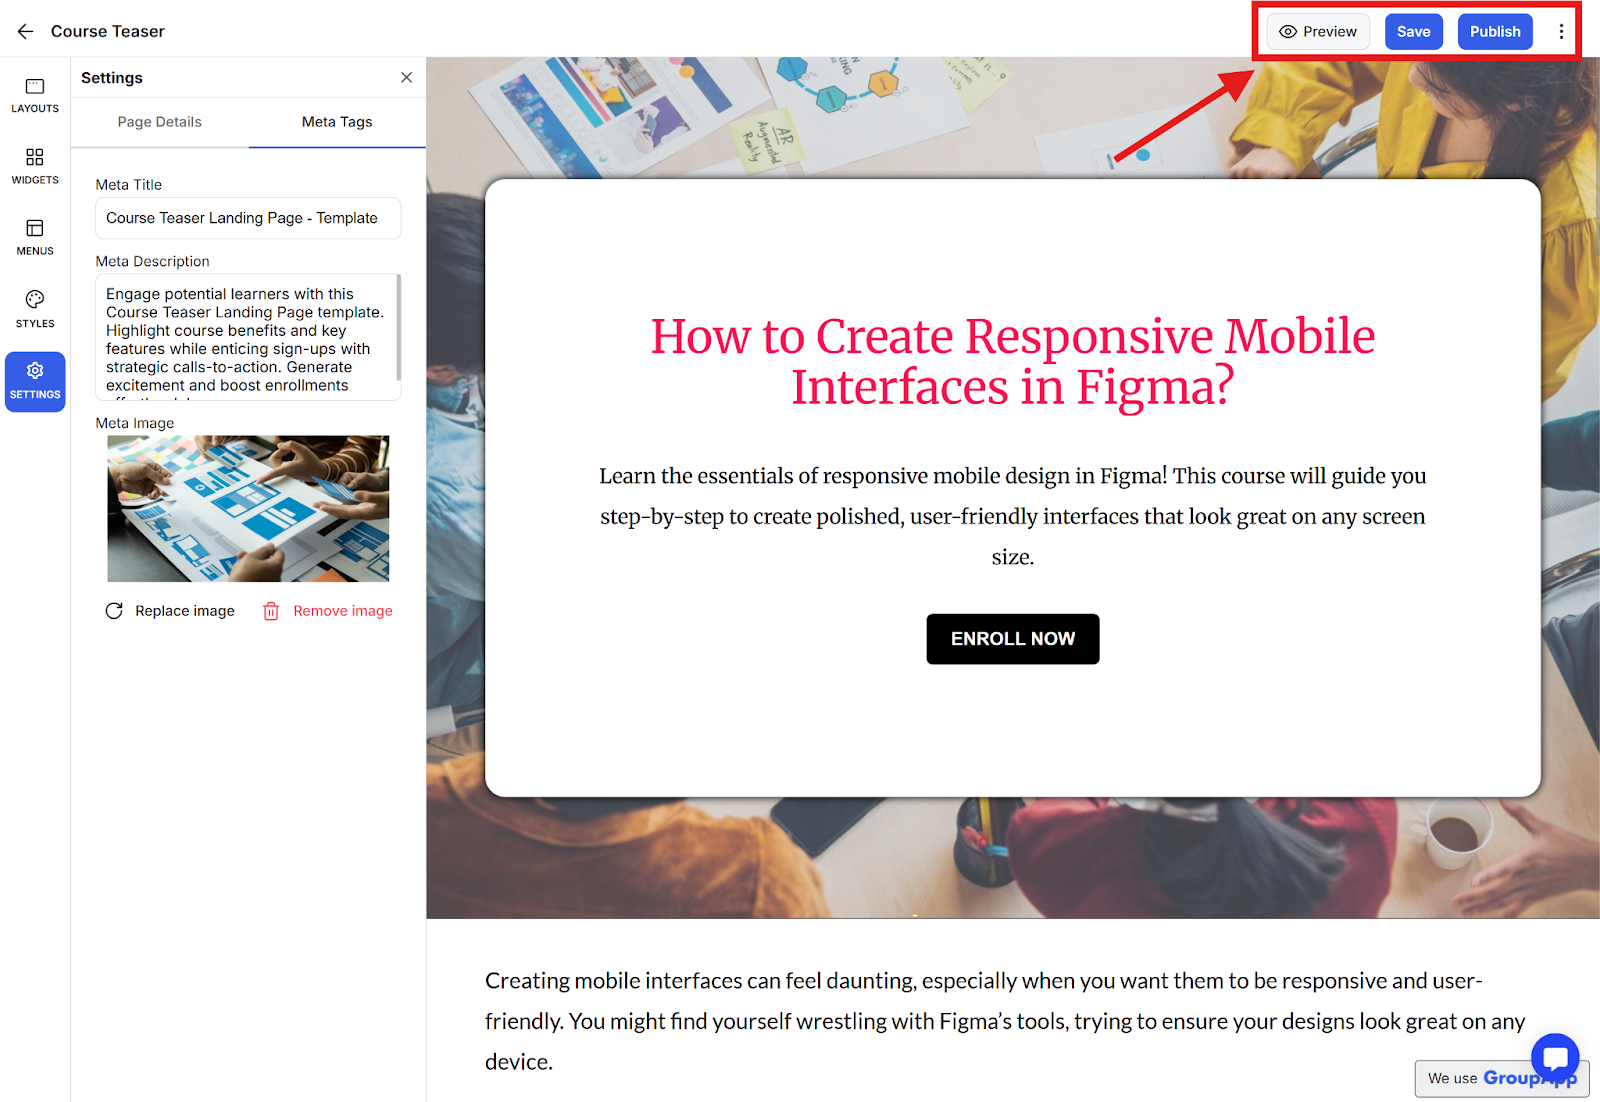
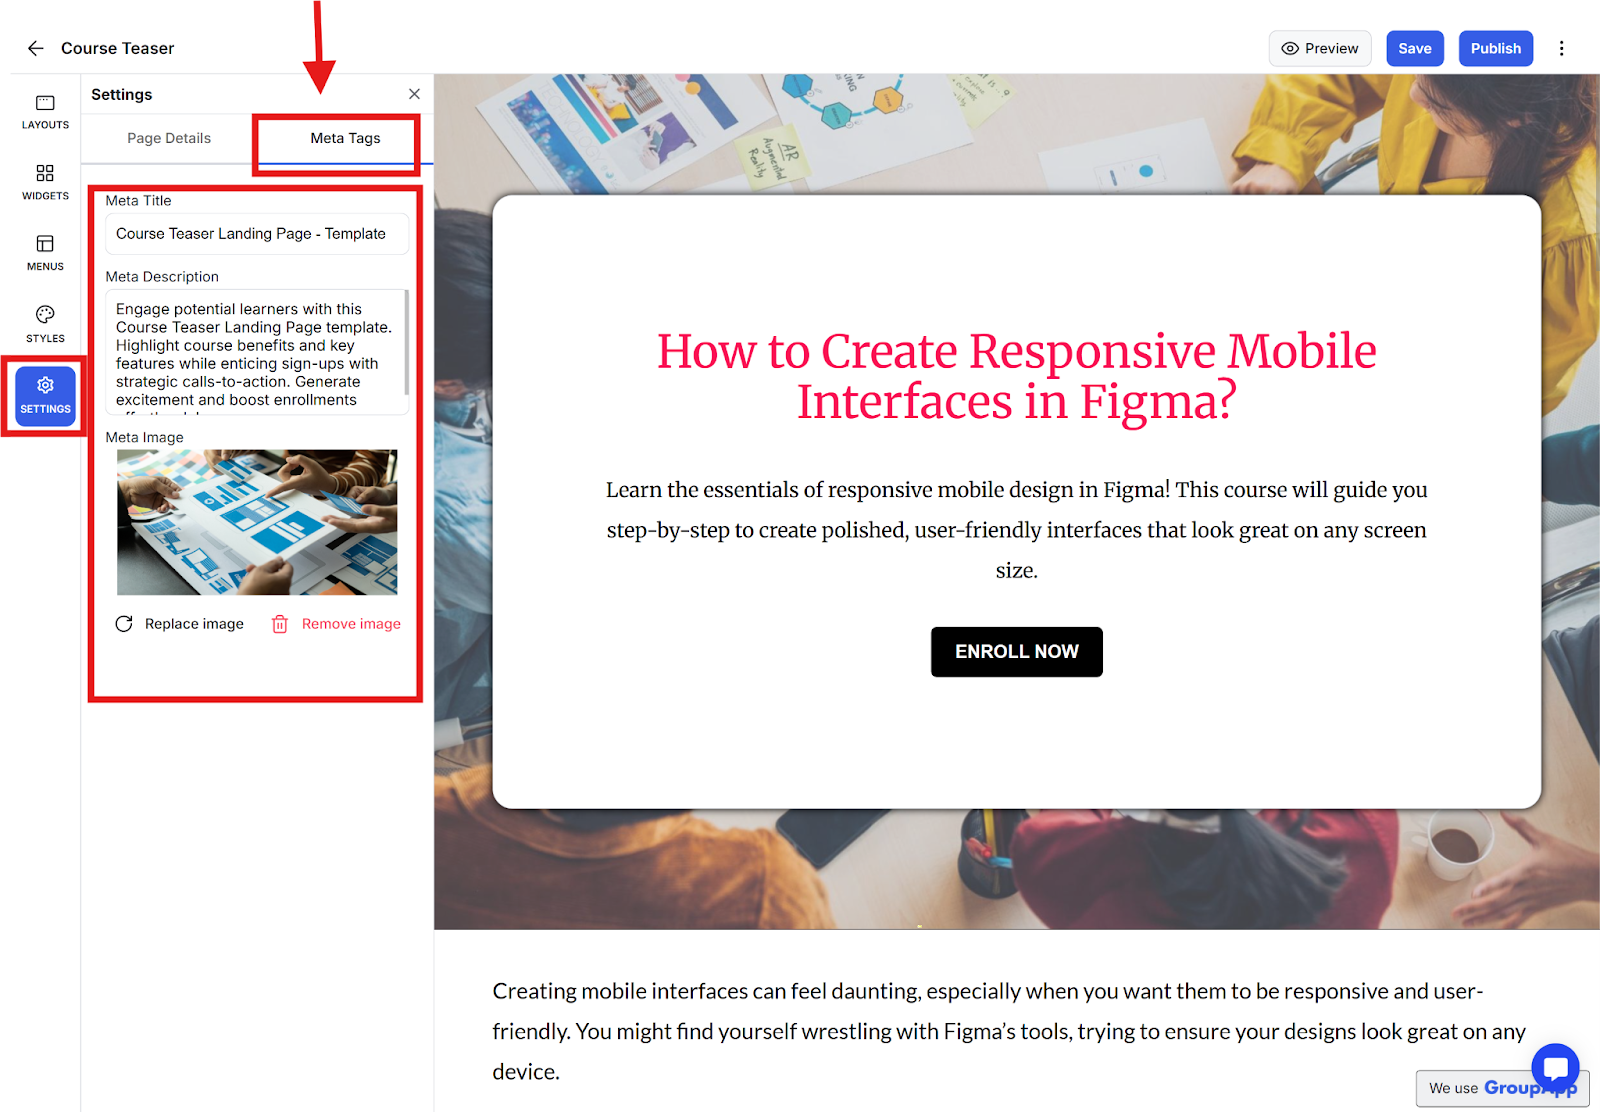
Configure page details, including:
Page title
Page description
Custom Page URL
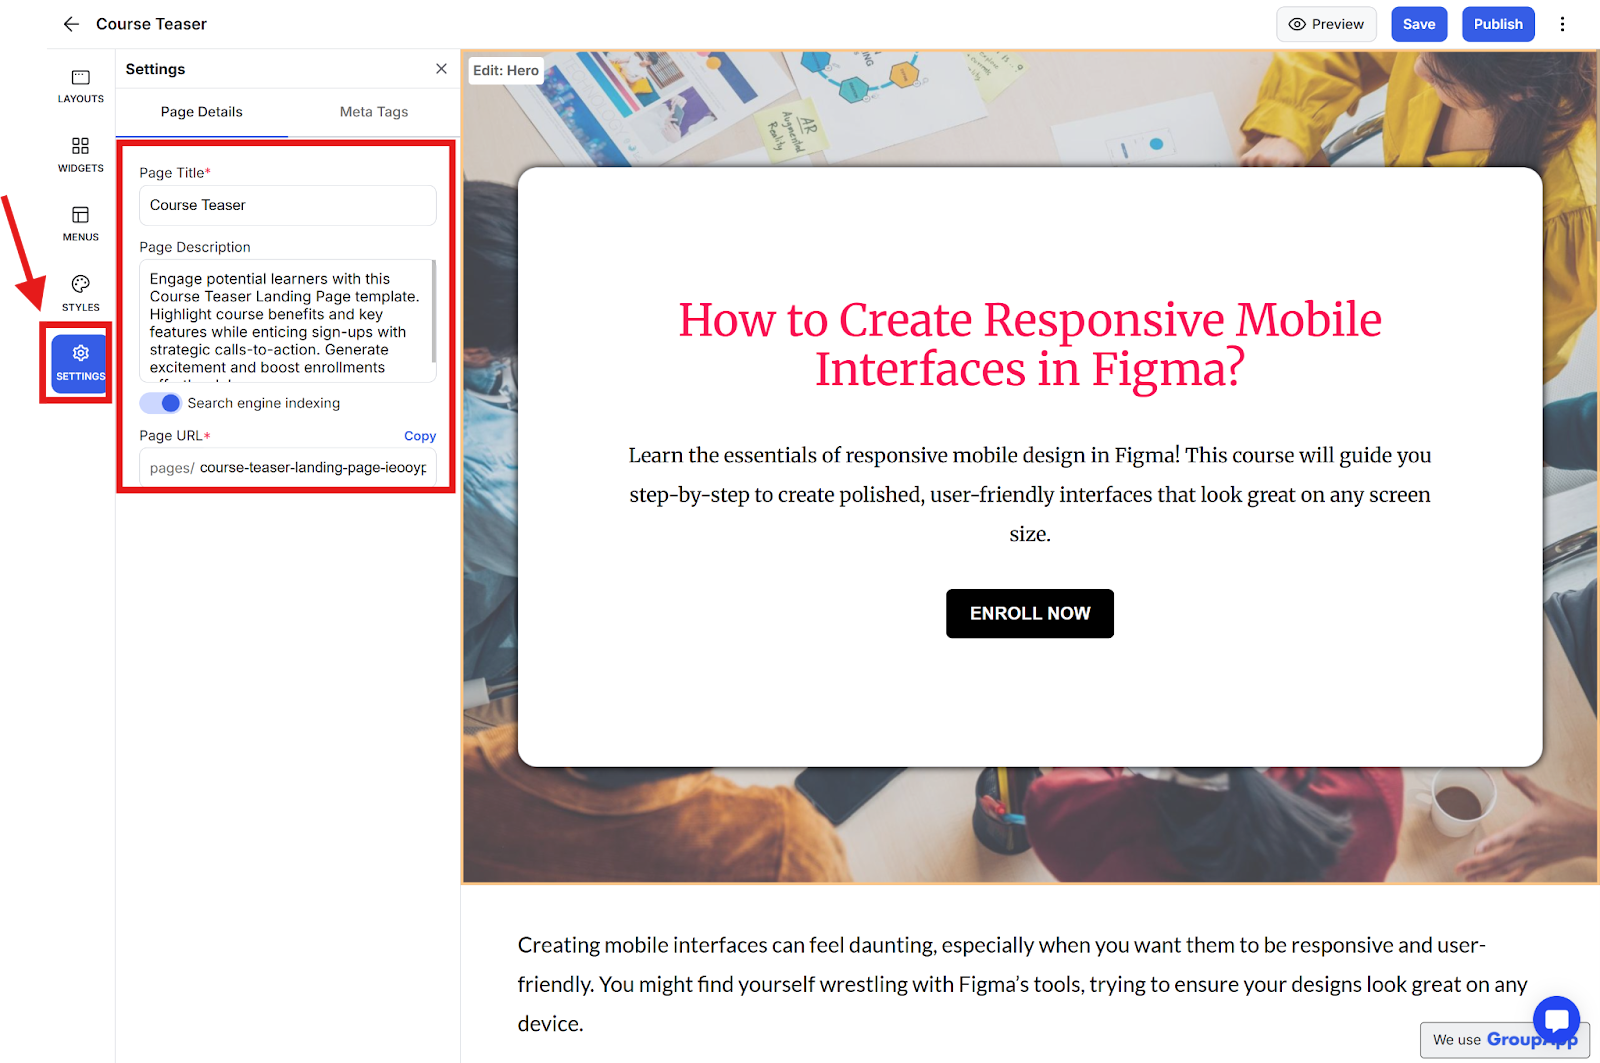
Meta tags for SEO:
Meta title
Meta description
Meta image
Preview your page using the preview option
Save your progress as needed
Click Publish to make your page live.