Assigning admin or moderator privileges gives certain members special permissions to help manage the community.
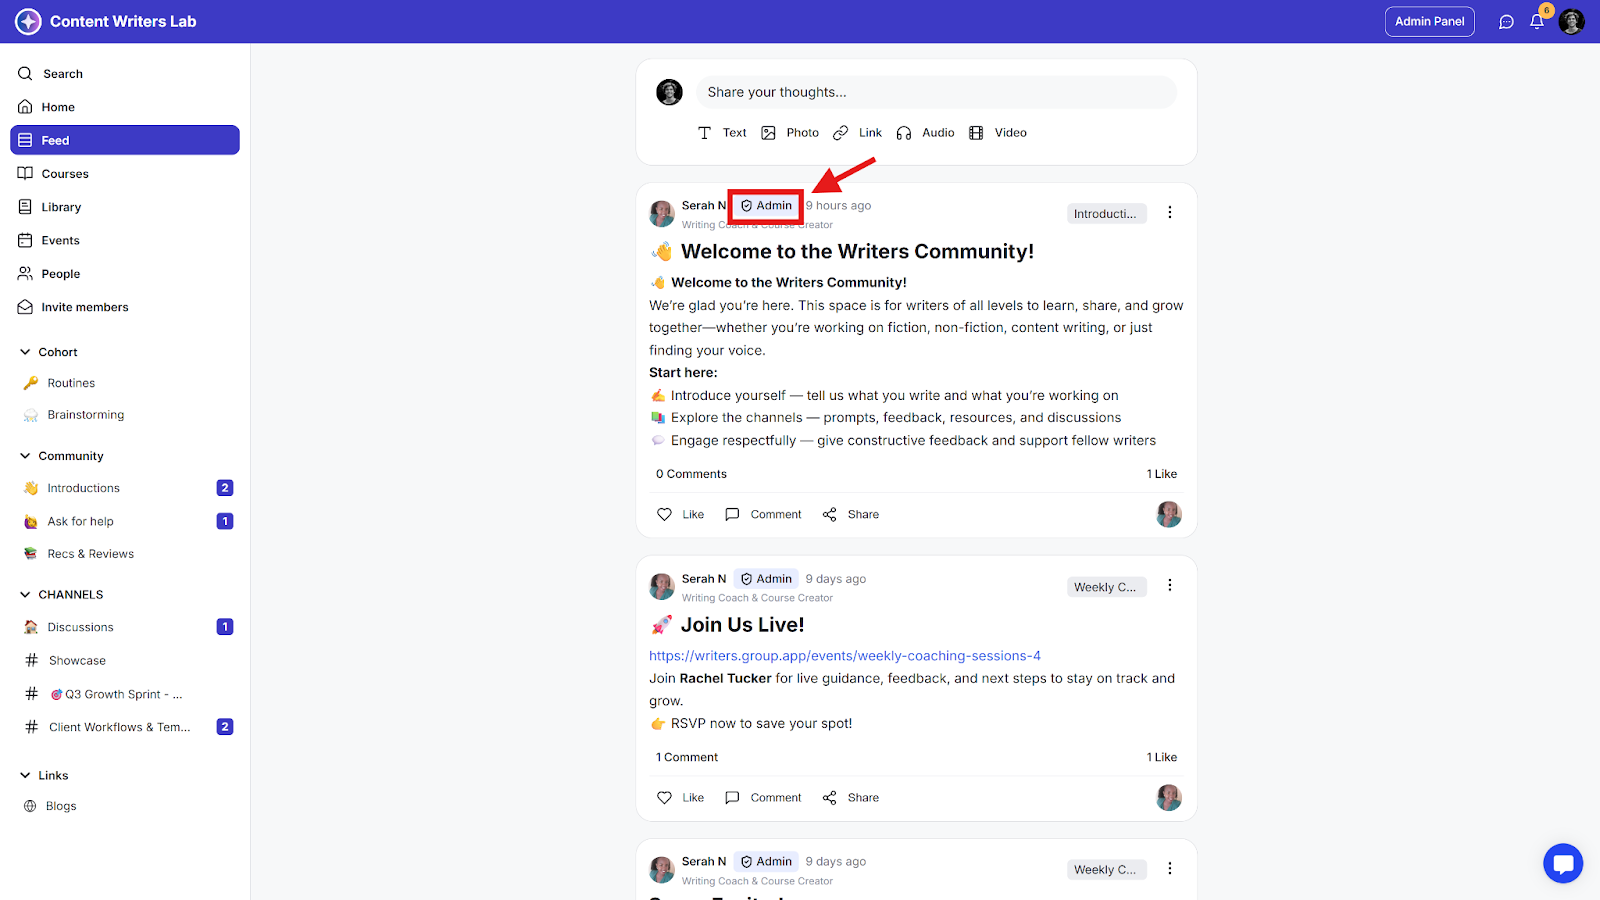
Admin: Has full control over the community, including managing settings, members, content, and other moderators.
Moderator: Helps manage the community by:
Approving membership requests and posts,
Create and Manage Events
Create and Manage Scheduled content
Create and Manage Library content
Create and Manage Workflows
Create and Manage Landing Pages
Manage courses or channels assigned to them,
but typically has fewer permissions than an admin.
Note: When you assign a member the role of a moderator, by default, they will have the following permissions:
View member details
Approve members & Posts
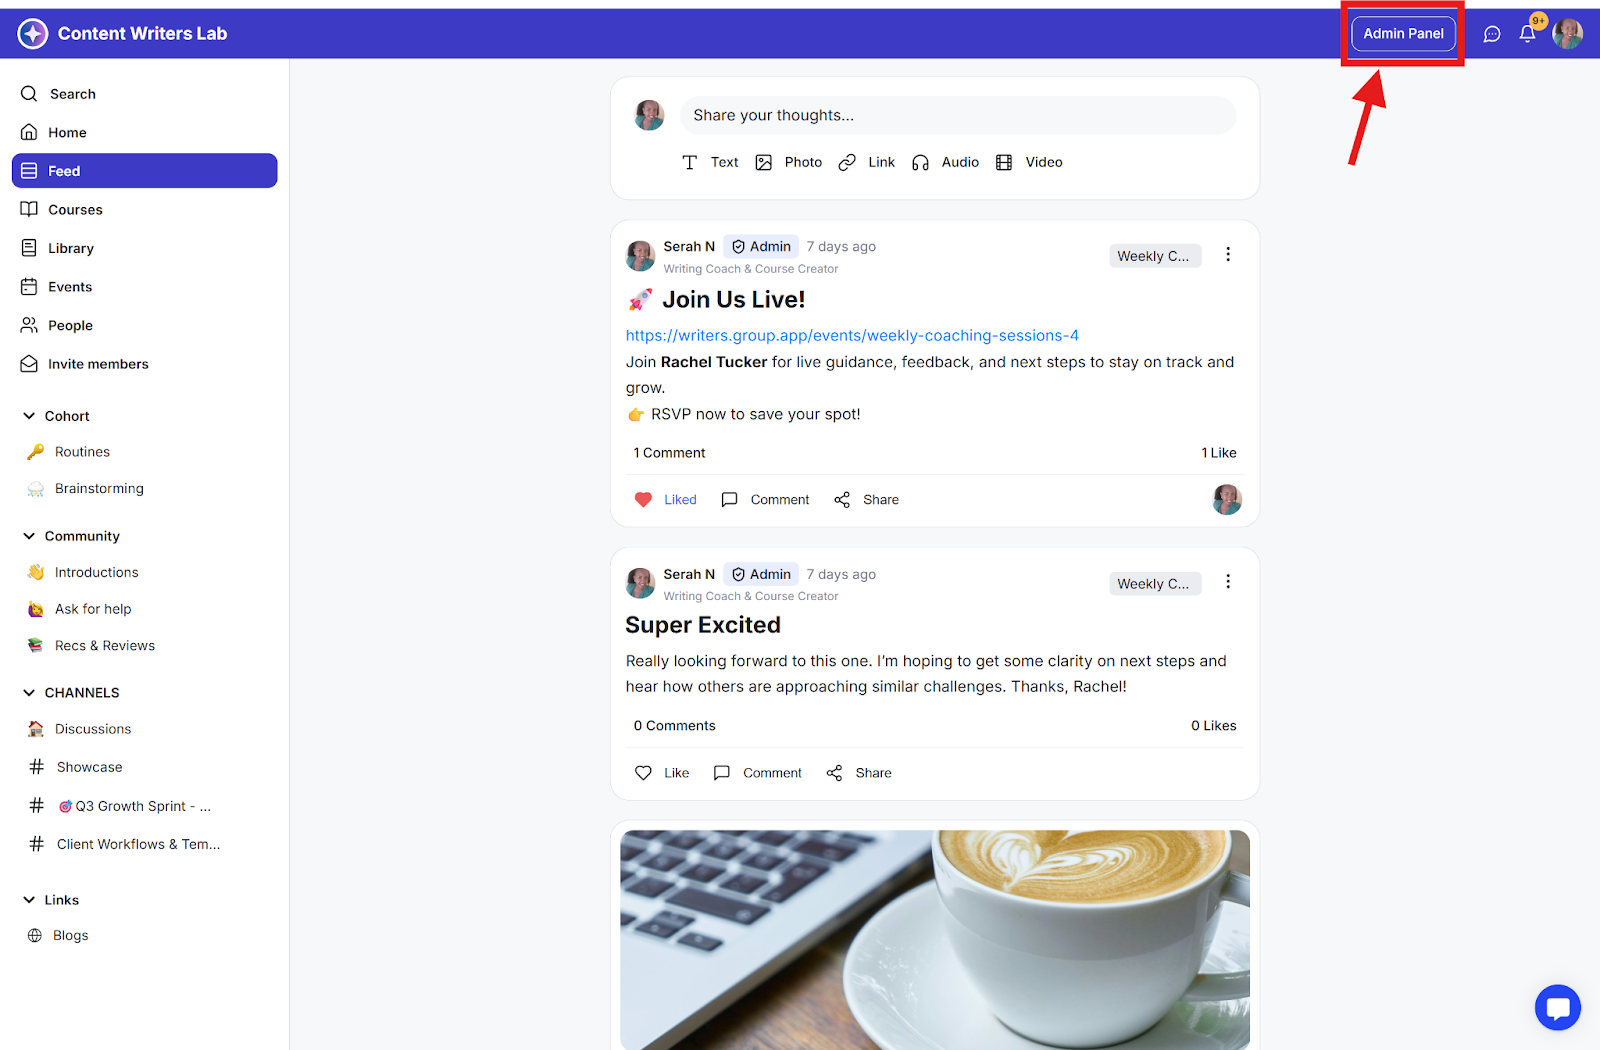
Step 1: Click on the Admin Panel button
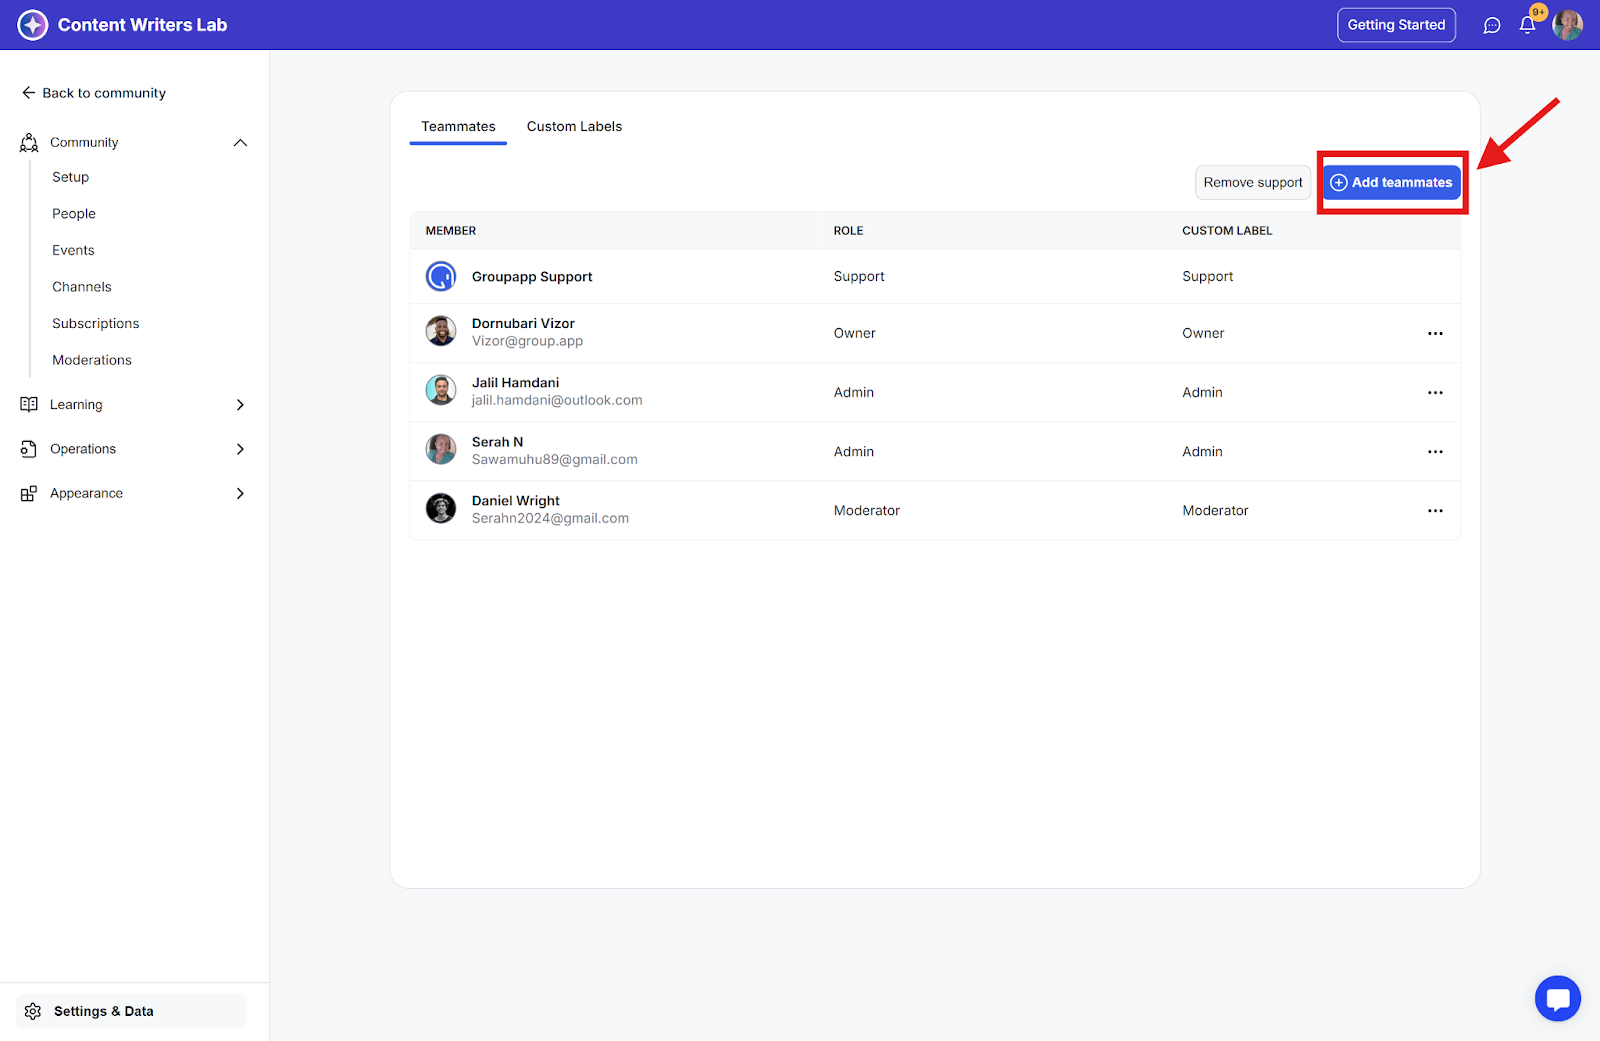
Step 2: Click on the Settings & Data and select the Teammates menu to open the teammate’s dashboard.
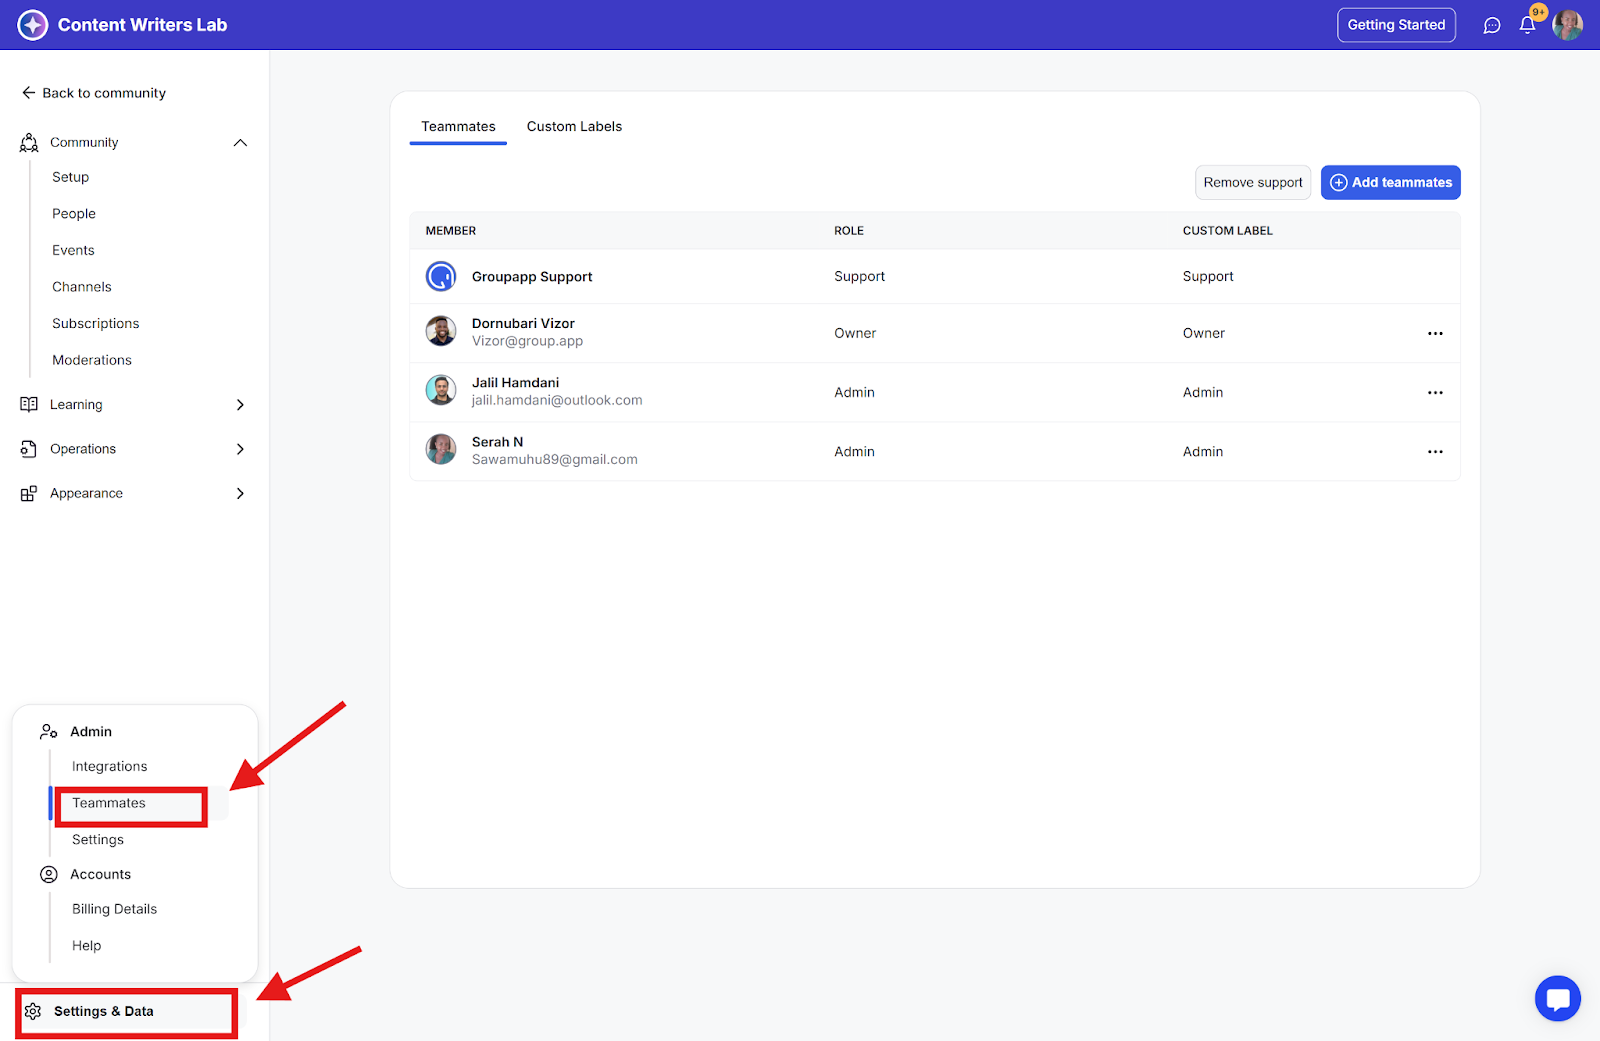
The teammate dashboard has two tabs:
Teammates
Custom Labels
Here, you'll find an option to add community members as teammates, along with a list of all current teammates. The custom role labels will be displayed as badges on their profiles, making it easy for others to see their assigned custom roles within the community.
The role defines a member’s permissions as an owner, admin, or moderator, determining their level of access and responsibilities within the community.
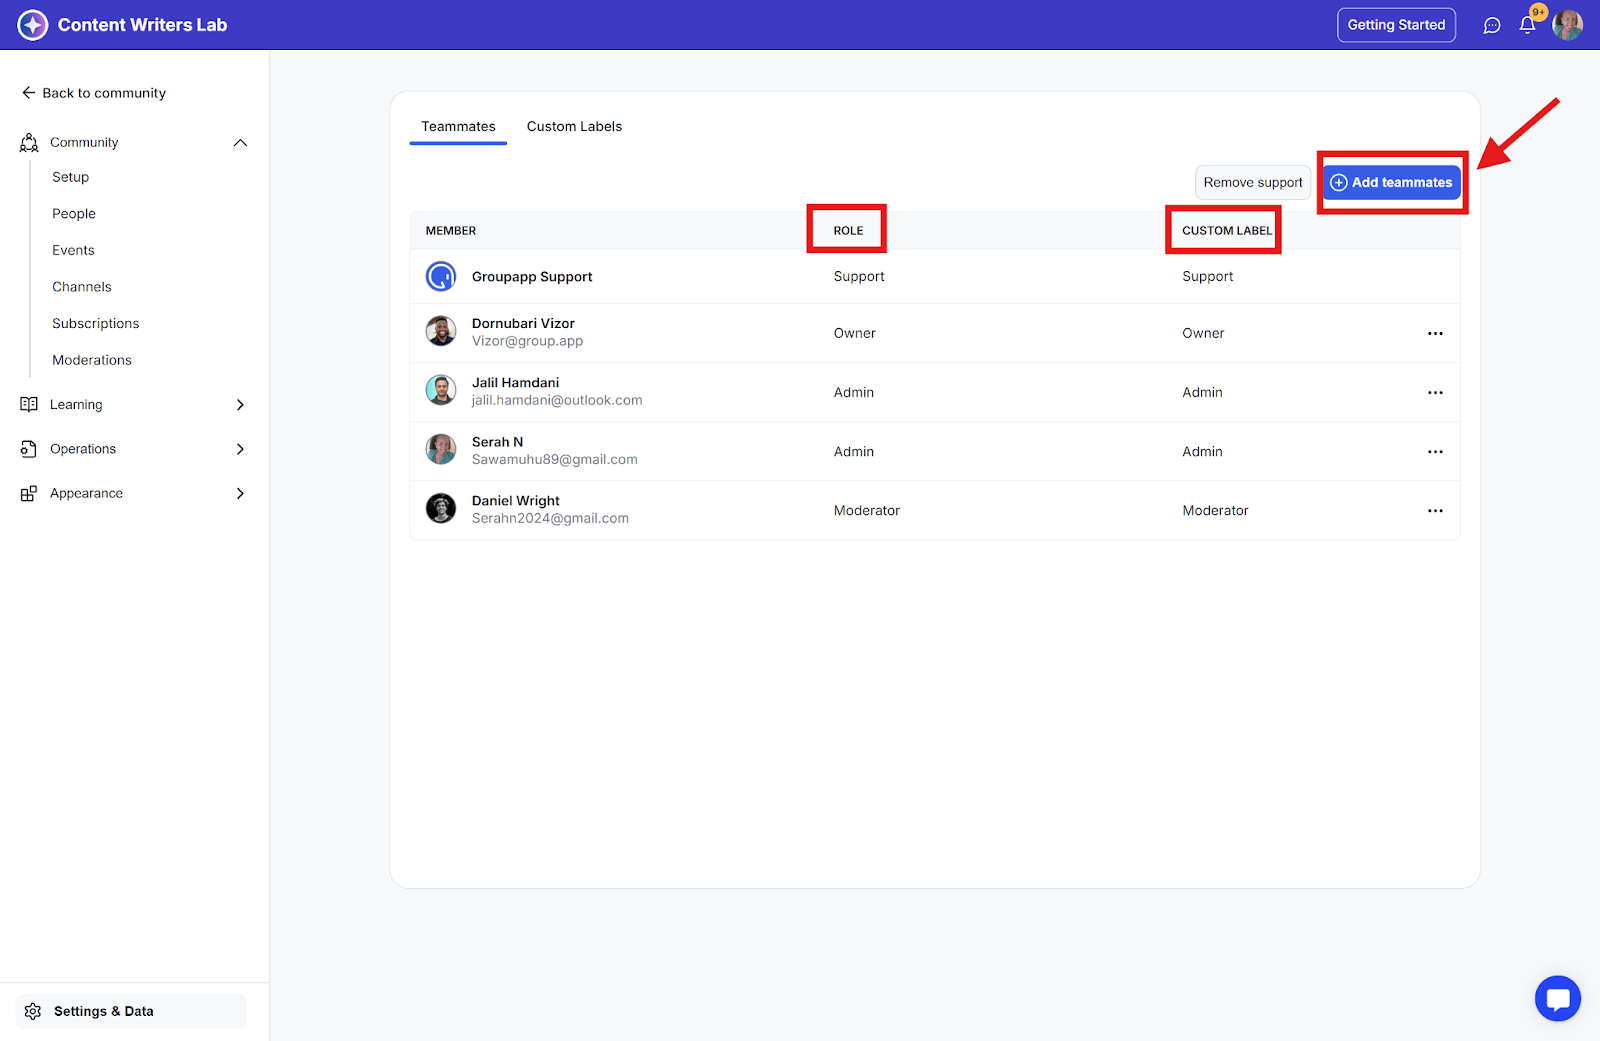
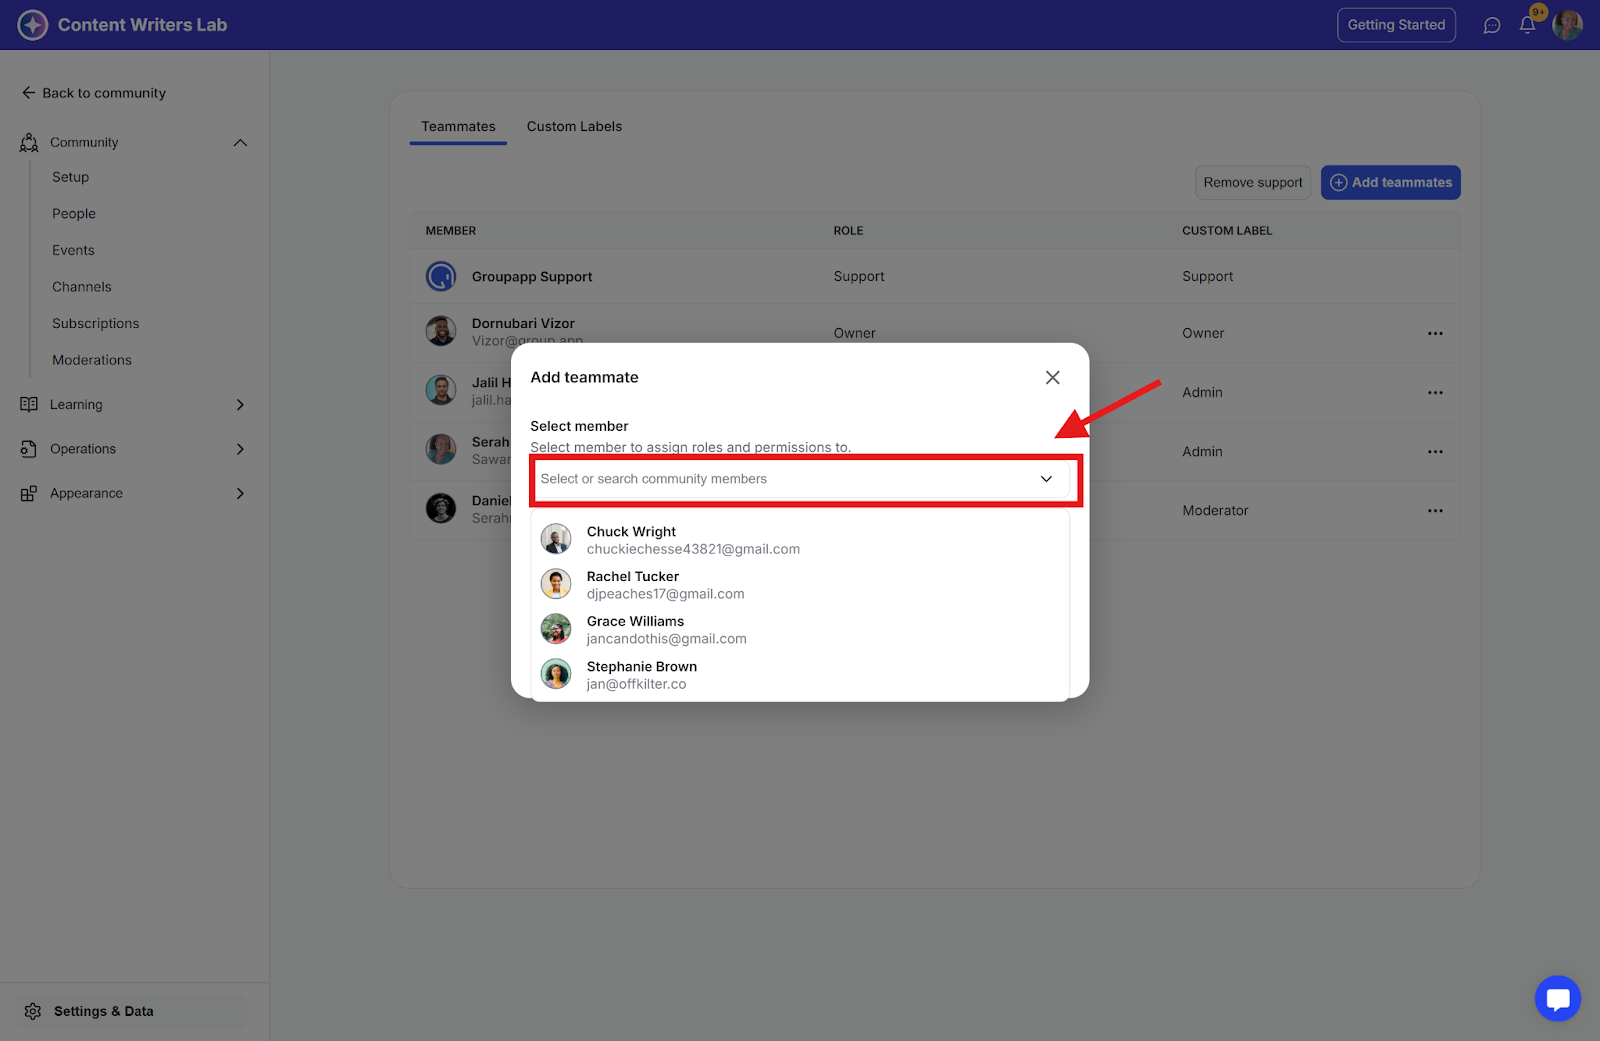
Step 1: Click on the Add Teammates button.
Step 2: A pop-up will open. Select/search for a member from the dropdown list.
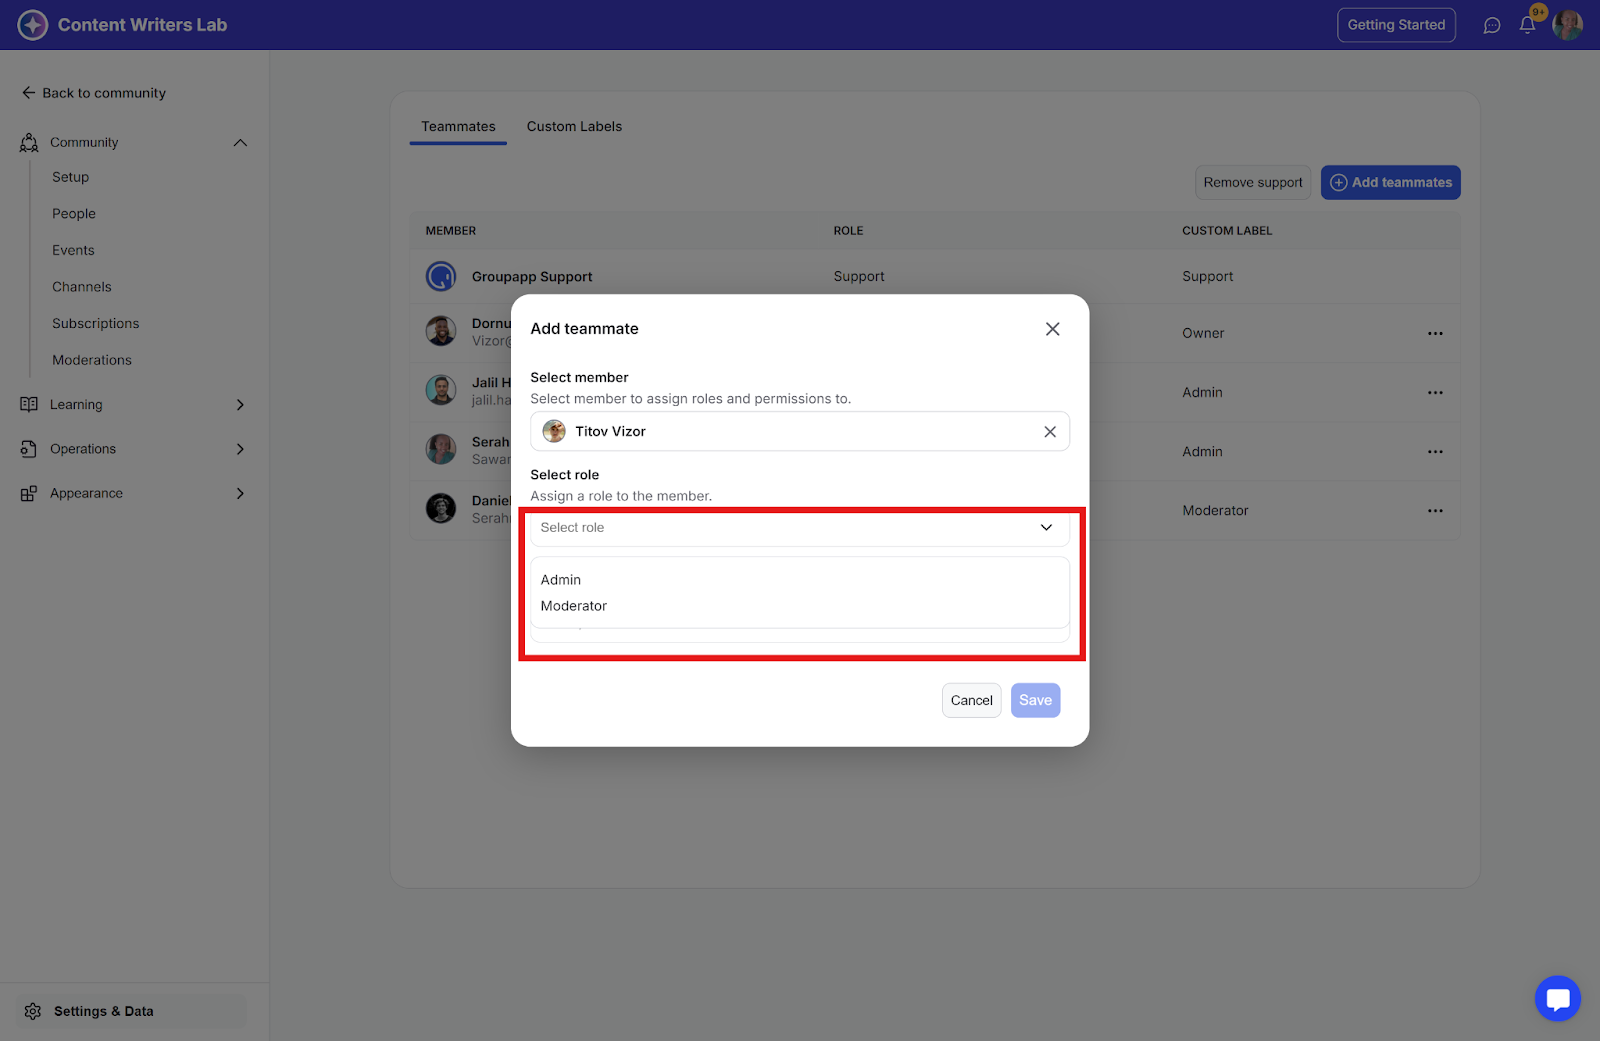
Step 3: After selecting the member, choose the role you’d want to assign to them.
Step 4: You will have the option of assigning a custom role label for the teammate from the dropdown list.

Or you can create your own custom role label name by clicking on the option to Add Custom Label Name or searching for the name from the dropdown
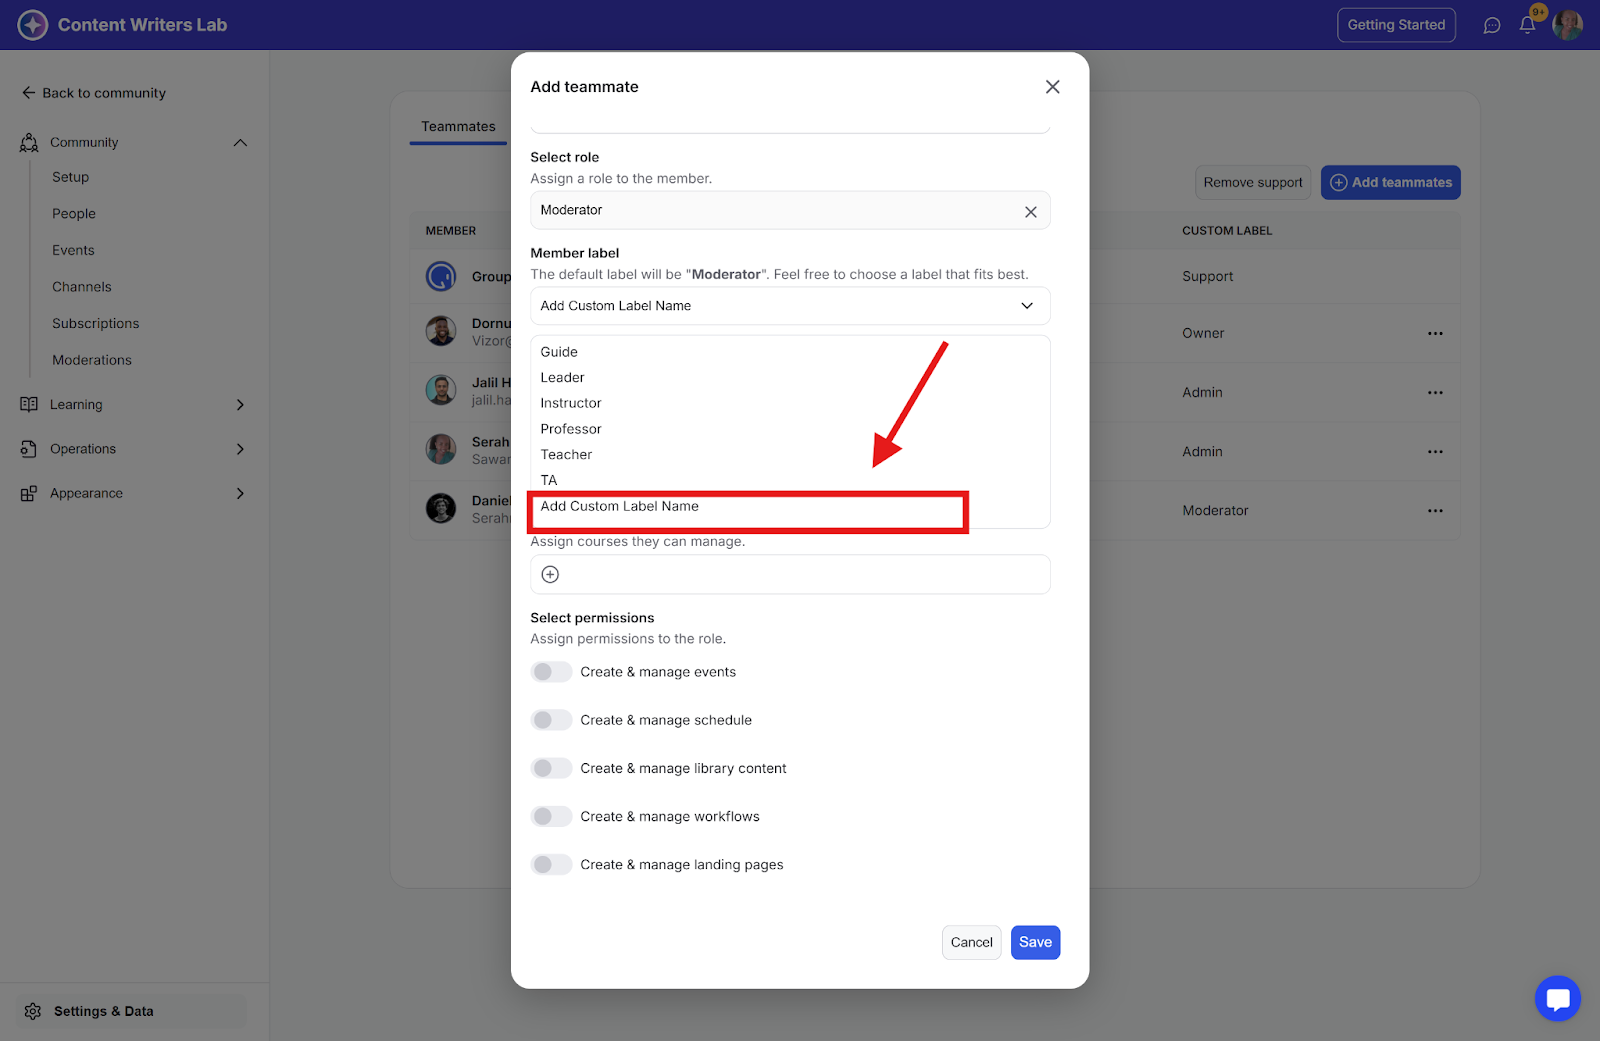
Step 5: You can type in your custom label. The custom label will appear as a badge right of the member’s name on the member’s profile on places like the channel posts, or the people’s page.
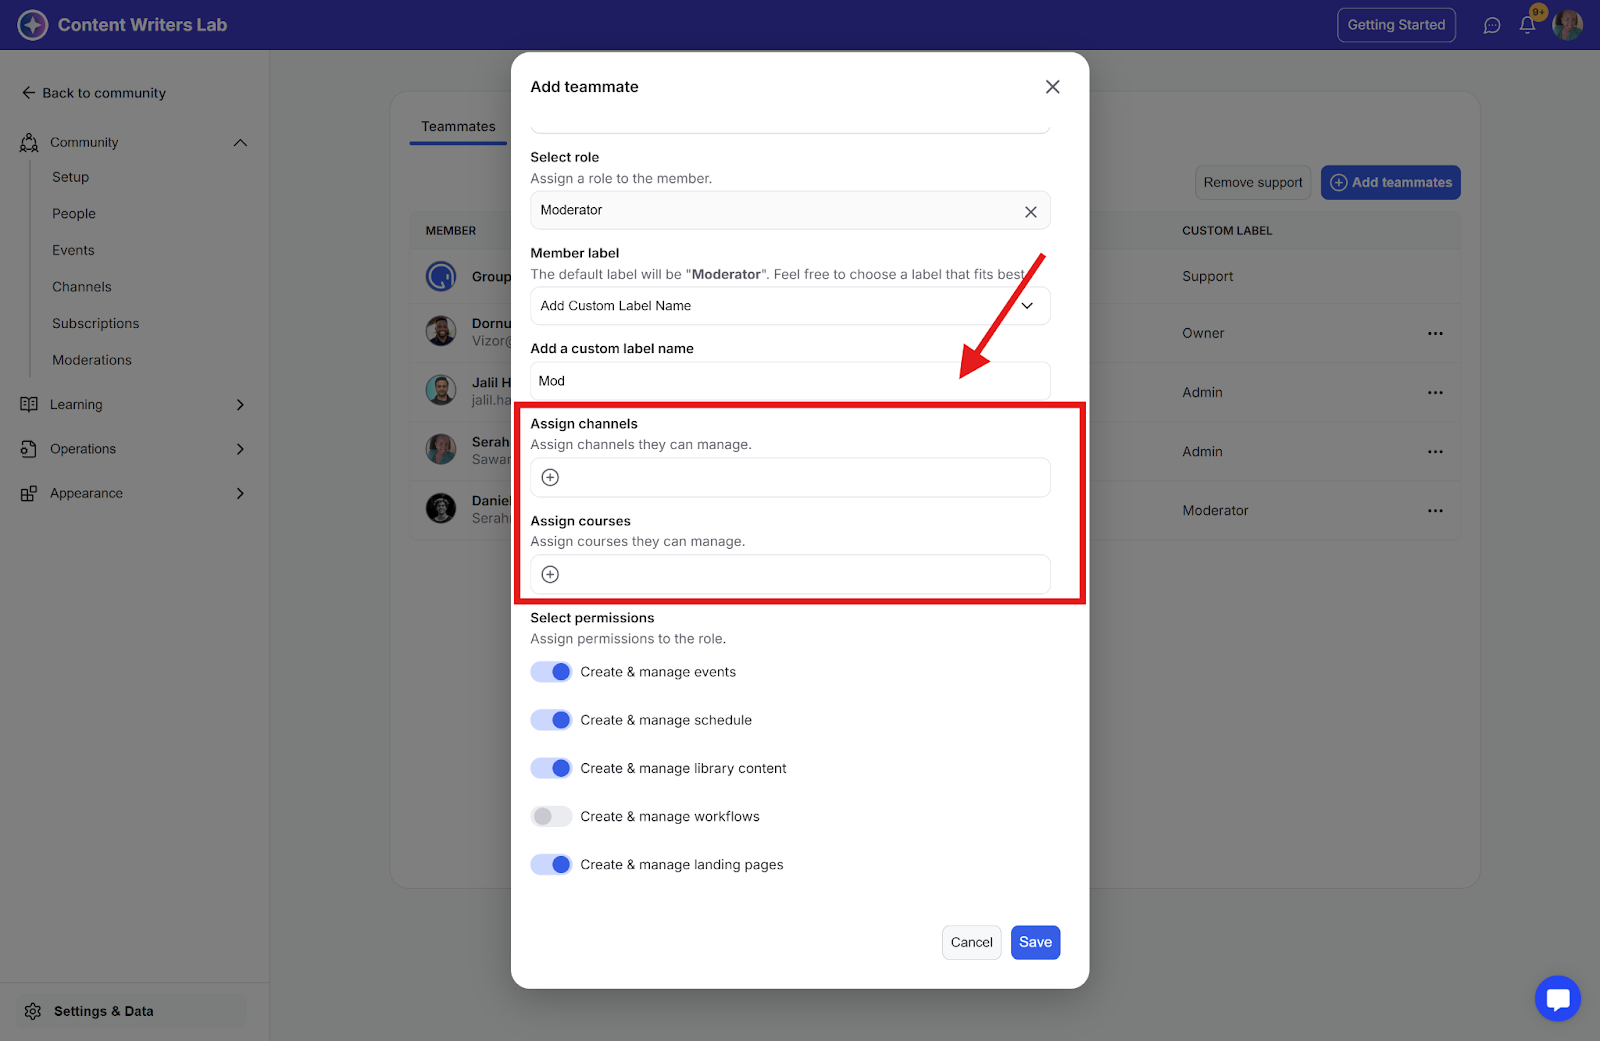
Step 6: When you select the role of moderator, you will have extra configurations to set.
1. Assign specific channels for moderators to manage and access. You can select which channels they oversee, and their permitted actions will include:
Editing channel details
Adding and viewing members in the channel
Assigning the channel to a category
2. Assign specific courses for moderators to manage and access. You can select the courses that they oversee, and their permitted actions will include:
Editing course details
Add & remove course lessons
View course enrollment records and student progress reports
Assigning the course to a category
Configure and Set Drip
Add pricing for the course
Publishing/deleting/duplicating the course lesson and sections
Note: Moderators will only have access to these specific actions for courses and channels, and no additional actions.
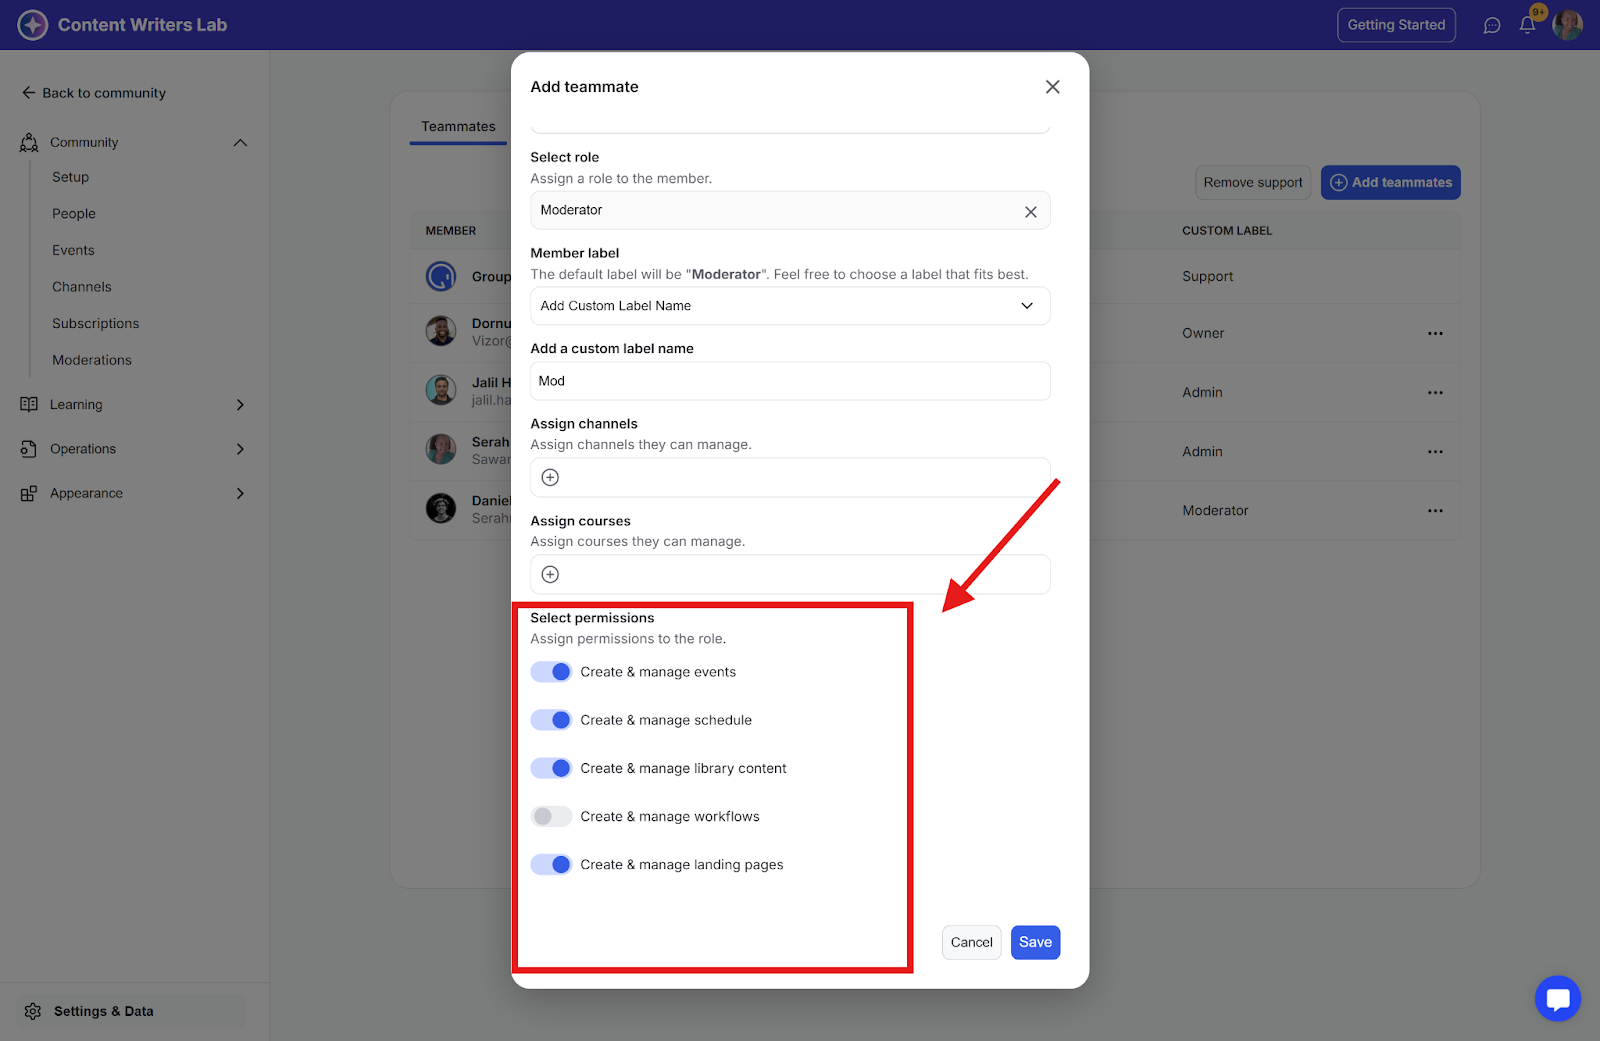
Step 7: When granted the following permissions, moderators will have unrestricted access, enabling them to perform all admin-level actions across community events, scheduled content, library content, workflows, and landing pages.
Create & manage events
Create & manage schedule
Create & manage library content
Create & manage workflows
Create & manage landing pages
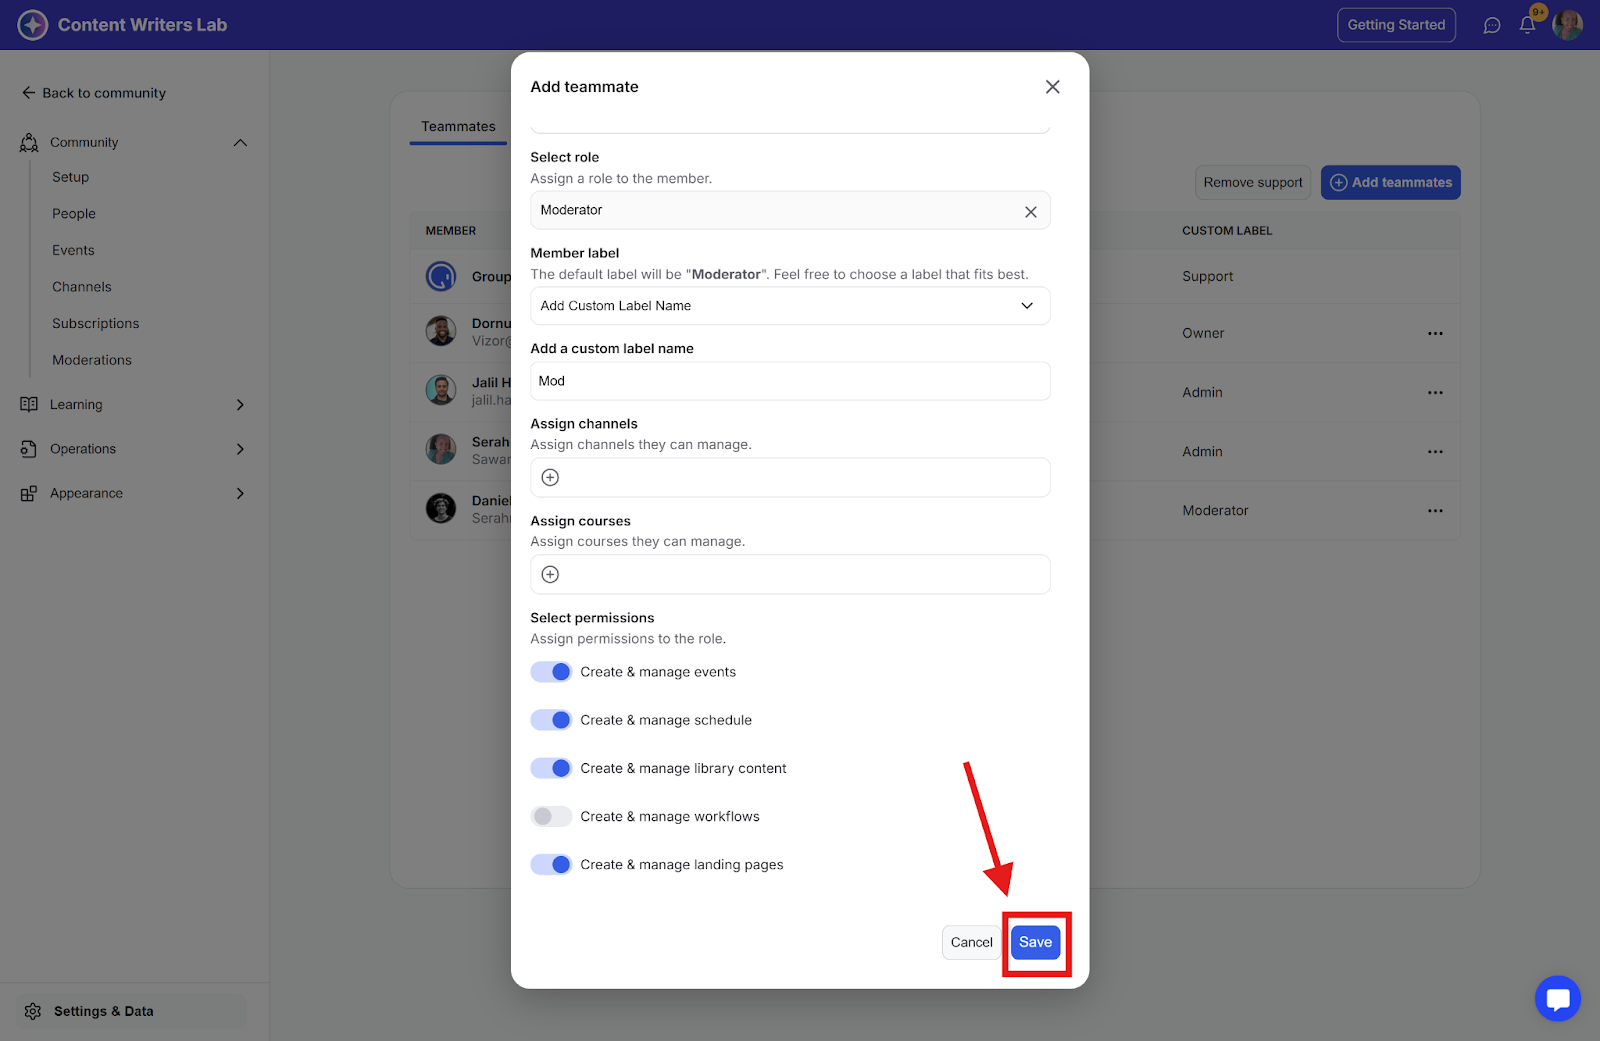
Step 8: Click the Save Changes button to update the changes.
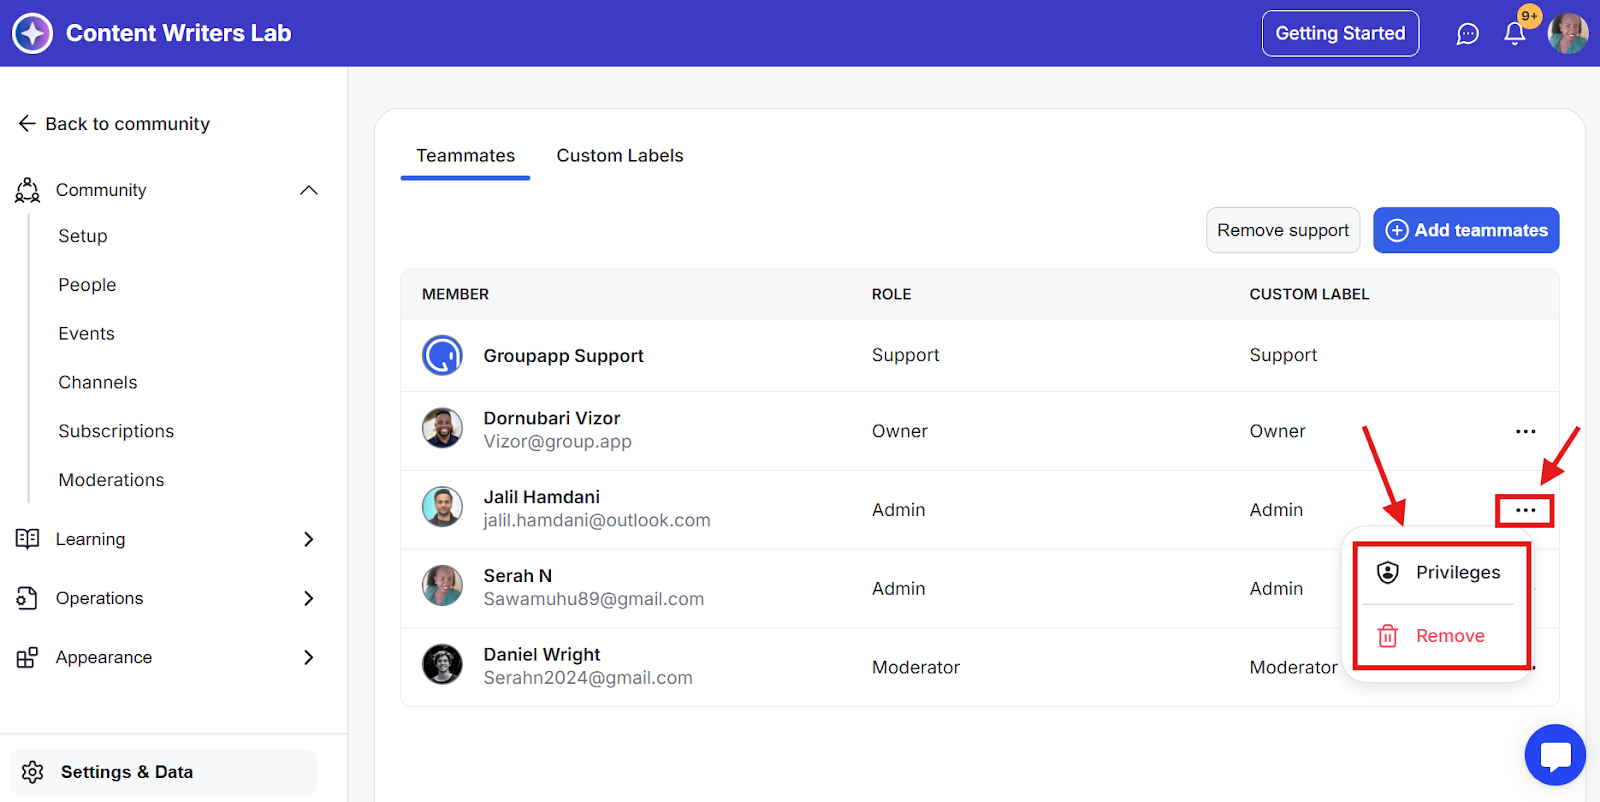
Step 9: You can remove or edit the privileges of an existing teammate by clicking the three-dot option.
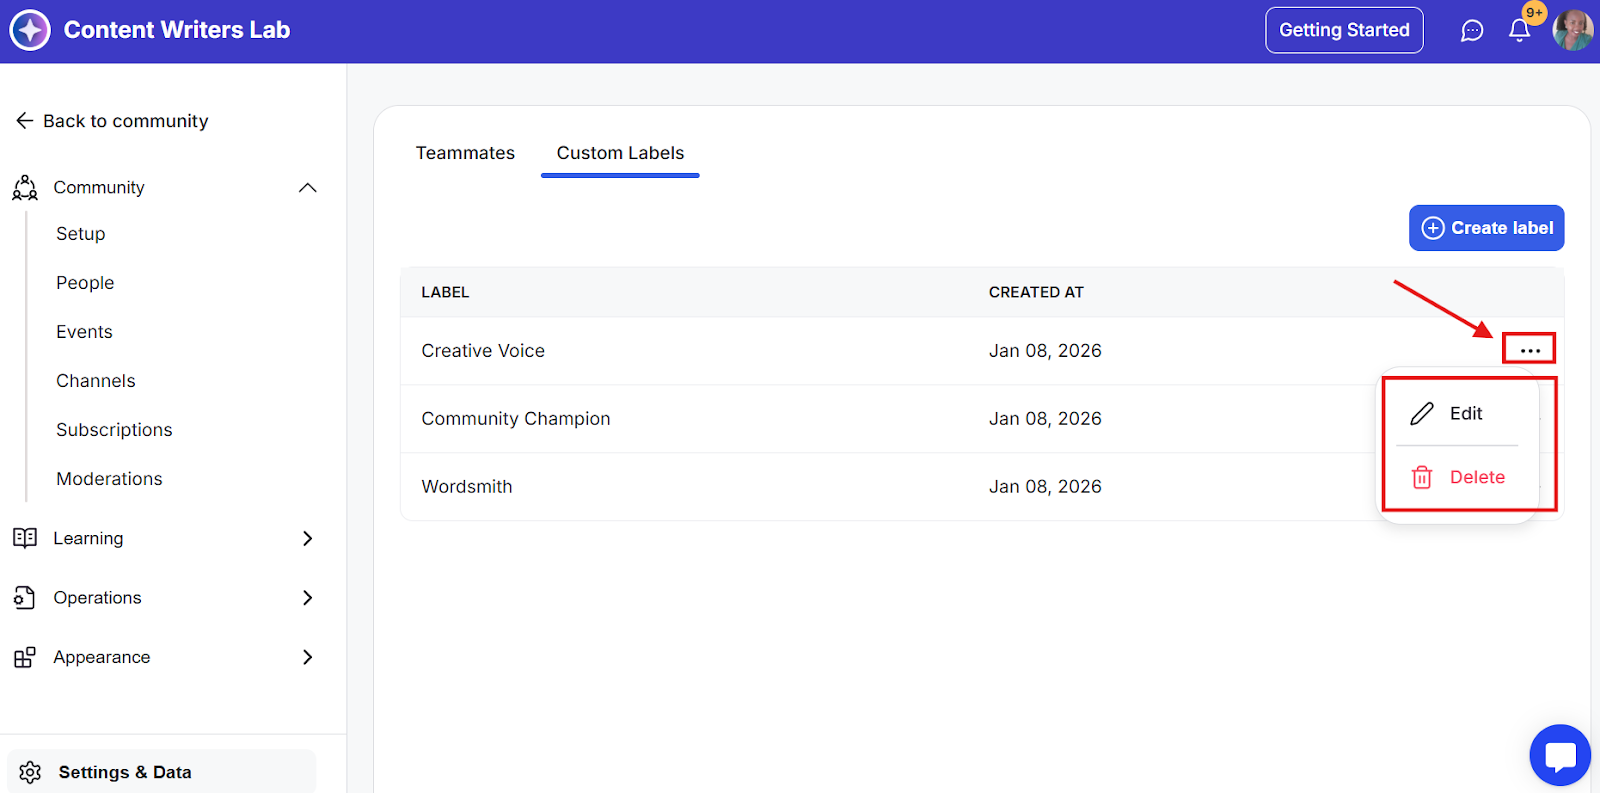
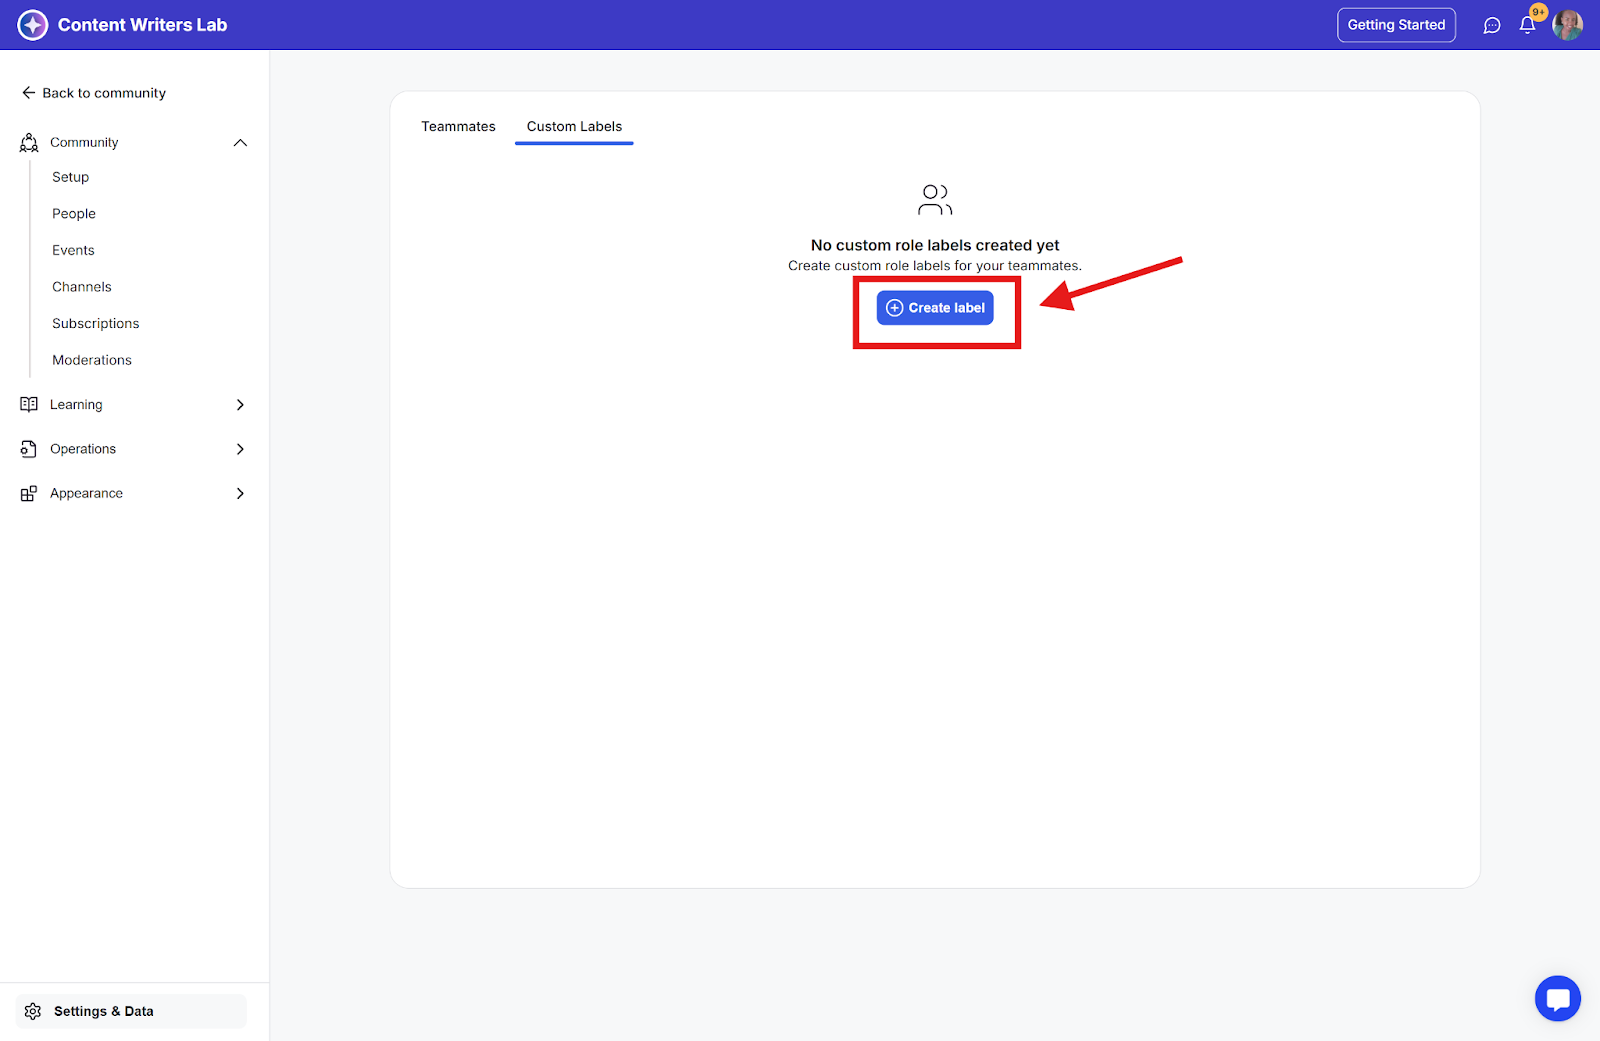
This tab will show the table list of all the custom role labels you have created
You'll also have the option to create a custom role label, which can be assigned to teammates as needed.
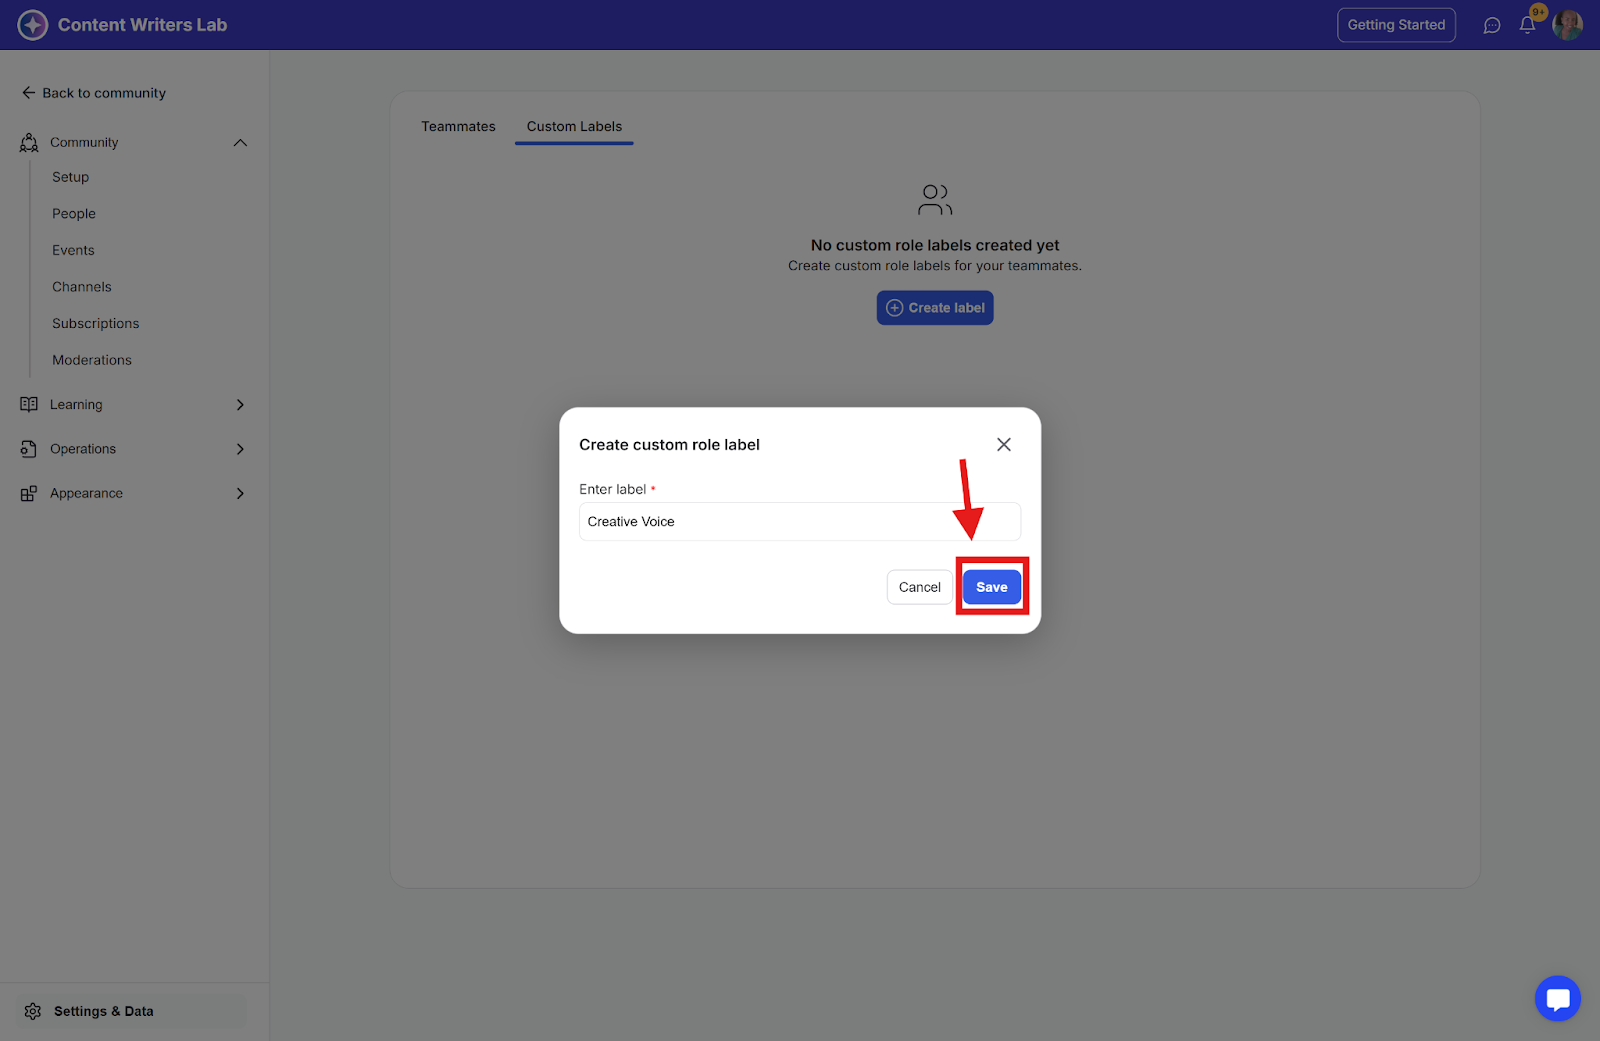
Step 1: Click the Create Label button
Step 2: In the pop-up, enter the name and click Save.
Step 3: You can edit or delete a custom role label by clicking the three-dot menu in the column.