This guide will show you how to configure segments for Channels
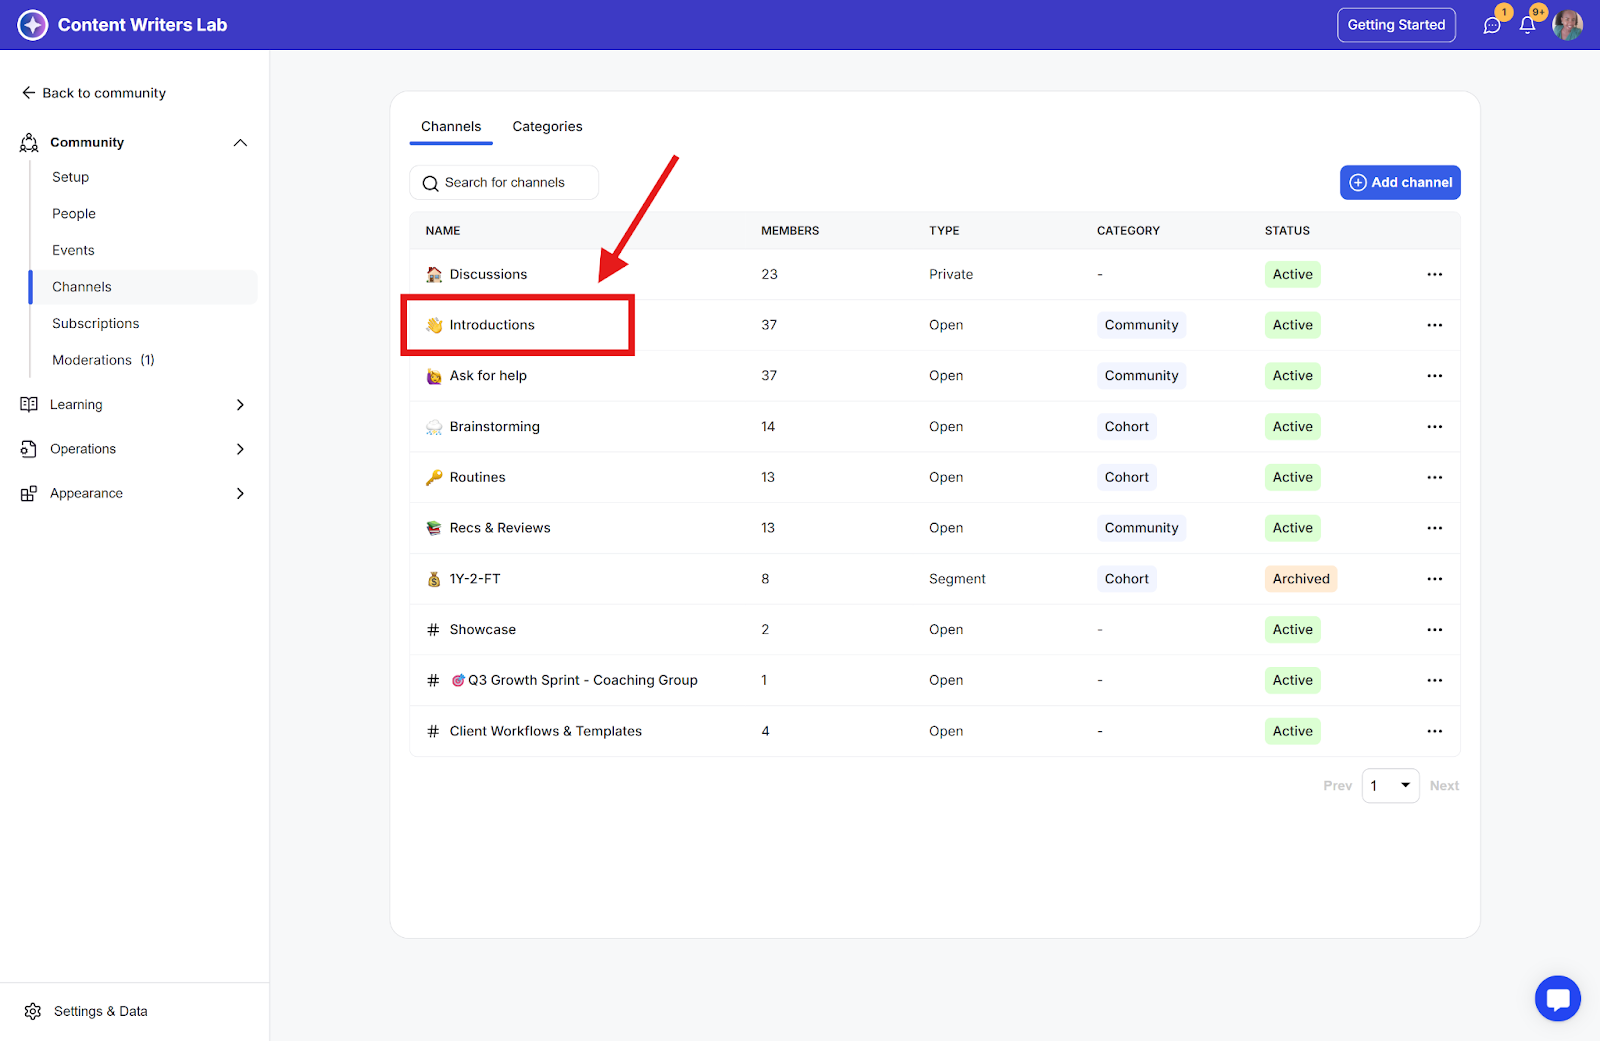
Step 1: Go to the Admin Panel and click on Channels in the side menu.

Step 2: Locate the channel you want to configure and click its name to access the channel's settings
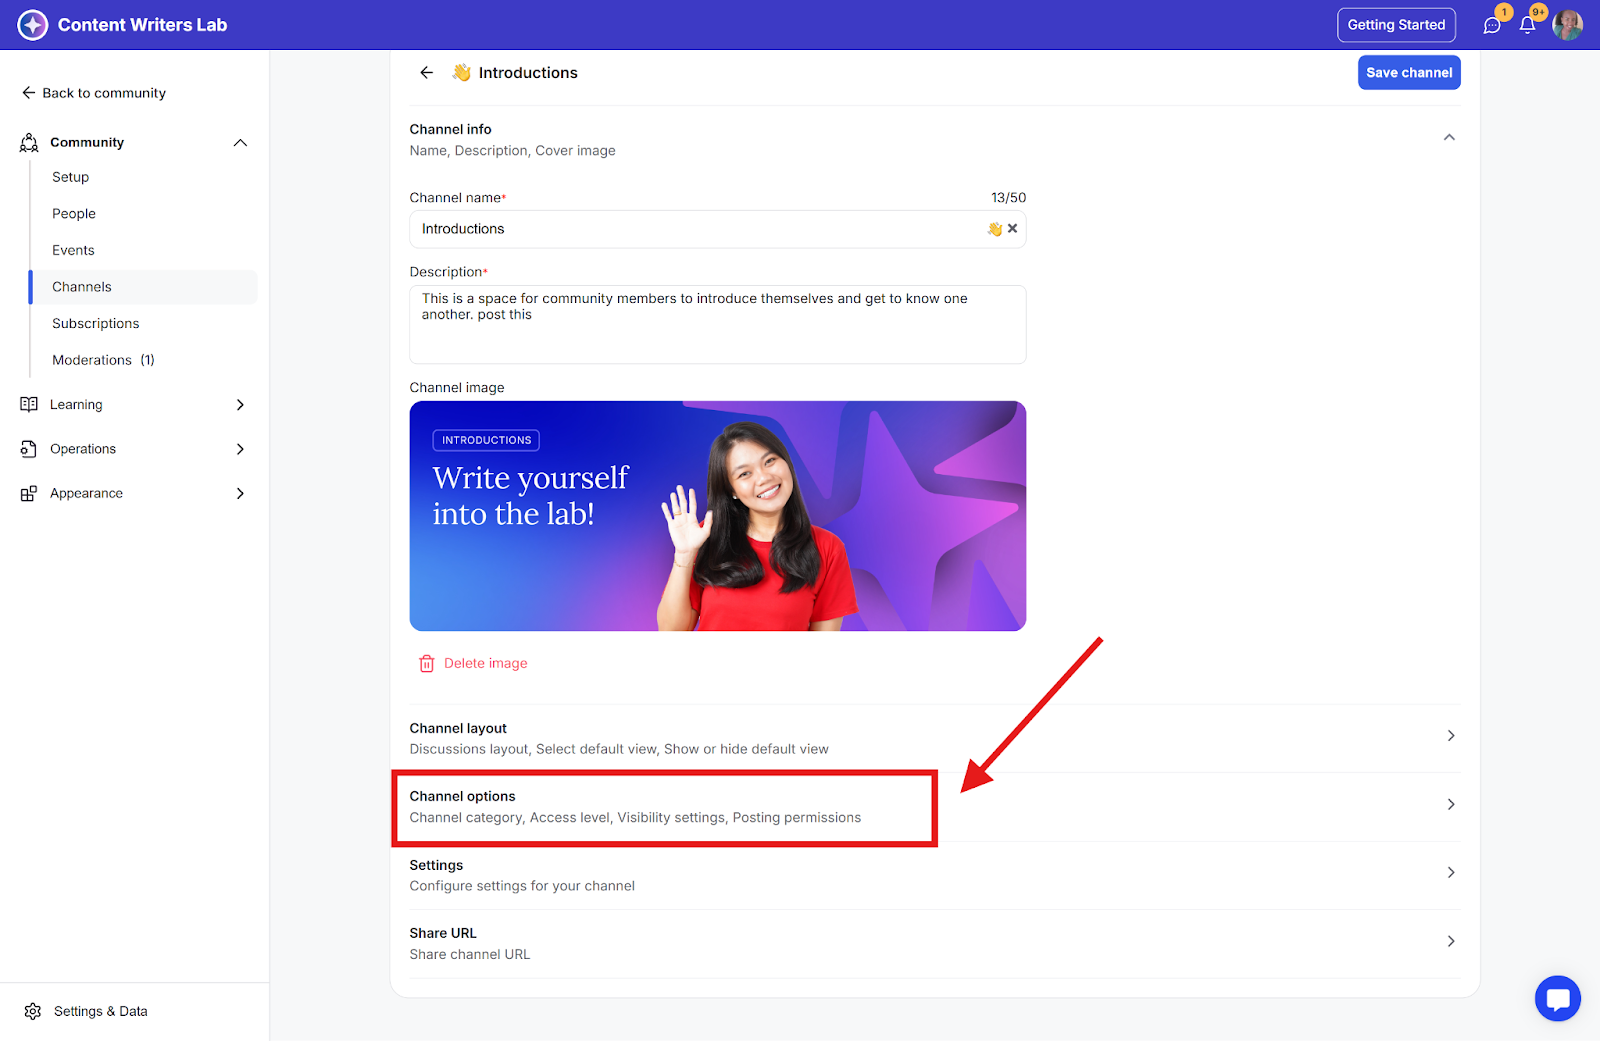
Step 3: Scroll down to the Channel Options section.
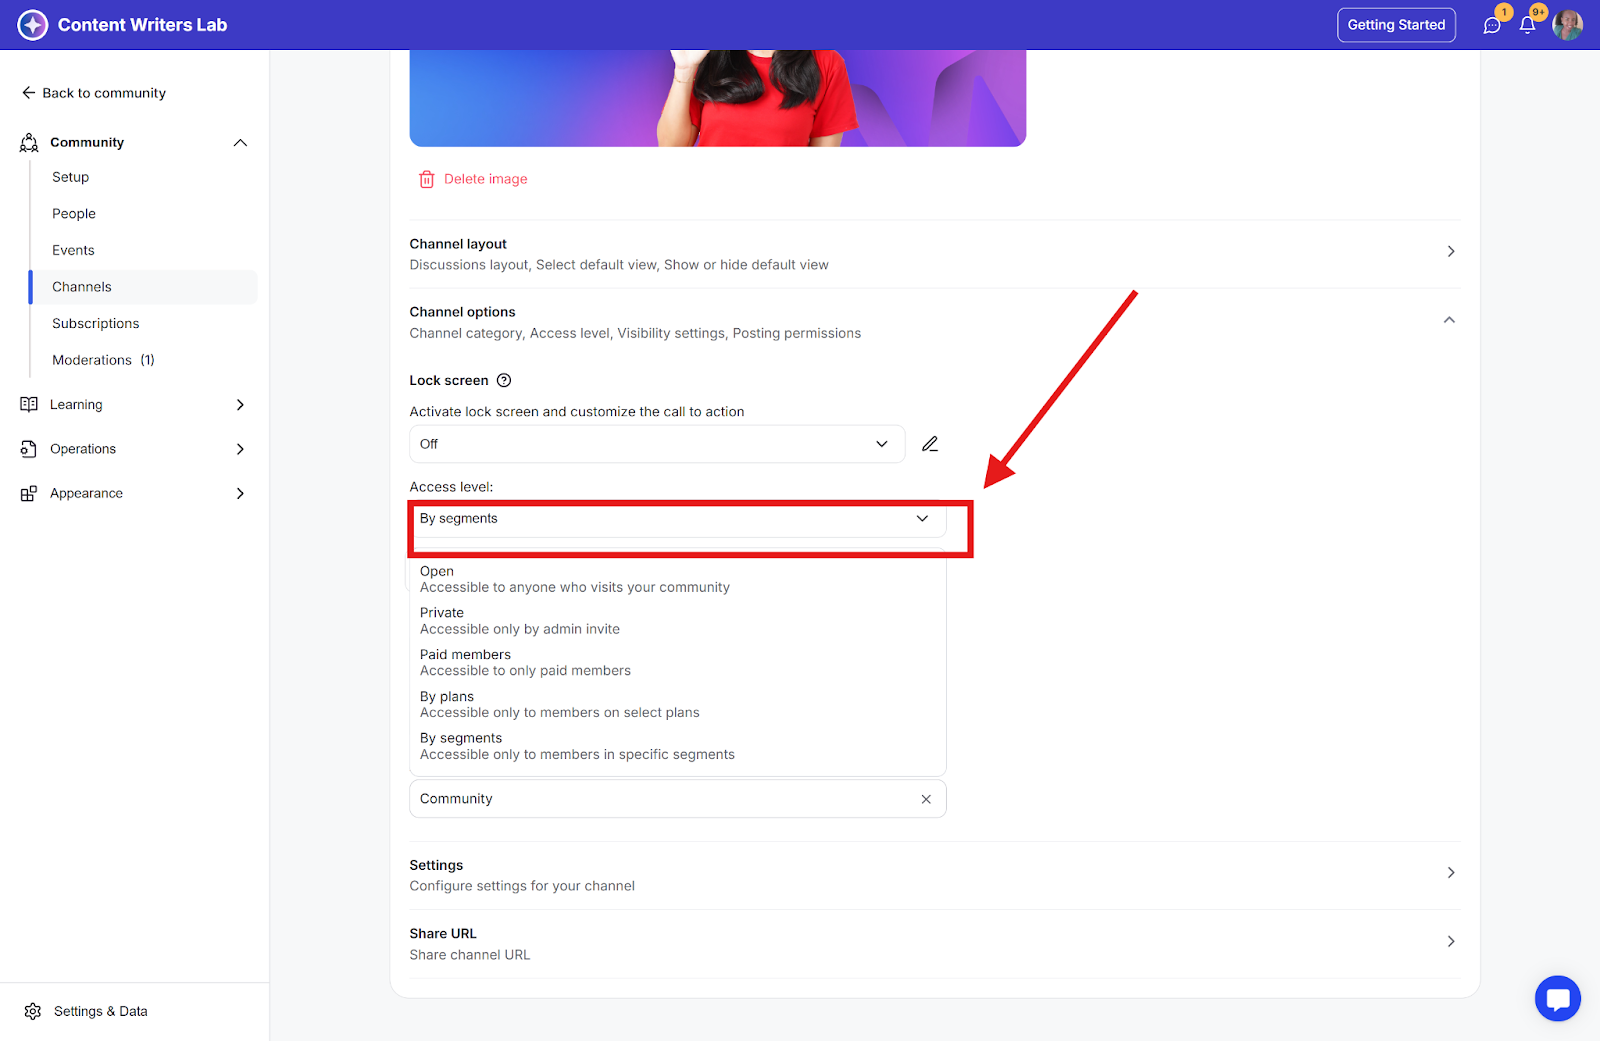
Step 4: Locate the Access Level sub-section and click By Segments from the drop-down.
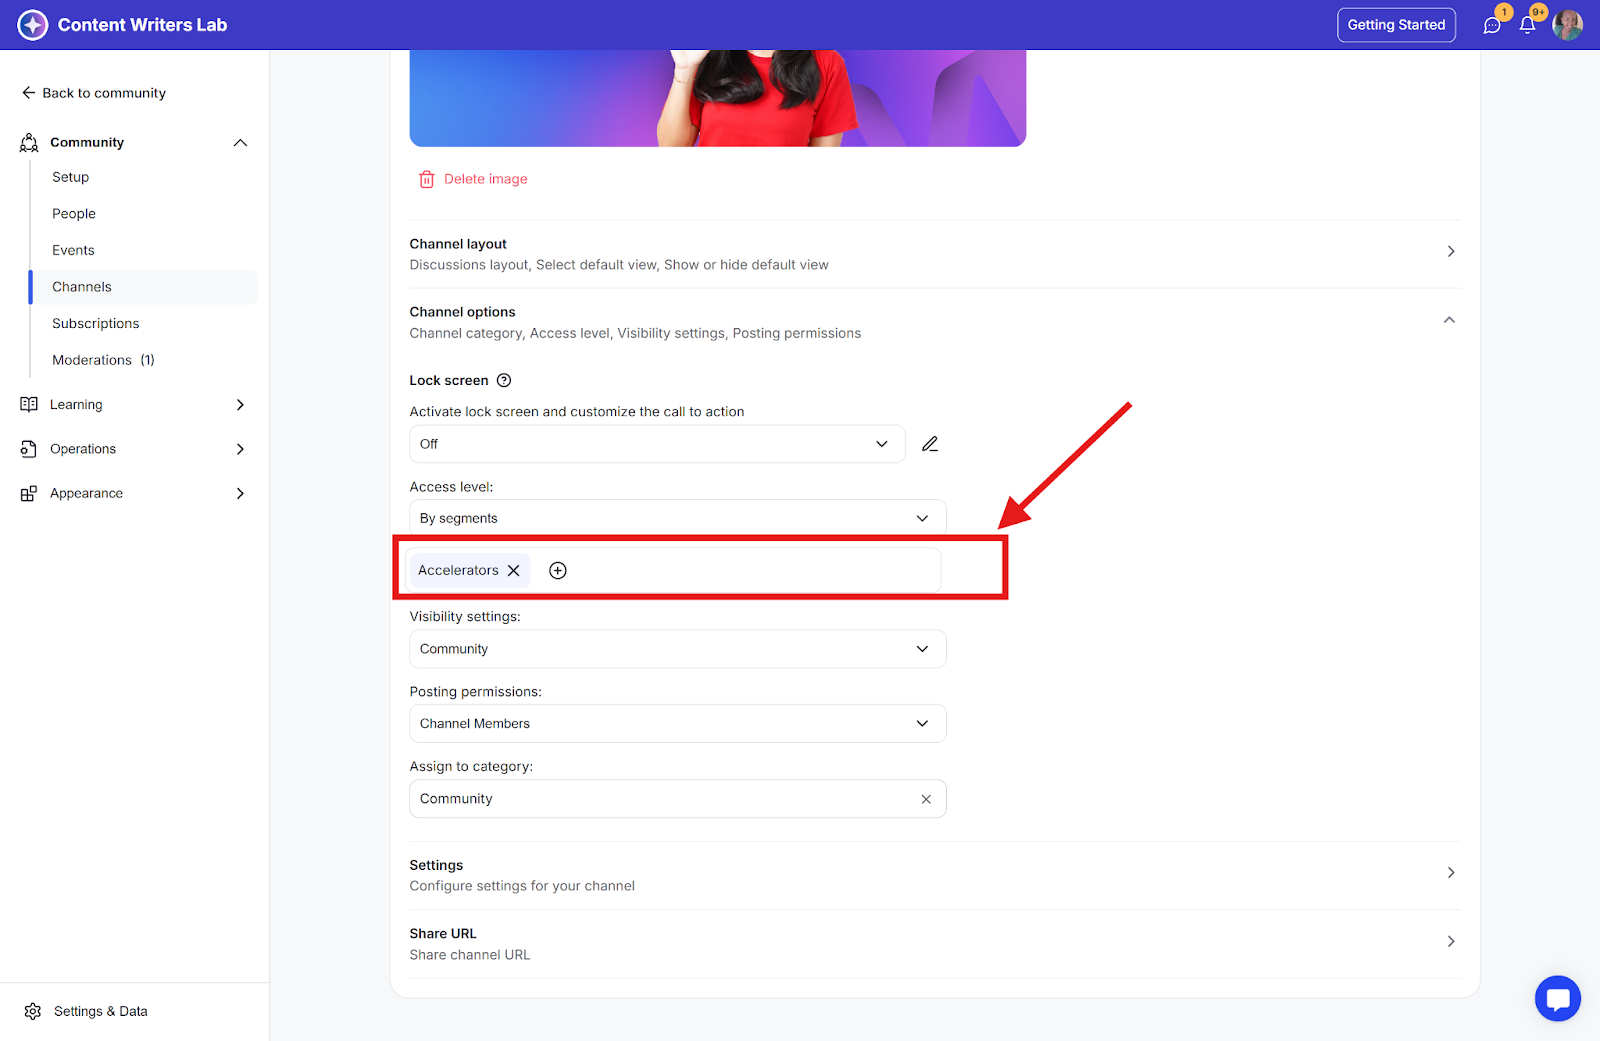
Step 5: Search for and select the segment.
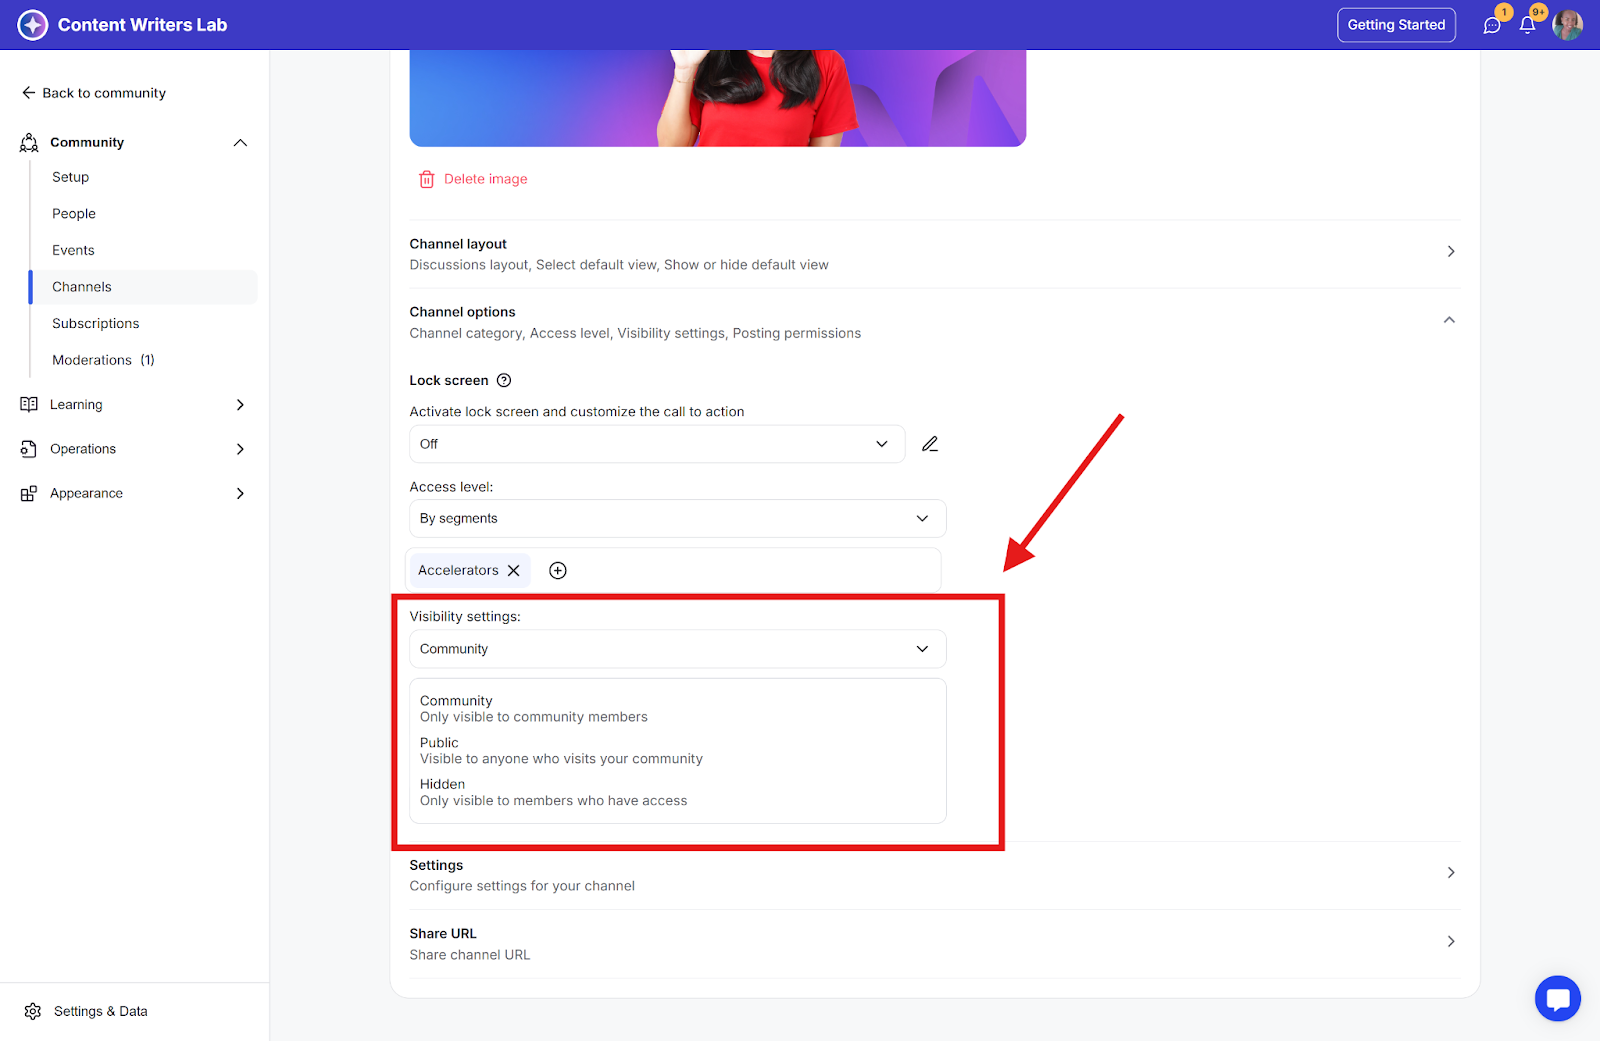
Step 6: From the Visibility Settings section, you can select from one of the settings:
Community: Only community members will see the channel/resource, but only the segment members will be able to access it.
Public: All community visitors (even logged-out users)/members will see the channel/resource, but only the segment members will be able to access it.
Hidden: Only segment members will be able to see and access the channel/resource from the course list/library content list/event list.
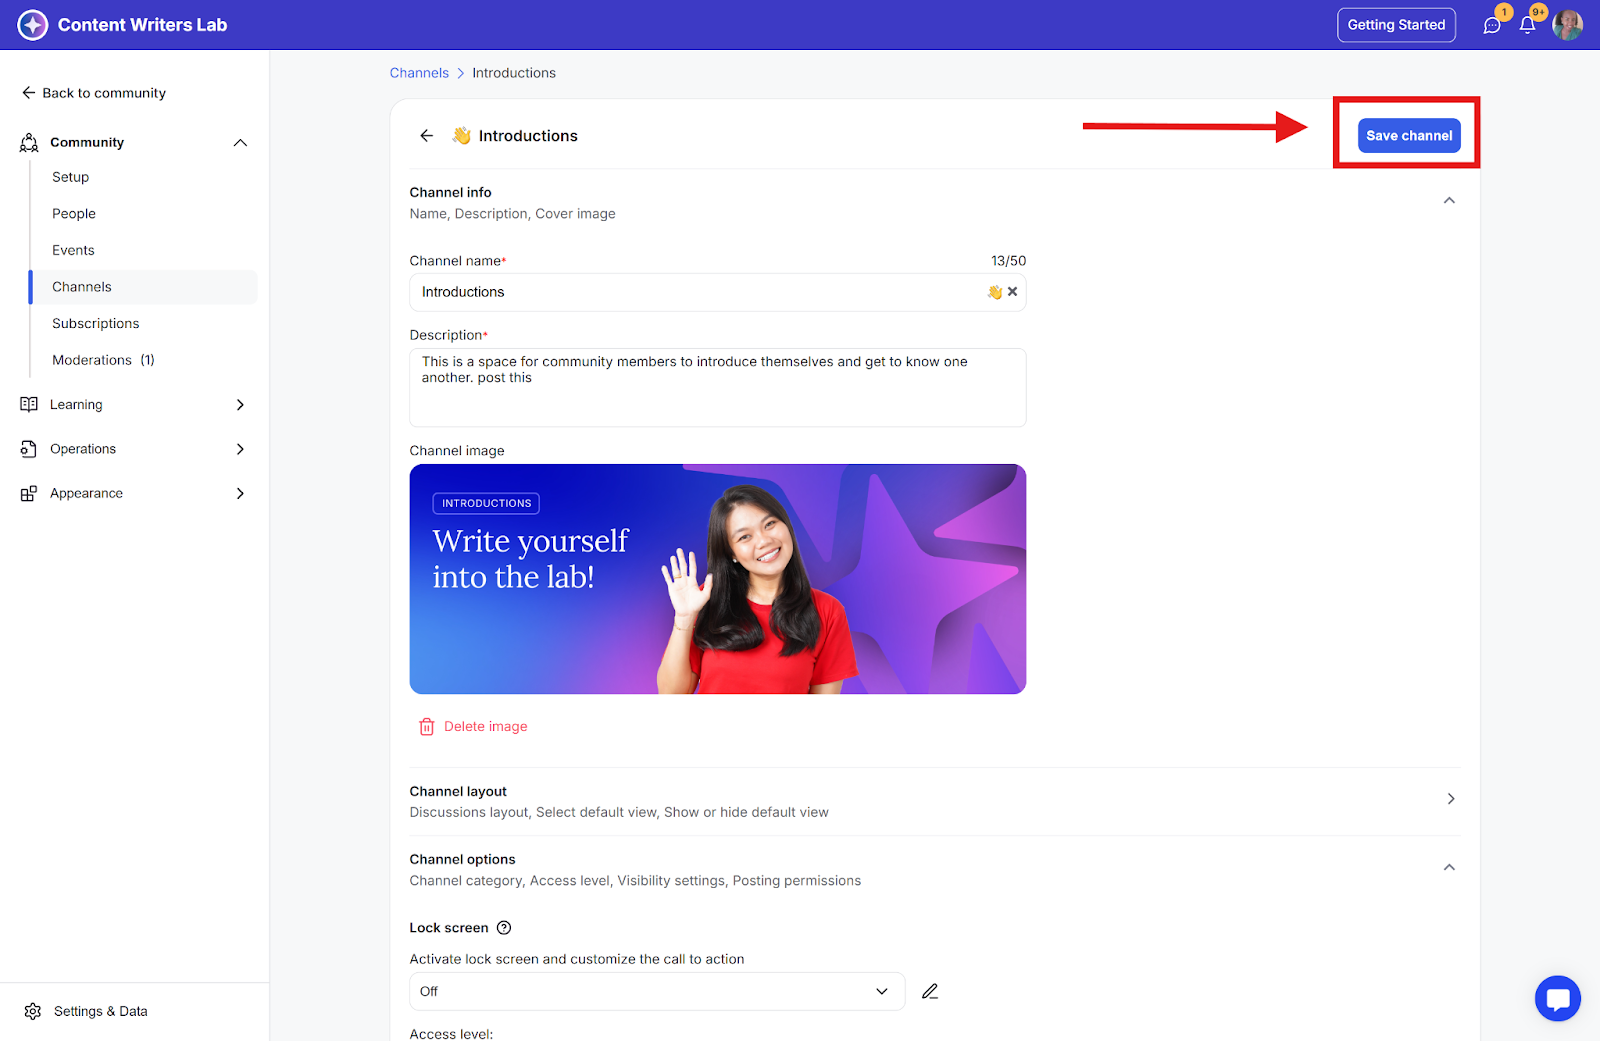
Step 7: Click the Save Channel button to apply the changes.
Avoid mixing segments with subscription levels. Decide early whether segments or subscription plans are the best approach for managing access levels.
Do not overcomplicate your setup or create too many segments.
When possible, delete unused segments and consolidate existing ones.
