Categories help you group Content Library items into clear sections, making it easier for members to browse and find specific resources.
You can assign categories from the Library overview or while editing a specific item. Please note that categories are different from filters. Categories organize content into sections, while filters allow members to sort content based on format, such as video, audio, or PDF.
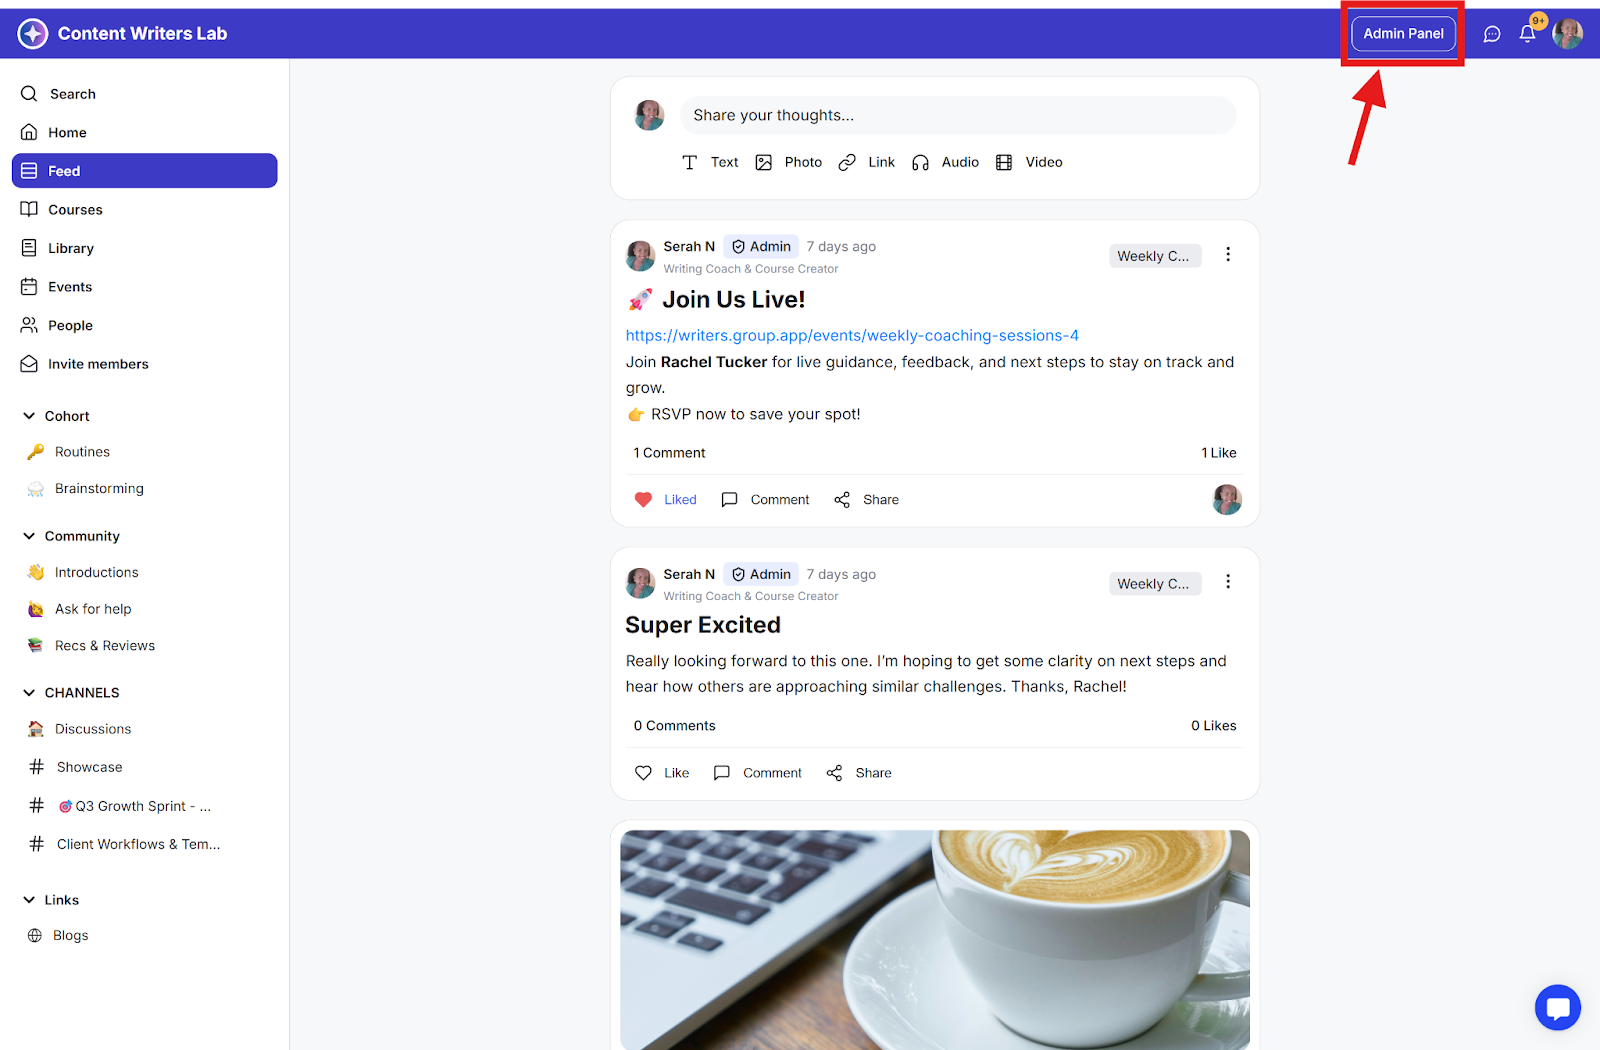
Step 1: Go to your Admin Panel.
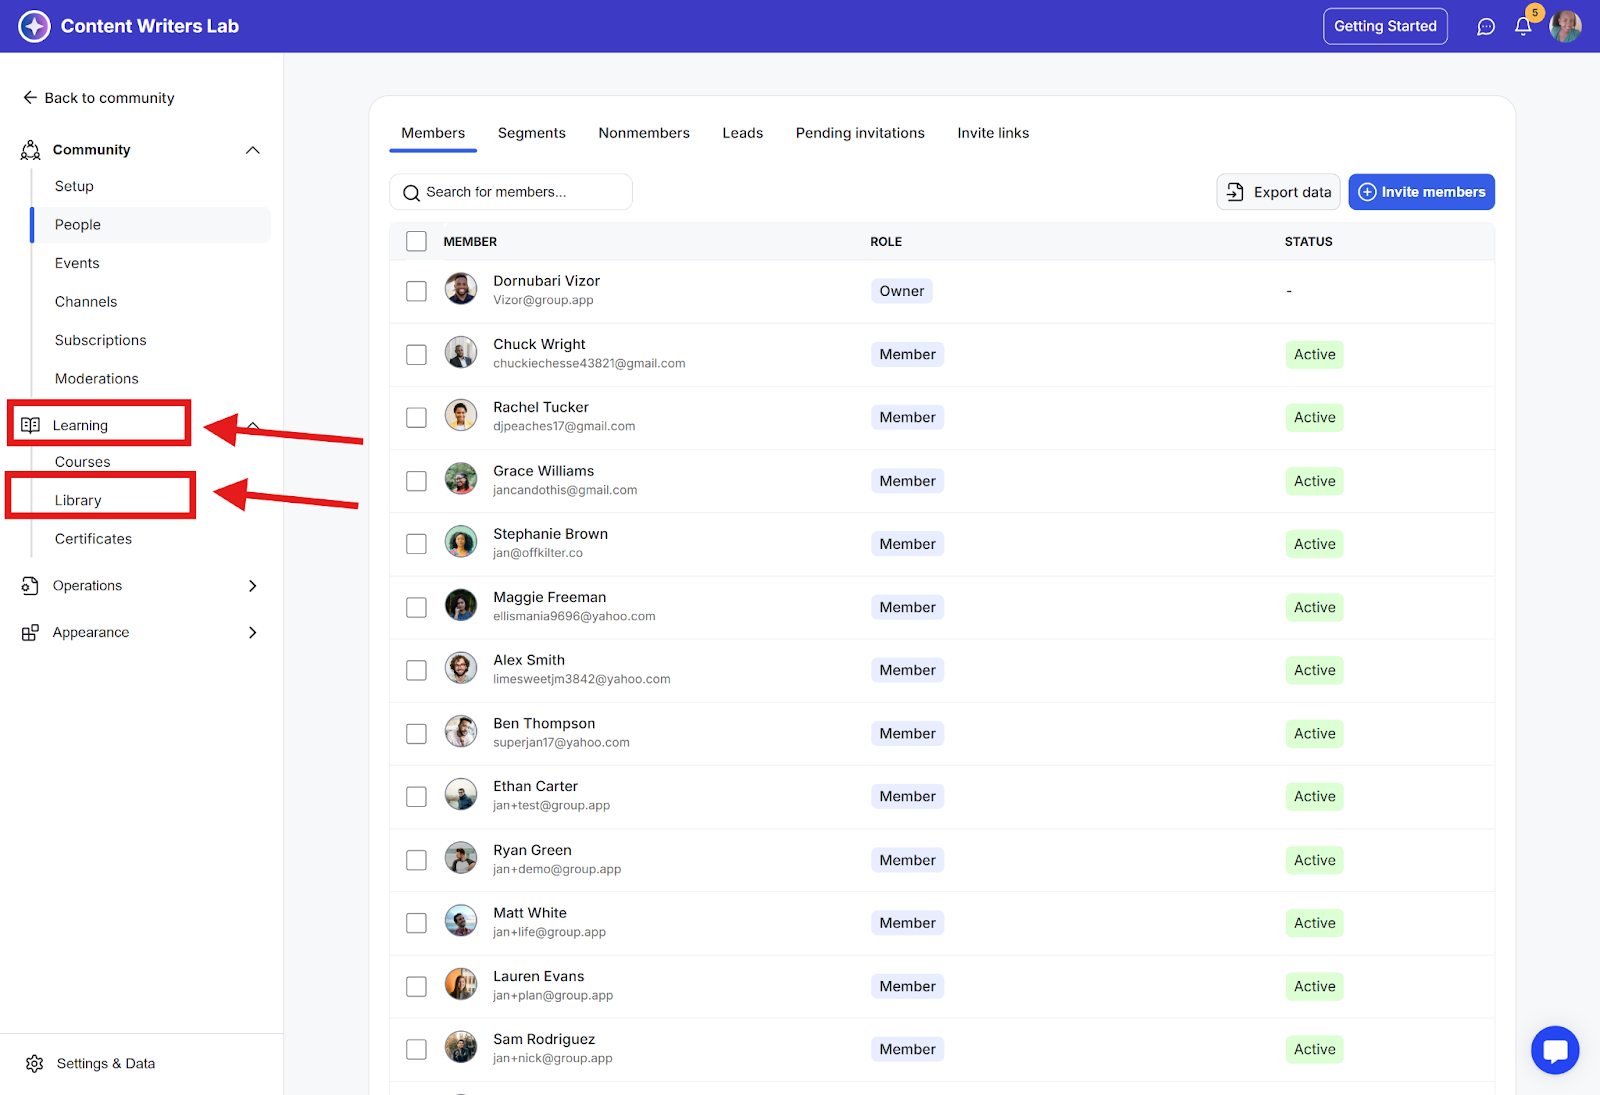
Step 2: Navigate to Learning and select Library.
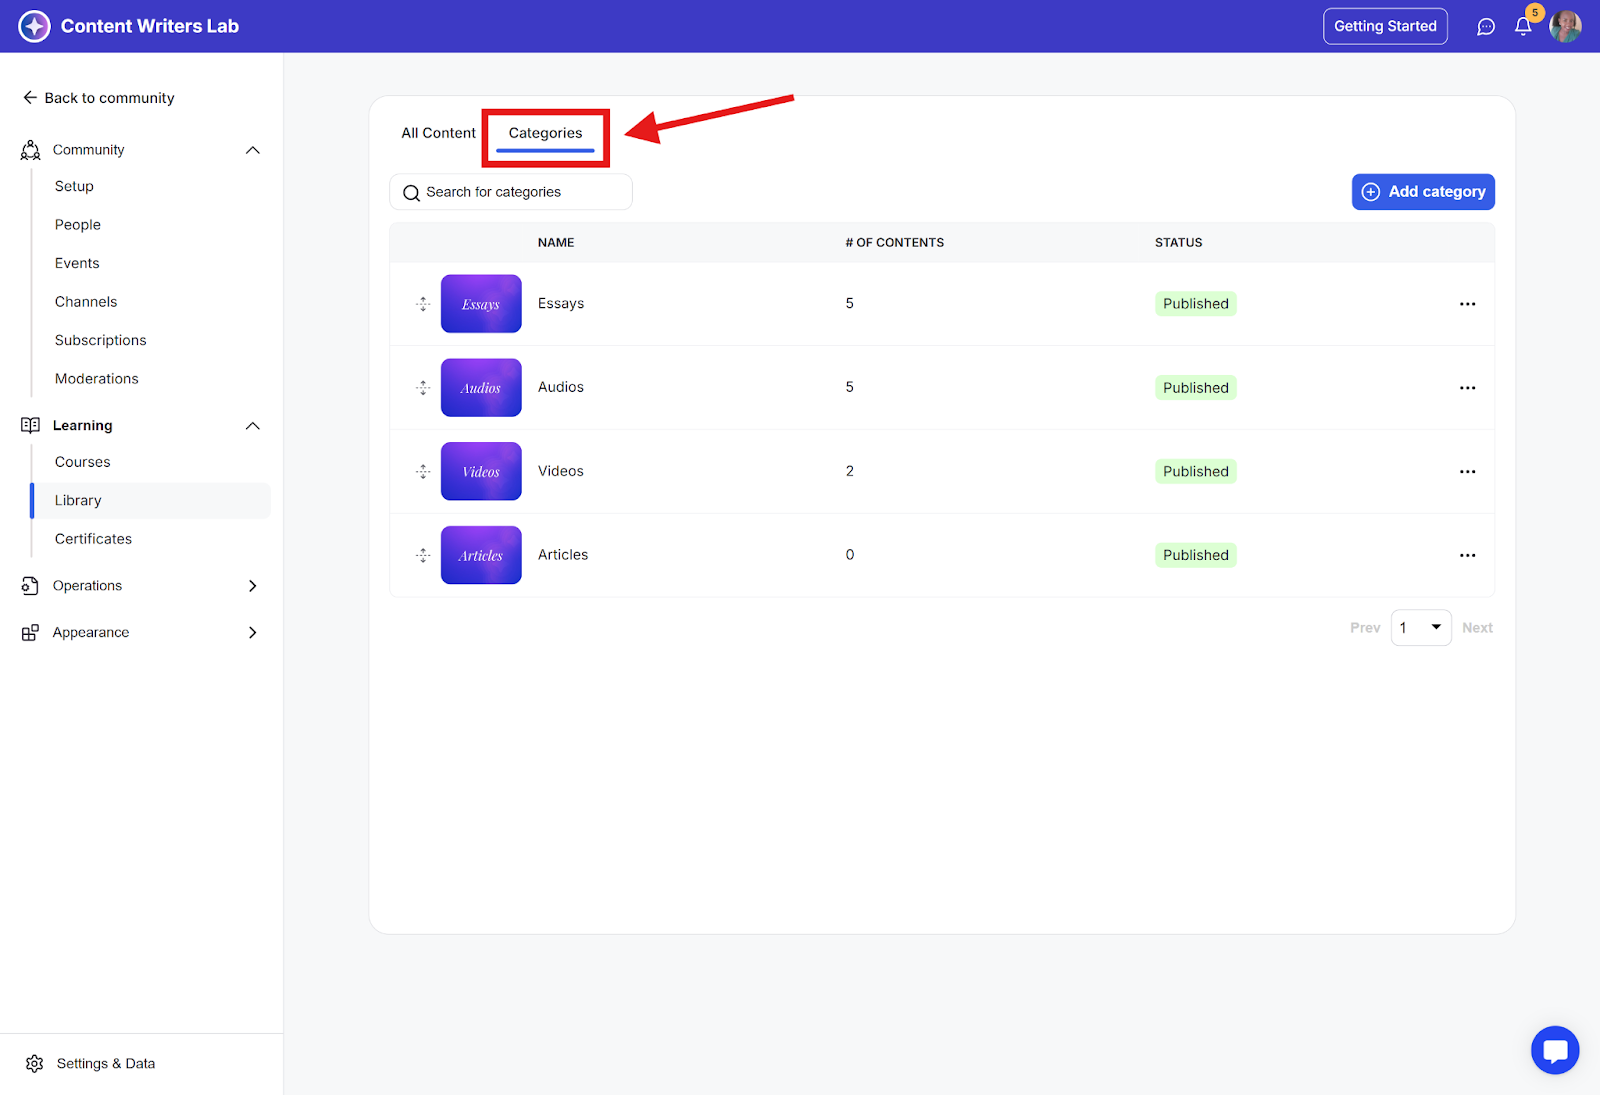
Step 3: Click the Categories tab at the top of the Library page.
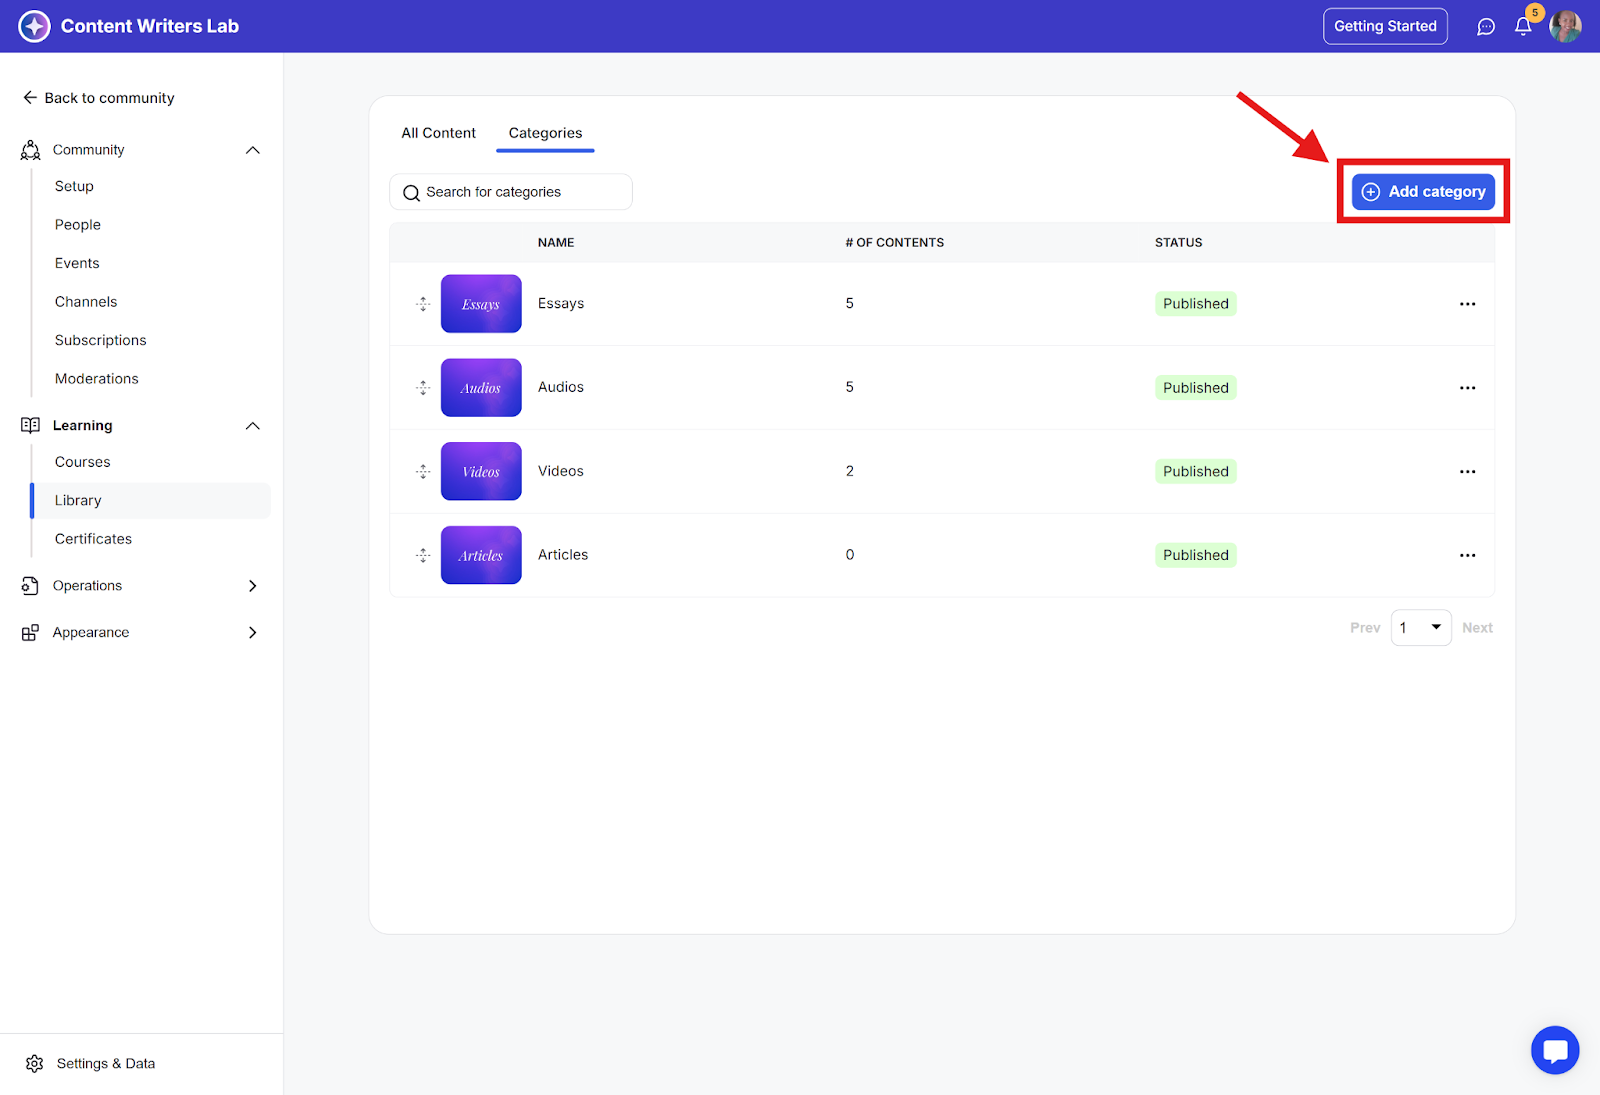
Step 4: Click the Add Category button.
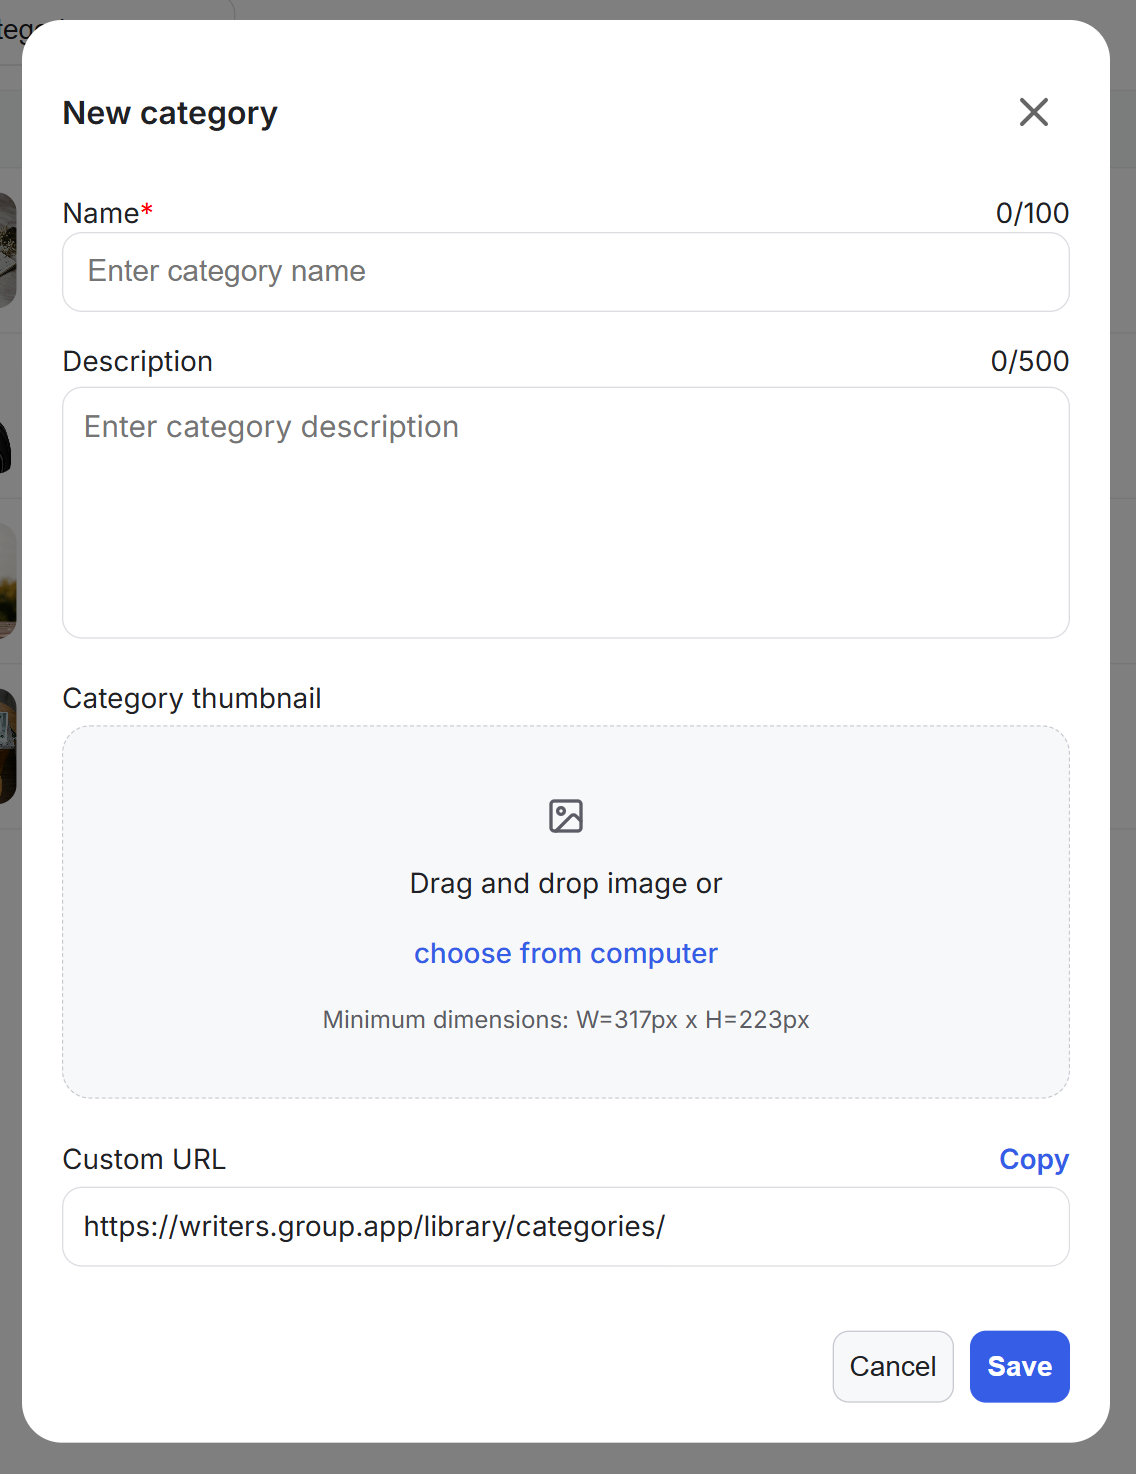
Step 5: Enter the category name, description, and thumbnail, then click Save.
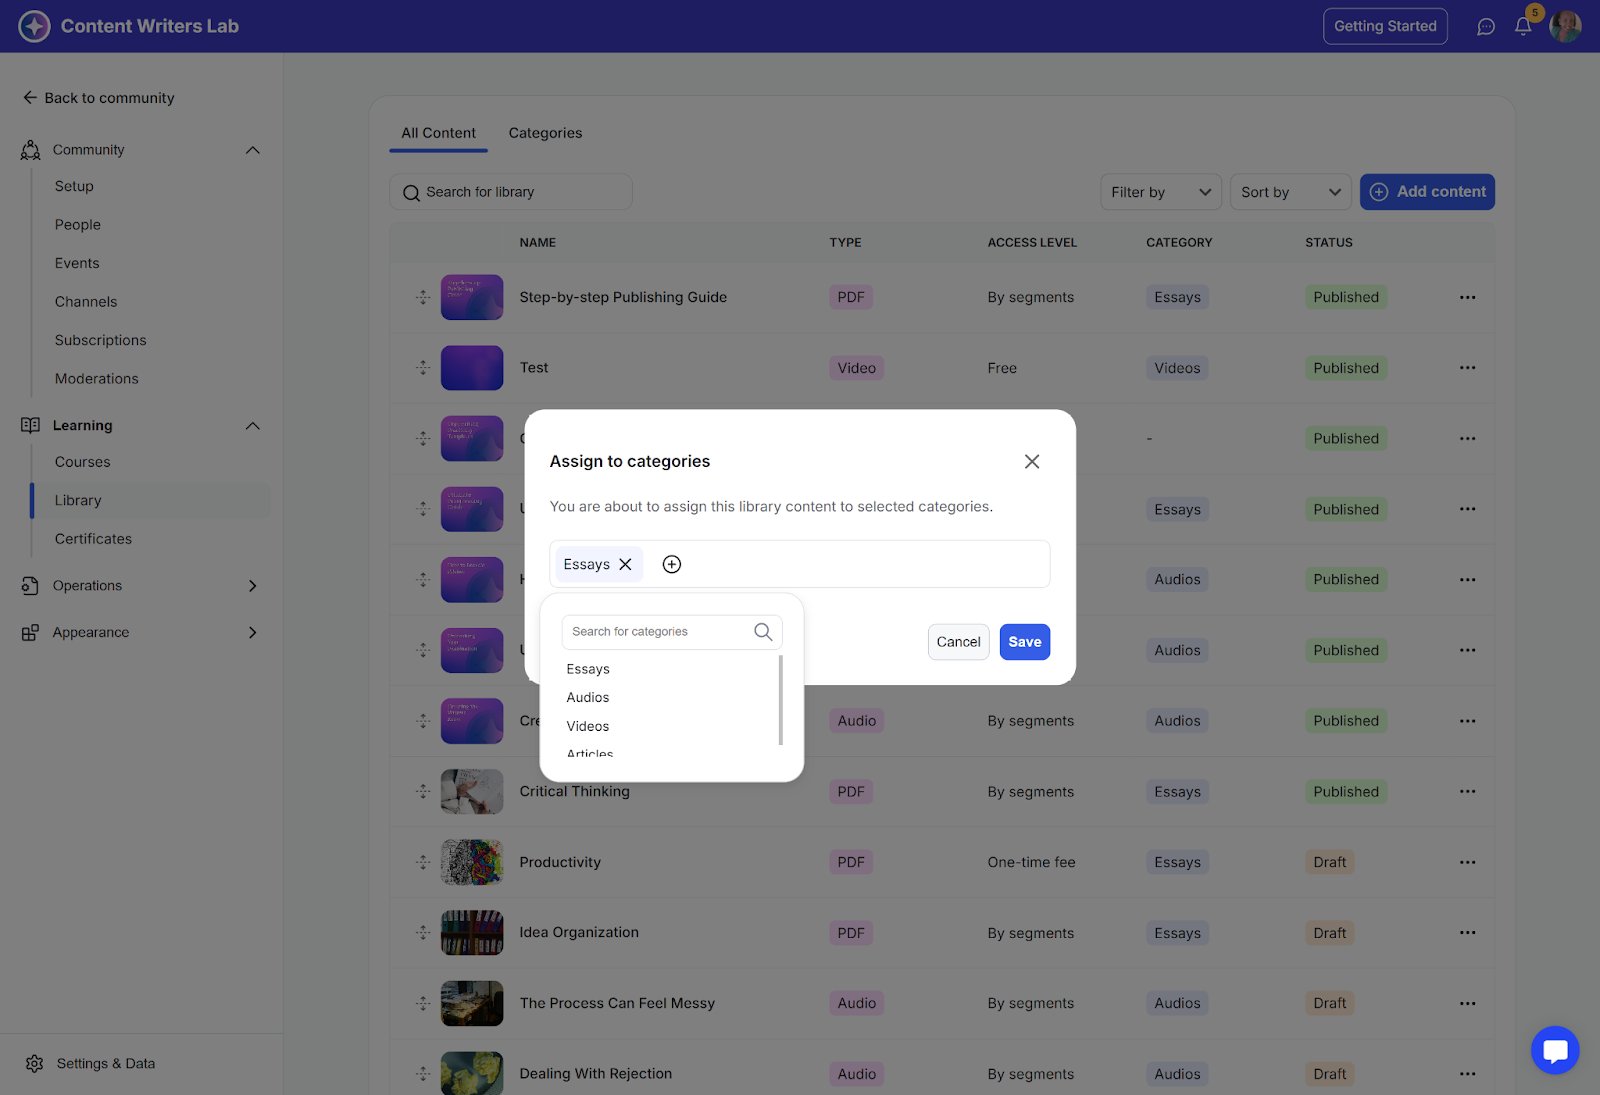
This method allows you to assign one or multiple items at once.
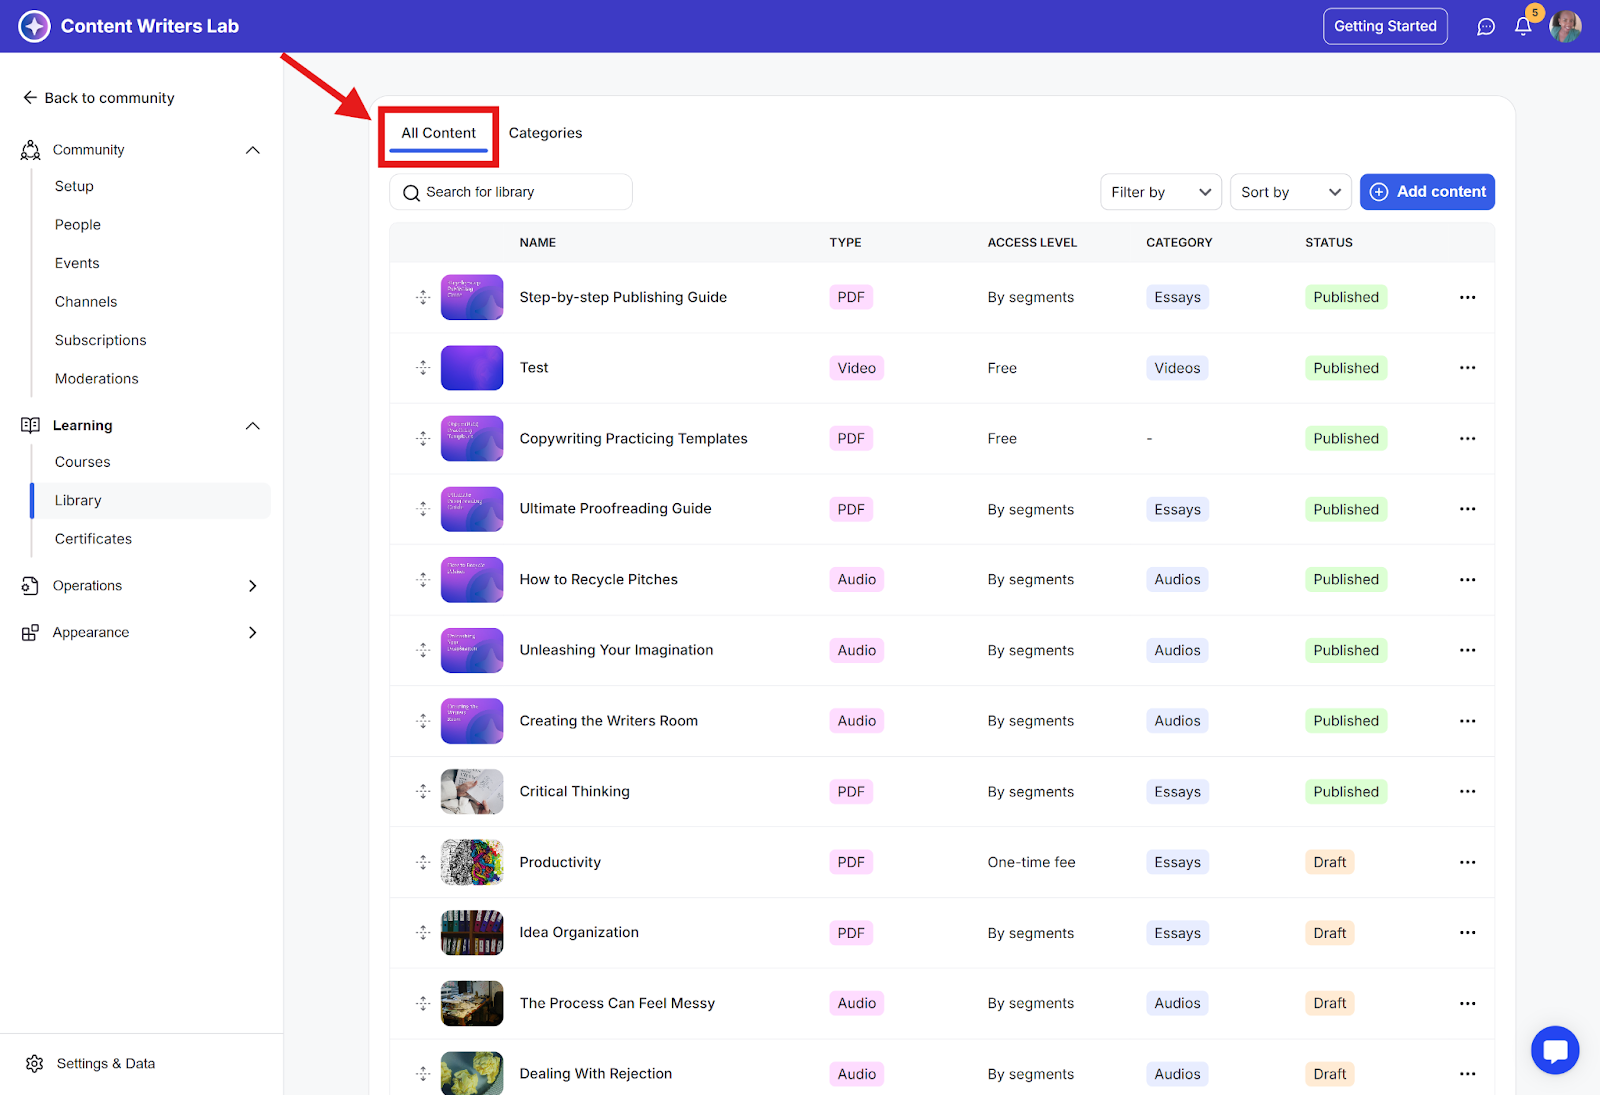
Step 1: In your Library, go to the All Content tab.
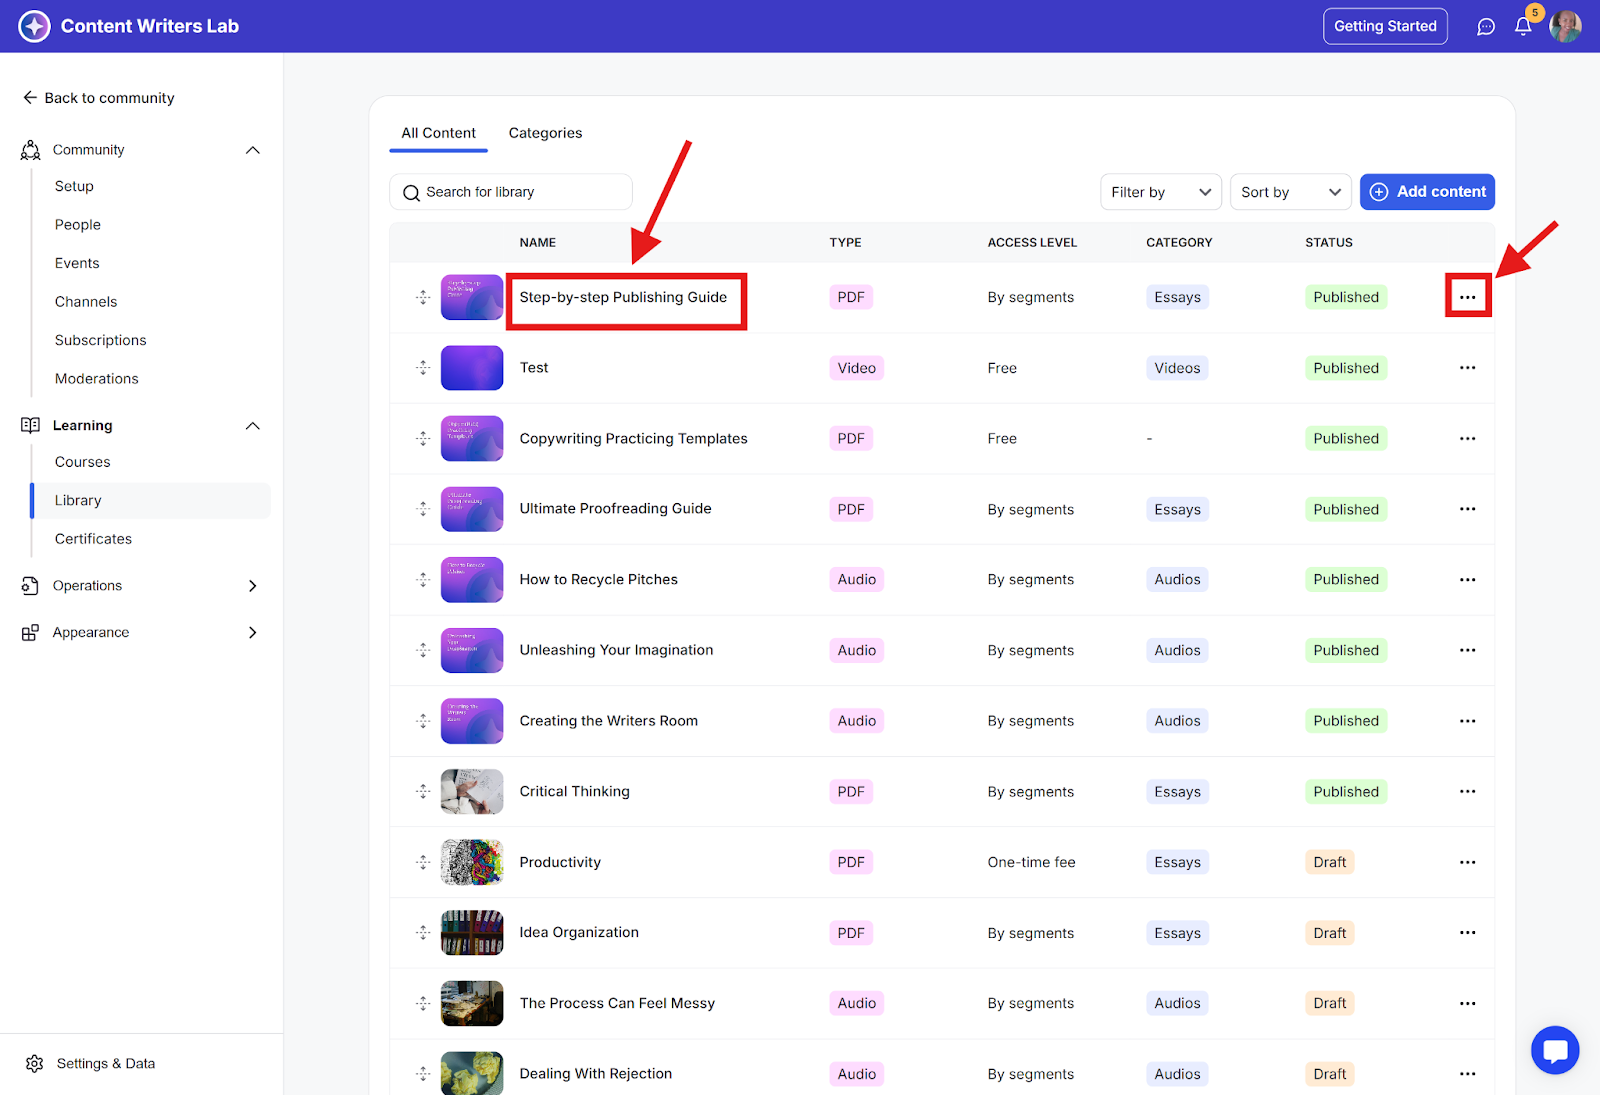
Step 2: Find the library item you want to categorize and click the three-dot menu on that item's row.
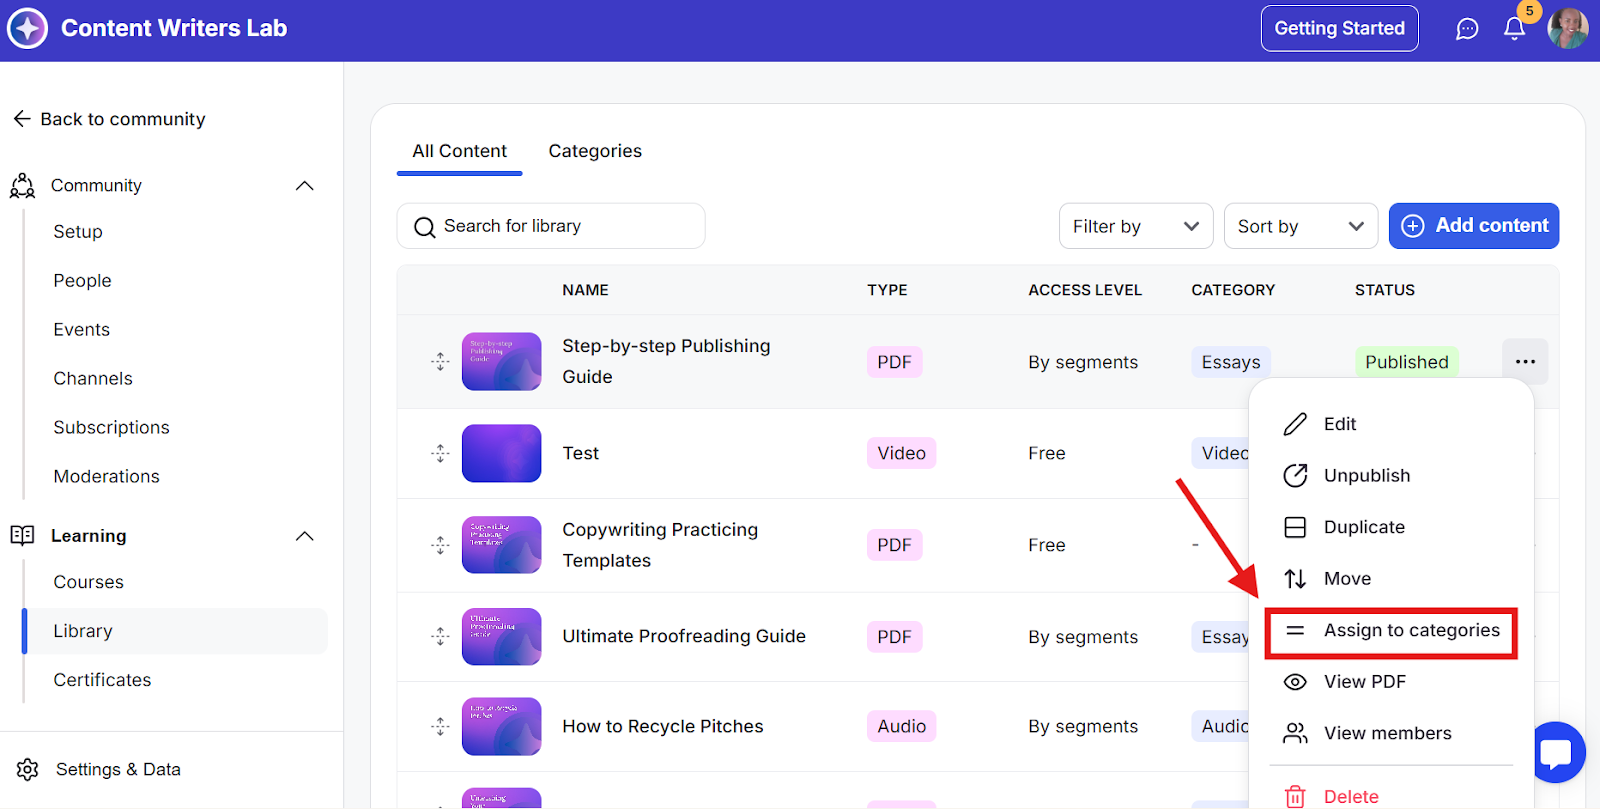
Step 3: Select Assign to Categories.
Step 4: In the pop-up, click the plus (+) button to reveal the list of existing categories. Select one or more categories and click Save to confirm.
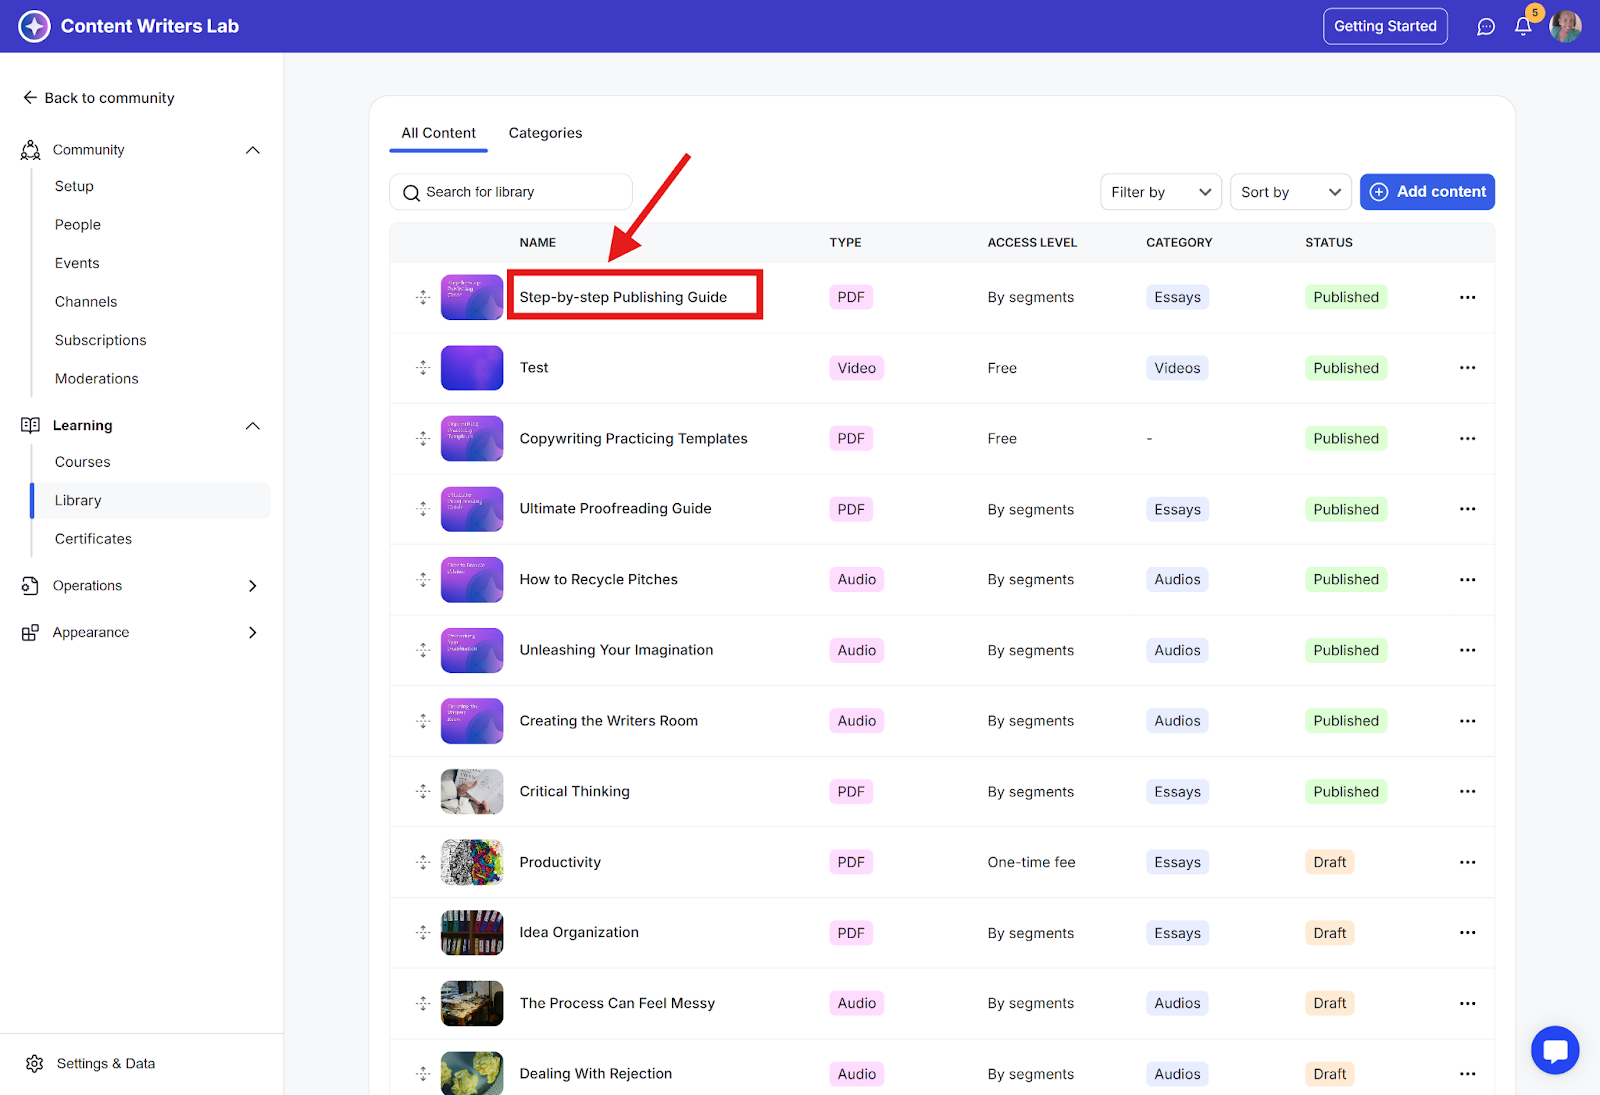
You can also add categories when creating or editing a specific library item.
Step 1: In your Library, click on the title of the content you wish to edit.
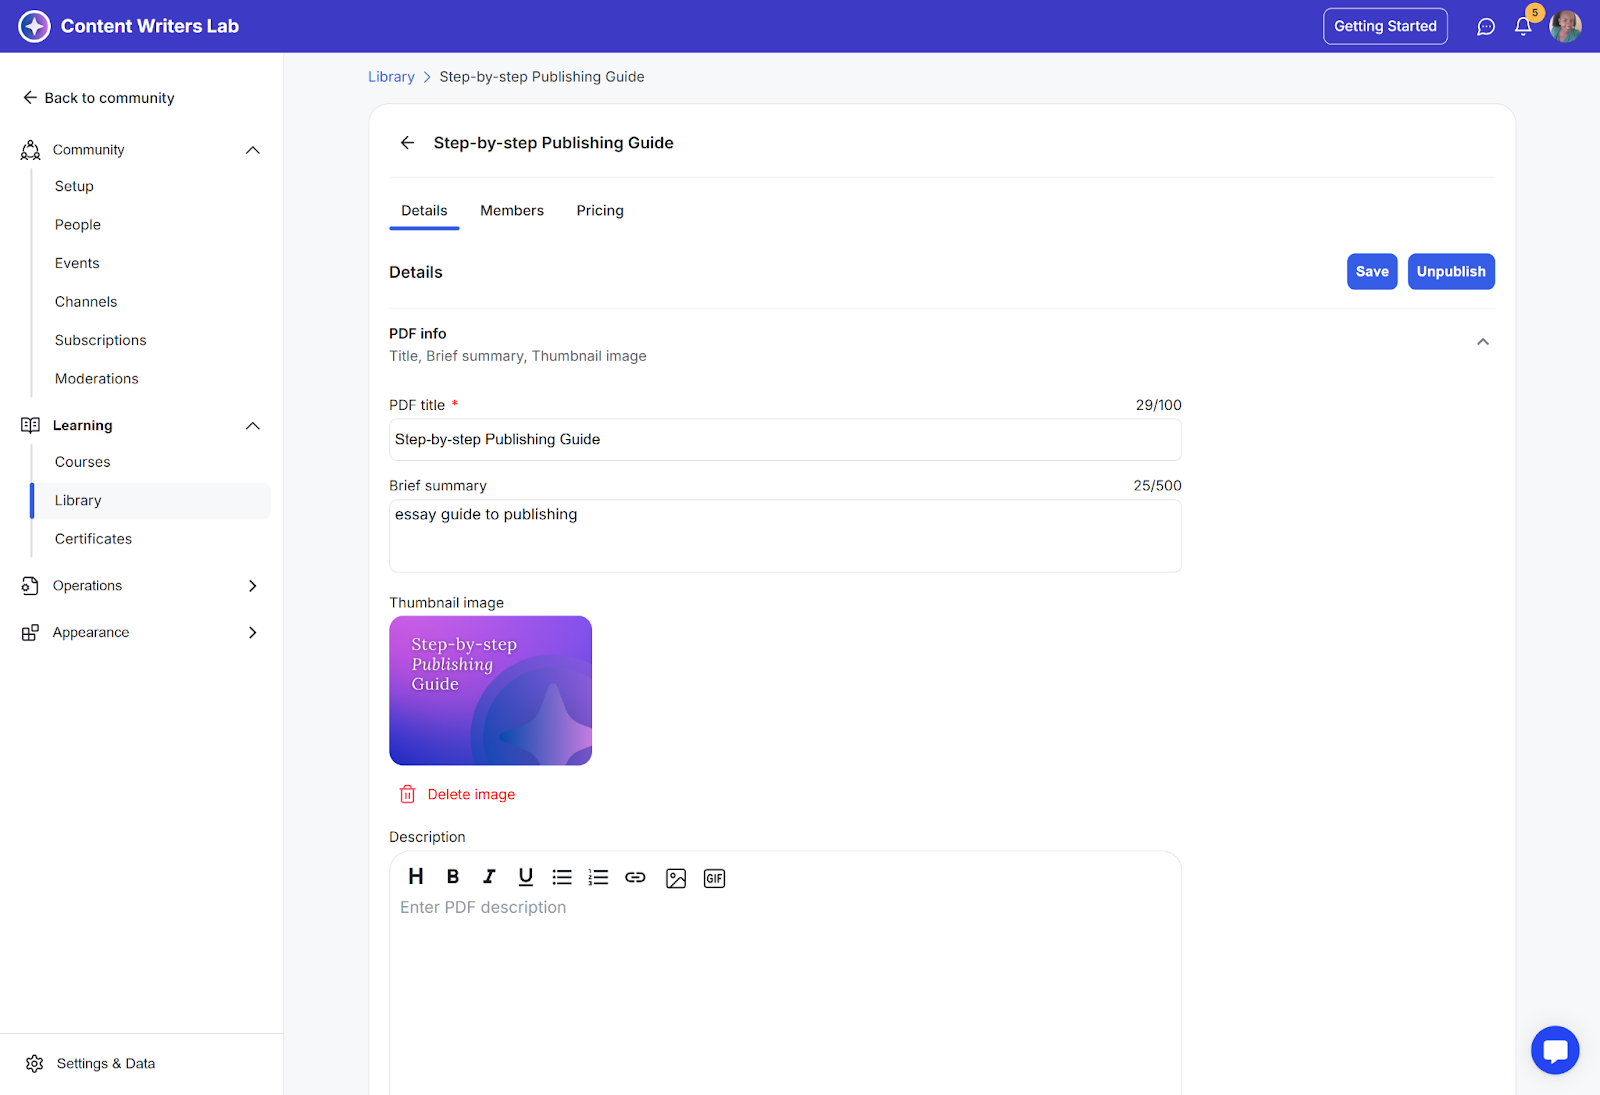
Step 2: You will enter the Edit Content mode for that item.
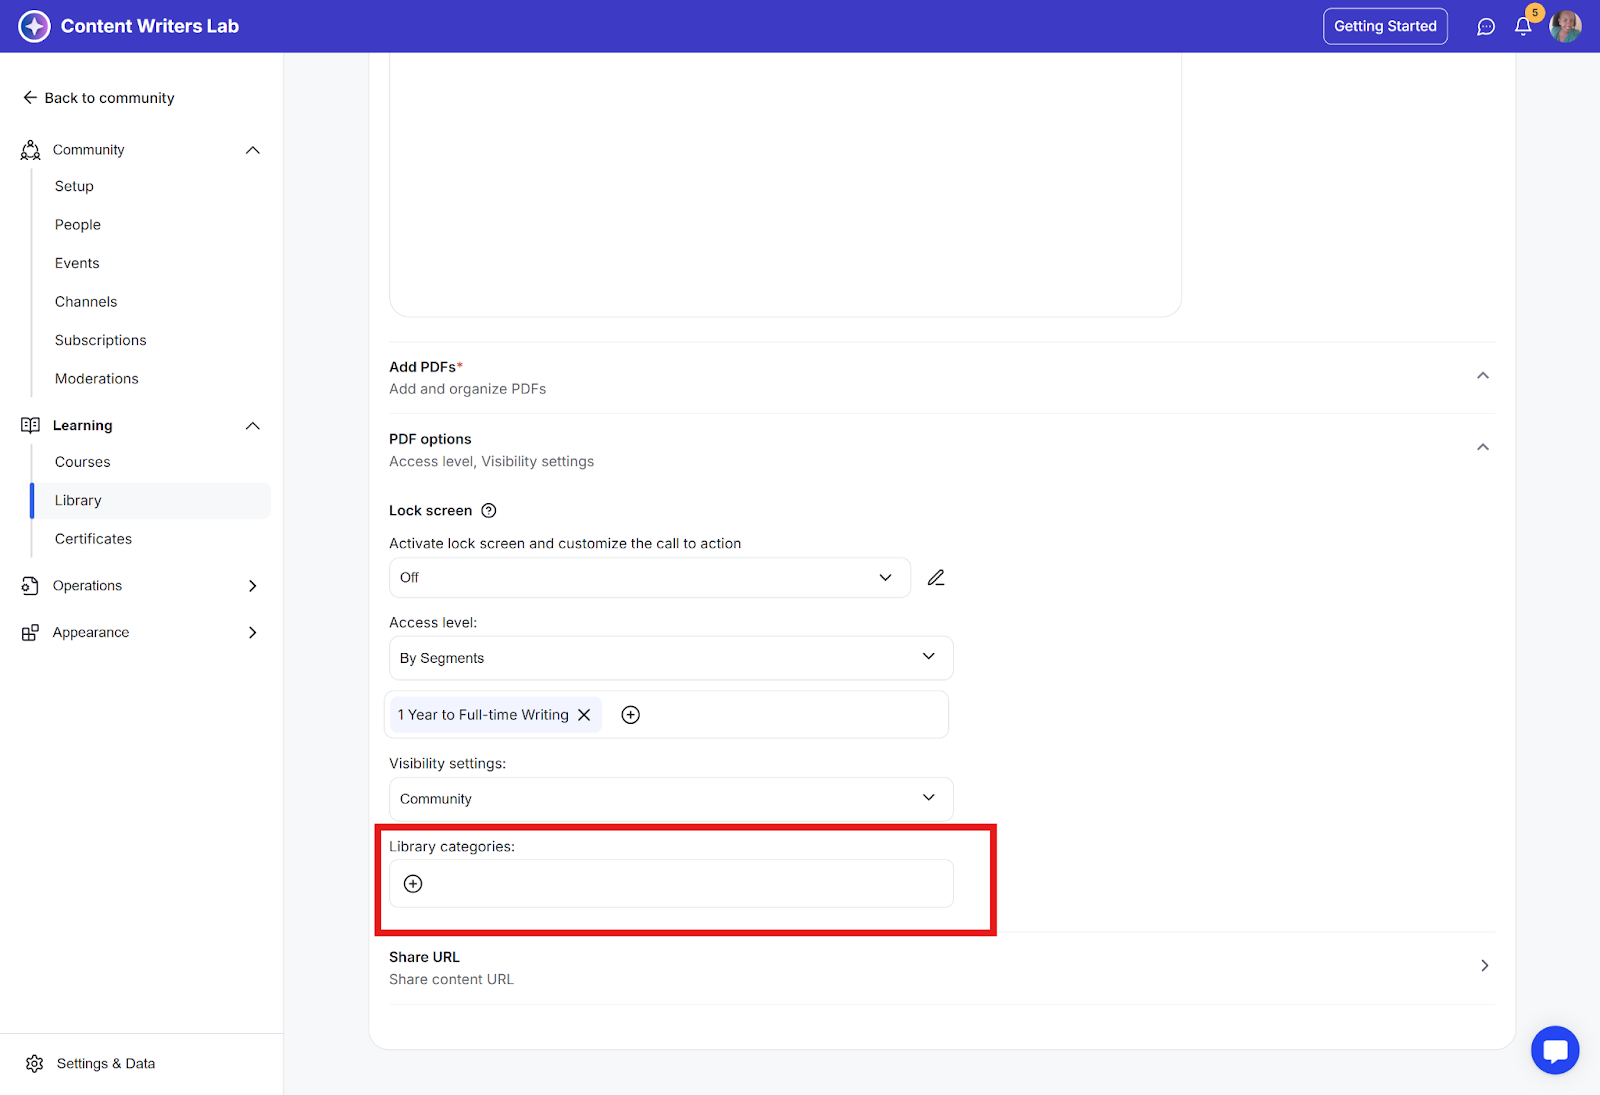
Step 3: Scroll down to the library content’s Options section. In this case, PDF Options.
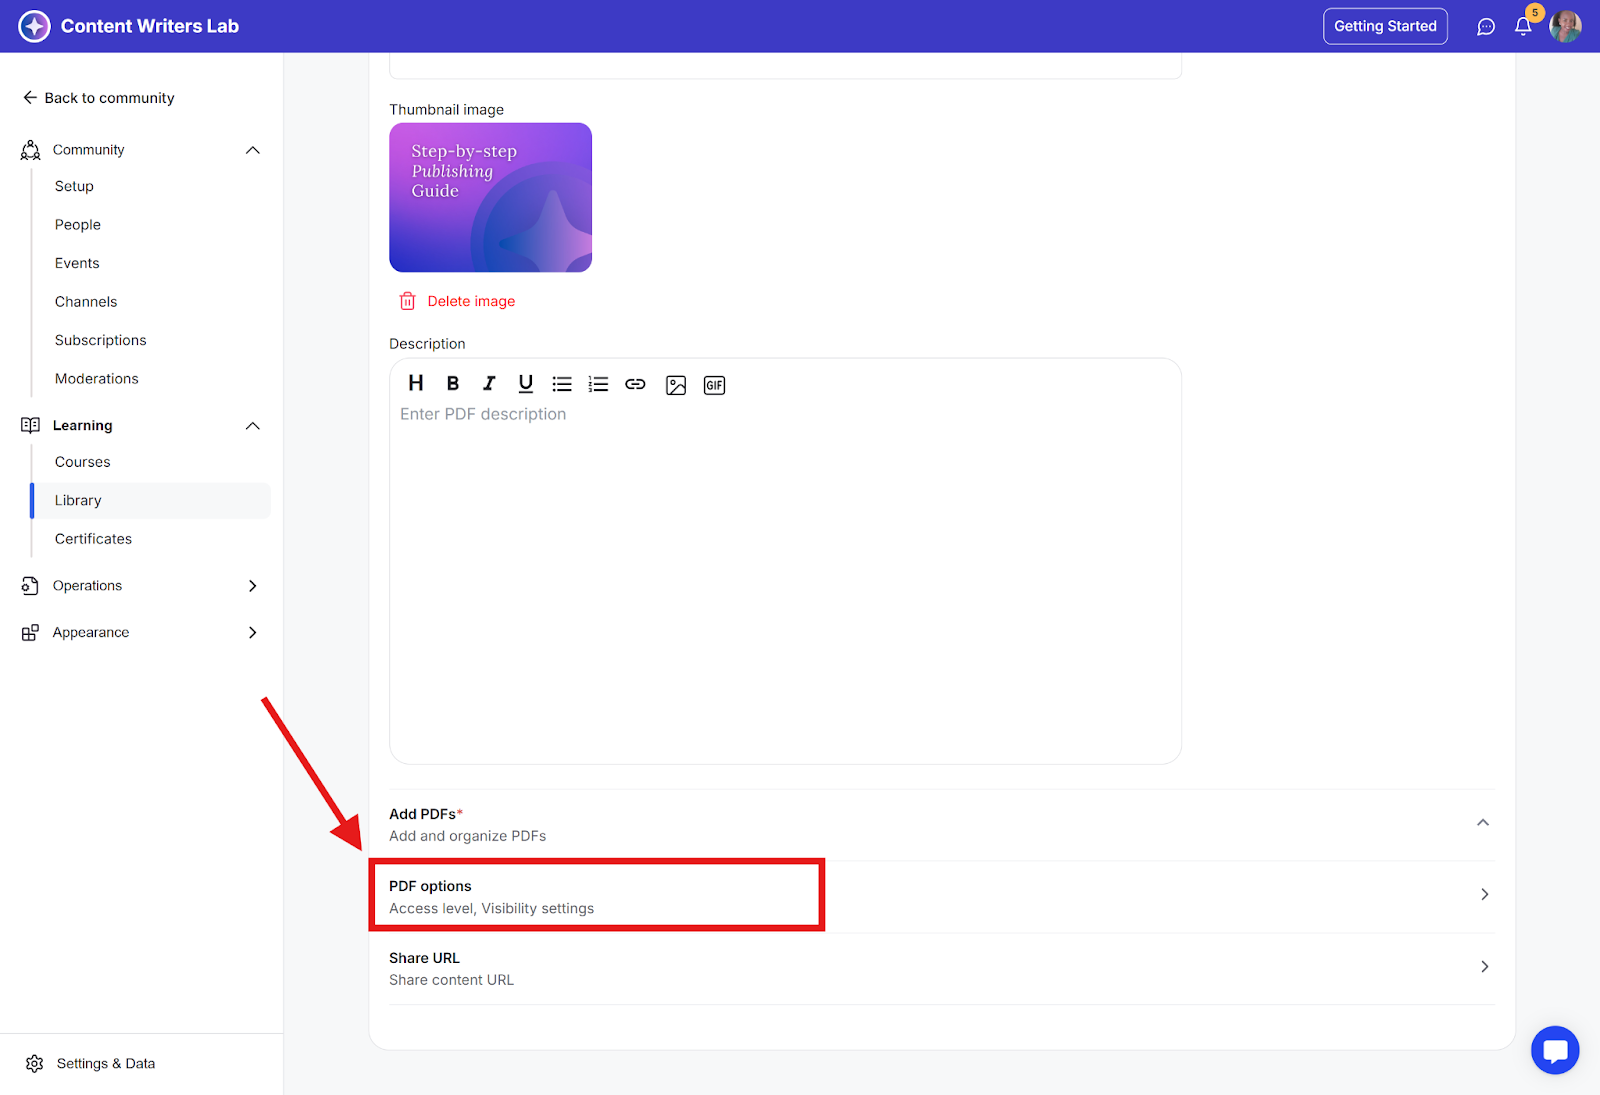
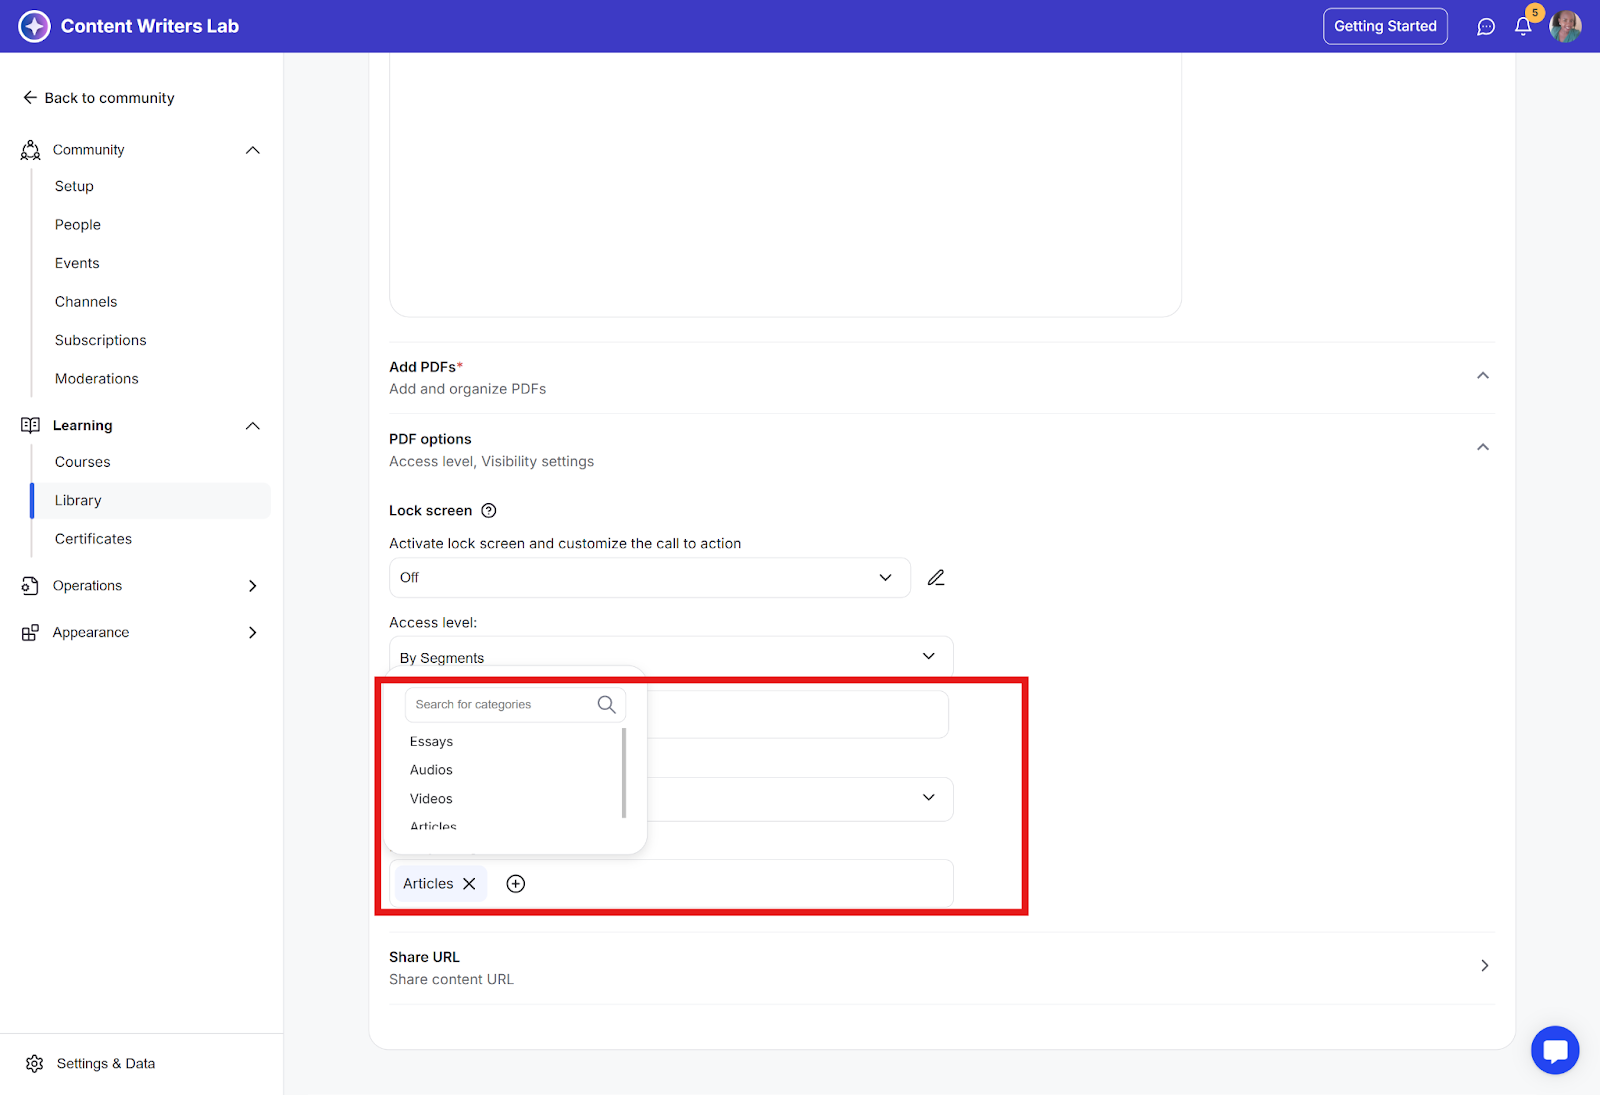
Step 4: Find and click the Library Categories field.
Step 5: Select or search for the categories you wish to assign.
Step 6: Once finished, click the Save or Publish button at the top of the page to update the content.

