Google requires every Play Console developer account to verify who is behind it. Until verification is complete you cannot publish, and for existing accounts an unverified status can eventually mean your apps and developer profile are removed from Google Play. It is worth doing carefully and early.
What you need depends on how you registered. Personal accounts provide contact details, identity documents, and verified email and phone. Organization accounts provide all of that plus documents proving the business exists, and a D-U-N-S number.
Sign in as the account owner. If you are signed in to several Google accounts, use a private or incognito window.
Have two documents ready as clear colour photos or scans — see the document list further down.
Check your details match before you submit. Your documents, your Google payments profile, and — for organizations — your Dun & Bradstreet record must all show the same legal name and address. This single point causes most rejections.
Google emails the account owner asking you to verify your developer account by a given date. You can also just sign in to Play Console, where the request appears as a notification near the top of the page.
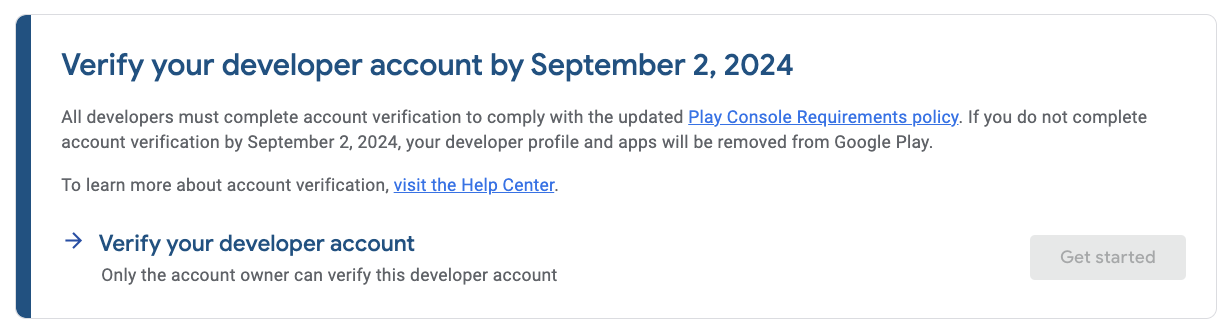
You may need to select an app before this appears, or it may show on the account-level page. You can also reach it directly under Developer account › About you.
Click Get started.
Google shows an outline of the steps involved.
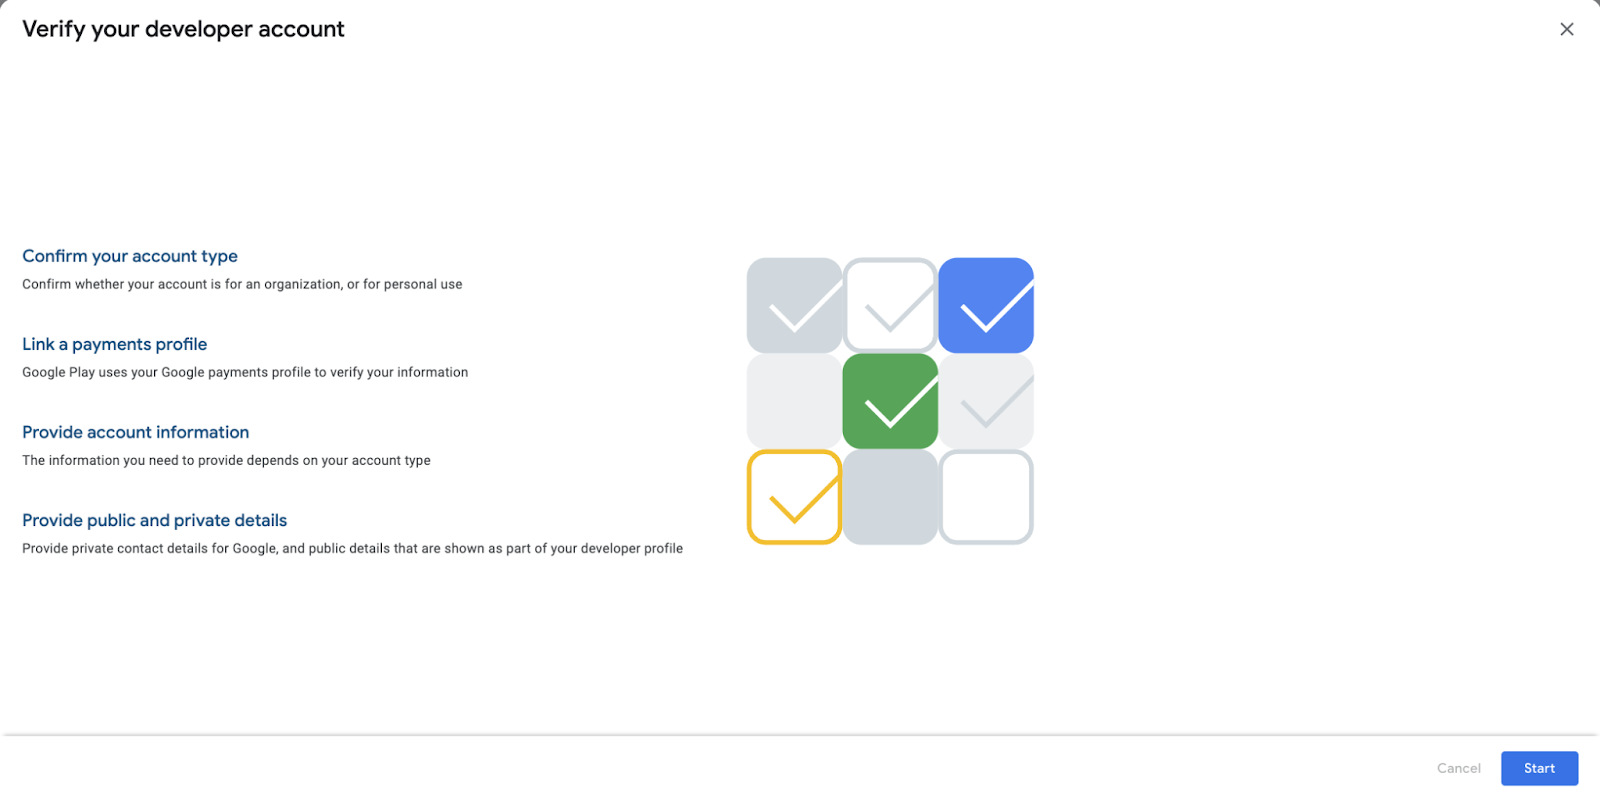
Choose whether you are verifying as an organization account or a personal account.
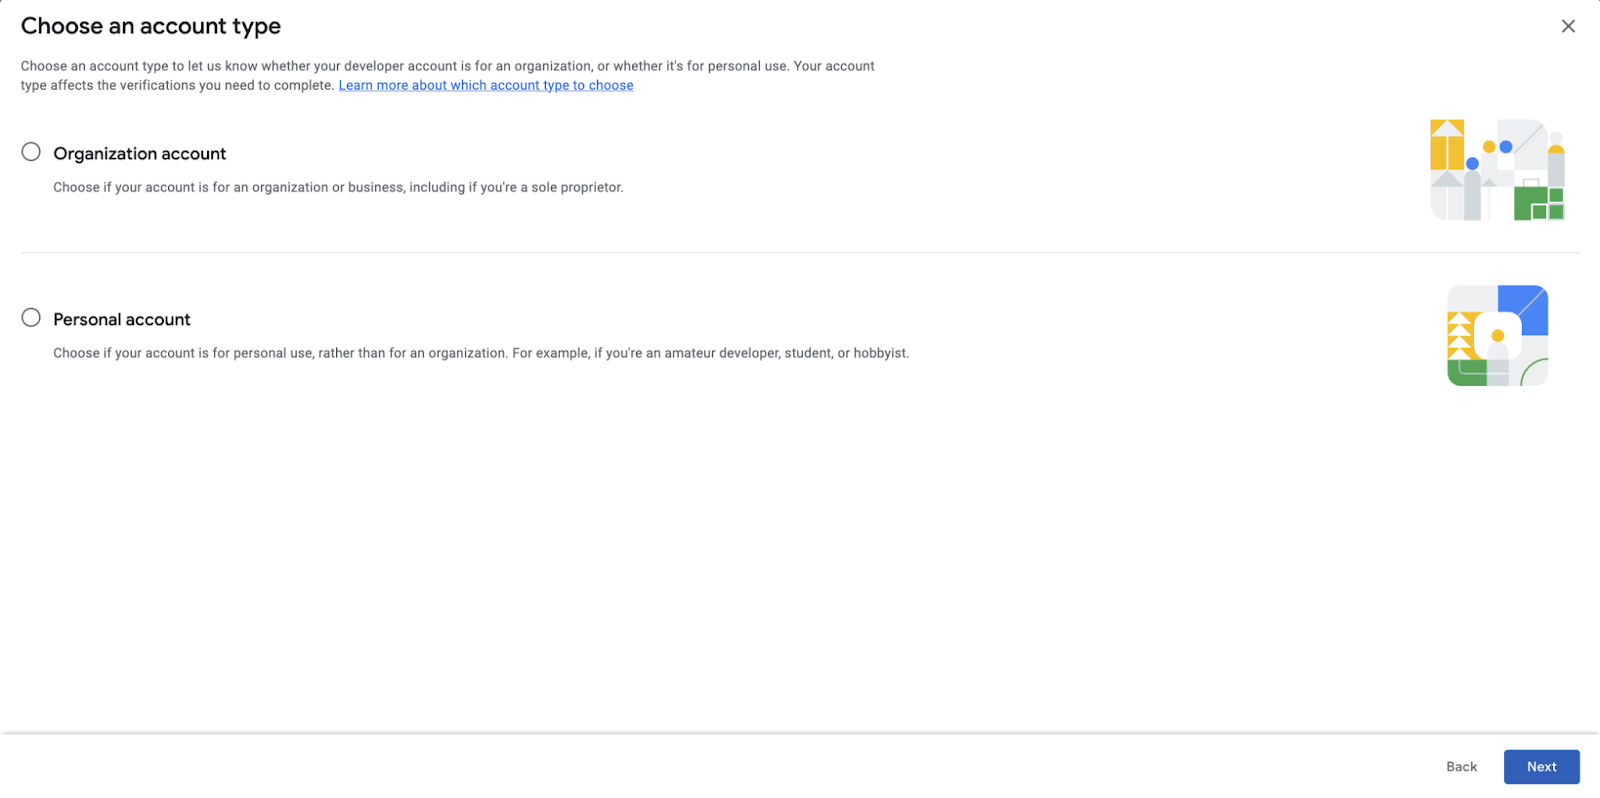
This must match the type of your Google payments profile. If it does not, verification will fail later with a payments profile error. If you registered as an organization you will be asked for your D-U-N-S number here.
The rest of this guide follows the organization path, since it has the most steps. Personal account verification follows the same shape, minus the D-U-N-S and business documents.
If you have not already, you will be prompted to set up or link a payments profile before continuing.
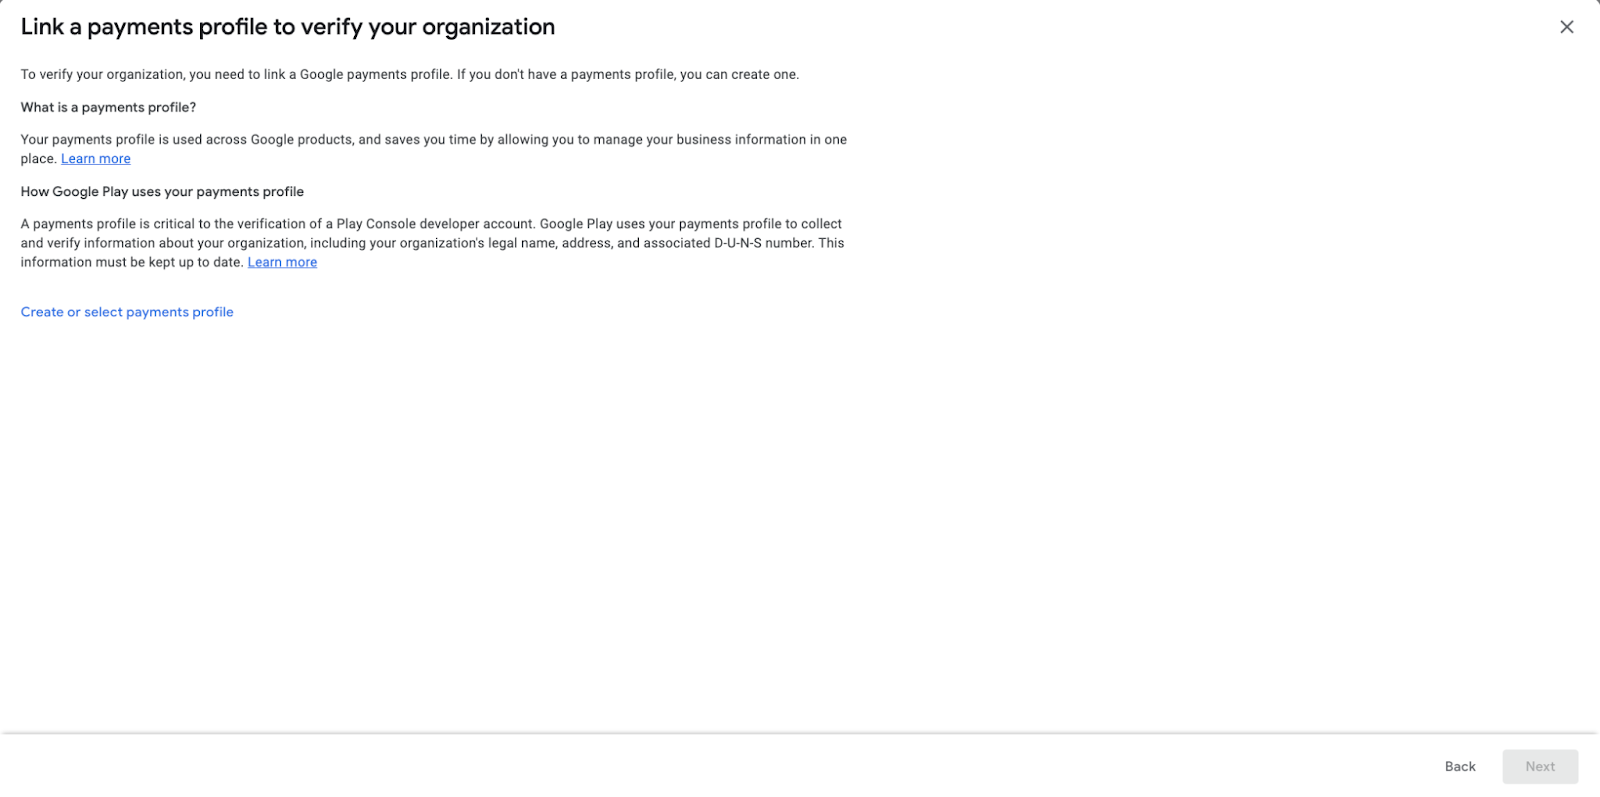
Click Create or select payments profile. If you already have a suitable one, use it. Otherwise create a new one of the correct type.
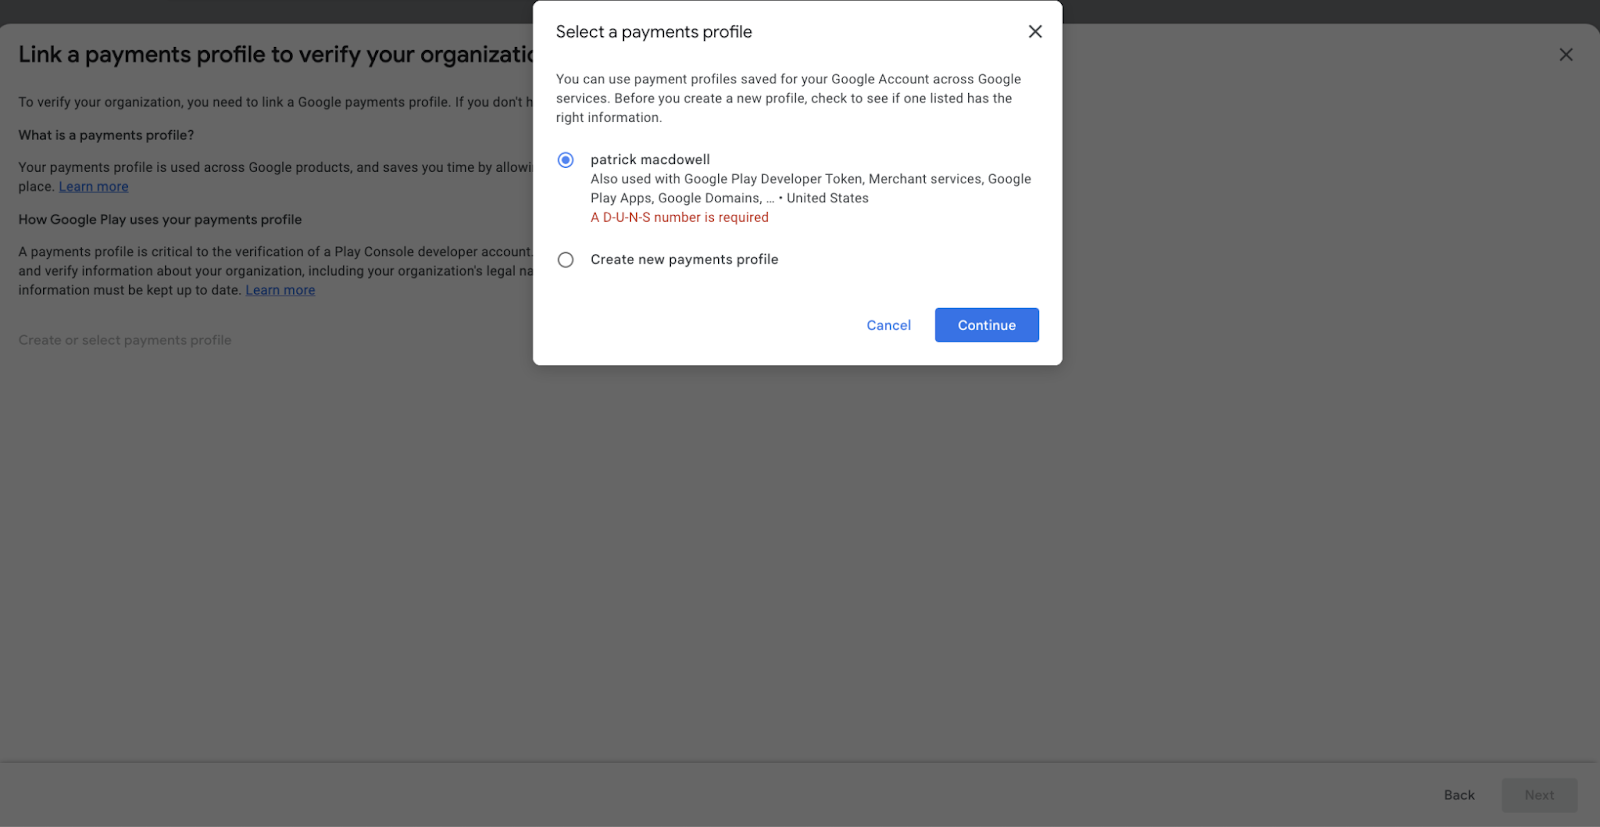
Remember: country, account type, and D-U-N-S number cannot be changed on an existing payments profile. If any of those are wrong you must create a new profile, verify it, and link it.
Organization accounts are asked for their D-U-N-S number next. If you do not have one yet, see How to Set Up Your D-U-N-S Number for Your Branded App — you cannot complete this step without it.
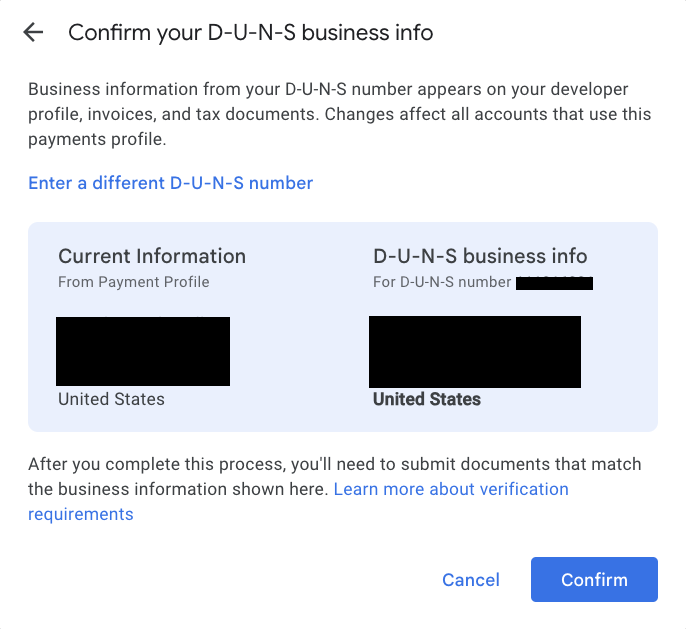
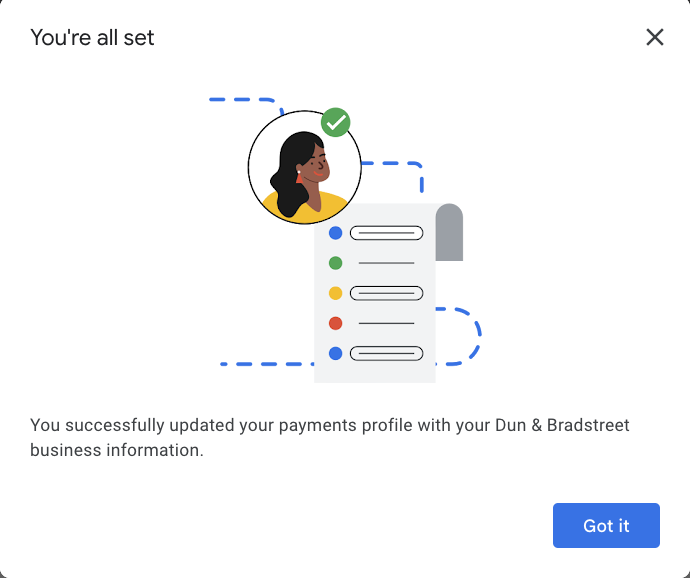
Click Confirm and you should see a confirmation page.
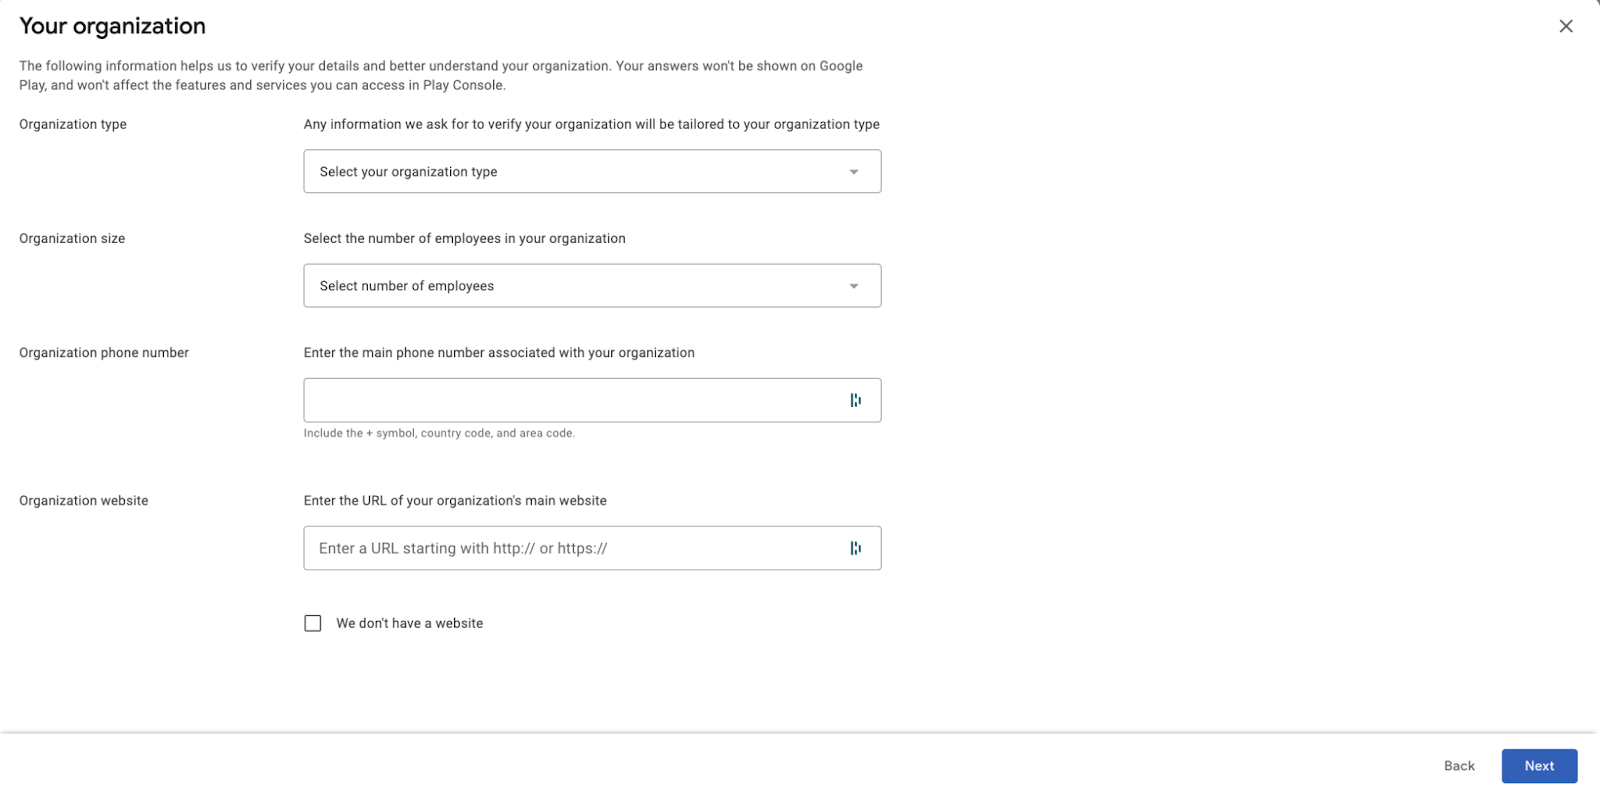
Enter the details for your organization or personal account. Copy your legal name and address exactly as they appear on your documents — abbreviations, missing suite numbers, and "Ltd" versus "Limited" all cause rejections.
You are then asked to verify the contact details you provided.
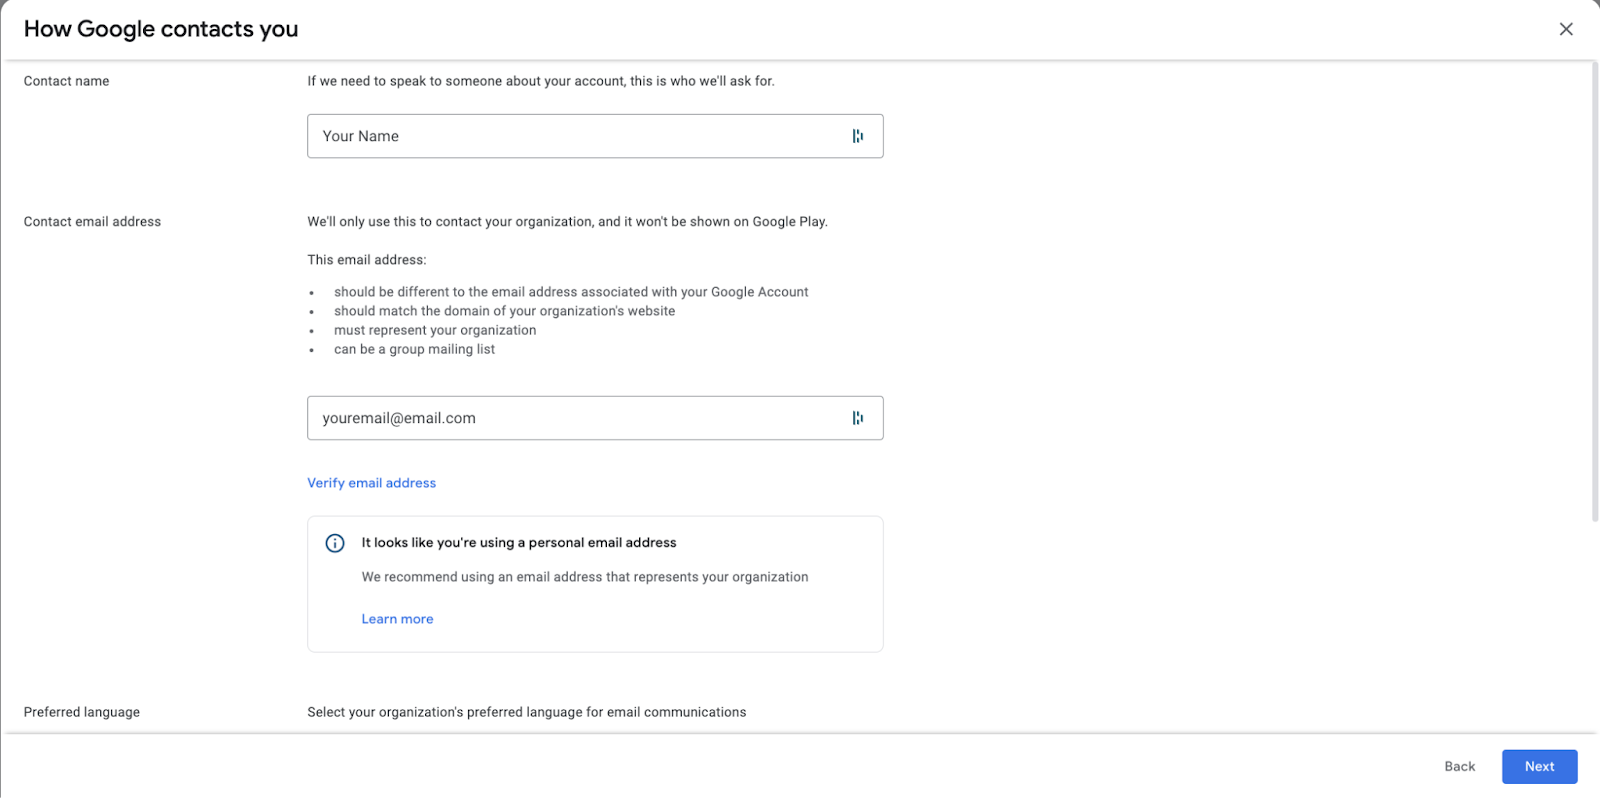
Click Verify email address and enter the six-digit code Google sends you.
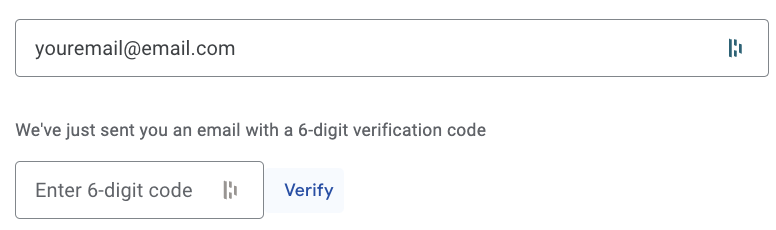
Do the same for your phone number. Enter it in international format — +[country code][area code][number], for example +14155551234 — and enter the code Google sends by SMS or voice call.
At this point most people hit the following error. It is expected — Google verifies your identity inside the payments profile rather than in Play Console.
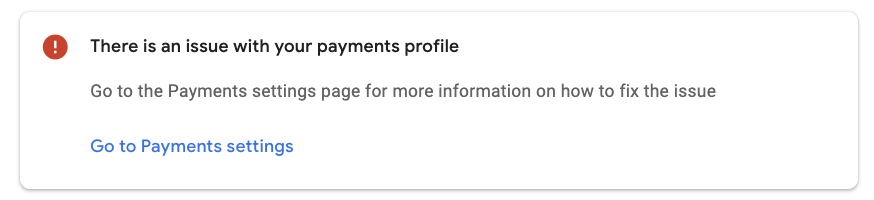
If you see it, follow the link through to your payments profile. If you do not, skip ahead.
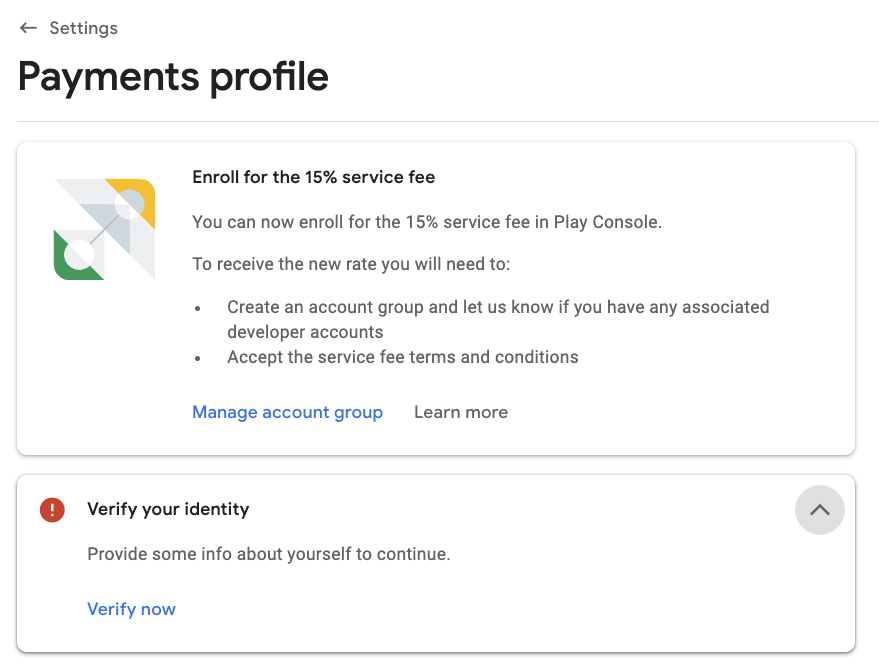
You will be asked to upload two documents.
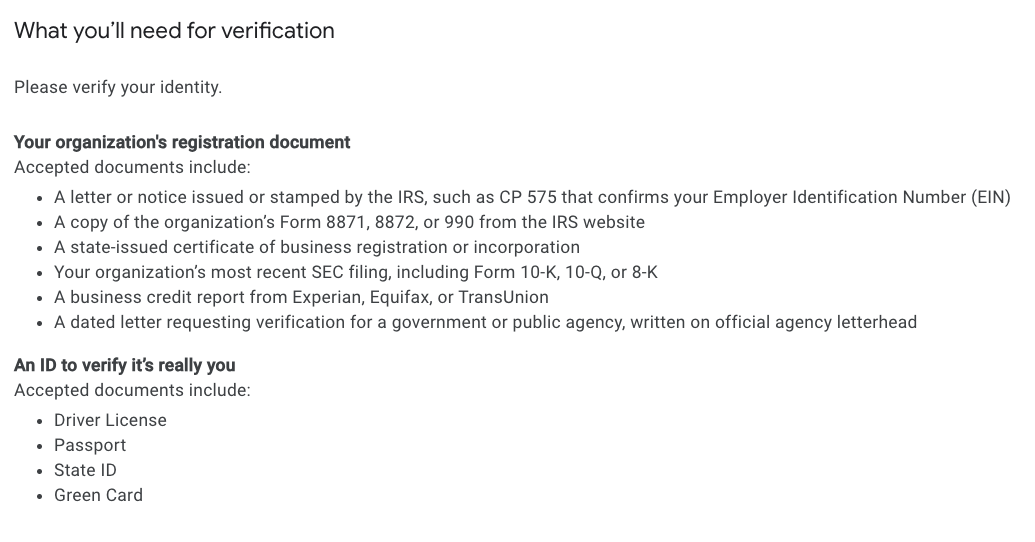
The exact list varies by country — Google's help page has a country selector — but broadly:
Personal accounts — a government-issued photo ID (passport, national or state ID, driving licence, or permanent resident card), plus proof of address (a photo ID showing your address, a utility bill for electricity, water, gas, internet or cable, an insurance statement, or a credit card or bank statement).
Organization accounts — a business registration document (a certificate of incorporation, a tax authority document, an official government letter, an SEC filing, or a business credit report from Experian, Equifax, or TransUnion), plus the authorised representative's government photo ID.
Document rules that trip people up: the details must match your payments profile exactly, photo IDs must be current and not expired, images must be in colour rather than black and white, and they must be clear and well lit. Photocopies are not accepted.
Once you have submitted, you should see a confirmation.

Google reviews your submission and emails the account owner when verification is complete. Google's guidance is that this may take a few days.
There is nothing to do in the meantime. You can keep preparing your store listing while you wait.
My account type does not match my payments profile.
This is the most common blocker. The account type lives on the payments profile and cannot be edited. Create a new payments profile of the correct type, verify it, then link it under Developer account › About you › Update details.
My name or address does not match.
For organizations, fix your Dun & Bradstreet record first, then update your payments profile via About you › Update details › Go to Google Payments Center. Editing your D&B details after verification triggers a re-verification, and Google will email the account owner about it.
My documents were rejected.
Re-check them against Google's document list for your country, make sure they are in colour, unexpired, fully legible, and show exactly the name and address on your payments profile. Then resubmit. If it is rejected again, escalate through Google's developer verification issues form.
I need to change my country or D-U-N-S number.
Neither can be edited on an existing payments profile. You will need to create and verify a new one, then relink it.
It has been more than a few days with no response.
Use the developer verification issues form or the Help option inside Play Console. Google does not publish a service level for this, so a polite follow-up is the right move rather than resubmitting.
What happens if I do not verify?
You cannot publish. For existing accounts, Google states that your developer presence and apps may be removed from Google Play, and you will not be able to republish until your information is verified.
Once verification is complete, follow How to Give GroupApp Access to Your Google Play Console and Google Cloud so we can create your app and start building. If you get stuck on any of the above, send us a screenshot at [email protected] — we have seen most of these errors before.